123FormBuilder Knowledge Base
Search our documentation platform for answers, service specifications and 3rd-party integrations.
Knowledge Base
Google Ads (formerly known as Google Adwords) is an effective tool to create successful marketing campaigns. It helps you monitor your success and double your conversion rates.
To track Google Ads you need to copy and paste a short JavaScript (JS) code snippet into your form’s Thank You page. 123FormBuilder offers the possibility to place scripts on your form on any of our plans.
In this article, we explain step by step how to track form conversions with your Google Ads tracking code.
Let’s get started:
1. Set up your conversion goal in Google Ads and copy the tracking code.
2. Paste the code into a text editor such as notepad, and save it with the extension .js
3. Afterward, upload the file on the webserver. Use any hosting service that can store the file online and be retrievable via URL.
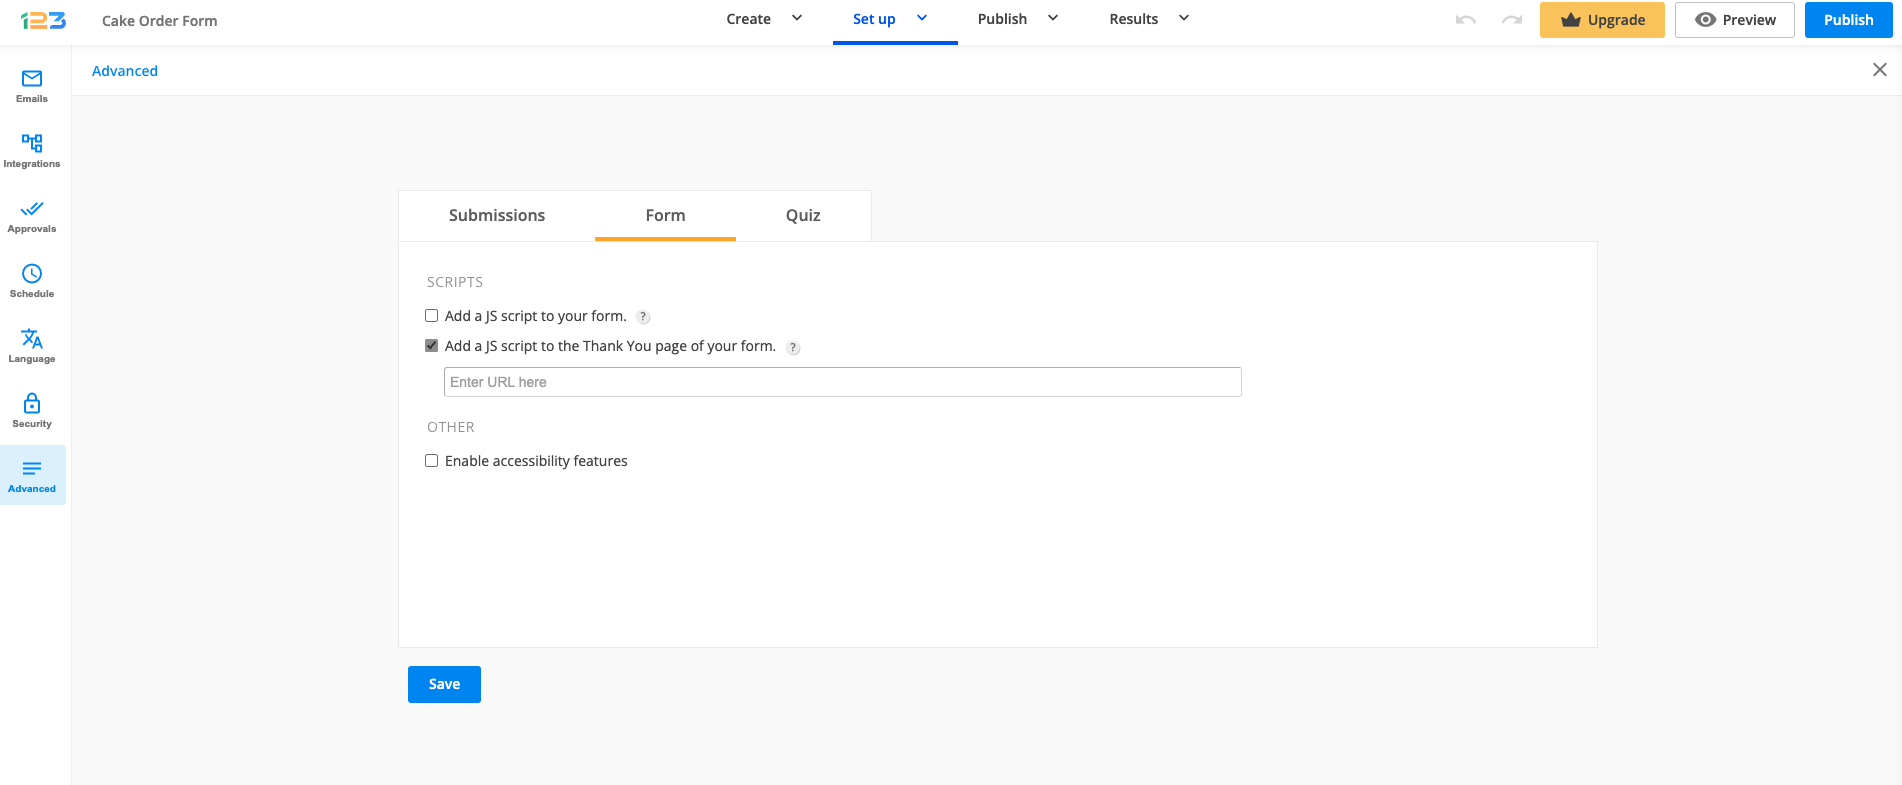
4. Log in to your form builder account, open up your form and go to Advanced and switch to the Form tab.
5. Enable the option Add a JS script to the Thank You page of your form and paste the URL where your .js file is located.
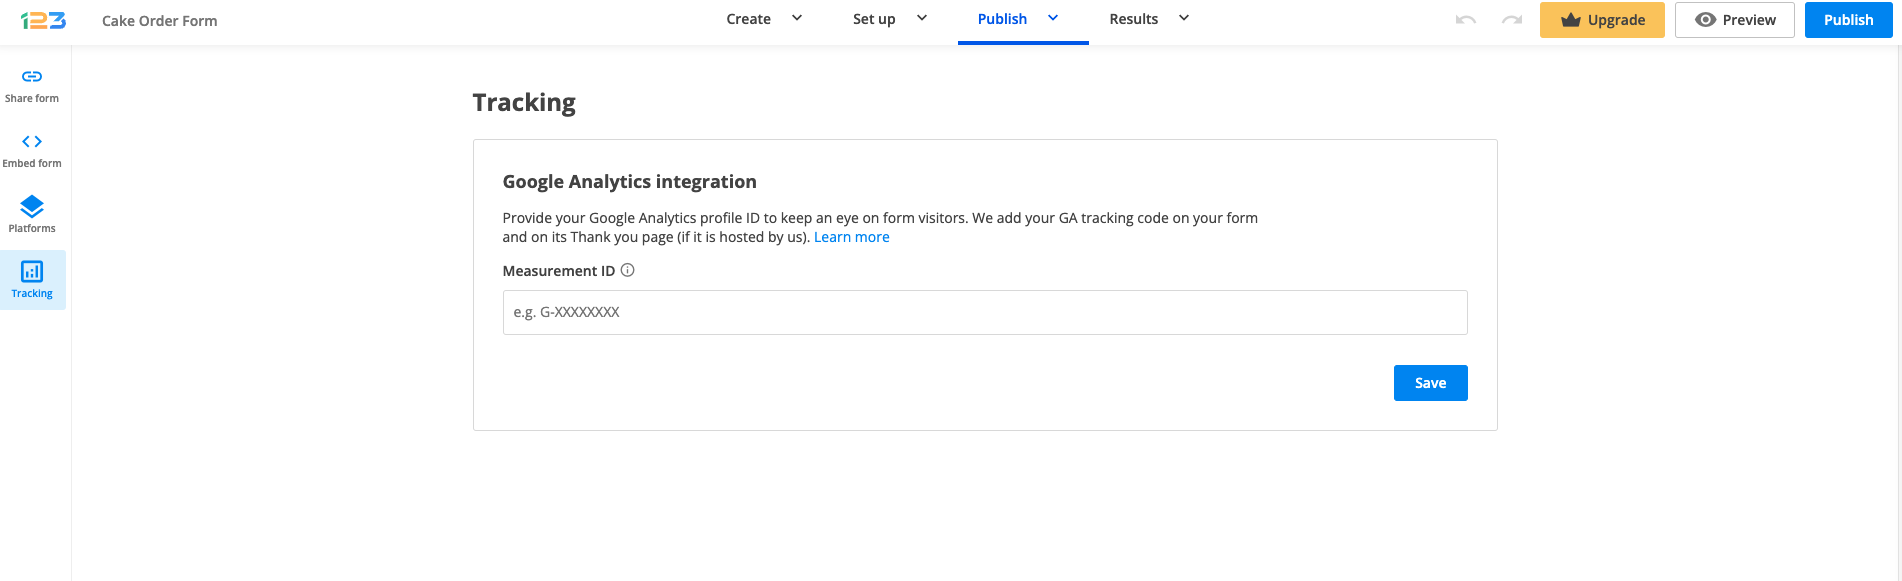
6. Go to Publish -> Tracking section and provide the measurement ID in order to enable Google Analytics integration.
That’s all! Each form submission is now measured as a conversion.
Related articles
At request, we can transfer forms from a 123FormBuilder account to another.
Important Notes
- It’s not possible to transfer forms that were made under a paid account to another free account. Form transfers between a paid subscription to a free subscription are not available.
- Forms can be transferred from paid to paid plans and free to paid plans.
Before making the transfer
There are a few things you need to check:
- You have access to the account.
- Both accounts must have the same features available. Double-check our Features Matrix here. The system restricts any account that has advanced features enabled.
- If you need more than 1 form transferred, select and group them into a new folder. This speeds up the transfer process.
Each form has a unique ID, present in the form link. Keep in mind that the form will no longer be available in the parent account. Duplicate the form to have a copy of it.
What is not transferred
The following elements are related to the account and not the form itself:
- Files uploaded.
- Custom theme templates. Only the custom template that’s applied on the form will be carried over.
What to remove
Essentially, it’s highly recommended to delete any connections made on the form such as:
- Google Map field API key.
- Payment gateway credentials.
- Integrations with third-party apps.
Requesting the transfer
- Contact us via email from the email address associated with the parent account.
- Add in CC the email address of the second account.
- Specify the folder or form that needs to be transferred and the new owner. Example: Requesting to transfer the Order Form/Group to john.doe@domain.com.
That’s it! Once the transfer is done you will be notified via email.
When you use the Update all existing records option under Action to perform, you first have to select a lookup field. This means that the application will search in that Salesforce field for a specific record that is already registered. If the value from the lookup field matches with a previous entry, the record will be updated.
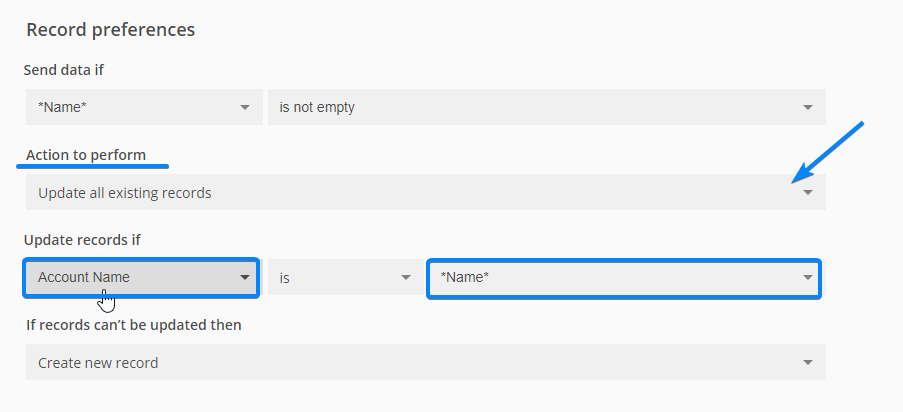
Important Note!
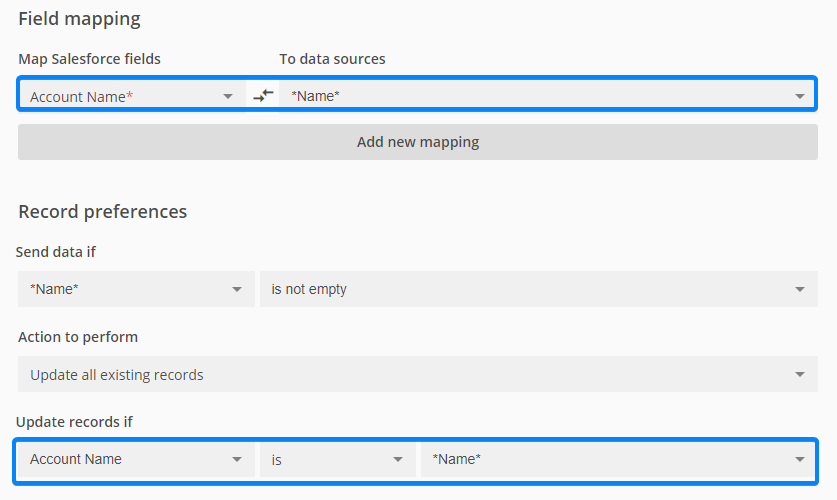
After you select a lookup field, make sure that you map that Salesforce field with a form field below.
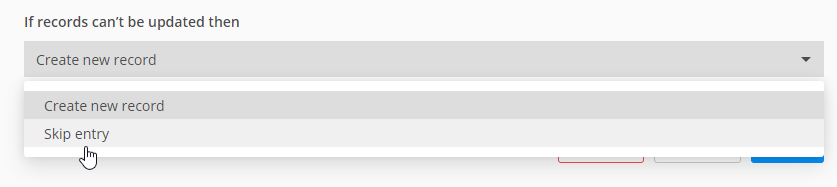
The final step is to decide what to do if no match is found:
Create new record – It means that a new entry will be registered if the new record doesn’t match with a previous one.
Skip entry – If there is no entry matching with a Salesforce record, no record will be updated and no new record will be created.
With the 123FormBuilder – Authorize.Net payment gateway integration you can create customer profiles in your Customer Information Manager from Authorize.net through form submissions, besides just having your form users pay the current order that they have submitted. You can later manage these customer profiles in your CIM as you want.
If not accustomed to the Authorize.Net payment gateway integration on our form builder, feel free to read our complete step-by-step Authorize.net documentation. By default, the CIM option is not enabled, but this can be easily done by ticking the Create a Customer Information Profile (CIM) option within the Authorize.net integration.

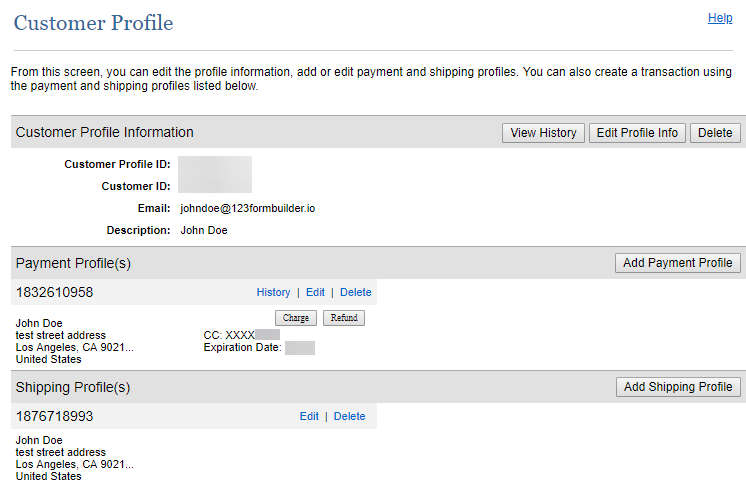
CIM profiles include details such as payment, billing, and shipping information. When a form user submits your order form for the first time, a customer profile is created in your Authorize.net CIM. A customer profile contains payment and billing profiles. Whenever the same form user submits a new order, a new payment and shipping profile is created under the same customer profile.
If you’ve enabled the CIM option, you’ll find all of your customer profiles that have been submitted through your order form in the Tools → Customer Information Manager section of your Authorize.net account.

Select a customer profile and use the View Profile link on top of the table to view the payment and shipping profiles of the respective customer.
Note: The billing address cannot be changed through form submissions, only manually within your CIM.
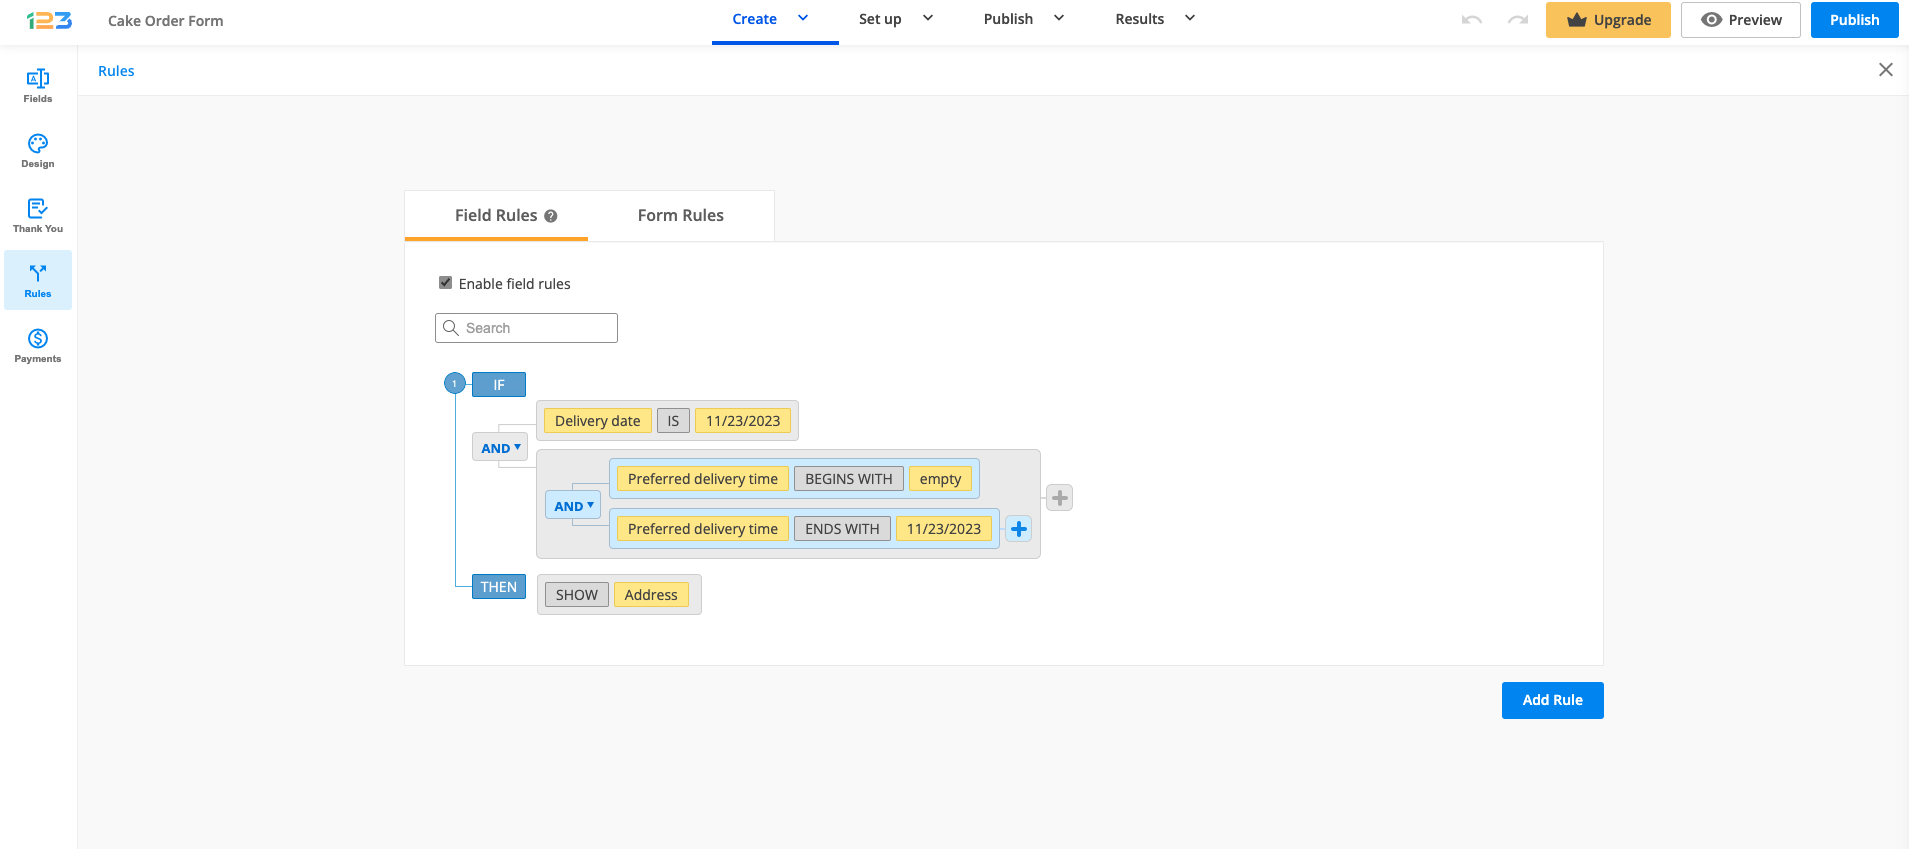
To use conditional logic to show or hide form fields, go to the Rules section of your form within the form builder. Tick the option Enable field rules, under the Field Rules tab.
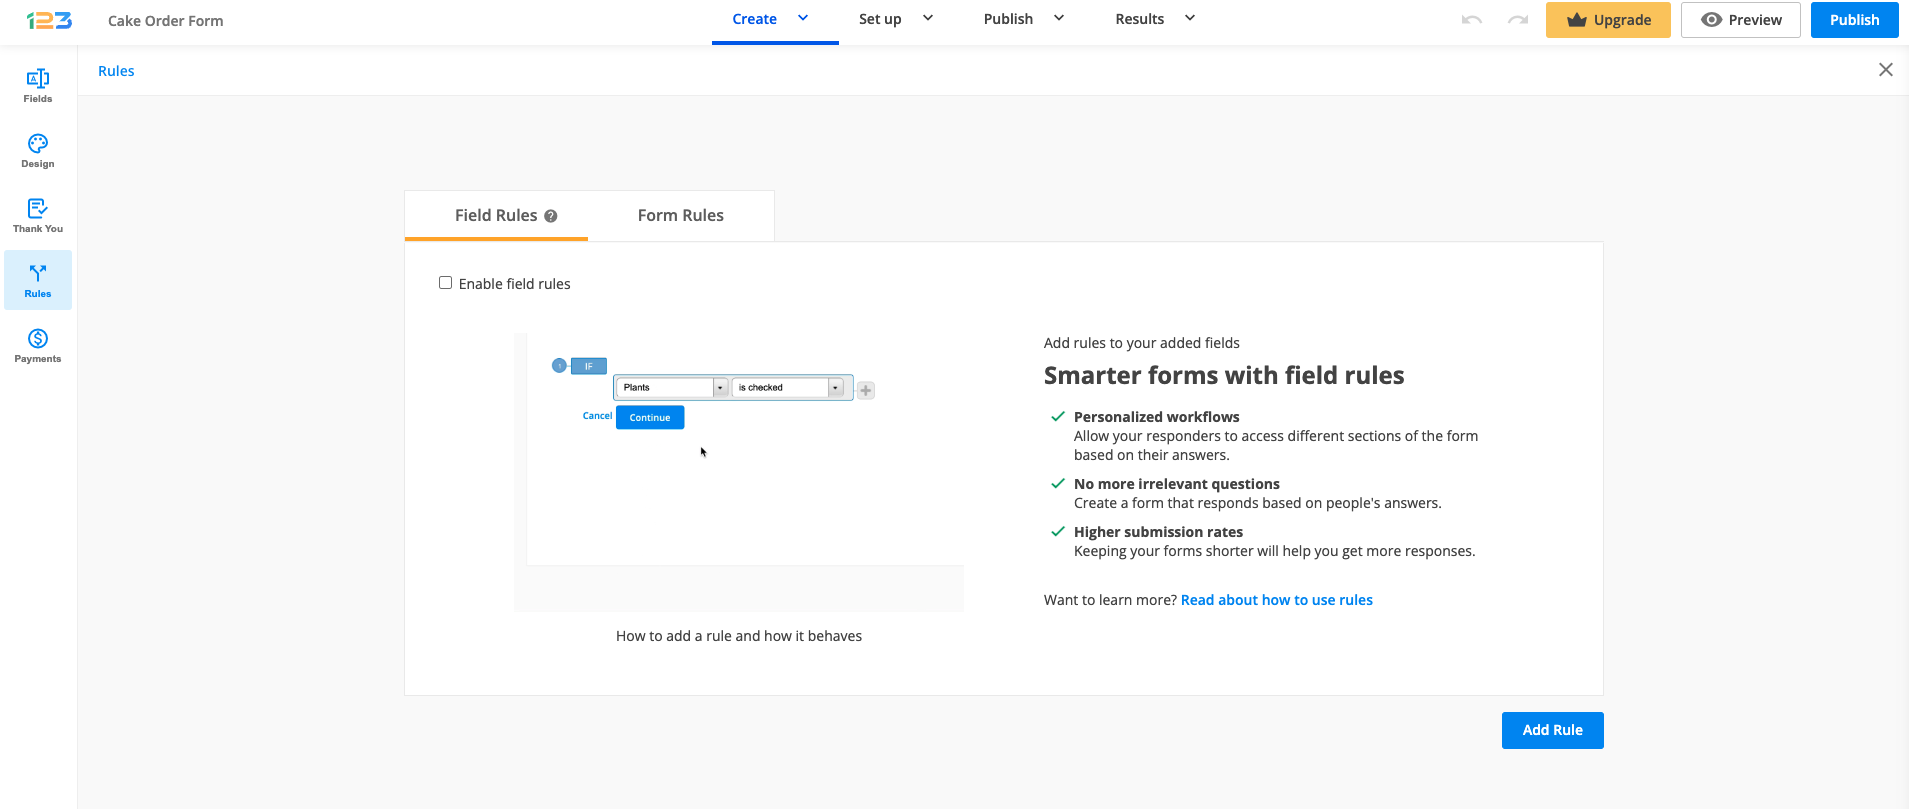
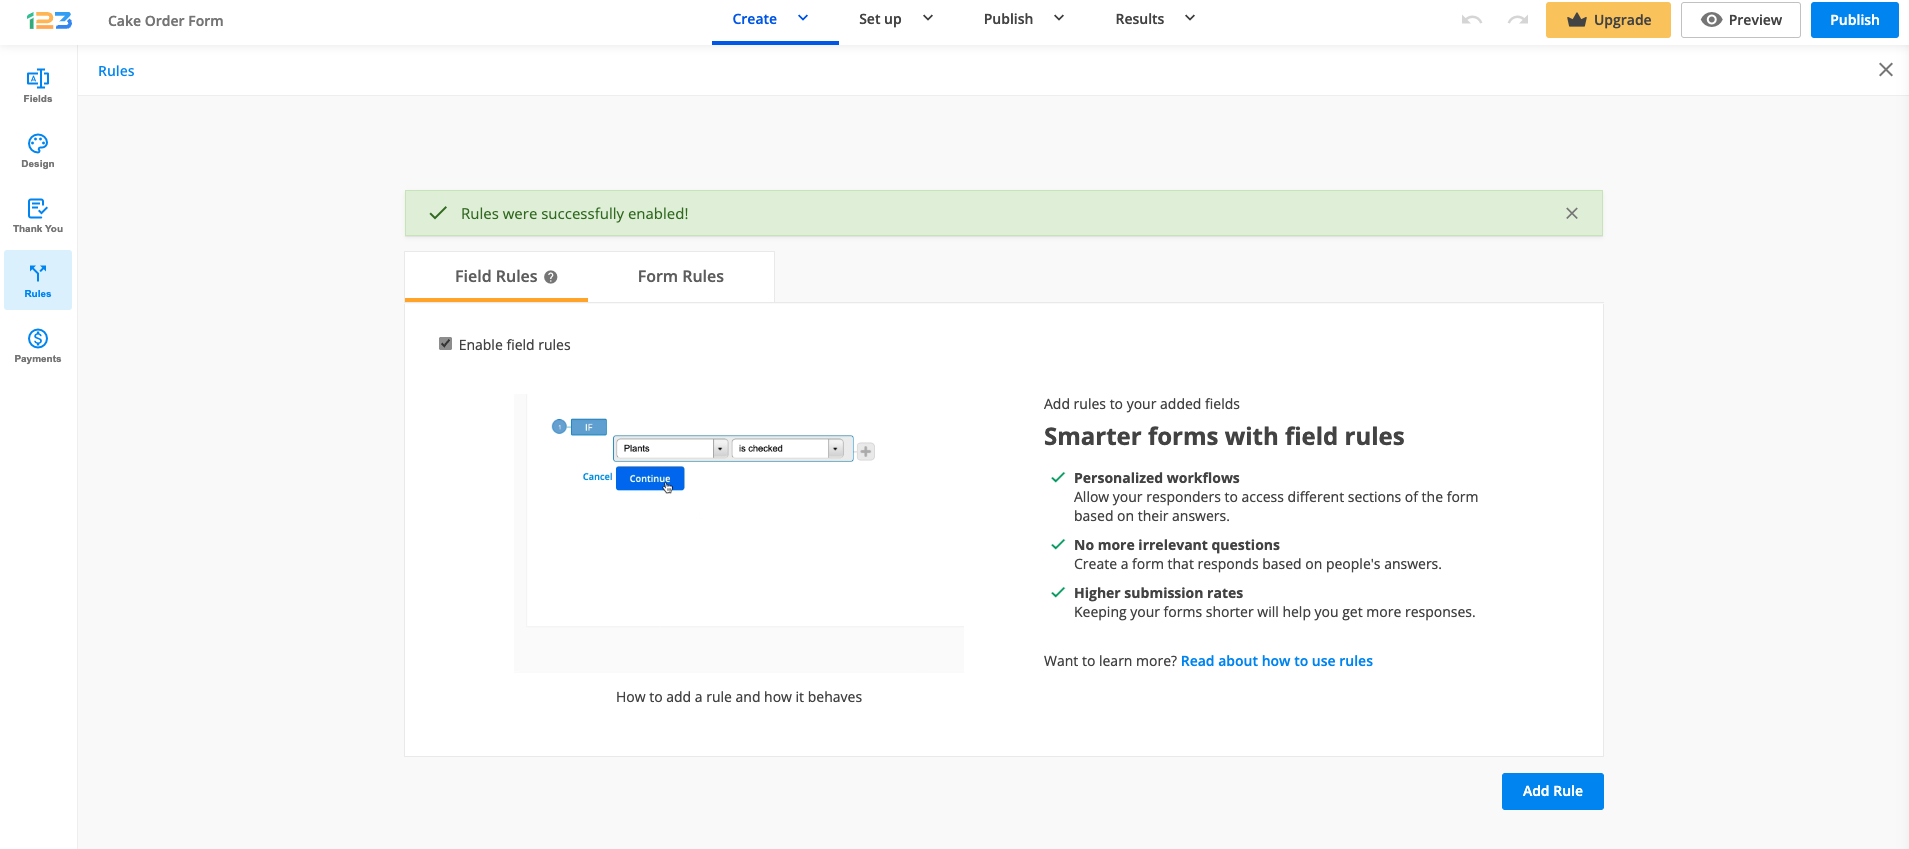
Afterward, click on the Add Rule button to start setting up your rules.
The first condition (IF) will appear on the page along with some dropdowns, a Cancel, and a Continue button.
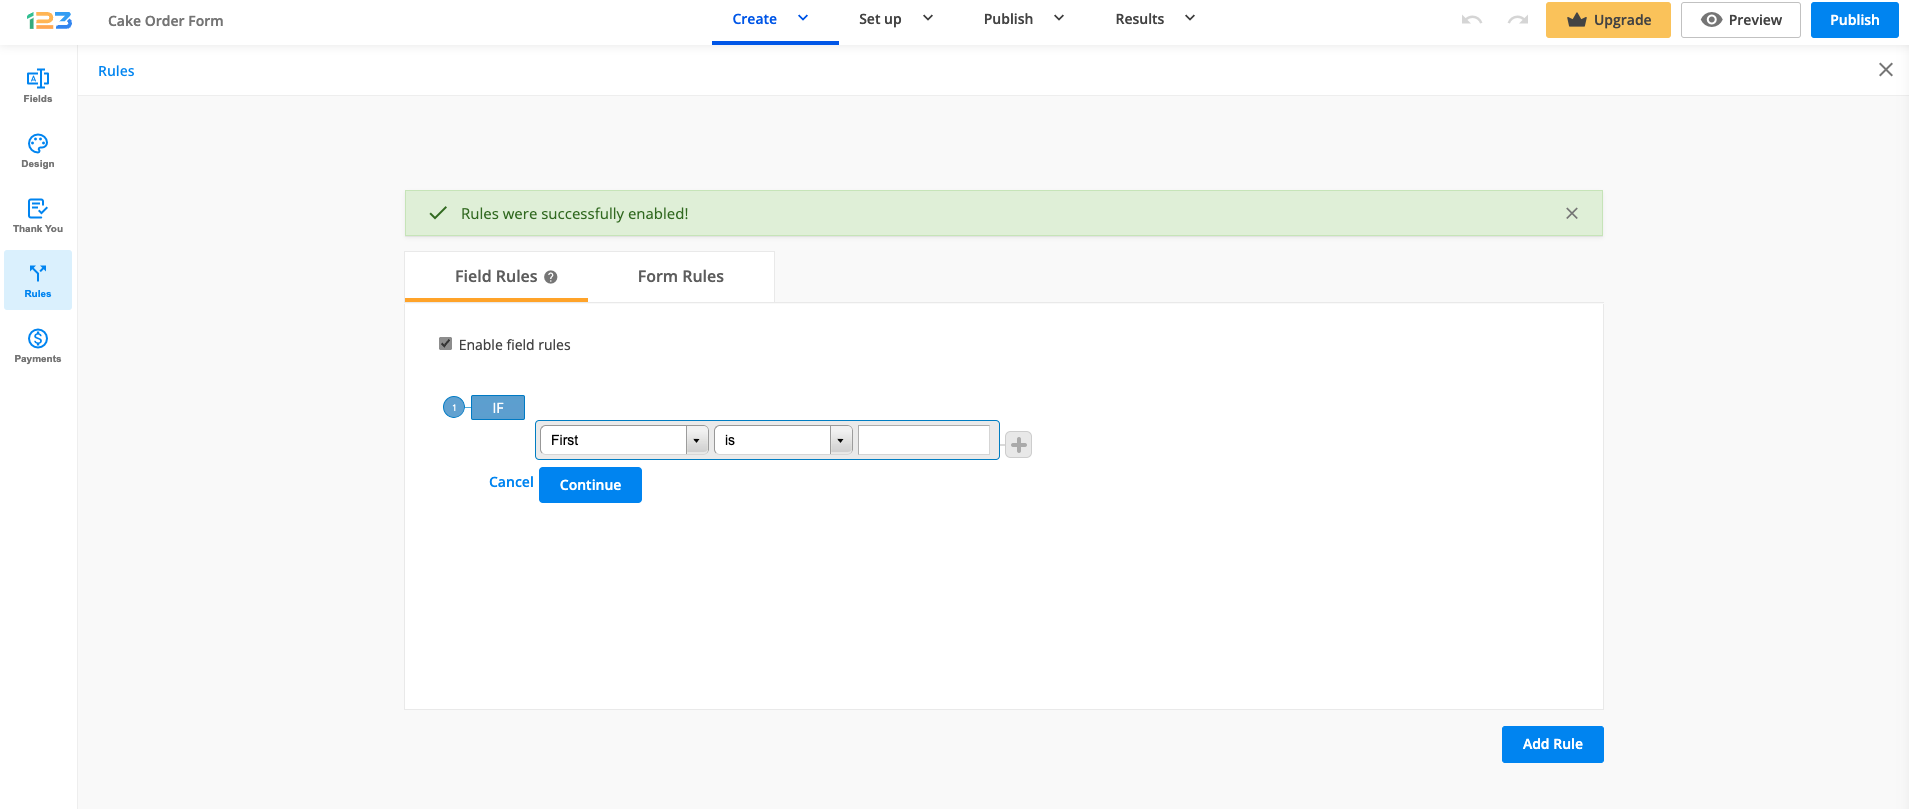
In the first dropdown, select the field to which you want the rule to apply. Here you will find a list of all the form fields that collect data.
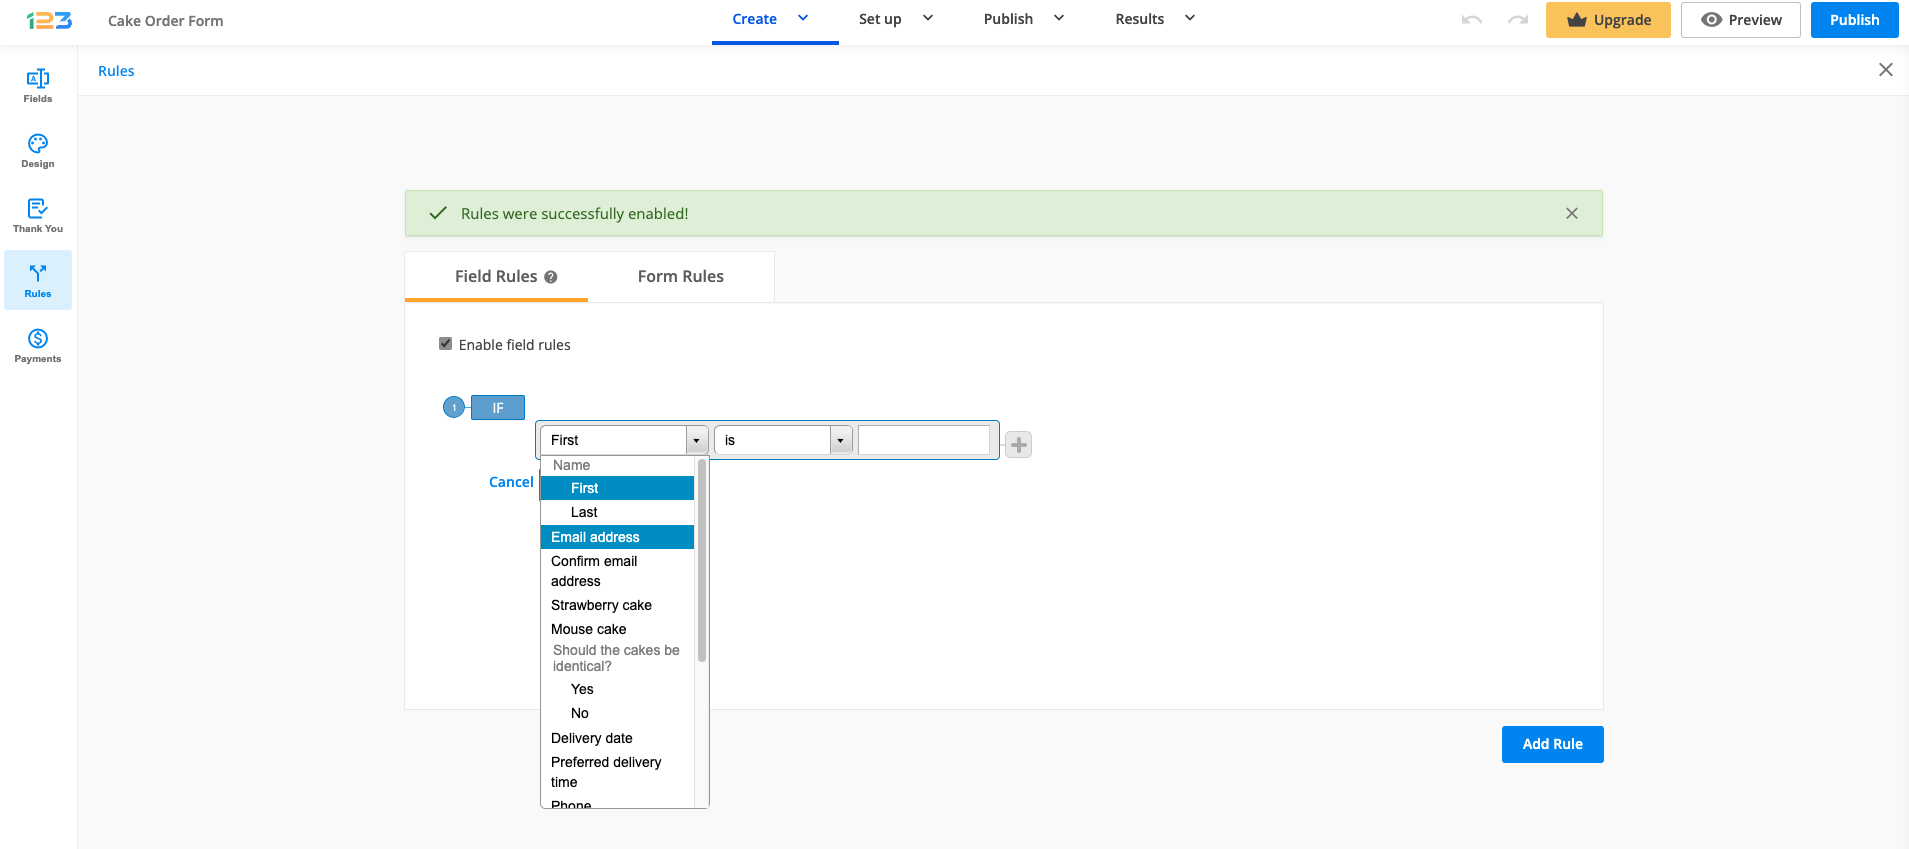
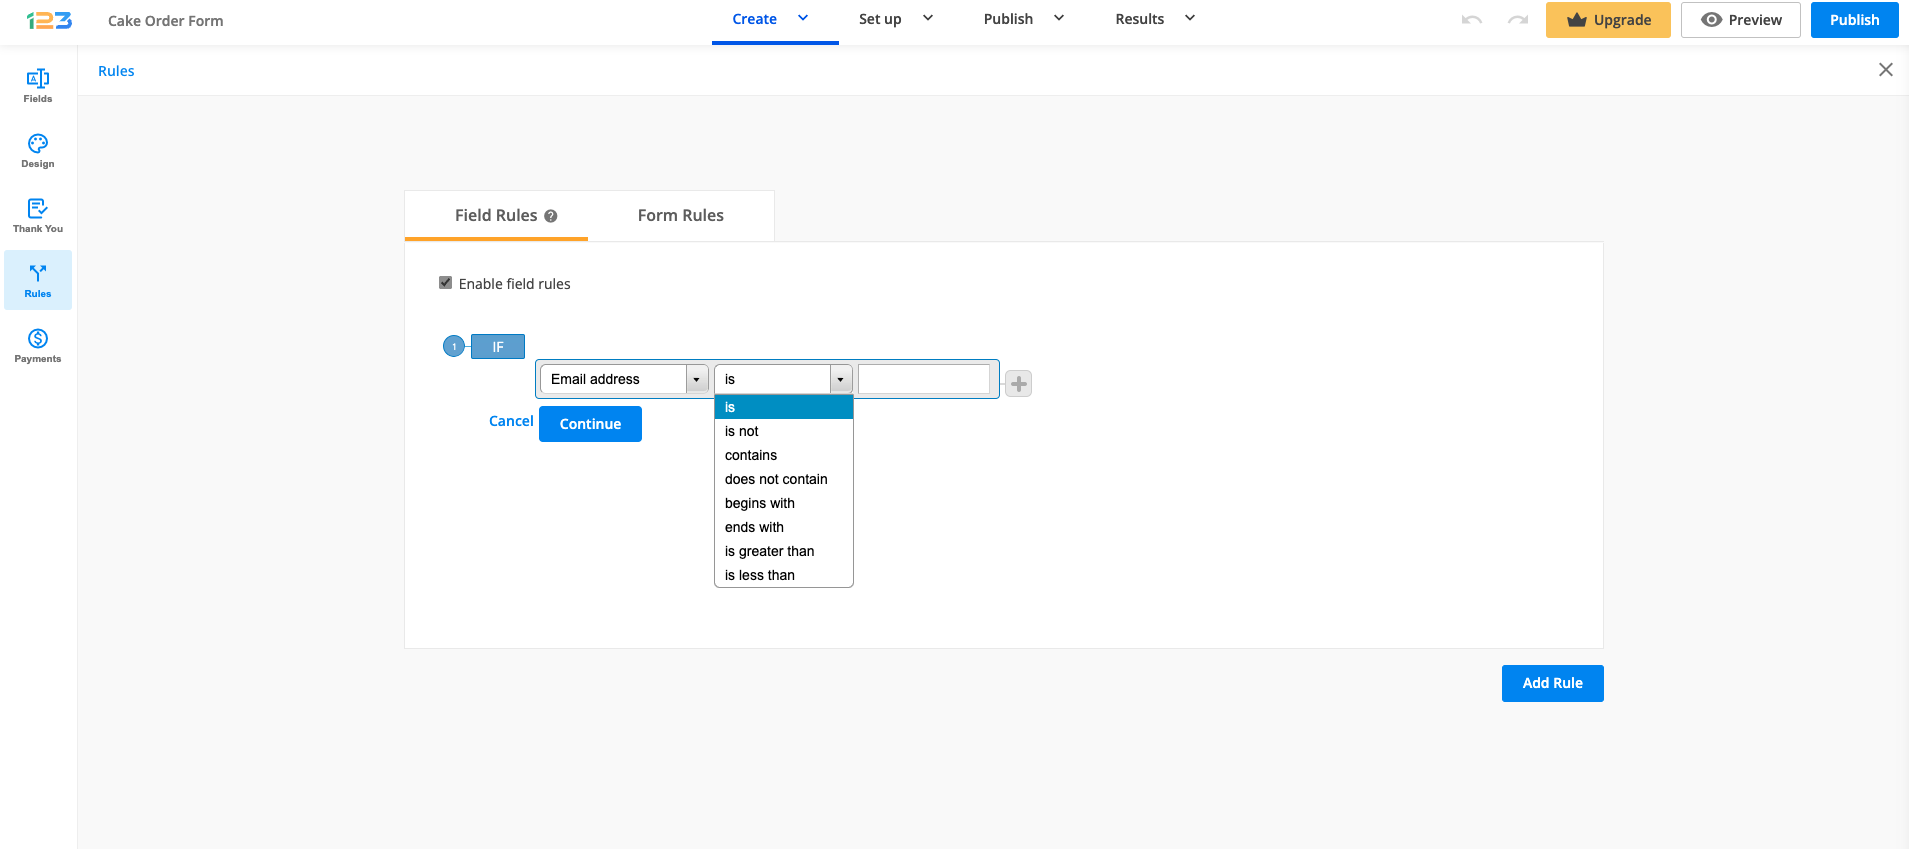
Then, select the condition. Depending on the field type selected previously, you will see different conditions. For the Email field, for example, you have the conditions: is, is not, contains, does not contain, etc. Another example could be related to age restriction: If age is less than 21, then don’t show the list of alcoholic beverages on the form.
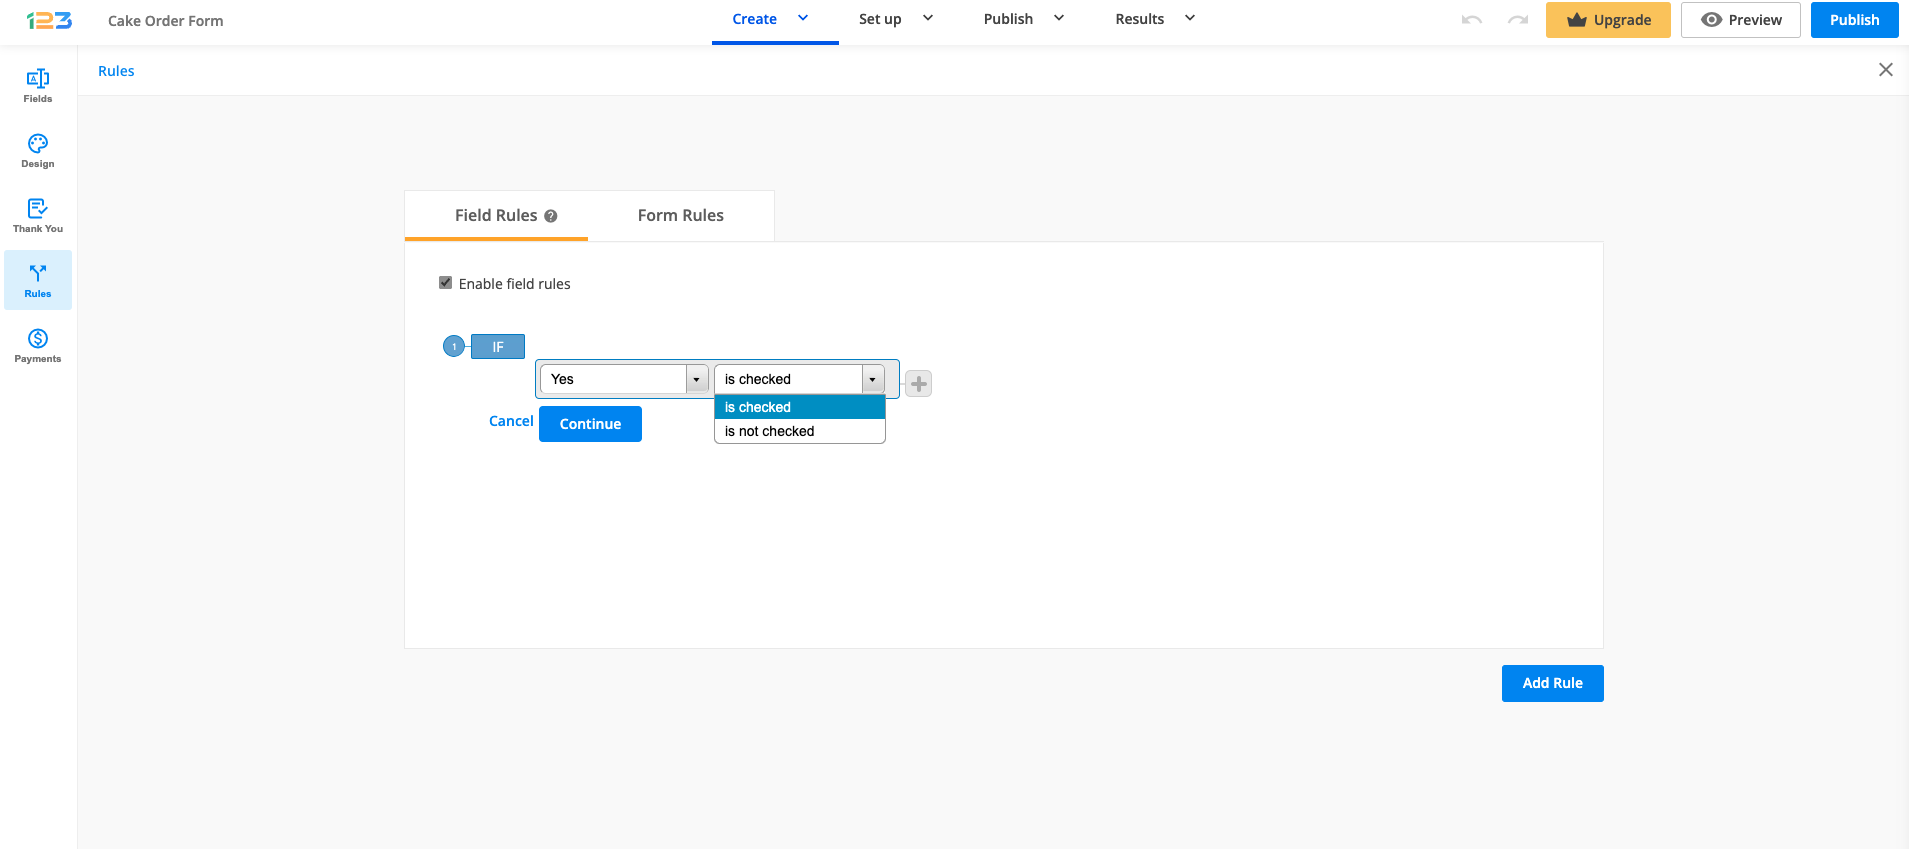
For choice fields, you can use the conditions is checked or is not checked.
If you want to create multiple rules, click on the grey plus sign to create a new condition. It is connected to the previous condition with one of the available connectors: OR and AND.
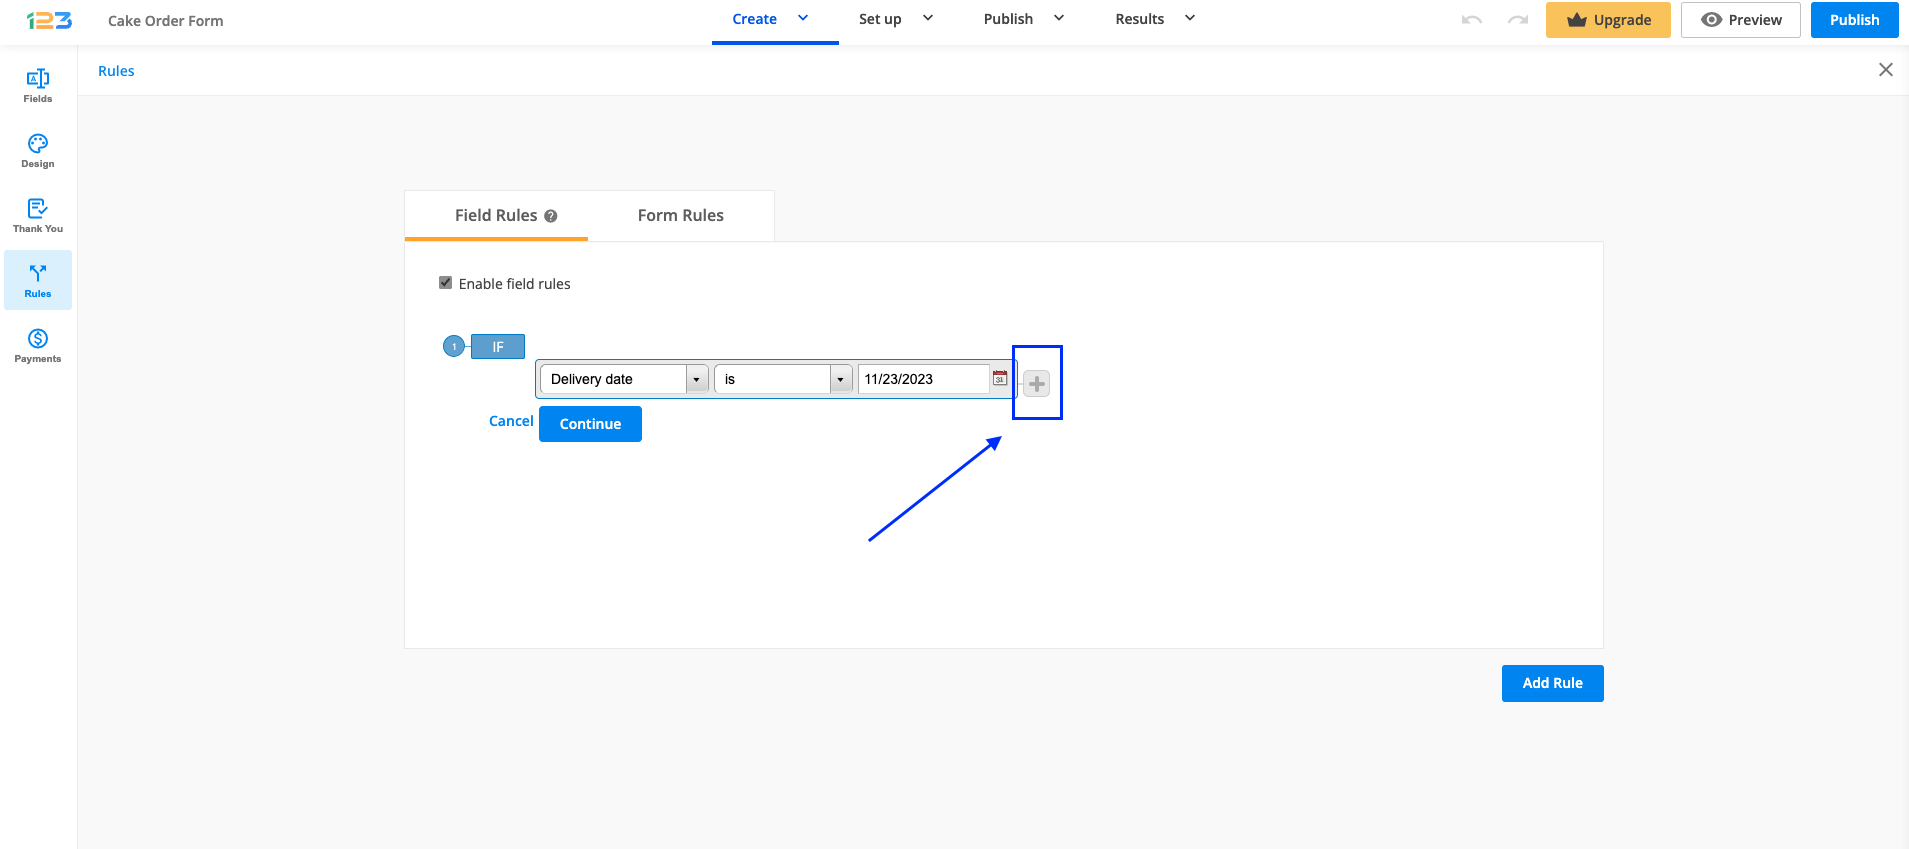
Use this button if you want to set multiple conditions within the same rule. You can always remove the second condition by clicking on the Remove button.
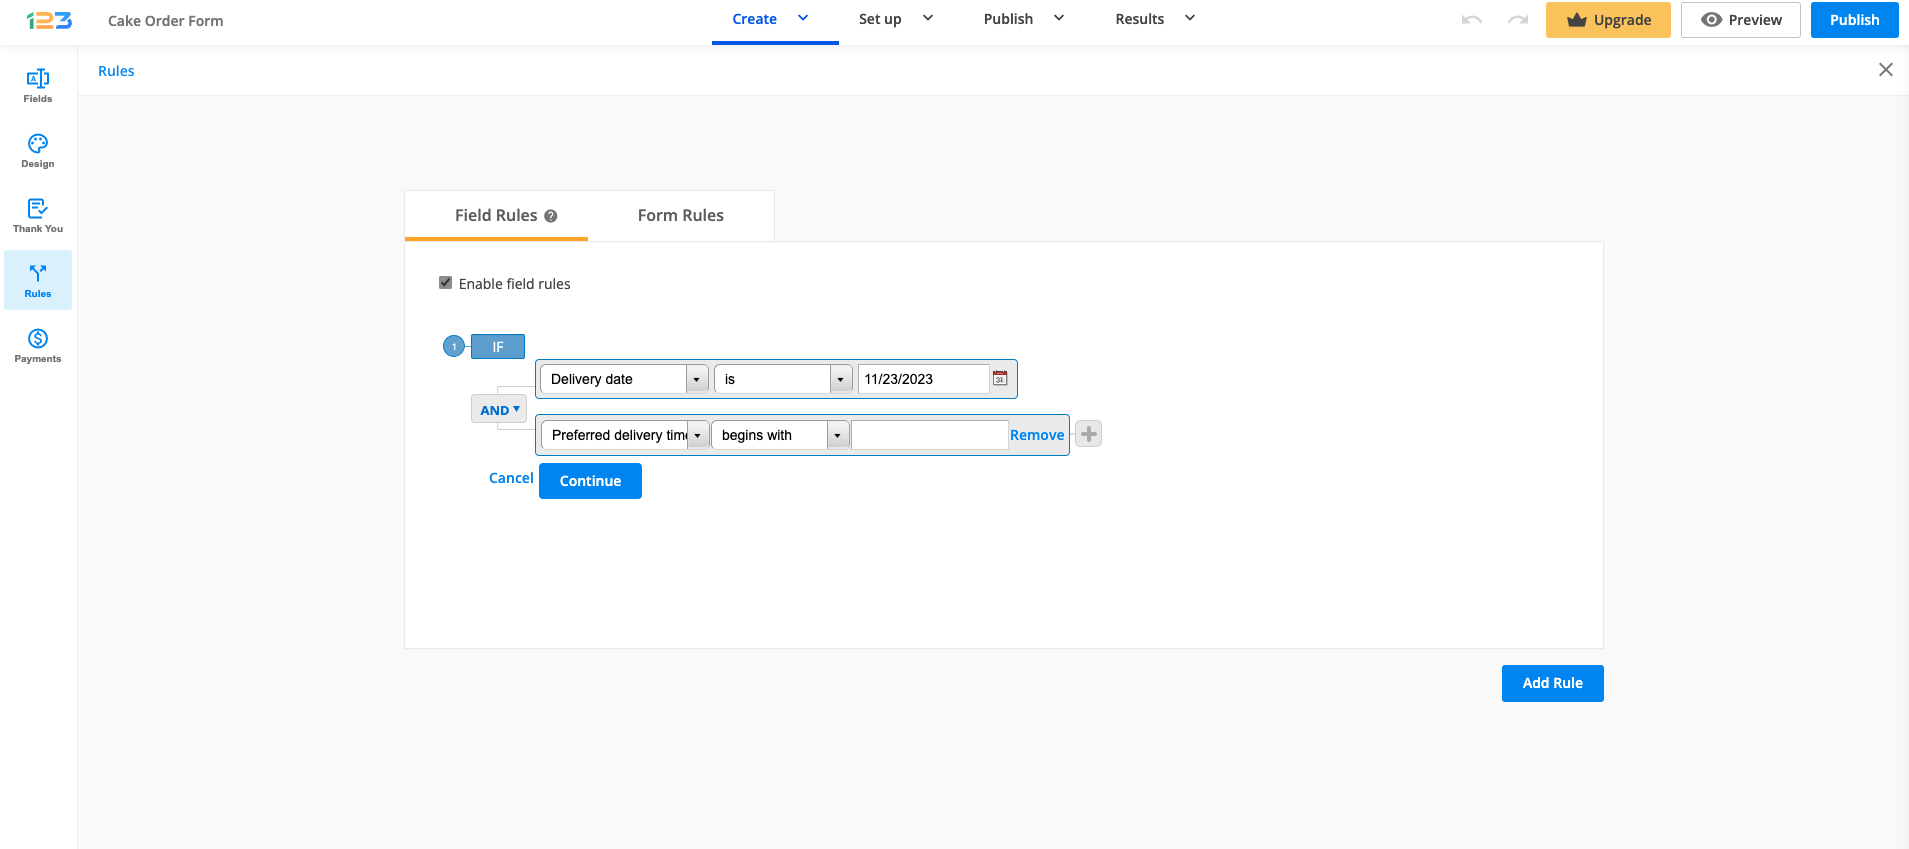
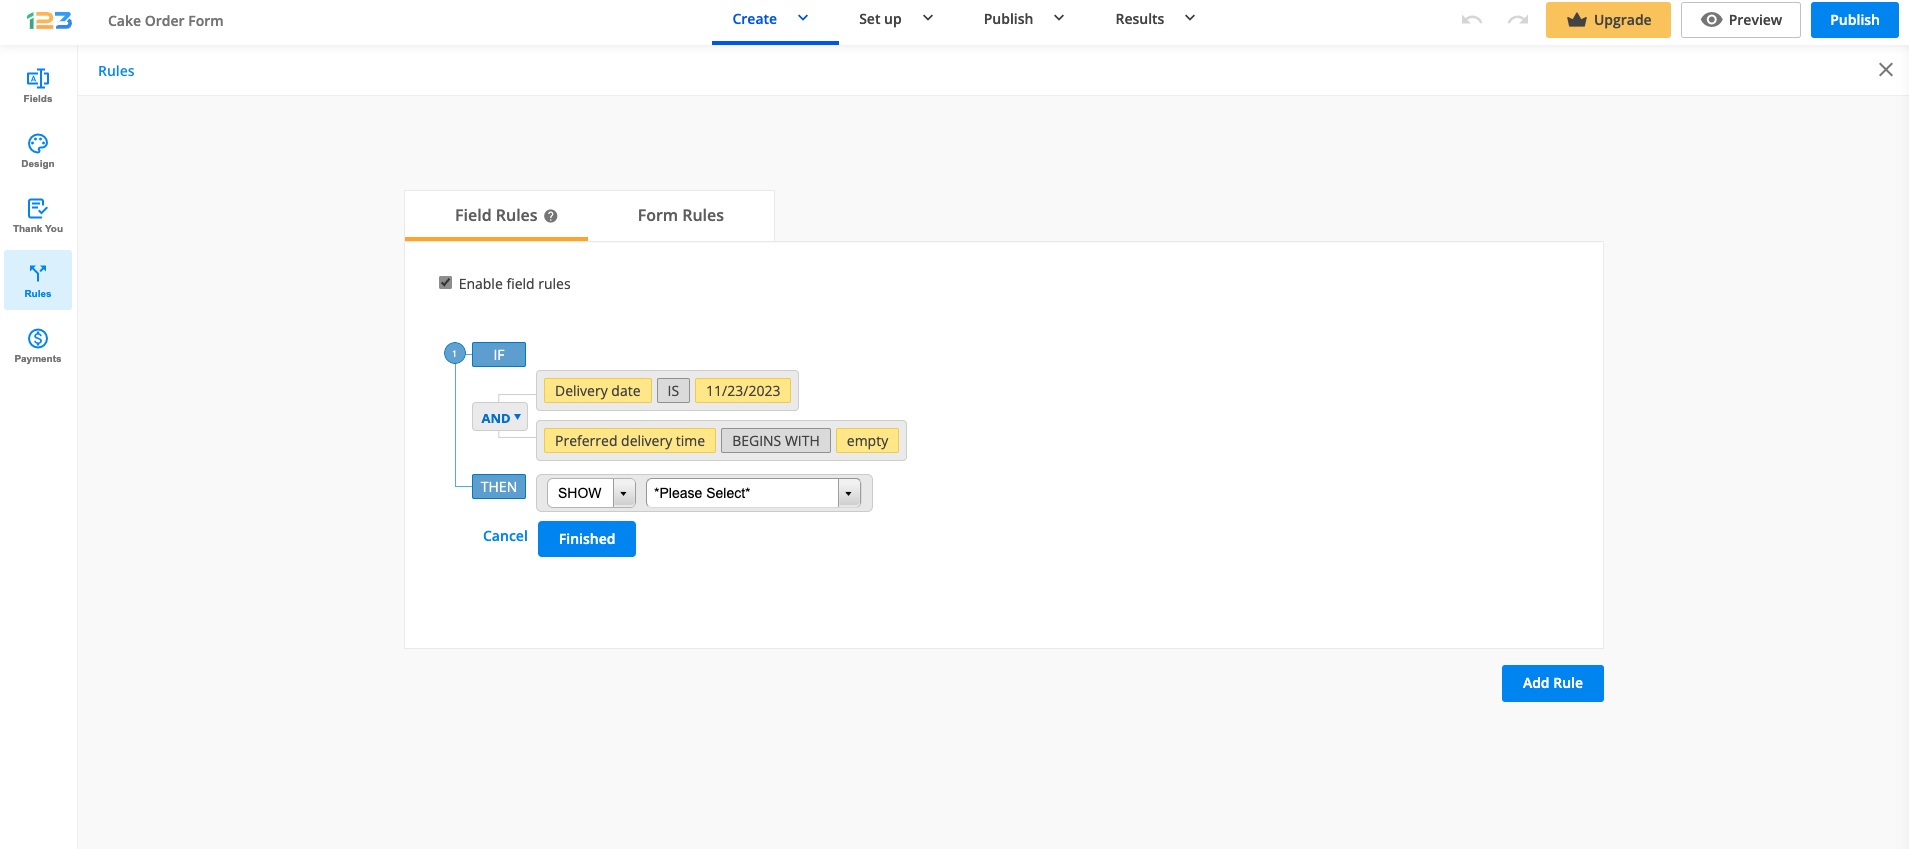
Next, hit Continue and select one of the two existing actions: Show or Hide. In the end, select the field or fields you want to show or hide after the condition has been met on the form.
Note: If you wish to Show or Hide the Multiply field group field, please select the Multiply field group element and all the fields included in it. Otherwise, your rule will not work as expected.
When hovering over the conditions, you will notice some additional options: Delete, Edit, Subrule. You can edit or delete a condition by clicking on the appropriate buttons.
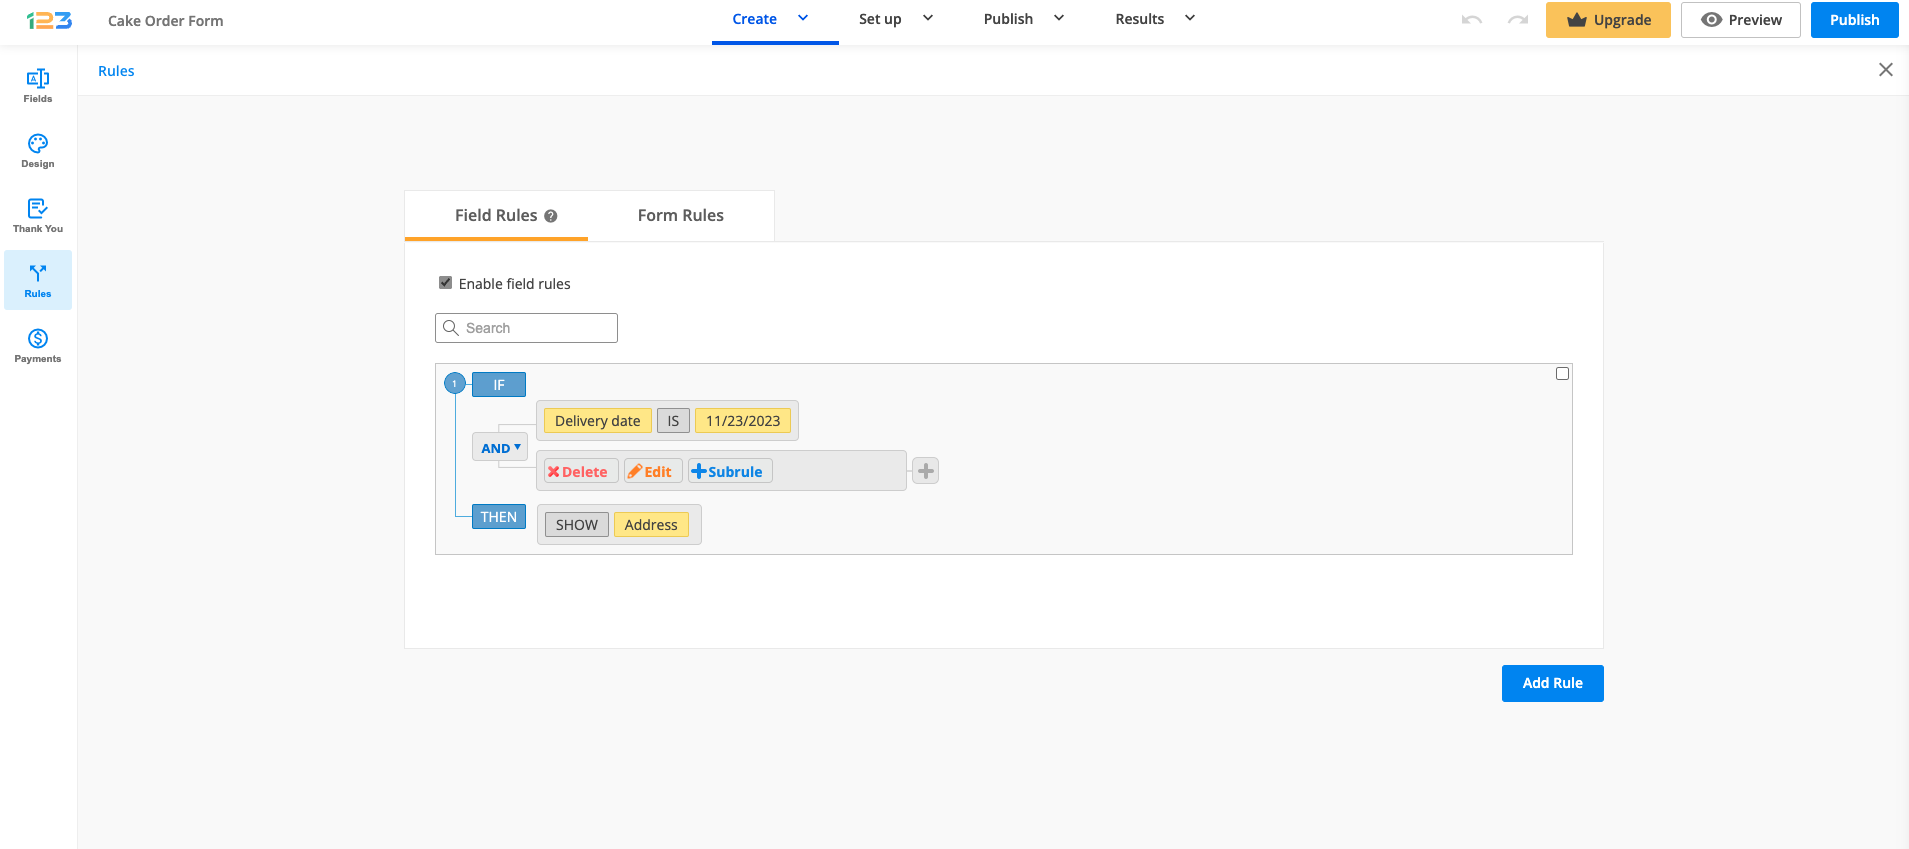
If you want to add a subrule (an additional layer of rule), click on the Subrule button. In the below case, for the second condition, we have added an additional rule with a conditional operator: AND/OR.
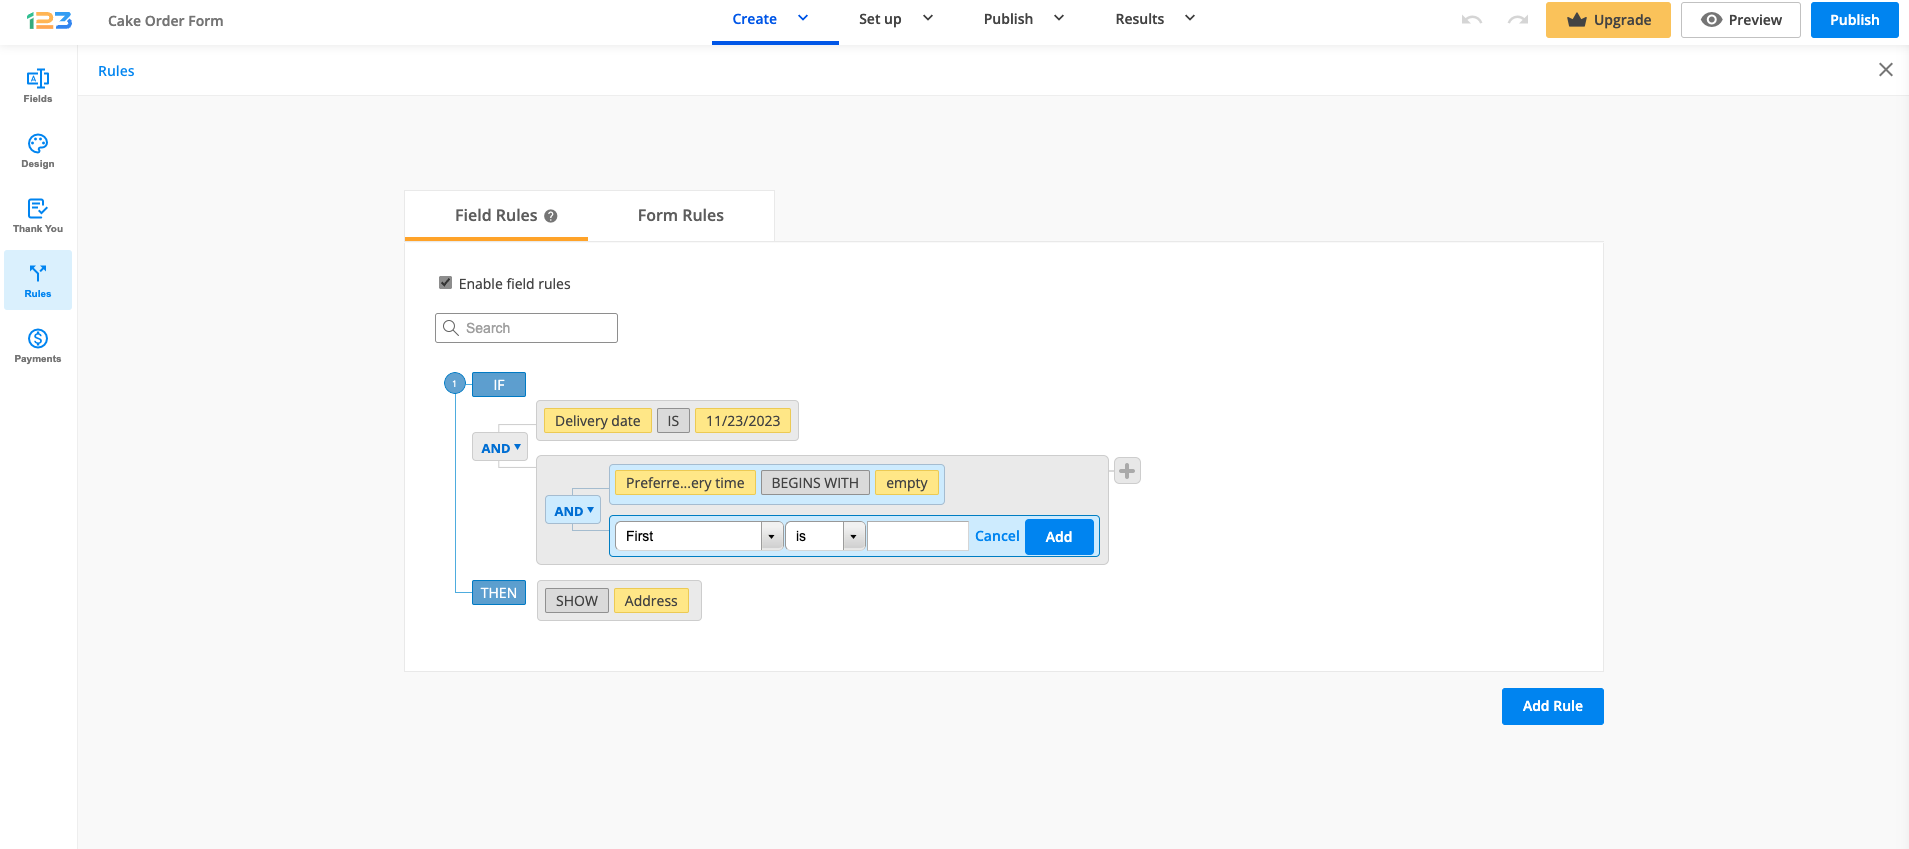
Once the subrule has been added, it will look like below:
Important Note
You cannot Show/Hide the same fields in multiple rules. This will create a conflict and your rules will no longer work properly. You can duplicate your existing fields to show or hide them in multiple rules.Hit Finished to add and apply the rule to your online form.
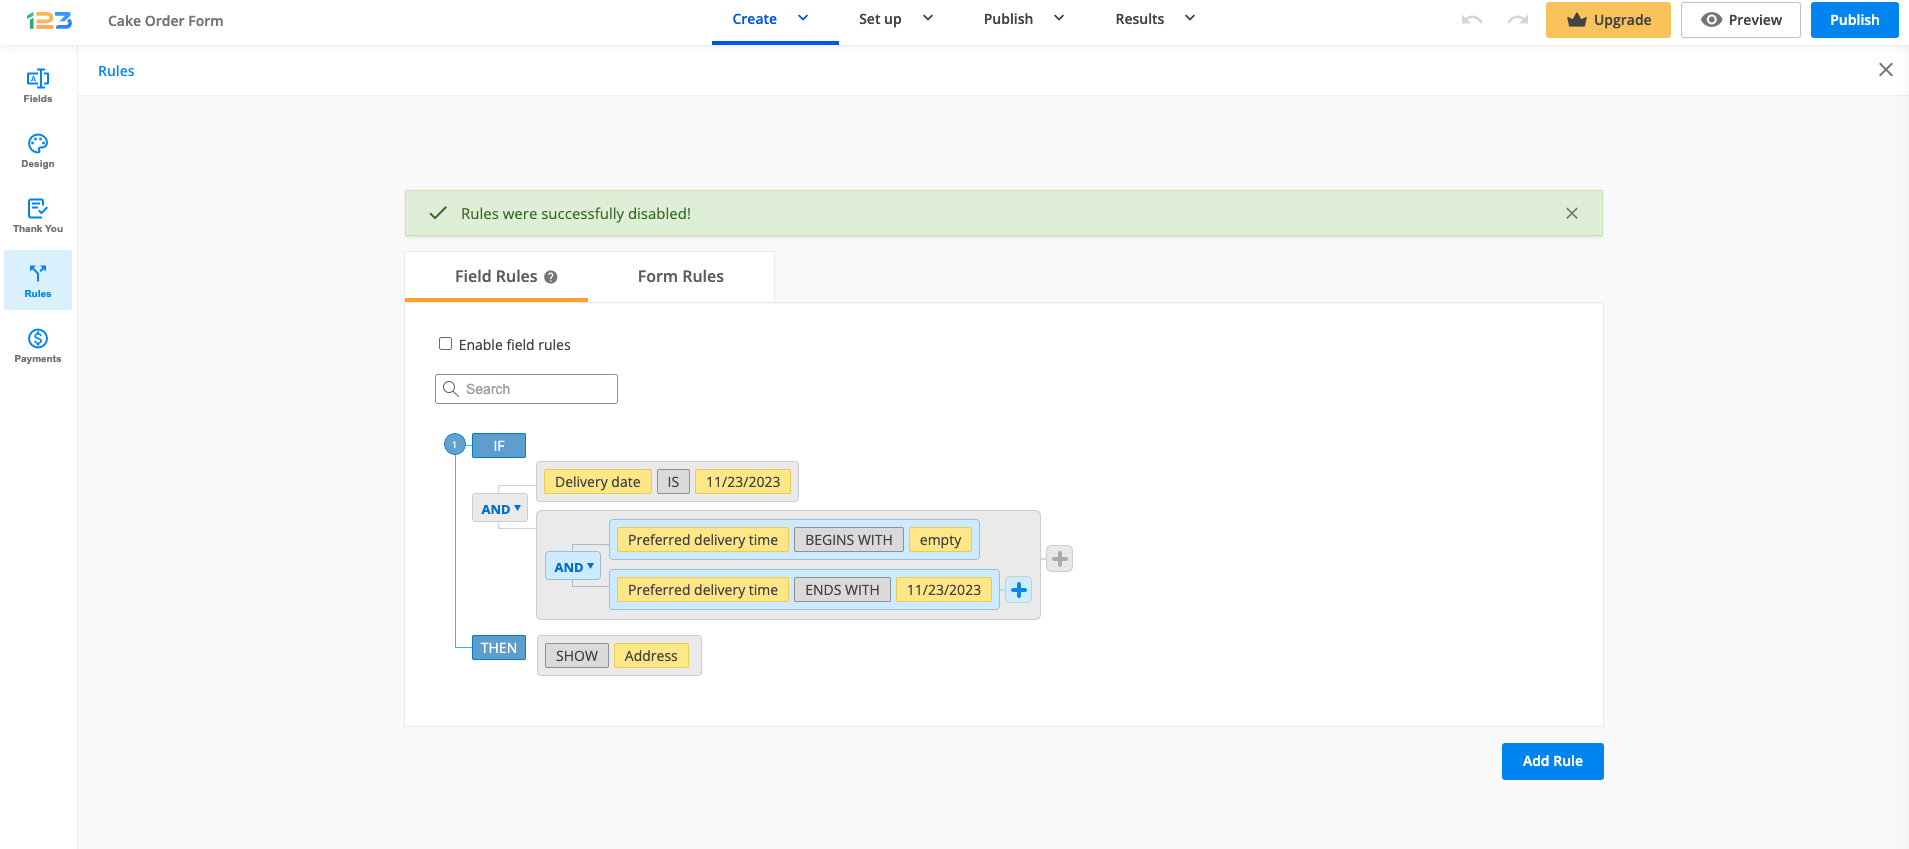
You can always disable the rules by clicking on the Enable field rules checkbox. The rules will remain the same and will be currently unavailable. At any time you can come back and turn them back on.
Related articles
If you cannot download CSV archives on Safari, namely you cannot download your form submissions in CSV at all within the form builder, you’ll need to tweak your browser a bit. To download the CSV file on Safari, follow these easy steps below:
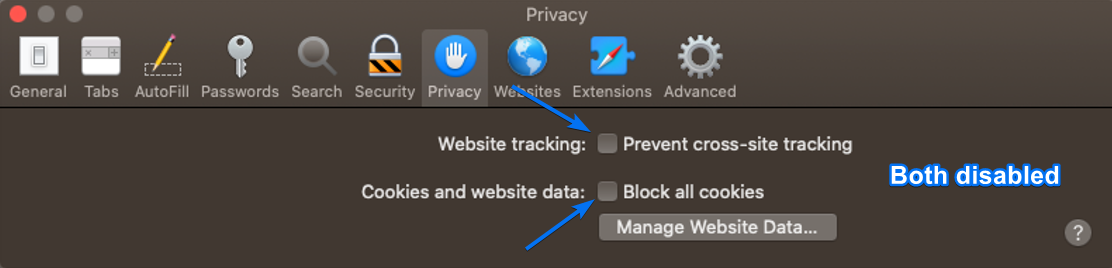
1. In Safari, go to Safari → Preferences and click on the Privacy tab.
2. Deselect the checkbox before the Prevent cross-site tracking option.
3. Deselect the checkbox before the Block all cookies option.
After you have applied these changes, you will be able to download your form submissions in CSV from now on.
Related articles
Great news, you can use images as options in a Single or Multiple choice field starting from the Gold plan! All you have to do is add a Single or Multiple choice field to your form and then go to Edit choices.

For each choice, you will have the option of uploading an image to be displayed as a choice. Only .png, .jpeg, .gif, .bmp, .svg, or .webp formats are accepted, up to 1 MB per image. Once you have uploaded all the files, do not forget to Save your changes.

Voila! You have now made a more interactive form as easy as 123!
Pro tip: You can make your choices as clickable buttons by removing the checkboxes. To achieve this, go to the fields right side menu, and from the Layout section, disable the Show selector toggle.

Related articles
Field rules accept the operators greater than and less than. They make form branching a lot faster to set up.
Let’s take an use case to showcase the usage of field rules with operators greater than and less than.
The easiest example that proves the usefulness of this feature involves File Upload fields. If you want to show the appropriate number of File Upload fields in a form based on user selection, you can do so really quickly using the operator greater than.
Without these operators, field rules would overwrite each other and you would need to add a greater number of fields and rules to your form. With the two operators, you only need as many File Upload fields and rules as the maximum number of files that can be uploaded by users.
How to set up conditional logic with the operators greater than and less than? In your form builder account, select your form, and go to the Rules section and click Add Rule.
Select the fields that will be affected by this rule. In the dropdown list containing the operators, select is greater than (or is less than).
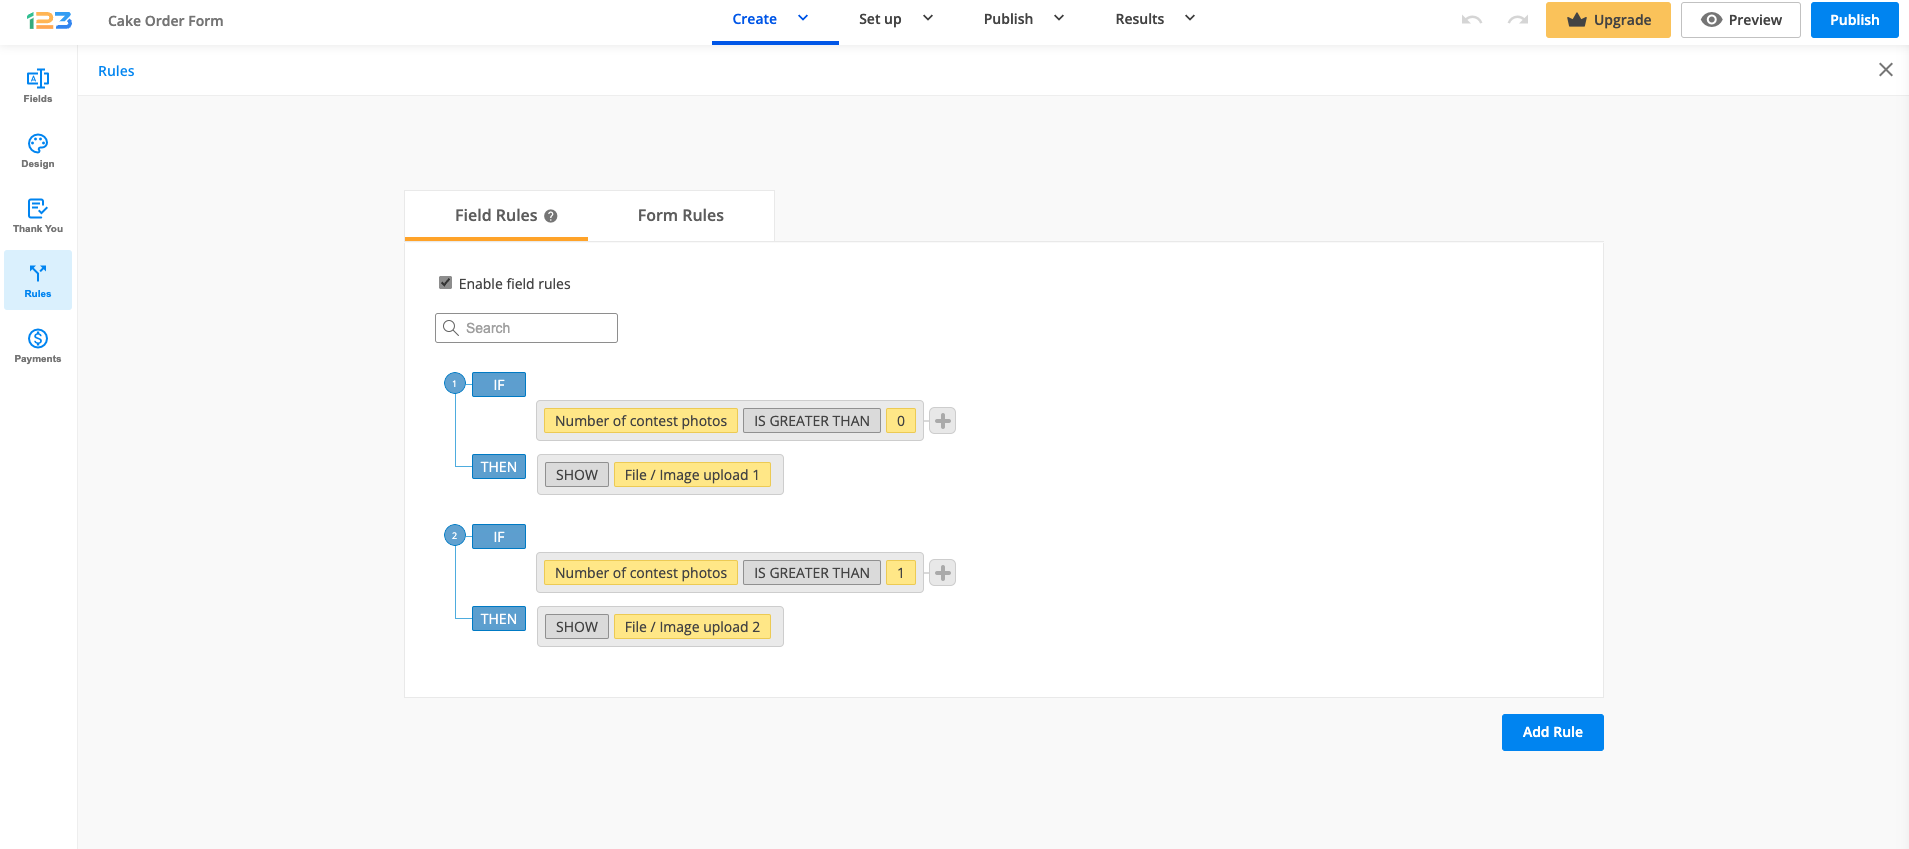
Firstly, since users can upload one file per File Upload field, the idea was to show the exact number of fields that the form users needed (and which they were asked to specify in a previous field).
Secondly, without the operators greater than and less than, the number of File Upload fields and field rules that had to be set up was much higher than the maximum number of files users could upload. So there you go, now it’s solved!
Of course, there are other wonderful ways of using this feature. Feel free to experiment and leave a comment about it — we’d love to hear your ideas!
You can also learn to use the greater than operator from our short video tutorial:
If you’ve forgotten your login information, here’s how you can retrieve it:
For your username, contact us from the email address associated with your account and we’ll retrieve your basic account information from there.

If you’ve forgotten your password, use the Forgot your password? link to receive a new one in your email. Follow the instructions from the email to reset your account password.
You might encounter this error “The set of choices must be unique” when customising Single choice, Multiple choice, and Dropdown fields.
The reason of this error is that you have 2 choices which are identical. By making sure that all choices are unique, you will not encounter this error anymore.

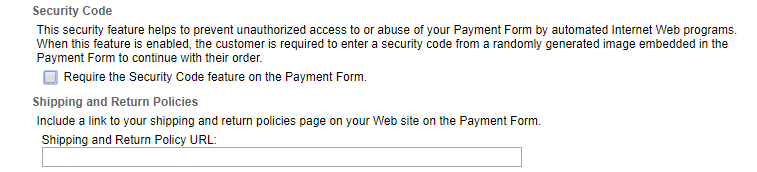
The message Error 312: The specified Security Code was invalid appears because the security code from your Authorize.net account can not be sent to 123FormBuilder. To prevent this problem, you’ll need to disable the Security Code option in Authorize.Net. This will solve the problem with the invalid security code error message on the payment page.
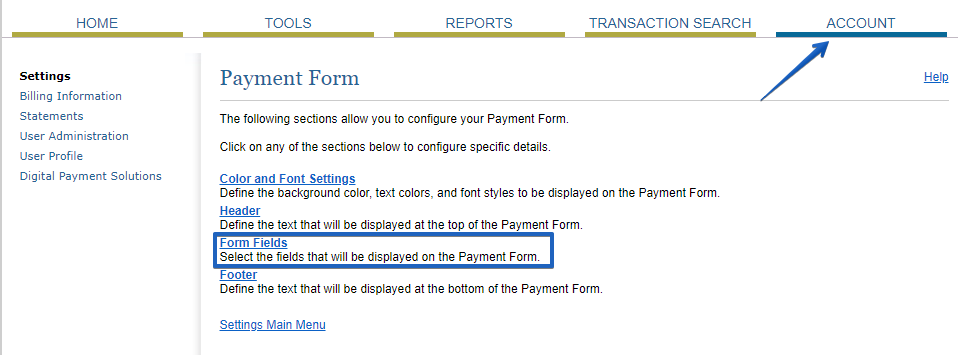
Log into your Authorize.Net account and click on Account. In Settings, go to Transaction Format Settings → Payment Form and click on Form Fields.
Scroll down through the options and uncheck Require the Security Code feature on the Payment Form and hit Submit. This will prevent the error to occur in the future.
Most Popular
Frequently Asked Questions
Here is a list of the most frequently asked questions. For more FAQs, please browse through the FAQs page.