123FormBuilder Knowledge Base
Search our documentation platform for answers, service specifications and 3rd-party integrations.
Knowledge Base
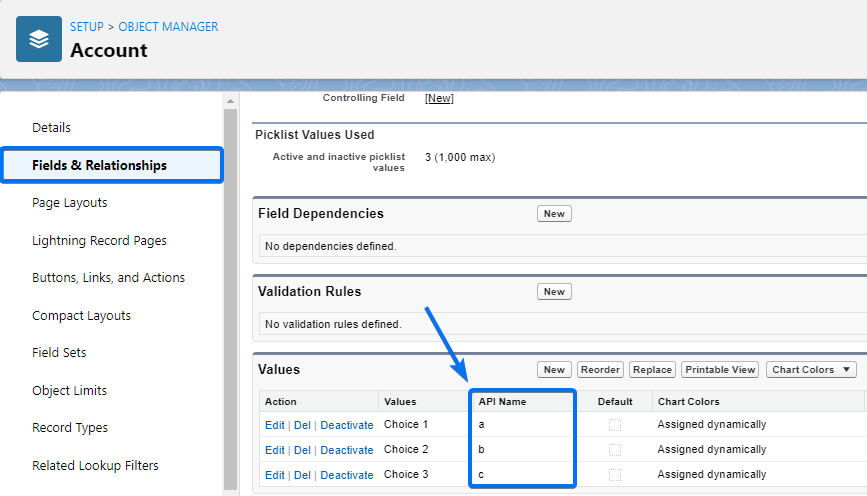
In order for the prefill to work on choice fields, the API Name of the Salesforce field values has to be identical to the form fields’ options, as you can see in the example below.
In Salesforce:
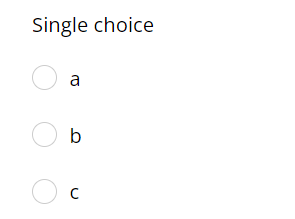
On the form within the form builder:
Also, each field from a Salesforce object requires a separate lookup. You cannot retrieve all of the fields from an object in a single lookup.
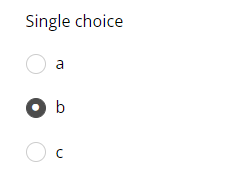
Prefill for single choice fields
Single choice fields can be prefilled from Salesforce picklists.
Form setup:
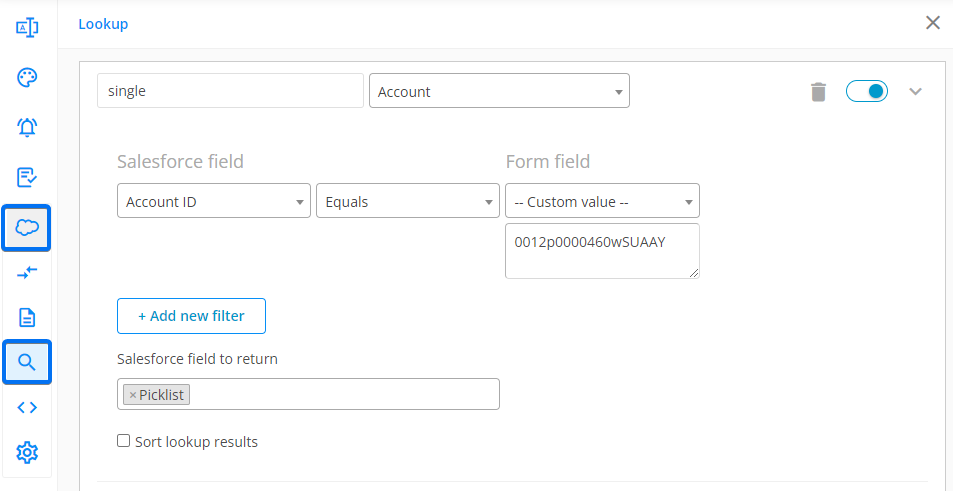
Once you access the Salesforce Integration → Lookup tab on your form, you will need to create one lookup for each Salesforce picklist, multi-picklist, or checkbox in order to retrieve its value on the form.
The setup should be similar to the one below. First, select the Salesforce object that you want to look up and add a filter (can be the record ID coming from the form URL). Then, select the Salesforce field that you want to map with your form field.
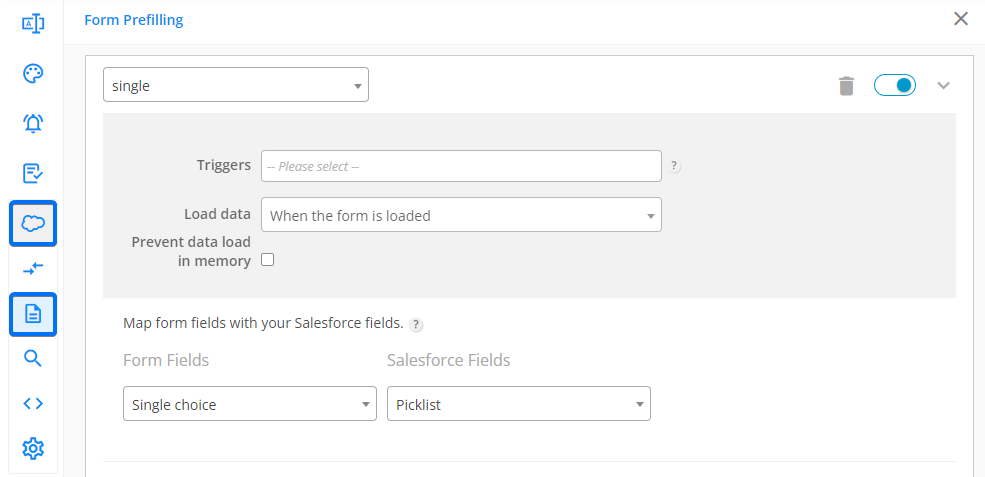
The next step will take you to the Form Prefilling tab in the Salesforce Integration section, where you will need to create prefill connector(s) for the lookup(s) you previously created in the Lookup tab.
After you select the lookup in the top dropdown, you just have to map the form fields to the relevant Salesforce fields in order to retrieve the value from the correct field.
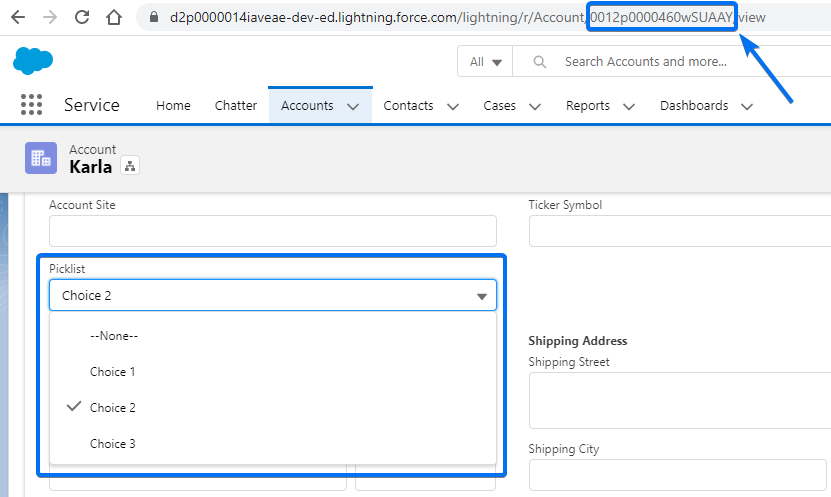
Once the setup is complete and you preview the form, the single choice field should be prefilled, having the corresponding option from Salesforce selected.
On the form:
In Salesforce:
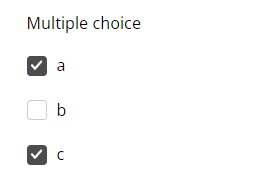
Prefill for multiple choice fields
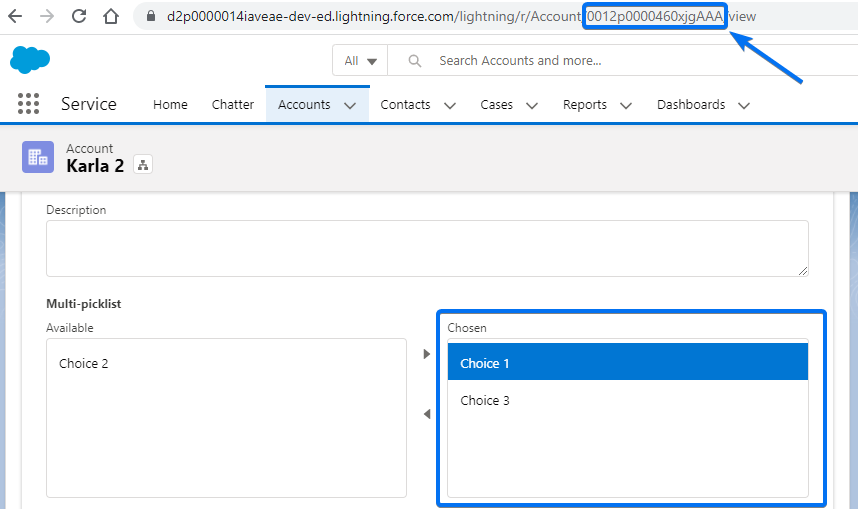
Multiple choice fields can be prefilled from Salesforce picklists, multi-picklists, and checkboxes.
The form setup is identical to the one above.
On the form:
In Salesforce:
Related articles
If you want to prefill form fields when embedding your form on a webpage, you can do that by tweaking and using the Javascript code from the forms Publish → Embed form section within the form builder.
Important note: when sharing the form link or publishing the form on WordPress, the procedure is different.
Read more about how to prefill form fields on WordPress.
Read more about how to prefill form fields when sharing the form link.
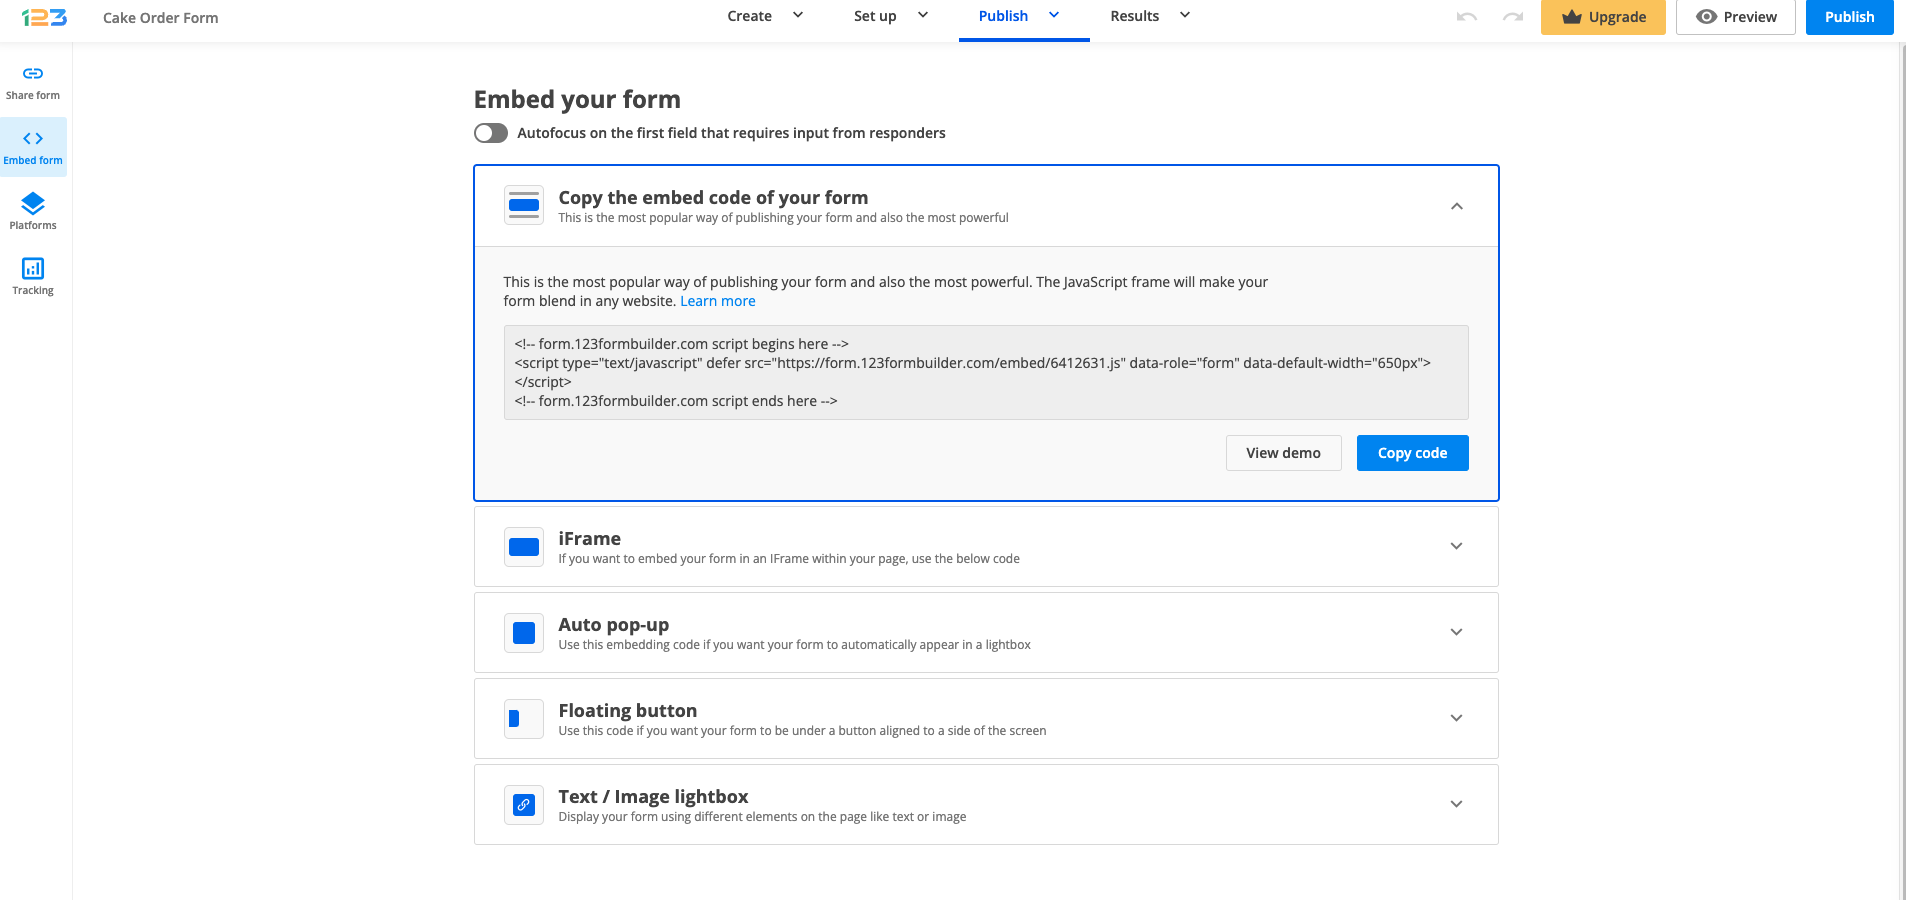
Customizing the embed code
Here is an example code that you can paste into your web page, and make the adjustments indicated below.
<!-- form.123formbuilder.com script begins here -->
<script type="text/javascript" defer src="https://form.123formbuilder.com/embed/YourFormID.js" data-role="form" data-default-width="650px" data-custom-vars="control33333333-1=John&control33333333-2=Doe&control55555555=johndoe@company.com">
</script><!-- form.123formbuilder.com script ends here -->
There are three areas in which you need to focus:
- Replace YourFormID with the actual ID of your web form.
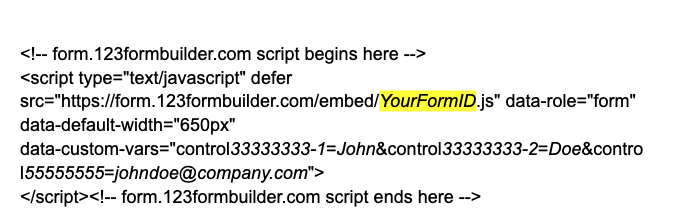
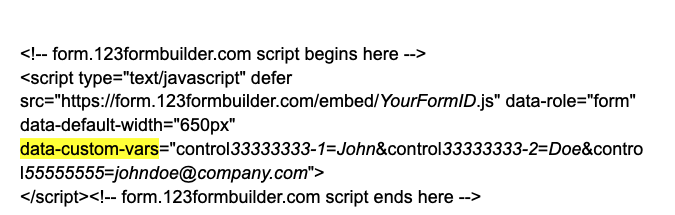
- The function data-custom-vars is not added by default if you copy the Javascript code directly from the Publish → Embed section. Therefore, you’ll need to add it manually to your code, followed by the IDs of the form fields you want prefilled with the desired values.
- Following,
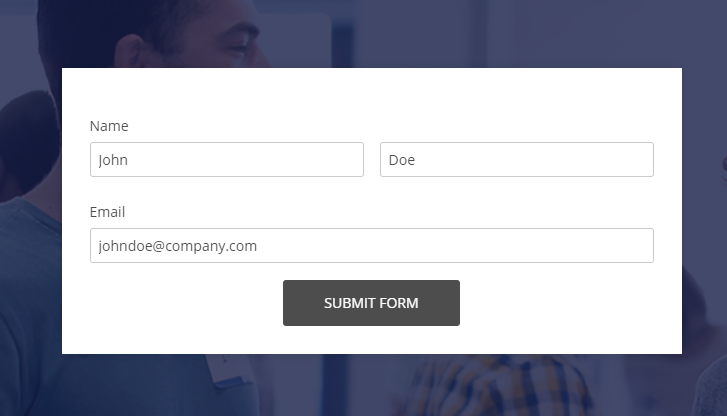
control3333333-1=Johnmeans that the field with the IDcontrol3333333-1hasJohnas the prefilled value. The field with the namecontrol3333333-2is prefilled with the valueDoe, and so on. Field – value pairs are linked through the operator&. To identify form field IDs, inspect the form code using a browser inspection tool.
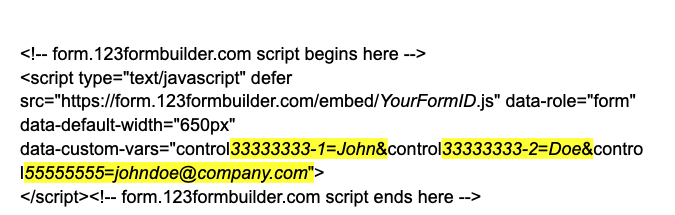
When you have a form field split into several subfields, you need to add the subfields number after the field ID. For example, the Name field contains the First Name and the Last Name subfields. These two have separate IDs: First Name – control33333333-1, Last Name – control33333333-2.
As previously mentioned, if you’ve copied the code from the Publish section, you need to add this extra part to your embed code. Replace the control ID with your own field’s ID and our default values with your desired ones.
data-custom-vars="control33333333-1=John&control33333333-2=Doe&control55555555=johndoe@company.com">
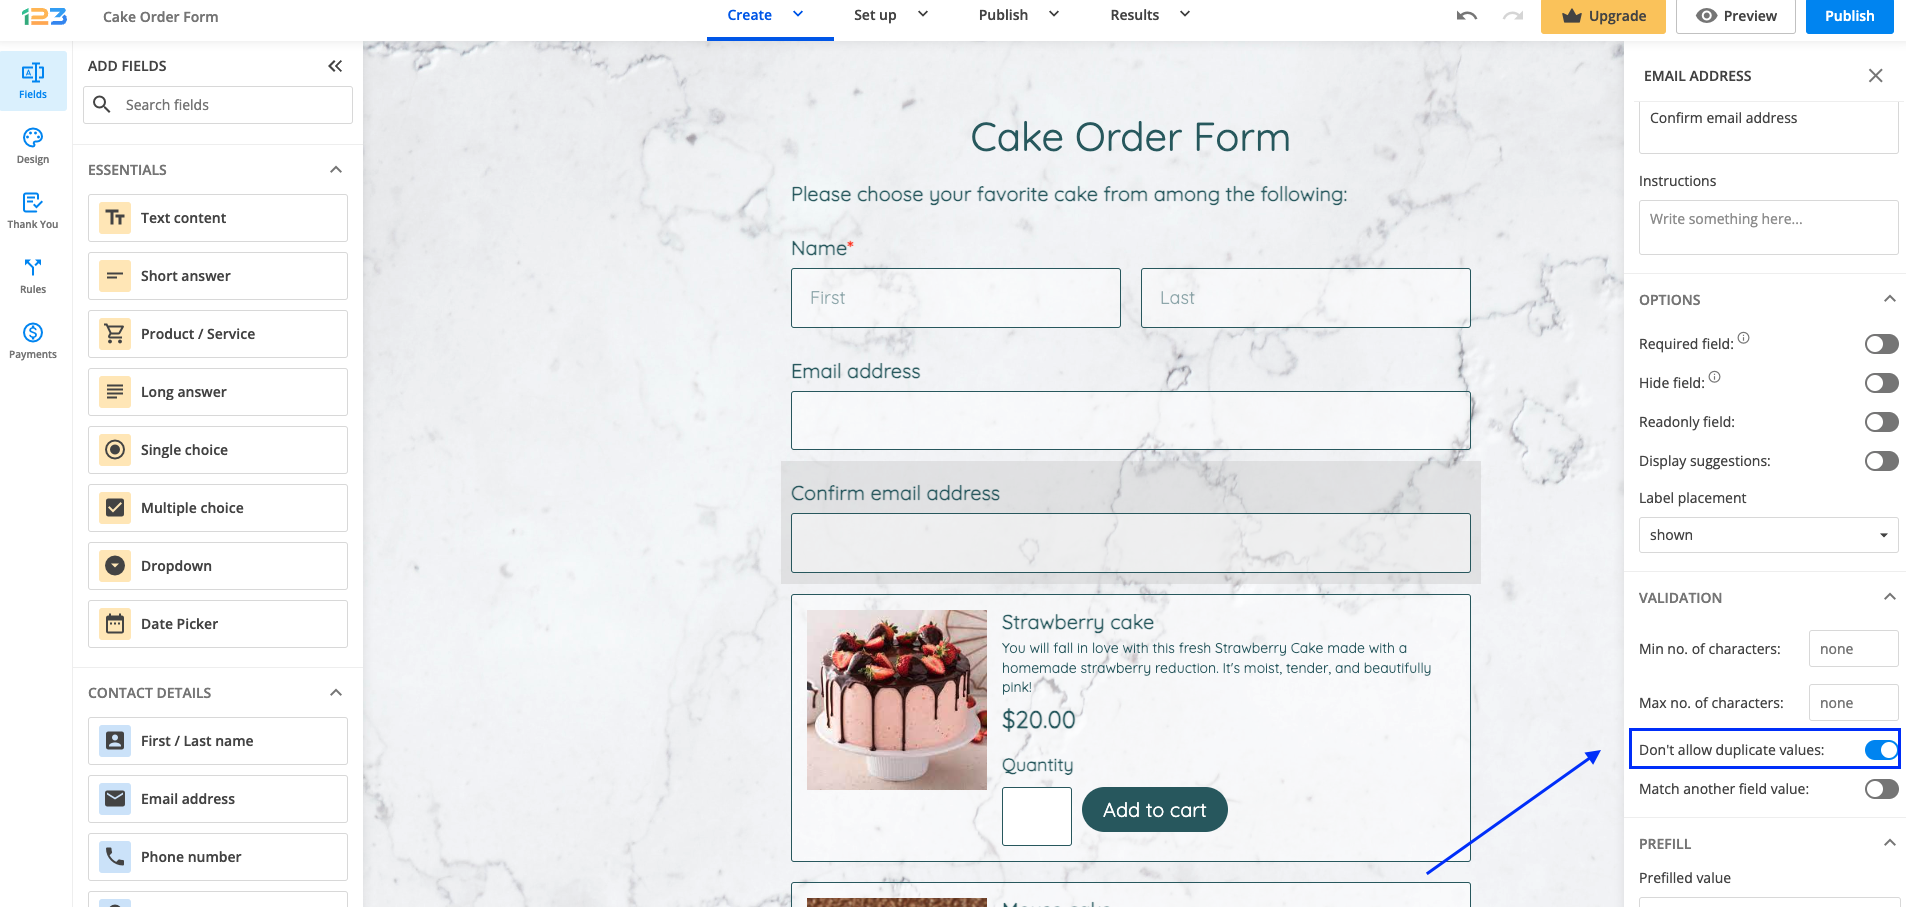
If you want to make sure that respondents’ input is unique and you don’t end up with duplicated info between submissions, you can enable Don’t allow duplicate values. Select the field you are interested in applying this validation to and in the right-side panel under Validation, you can find the Don’t allow duplicate values option.
Only the following fields have this option:
- Short answer
- First/Last name
- Email address
- Number
- Formula
- Link
Use case: the most relevant use case is for the Email address field. There are cases in which you might want to have unique email addresses and by enabling this option, you won’t end up with duplicate input. If one email address has been used once, it can’t be used again.
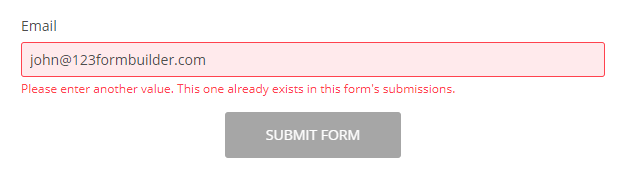
When respondents provide input that already exists in your form submissions, they get the following field validation error:
Related articles
To publish your form on the Tumblr blog hosting platform, follow the steps below:
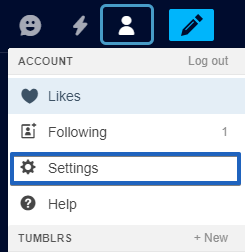
In your Tumblr account, go to the Settings section.
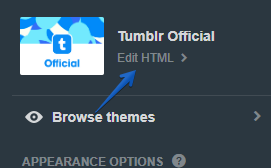
Click on the page name (the last option in the menu on the left) to edit your page.

Next, select the Edit theme button.

Click the Edit HTML button to access the page code.
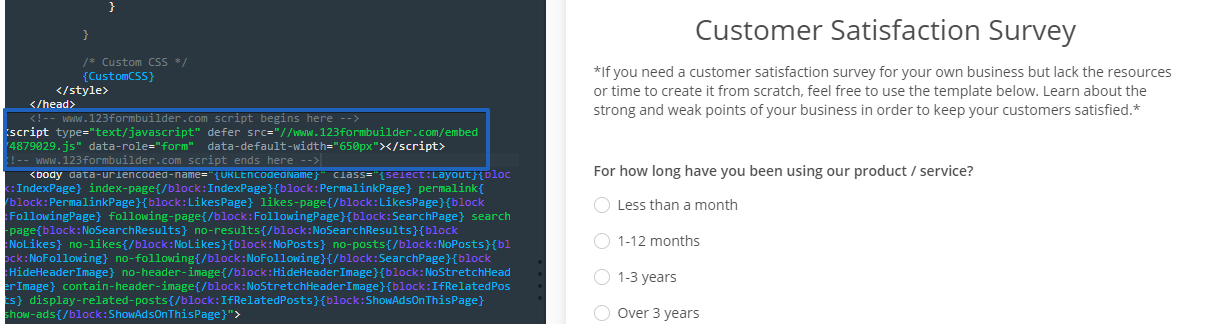
Insert the Javascript code of your form in the page code. Get the code from your form builder account, the Publish section → Embed form → first option on the page.
Click Update Preview to see the updated page on the right side of the page and then click Save.
When embedding a form on a WordPress page or post, the code retrieved from the Publish → Platforms → WordPress section within our form builder normally looks like this:
[ 123-contact-form i507842 ]
In order to prefill form fields you need to change this code in the following way (in one line):
[ 123-contact-form i507842 control3592242-1=John&control3592242-2=Doe&control3591576=johndoe@company.com&control35 91577=This is a test message. ]
control3592242-1, control3592242-2, control3591576 and control3591576 are the name attributes of form fields. You can retrieve them by inspecting the code of your form with a browser inspection tool.
John, Doe, johndoe@company.com and This is a test message. represent the prefilled values assigned to the fields above.
Name attributes and values are connected through the operator &.
[123-contact-form i507842 control3592242-1=John&control3592242-2=Doe&control3591576=johndoe@company.com&control3591577=This is a test message.]
Related articles
The best way to publish online forms on PhotoShelter is to use the JavaScript code, located in the Publish → Embed form section of each online form from your 123FormBuilder account. This way, each time you edit your online forms, the changes are automatically applied to your PhotoShelter website. Here’s how you can add your 123FormBuilder online form on your PhotoShelter website.In 123FormBuilder, go to the Publish → Embed form section of your form and copy the JavaScript code.

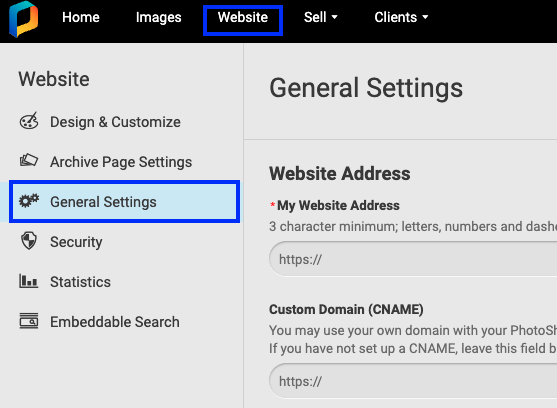
Log in to your PhotoShelter account and go to Website → General Settings.
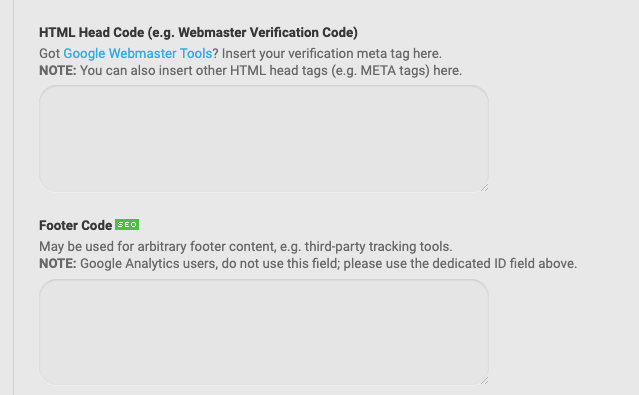
You can add the JavaScript code in HTML Head Code and Footer Code. It’s all up to you to choose where the online form is more fitted on your website. Paste the JavaScript code inside the code box and press Save Settings to finish.
Go to My Site to view how your online form is displayed on your PhotoShelter website. Site visitors can now view your work and use your 123FormBuilder online form to request a photoshoot appointment.
Publishing online forms on Jigsy couldn’t be any more simple with the JavaScript code we provide for each online form you have created on 123FormBuilder. All you need to do is copy the code and paste it into the JavaScript widget of your Jigsy webpage. The form will be automatically embedded on the page. You can customize the theme of your form exactly as you want it to look on your Jigsy webpage.

In the form builder, copy the JavaScript code located in the Publish → Embed form section of your form.
In Jigsy, enter the editor mode of the webpage where you want to add your online form and click on Add Content to Page, on the top-right.

In Content, drag the JavaScript or HTML code widget on your webpage.

In the popup window (HTML Block), paste the JavaScript code.
You’ll immediately see the online form displayed on your webpage. Save your changes and you are done. People will be able to submit your form directly from the webpage from now on.
There are many options to choose from when publishing online forms on a SnapPages website from your 123FormBuilder account. We recommend that you embed your form with the JavaScript code from the Publish → Embed form section of your form so that any changes you perform on your form are automatically reflected on your website.
To publish online forms on SnapPages using the embed option, follow these simple steps.
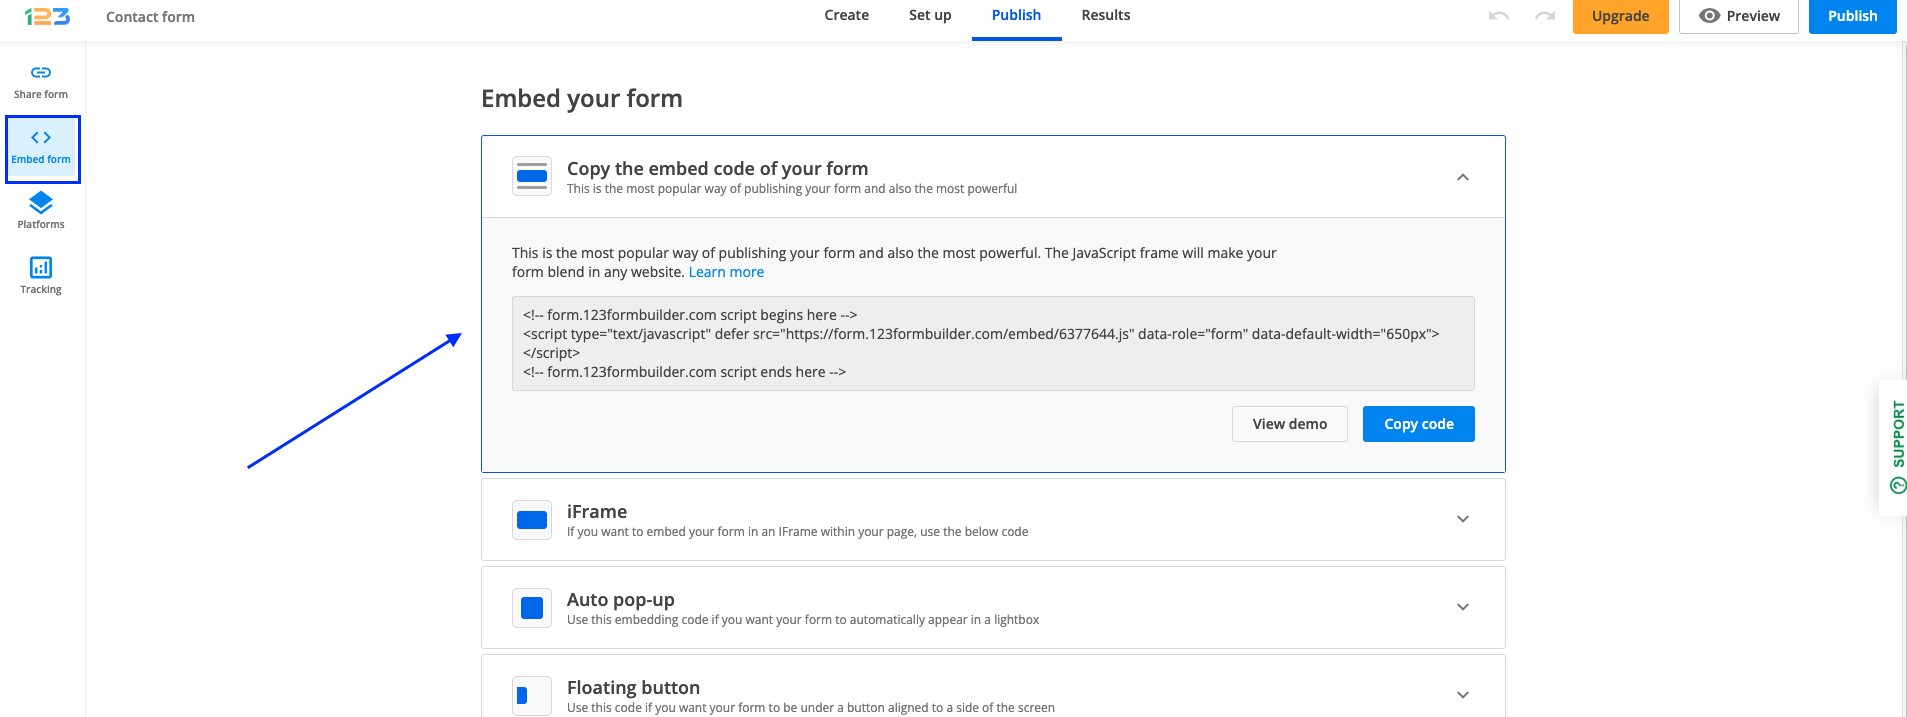
Go to the Publish → Embed form section of your form and copy the JavaScript code.
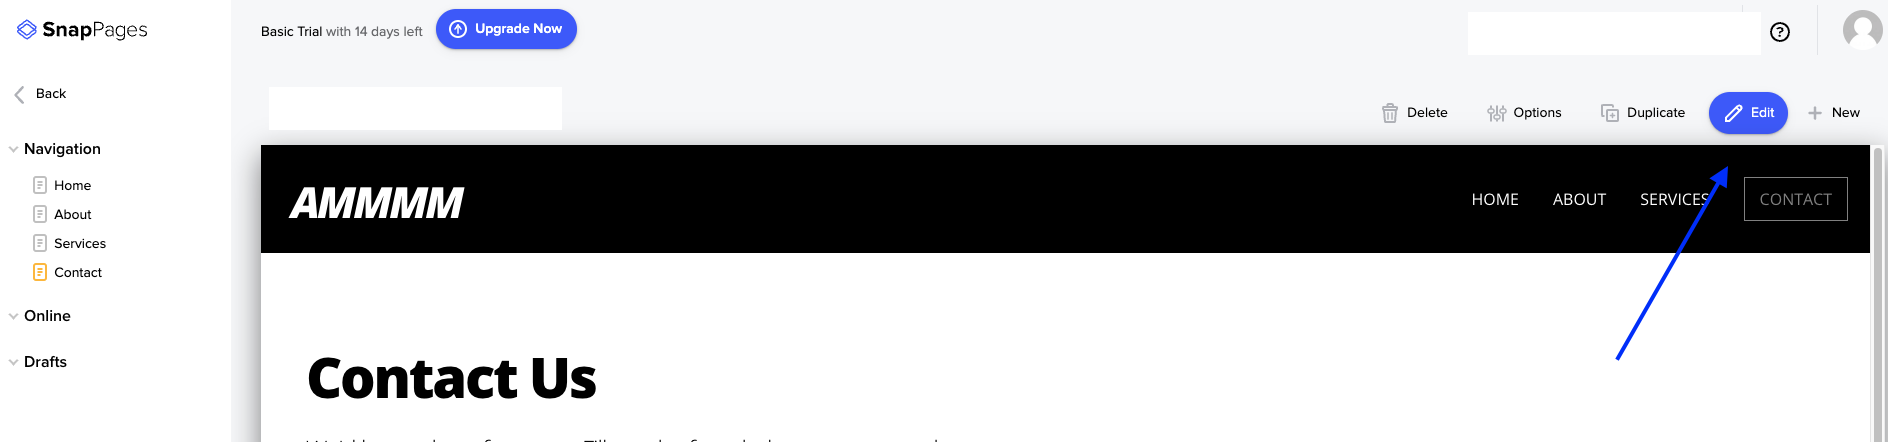
In SnapPages → Pages, select the webpage where you want to publish your form and access it in edit mode (Edit Page).
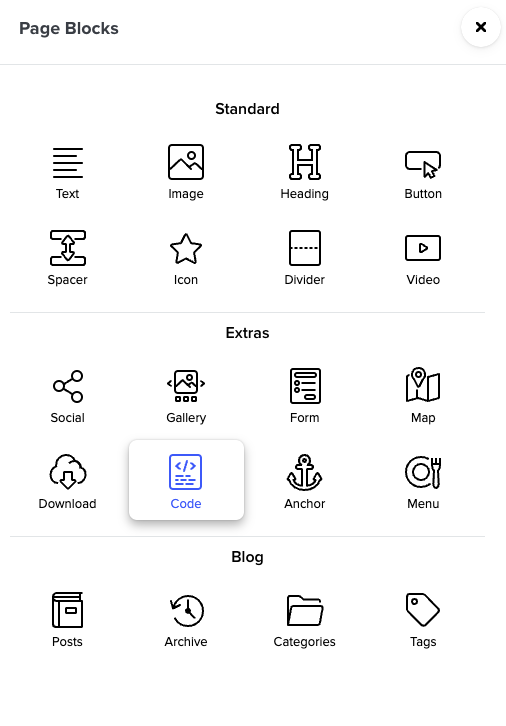
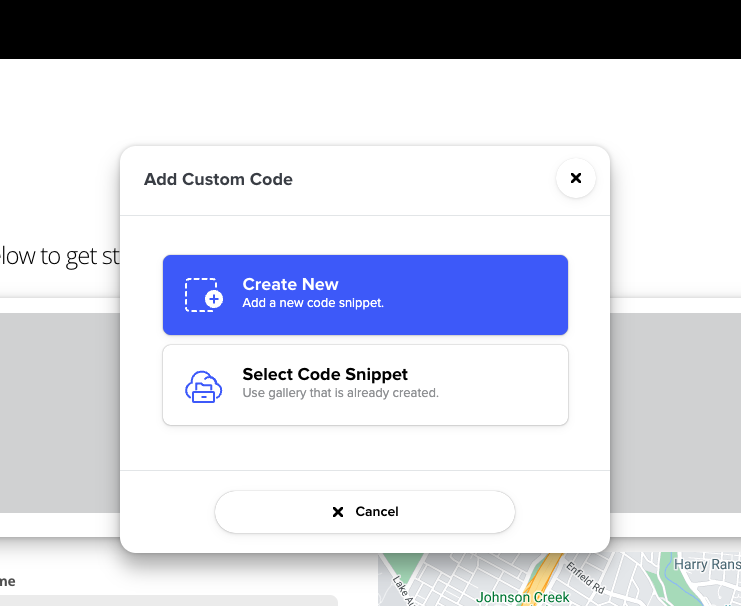
From Add Blocks, drag and drop the Code Box widget on your page and in the popup, select the Create New option.
Paste the JavaScript code from 123FormBuilder and press Save. The form will not be displayed in the editor, so you’ll need to save the changes made to your webpage (Save and Continue) and publish it.
You’ll see the results in the Pages section, where all your web pages are displayed in preview mode. You will now be able to receive submissions from your SnapPages website. Enjoy!
To publish an online form from 123FormBuilder on your Squarespace webpage, you’ll need to copy the Javascript code we have provided for you in the Publish -> Embed form section of your form in the form builder. You’ll use the code to paste it in an Embed widget in the editor of your Squarespace webpage.
Let’s take it step by step.
In 123FormBuilder, go to the Publish – Embed form section of your form and copy the Javascript code (which is also recommended when embedding the form on any website).

In Squarespace, enter the editor mode of your website and select the page where you want to embed your form (or create a new page). In order to open the widget panel, click on Add block and search for Embed. Now you have to edit the widget by clicking on the pencil icon and select Code Snippet->Embed data where you have to paste the JavaScript code from Publish section.
The form is not visible in the editor, therefore you’ll need to save your webpage and preview it afterward.
Your 123FormBuilder web forms can easily be embedded on NationBuilder. This way, people will access your forms directly on your nation’s website.
Here is how to publish a web form on NationBuilder:
1. In your form builder account, go to the Publish section of your form and from Embed form, copy the Javascript code.

2. Log in to your NationBuilder account.
3. From the Control Panel section of your nation, go to Website and access the page where you want to publish the form.
4. Switch to the Template tab and paste the Javascript code of your form.
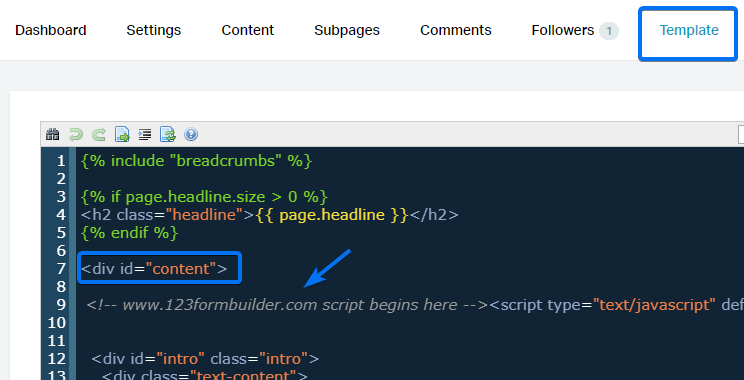
5. Press the Save and publish changes button under the editor, and you’ll find your online form embedded in your post.
You can set up all of your notifications to be sent in HTML format or as plain text in the form builder. This includes all of our available templates: default notification, HIPAA notification, autoresponder, copy of submission, payment notification, approval email, quiz template.
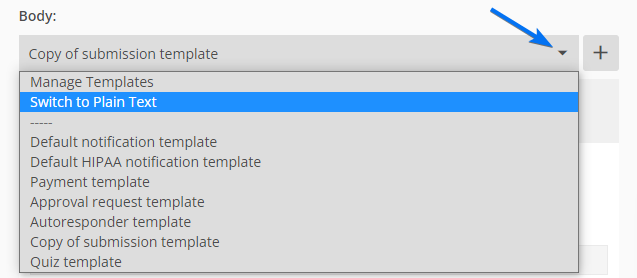
By default, all email templates will display in HTML format. To change the format, simply choose one of our available email templates that best suits your needs. Afterward, click the Body’s dropdown list and select the Switch to Plain Text option.
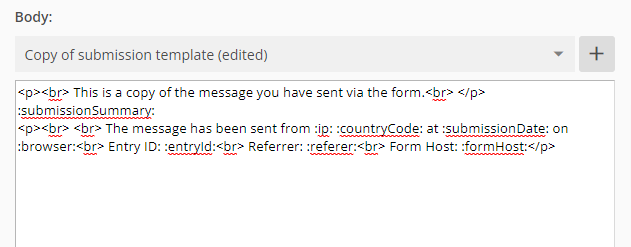
The plain text format will display all the HTML elements and attributes used in the HTML format. Delete them and start typing your message.
It’s important to mention that the Form Summary table will not display in the Plain Text format. If you wish to include the user’s input in your notification, you will need to add each field variable individually. Check out our Custom template variables article for more details.
Don’t forget to click Save at the bottom of the page once you’ve finished composing your message. If you want to switch back to the HTML format, click the Body’s dropdown list again and select Switch to HTML.
Related articles
With our online form builder, you can create amazing web forms and publish them on your Shopify store. In this article, we show you all the steps to publish a web form on Shopify.
In My Forms choose the online form you want to use. Click the overflow menu and select Publish Form.

In the Embed in page section of your form click the Copy code button.

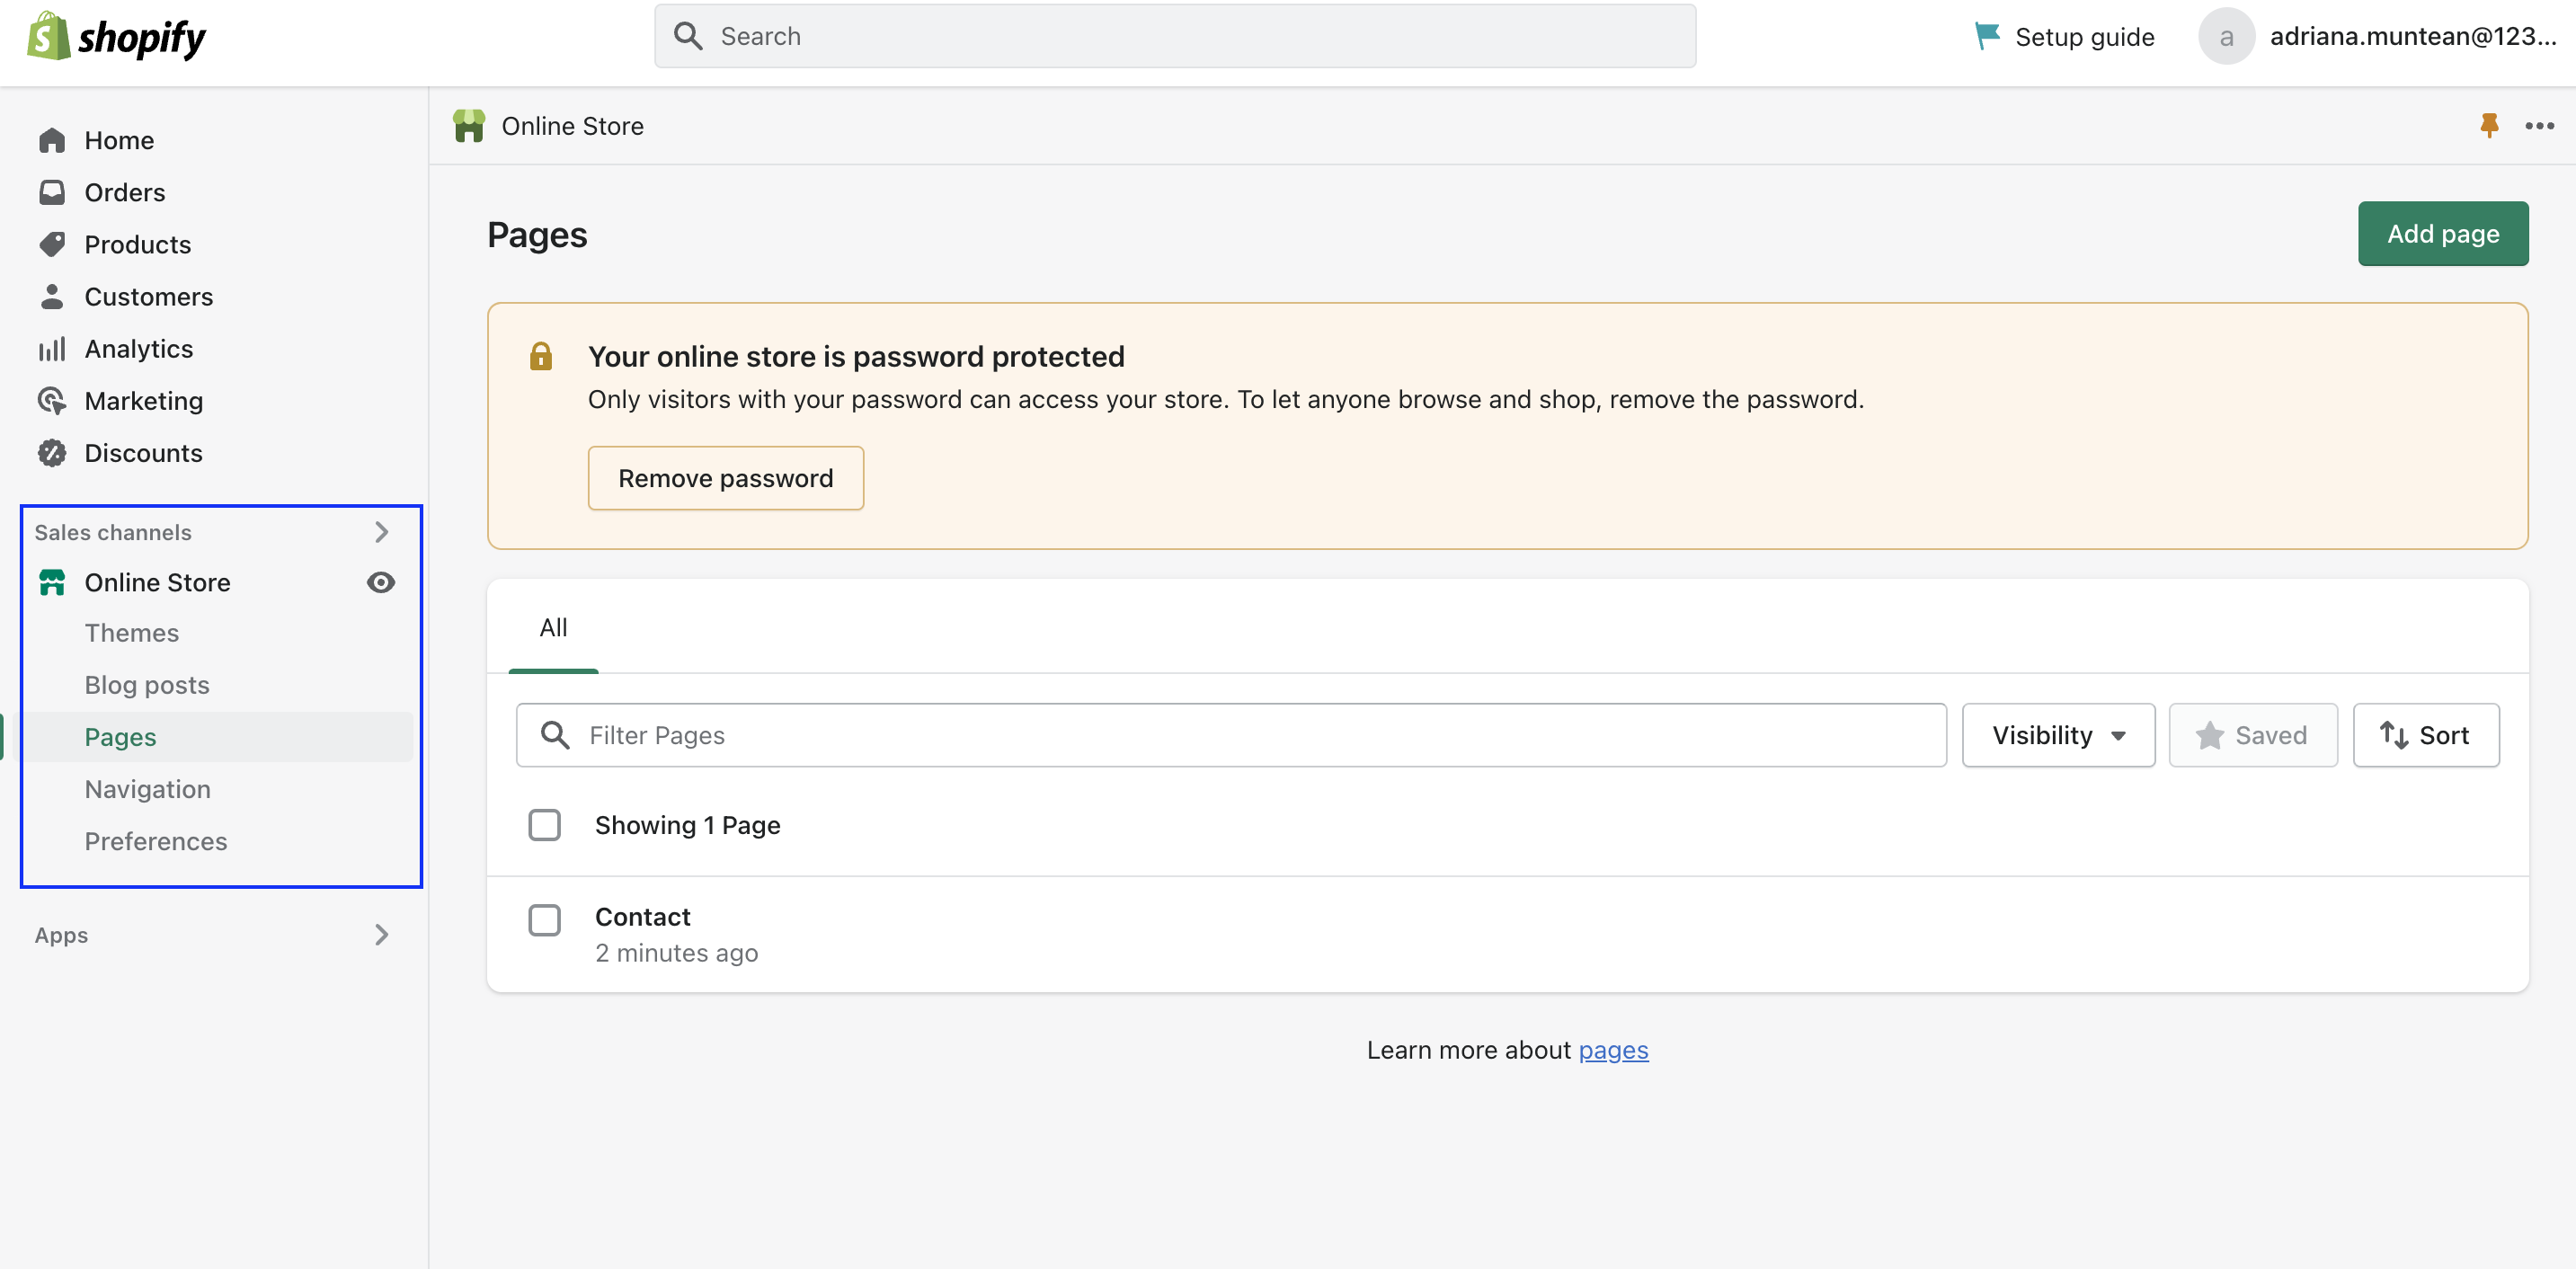
Go to Online Store → Pages and select the page where you want to add the online form.
Click on the HTML icon to switch to the HTML editor and paste the code of the online form inside the content. When you have finished editing the page, click on Save and View page to see your online form.
If you want to add a different publishing method, repeat the steps above, but instead of using the embed code of your online form, use one of the codes from the Link to form or Lightbox tab in the Publish section.
All form submissions will be saved in the Submissions section on 123FormBuilder.
Whenever you edit the online form in your 123FormBuilder app, all changes will be automatically applied to your Shopify store.
Related articles
Most Popular
Frequently Asked Questions
Here is a list of the most frequently asked questions. For more FAQs, please browse through the FAQs page.