123FormBuilder Knowledge Base
Search our documentation platform for answers, service specifications and 3rd-party integrations.
Knowledge Base

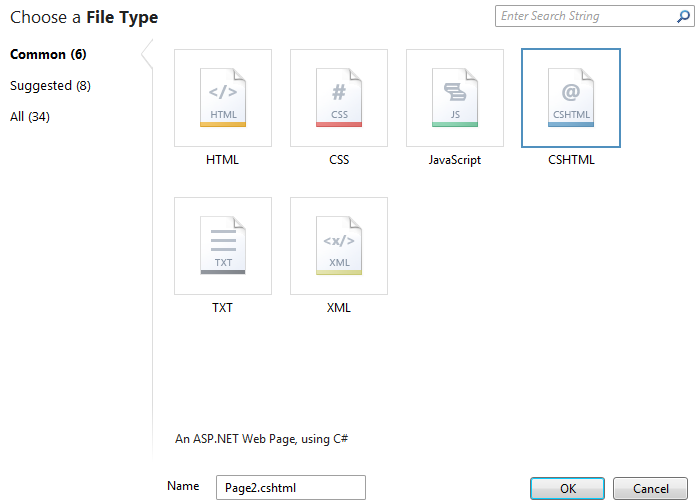
In the lightbox, select HTML or CSHTML. Next, press Ok.
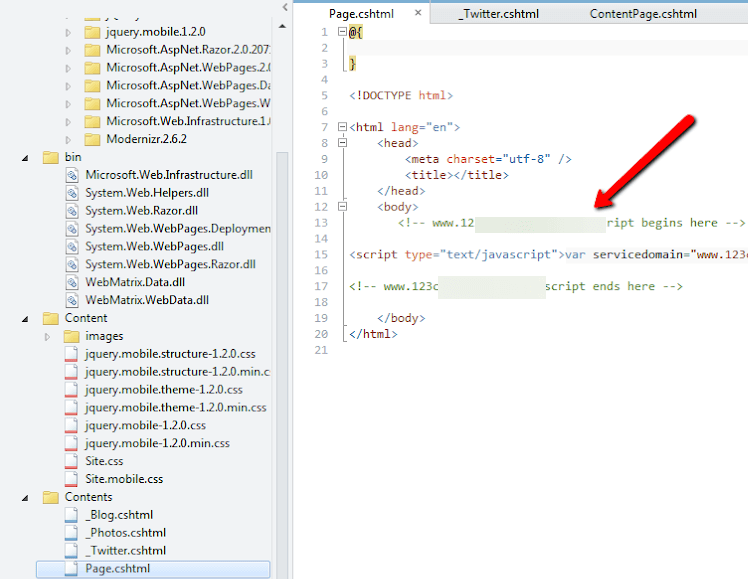
A script will appear on the screen, on the right side. Place the cursor between the body tags and paste the JavaScript code there.
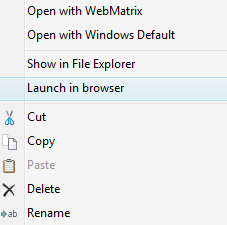
Rename the file if needed and you’ll see the results by launching the file in your browser (right-click file and select Launch in browser).
Yes, you can use an iFrame code to add the URL of the report generated in the form builder and display it on your web page. The code looks something like this:
<iframe src="form-report-URL" width="560" height="315" allowfullscreen="allowfullscreen"></iframe>
- Replace form-report-URL from the src attribute with the URL of your form report. You can find it in Reports → Your report → Publish.
- Adjust the values for width and height. We recommend adding a higher value for both, in case you have other content on the page, so the two elements don’t get mixed.
Once you’ve finished editing this code line, include it in the HTML editor of your web page. If you are using a website builder service, use an HTML widget and paste the code line there. The report will be automatically updated to your audience.
Important Note
Make your report public in Reports → Your report → Publish, otherwise the report will not show up on your web page.Yes, our file upload fields work on iOS but only for versions above 5.1.1. ( 3GS or newer). Mobile devices that use iOS version 5.1.1 or lower are not compatible with the File upload feature. This is due to the fact that file upload fields use the input type file which is not supported on all mobile browsers. If possible, upgrade your iOS version in order for the File upload field to work on the online form of your choice from the form builder.
For Android devices, you will need at least Android Froyo, version 2.2 of the Android mobile operating system.
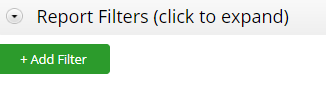
In the Reports section of your form, when creating or editing a report, click on the Report Filters bar to expand it. Press the Add Filter button and select Quiz Score in the dropdown.
This field contains the value of the quiz results in number of points per submission. When added, it will filter the quiz results of each submission in particular. After you have selected the Quiz Score field and the operator, type in a value and press Add Rule.
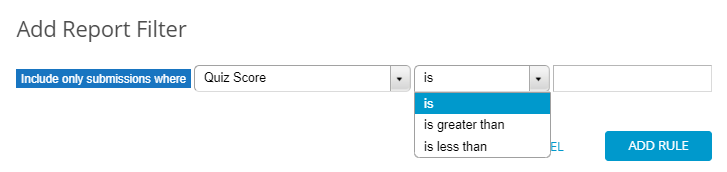
The operators that can be used with Quiz Score are:
- is
- is greater than
- is less than
Example: Let’s say your quiz has 100 points, but you want to filter only the submissions that achieved over 50 points. You’ll apply the filter with the following rule: Include only submissions where Quiz Score is greater than 50. Submissions that have achieved results less than 50 will no longer be included in your report.
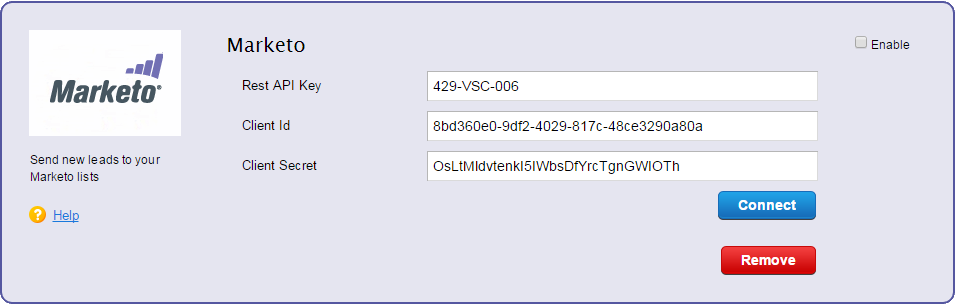
Use the 123FormBuilder – Marketo integration to send leads to one or more lists from your Marketo account. Go to the Integrations section of your form and search for Marketo using the search bar and hit Connect to install the application on your form.
Provide your Rest API Key, Client Id, and Client Secret to proceed to the customize settings phase.
Note: You need at least one existing mailing list in Marketo for the integration to work.
To retrieve the Client Id and Client Secret, you’ll need to create a custom service in your Marketo account. Here’s how you do it:
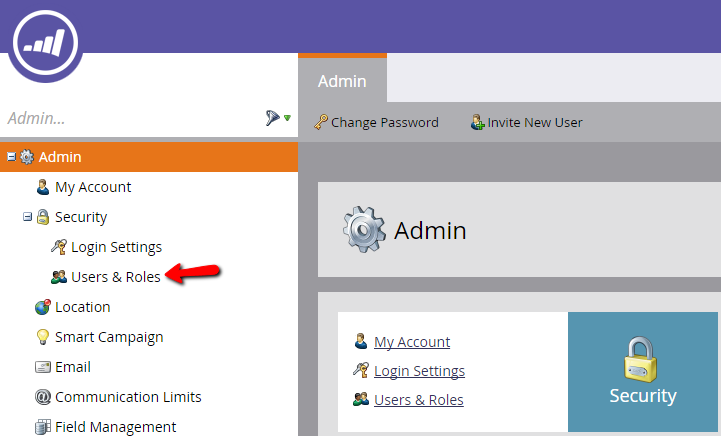
1. In your Marketo account, go to Admin and click on Users & Roles, on the left.
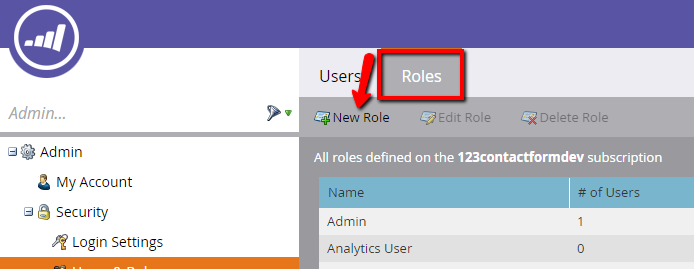
2. Click on the Role tab (on top) and hit New Role.
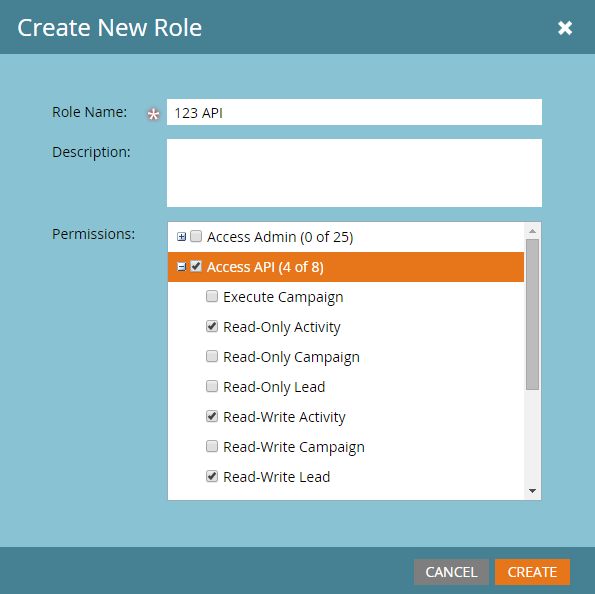
3. In the Create New Role lightbox, type in a Role Name and go to Permissions (third box below). Check the option Access API and deselect the sub-options below, except Read-Only Lead, Read-Write Activity, and Read-Write Lead. Next, press Create.
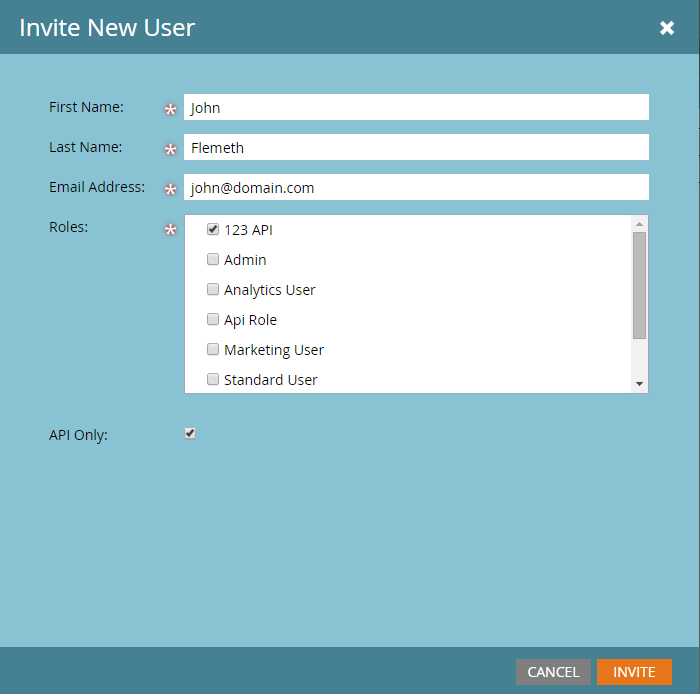
4. Now go to the tab Users and click on Invite New User. Provide a name and email address of the API only user, select the newly created role, and tick the checkbox API Only. In the end, click on Invite.
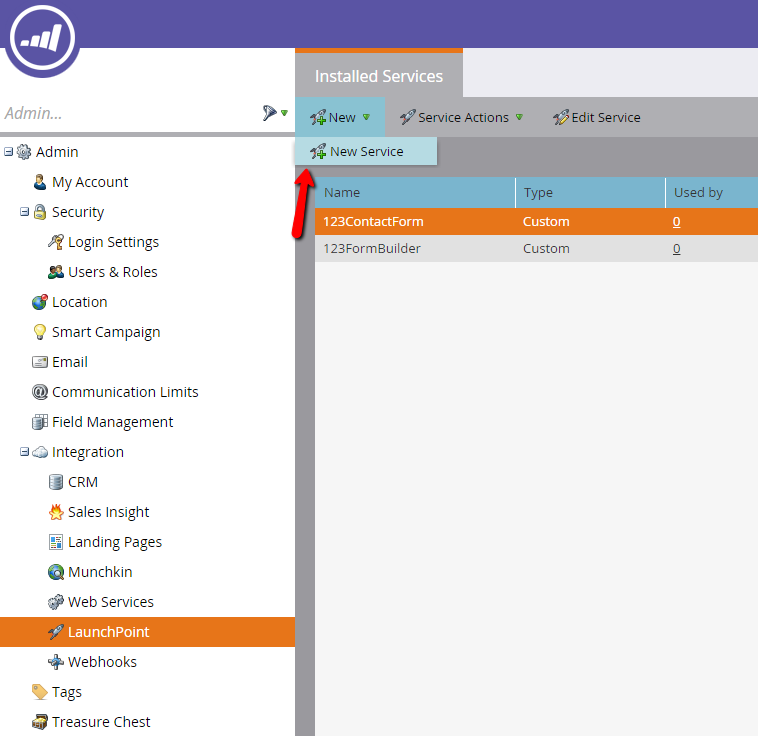
5. You’ll now be required to create a custom application. Go to Admin → LaunchPoint and create a new service.
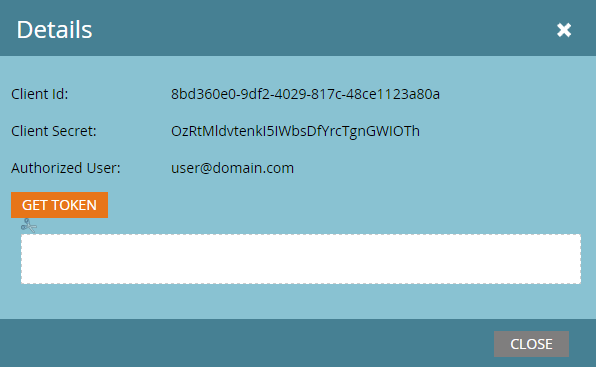
6. In the lightbox, enter a name and select an API Only user in the dropdown list below. Notice that only users that are API only are displayed. Hit Create to exit the lightbox and go to View Details to retrieve the Client Id and Client Secret needed for your 123FormBuilder – Marketo integration.
7. To find the Rest API, go to Admin → Web Services and you’ll find it within the Rest API box. It’s the series of characters displayed at End Point and Identity as shown in the example below:
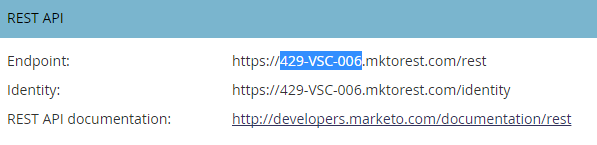
This concludes the steps in retrieving the Rest API, Client Id, and Client Secret for the 123FormBuilder – Marketo integration. Return to your 123FormBuilder account, go to your form, paste the three codes in the Marketo application box, and hit Connect to continue.
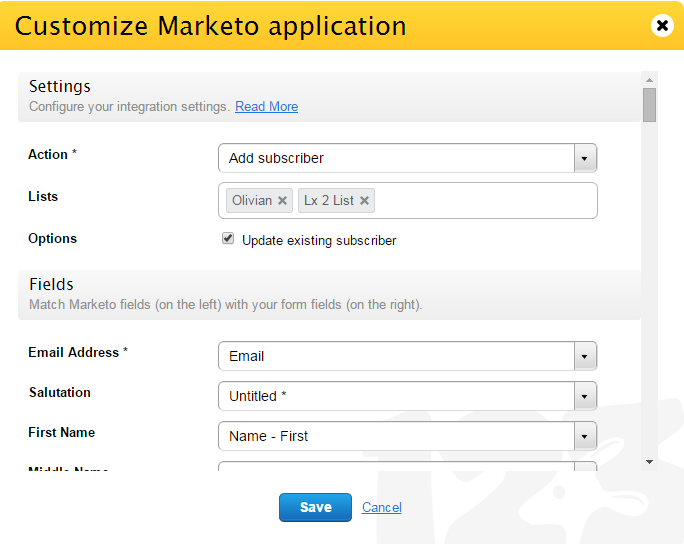
Go to Customize to set up your 123FormBuilder – Marketo integration. Here you can select one of the two available actions: Add subscriber and Unsubscribe email. Below, select a list from your Marketo account where new leads will be sent on submission. You can send the same lead to multiple lists on the same submission.
Use the Update existing subscriber option if needed and start mapping 123FormBuilder fields with Marketo fields and custom fields in the Field subsection. Remember to set the Email field as required on the form in order for the integration to work properly. In the end, use the Email Handling for problems that might occur during submission, such as a bad network connection on the submitter’s side that would prevent the lead to be created in Marketo.
By default, the forms made with 123FormBuilder are using the most common encoding set, UTF-8.
Any special characters will be displayed on the form without any problem since UTF-8 is the most popular character set used on the web.
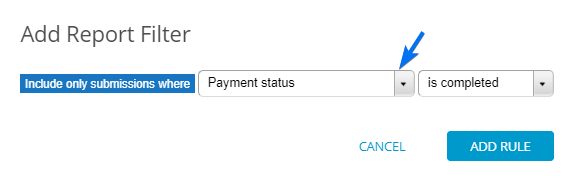
Yes, you can filter reports based on payment status. In the Reports section of your form, click to edit or create a report. Next, click on Report Filters (on top) and hit Add Filter.
In the lightbox, select Payment Status in the first dropdown and one of the available options in the next.
Use the Is invoiced option only if you have FreshBooks integrated on your online order form.
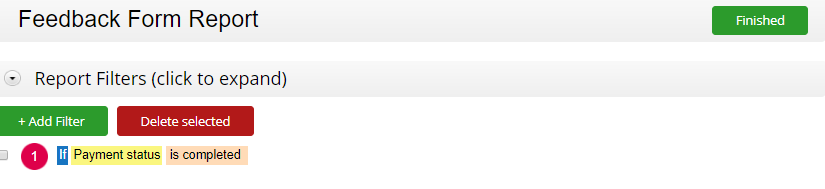
For example: If you Include only submissions where Payment Status is completed, submissions that haven’t completed payment will not be included in the report.
With 123FormBuilder’s online form builder, you can create amazing web forms and publish them on your OpenCart website. Follow this guide to find out how.
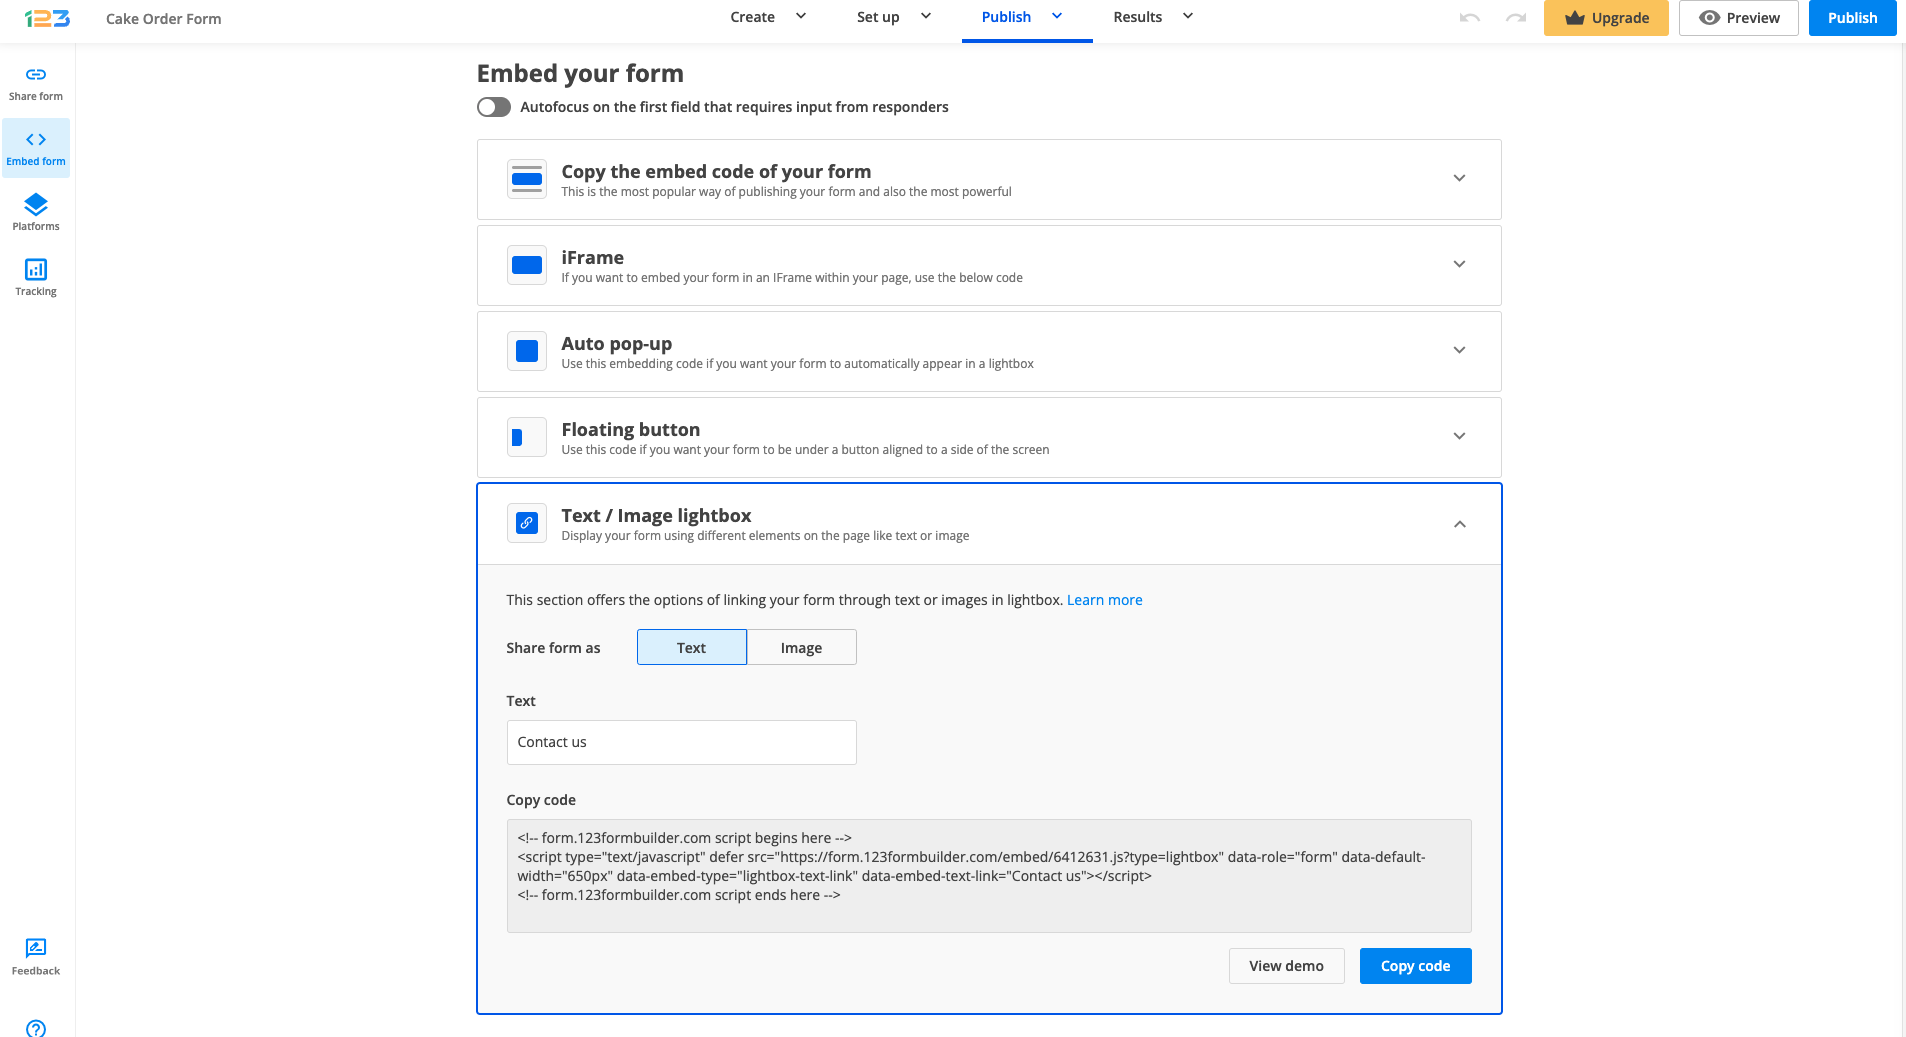
To add web forms to your OpenCart website, go to the Publish – Embed form section of your form within your 123FormBuilder account. We recommend you use the JavaScript code, as it automatically updates your form in OpenCart whenever you apply changes in the Form Editor from 123FormBuilder. As such, copy the JavaScript code of your form and log in to your OpenCart admin account.
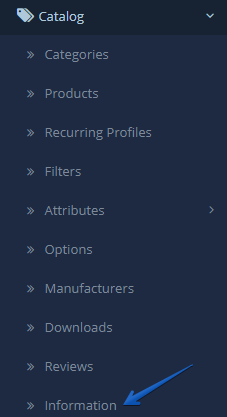
1. In the dashboard of your OpenCart website, navigate to Catalog and click on Information. Here you can edit or create a new page that can be accessed from your website’s footer.
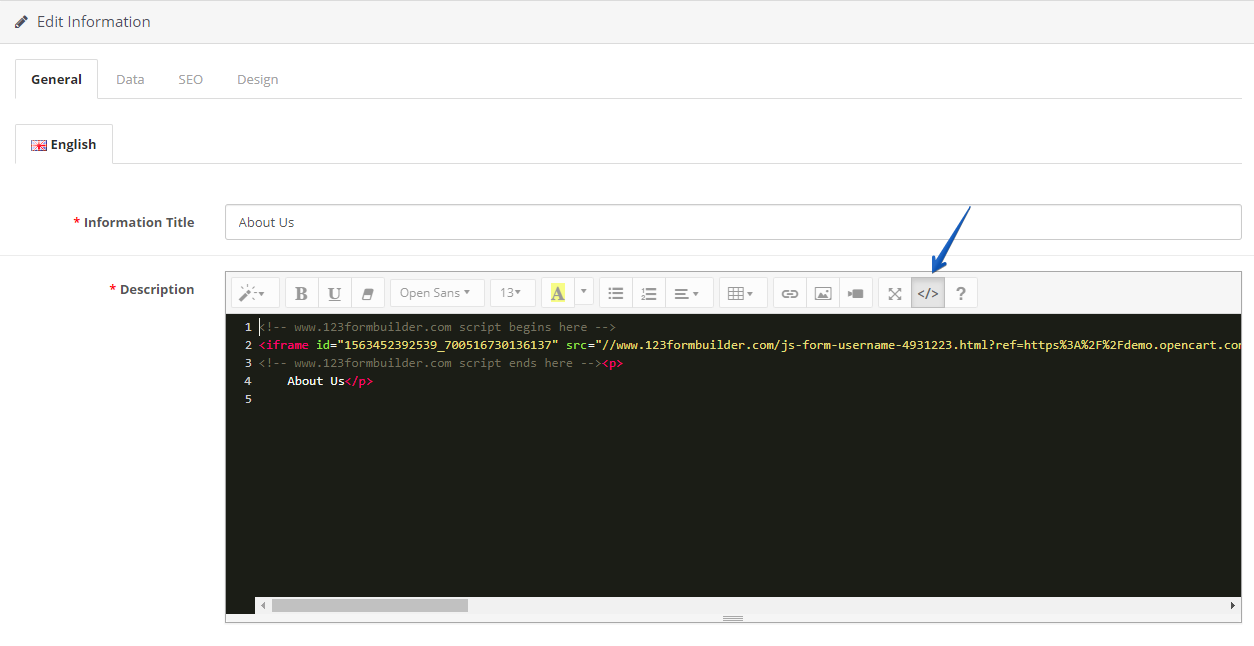
2. In the page editor, go to the page’s description box and click Code View. Delete all HTML tags and paste the JavaScript code there.
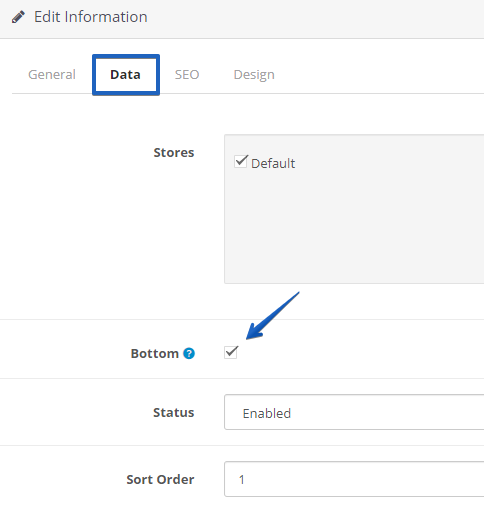
3. Next, go to Data and tick Bottom in order for the form to be accessed from the footer of the page. Don’t forget to save your page before leaving.
You can add a web form to any other editable web page in the Information section of your catalog. You can also create a new HTML file containing the JavaScript code of your form and upload it on your OpenCart server, although it implies some codding experience.
Use our web form builder to create the web forms you want and publish them on your SmugMug website as easily as 1-2-3! Follow this guide on how to add your web forms on SmugMug.
To add online forms to SmugMug, simply log in to your 123FormBuilder account. Afterward, select the online form you want to publish, and access its Publish section.
Next, select Embed form → Text/Image lightbox and choose the HTML link you wish to use (Text or Image). These are the available methods to publish our forms on your SmugMug website since you can’t insert Javascript codes.
In your SmugMug account, go to Site -> Customize Design and select the webpage you want to edit from the panel on the right. Click on the Content tab and select HTML & CSS from the list below.
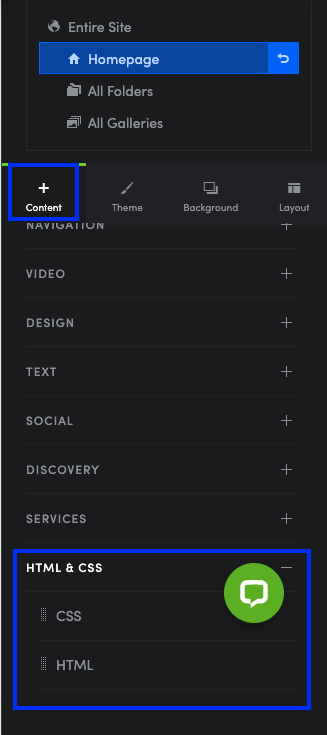
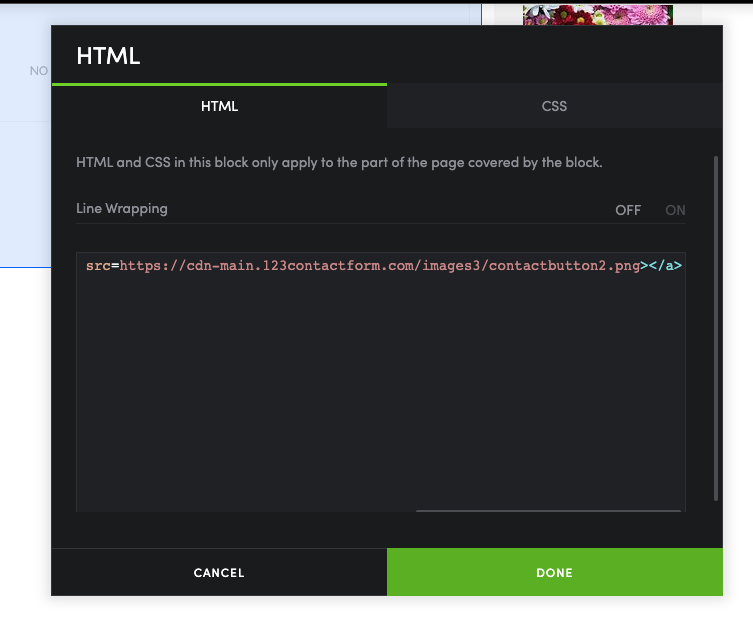
Drag and drop the HTML element on your page and paste the code of your form inside the HTML box editor. Hit Done and you’ll see the online form displayed on your webpage. Don’t forget to save the changes made to your page before you exit.
From now on, visitors can submit your online form on your SmugMug website. All submissions will be saved in the Submissions section of the form in your 123FormBuilder account.
123FormBuilder is compliant with the eight principles that guide the Data Protection Act of 1998, amended in 2003, and part of the Directive 95/46/EC (check out our form security page). Principles which are:
1. Personal data shall be processed fairly and lawfully.
As the ‘data processor‘, we ensure a secured 256-bit SSL connection while you are logged in to your 123FormBuilder account and provide secured SSL online forms to share with other people. All personal data of the account owner can be accessed in the My Account section of their 123FormBuilder account.
We will not use any kind of private data in ways that violate the Data Protection Act, but instead strengthen the privacy and safety of your account through a 2-step verification login, as well as form protection measures from external threats (such as spam, viruses, malware). All paid subscriptions are closed on a secured SSL page and will be handled by 2Checkout, the payment gateway we use. For more information, follow our documentation on how does 2Checkout handle 123FormBuilder subscriptions.
2. Data is obtained only for one or more specified and lawful purposes.
We will only request data and information to build your 123FormBuilder account. These include your email address that we will associate with your account, username, and password. All data will be secured in your My Account section, where only you will have access. As for paid plans, we will only ask for the data that completes the transaction for your subscriptions.
3. Personal data shall be adequate, relevant, and not excessive in relation to the purpose or purposes for which they are processed.
We will never ask or request data or information which is not associated with your 123FormBuilder account. The same applies to our users, as ‘data collectors‘ on the web. Users that attempt to collect illegal and sensitive information (phishing) will be automatically blocked, as stated in our terms of service.
4. Personal data shall be accurate and, where necessary, kept up to date.
123FormBuilder users are entitled to ask a customer support representative to update their account information whenever needed. Form owners can also enable an edit record option that will allow form submitters to edit their submissions at a later time to keep their data updated. This option is mostly useful for clinics or other institutions where profiles are created and saved in a database through form submissions.
5. Personal data processed for any purpose or purposes shall not be kept for longer than is necessary.
As the subject of the Data Protection Act 1998 and other international regulations, we keep data no longer than necessary. Forms that are created on paid plan accounts can be recovered within a 30 day period after they have been deleted. Forms that haven’t been requested to be recovered during this period will be permanently deleted from our hosting database.
6. Personal data shall be processed in accordance with the rights of data subjects.
All provided data on a form is returned with a copy by email to the data provider, as the owner of the 123FormBuilder account. It’s up to the owner to decide if she/he will allow a copy of the submission to be sent to the form submitter. This implies the use of autoresponders or copies of the submission, in the Notifications section of the 123FormBuilder account.
7. Appropriate technical and organizational measures shall be taken against unauthorized or unlawful processing of personal data.
Hosted on Amazon Web Services, 123FormBuilder is highly protected by any threats that could endanger our users. Our platform is carefully monitored on a 24/7 basis and benefits from all the latest updates that come along. Besides our 256-bit SSL connection, we are protected from spam, viruses, and malware threats by McAfee Secure.
8. Personal data shall not be transferred to a country or territory outside the European Economic Area unless that country or territory ensures an adequate level of protection for the rights and freedoms of data subjects in relation to the processing of personal data.
All our data is kept and encrypted in secured data centers at Amazon Web Services, across the United States and the European Union. Even though there isn’t an equivalent in the US for the Data Protection Act 1998 of the UK and the EU’s directive, there is a bilateral agreement between the parts that permit the transfer and keeping the data safe.
Data Protection Act compliance is not applicable without the direct responsibility of our users. Do not give away sensitive information regarding your account or data that might violate privacy laws. Also, collecting data in an act of phishing is highly forbidden and will not be tolerated.
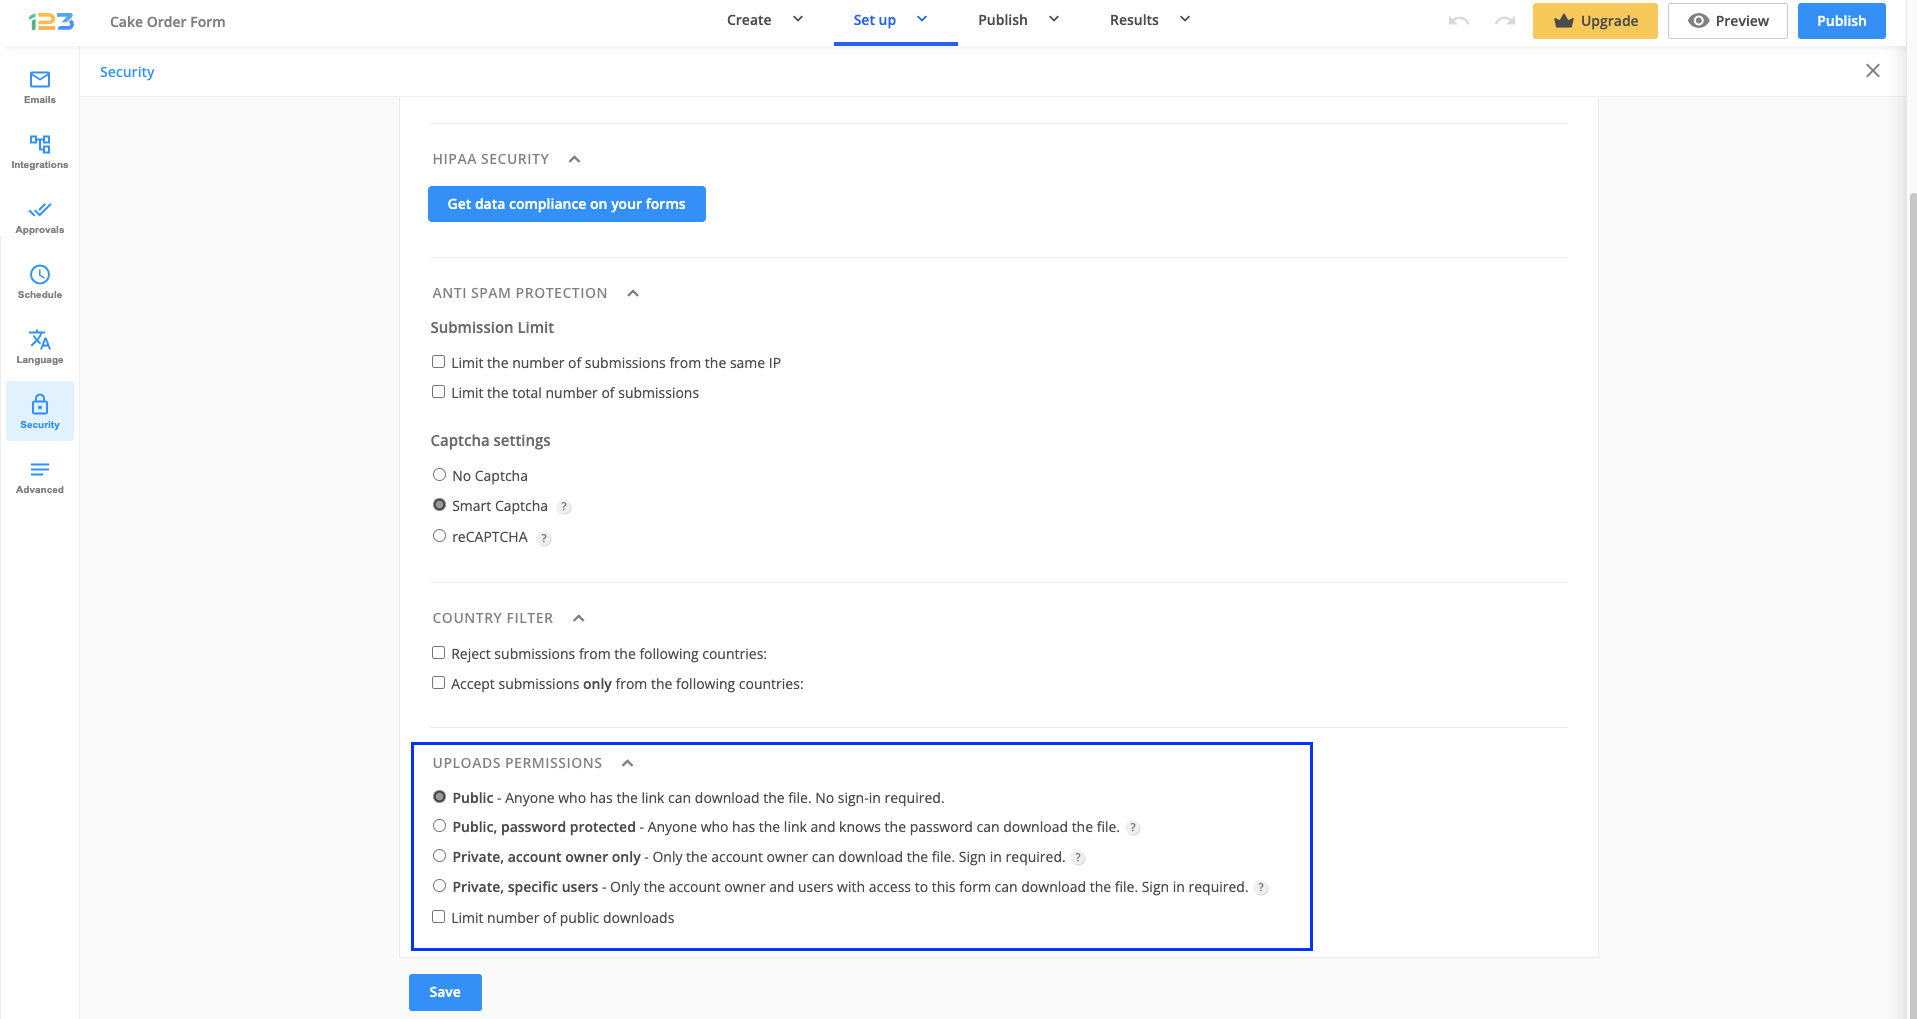
All files uploaded through your online forms appear as downloadable links in the Results → Submissions section when viewing each submission separately (in the View Submission lightbox).
By default, anyone can use the link if they can access it. This means that they can download the files uploaded on your forms. In the Security → Uploads Permissions section, you have several options to help you secure these links.
1. Set up a password – only people who know the password can download the file.
2. Make the link private – access the link only when logged in to your 123FormBuilder account.
Use the 123FormBuilder – Campaign Monitor integration to add new subscribers to your Campaign Monitor mailing lists. Go to the Integrations section of your form and search forCampaign Monitor using the search bar, then click on Connect. Now the Campaign Monitor app is added to your form and all you need to do is activate the app with your Campaign Monitor credentials and associate the proper fields.
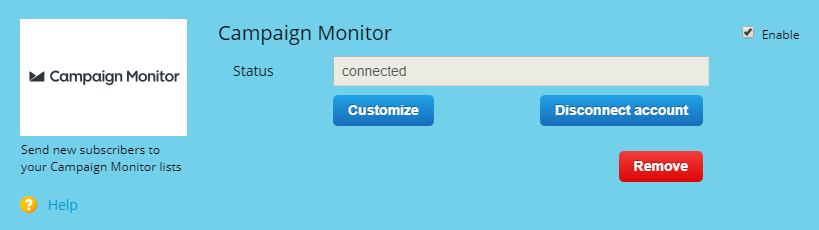
Click on Connect to submit the username and password of your Campaign Monitor account. If you use multiple accounts in Campaign Monitor, select one of the accounts that appear in the dropdown list, hit Continue, and click on Allow in order for the two accounts (123FormBuilder and Campaign Monitor) to communicate with each other.
In the Customize lightbox from 123FormBuilder, select the Client and List in Settings. In Default Fields, associate the email field of your form (which needs to be required) with the email field from Campaign Monitor and a form field for Name if needed. If you do not assign a required email field, the 123FormBuilder – Campaign Monitor integration will not work.
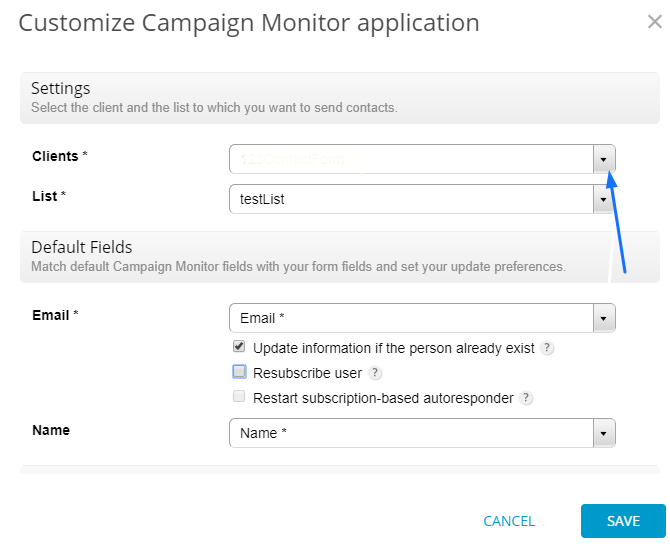
With the 123FormBuilder – Campaign Monitor integration you can opt to update subscribers based on the email address, resubscribe them if inactive and reinclude them to your autoresponder list.
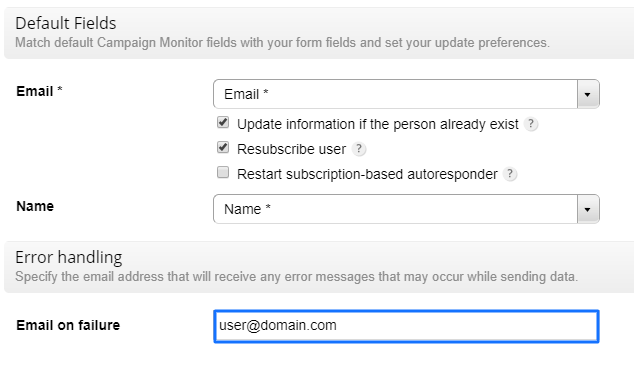
- Update information if the person already exists. If a user submits a form with an email address already registered in your list, all information will be updated to the respective user.
- Resubscribe user. Works only when the update information option is enabled. This option will resubscribe users that have been previously unsubscribed in Campaign Monitor.
- Restart subscription-based autoresponder Works only when the previous two options are enabled. This option will add the respective email address of the submission to the autoresponder list of your Campaign Monitor account.
Some situations might occur when a visitor has a low internet connection. This could prevent the submission to be sent to Campaign Monitor. Upon setting your email address in Error handling, you will receive an email each time the form has been used but failed to send form data to Campaign Monitor.
Don’t forget to hit Save and you are done. You can now collect new subscribers in your Campaign Monitor mailing list via 123FormBuilder online forms.
If you want to adjust the settings of the 123FormBuilder – Campaign Monitor integration, just return to the Integrations section of your form and hit the Customize button within the application box.
Most Popular
Frequently Asked Questions
Here is a list of the most frequently asked questions. For more FAQs, please browse through the FAQs page.