123FormBuilder Knowledge Base
Search our documentation platform for answers, service specifications and 3rd-party integrations.
What are custom recipients and how to use them on 123FormBuilder?
With custom recipients, you can send email notifications to different addresses by using conditional logic. This feature is especially useful for users/companies that receive many emails. Sending emails directly to the department that should handle the issue helps fasten your business processes.
For example, company ABC has 3 departments: cars, motorbikes, and trucks. The company receives all form submissions to the same email address: contact@abc.tld. The ABC employee that handles the submissions sorts the emails and forwards car-related emails to cars@abc.tld, motorbike-related emails to motorbikes@abc.tld, and truck-related emails to trucks@abc.tld.
This is time-consuming and adds some delay to the reply action. By using custom recipients, company ABC will have the form submissions sent directly to the right addresses.
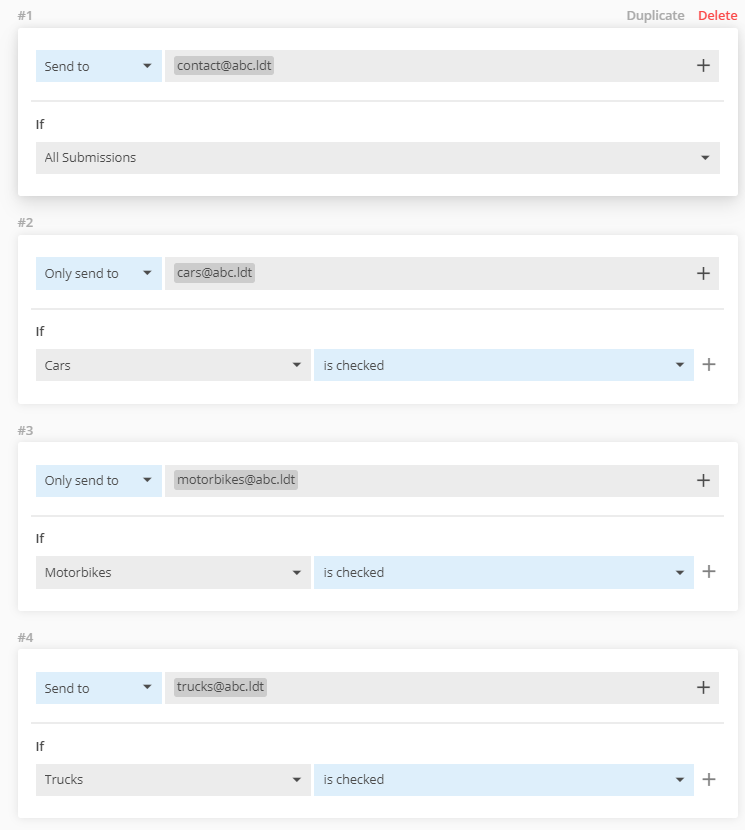
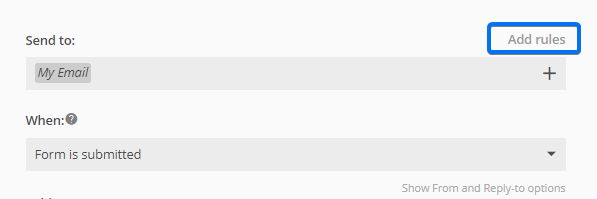
To start adding custom recipients in the form buider, go to Emails and click on Add rules where you list your form’s recipients.
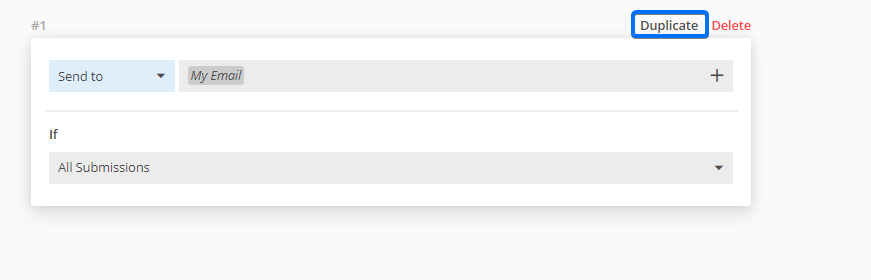
You’ll see that the email address used to create your account is, by default, set to receive all submissions. Press Duplicate to create a new rule.
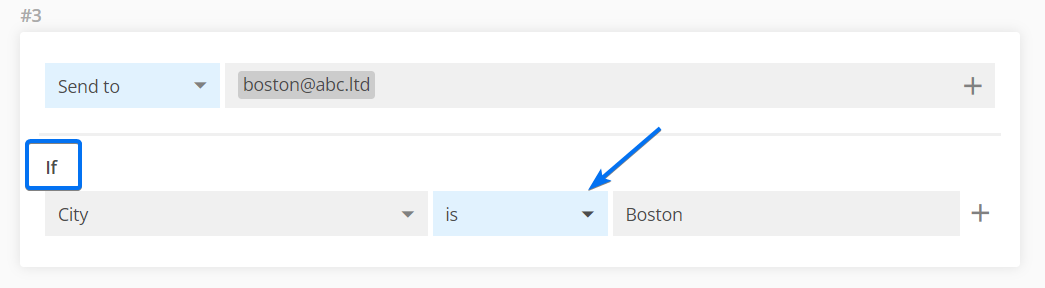
In the first dropdown list, you can select Send to or Only send to. If you select Send to, then the submissions that meet the conditions will be sent to both the primary email address and the one added afterward. If you select Only send to, then submissions will only be sent to the newly added address.
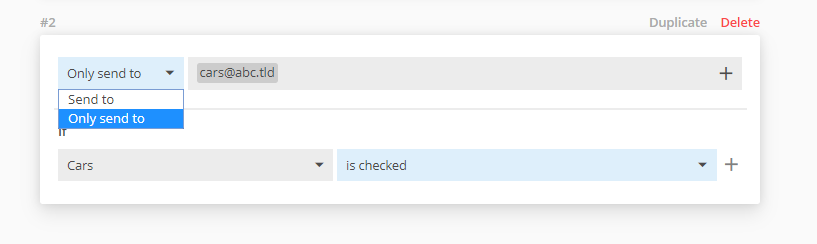
Type a new address in the text box and choose from the second dropdown list the field that will affect the behavior of the email notification. Then specify the conditions that it needs to meet.
E.g.: City – is – Boston. This means that the specified address will receive all submissions with Boston included in the City field.
Don’t forget to Save your changes from the Notifications page.
Similar Articles
Frequently Asked Questions
Here is a list of the most frequently asked questions. For more FAQs, please browse through the FAQs page.