123FormBuilder Knowledge Base
Search our documentation platform for answers, service specifications and 3rd-party integrations.
How to add a DKIM signature to email notifications?
What is DKIM?
DKIM (Domain Keys Identified Mail) is a standard email authentication method that adds a digital signature to outgoing messages. Receiving mail servers that get messages signed with DKIM can verify the sender’s identity, and ensure that messages actually came from the sender, not someone impersonating the sender.
In other words, it detects forgery and prevents the delivery of potentially harmful emails. So, it helps protect email senders and recipients from spam, spoofing, and phishing. Plus, it improves email deliverability, by reducing the chances of being blocked by the recipient’s servers or entering spam.
How does it work?
A DKIM signature is a header added to email messages, which contains specific values that allow receiving email servers to validate the source of the message.
For this, a pair of unique encrypted keys are used:
- a public key – included in the digital signature, and is accessible by internet service providers;
- a private key – kept on the outgoing server, and is used for verifying the signature once the email is delivered.
When these keys match, it means that the identity of the sender is valid.
Who is it for?
Suppose you are using 123FormBuilder to collect data from your customers and use email notifications to communicate with your customers. In that case, DKIM can help you rest assured that your messages are delivered and trustworthy. Especially if you are choosing to personalize the email notifications and send them on behalf of your own custom domain (using a custom email address as sender or from email).
Not sure if this feature is right for you? Drop us a line, we are happy to help!
How to add a DKIM signature to email notifications, sent through 123FormBuilder?
First things first, for DKIM (Domain Keys Identified Mail) to work:
- you need to have an Enterprise account and purchase the DKIM add-on, if you are interested in this get in touch with our sales team;
- custom email domains used as sender or from emails need to have properly configured SPF records;
- a new TXT record needs to be created in your organization’s DNS;
- the setup needs to be validated on our side after the DNS is updated;
When editing your forms, you need to navigate to the “Emails” section. In the left side panel, you directly have the orange banner with “DKIM. Interested? Get in touch ->”.
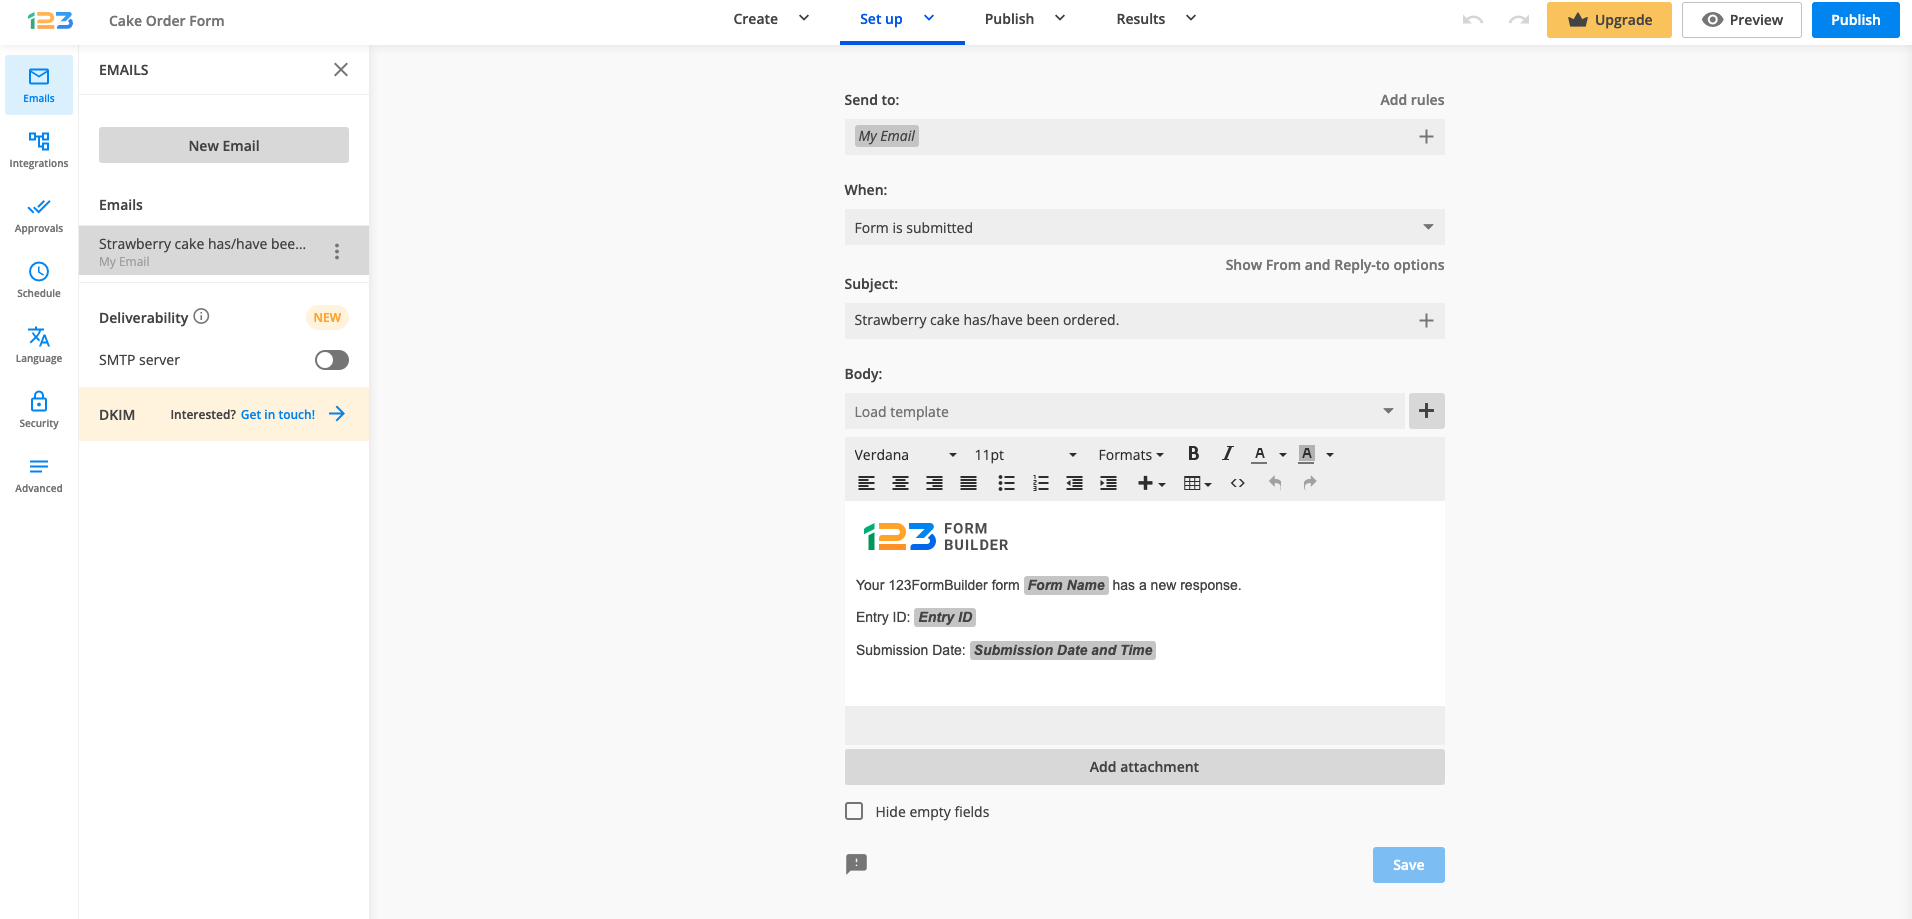
Another option would be to click on and click on “Show From and Reply-to options”. Then you will see:
- a dropdown that allows you to select a “From email” – which will appear as the sender of the email notification;
- and two options displayed above this dropdown – Add email & Enable DKIM.
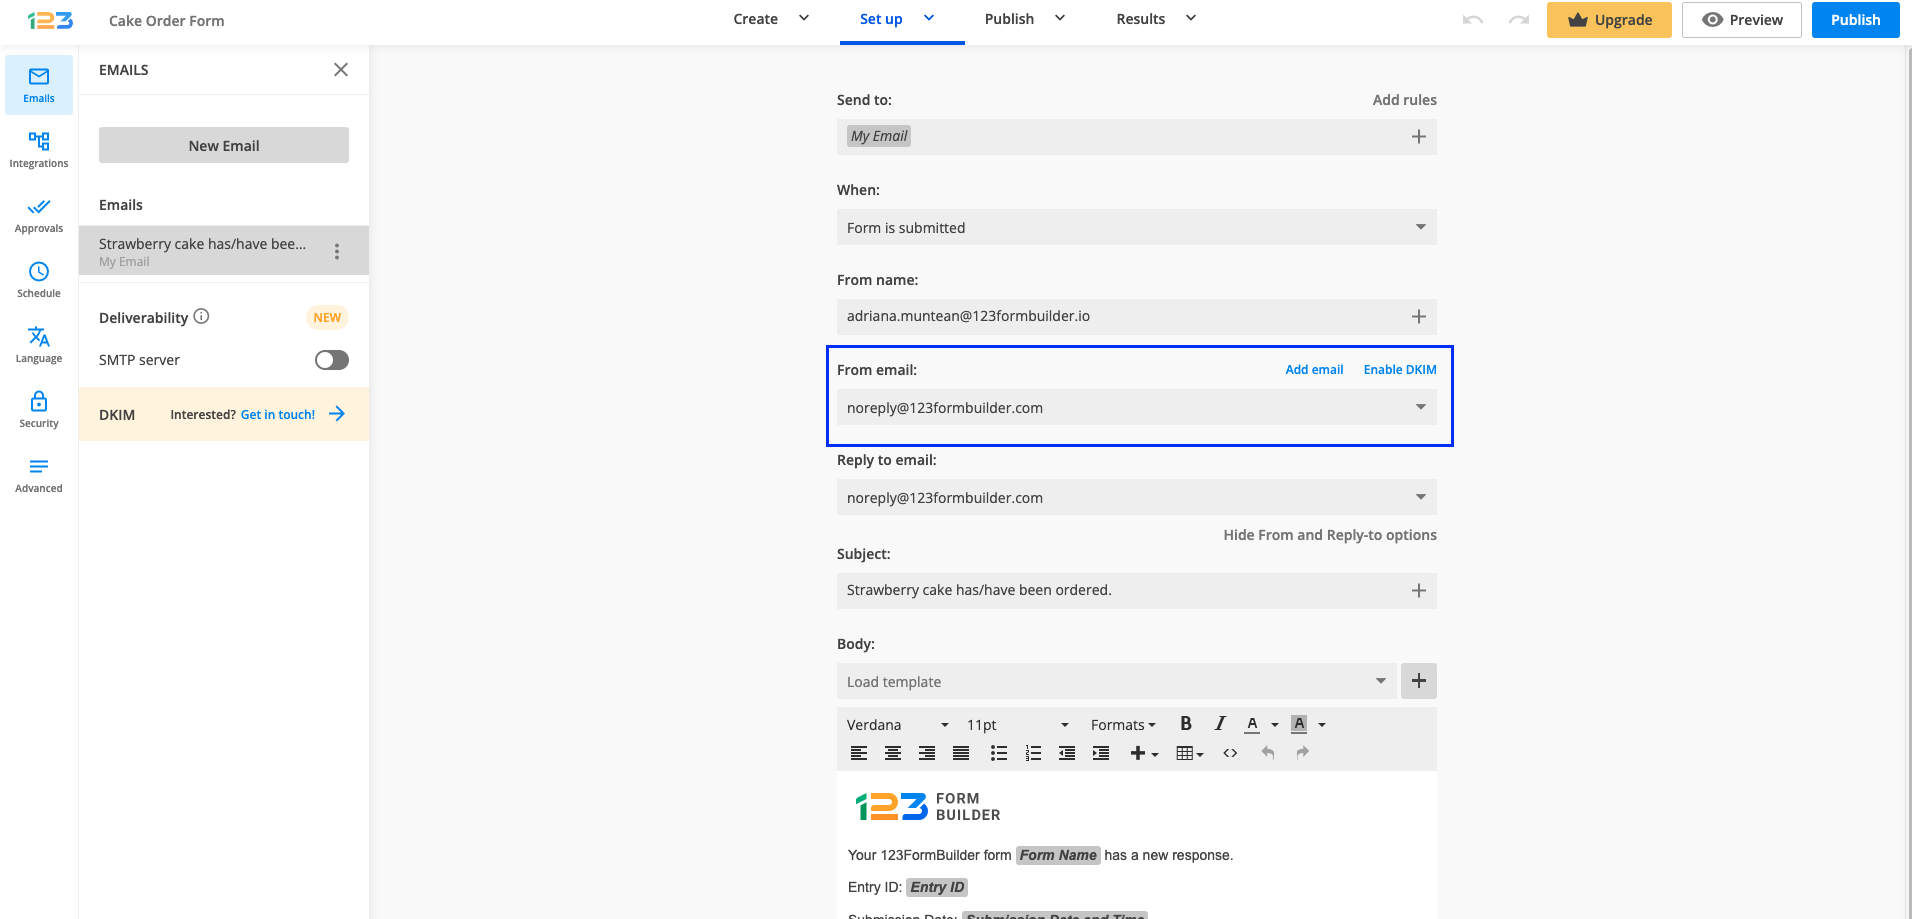
If you don’t want the sender of your email notifications to be noreply@123formbuilder.com or noreply@myfor.ms, but want to use an email from your own domain instead, based on the desired level of security you can either:
- Click on Add email and configure SPF records for your organization’s domain;
- Or click on Enable DKIM and include a DKIM signature to your email notifications, as an addition to the SPF records (which are mandatory for all custom senders).
If you already paid for the DKIM add-on, clicking on Enable DKIM will allow you to choose from two options:
- Add the DKIM signature to a custom domain for which you already configured the SPF records;
- Or, add a new email and configure SPF & DKIM in the same step.
If you want to learn more about the setup steps, check out this page. Additional information about email security protocols here
Related articles
Similar Articles
Frequently Asked Questions
Here is a list of the most frequently asked questions. For more FAQs, please browse through the FAQs page.