123FormBuilder Knowledge Base
Search our documentation platform for answers, service specifications and 3rd-party integrations.
Knowledge Base
Yes, you can recover your deleted web forms, but only if your account is using one of our native paid subscriptions. We can recover deleted forms within 30 days from the day they were deleted. This feature is not available for free users. However, if you need assistance in rebuilding them, we’re always happy to help.
If you’ve deleted a form by mistake and need it restored, please contact us.
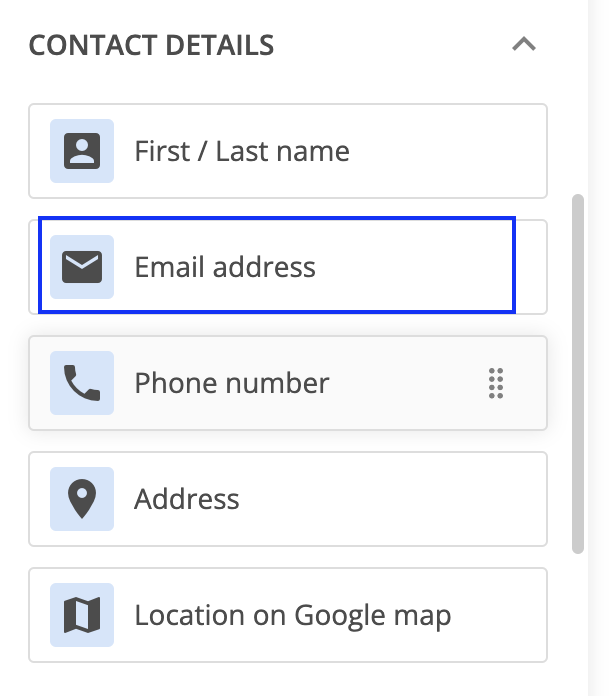
With 123FormBuilder, you can easily retrieve the address and the coordinates of your users with the help of our Google map field. On the map, users can pinpoint locations or add their address and the GPS coordinates are auto-filled into a separate Address and Short text field.
Here’s how to retrieve the address and coordinates from your Google map field.
In the Form Editor add the following 3 fields:
- Google map field
- Address field
- Short text field
Connect your Google map API and add your preferred default address. Read this article for more details.
Afterward, match the Google map field with the Short text and Address field from the right side panel.
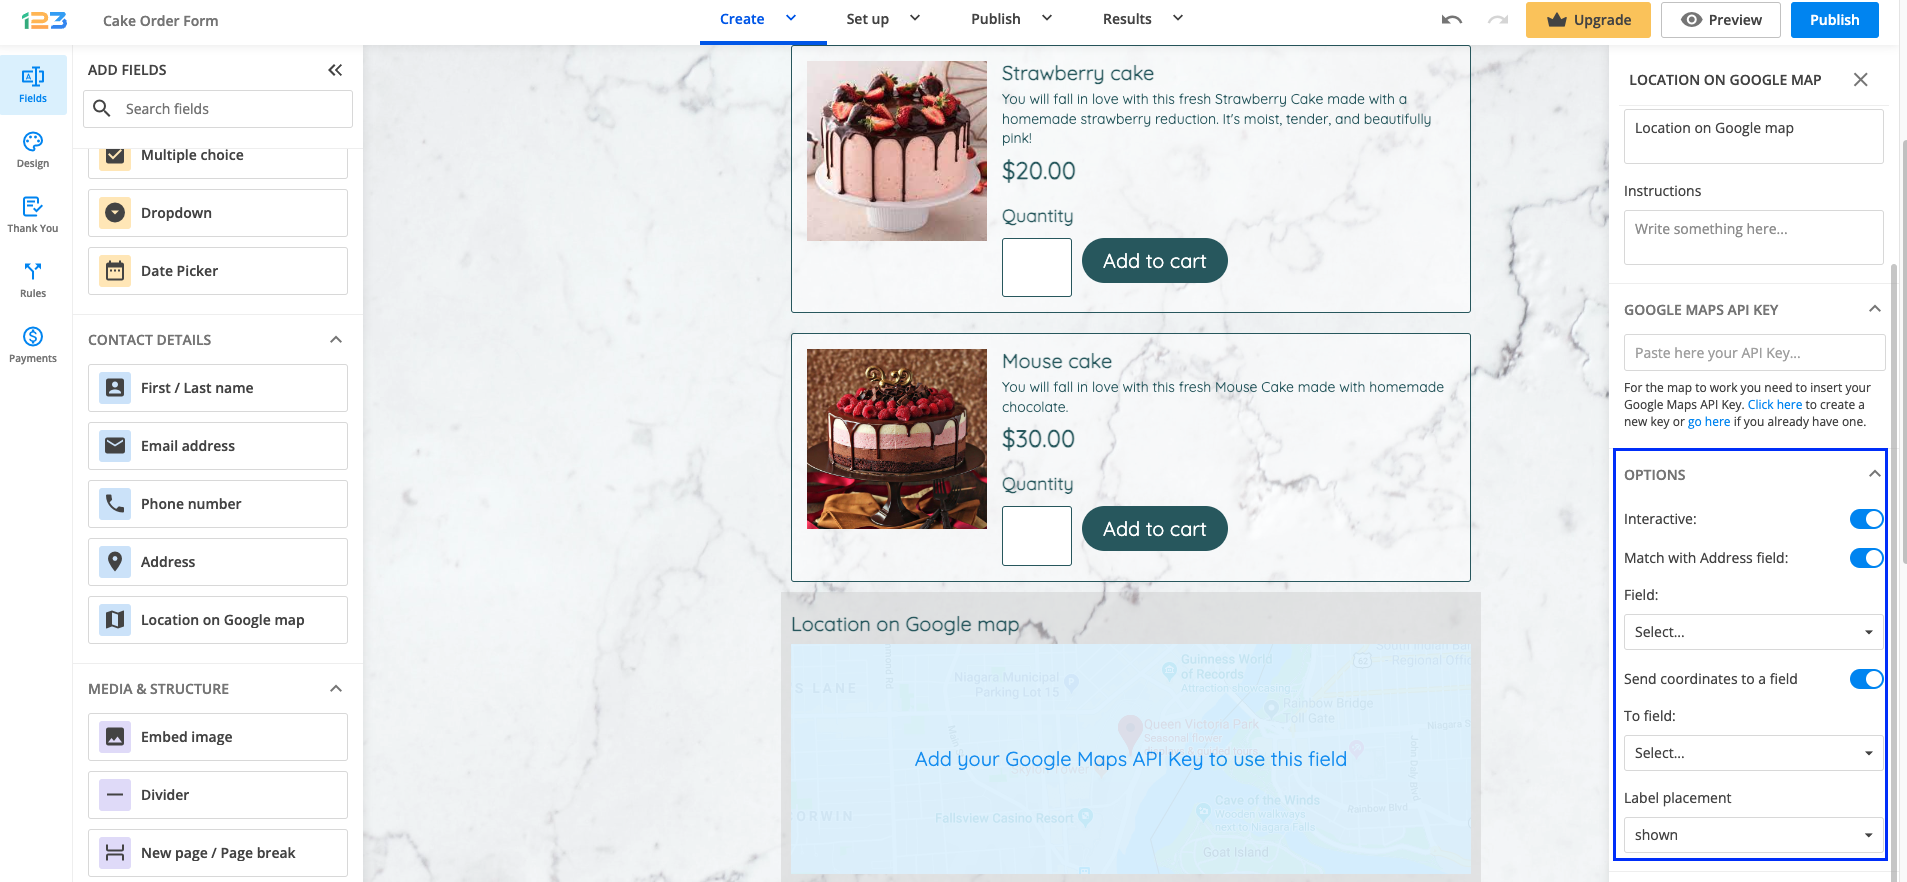
The two fields will automatically receive the data from the location selected on the map. The map is interactive by default. This means that users can navigate through the map and also view the map in satellite mode.
We recorded a short video to demonstrate how this works. Check it out below to see how the Address and the Coordinates (short text) fields are prefilled with the information collected from the Google map field.
Related articles
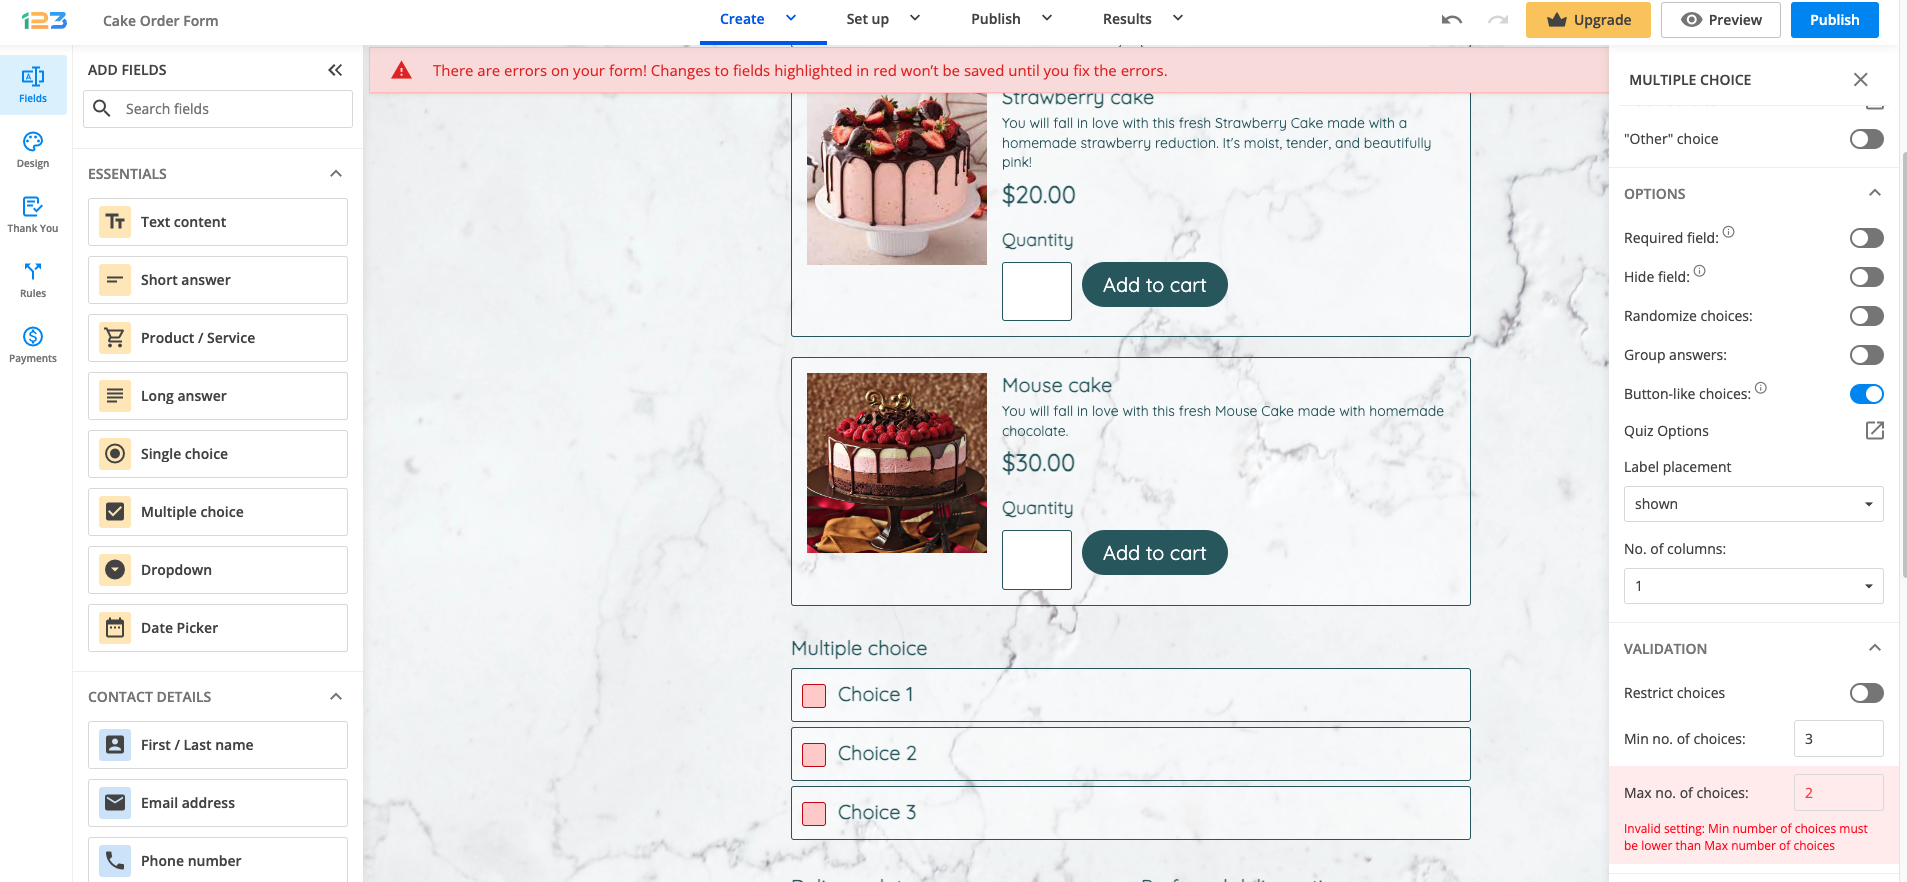
Yes, you can specify a minimum number of choices for a Multiple choice field.
Once you have added a Multiple choice field, in the right side panel, under the Validation section, you will find the Min. no of choices option.
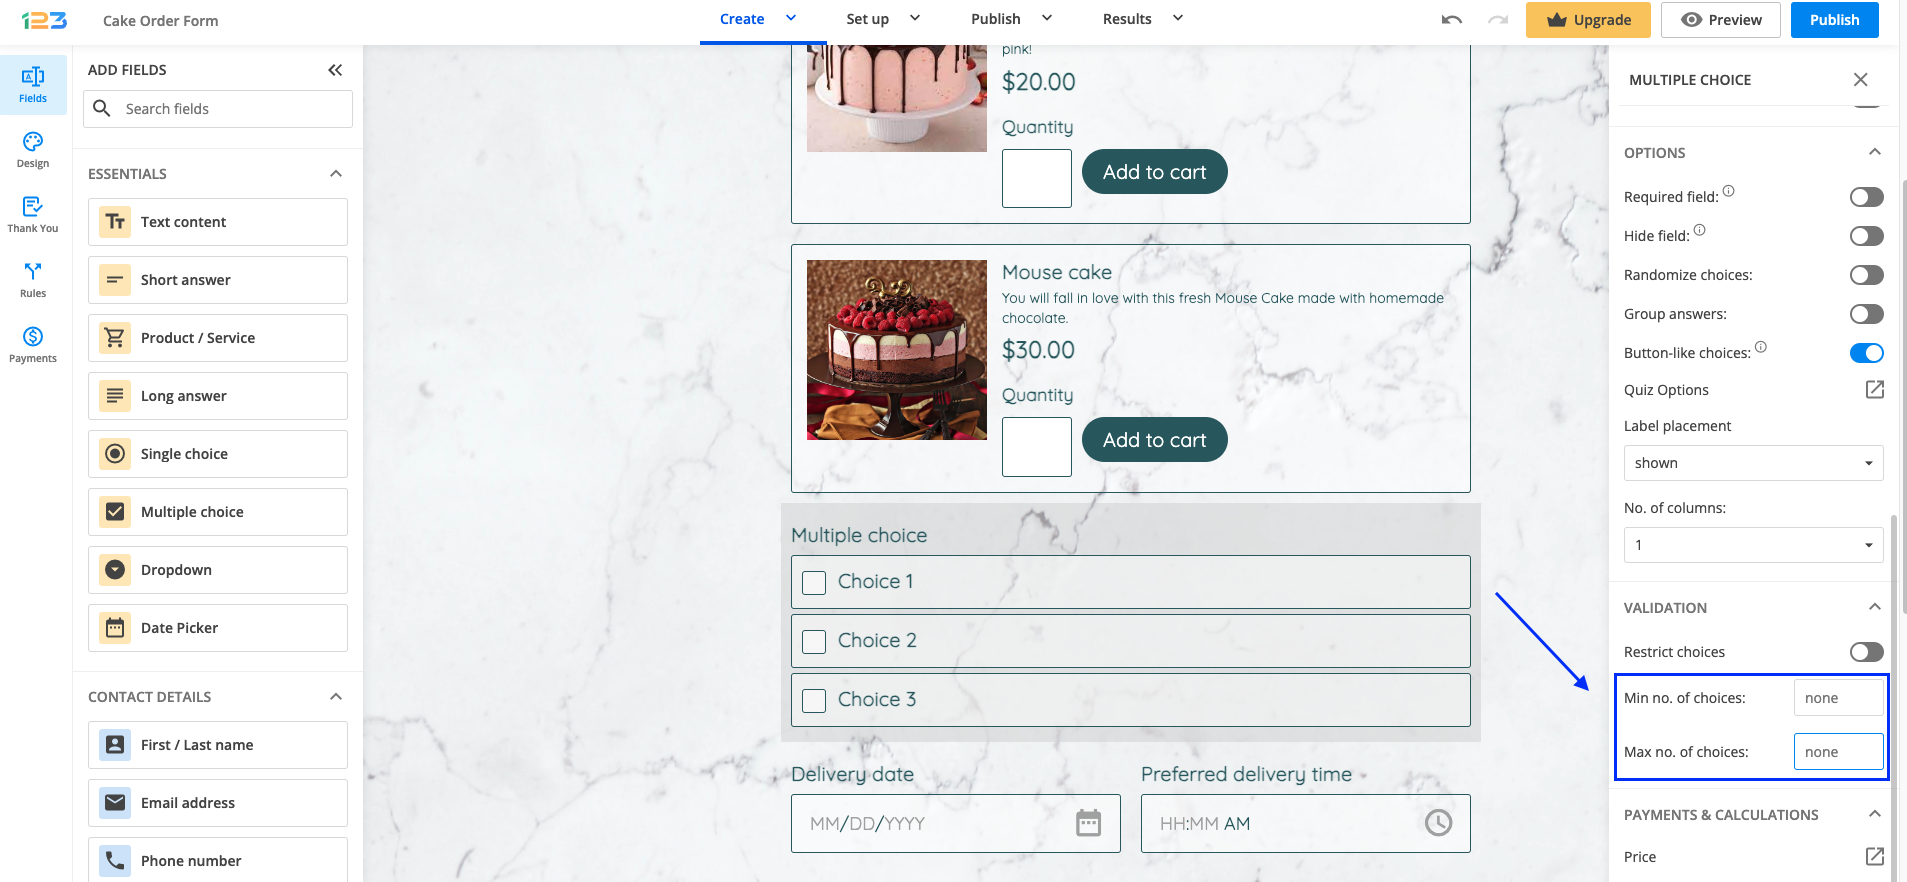
Use cases
If you want your respondents to select a specific number of choices (e.g. exactly 2 choices), you’ll need to specify the same value for both the maximum and the minimum number of choices. Make sure the value typed in for the Min no. of choices doesn’t exceed the value you have for your Max no. of choices, otherwise, you’ll receive an error.
When your respondents don’t select the minimum number of choices you’ve set up, they will receive an error message. You can change the text of the message in the Languages → System Messages section.
Related articles
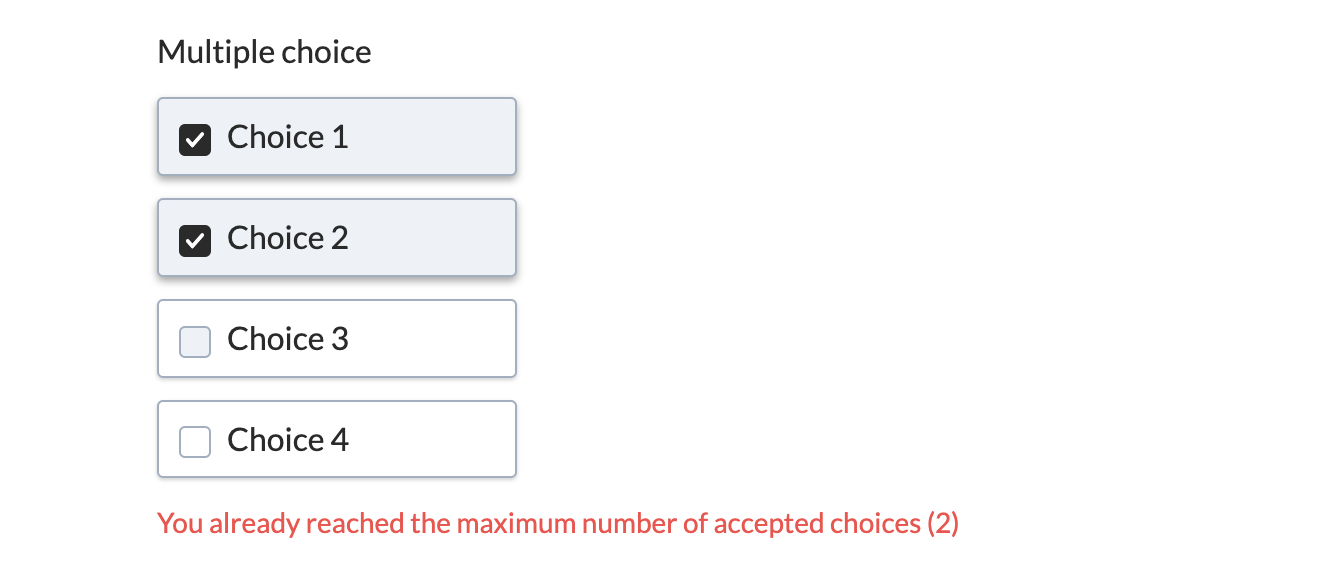
Yes, you can set a maximum number of choices for your Multiple choice fields.
In the form builder, click on the Multiple choice field. From the right side panel, go to Validation and from there you can set both the minimum and maximum number of choices your respondents can select.

In order to keep things clear for your respondents, you can specify in the Instructions box of the field that only a certain number of options can be picked.

After reaching the maximum number allowed, your respondents will receive a warning message if they try to select another option.
Related articles
Default values can be set for Single choice, Multiple choice, Dropdown, and Likert scale fields on your form.
After you’ve typed the options in the Choices section, click on Default choice. In the lightbox that opens, select the choice you want to have pre-selected on your form.
To clear your choice fields from the default value, simply check it again in the Edit choices lightbox.

Related articles
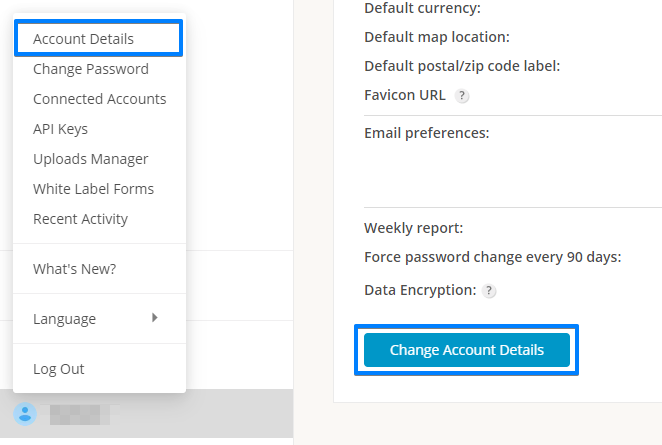
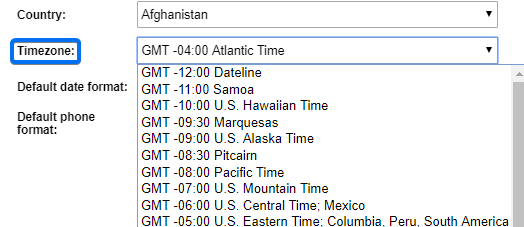
Yes, you can set your own timezone in your form builder account. Go to My Account → Change Account Details.
In the dropdown labeled Timezone, choose your time/region option. This information will be used in your Submissions section and in the email notifications sent after the form is filled out and submitted.
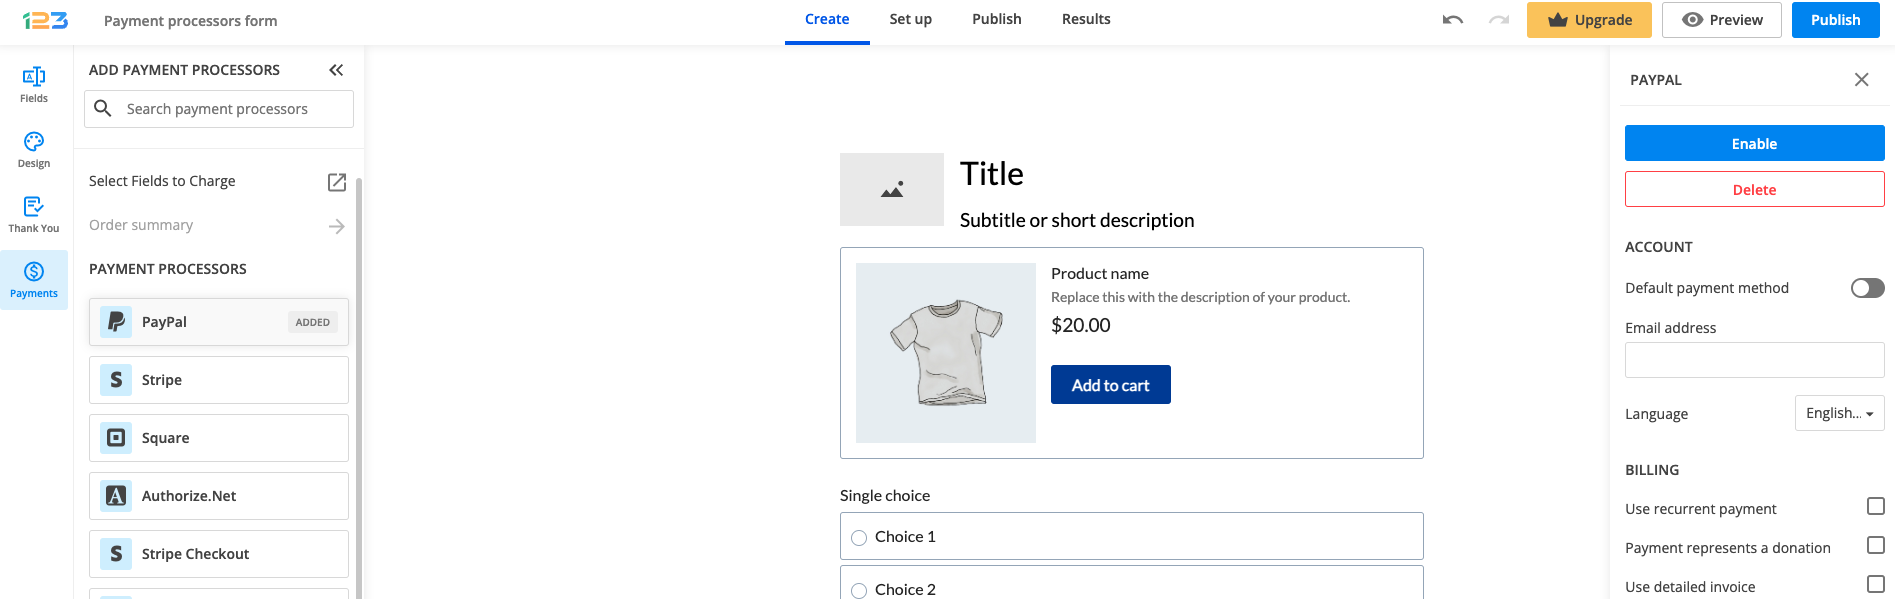
Yes, you can use multiple payment gateways on your online form. This way, your respondents can select the payment method most convenient for them.
You can enable multiple payment integrations on your form. Let’s say that we are interested in adding Authorize.net & PayPal on our form.
Once both payment processors have been enabled on your form, you will notice some changes. Both payment processors have an enabled tag near their name.
On the form, we are adding a Payment method section visible to respondents. They can easily choose through which payment method they want to pay – as they are also seeing the payment processor name and the accepted cards for each payment processor.
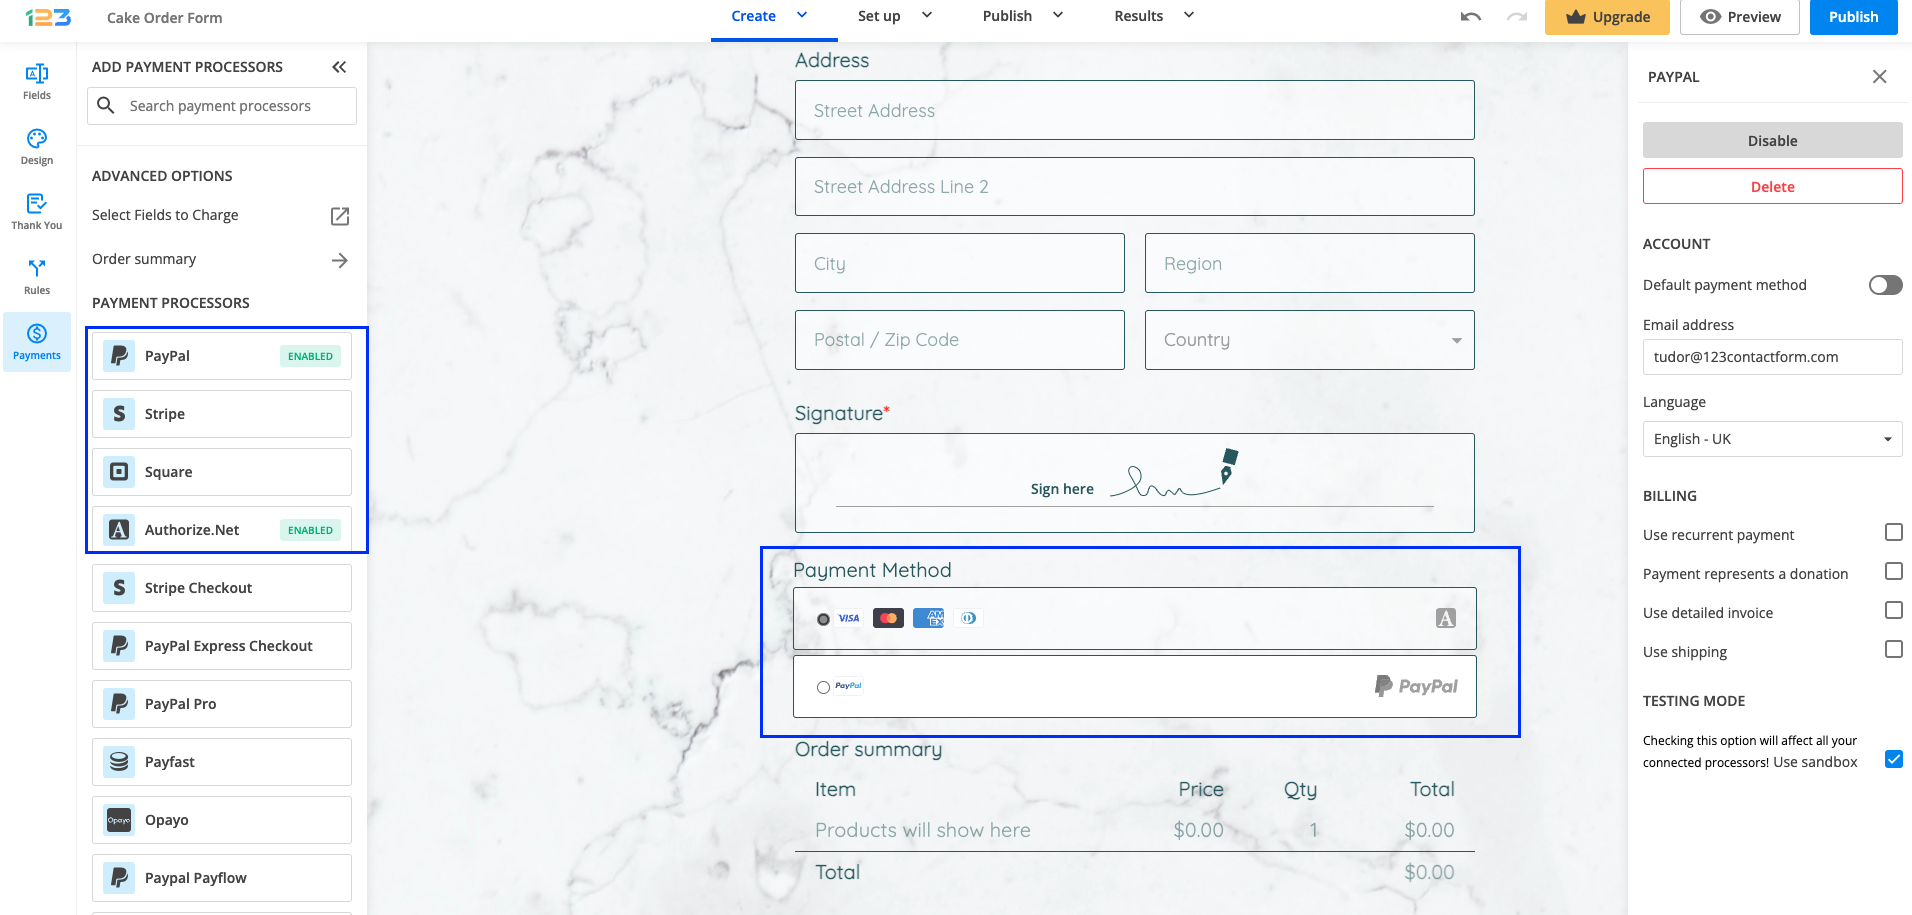
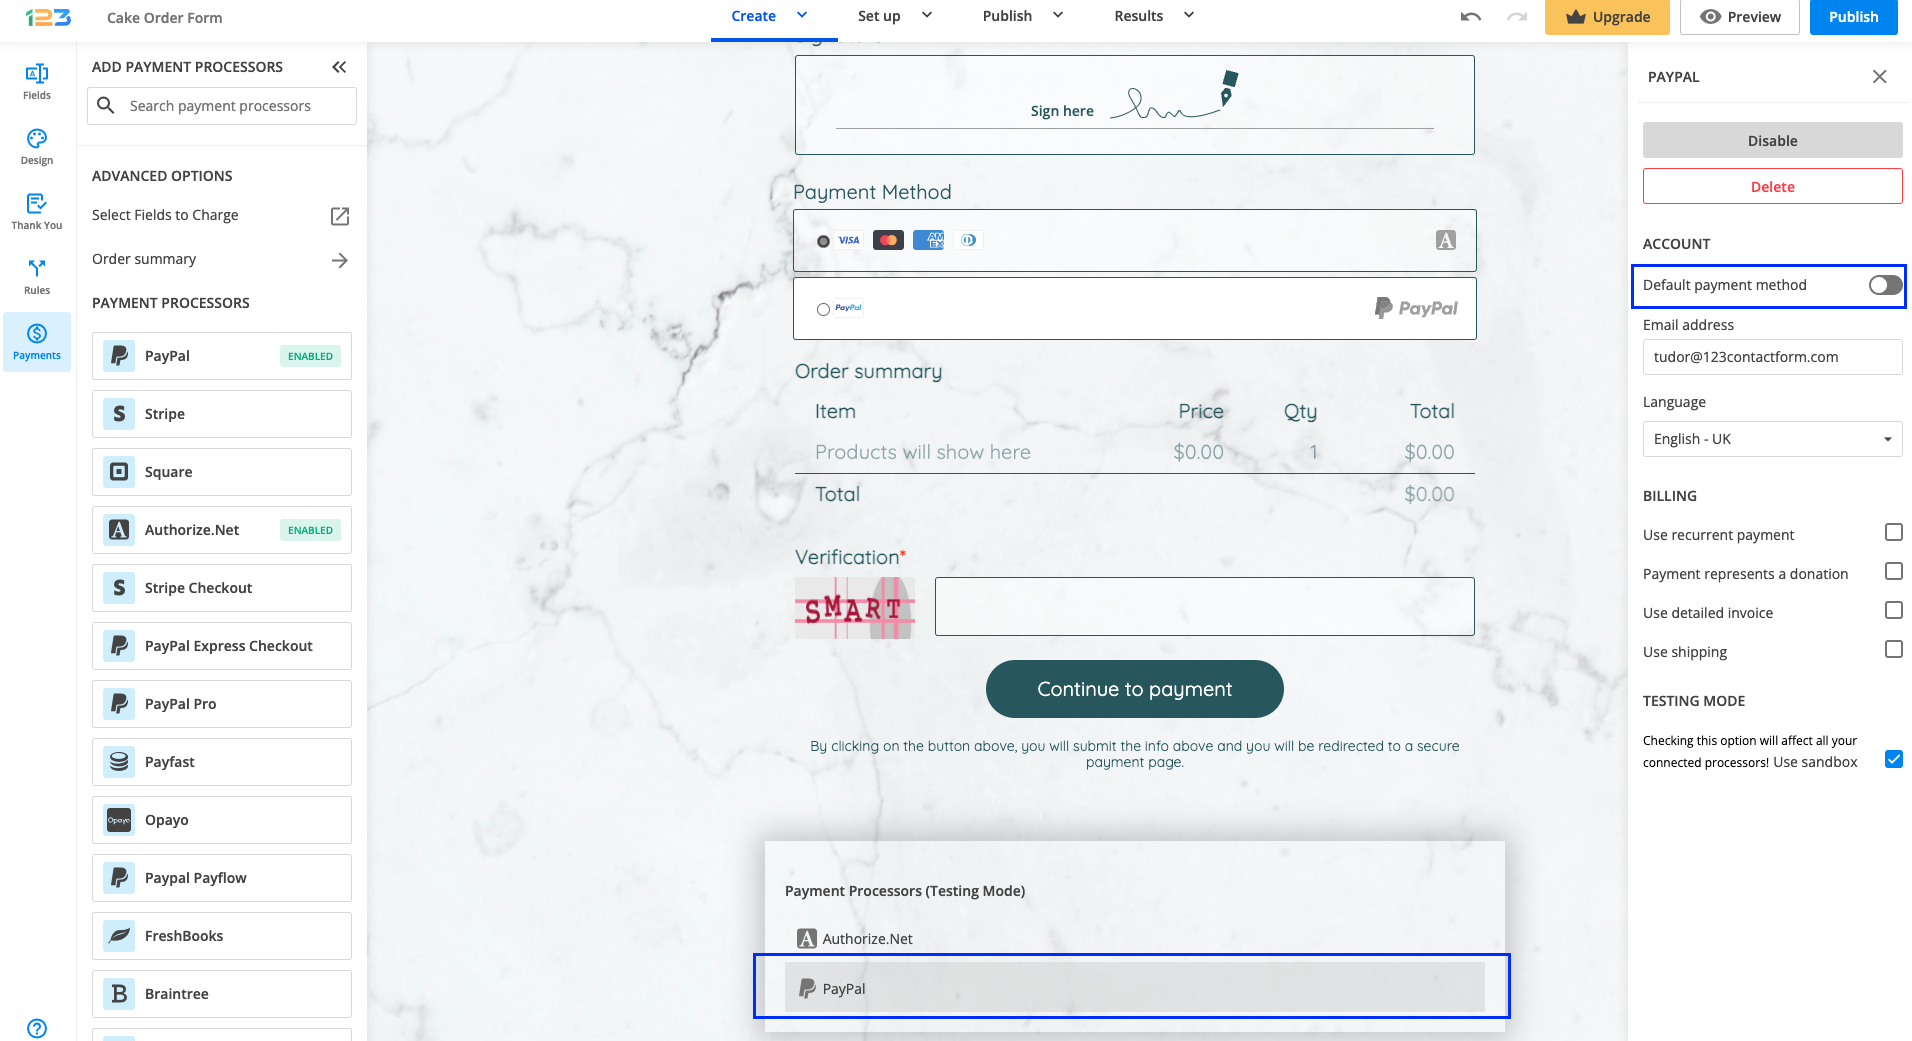
In our example, PayPal has been marked as default payment method. This means that by default, on the form, Authorize.net will be selected, but respondents can select PayPal if they want to.
You can easily change the default payment method by going to the payment processor you want to mark as default and switching the toggle on for Default payment method.
Related articles
You can easily direct your submitters to a page on a website after they have filled out the form by using the new Go to URL option.
With this feature you can add a button on the Thank You page, thus directing your users to a URL of your choice after submission. This approach allows form submitters to engage further with your content or services, at their own pace.
To add the Go to URL button, access the Thank you section from the Create tab within the form builder. Next, go to the Options section in the right-side panel and turn on the Go to URL toggle.

Once enabled, two new input fields will open. In the first one, you can change the Button text from Go to URL to something more suggestive for your use case. In the other, you need to provide the Button URL. When your users click the button, the URL provided will open on the same page.

The Go to URL button has the same color and text color as the Submit button. If you wish to change them, you can do so from Design → Quick Setup → Button color & Button text color.

If you need to redirect users automatically after they submit your form, you can enable the Redirect to URL option instead.
Related articles
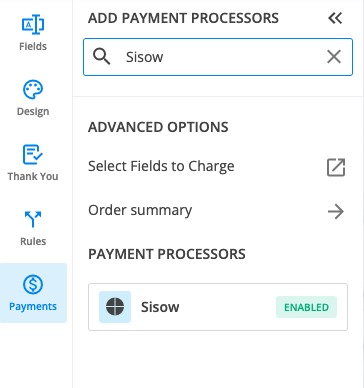
Yes, you can integrate your payment forms with Sisow. Sisow supports iDEAL, DIRECTebanking, MisterCash, Webshop Giftcard, Podium Cadeaukaart.
Setting up your Sisow integration
1. Click New Form from your account dashboard and start creating your payment form.
You can use choice fields (single/multiple choice and dropdown lists) to display the products on sale or, even better, Product field
2. In your Form Editor, in the left side panel, you will notice the Payments section. By using the search bar, you can quickly find Sisow.
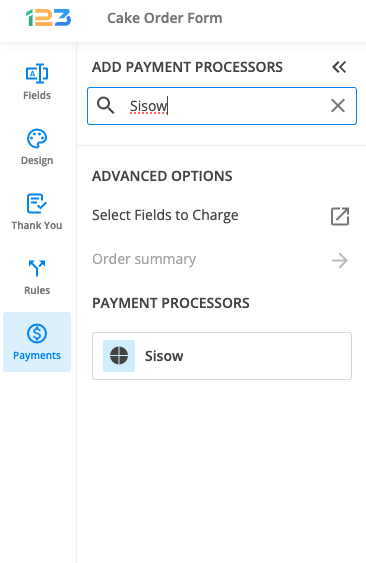
3. After adding Sisow on your form, you will notice a couple of changes: the Sisow payment processor has a tag near its name & the settings panel opens up to the right side of the page.
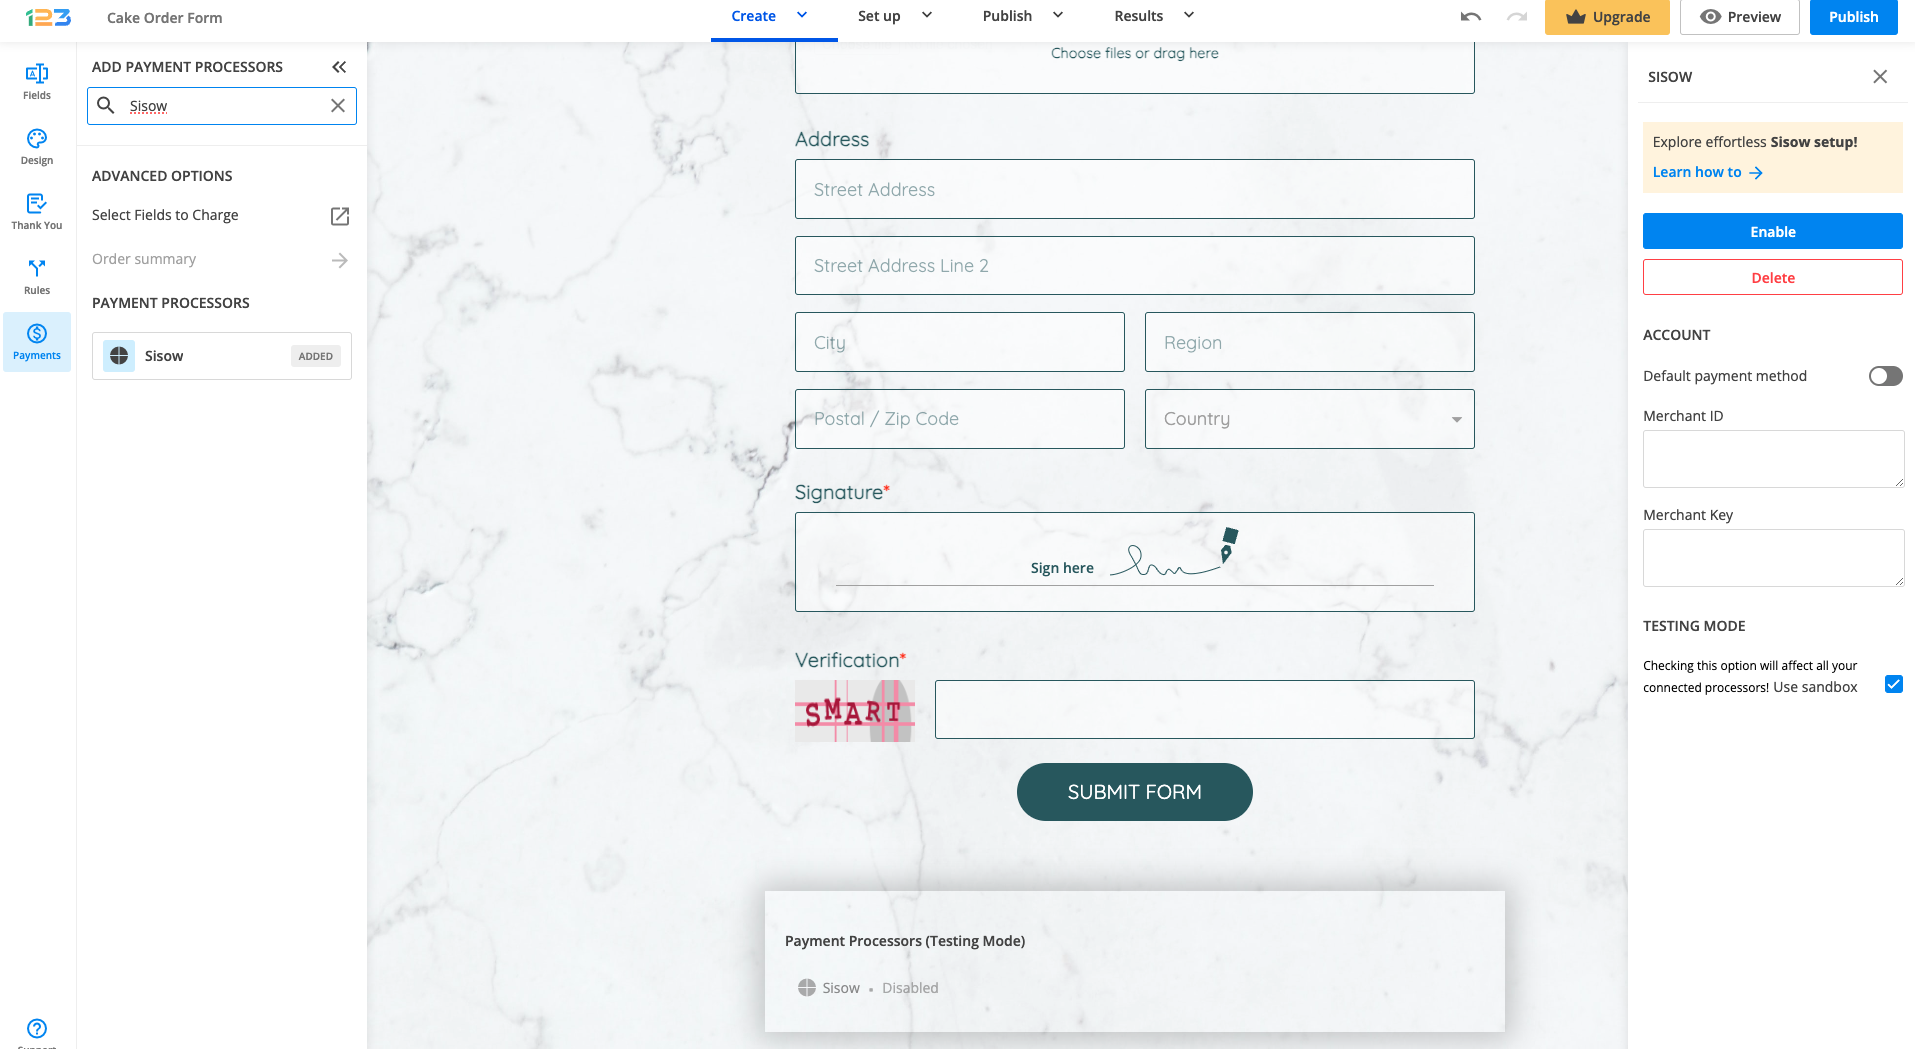
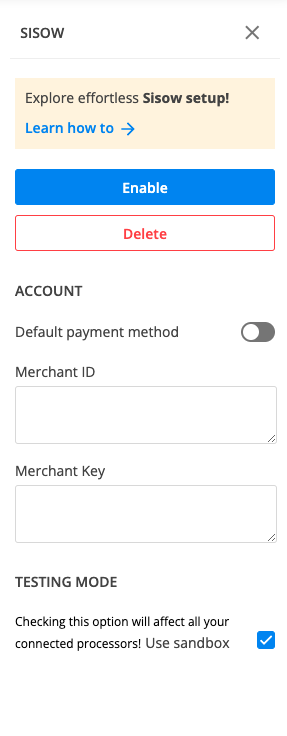
4. In order to set up the Sisow integration, you have to type in your Merchant ID and Merchant Key.
Important Note
Sisow has a sandbox system included in the merchant account for testing purposes, so whenever you enable the sandbox option from 123FormBuilder, you’ll be able to test the payment procedure of your order form.The only payment methods you can test are iDEAL, DIRECTebanking, MisterCash, WebShop GiftCard, and Podium Cadeaukaart.
You can use Sisow if you have an account at one of the following banks: ABN Amro Bank, ASN Bank, ING, Rabobank, SNS Bank, RegioBank, Triodos Bank, Van Lanschot Bankiers, Knab, bunq, Handelsbanken, or Revolut.
5. Enable the payment integration by clicking on Enable button. By enabling Sisow, you will notice a couple of changes on your form.
The Sisow payment processor on the left side panel has an Enabled tag on it so you could easily scan which payment processor is enabled.
Another change is that on your form it will be displayed an Order summary. Here will appear all the products your respondents select on the form, together with the price per option, quantity and the total price. If you want to customize the order summary, all you have to do is click on it and the available settings appear on the right side panel.
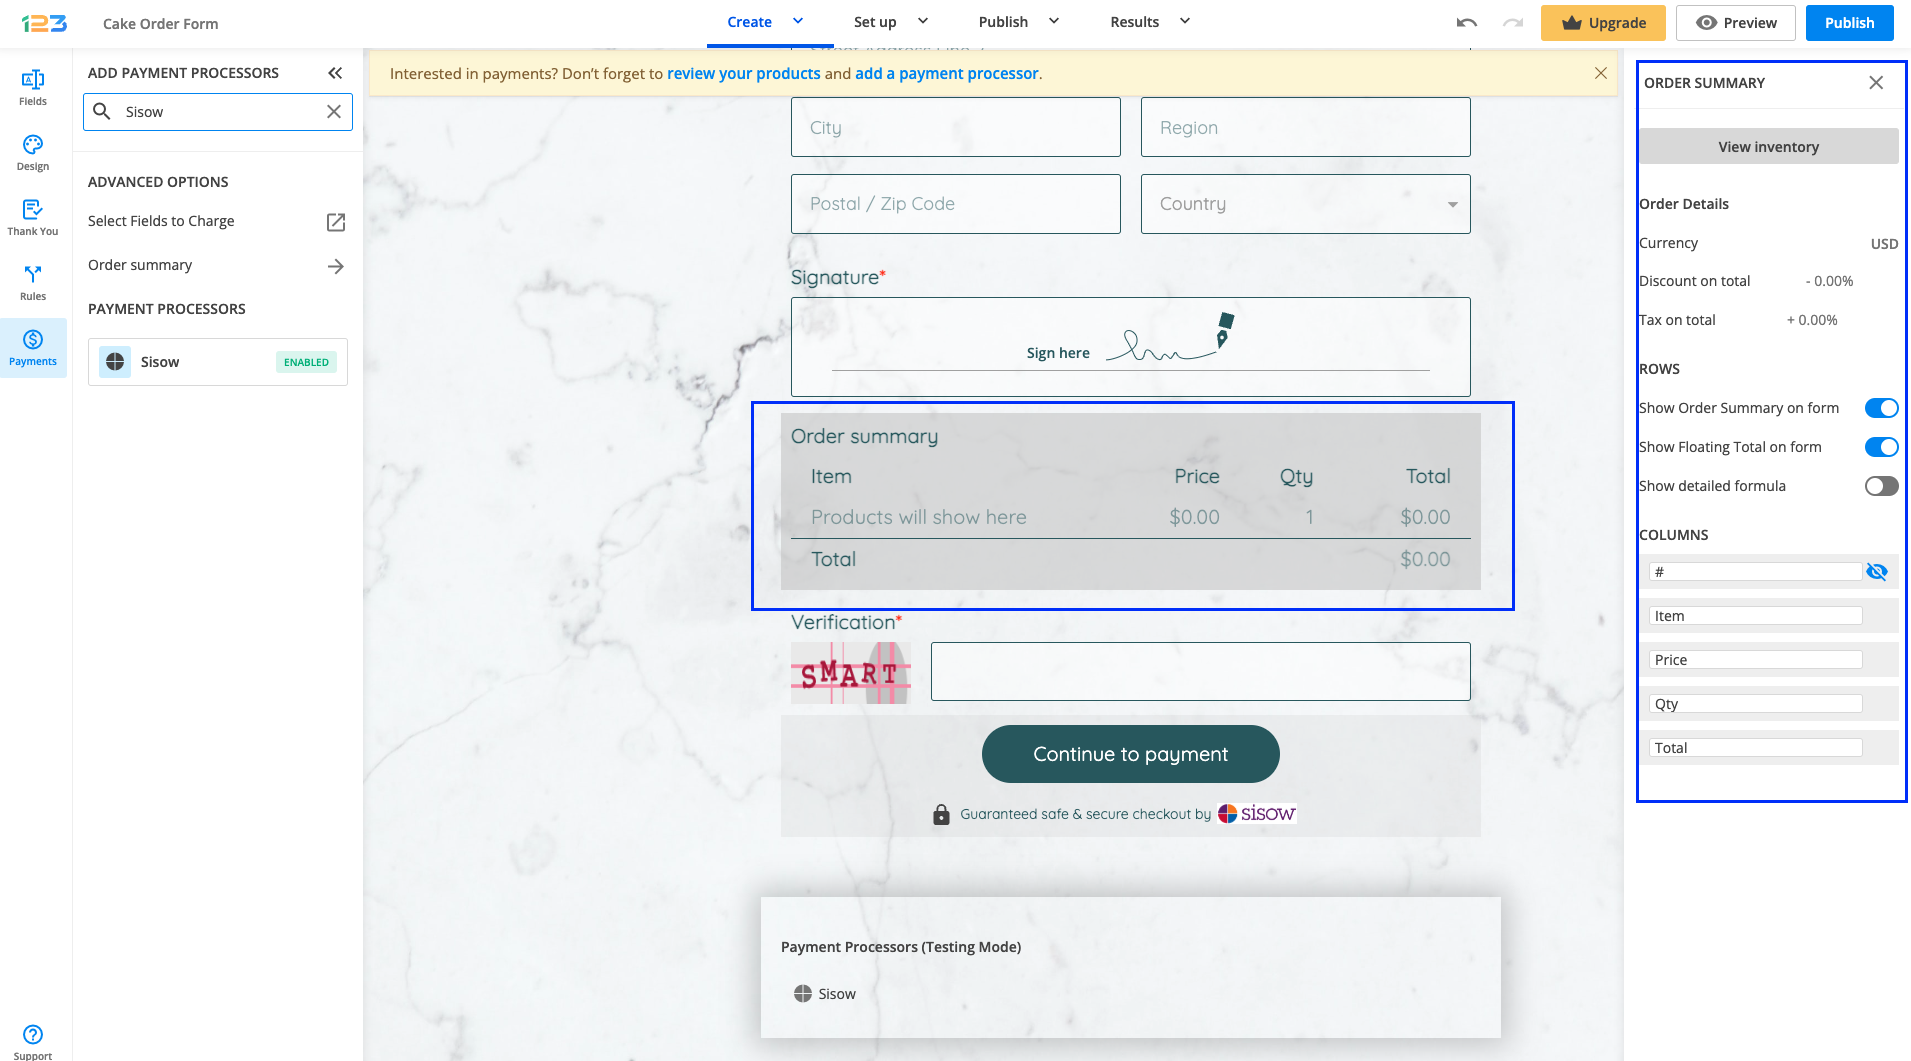
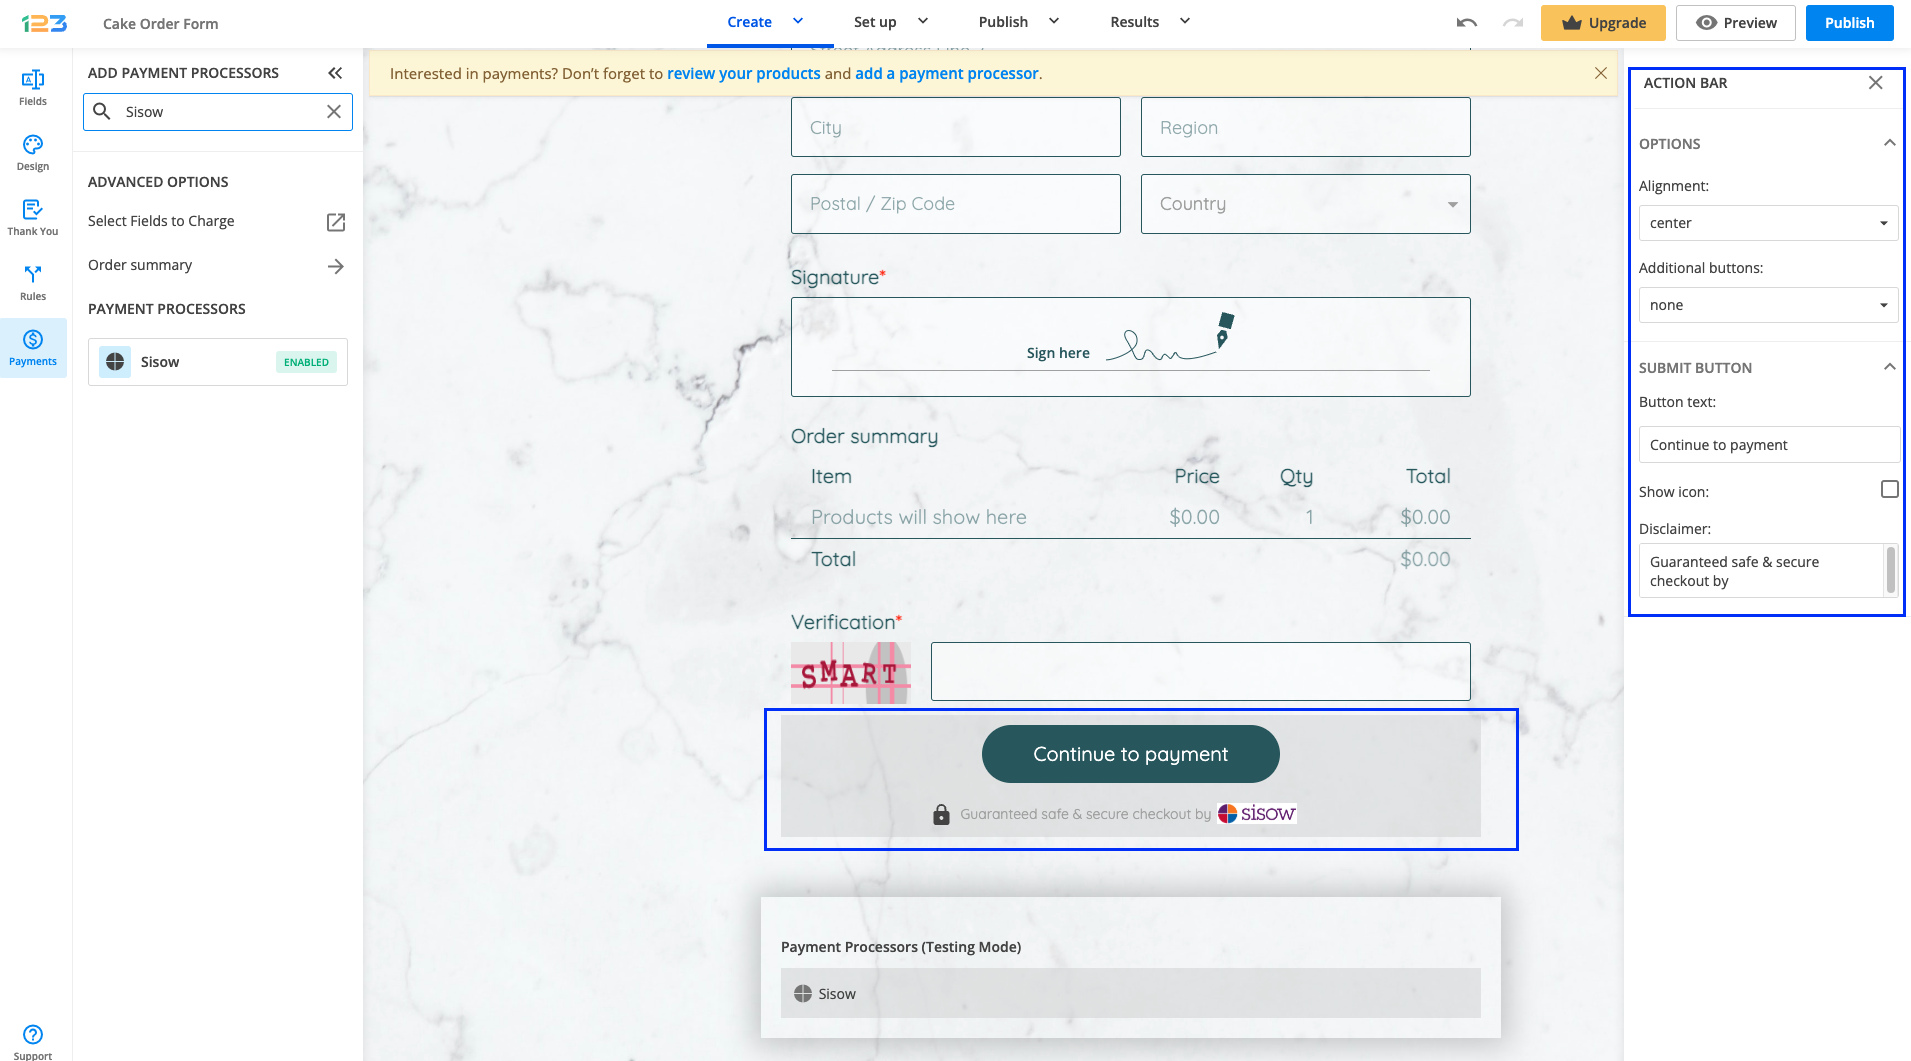
Another change is related to the Submit button. Once your payment integration is enabled, the Submit button is changed to Continue to payment. Below it, we are displaying a disclaimer together with the Sisow logo so that respondents are aware they are proceeding to a payment.
You can customize the action bar (everything that is related to the submit button, additional buttons, disclaimer, etc) by simply clicking on this area.
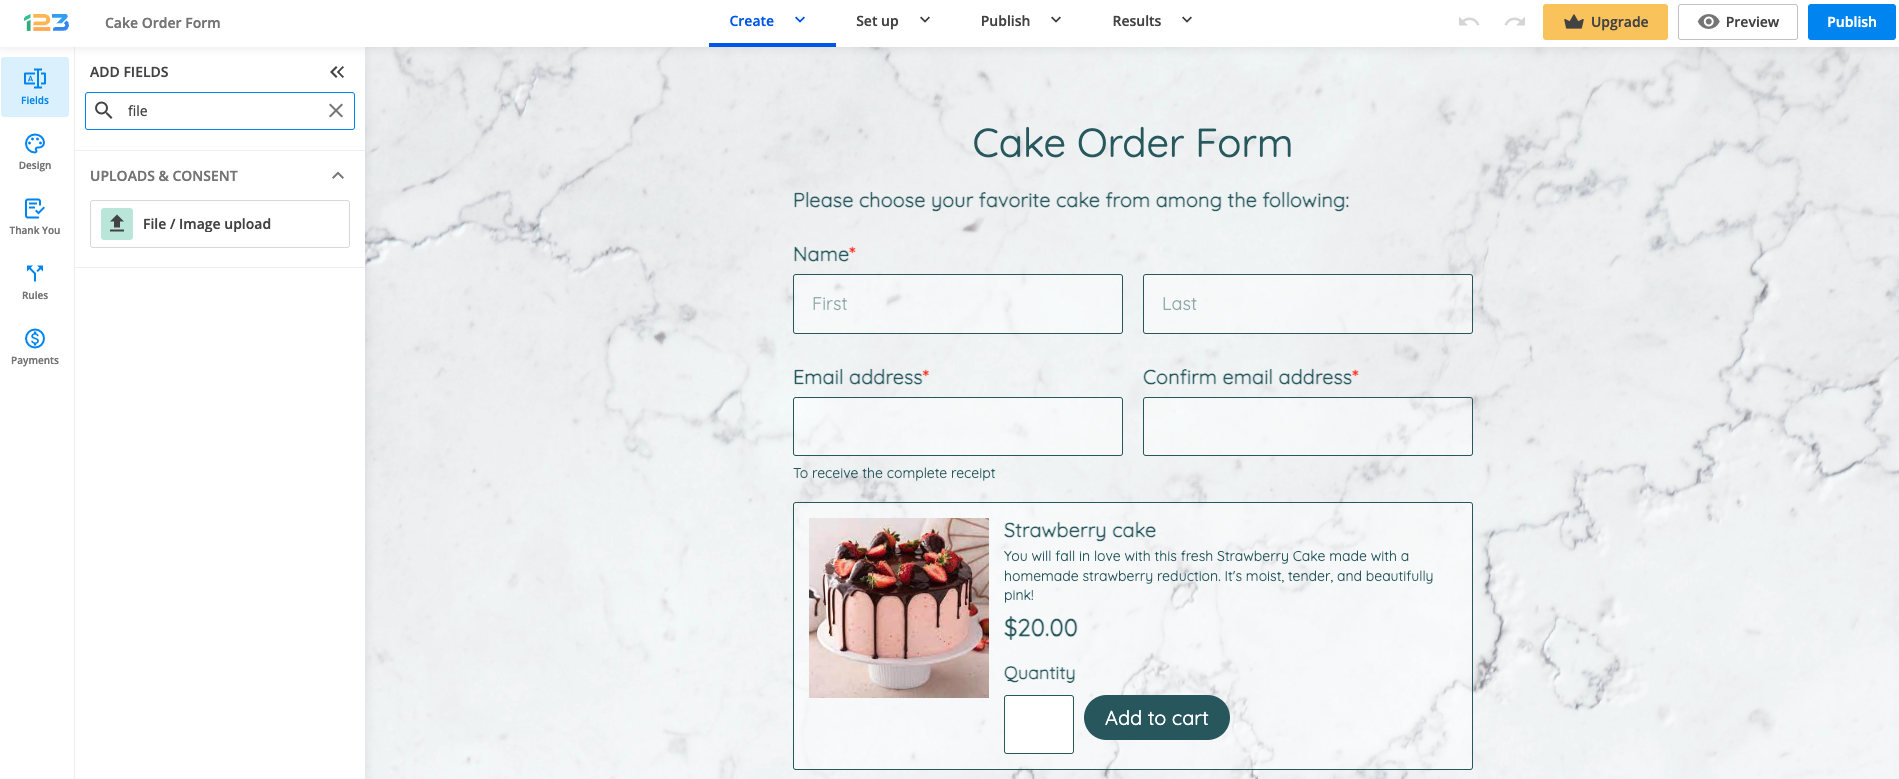
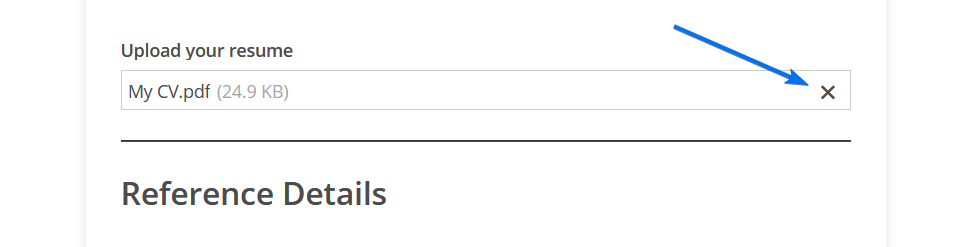
Yes, your visitors can upload files using your contact form. Use the File/Image upload field to receive files from your website visitors.
Go to the Form Editor, and you’ll find the File/Image upload field under Uploads & Consent.
Form users can remove the file added to your form by pressing the X sign inside the field.
There are a few important aspects to take into consideration about the File/Image upload field:
- Form users cannot upload files bigger than 150 MB per field.
- You can add a maximum of 50 upload fields per form.
- The total size of the files submitted on a single form cannot exceed 1 GB.
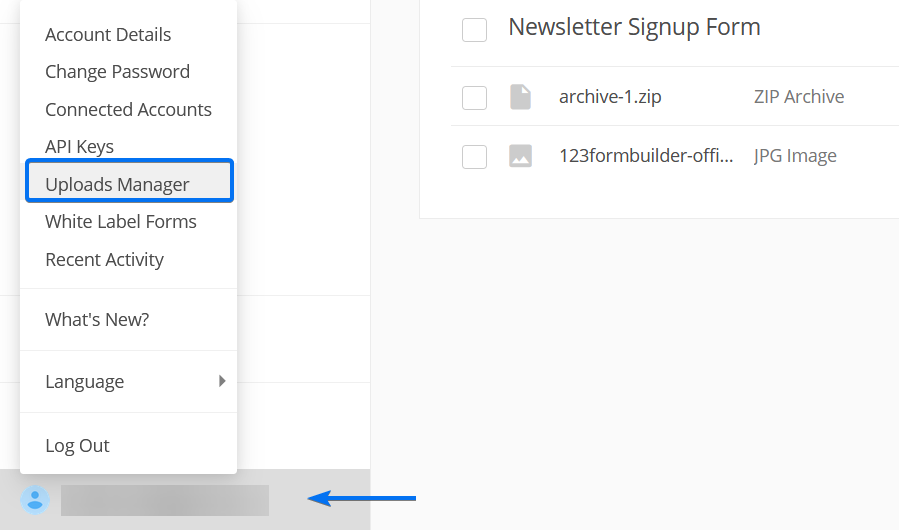
In My Account → Uploads Manager, you’ll find all the files uploaded by your form users.
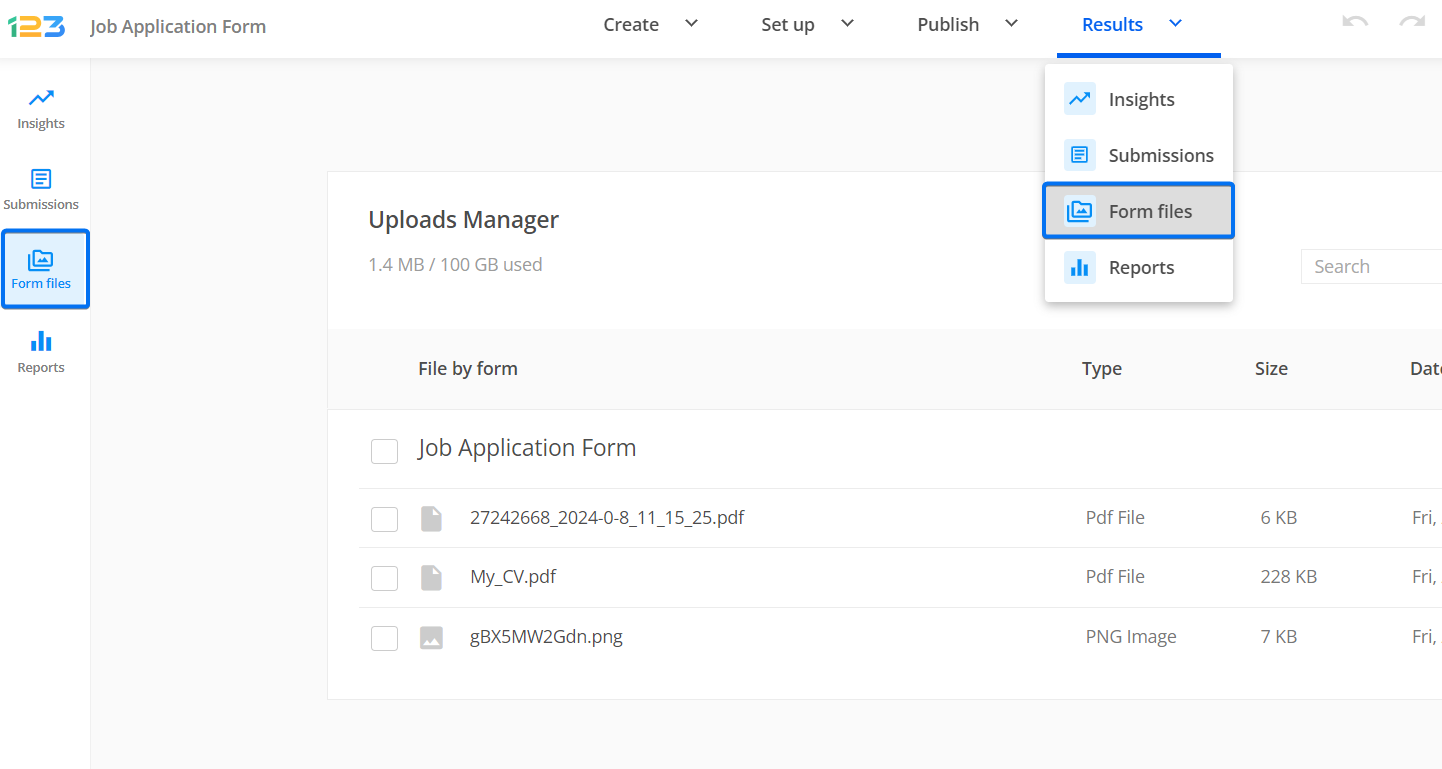
You can also see the files uploaded through each form separately by going to the forms Results → Form files section.
Read more on how to manage file uploads from online forms.
Related articles
HubSpot is a great Inbound Marketing and sales automation platform that helps small and big companies. Managing all leads in one place and creating automated workflows is what a company aims for. With 123FormBuilder, you can automatically sync form responses to your HubSpot account.
To integrate 123FormBuilder with HubSpot, follow the steps below:
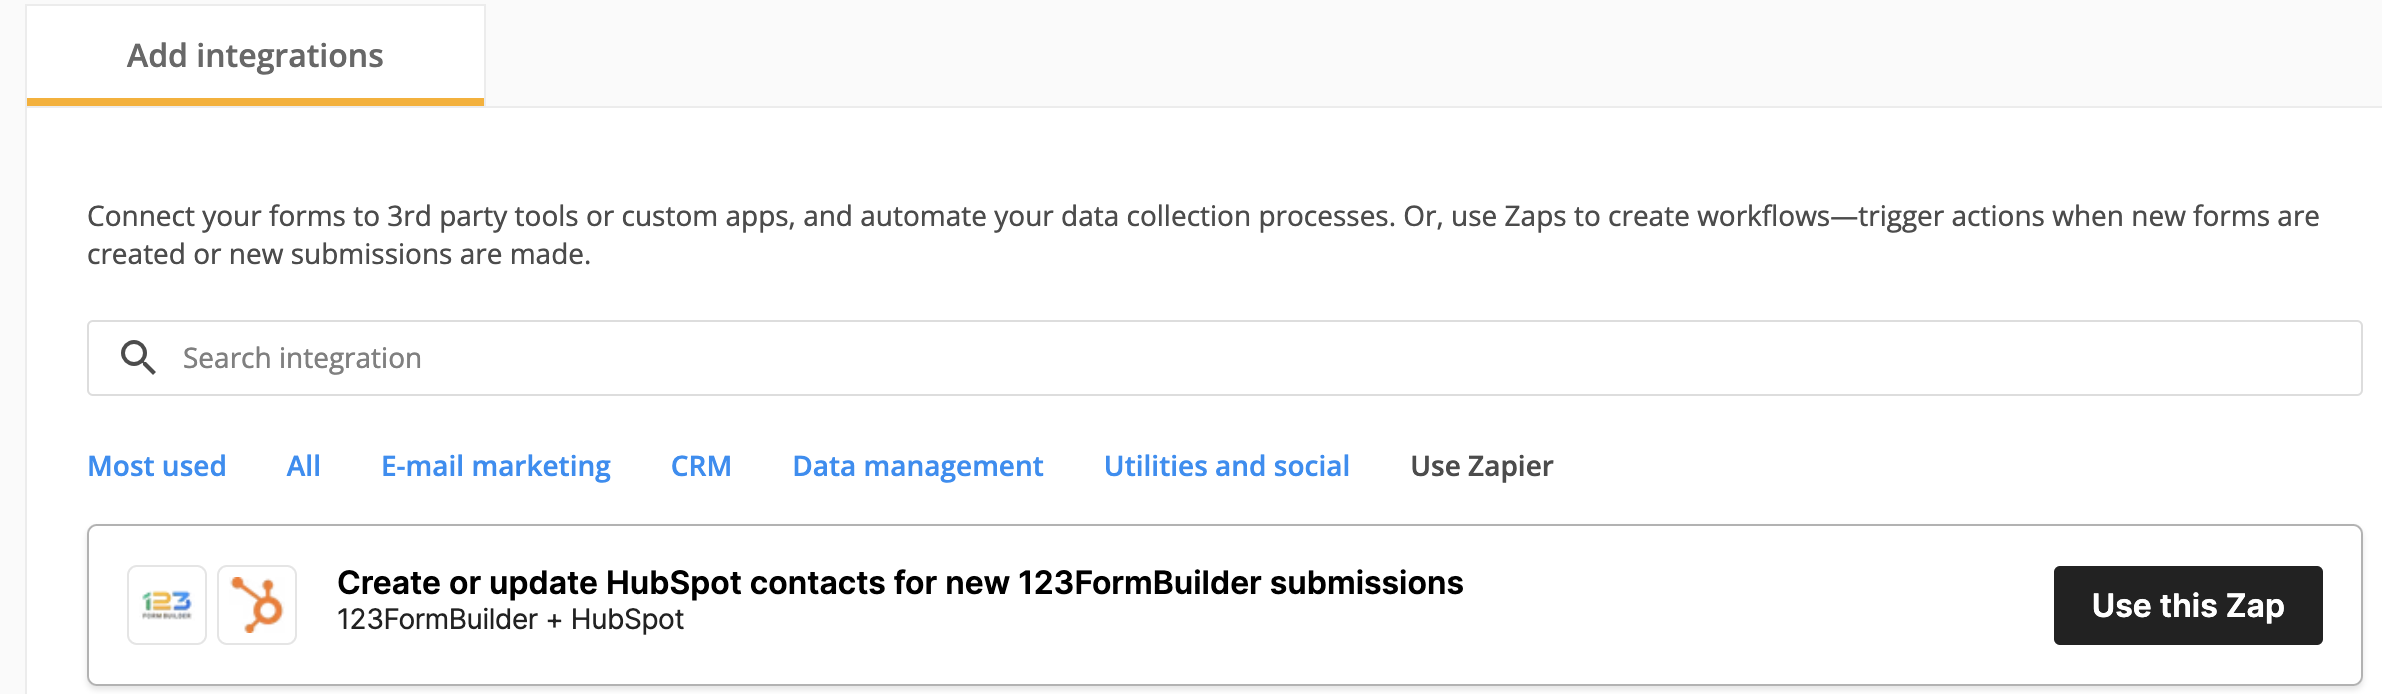
1. Log in to 123FormBuilder and go to your form’s Integrations section.
2. Click on Usa Zapier and click on Use this Zap for Hubspot.
3. Connect your 123FormBuilder account and choose your form.
4. Make a test submission to sample the data.
5. Choose the triggers New Submission in 123FormBuilder and Create or Update Contact in HubSpot.
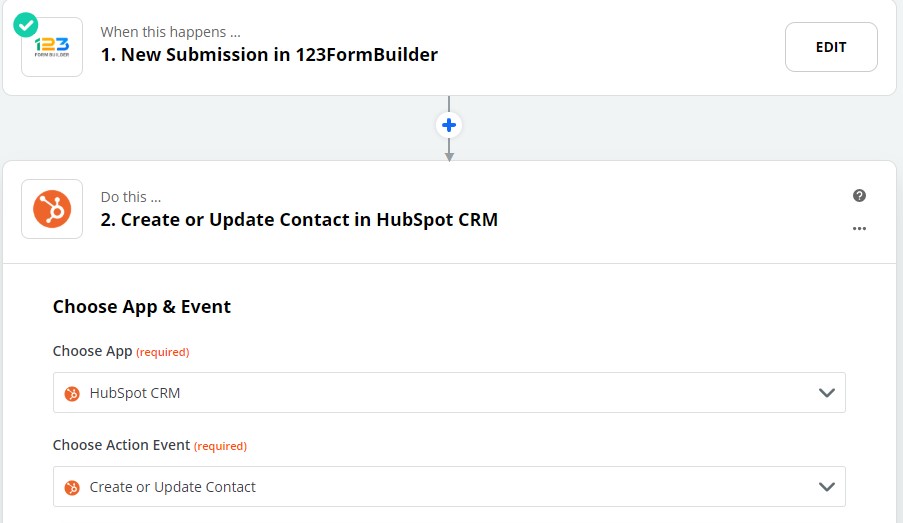
6. The last step is to associate the fields. After that, test out the zap and toggle ON the zap. Now, all form submissions will be automatically synced.
Important notes!
- The application’s settings and status can only be checked on Zapier’s side.
- Keep in mind that the Basic free plan allows only 100 API calls per day, and the Premium Wix plan has 200 API calls per day. If you wish to create more API calls per day, you’ll need to upgrade your account. Starting with the Gold plan, you can make unlimited API calls.
123FormBuilder is equipped with all the field types you need to build your form. In this article, you will learn how to choose the right field.
Choose the best input type
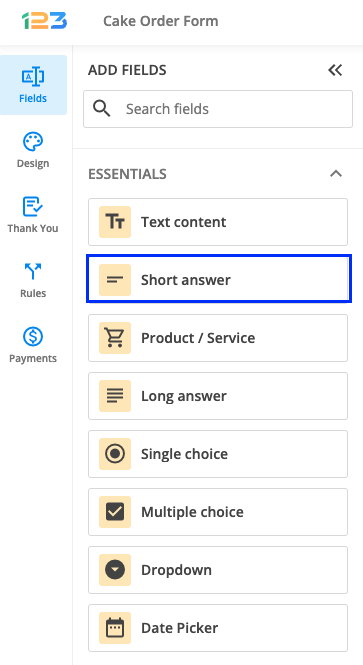
The most common input field is the Short answer field. Users can type letters, digits, and special characters. Simply change its label text and you are good to go. You are also able to change the field validation to avoid user mistakes.
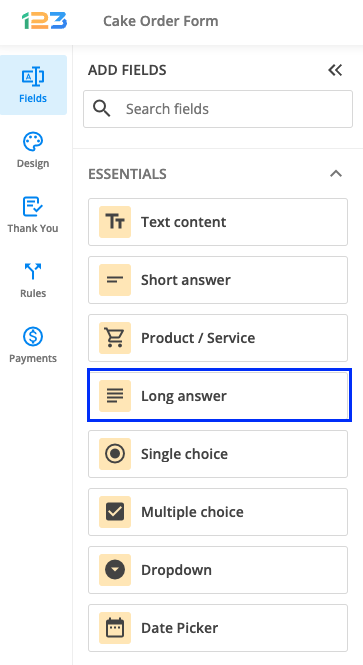
Collect more information with the Long answer field. This way, you can receive a large amount of information such as comments, notes, feedback, impressions, etc.
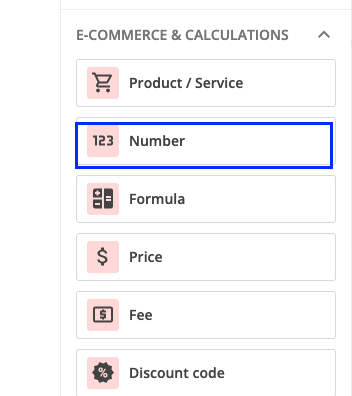
For numeric input use the Number field. It works great with Age, Quantity, and Number of registration inputs.
We also developed fields that have a certain field validation established. For example, the Email address field does not allow input in other formats than example@domain.com.
Don’t worry if you add a certain input field and later decide that you need another. With 123FormBuilder, you can convert field types so you won’t lose all the work you’ve put into customizing a field.
You can convert a field from the side menu by clicking on the Change field type dropdown. The fields that can be converted to one another are Short answer, Long answer, Email address, Phone number, Link, and Number.

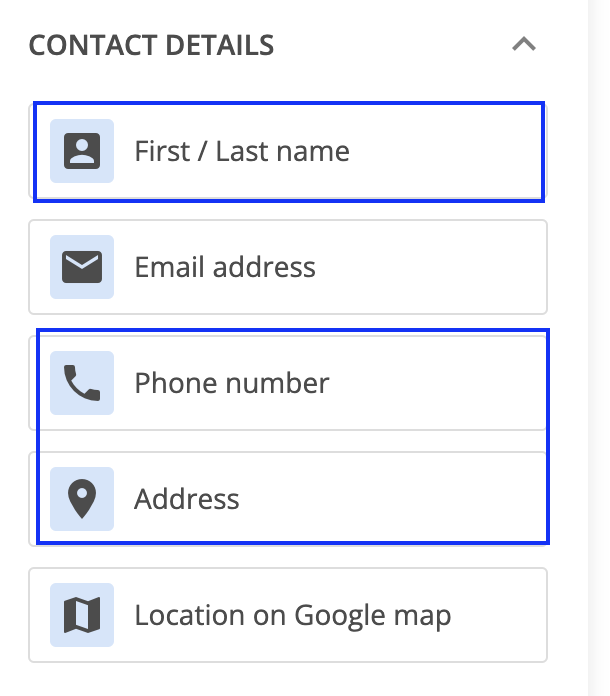
The Phone number, Address, and First/Last name fields have a predefined structure and are composed of subfields. These types of fields support autofill.
Choose the best choice field
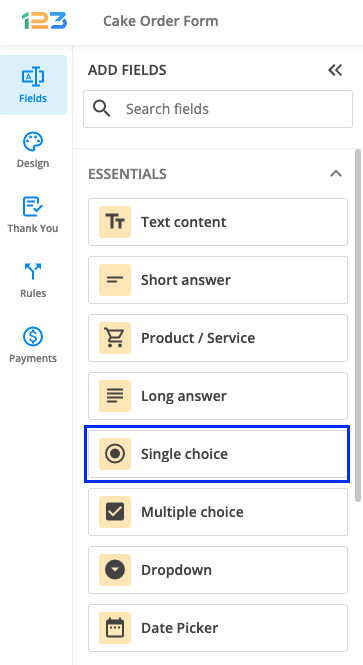
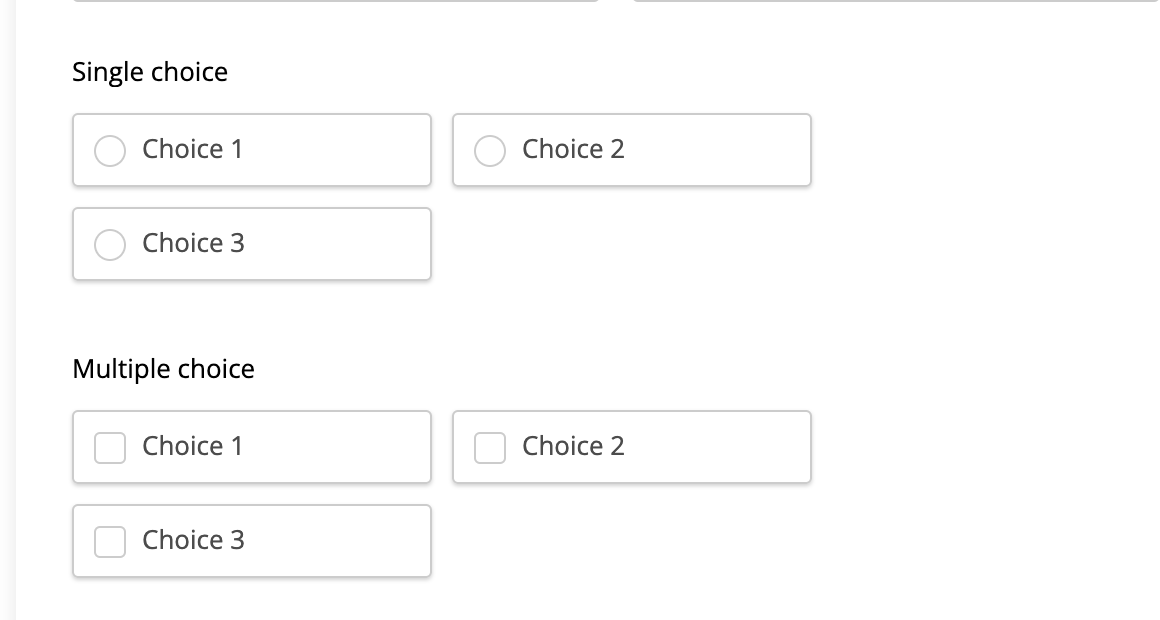
For questions that require only one answer, for example: Yes/No, use the Single choice field. With this type of field, form users can only choose one answer.
When you have several options, go for the Multiple choice field. Users will have the ability to select one or more options.
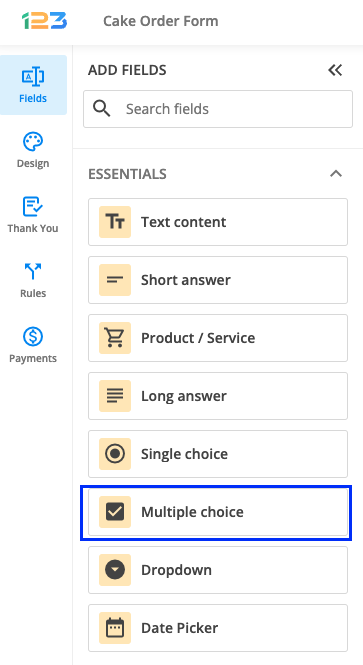
To distinguish these two fields look at the symbol next to the options. Single choice fields are represented by circles, while Multiple choice fields are by squares.
The Dropdown field saves a lot of space and is suitable for a large list of choices. Enable the searchable option to help users find the option they are looking for.
If you’ve added a choice field to your form but later decide it would work better as a different type, no problem! You can easily switch between choice fields without needing to start over.
To make the switch, click on your choice field and select the new field type from the dropdown menu on the right-side panel. Your choices will automatically transfer to the new format.

Important Note
Switching between field types after your form has collected submissions will delete the data associated with that field. To avoid losing any data, you can duplicate the field and convert the duplicate to the desired field type, then hide the original field.Other fields
You can add an image, video, or PDF file to your form by using Embed image, Embed video, or Embed PDF fields.

Create a multi-page form by placing New page/Page break fields. Divide your forms into sections and this way, users will not be intimidated by endless forms.
You can offer your respondents the possibility of uploading a file or an image by using the File/Image upload field. Use the Link field if you need to receive a correct URL from your respondents. You can even ask for signatures directly on the form if you add the Signature field.
In case you need to collect consent/agreement from your respondents, you can add the Terms of service field on your form or the GDPR Agreement field.

Lastly, if you can not find a field you are interested in at a quick glance, you can always try the search function.
Related articles
Most Popular
Frequently Asked Questions
Here is a list of the most frequently asked questions. For more FAQs, please browse through the FAQs page.