123FormBuilder Knowledge Base
Search our documentation platform for answers, service specifications and 3rd-party integrations.
How to create a contact form with 123FormBuilder as easy as 1-2-3!
If you’re looking for a guide on how to create a contact form for your website, consider reading this documentation.
123FormBuilder is a professional web form builder that not only creates user-friendly contact forms but also covers them with many features that you might find useful. Know that you can build a contact form with the forever free plan (Basic), while the paid plans enable more advanced features for your contact form.
To create a contact form, sign up for the 123FormBuilder service and follow the steps below:
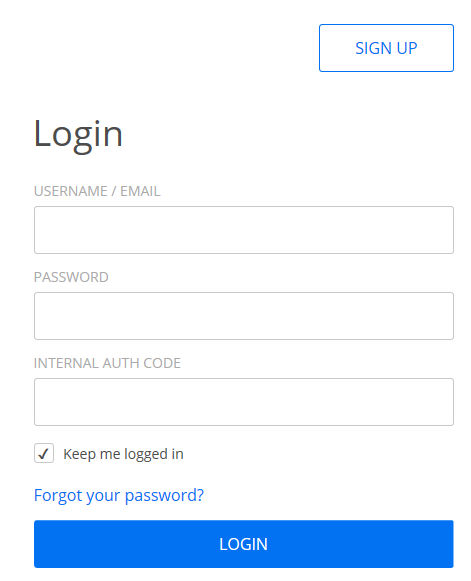
Sign up or log in to 123FormBuilder with your account credentials. If you’ve just signed up, you’re already logged in. If you already have an account, enter your username and password on the login page.
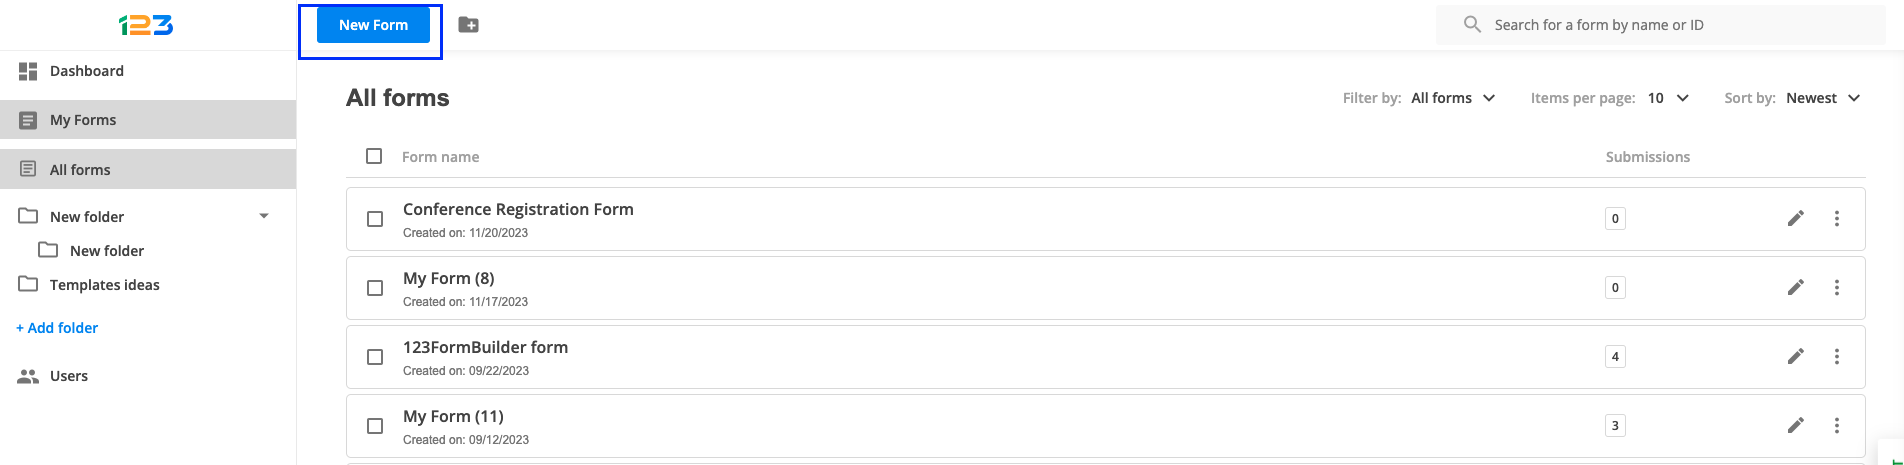
Click New Form on the top right side of your dashboard.
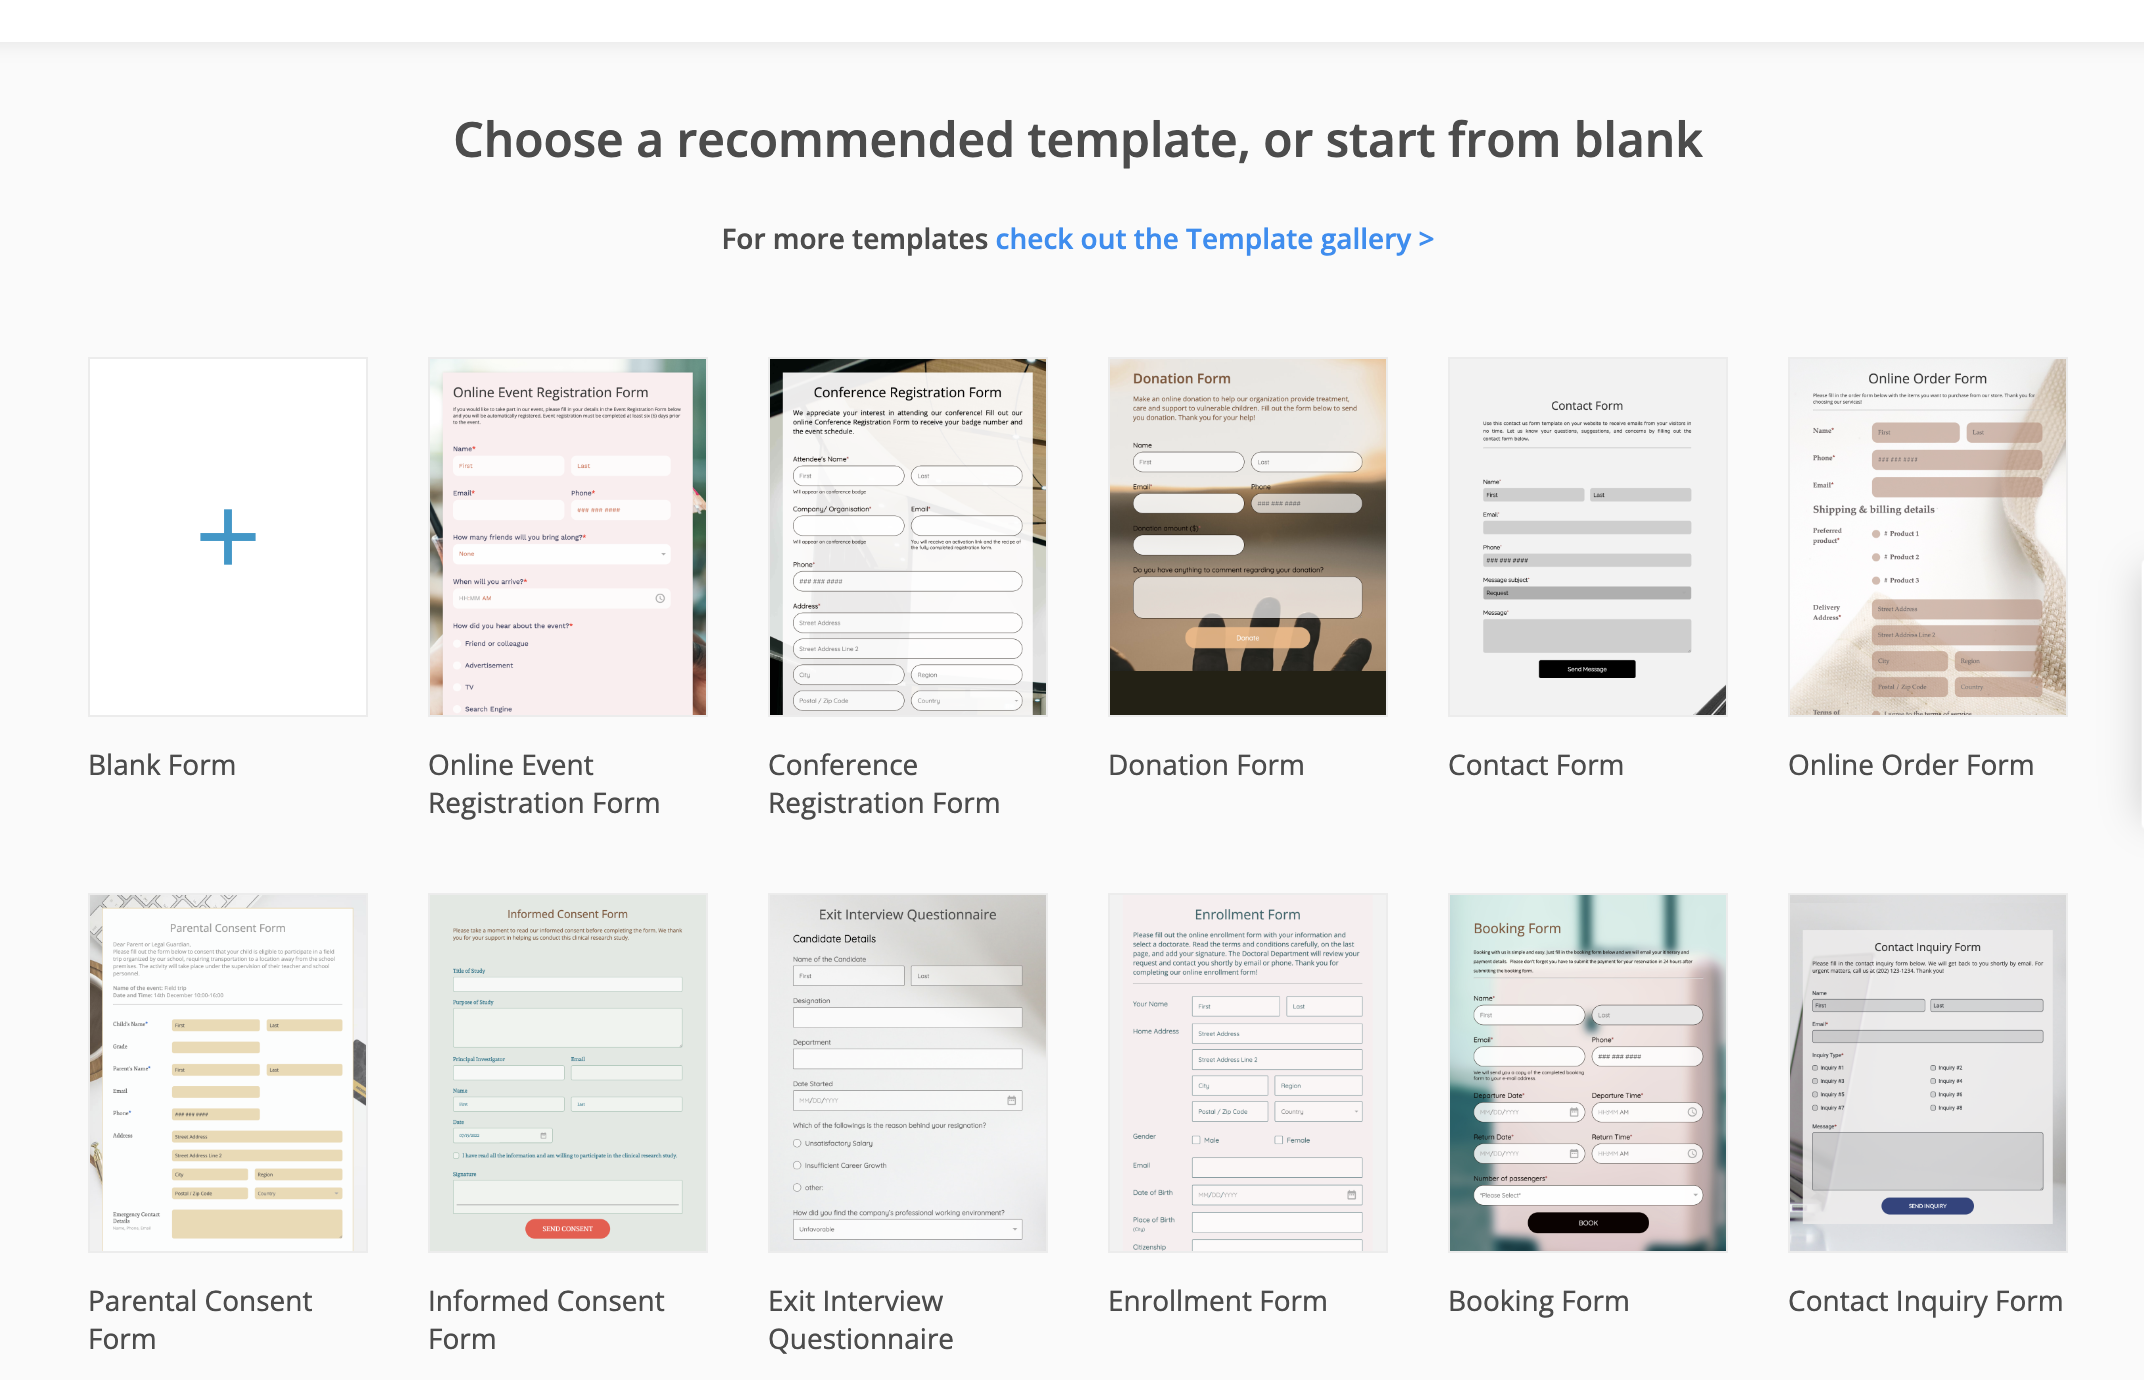
You can select a form template or you can create the form from scratch. If that is the case, select Blank Form.
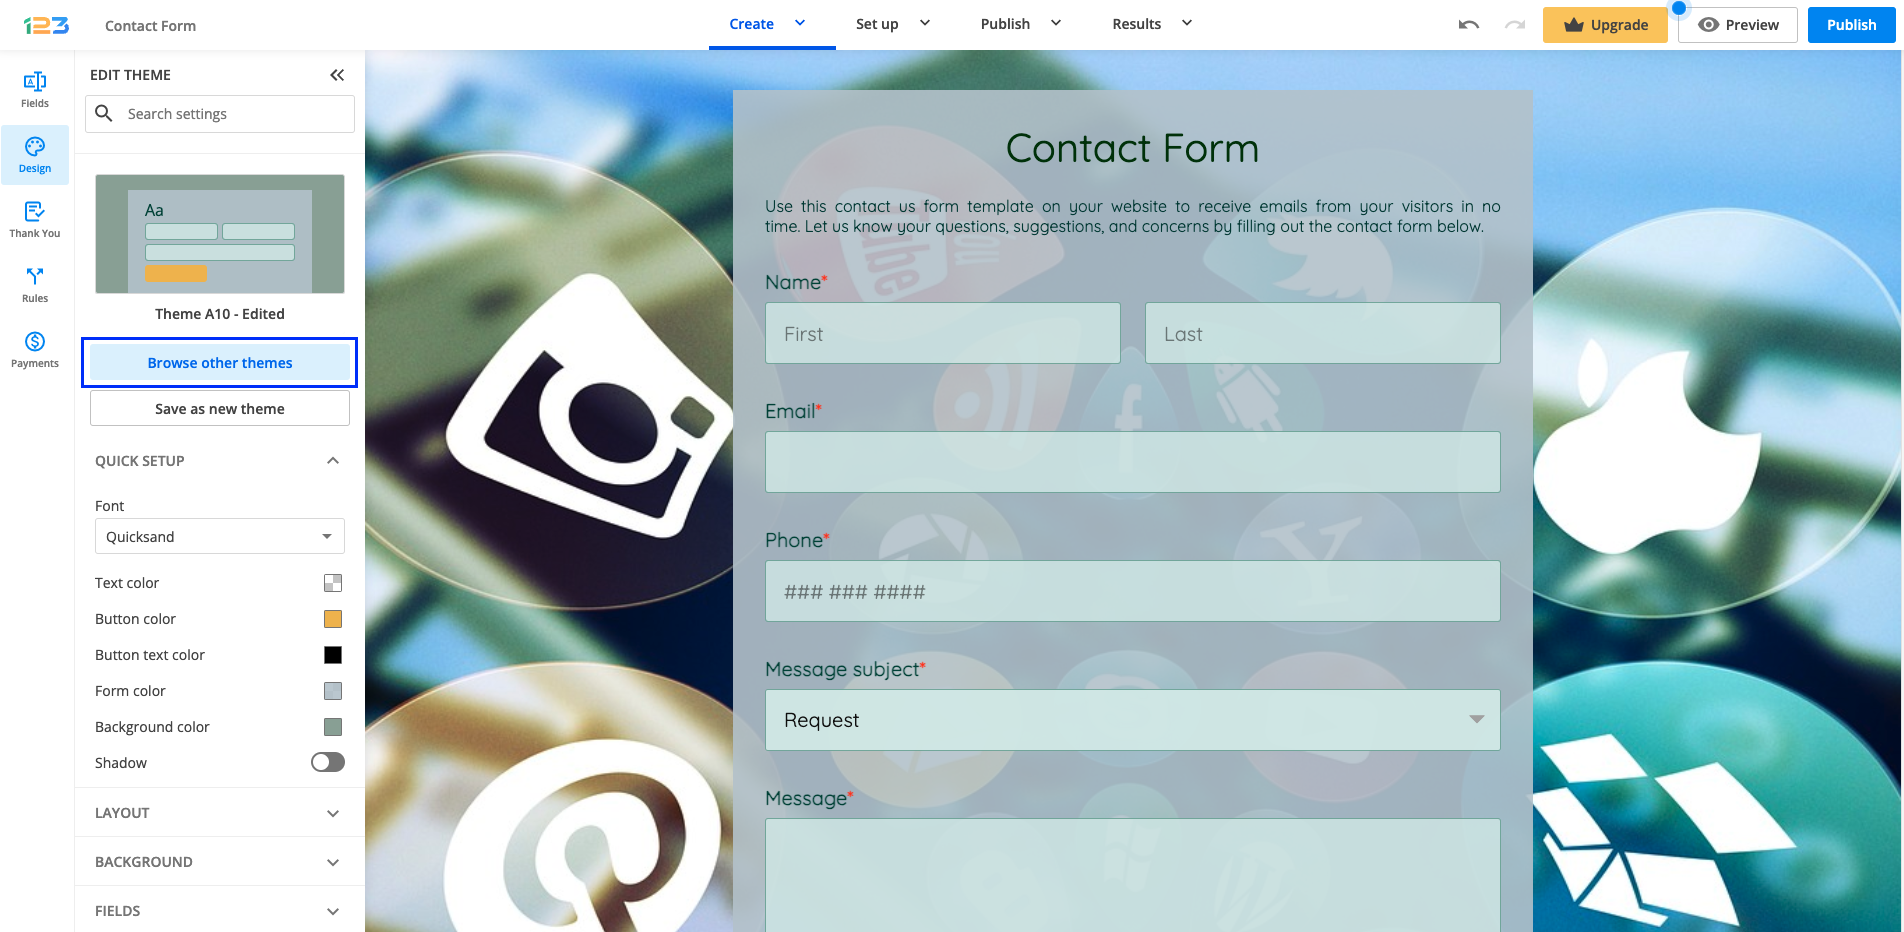
You are now in the Form Editor, where you can adjust the form fields and form layout (if you’ve selected a form template), or add your fields on the form.
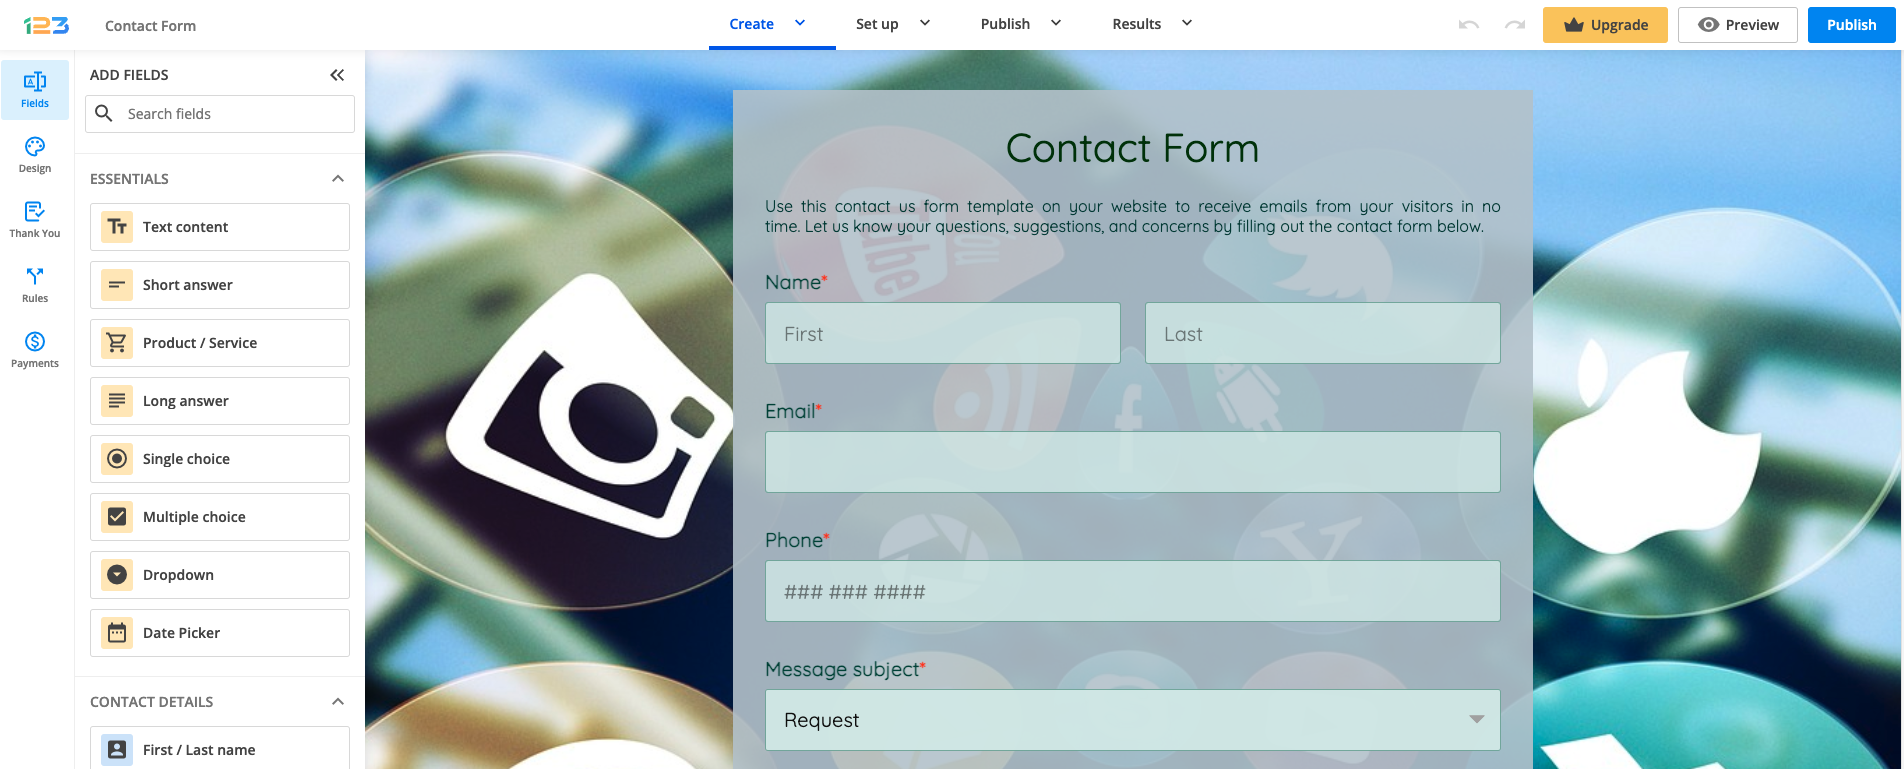
There are multiple types of fields, categorized based on different sections: Essentials, Contact details, Media & Structure, Uploads & Consent, Date & Time, Rating scales, Calculations, Payments.
To add a field on the form, select it and drag it to the layout. Hold the click on the field while placing it on the form. You can drag and drop the fields that are already included in the form layout if you want to change the order in which they appear. By hovering on the sides of the fields, you can adjust the layout and design of the form. You can also add multiple fields on one row and adjust their sizes.
You may also change the design of the form by clicking on the Design button from the left-side panel.
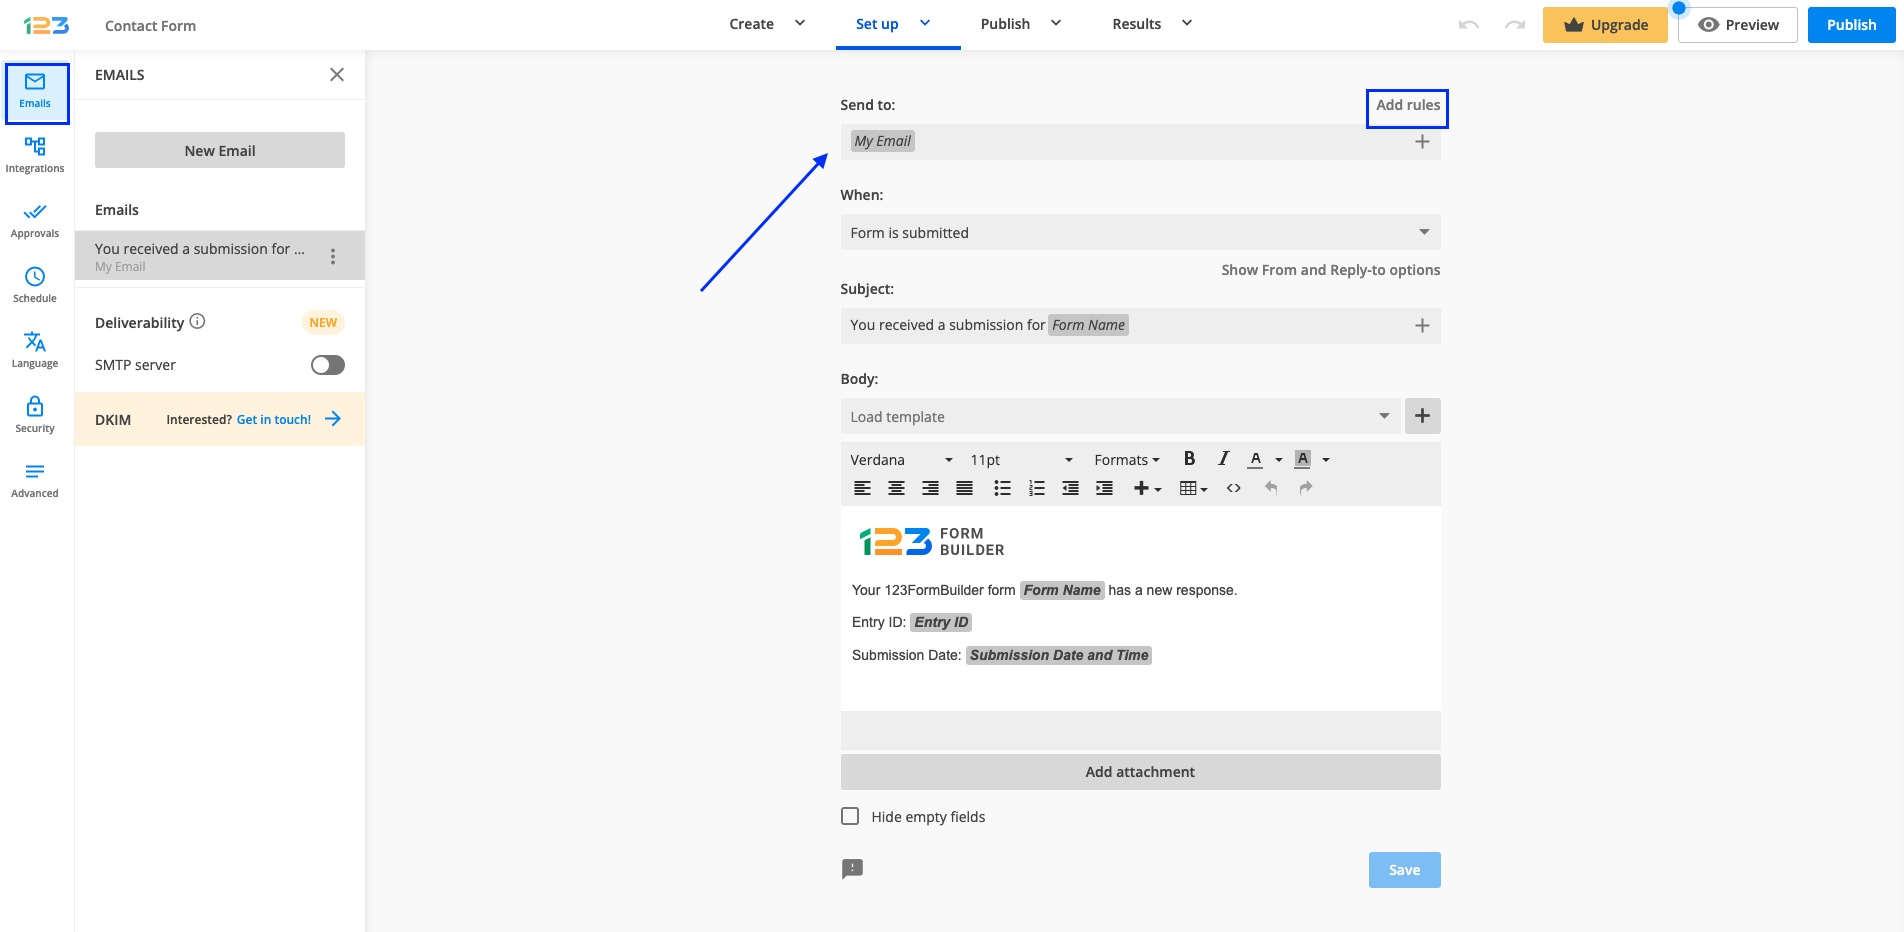
When you are done creating and designing the form, there are multiple other settings you can enable. However, in this article, we are going to set up the email notification that we receive after the contact form is submitted.
To start, select the Emails button from the left-side panel in your form editor. The email address associated with the 123FormBuilder account is automatically the recipient of the email notifications for each form created (My Email variable). You may change this by hovering over the email variable and clicking it to remove it. You can also add new recipients by using the plus sign button and creating branches based on certain conditions (Add rules).
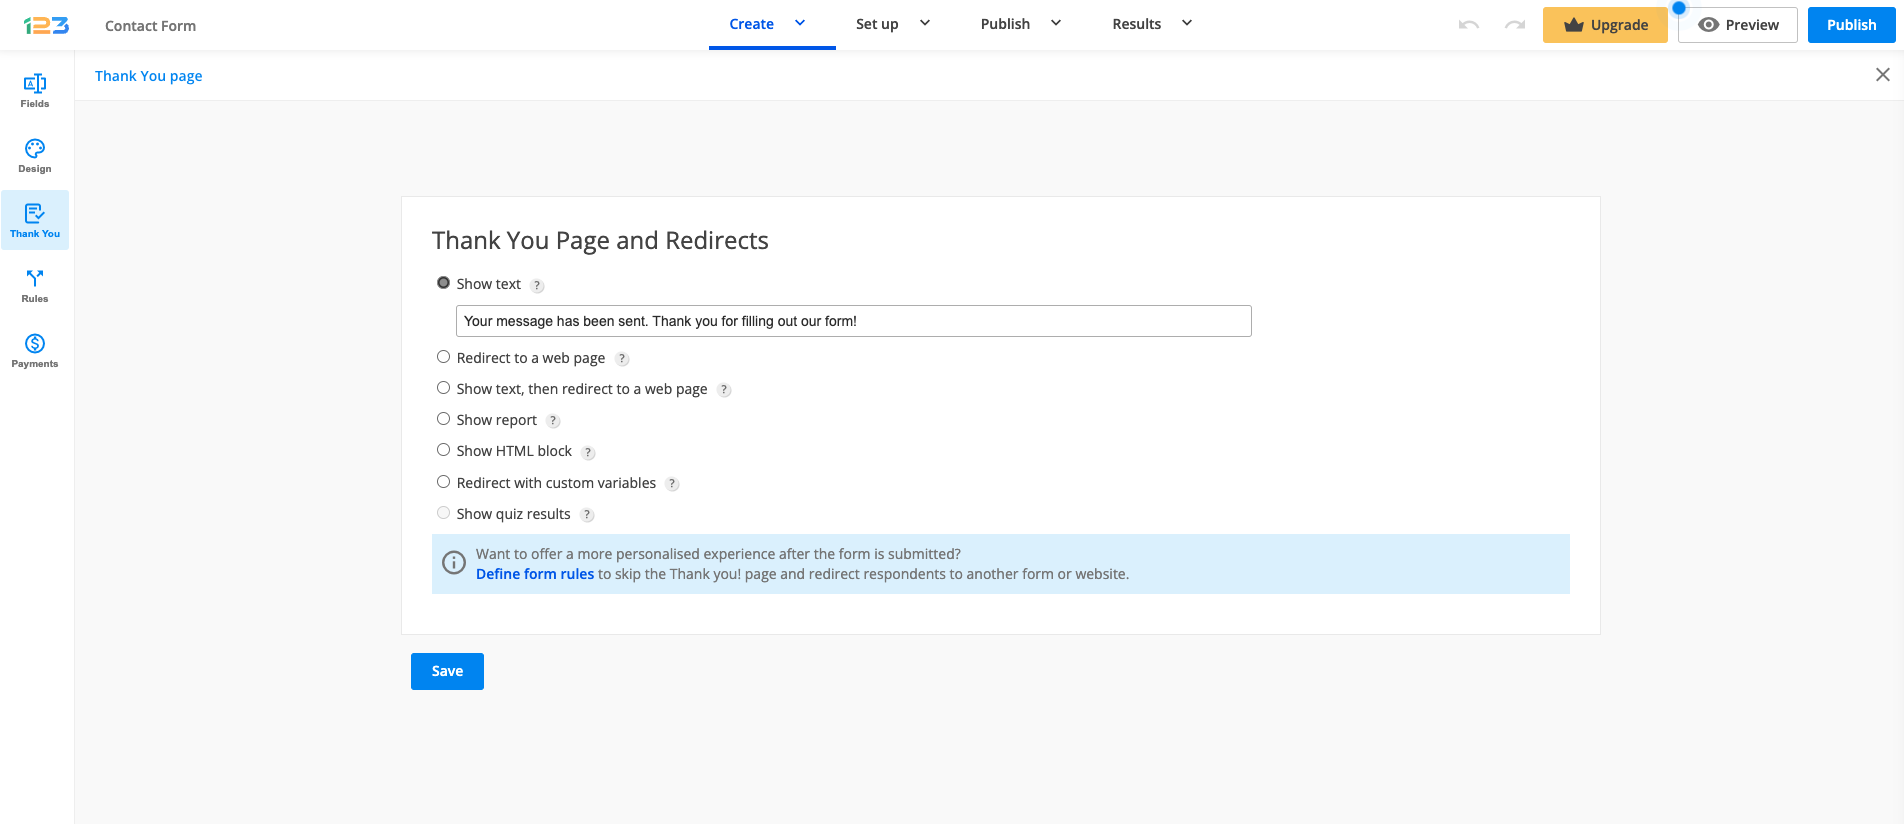
In the Thank you page section, select what should appear after the user submits the form.
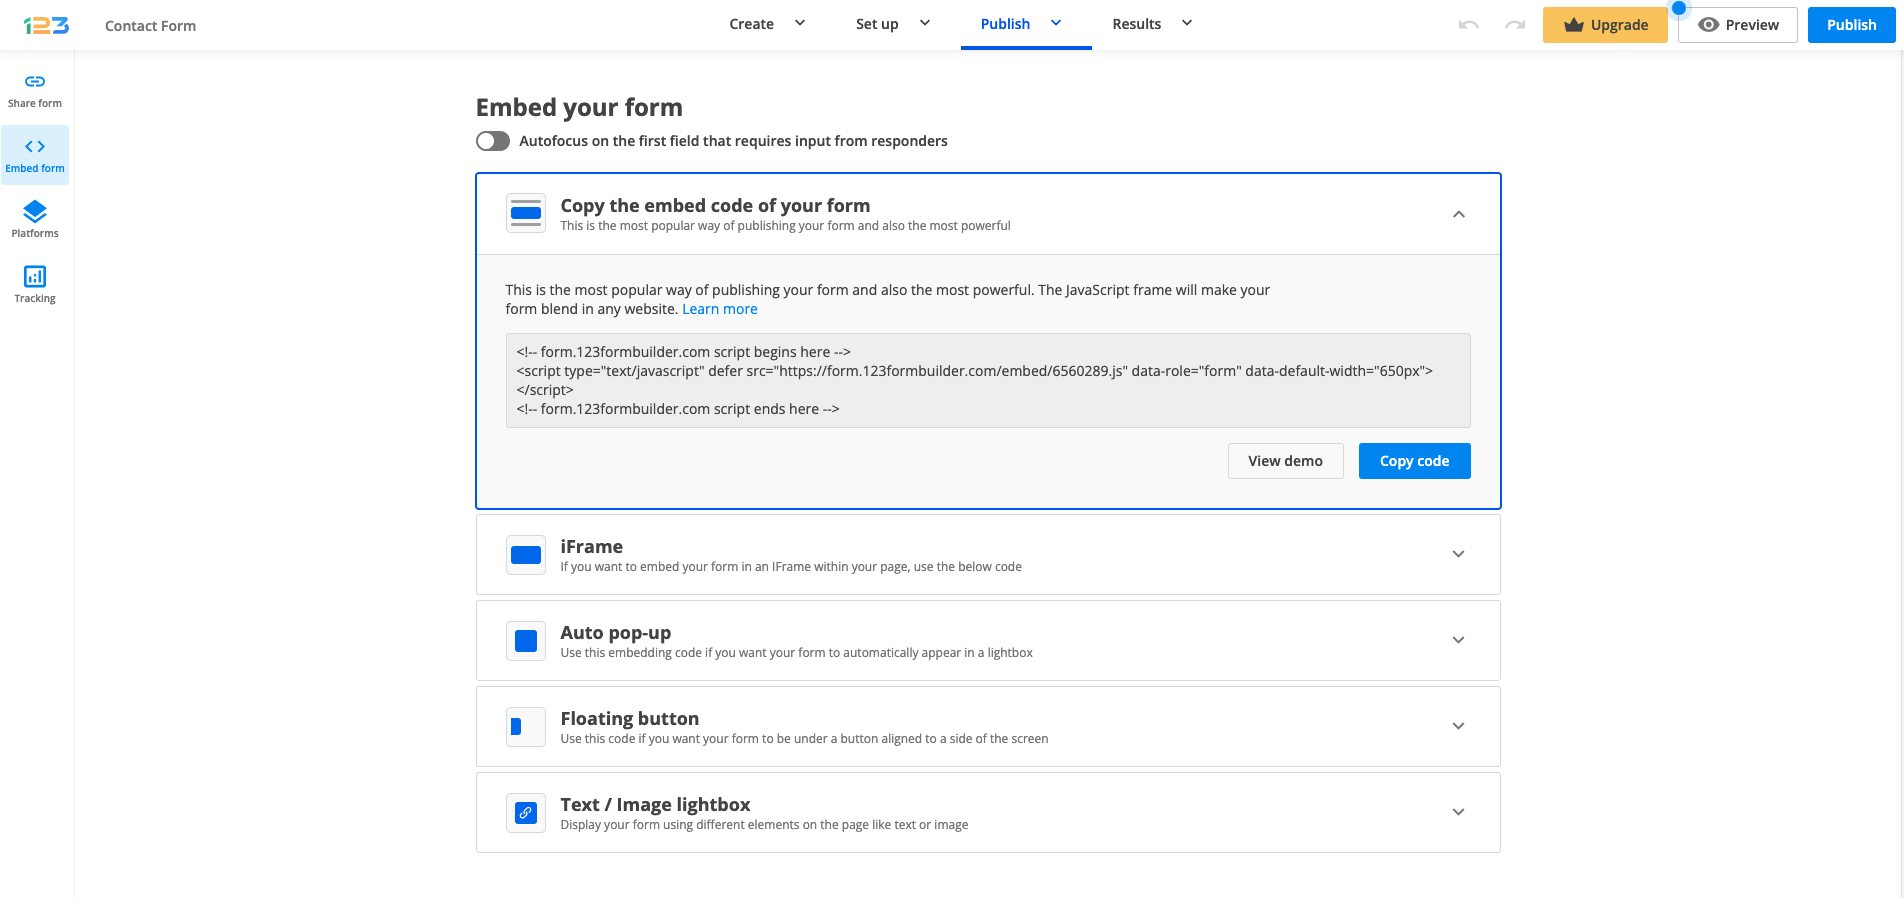
Finally, hit the Publish button to get the publishing code. 123FormBuilder provides many publishing options to choose from, but let’s assume we’re going to use the Javascript embed code.
In Publish, click on Embed form and select copy the first code – Javascript code.
And there you have it!
A great contact form that will allow your audience to communicate with you fast and easily. And as you’ve seen, no coding skills were needed. If you want to build more advanced forms, feel free to browse around your account and create new forms.
8 comments
Leave a Reply
Similar Articles
Frequently Asked Questions
Here is a list of the most frequently asked questions. For more FAQs, please browse through the FAQs page.
super information
How much & what’s the difference to the Upgraded & regular software. What makes upgraded better than normal? I ask bc I’m looking for software for a privately owned construction co. Thanks
Hi Aimee! This depends on which features you need on your account/forms. Check out our Features Matrix to see each plan’s price and details.
wow very nice platform
Thank you for taking the time to share your experience with us!
Why is there no option to create an “Click Here to Apply” button? Having the code in our ad seems confusing to our applicants.
Hello Randy,
Our sincere apologies for the delayed reply. Please go to the Publish section of your form -> Embed Code -> Link to Form -> Image or Text. There you can add your own text or add an image for the button.
Thank you!
Very Interesting. This is what I needed. I was in touch with George of your company already. He has the scope of what I need.