123FormBuilder Knowledge Base
Search our documentation platform for answers, service specifications and 3rd-party integrations.
How to create a double opt-in flow using approvals
You can create a double opt-in flow using Approvals in order to verify if the submitted data is correct and/or confirm respondent’s identity. In this way, you can make sure that the respondents submitted the information themselves and weren’t impersonated by someone else.
After the form is submitted, respondents will receive a copy of the submission on email and will be asked to review & confirm the submission, by clicking on a link included in the email.
Use cases
The double opt-in flow can be used for:
a. forms collecting personal or sensitive information (e.g: information used for administrative, legal, financial or medical reasons)
b. lead generation forms, such as registration, sign-up & subscription forms
c. application forms
Benefits
a. this flow will allow you to get more done without the hassle of manual work.
b. you can have peace of mind that the collected data is correct, and that respondent’s identity & contact details are verified. In this way, you will no longer reach your respondents based on incorrect or incomplete data, and you will have insurance that they are not using fake email addresses or are not impersonated.
c. this will give more accountability for respondents; there will be less chances of changing their mind after the fact, which could mean less time wasted, even less refunds.
How to set up double opt-in flow
First thing would be to create the form that you need and make sure you collect the respondent’s email address using an Email field and make it required.
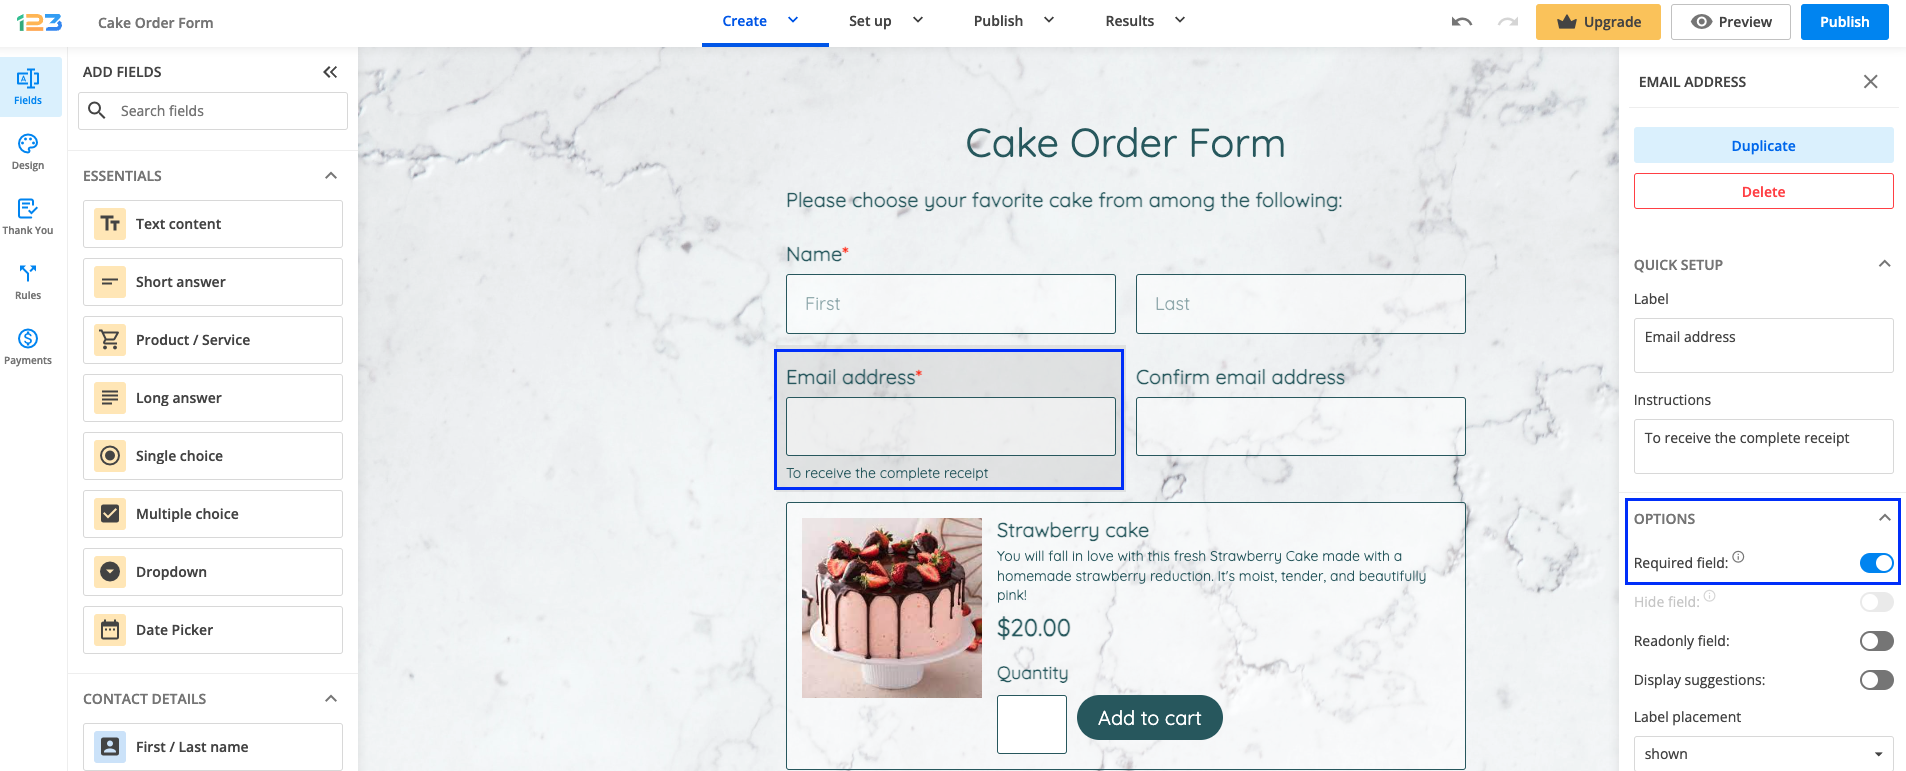
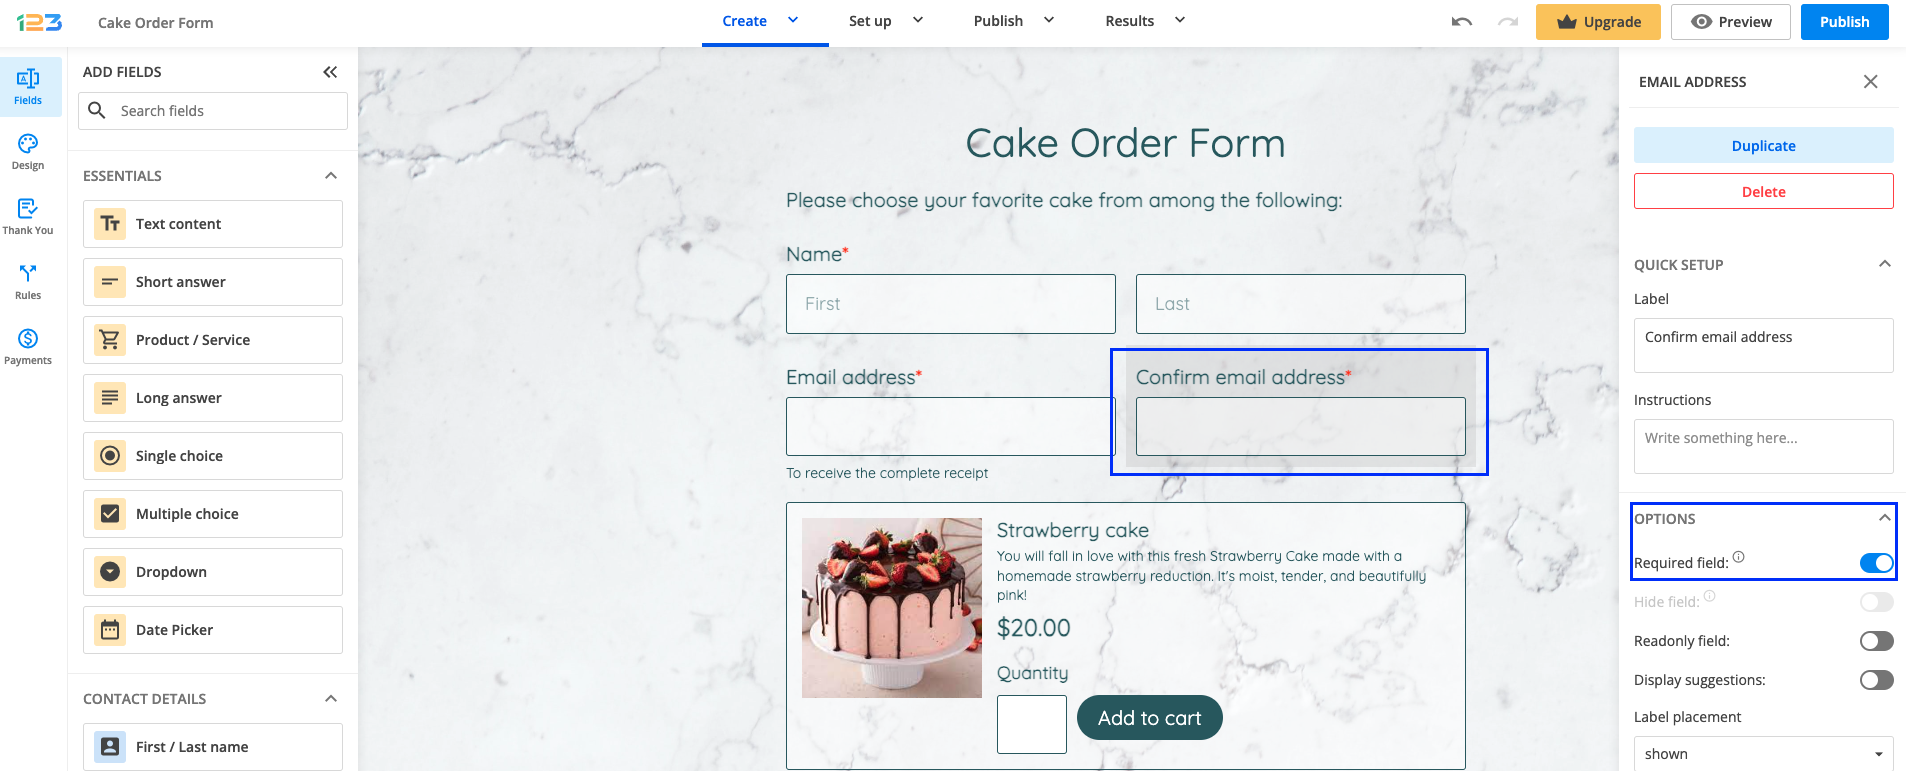
Tip: If you want to go the extra mile and ensure that there are no typos when respondents fill out their email addresses, you can ask them to confirm their email address by duplicating the Email field, and linking the second email field to the first use using the option Match another field value. Also, do not forget to make it required.
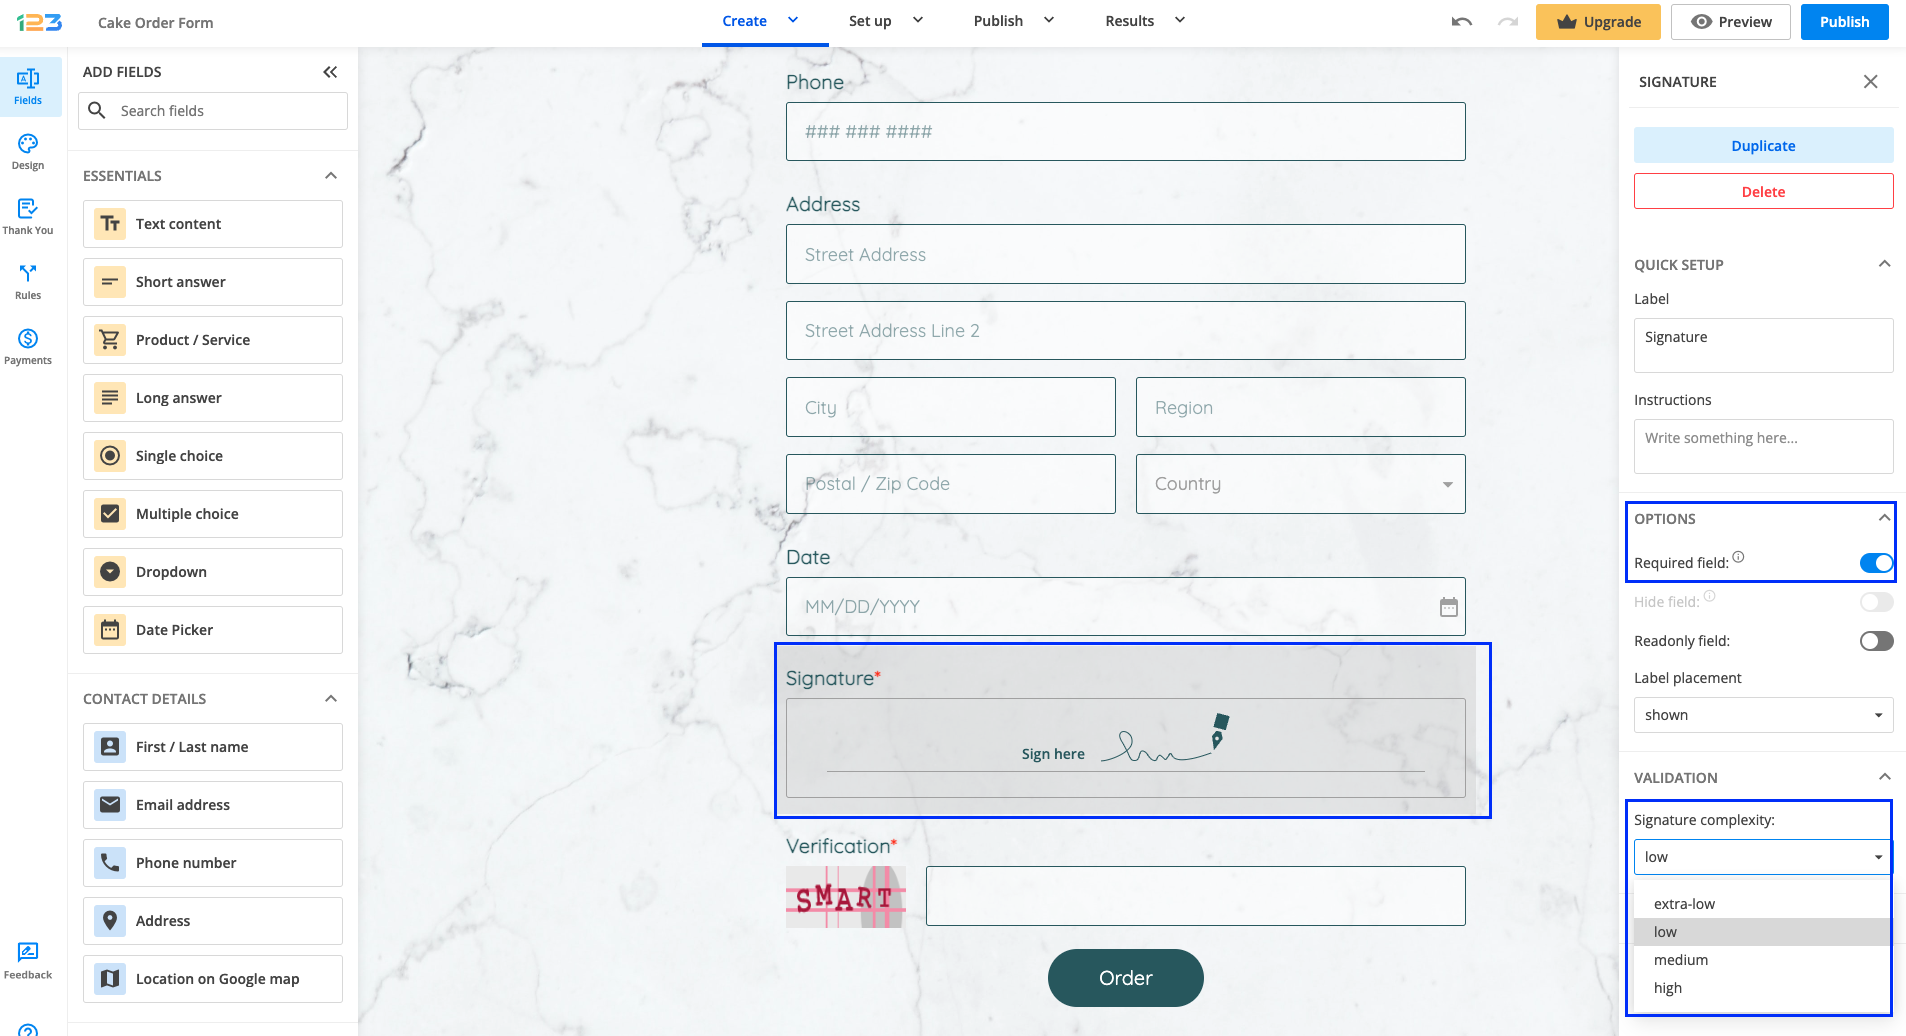
You can also add a Signature field at the end of the form and ask respondents to confirm that the filled-in data is correct.
Tip: if you want to ensure that respondents actually sign the form and avoid collecting simple doodles like dots or lines, increase the Signature complexity to medium or high, and don’t forget to make this field required as well.
The next step would be to go to Set up and visit the Approvals section. This will allow you to send out a confirmation email to respondents after the form is submitted and ask them to take action.
Tip: you might be tempted to use a simple email notification instead, but using Approvals feature will allow you not just to send out a custom email to your respondents, but also:
a. ask them to take action and confirm/cancel or edit their submission, directly from the received email
b. ensure that submissions remain in a pending state until you have the respondent’s confirmation or rejection in case they have changed their mind and cancelled their submission.
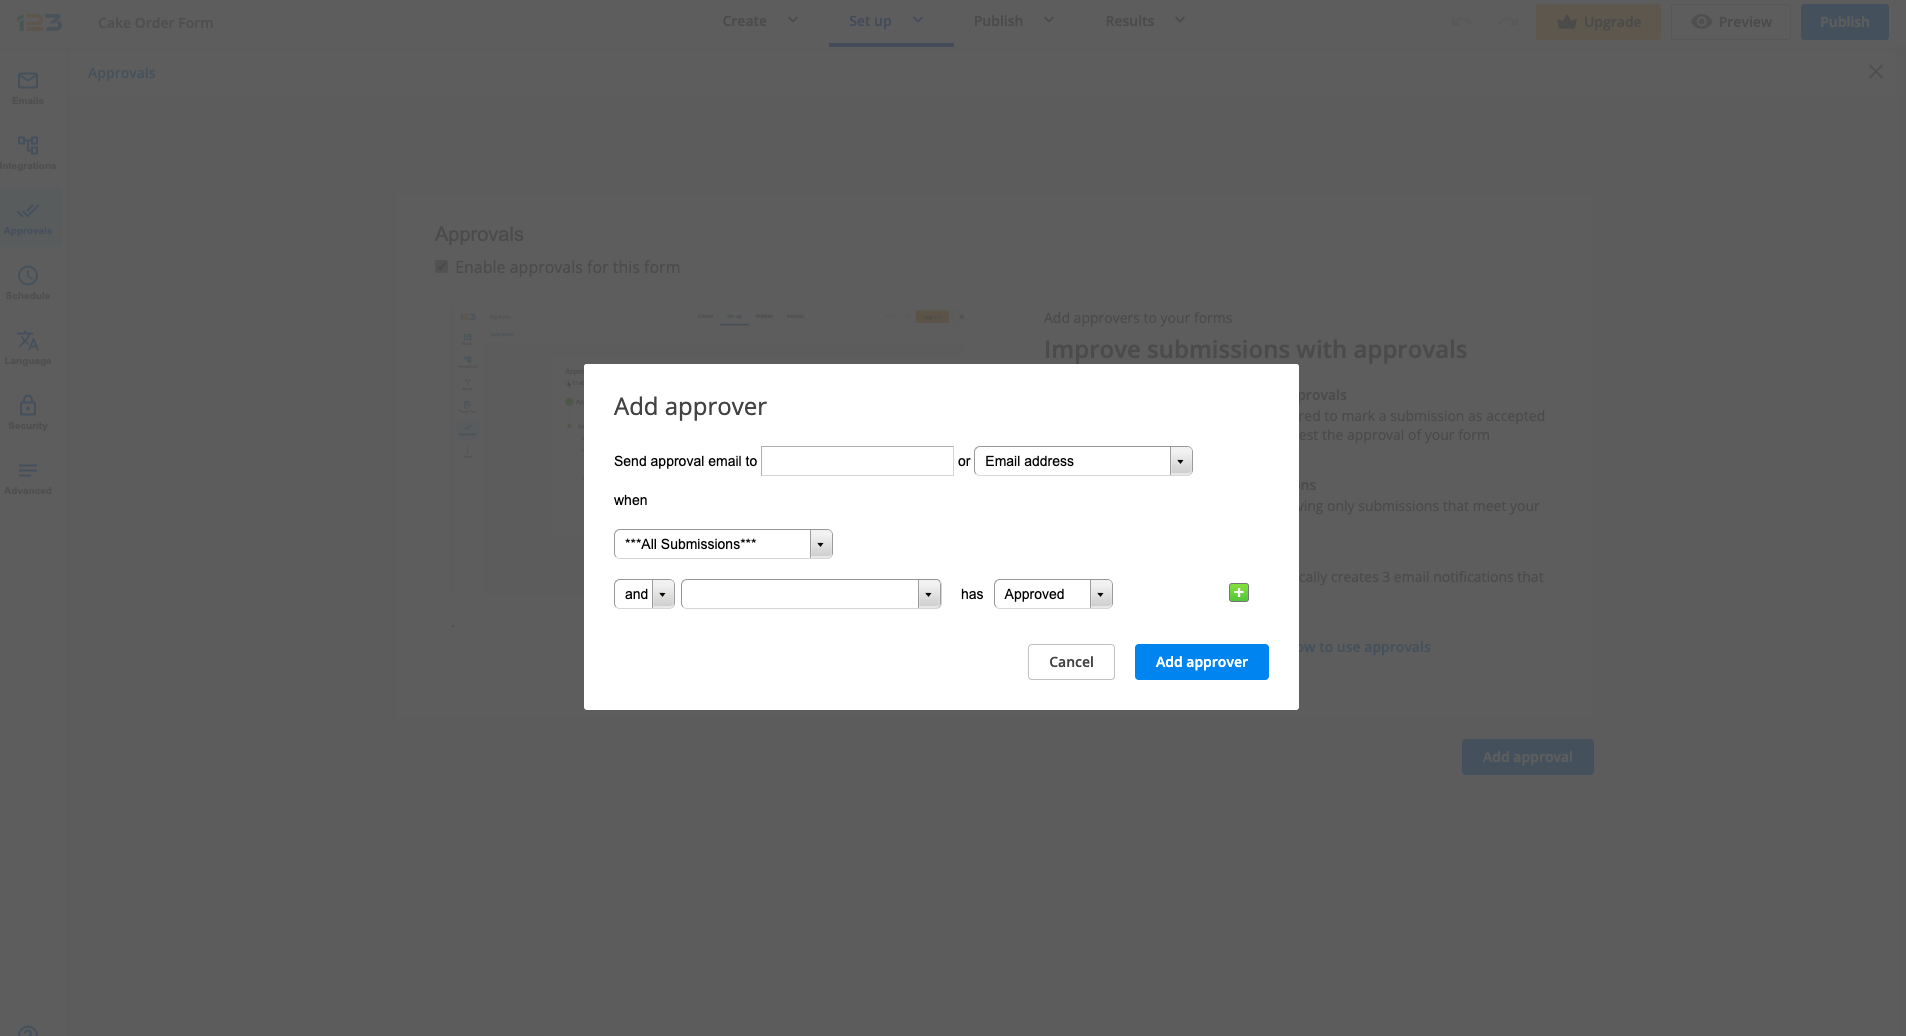
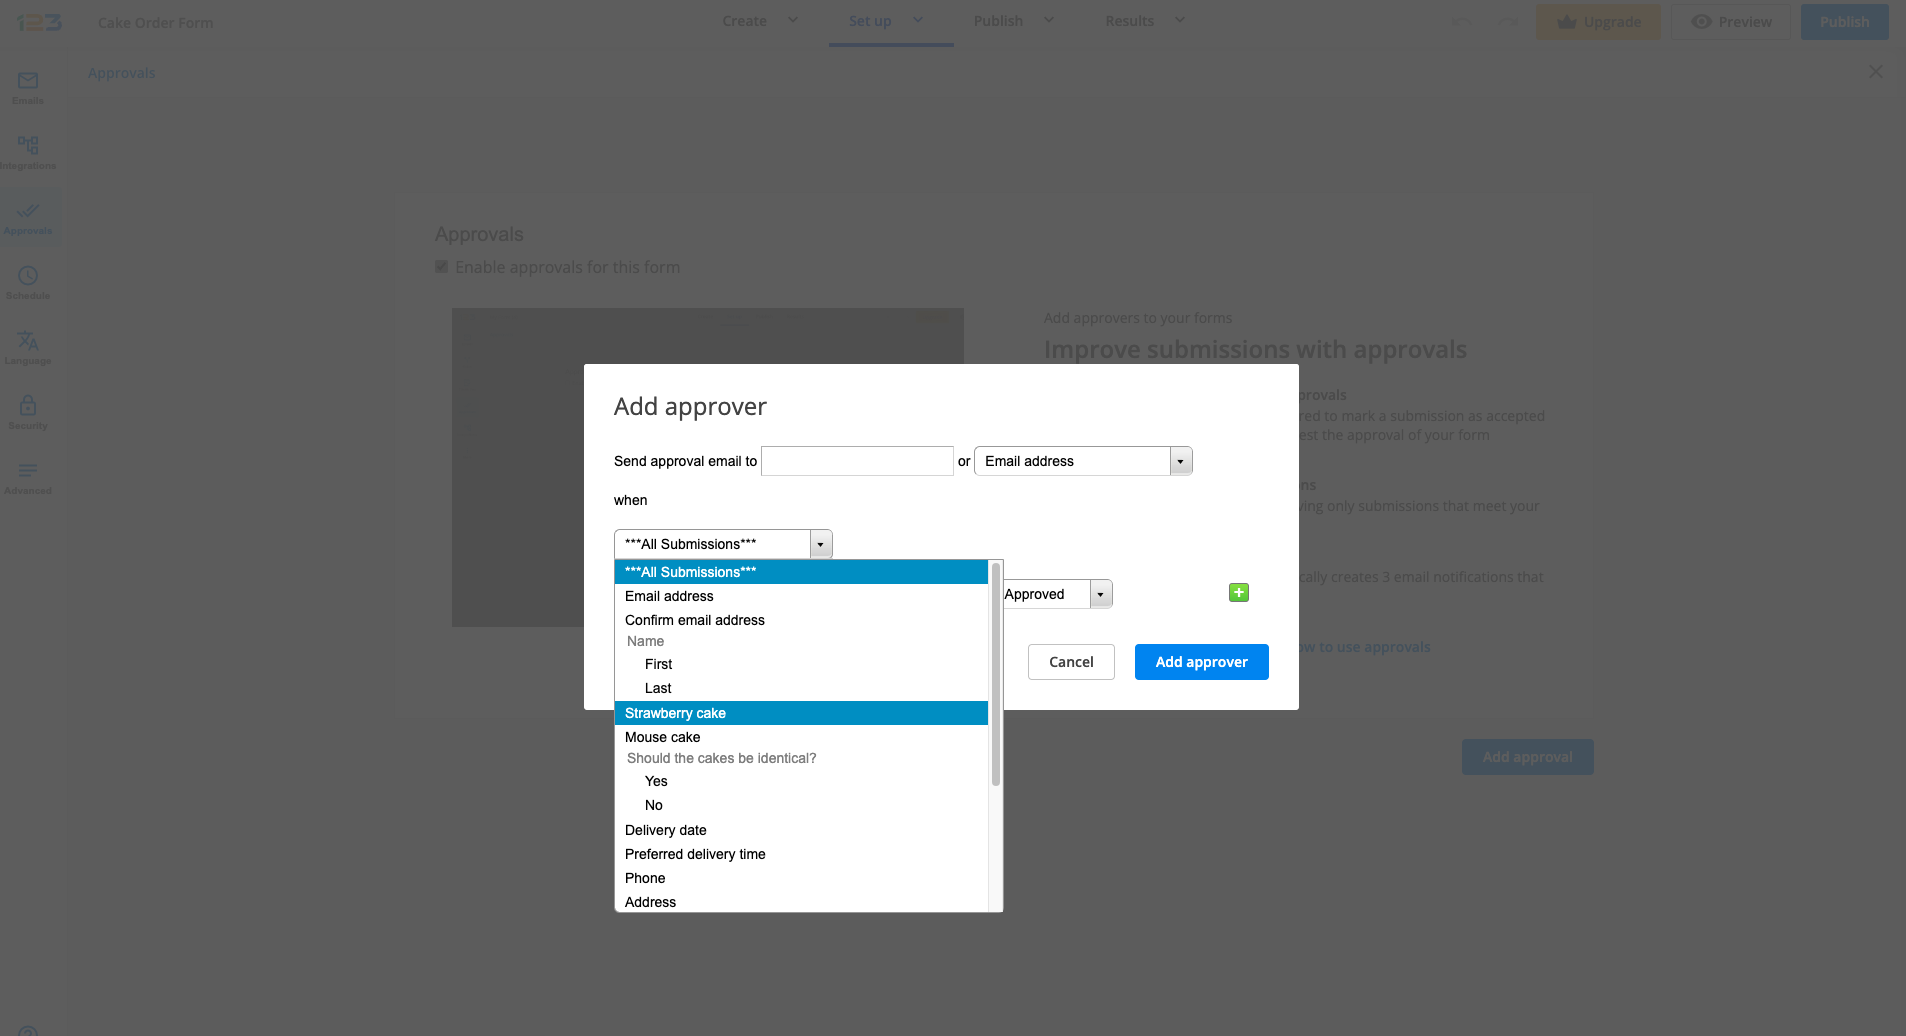
Start by clicking on the New Approver button in order to specify:
a. who should receive the confirmation email
b. when should the confirmation email be sent.
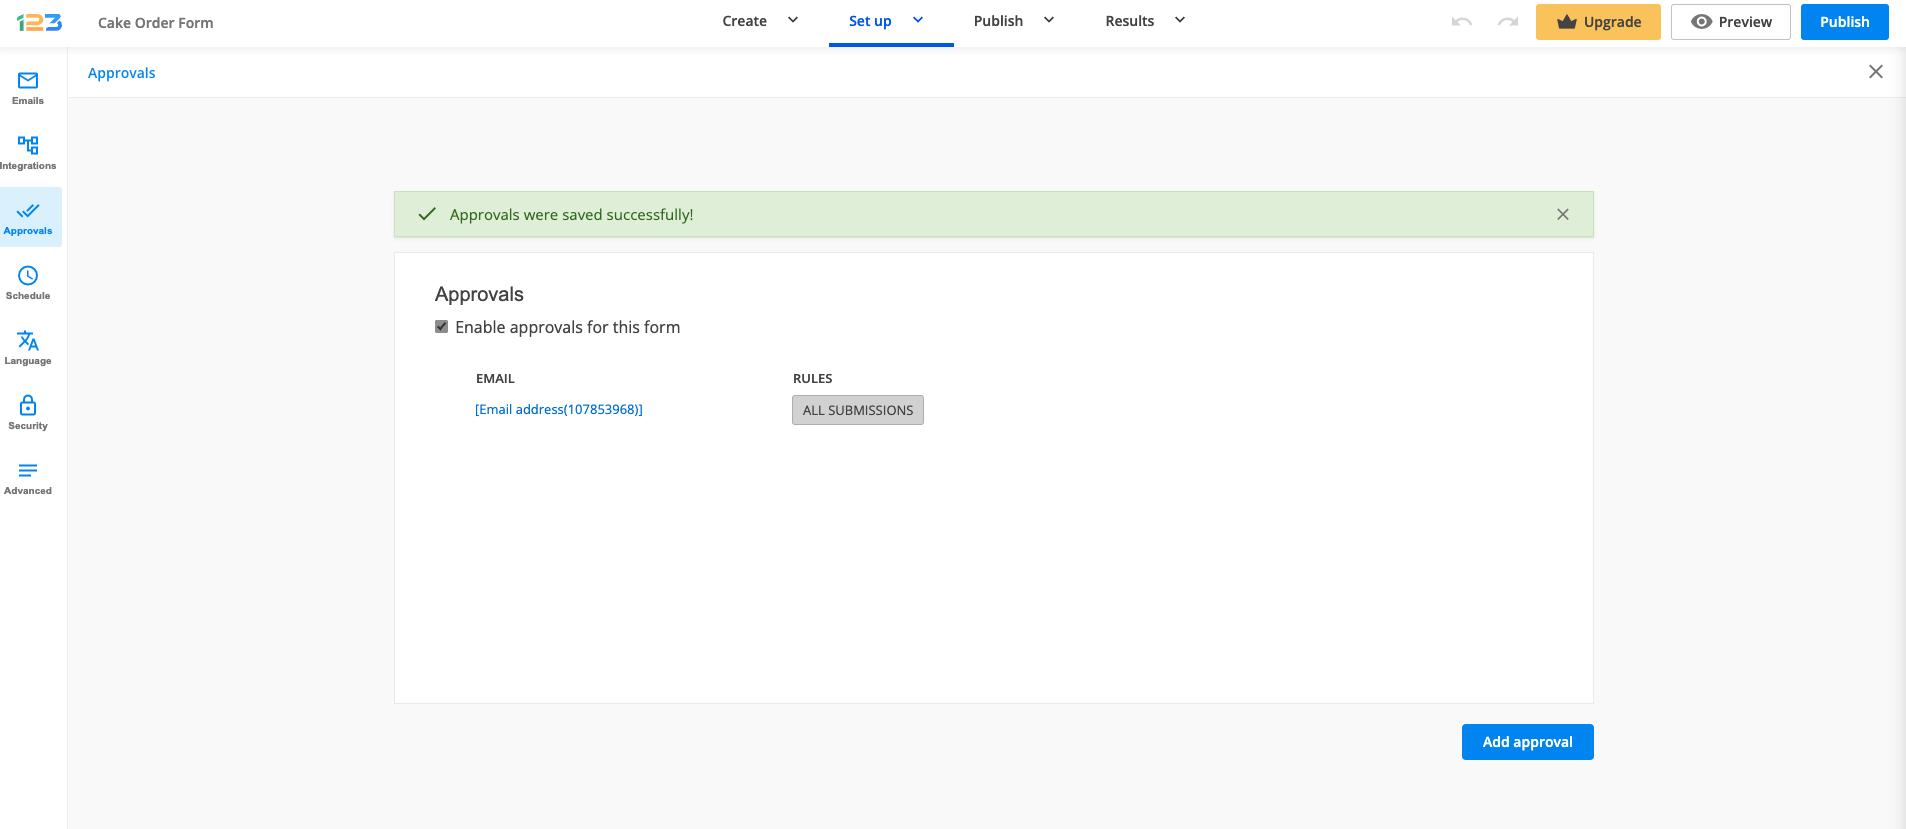
In the pop-up that opens, edit the first line called Send approval email to and select the email address field (through which you are collecting the respondent’s email address) using the dropdown displayed on the right. Go to the next line and make sure you select All submissions for when the approval email to be sent. For now, please disregard the options that appear after the and/or dropdown and go ahead and save the setup by clicking on Add approver.
Tip: If you need to apply another layer of filtering and disqualify specific submissions that don’t meet your criteria, you can choose to send the email confirmation to the respondent only if the submission contains specific information. For this, instead of selecting All submissions, select the fields that you want to review and create one or multiple conditional logic rules. These rules will allow you to customize specific “if this then that” scenarios, and ensure that the confirmation email is sent only when the submission data meets these conditions.
For example, in the below example, only if the Product 1 choice is checked, then an approval email is sent to the respondent’s email address.
After you add an approver, click on Enable approvals for this form. Once it is enabled, you will be invited to navigate to the Emails section, as three automatic emails have been created for you.
Once you have reached the Emails section, looking on the left side you will see a series of email templates. Let’s take them one by one.
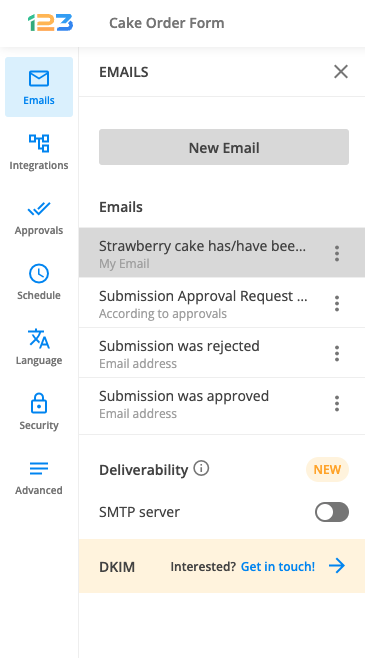
a. The 1st template called You received a submission for… is the email that you will receive as soon as the form is submitted (before respondents confirm or cancel the submission)
b. The 2nd template called Submission Approval Request for… is the confirmation email that will be sent to respondents once the form is submitted (based on the setup that you just defined in the Approvals section). More details will follow below.
c. The 3rd template called Submission was rejected is the message that will be sent to respondents and optionally yourself after the submission was canceled by respondents.
d. The 4th template called Submission was approved is the message that will be sent to respondents and optionally yourself after the submission was confirmed by respondents.
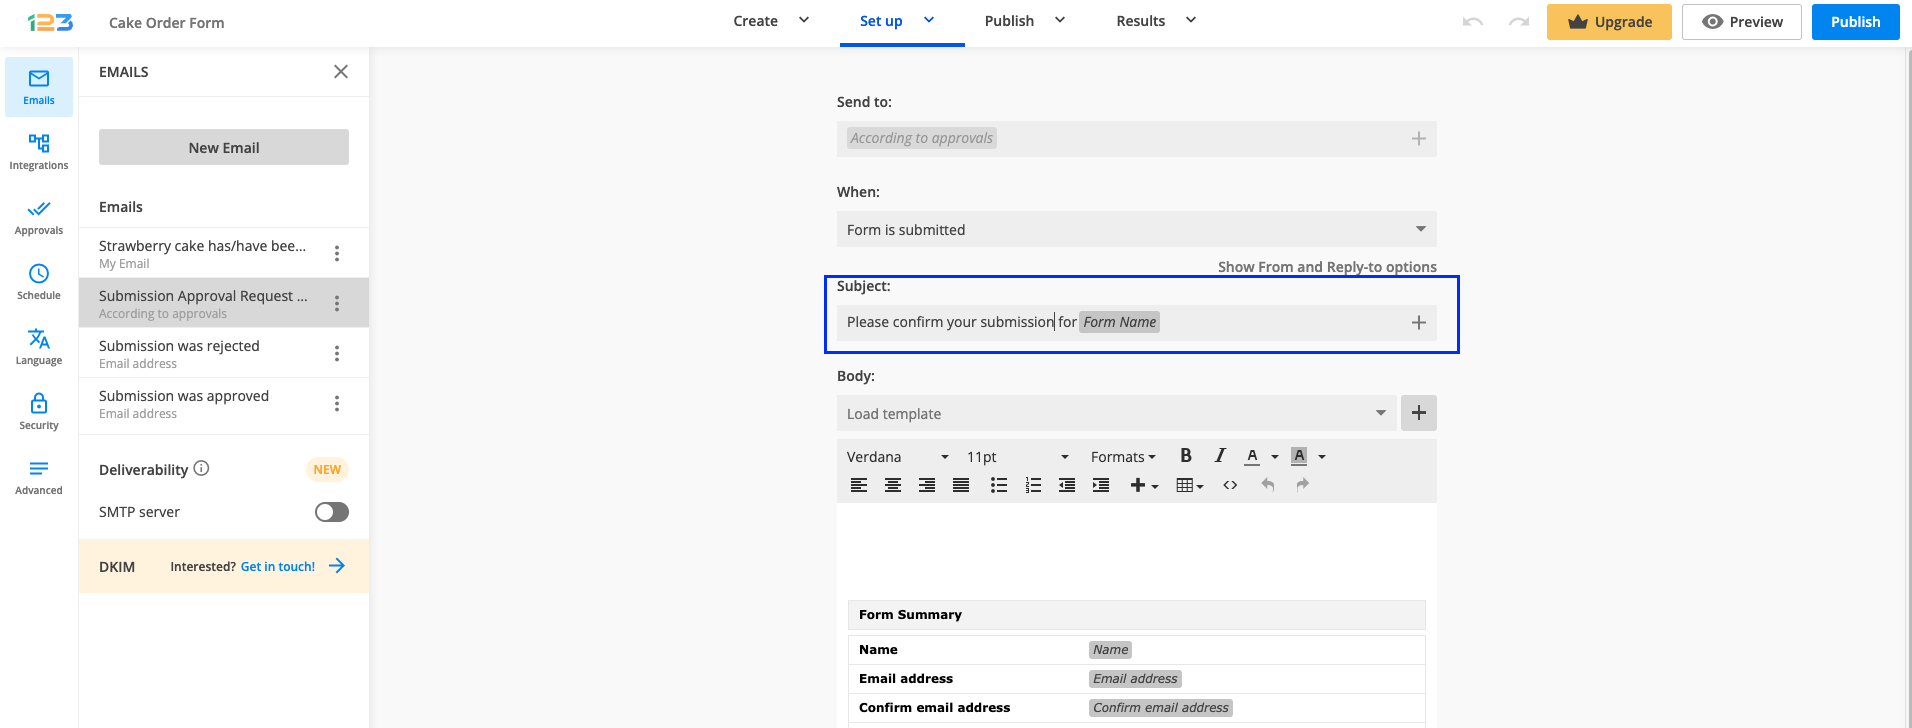
The 2nd template, Submission Approval Request for… is essential for the double opt-in flow, as this is the email that will be sent to respondents after they submit the form asking them to take action, review the submission and confirm/cancel it.
There are a few steps that you should take into account while customizing it:
a. Skip the send to & when options, as you already defined them inside the Approvals section.
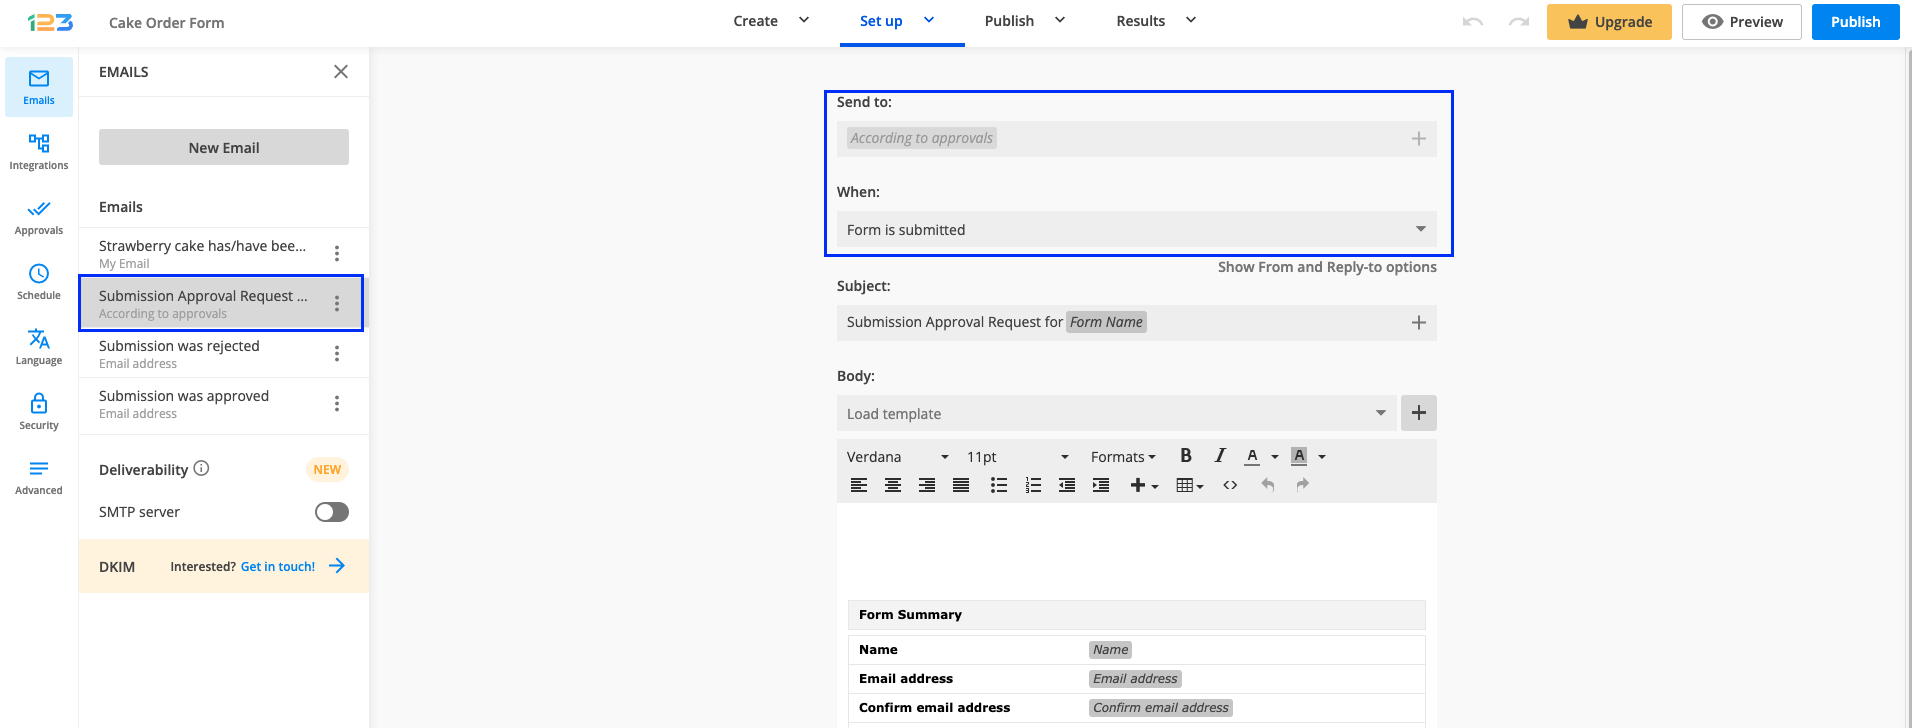
b. Edit the email subject, so respondents understand what the email refers to and the action that is required on their end.
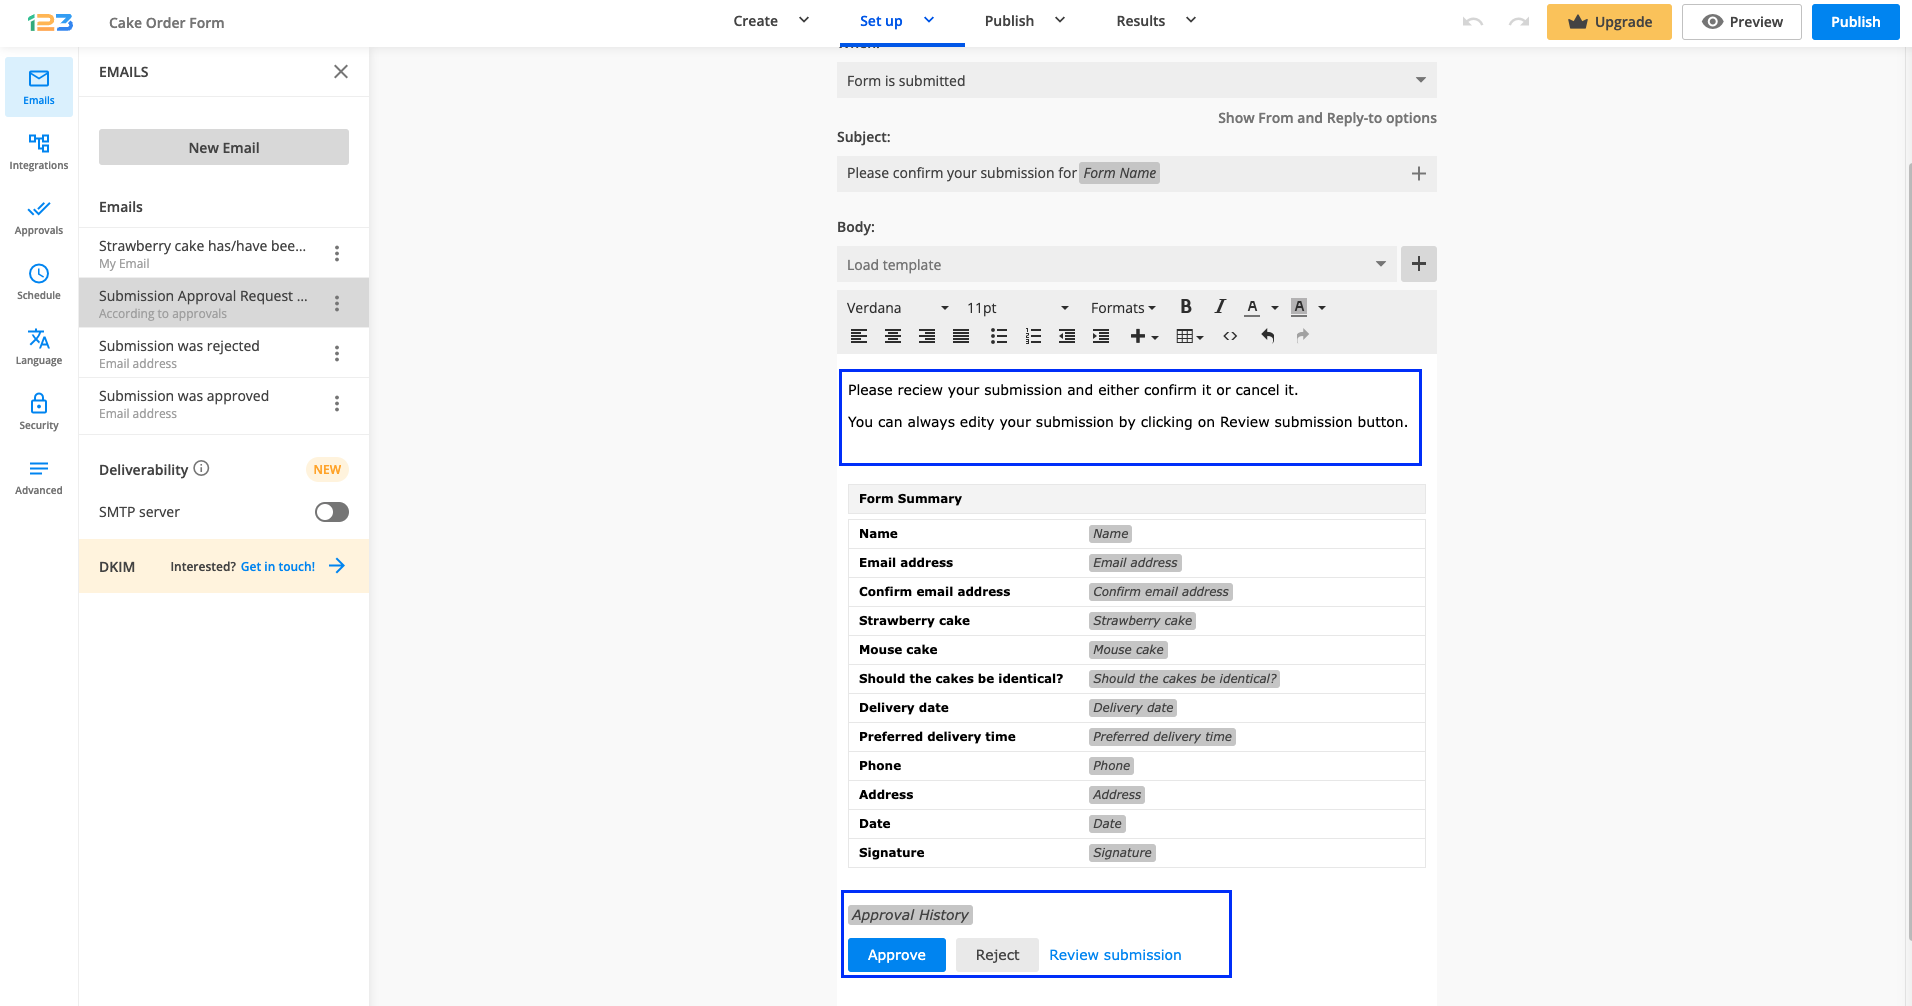
c. Customize the email body by:
– adding a suggestive message, so that respondents understand what is required of them and that the submission will be taken into account once it is confirmed
– keeping the form summary, so respondents can quickly review the submitted information directly by reading this message
– editing the button text displayed on the Approve button, so respondents understand that the call to action is to Confirm the submission
– editing the button text displayed on the Reject button, so respondents understand that the call to action is to Cancel the submission if they have changed their mind
– highlighting that they can edit the submission and complete missing details, fix typos or update information using the Review submission option.
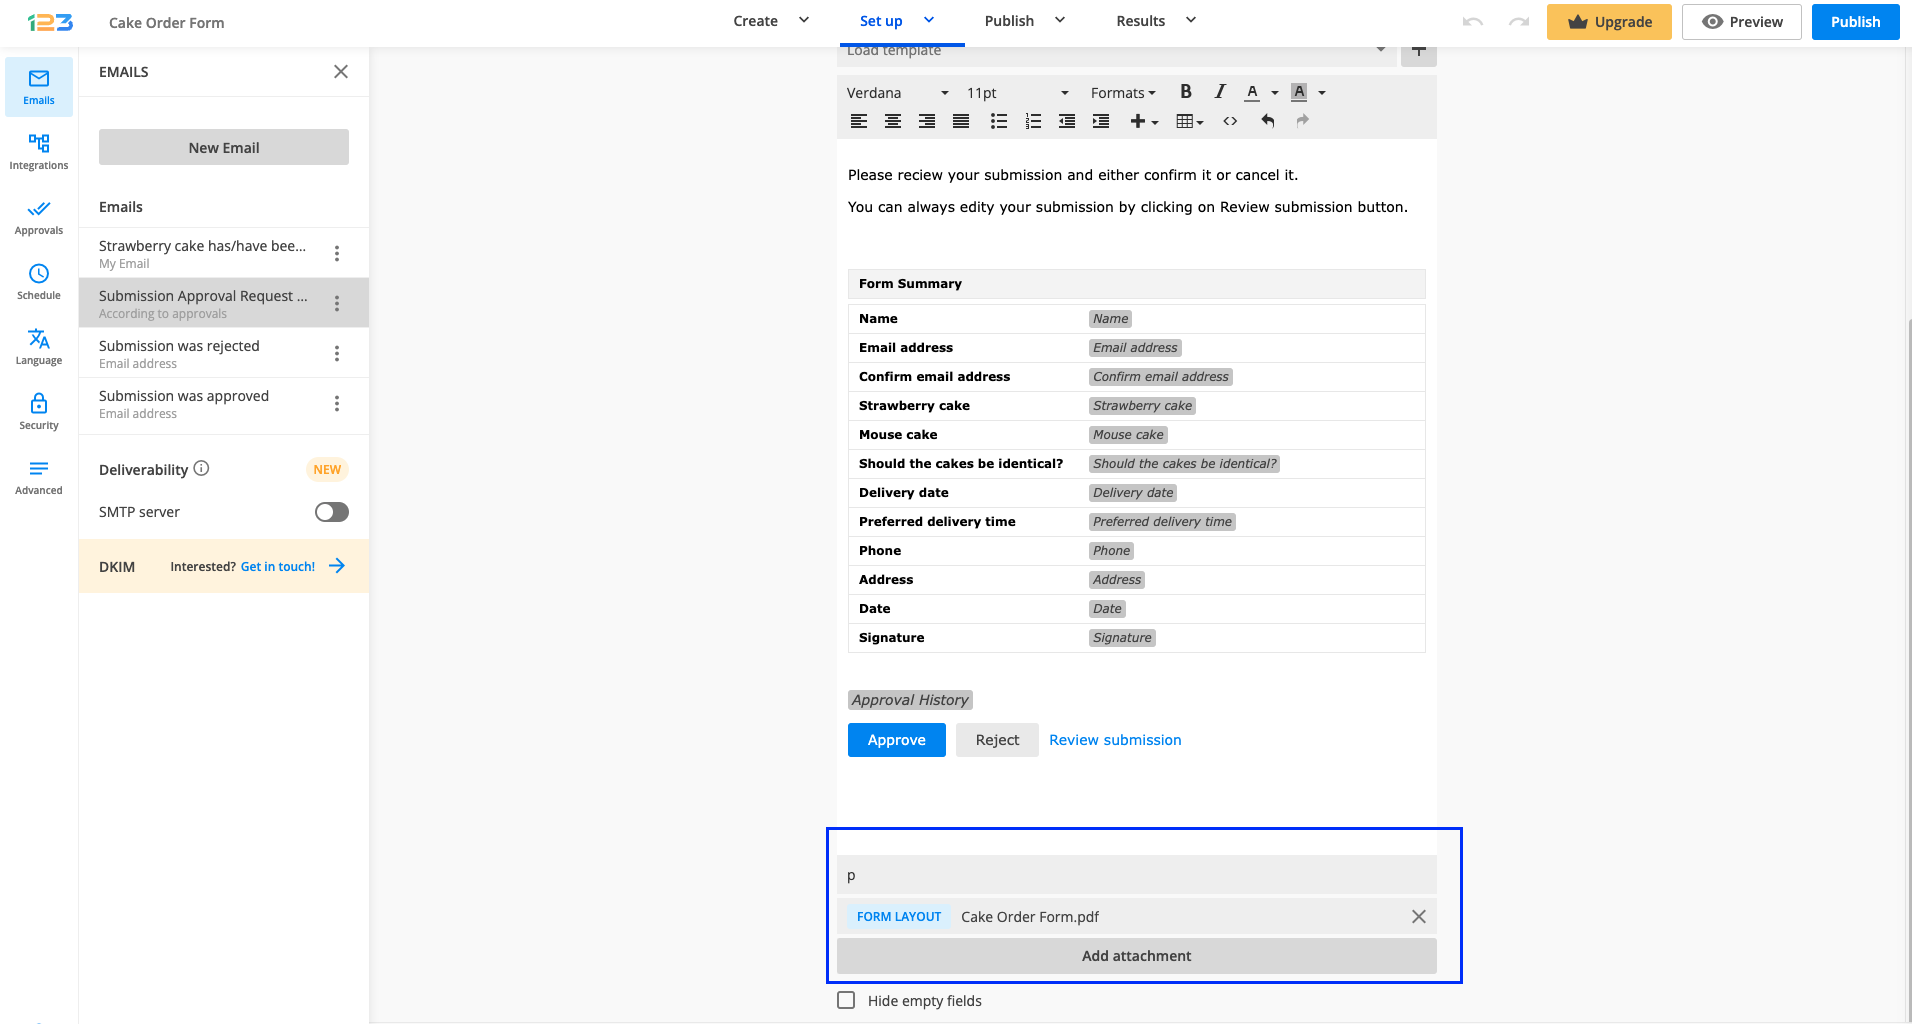
d. Consider attaching a copy of the submission as PDF. You can choose to attach a PDF that looks exactly as the form (Submission PDF using form layout) or one that looks more like a table, but that can be customized (Submission PDF).
d. Don’t forget to save the setup by clicking on Save button. You will also see an informative message that the email was saved.
As the last step, don’t forget to edit the Submission was rejected and Submission was approved templates and:
a. Add the email address field through which you collect the respondent’s email addresses as a recipient, and your email as well in case you want to be notified when the submission is confirmed/canceled.
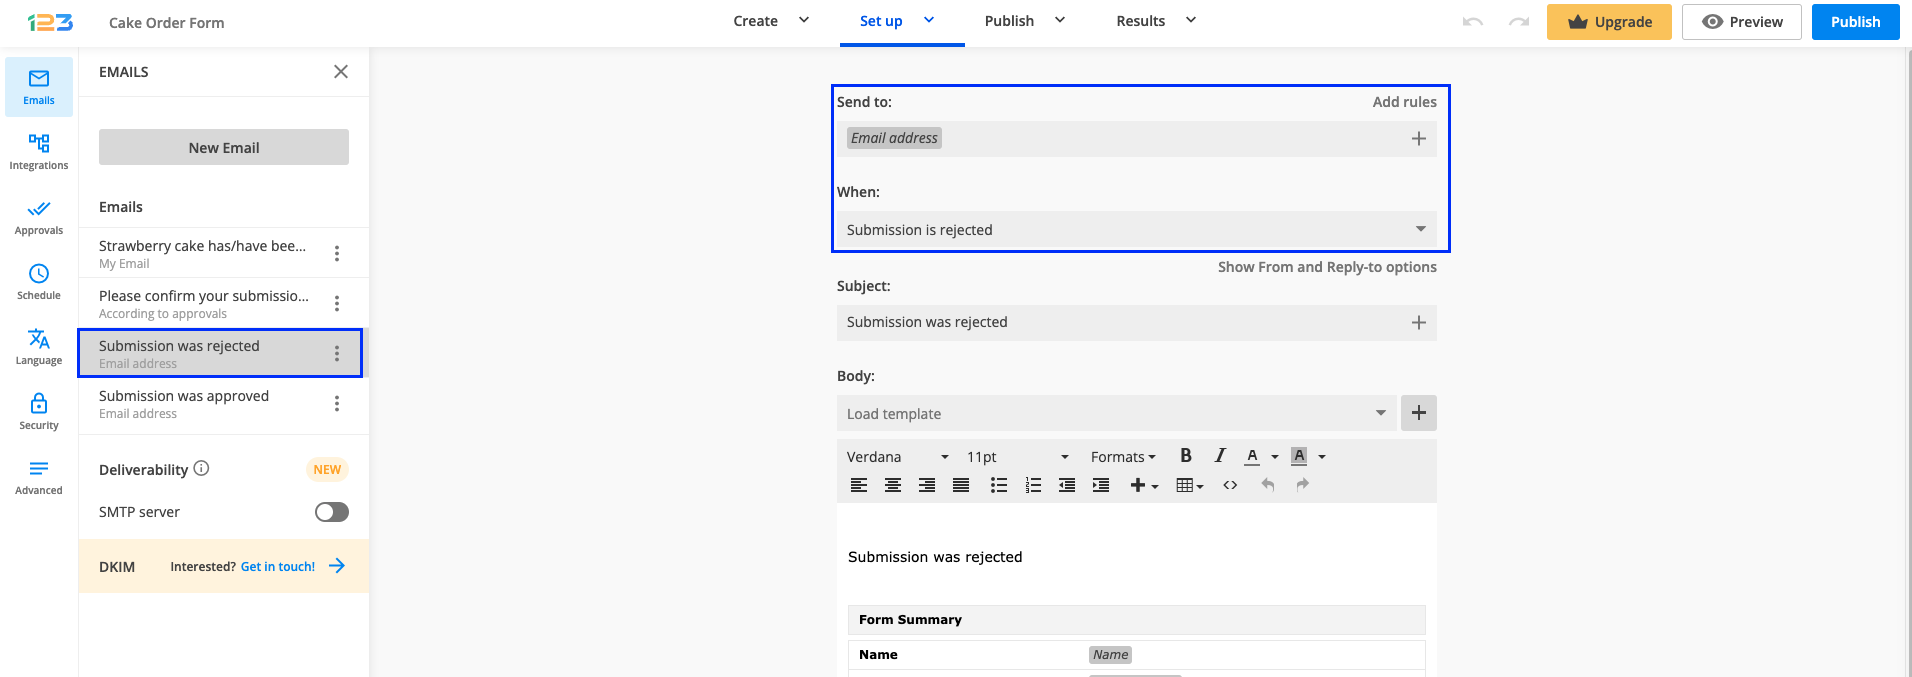
b. Edit the email subject and body, and include messages that are more appropriate for your use case
c. Attach a copy of the submission as PDF, to have a snapshot of the final version just in case it was edited in the previous step
d. Don’t forget to save the setup for each email notification.
And you are done, but before publishing the form, we recommend previewing the form, filling it out and making a test submission.
Tip: fill in your own email address on the form, so you can receive the email notifications and test the end-to-end flow. While experiencing the flow the same way your respondents would, you can easily spot where to make improvements if needed.
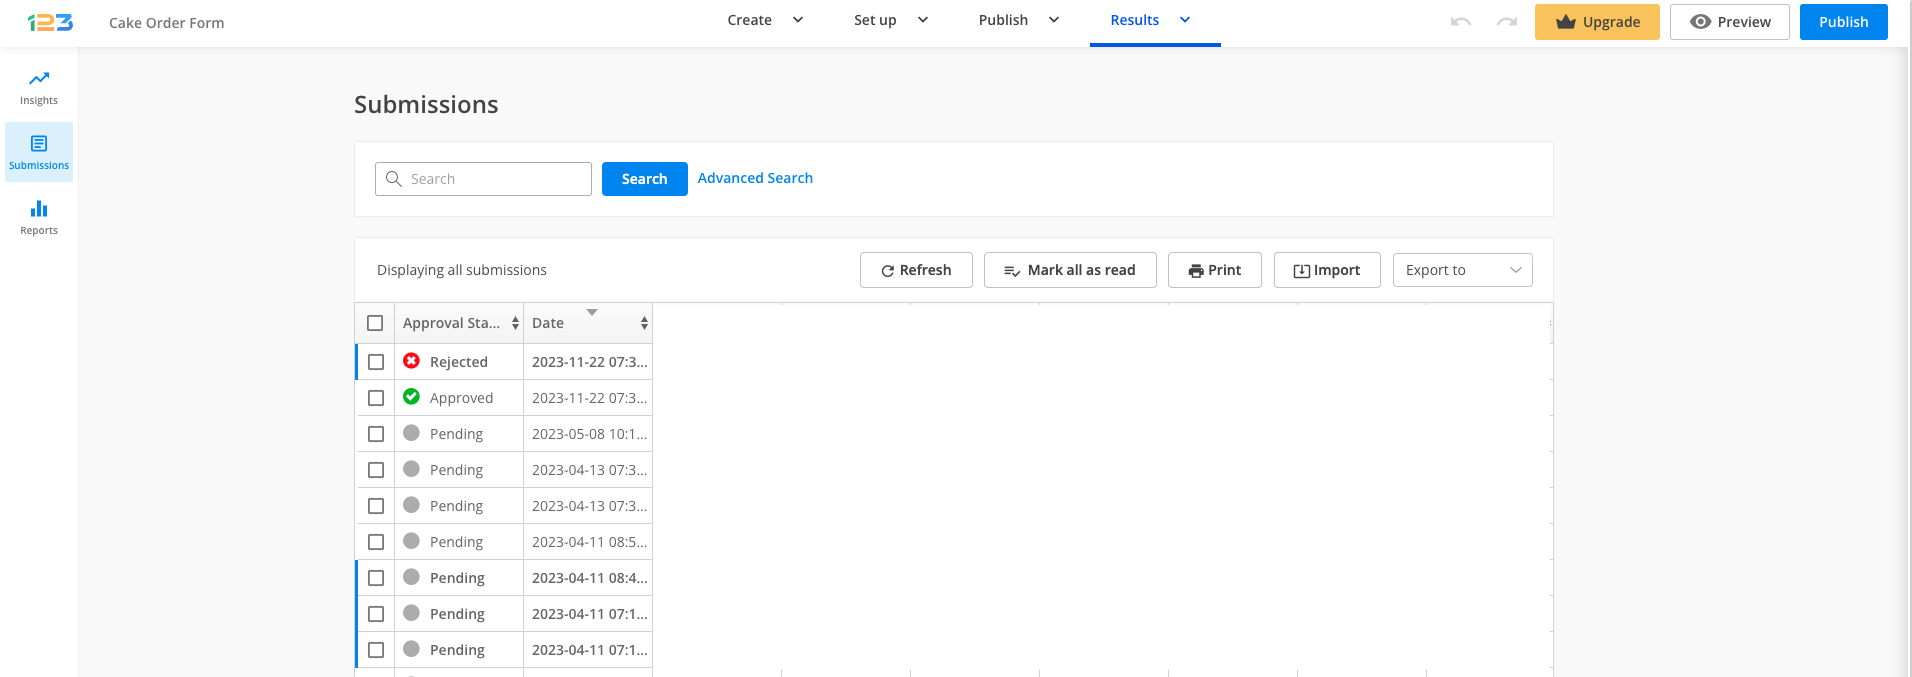
If you navigate to Submissions section, from the Results tab, you can also check the status of the submission and notice how it changes from pending (after the form is submitted), to approved (after the submission was confirmed) or rejected (after the submission was cancelled).
Related articles:
Similar Articles
Frequently Asked Questions
Here is a list of the most frequently asked questions. For more FAQs, please browse through the FAQs page.