123FormBuilder Knowledge Base
Search our documentation platform for answers, service specifications and 3rd-party integrations.
What can I do with Product/Service field?
The Product field can help you create customized forms allowing your customers to select and purchase products or services without leaving the form.
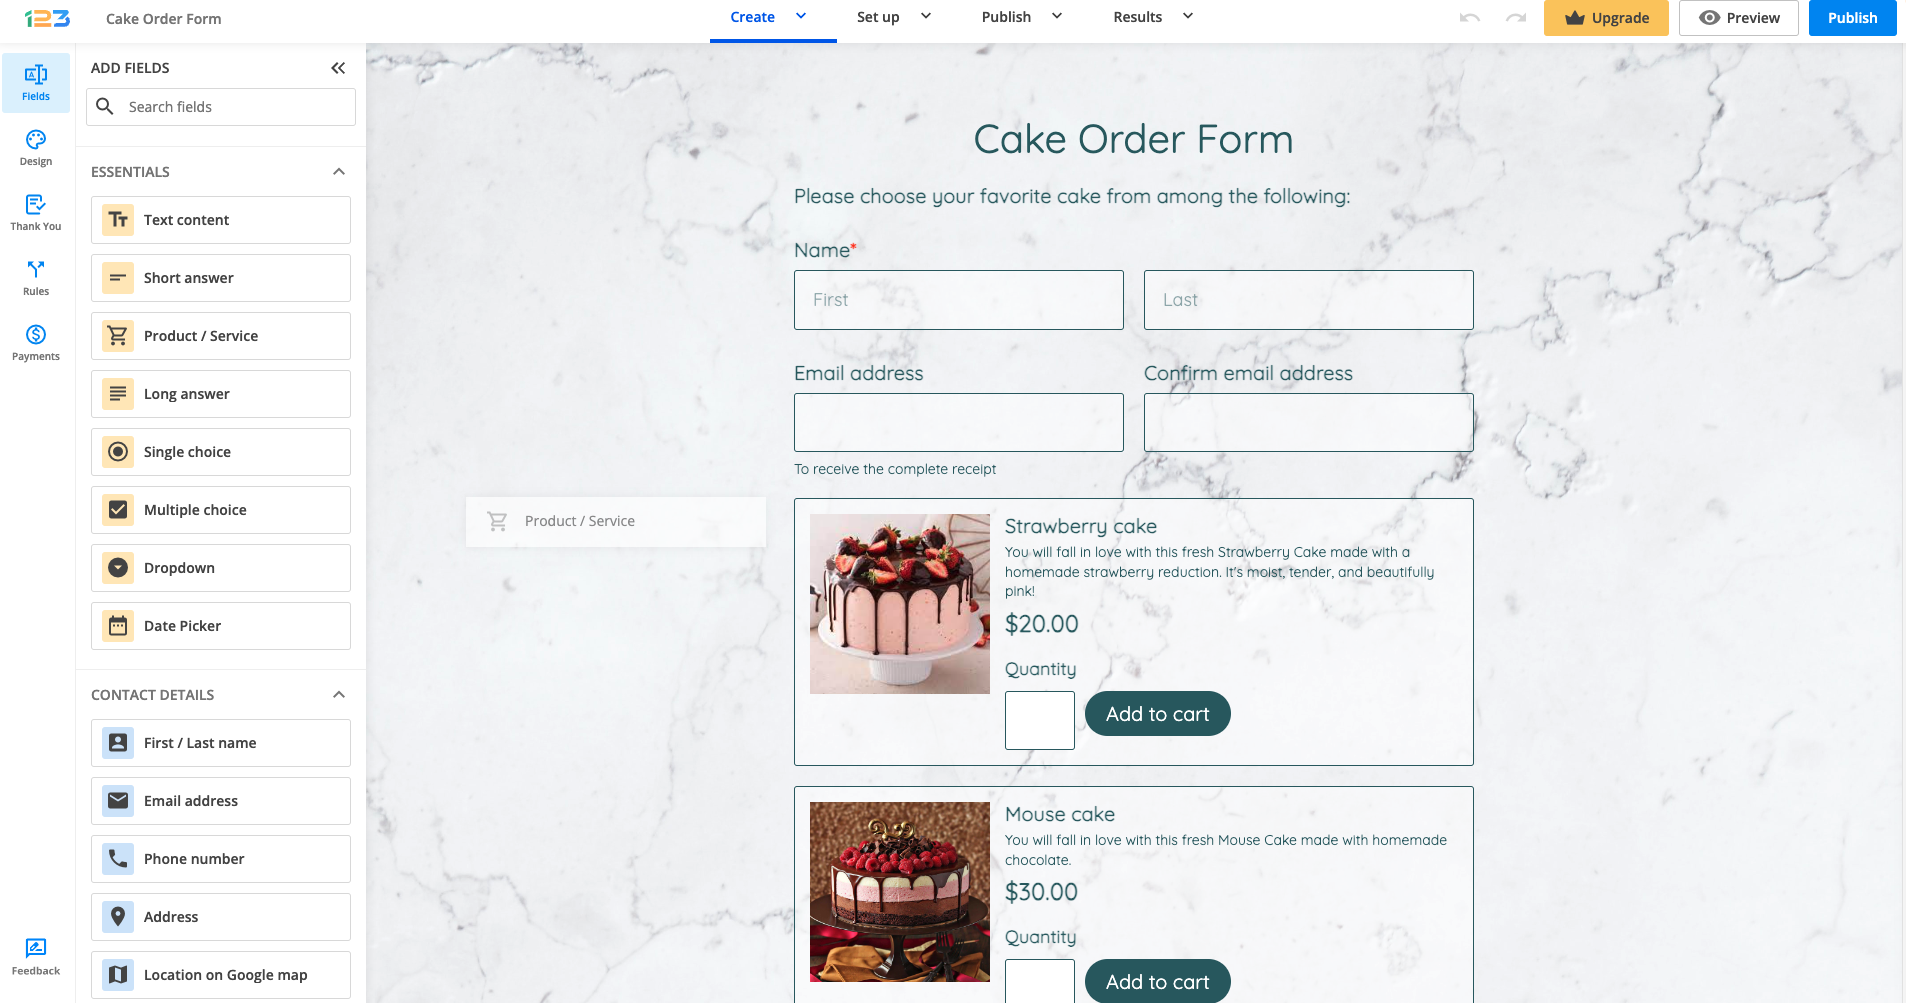
You can do various things with the Product/Service field in order to streamline your process. Let’s start with a cake order form as an example, where our respondents can order a Strawberry cake, a Mousse cake and/or a Vegan cake.
Email notifications
You can set up different email notifications that can help you with your orders. Based on the respondents’ cake selection, you can send email notifications to different email addresses. This can be done by creating email rules. All you have to do is click on Add rules in the Emails section.
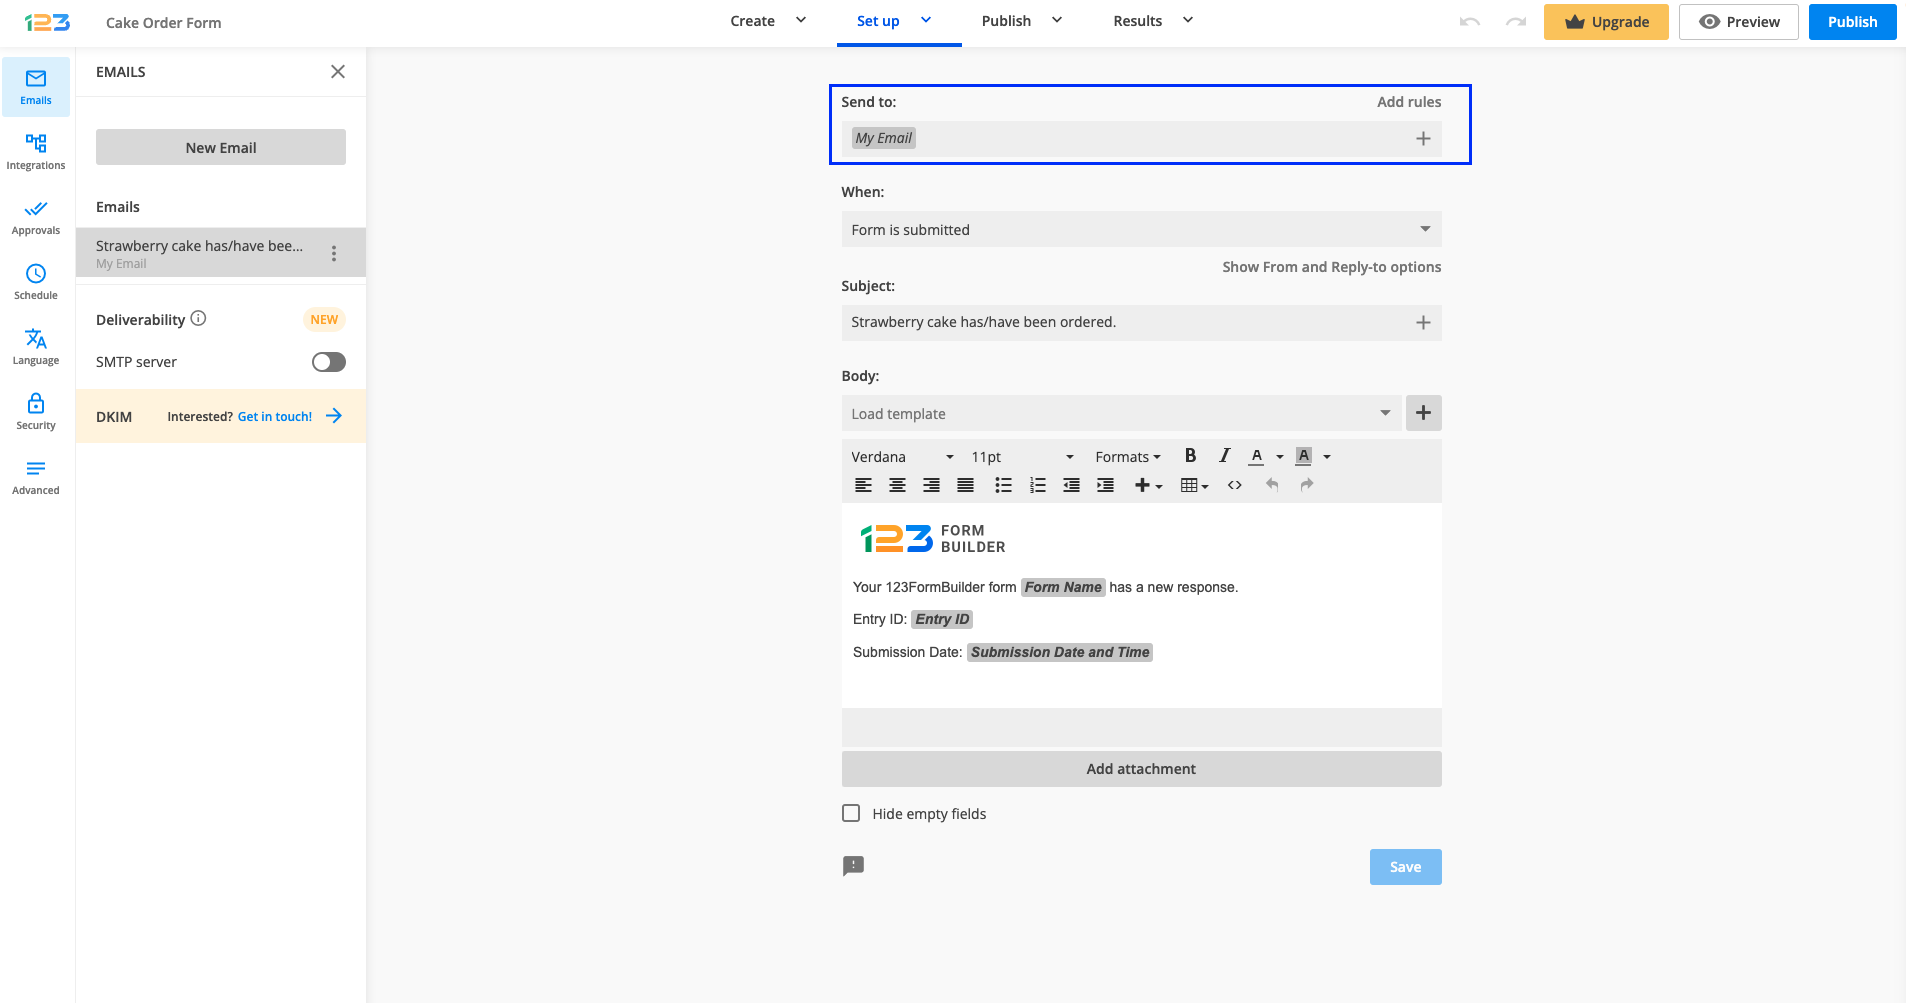
Afterward, you can create your email rules one by one. If you want to send an email to a specific email address only if your respondents have selected Strawberry cake, all you have to do is:
a. input the email address to “Send to”
b. set the condition: If Strawberry cake is
c. set the second part of the condition: is 1.
Therefore, when a respondent selects Strawberry cake, then an email notification is sent to that specific email address.
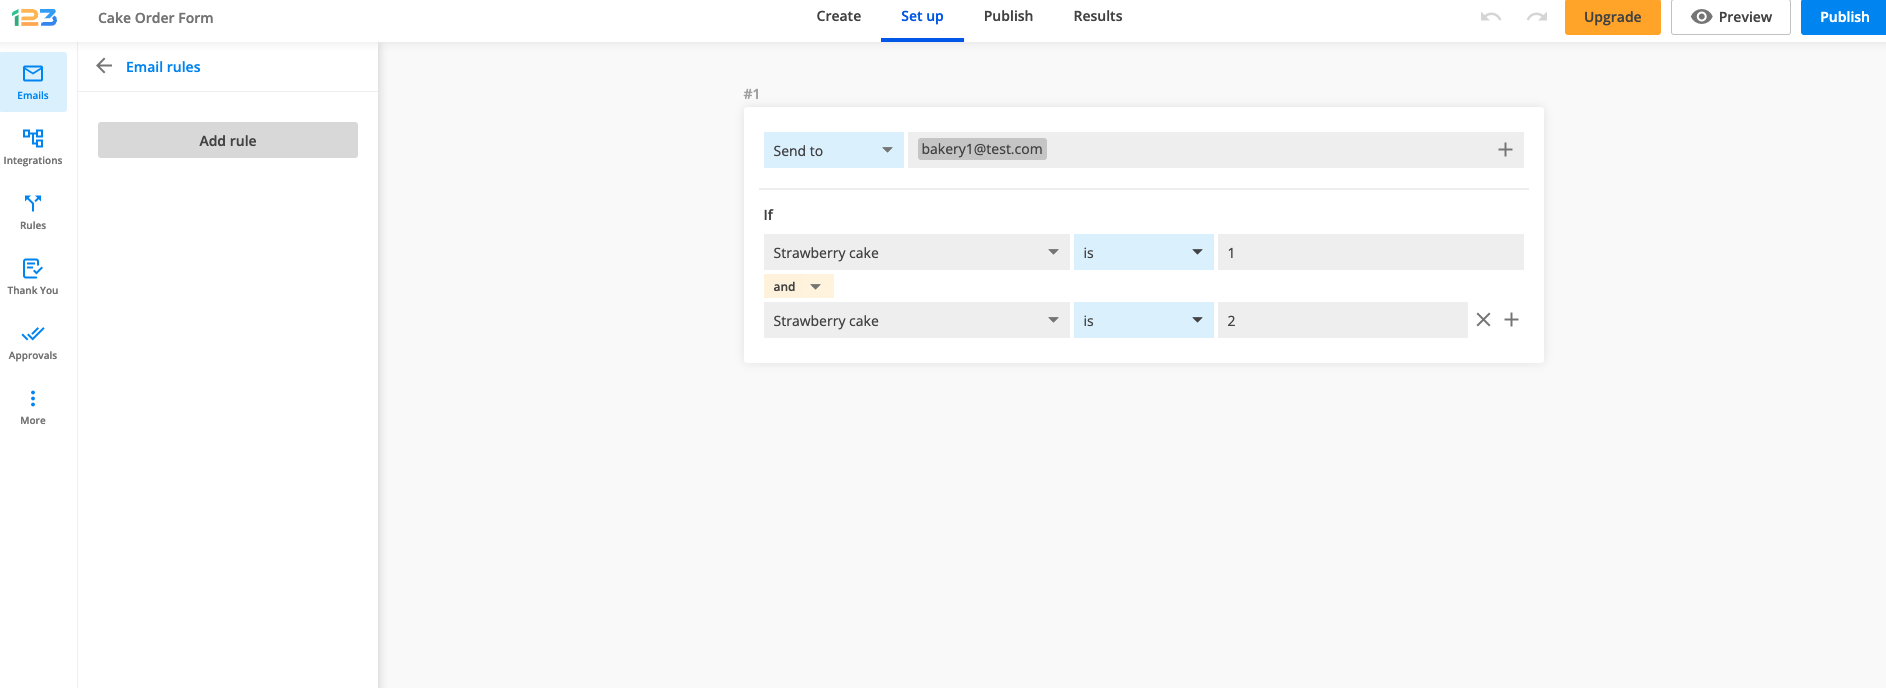
If you are using the Quantity selector for your Product/Service field, keep in mind to update your email rules. Respondents can select multiple items from the same product/service, so this has to be reflected in the email rule. For example, if your respondent selects 2 Strawberry cakes, then the below email notification is not sent, as the condition is set to 1 Strawberry cake.
If you want to cover all scenarios, then you have to update your email rule as below:
The same principle applies to all your products. Keep in mind that you can select different logic operators: is, is not, contains, and so on.

When it comes to the email notification, you can easily customize it as you wish. For instance, you can add the Product/Service field to your email Subject.
Consider this scenario: you want to send an email notification when a Strawberry cake is ordered. Create your subject line and pipe in the quantity of a specific product within the subject line by clicking on the + sign.
If your respondents have ordered 2 Strawberry cakes, when receiving the email notification, the subject line will look as below:

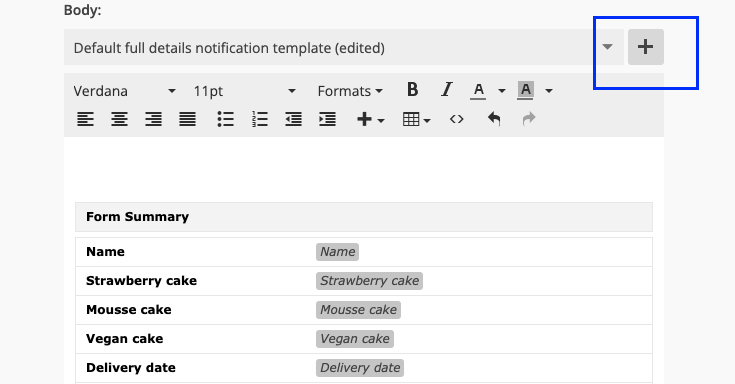
When customizing the email notification template/body, you can add the Product/Service field to it by clicking on the + sign.
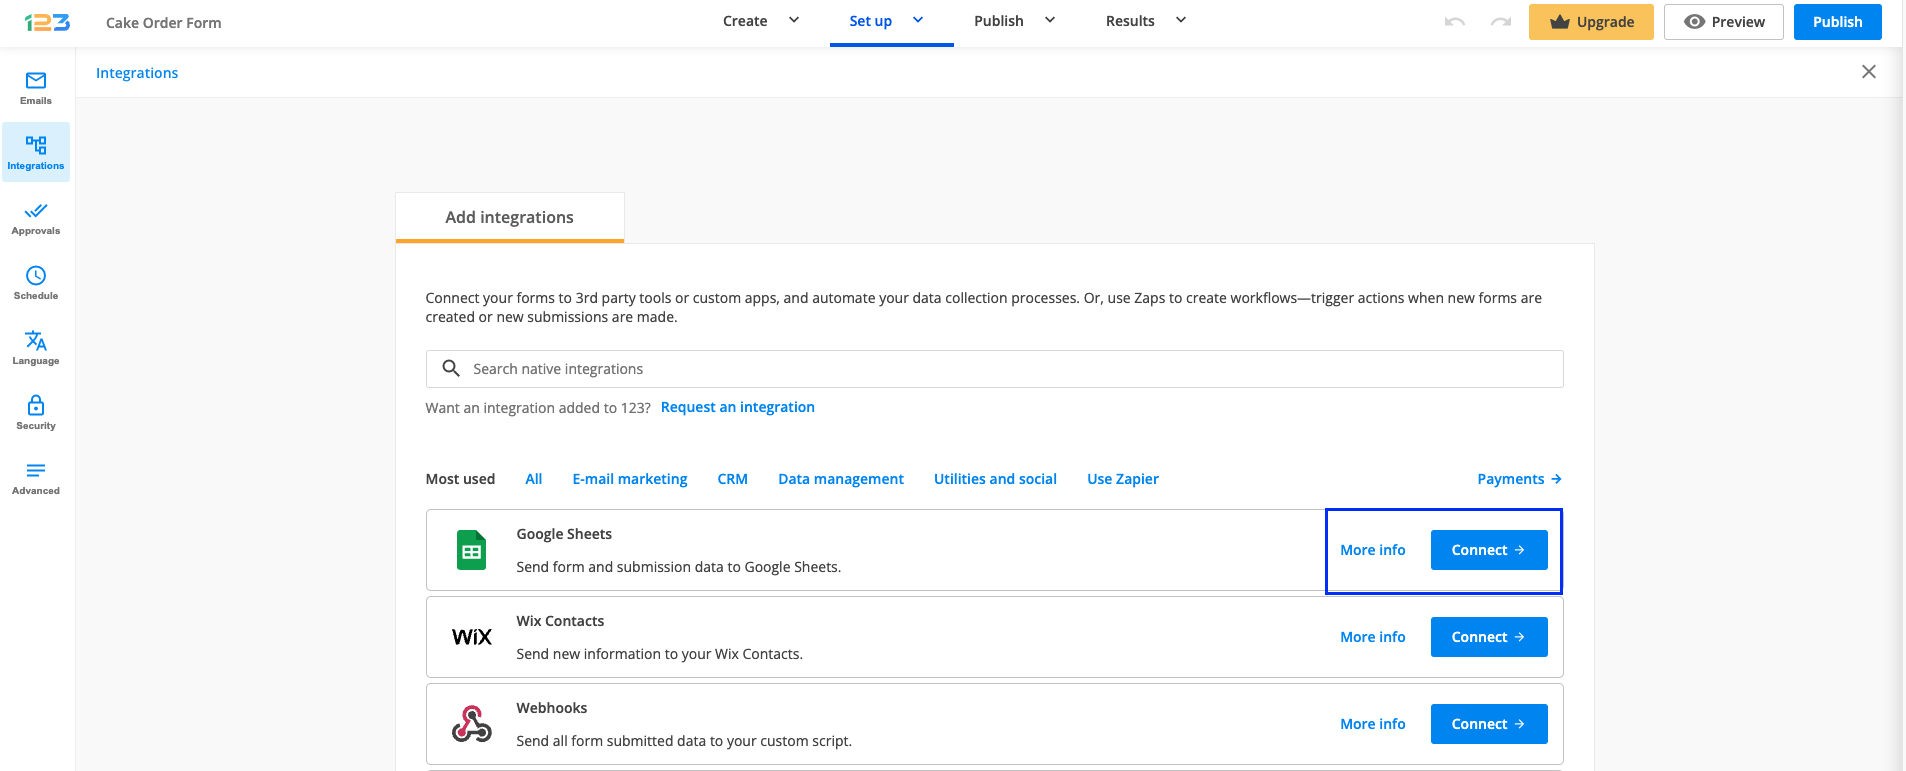
Integrations
To fully automate your workflow, you can always use integrations. As an example, we are going to enable Google Sheets. By doing this, all the submissions you’ve collected on the form from the moment of enabling the integration will be gathered in a Google Sheet.
Go to Integrations and click on Connect for Google Sheets.
The next step is to connect your Google Account.
Now let’s test our form. Make a test submission and go to your Google Drive. A file has been automatically created, with the name of the form.
In the below example, we have received an order for 3 Strawberry cakes, 1 Mousse cake, and no Vegan cake.

The value we are sending for the Product field is the quantity. If you did not enable the Quantity selector, then the default value that we send is 1.
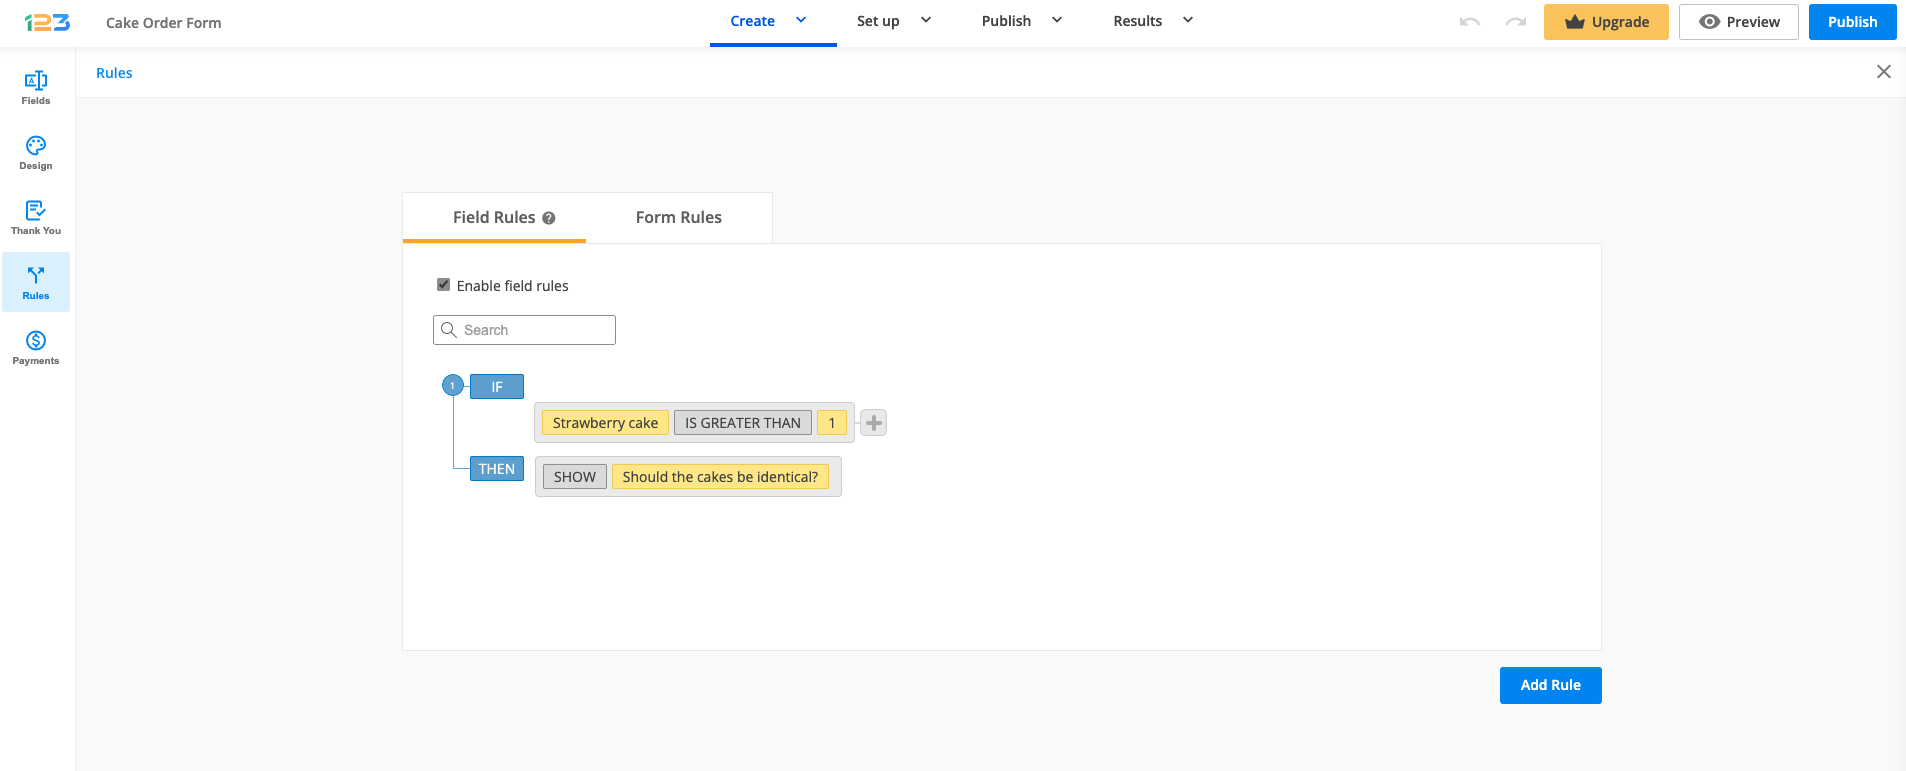
Rules
You can create field or form rules by going to the Rules section from Set up. Just enable them and click on Add rule in order to begin the process of creating rules for your fields/form.
For example, if your respondent orders 2 Strawberry cakes, you want to know if they should be identical or have something different. In this case, if the Strawberry cake has a value greater than 1 (meaning your respondent has ordered more than 1 strawberry cake), then the question Should the cakes be identical? is shown.
Approvals
The Product field can also be used in an approval flow. You can enable Approvals by going to Set up → Approvals and checking Enable approvals for this form.
After clicking on Add approval, you can create the approval flow.
Let’s say that whenever someone orders more than 1 Strawberry cake, you want to send an approval email to a certain email address. The approval condition would look like below:
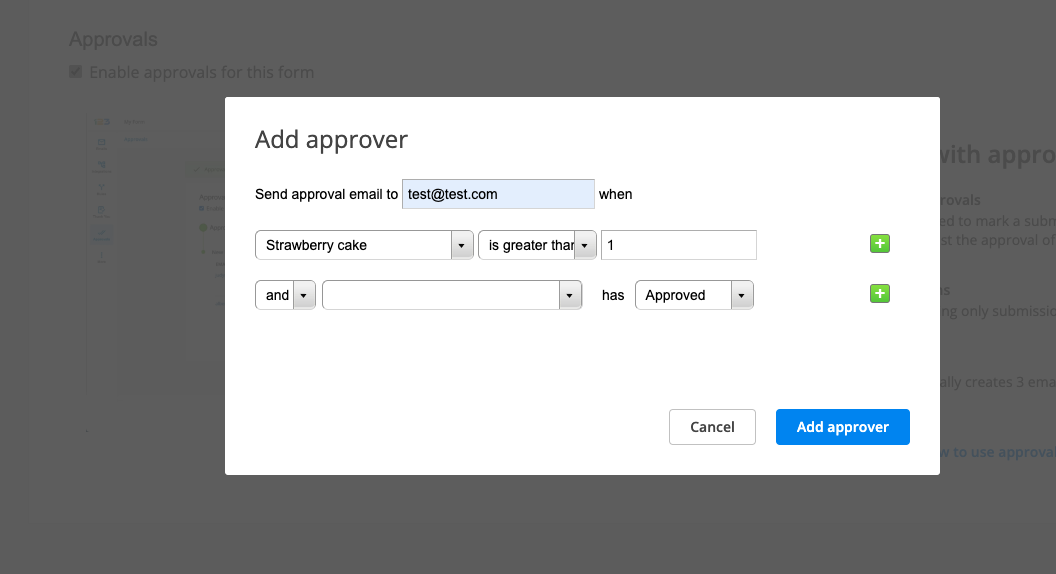
Finally, select the Add approver button and you’re all set.
Related articles
Similar Articles
Frequently Asked Questions
Here is a list of the most frequently asked questions. For more FAQs, please browse through the FAQs page.