123FormBuilder Knowledge Base
Search our documentation platform for answers, service specifications and 3rd-party integrations.
Essential Fields in the 123FormBuilder tool
As essential fields, you can use Text content, Short answer, Long answer, Single choice, Multiple choice, and Dropdown.
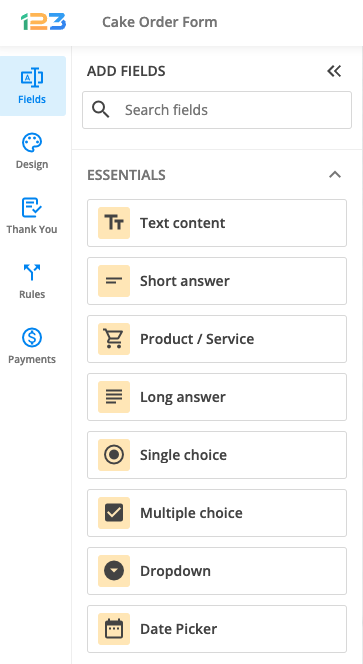
Thanks to the awesome drag-and-drop form builder, you can easily add any field to your form. Drag fields from the panel on the left to your main view, to the place where you want them to be. You can reposition them afterward. You can also add fields by just clicking on them in the left panel. Each element comes with an Edit option that lets you control its appearance and behavior. In this article, we’ll cover all the essential fields available.
General Particularities
- Type in the Label of the field, the title you want your users to see.
- Set the label’s Visibility – shown, hidden, inside the field, removed
- When you edit the Label you can also choose the title’s style: normal, bold, or italic.
- Check the Required box if the field must be filled in (a red asterisk will indicate that the field is required).
- Click on Hide field if you don’t need to display it on the form.
- Add Instructions if you want to provide additional information regarding the text box; instructions will appear right below the field label.
- Default Value. Specifies the default value of the text field (e.g John Doe).
- Short text fields can show a Unique ID. The ID is automatically generated when the form’s page is refreshed.
- Match another field value. Match two input fields to force the user to type the same value in both.
- You can choose to make an input field Read-Only.
- On choice fields, you can enable the “Other” choice instead of the pre-established choices. Once clicked, it will open an input field.
- Limit the number of times a choice can be selected. Once the limit is reached, that particular option will be grayed out.
- Choice fields can be used for Quiz forms.
Text content
The Text content field is used to input a title or description for your respondents. This way, you can structure your form so that your respondents can easily navigate and provide you with the data you are looking for.
You can customize the text directly within your form main view, by double-clicking it to start editing. At the top of the form, you will find the editing menu bar which allows you to adjust the appearance and style of your content without leaving the field.
Simply select the text to make it bold, italic, or underlined. You can also change the text size and color, add URLs, adjust the transparency, create lists, and align the text as needed.
For other properties such as label placement, font, field name, and field ID, you’ll find them in the right-side panel.

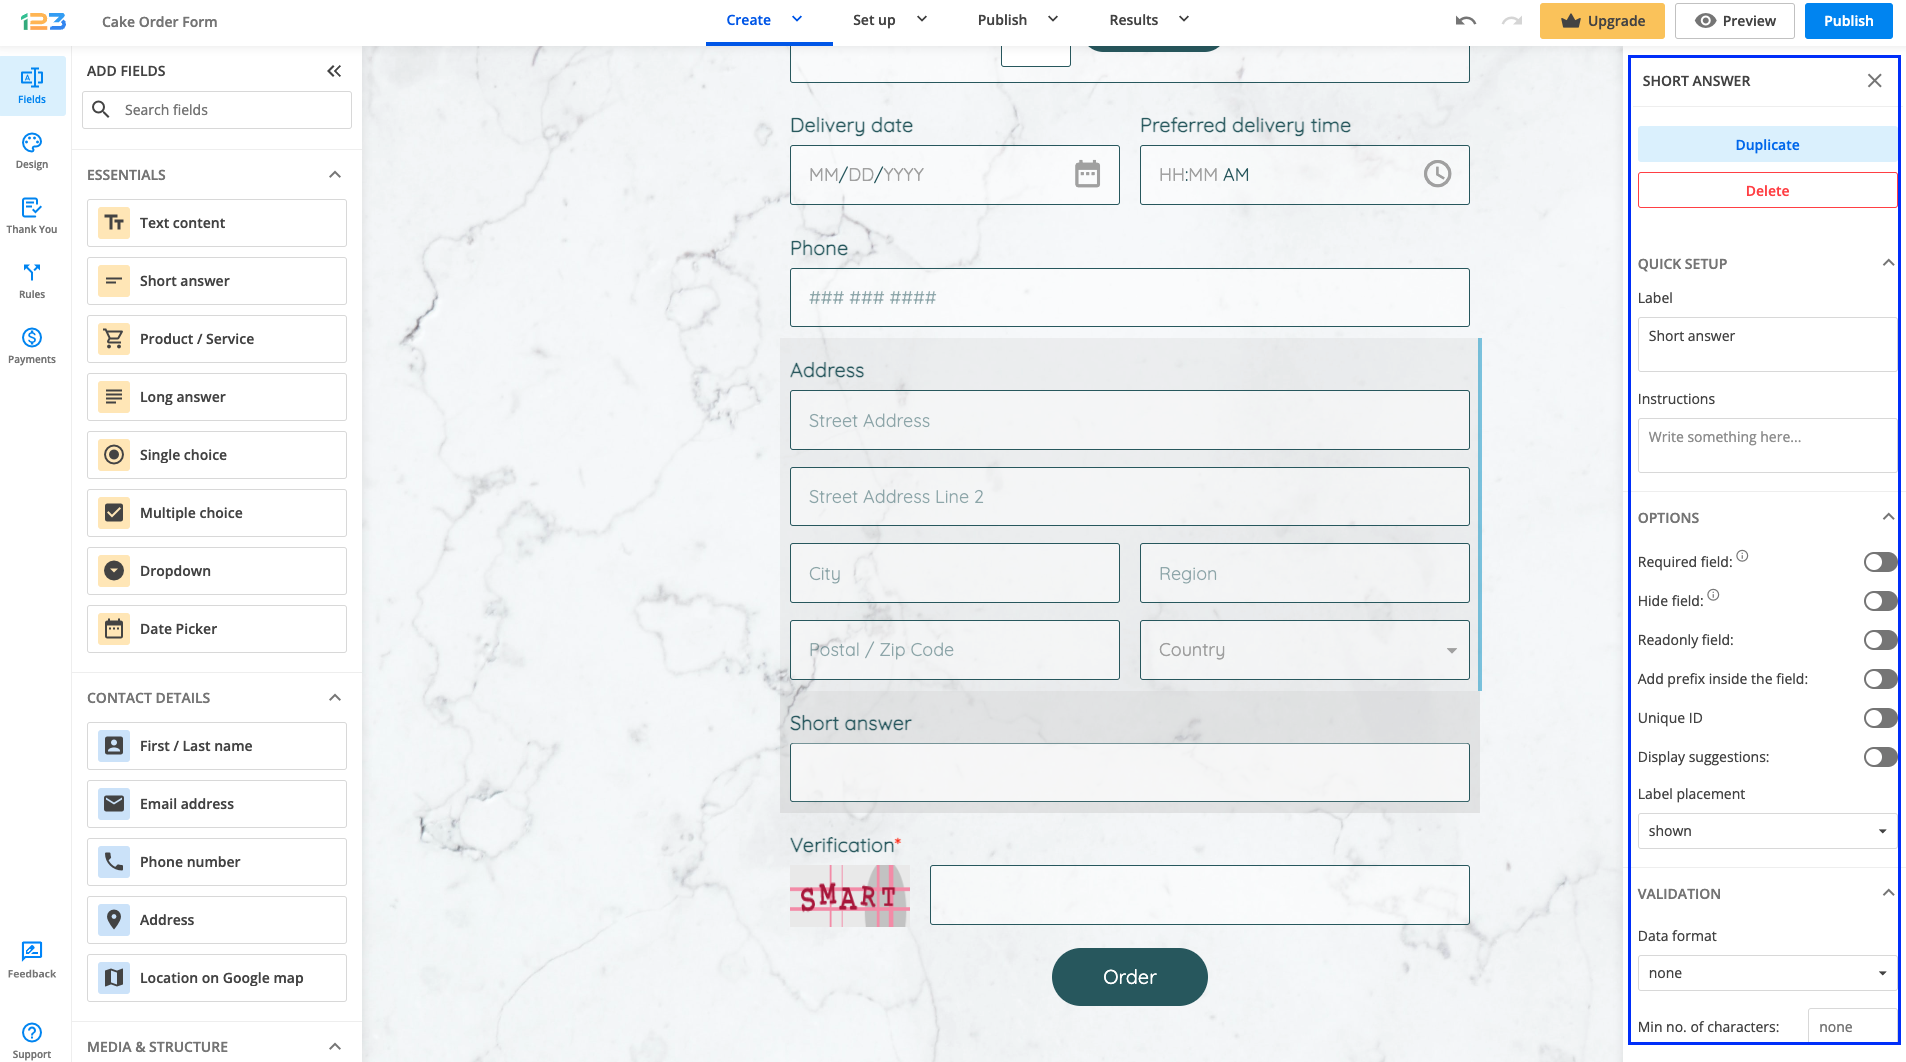
Short answer field
A Short answer field allows users to enter any characters. You can use this field type to collect simple text inputs.
You can make this field required, meaning that your respondents won’t be able to submit the form unless they provide their input. From Validation, choose the Data format you will accept for this field. For example: alpha numeric (letters and numbers), alpha numeric space (letters, numbers, and space tab), full name, or regular expression.
If you are interested in setting the length of your respondents’ answers, you can use Min no. of characters and Max no. of characters.
Providing additional information for your respondents can be made by using the Instructions field. If you are interested in making this field a read-only one, you can set this up as well.
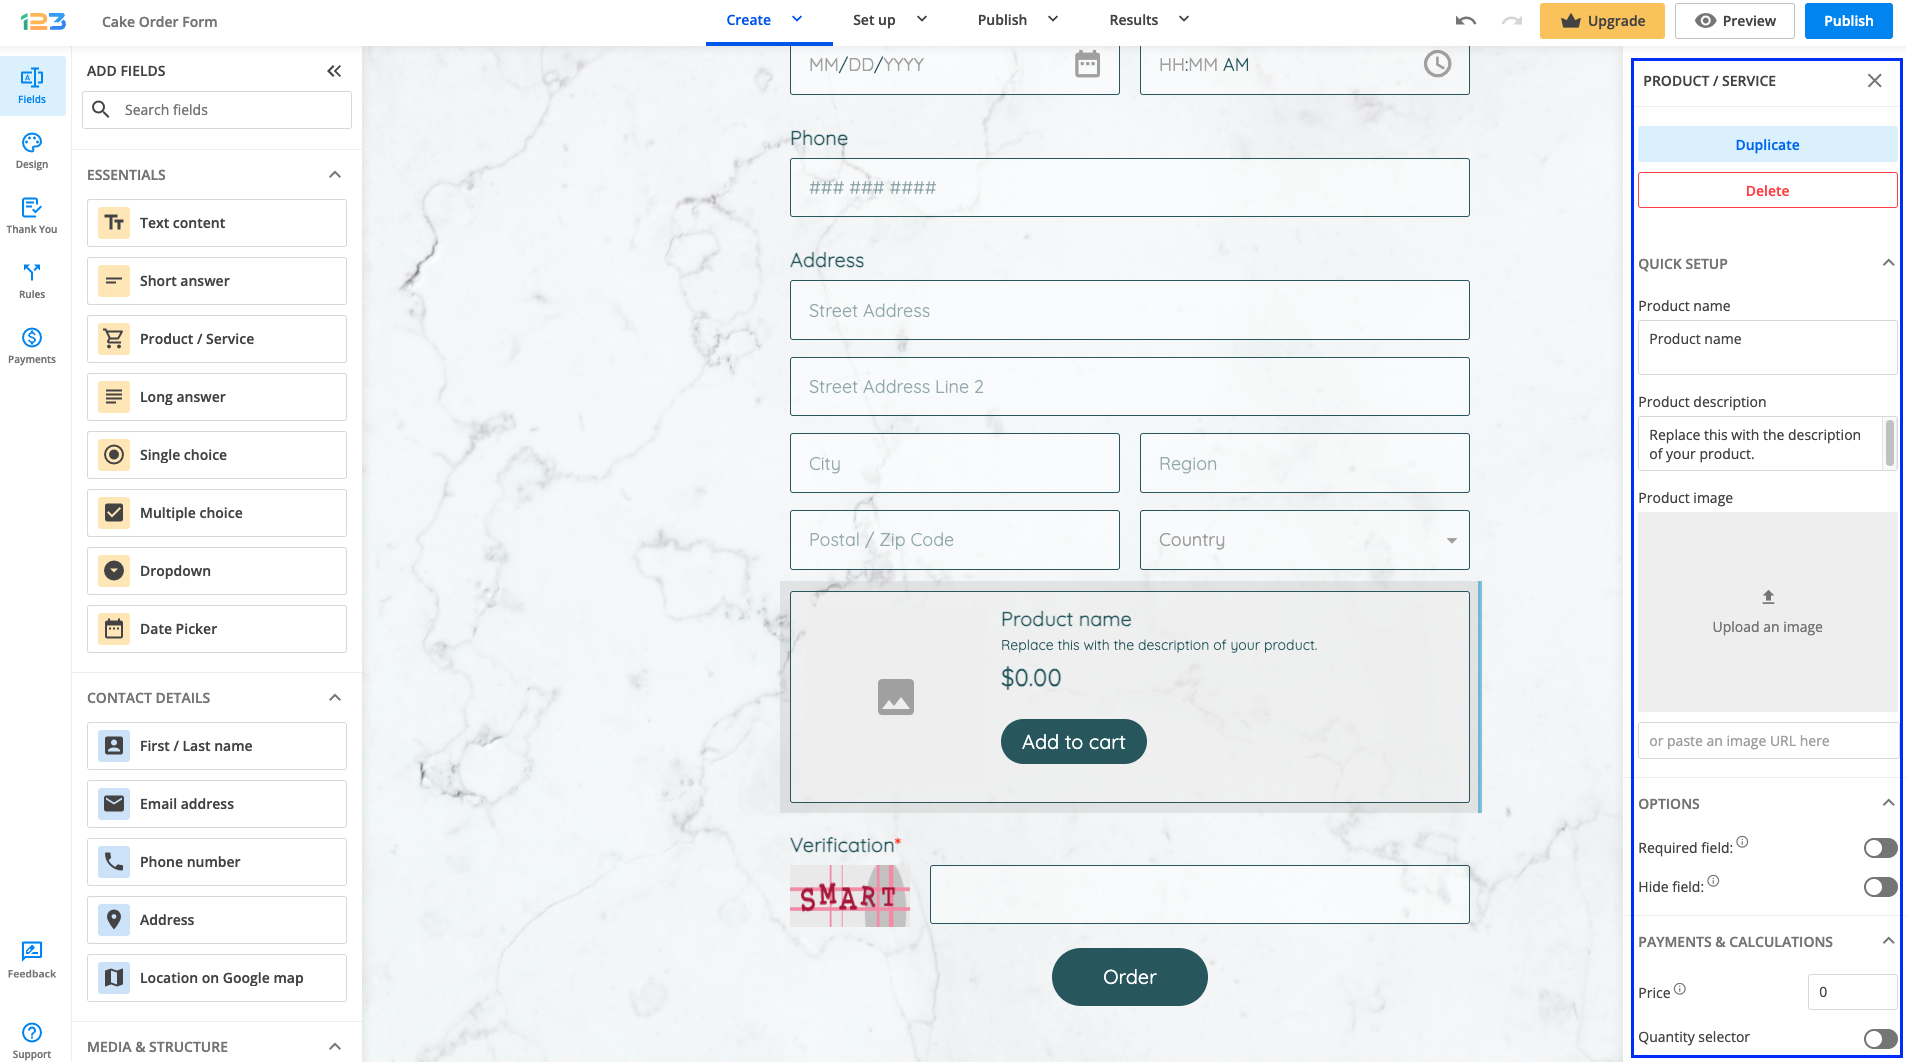
Product/Service Field
The Product/Service field is perfect if you are selling any type of products or services. You can upload an image of your product, mark it as required or hidden. As we are talking about products, you can display a price for it and a quantity selector – so that your respondents can type in how many items of that product they want to order.
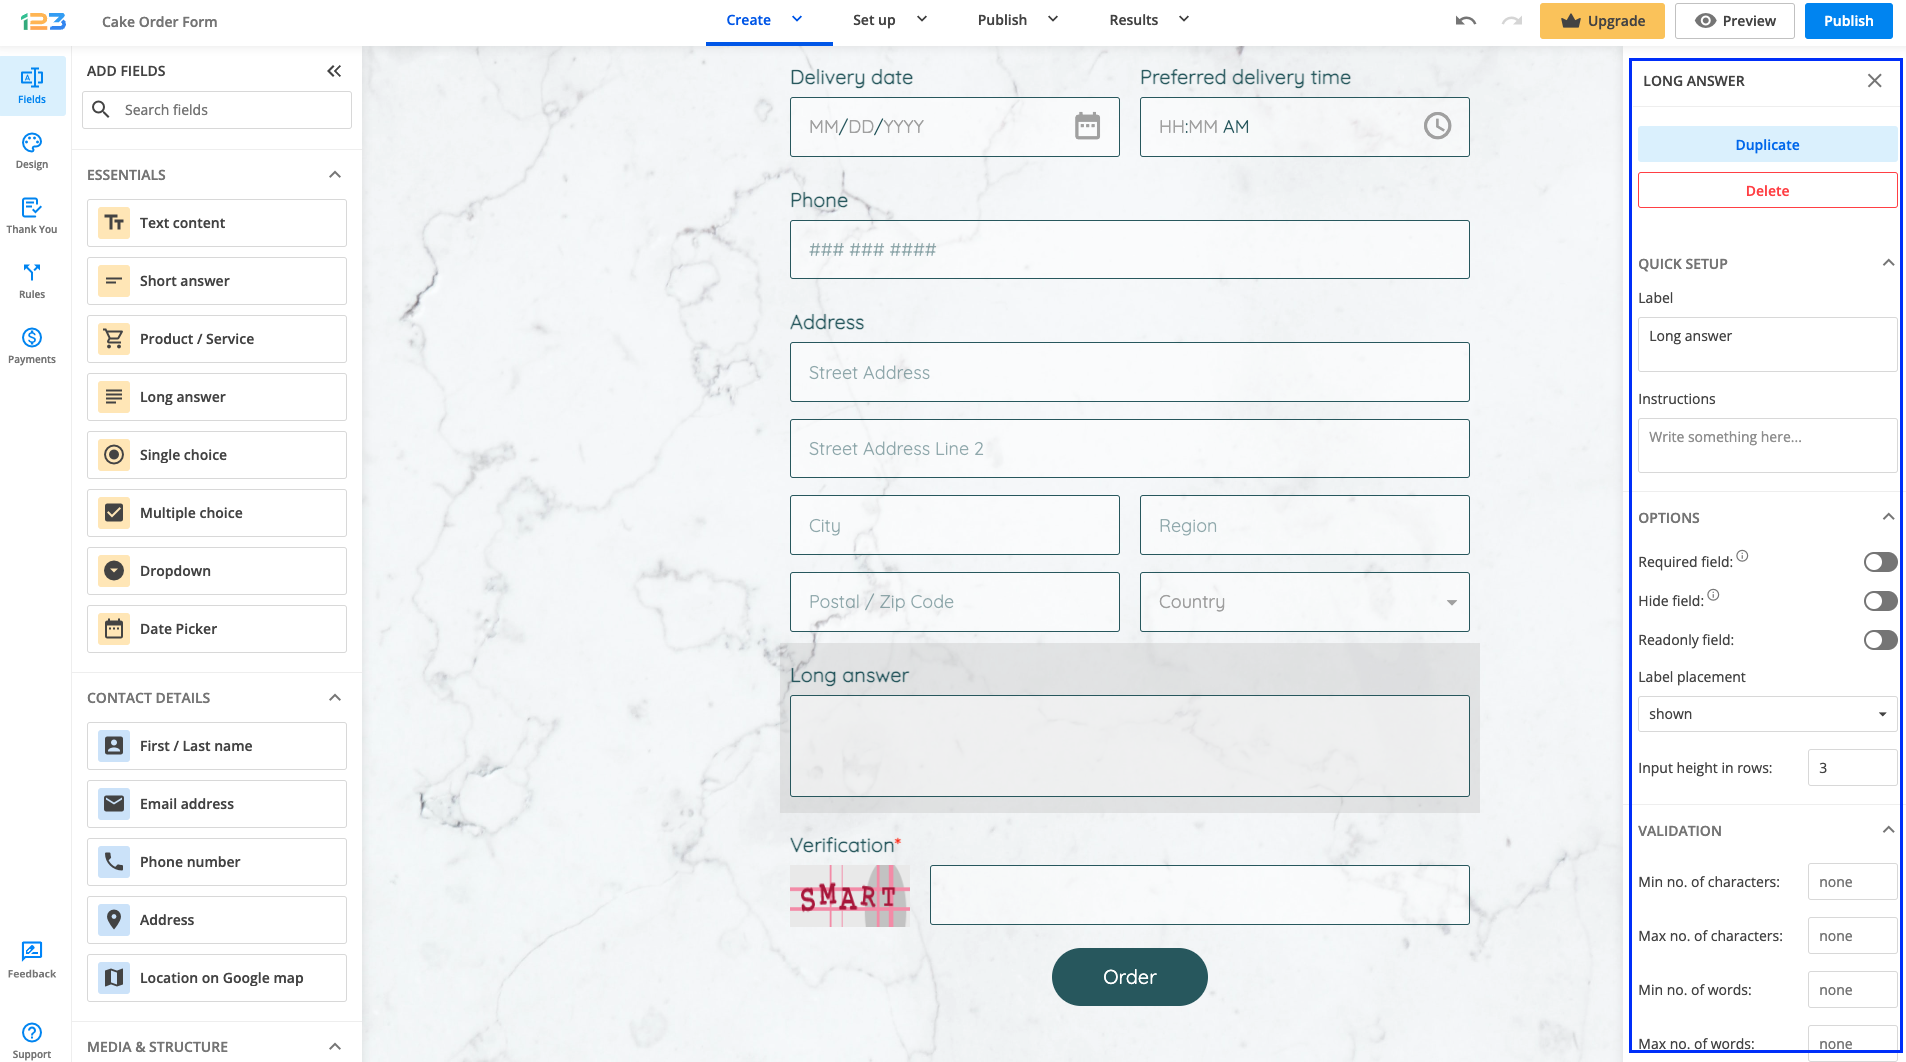
Long Answer Field
Long answer fields are similar to short answer ones, the difference being that they allow for more text input. For example, you may use Long answer fields for comments or suggestions. You can set the minimum and the maximum number of words allowed or increase the height of the field in rows. The field’s height will also increase automatically according to the size of the input typed in by your respondents.
Single Choice Field
The Single choice field allows users to choose only one item from a list of options. If you decide later that a different choice format would suit your needs better, you can easily switch between Single choice, Multiple choice, and Dropdown fields, from the dropdown menu on the right-side panel. Your existing options will automatically carry over to the new format, saving you time and effort.
By default, the choices are set to have a button-like design, but if you want to disable this, you can do so by turning off the Button-like choices toggle. From the No. of columns dropdown menu, you can choose to display your options in 1 to 4 columns.
If you want to make the form more visual for your respondents, you can upload an image for each choice.
You can select a default choice, randomize choices, or even bulk import choices of your liking. By enabling the Clearable option, you can offer your respondents the possibility of erasing the choice selection so they can select another option.
Another cool feature is the possibility of limiting the number of times a choice can be selected by enabling the Restrict choices option. The limitation can be Reset every day and you can also opt-in to Show the number of choices left.

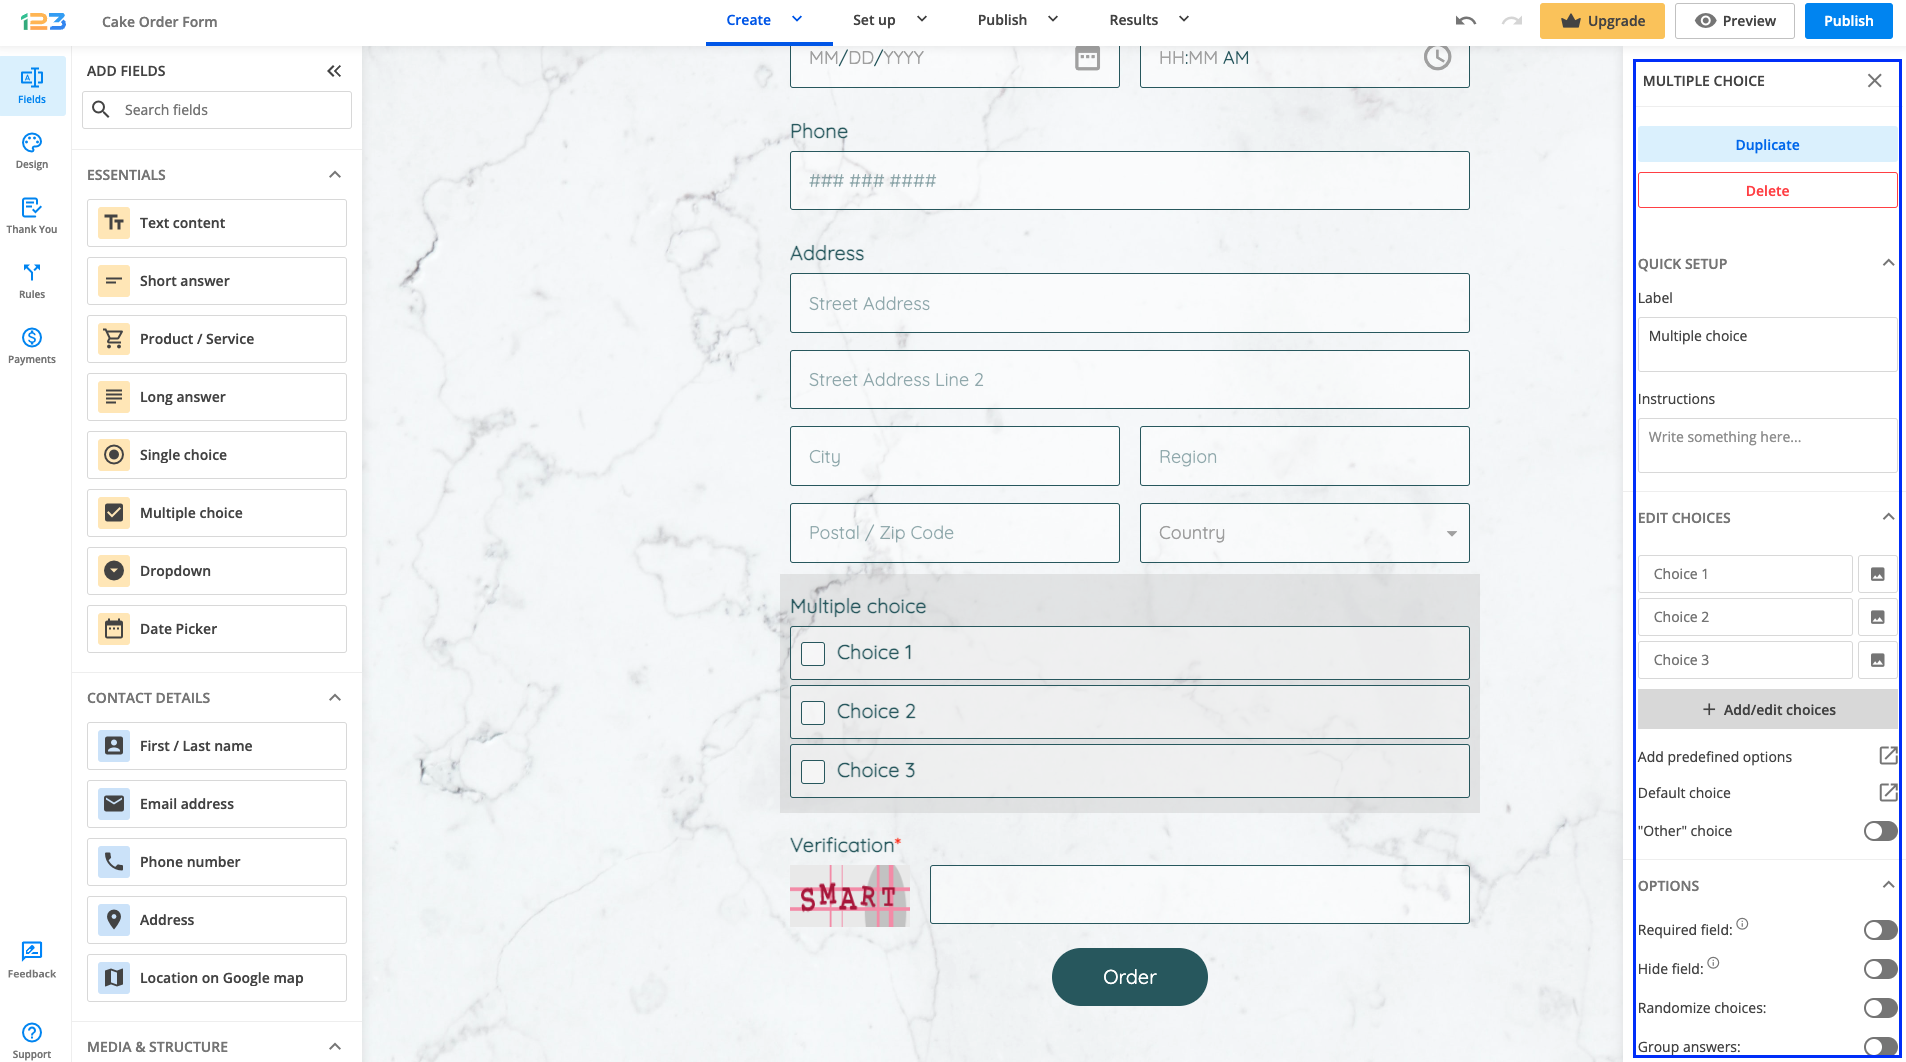
Multiple Choice Field
The Multiple choice field allows users to choose any number of items from a list of options. Besides all the settings already outlined for the Single choice field, the Multiple choice field offers the possibility of setting a minimum and a maximum number of choices to be chosen by your respondents.
You can choose to Group answers to receive the actual choice text instead of the Yes and No indicators.
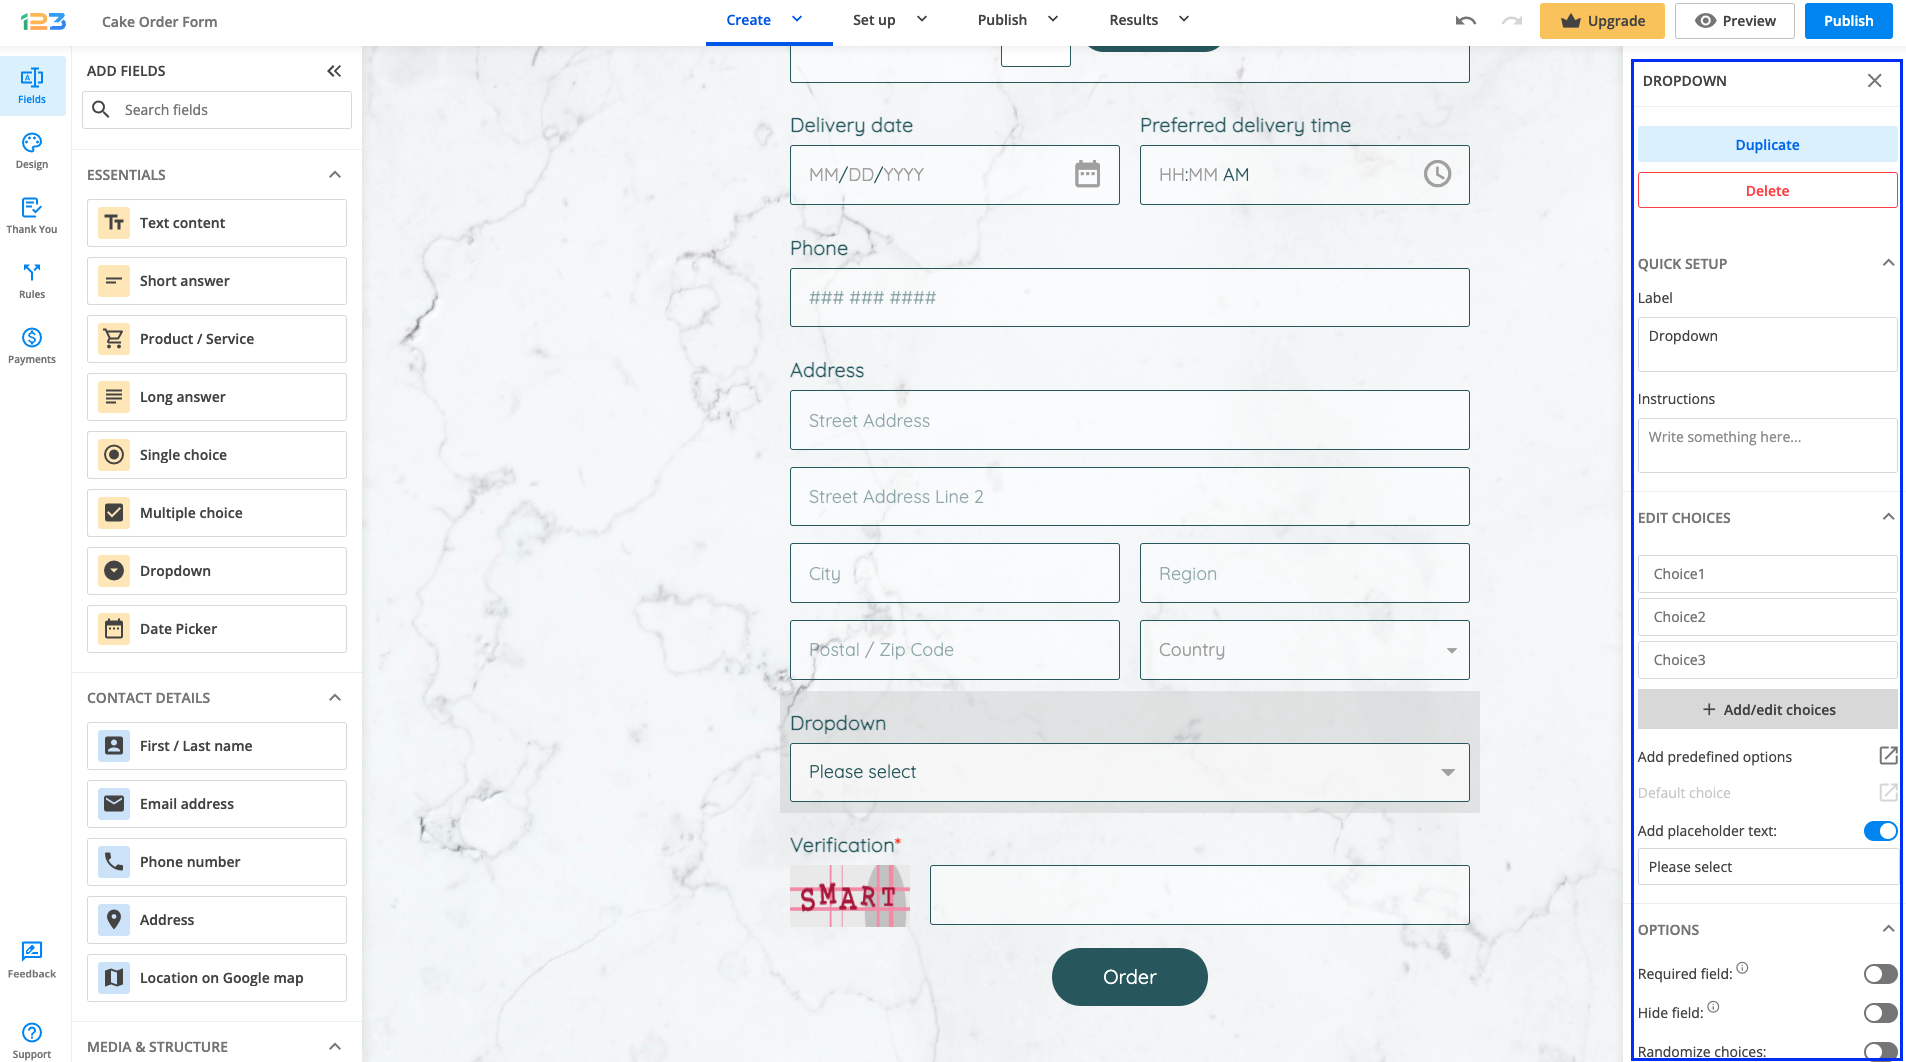
Dropdown Field
The Dropdown field provides a list of several options from which your visitor will have to select one. You can make the dropdown Searchable for your respondents, and you can also set a default choice.
Add a placeholder text that will show up on the first line. If you want to keep the first line blank, delete the Please select default message.
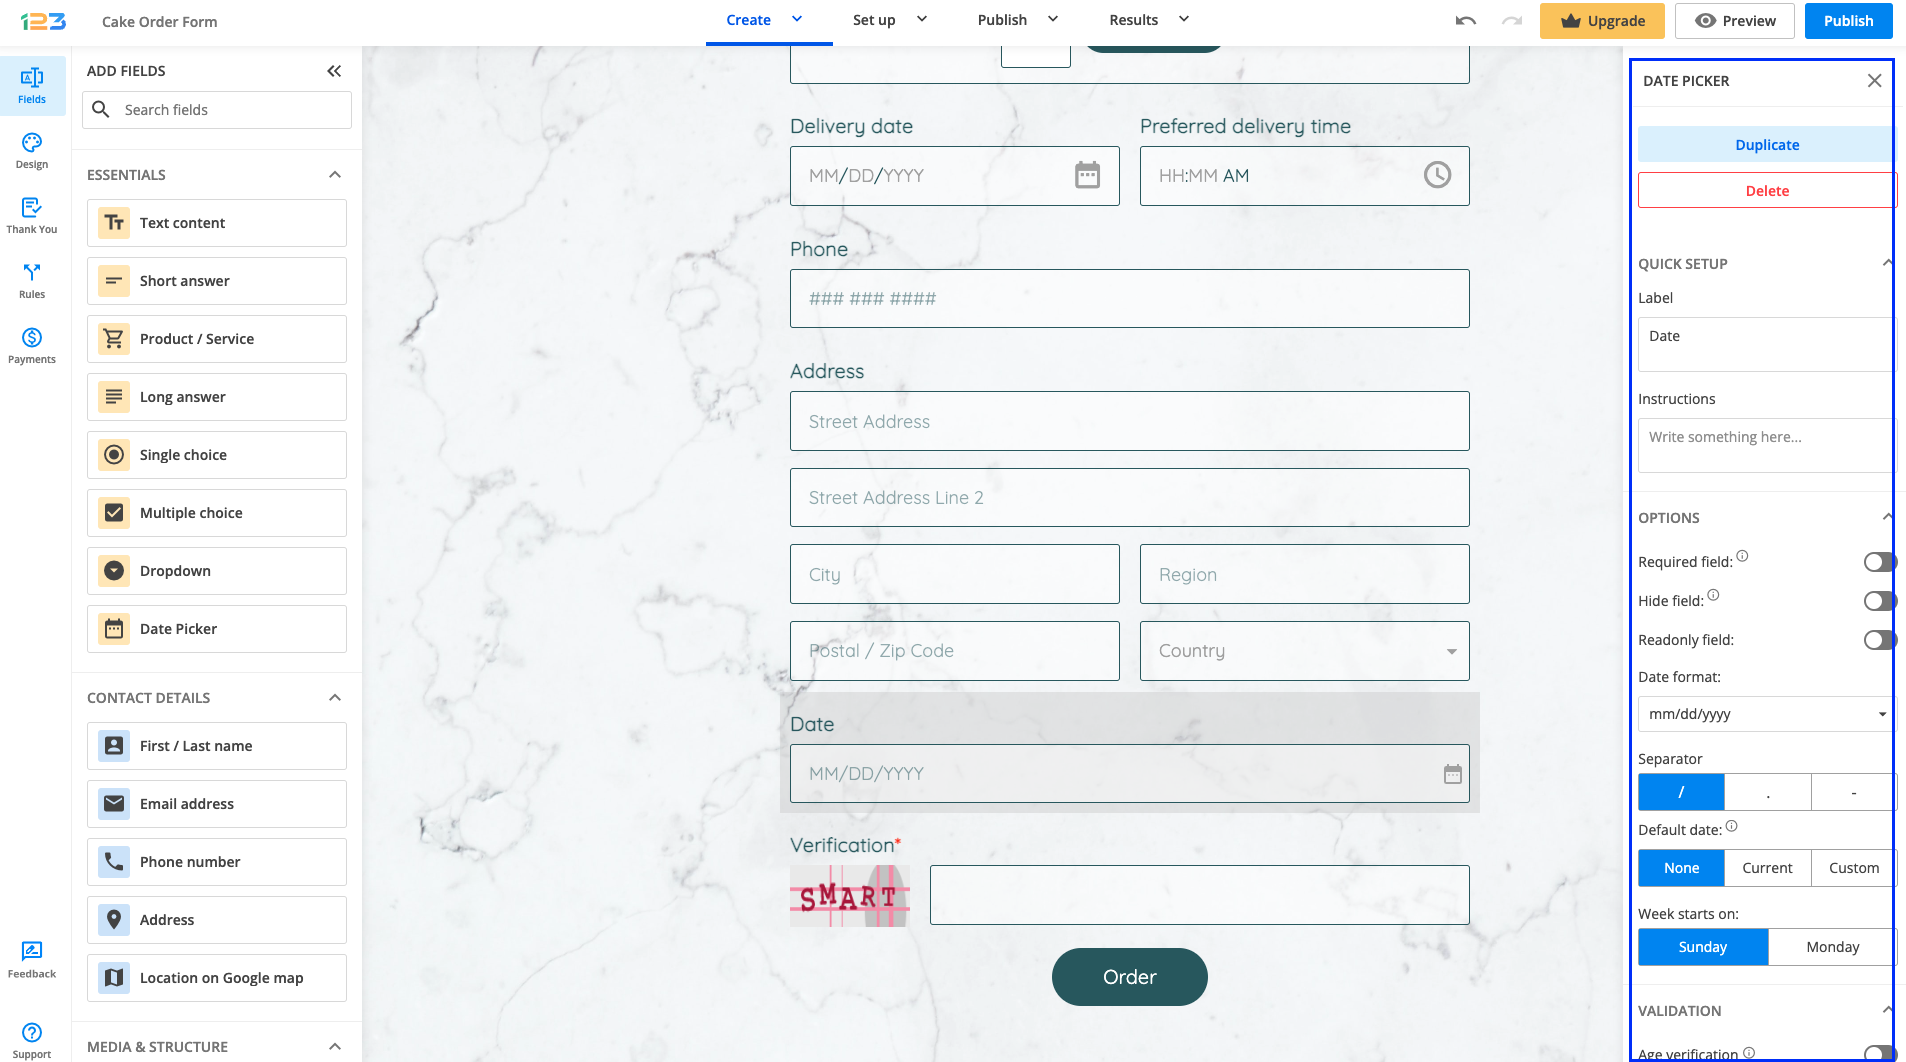
Date Picker Field
If you want your respondents to select a certain date, all you have to do is add a Date Picker field to your form. You can mark it as required, hidden, or readonly.
Other settings are related to the date format. By default, it is set on month/day/year, but you can change it according to your needs. You can choose the separator, set a default date and the day on which the week starts on.
The new aspect of this field is the age verification feature. You can set the minimum age and we will perform a check on the form once your respondents select their birthday date.
You can also disable days to be selected by your respondents or even set up a start & end date.
16 comments
Leave a Reply
Similar Articles
Frequently Asked Questions
Here is a list of the most frequently asked questions. For more FAQs, please browse through the FAQs page.
I am trying to get headings at the end of my form to be added to the automatic reply after someone completes the form. Currently, I get the questions and answers but the headings at the end (which are rules) just show up as brackets.
Hi Elizabeth, heading fields are only to display information on the form. What you can do is the following: add a short text field, add a default value with your heading text, and set the field to be read-only. You can also remove the label. Here are two screenshots with these settings:short text field with default value and the read-only option
Now, since they are input fields, they can be incorporated into your email template. I hope the above helps. If you have any questions, let me know. Have a great day.
Hey all,
How can I make certain field visible or not due to a selection on a previous question.? Does it make sense.
In other words, I field must only appear due to an answer in a previous drop-down box.
TIA
Hello! Yes, this is a feature that we offer, called branching and conditional logic. For more information, feel free to check out this article: field rules
Hi,
I need to show in the form the e-mail from a previous form.
I have already made the redirection with customs variables: 123formbuilder.com/sf.php?s=form-5147990&customVars123=yes&control58816435=request5145983. But now i don´t know how to show in the text the e-mail filled in the previous form. example: “An email was sent to johndoe@JJ.com”
Could you help me with that?
Thank you,
Hi Ricardo! To show directly on the form and in plain text, you will need to have a script that passed the email input into a heading or HTML block field. A much easier and faster option will be to add the information on the second form’s Thank You Page. Choose in Settings – Thank you Page -> Show HTML Block. In the body add the email field variable form the right-side dropdown list. You should have something like this: An email was sent to {[email fieldID]}.
Is it possible to change a short text field to a number field without creating a new field?
Hello Willie,
Thank you for the comment and our sincere apologies for the delayed response.
Yes, it is possible. From the edit panel of your short text field you will need to change the Field Validation to numeric.
Hi, I need help please. I have field titles that are in ALL CAPS/2pt, and are running into the input boxes if I don’t move some of the field title text down to another line. I want all the field title text on one line. This should be possible? Also how do I justify the input boxes to the right or further away from the field titles? Thank you!
Hello Carina,
The form looks fine on our side. Please contact our Support Team at support@123formbuilder.com or via our contact page for anything related to your account.
Thanks!
Is there a way to create a report chart based on a check box field with 6 options? It would be great to have the visible data for that!
Hello Laura,
Yes, it’s possible. Follow our documentation here to learn more. You can create a report based an the 6 options you’ve added to the Checkbox field.
For further assistance, don’t hesitate to contact our Support Team at support@123formbuilder.com or via our contact page.
Thanks!
Hi there – how do I make the text box fields TALLER, and make the input text that appears IN them larger?
Thanks!
Hello Stephen!
These can be accomplished by adding some custom CSS to your form. In the Form Settings section, go to Themes and click on the link Use custom CSS. In the lighbox that appears you can use a code such as: input {height:50px} (this code will make the input box taller. Adjust the value as you see fit}.
As for the text that appears in the input, use the code: input {font-size: 24px;} (Change the value as you see fit on your form).
If you have text areas on your form, then you will need to use this code: input, textarea {font-size: 24px;} (This will change the size of the text within the input and textarea to 24 px)
If you are also interested in changing the font family used within the input, follow our documentation at: https://www.123formbuilder.com/docs/how-to-change-the-font-family-for-form-inputs/
For further assistance, don’t hesitate to contact our Support Team at support@123formbuilder.com or via our contact page.
Thanks!
I Am trying to insert a form in my front page but I could please could you help me
Hello Daniel!
Have you tried using the JavaScript code to embed your form on the front page or any other options available in the Form Publish → Embed Code section of your form?
For technical assistance, don’t hesitate to contact our Support Team at support@123formbuilder.com or via our contact page.
Thanks!