123FormBuilder Knowledge Base
Search our documentation platform for answers, service specifications and 3rd-party integrations.
New User Interface & Navigation on 123FormBuilder
We always strive to provide an intuitive user interface and fluent experiences. Here are the highlights of our enhancements to the user interface and navigation on 123FormBuilder.
Navigation
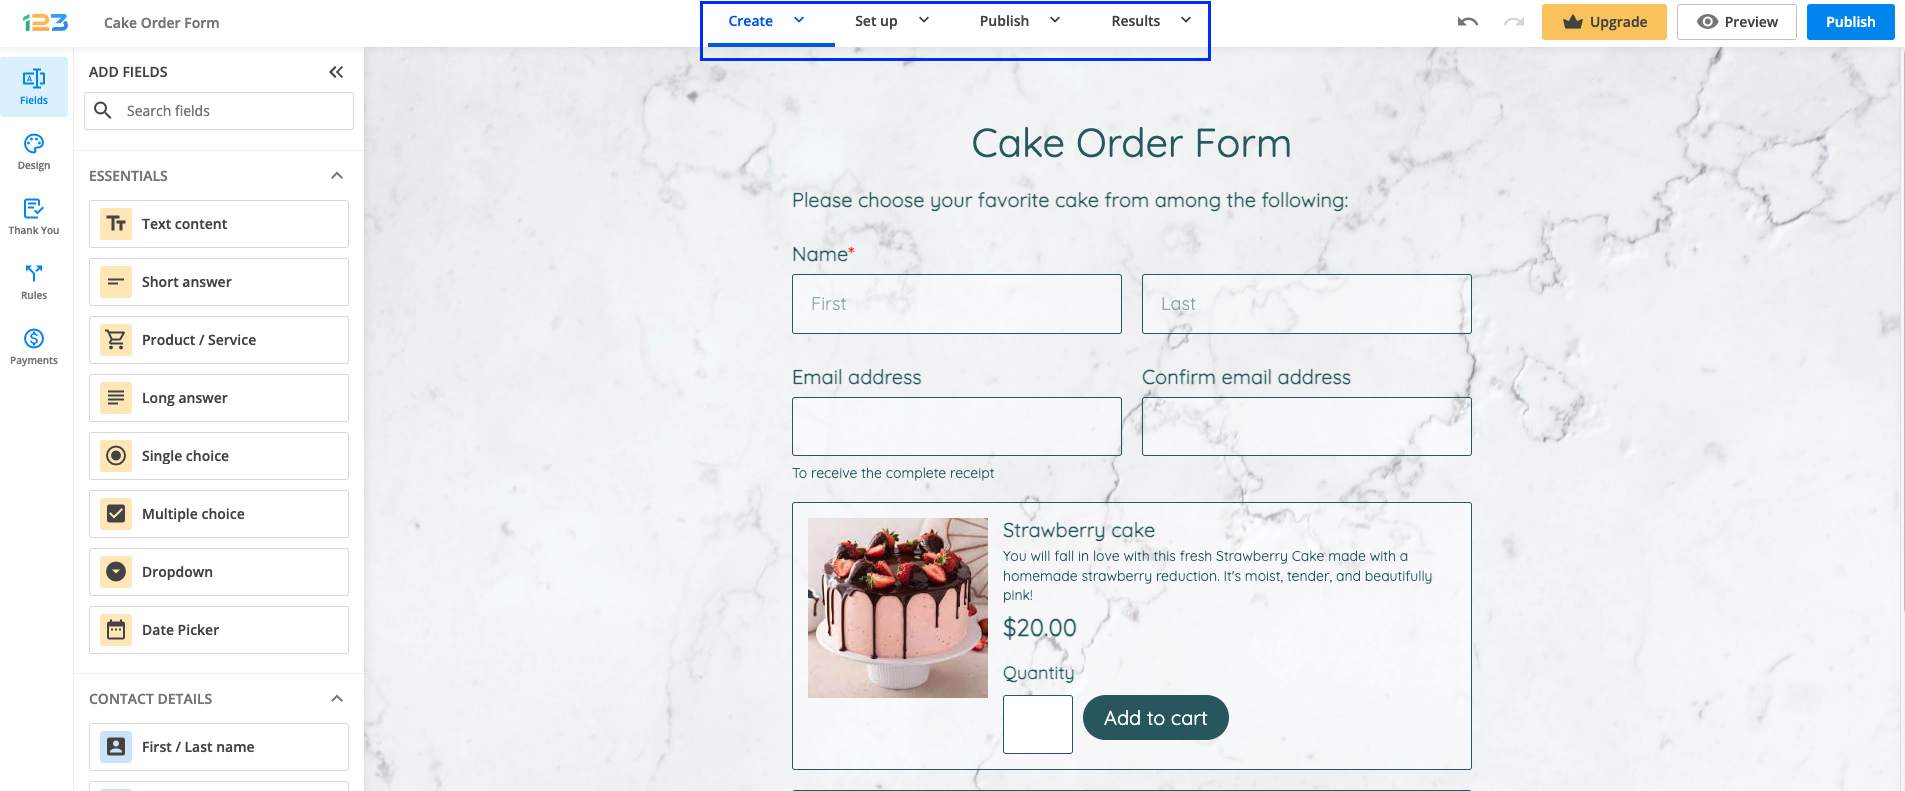
Once you start creating a form, you will notice we have 4 important navigation steps: Create – Set up – Publish – Results.
We will take each section one by one to explain them better, but the important thing is that each section has its own purpose in creating and defining your form better for you to make the most out of it.
Create
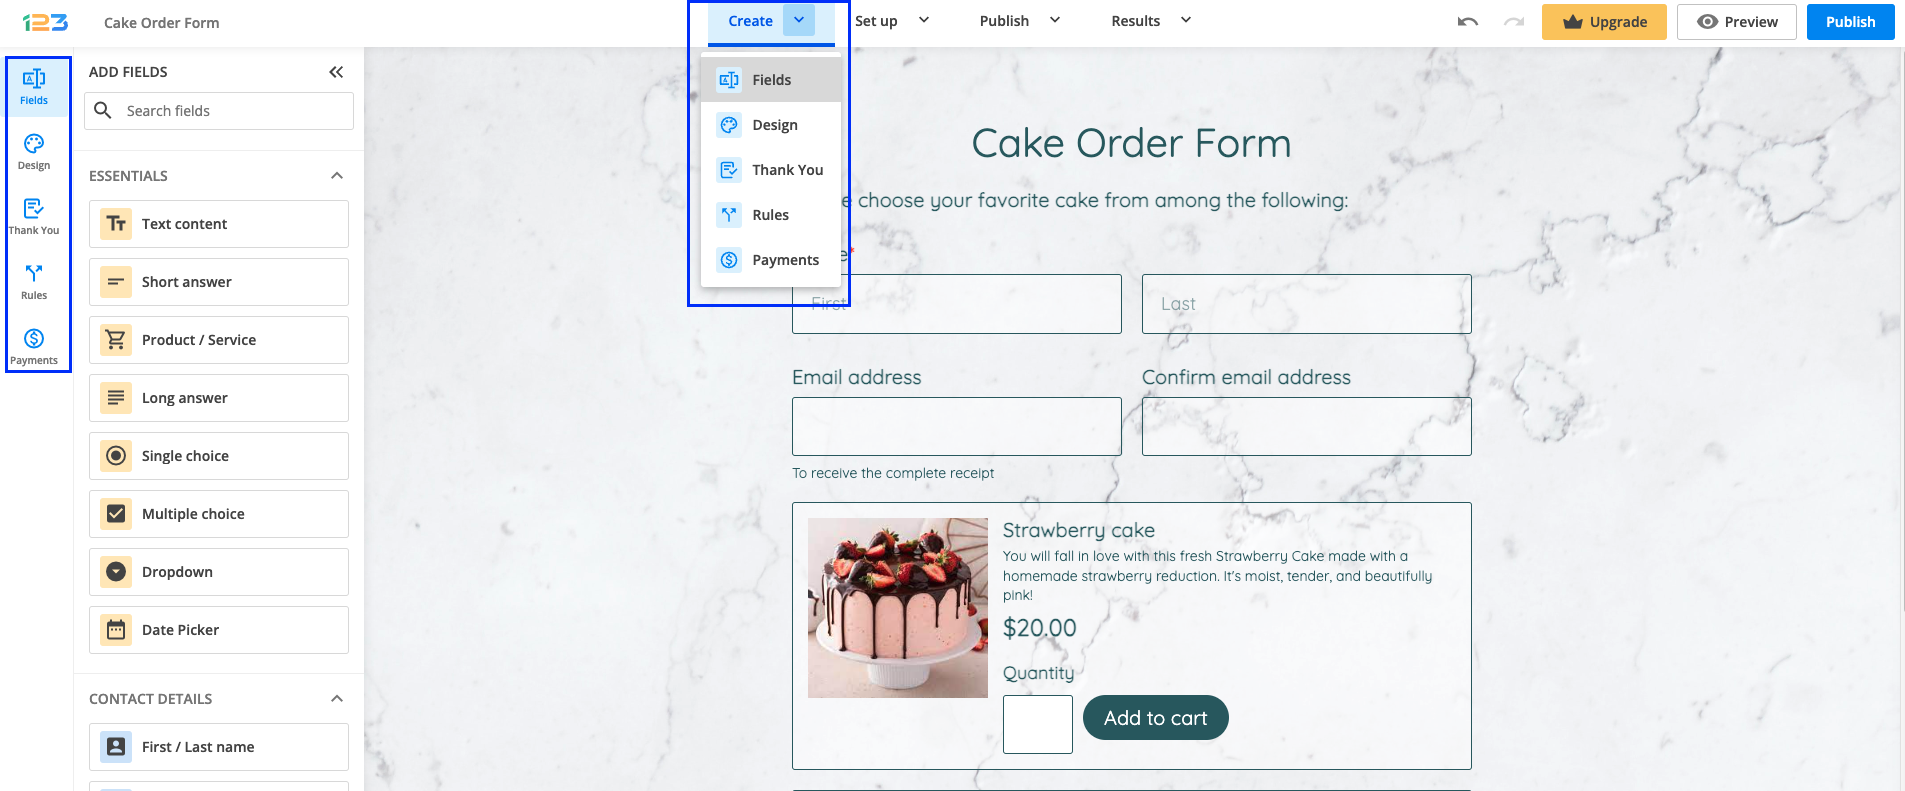
You can easily switch between Fields (to add fields to your form), Design (to apply design changes to your form), Thank you (to configure the Thank you screen shown after submitting the form), Rules (to apply field rules & form rules) and Payments (to add & enable a payment processor on your form).
You can navigate from one subsection to another either by clicking on the left-side panel icons or by going to the main navigation and clicking on the arrow that expands all the subsections you can find within a section.
Fields
By default, the Fields section is selected when you start creating the form as it represents the core structure. This contains a list of fields organized under different categories in the Form Editor. There are seven categories: Essentials, Contact details, Media & Structure, Uploads & Consent, Date & Time, Rating scales, E-commerce & Calculations.
All fields can be dragged & dropped into the form and customized as you wish. Once you have added a field to your form, you will notice a side menu with a few options (Settings, Duplicate, and Delete). Clicking on the Settings option will open a panel on the right side. From here, you can customize the newly added field, such as marking the field as required or setting up a validation.
The field label (question text) and instructions can be edited inline. Each time you click on a field, the inline menu bar will display at the top of the field so you can customize the label text any way you see fit for your form.

Design
By navigating to the Design section, you can change just about anything on your form, from text font and color to the style of the submit button. Expand the section you want to apply changes to in order to find more design settings. From the Design section, you can also change the form’s theme by clicking on Browse other themes. Here you will find some predefined themes as well as the custom form themes that you created and saved.

Thank You
If you want to change the screen your respondents see after they submit the form, then you have to go to the Thank You section where you can find multiple options.

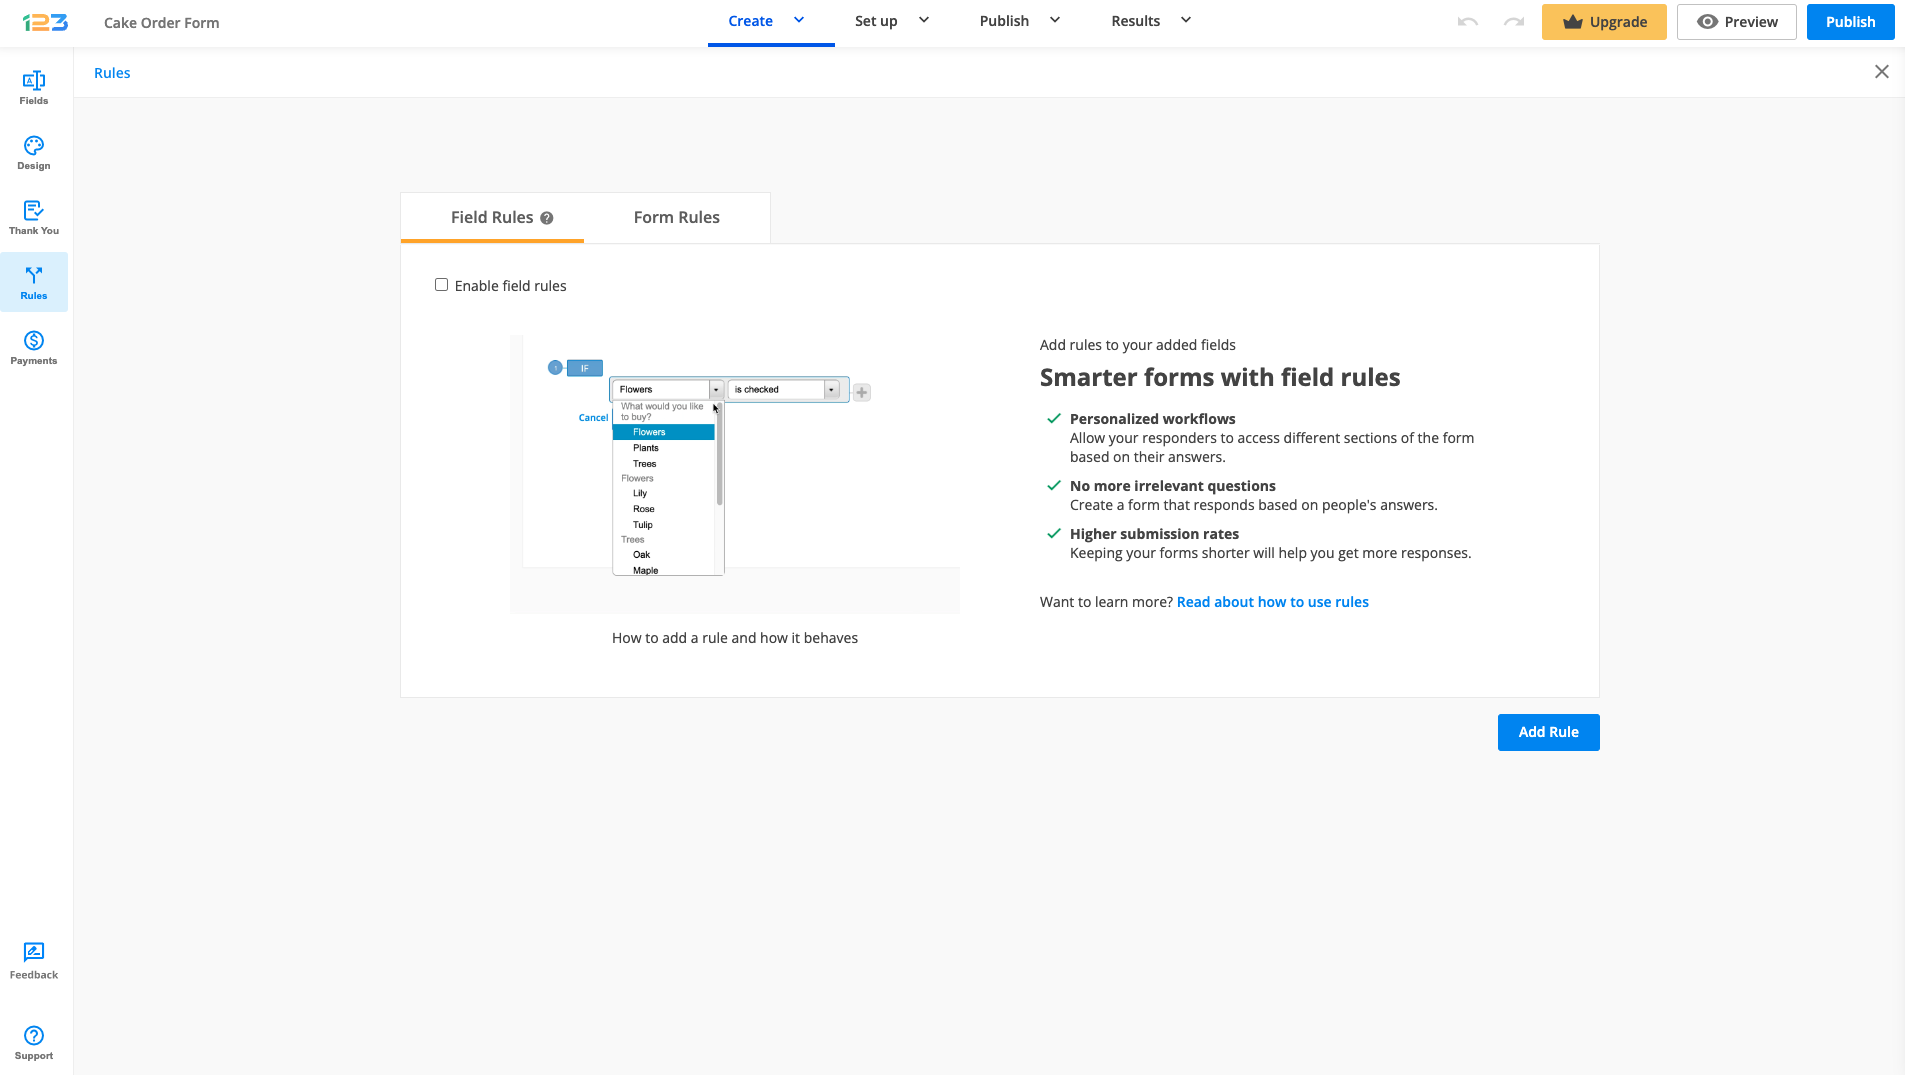
Rules
With 123FormBuilder, you can make your form more dynamic by changing its behavior based on the input provided by your respondents. Navigate to the Rules section where you can apply field rules & form rules.
Payments
One of the most important sections, especially if you are creating an order form, is Payments. From here, you can choose the payment processor that fits your needs. Once added to the form, in the right side panel, you will need to provide additional information to enable the payment processor.

Set up
After you have the structure of your form, you’ll most likely be interested in making it more powerful. With 123FormBuilder, you can easily achieve this. The Set up section offers you multiple customizations for your form, empowering you to tailor it to your exact needs.

Emails is the first section from Set up which opens by default. From here, you can create & customize the emails you want to send out after the form is submitted.

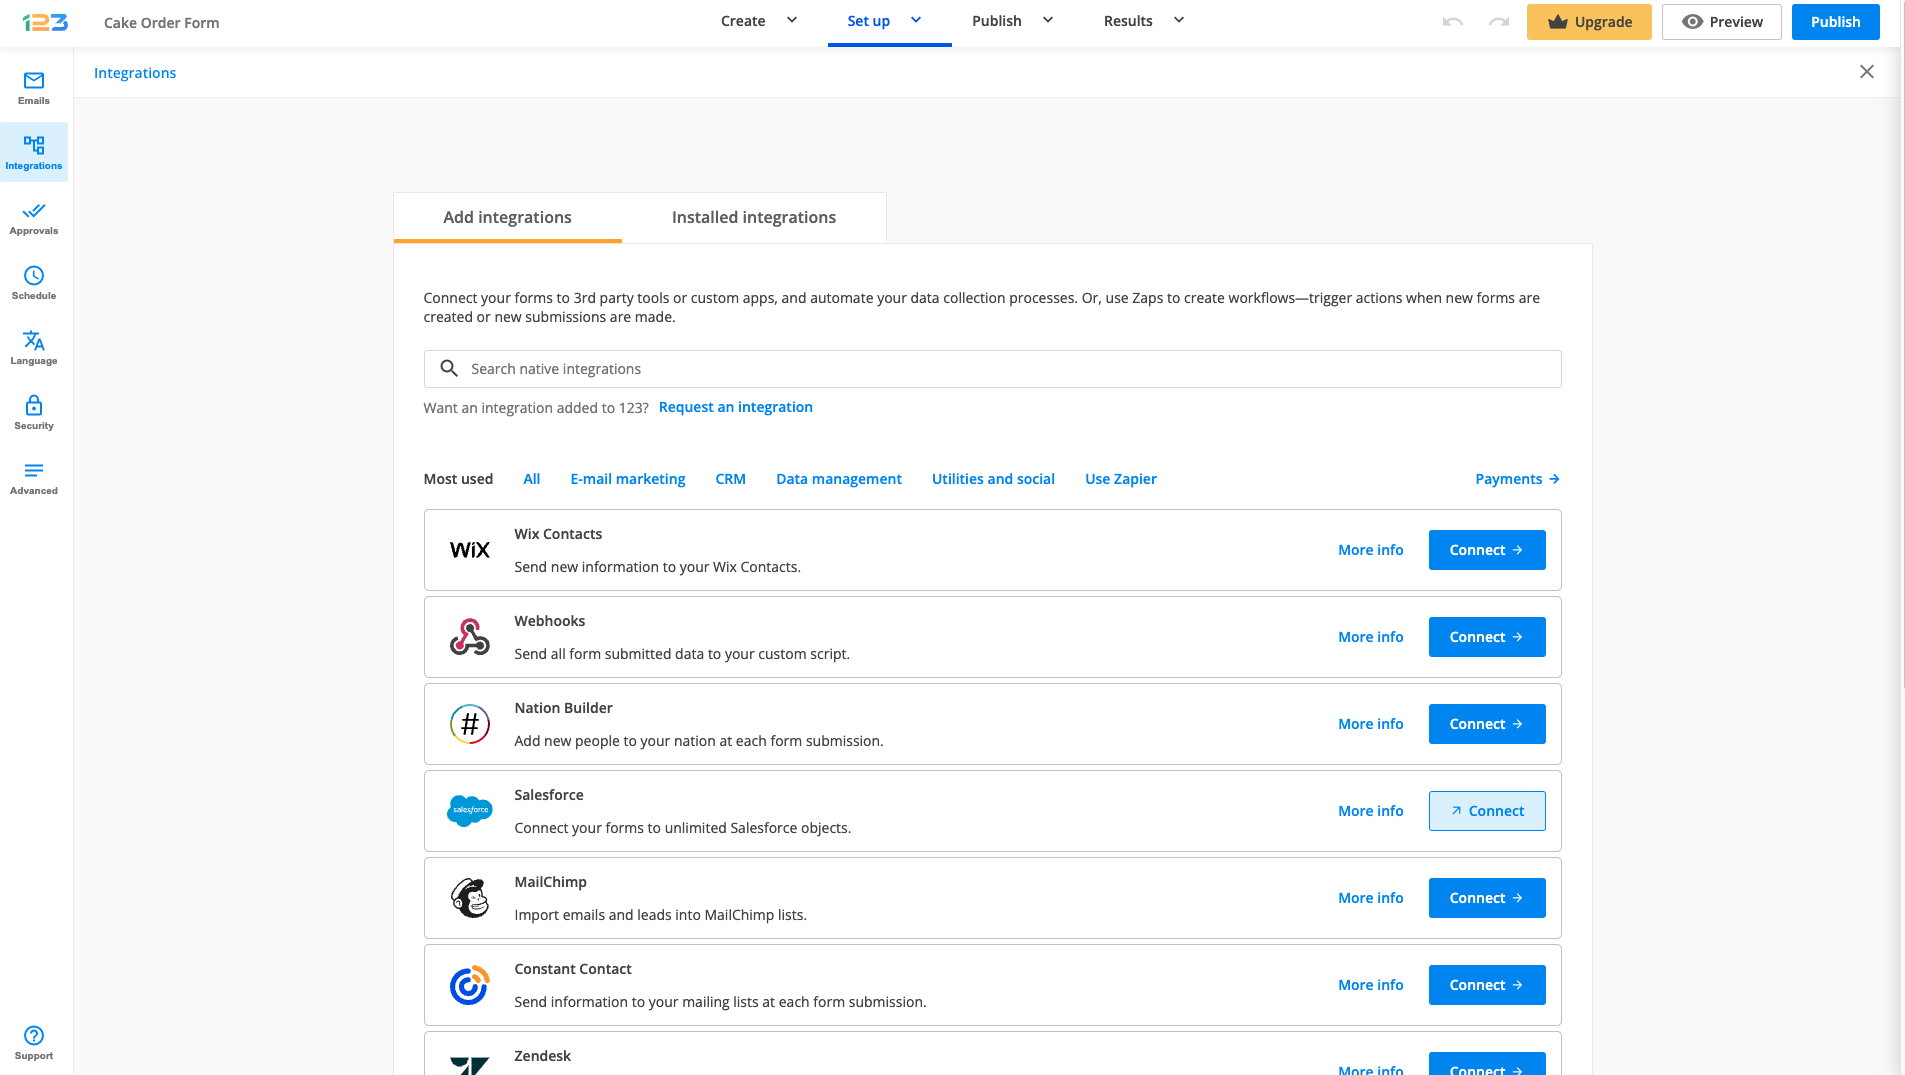
The Integrations section offers you multiple options for connecting with over 30 third-party app integrations. You will find 3rd party apps specialized in email marketing, CRM, Data management, Utilities, and social. We also included our Zapier most used connections.
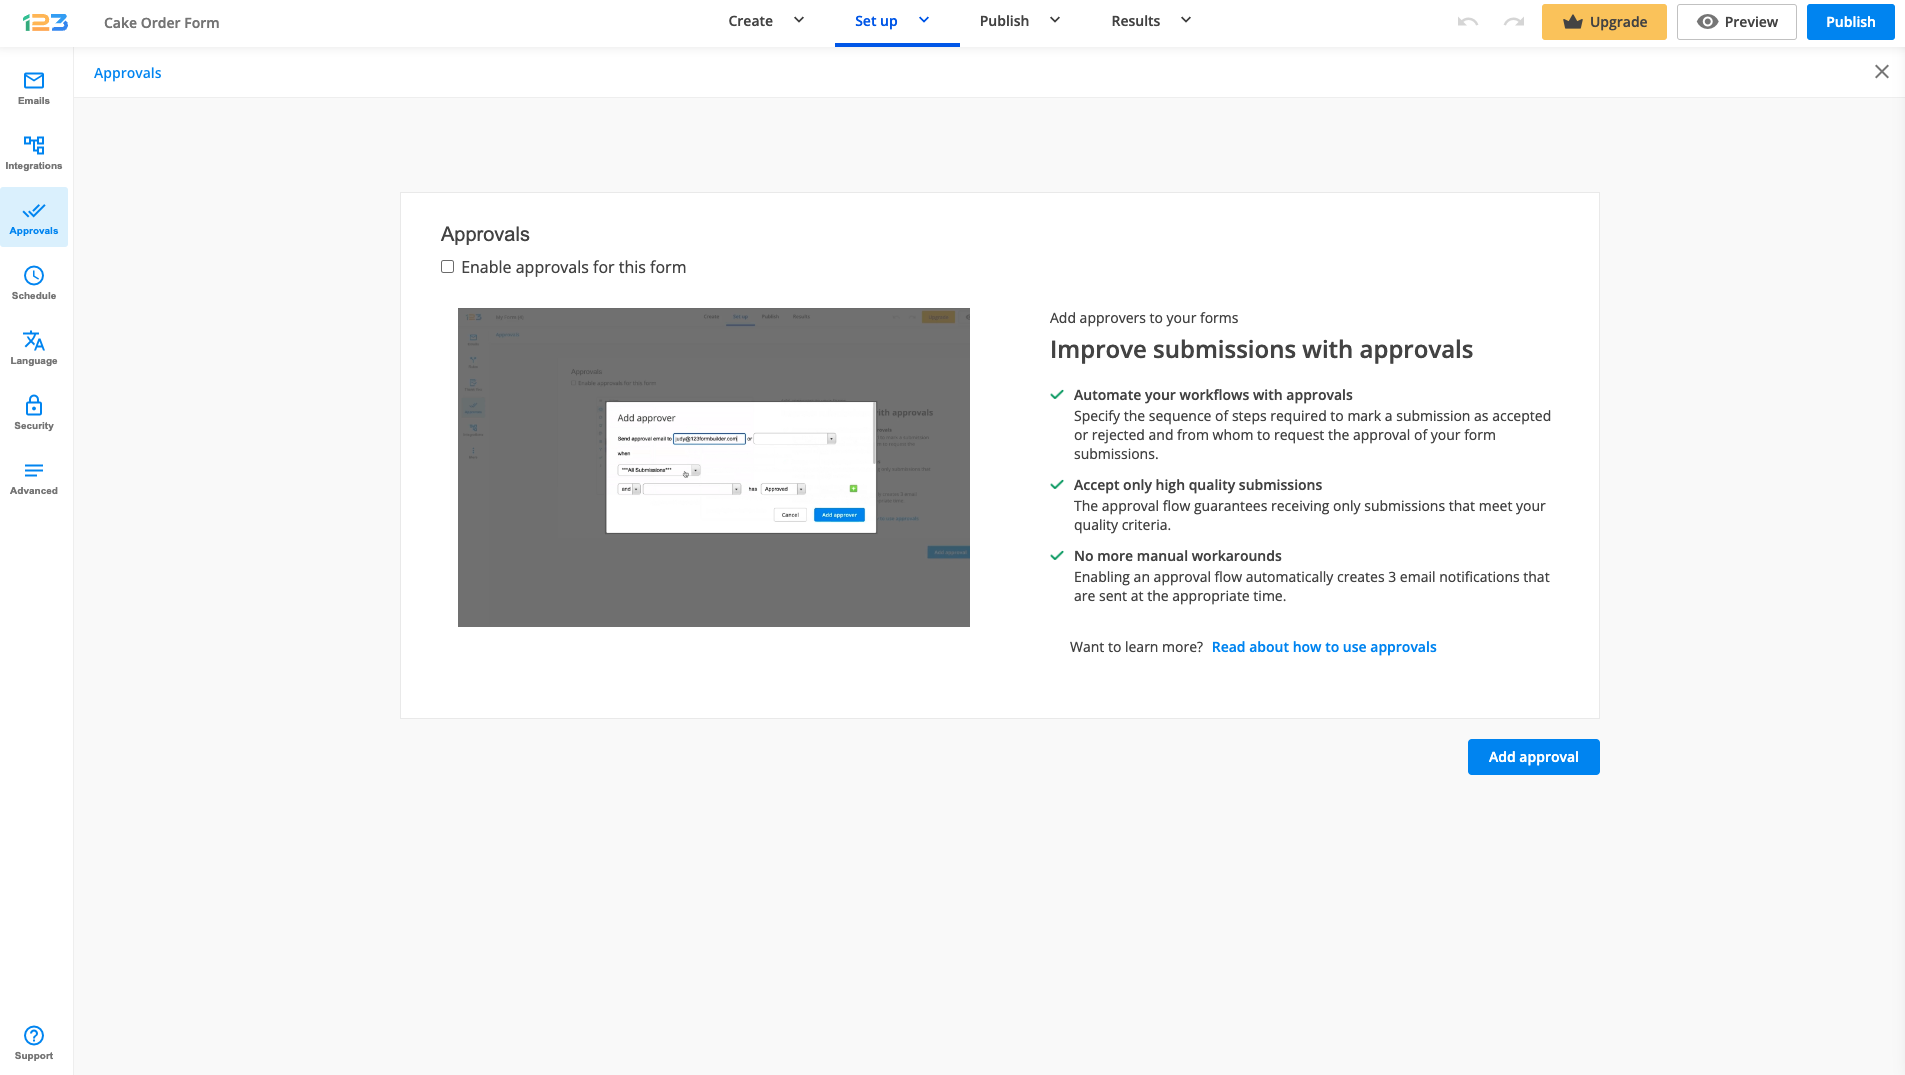
You can even create a series of steps to accept submissions by setting up approval rules in the Approvals section.
Using the Schedule section, you can open your form to submissions within a predefined timeframe or only on selected days of the week. If you have subusers, you can also make your form active only for yourself and your team.

The Language section offers you the option to create a multilanguage form by adding translations for each language.

If you want to create a password for accessing your form, set a limit for your submissions, or add a Country filter, then Security is the place to do it.

Advanced is the section from where you can add scripts to your form, allow users to edit and save for later their entries, and many more.

Preview
You can preview the form by clicking on the Preview button. Here you can switch from a desktop view to either a tablet or mobile view. Additionally, for the Tablet & Mobile view, you can check two different views: Portrait & Landscape. These features are really helpful for you to test how the form would display on different devices to make sure your respondents have the smoothest experience when completing the form.
Extra tip: based on your form, we are calculating an estimated time it would take your respondents to complete the form. Pay attention to it and make sure your forms are easy and quick to fill out to make the best out of them.

Publish
When you are satisfied with how your form looks and you have applied all the configurations that you need, all you have to do is Publish your form and share it with your respondents.
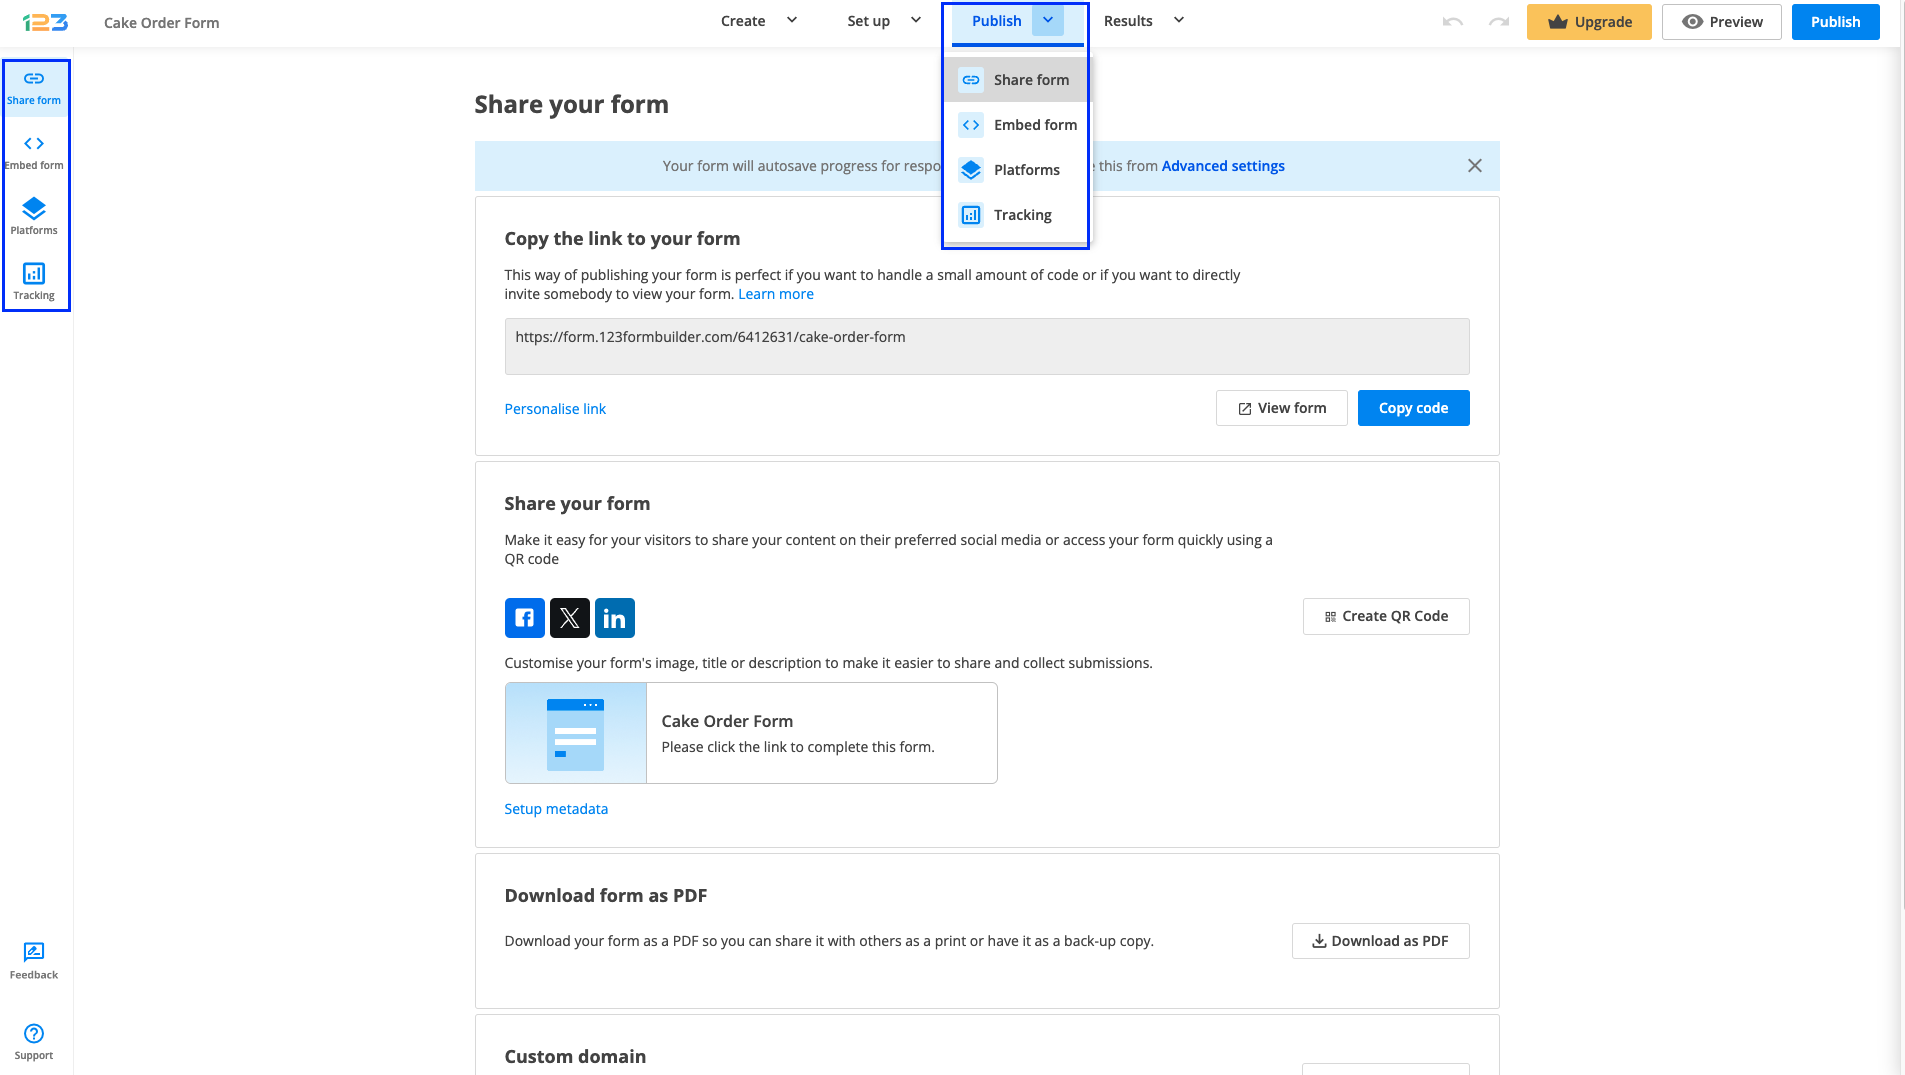
Share form is the first section of Publish. From here you can copy the link of your form, quickly share your form on social media, create a QR code for your form, or even download it as a PDF. The option that brings the best personalization to your form is adding a custom domain.
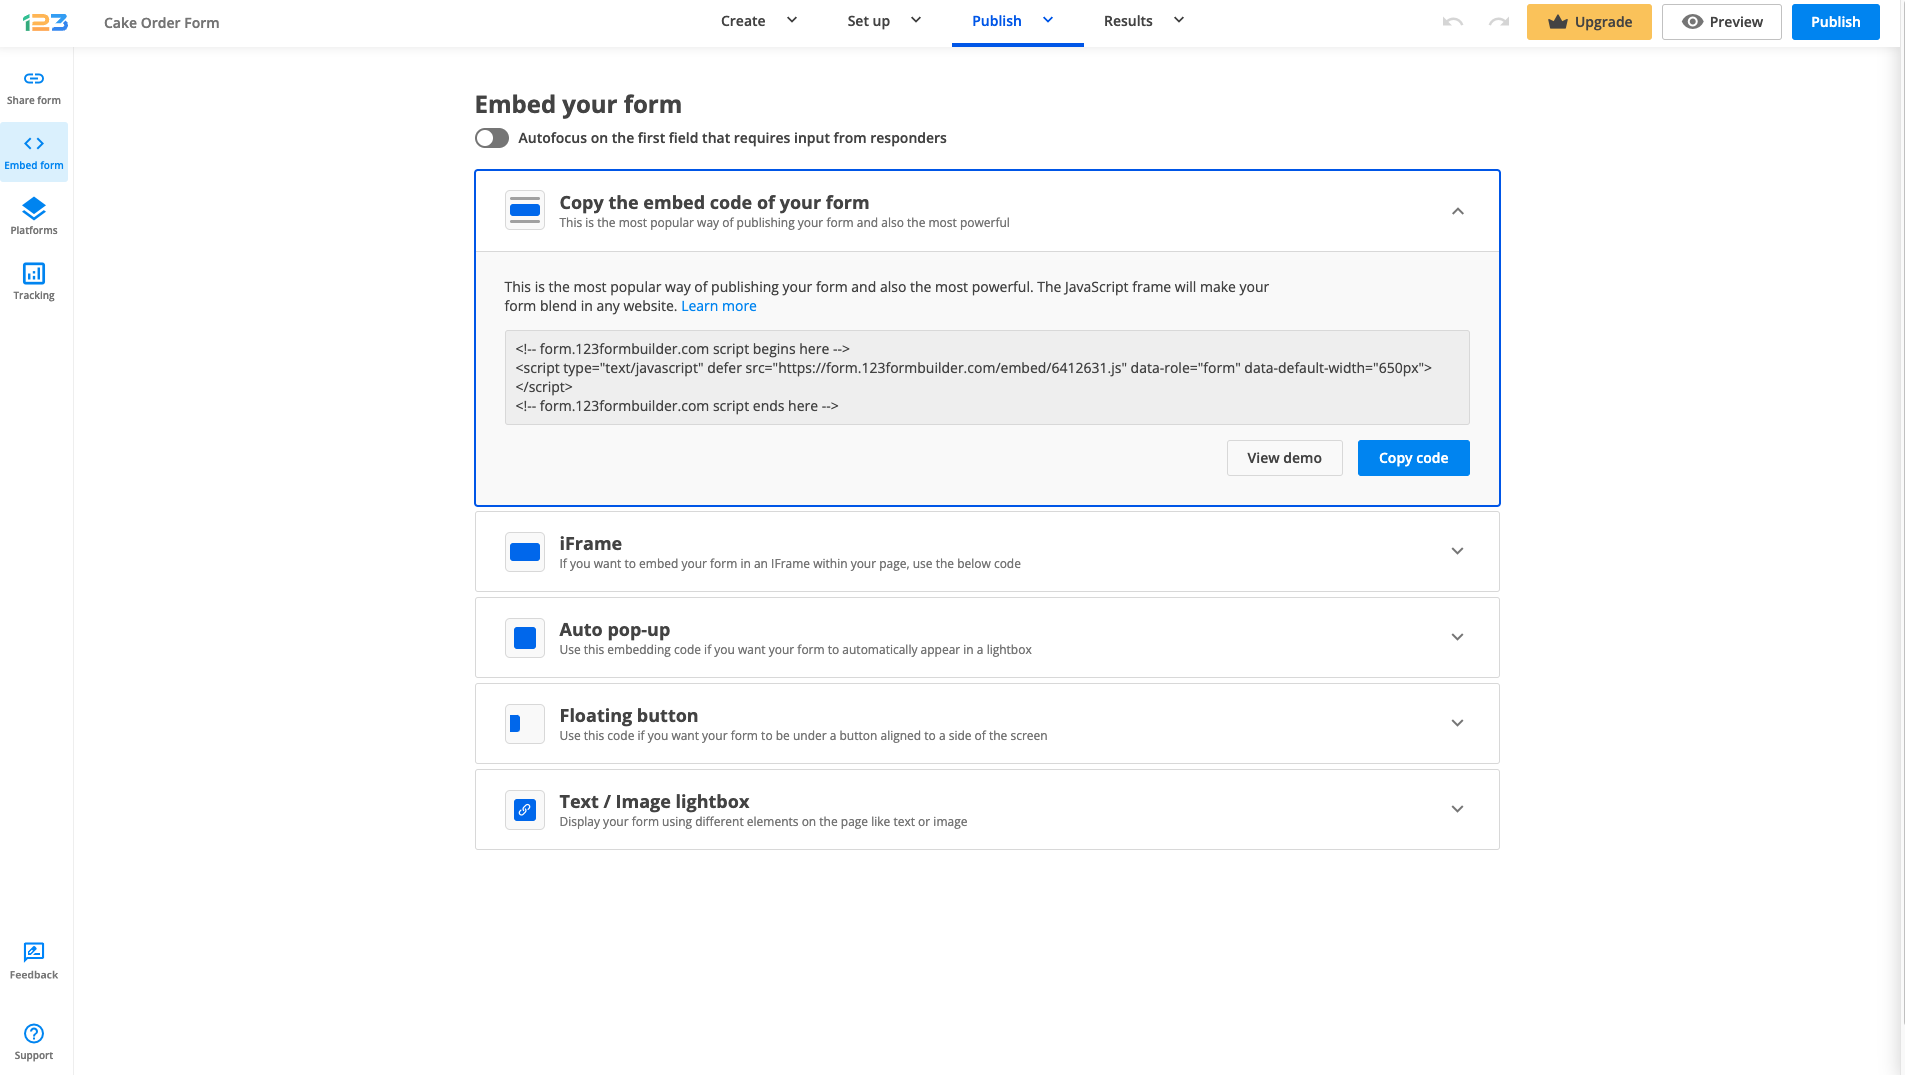
The Embed form section offers multiple embedding options: you can use the classic JavaScript code or switch to an iFrame. If you want your form to pop up on your website, simply select Auto pop-up and copy the provided code. A more modern approach would be embedding your form as a Floating button. Just customize the text, color, and alignment and there you go! The code is ready for you to copy and embed on your website.
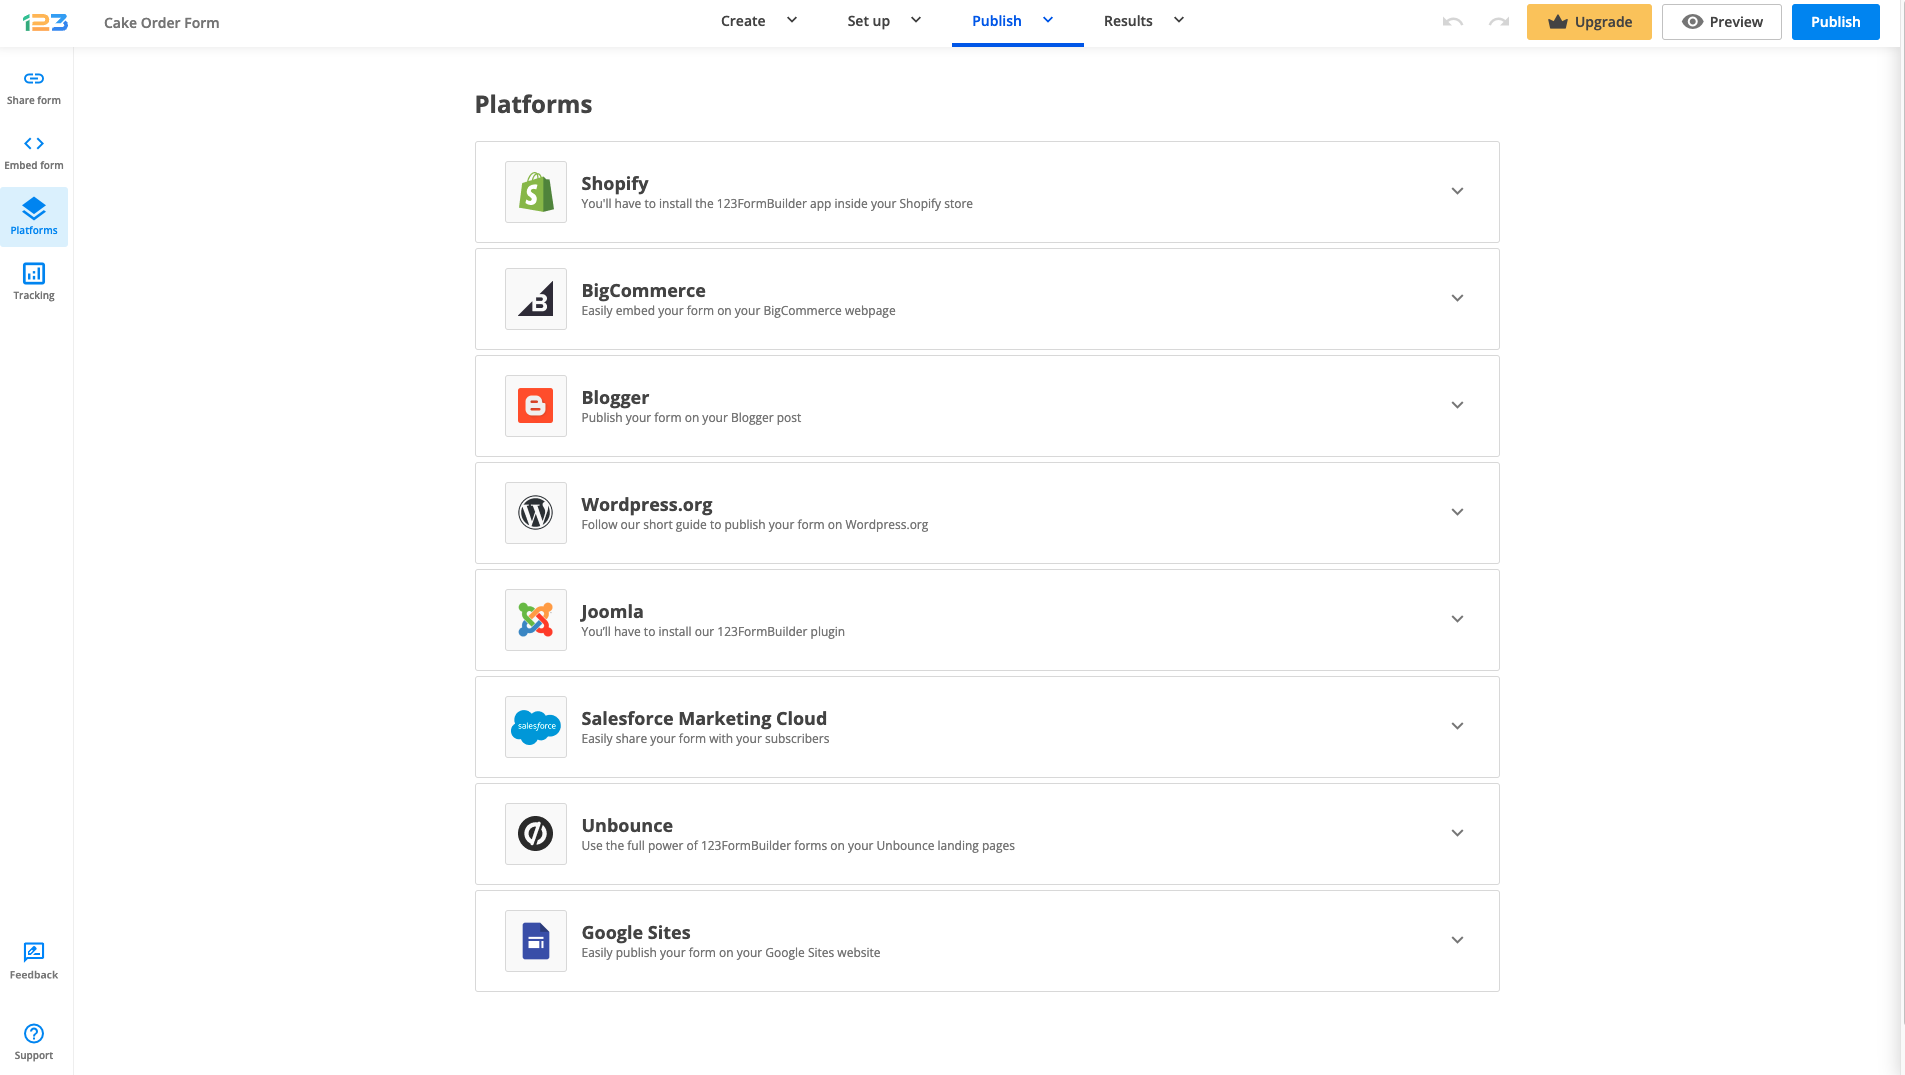
The Platforms section acts as a quick sharing method on one of the most popular platforms.
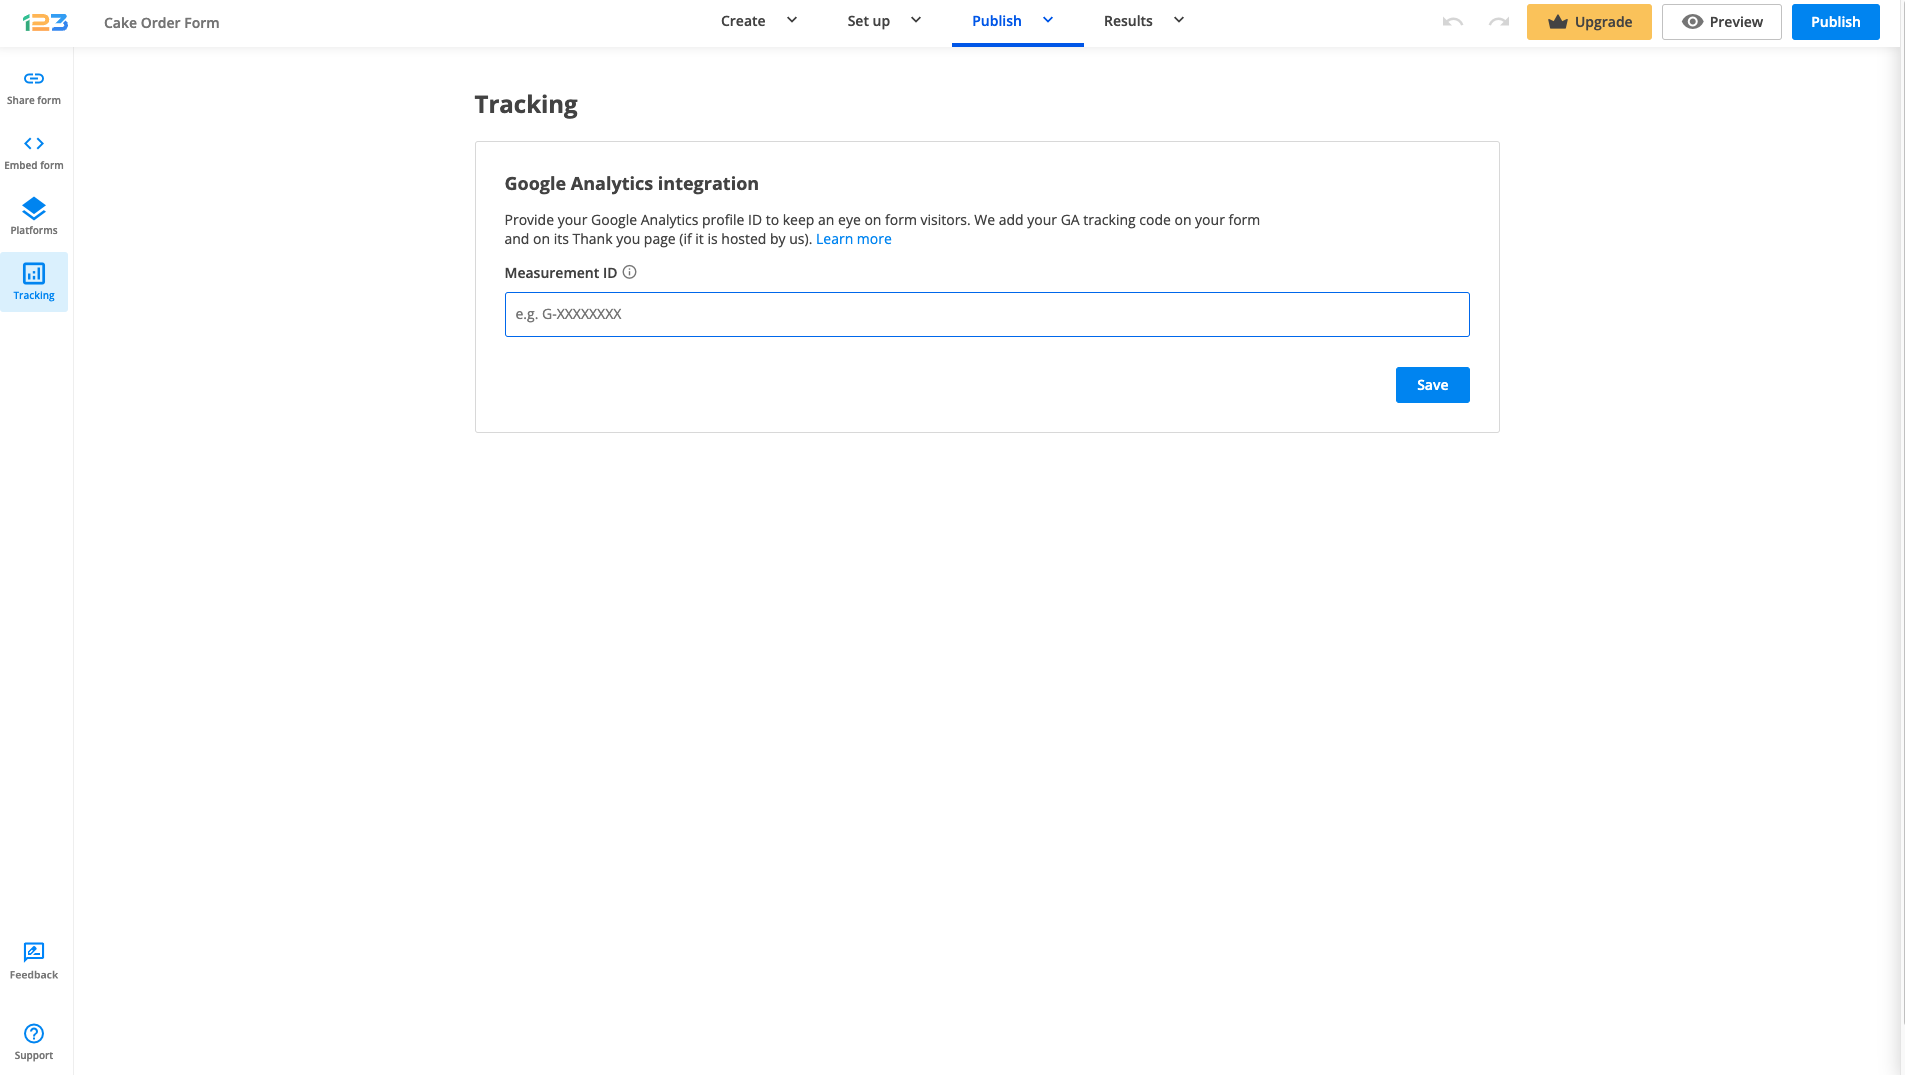
With 123FormBuilder you can also use Google Analytics to track your form’s performance. Just click on Tracking and provide your information.
Results
After you make a test submission or start to gather real submissions, the next step is to check your Results.
In the Results section, you can find all the collected data. This is divided into three sections: Insights, Submissions, and Reports and you can easily navigate between sections.
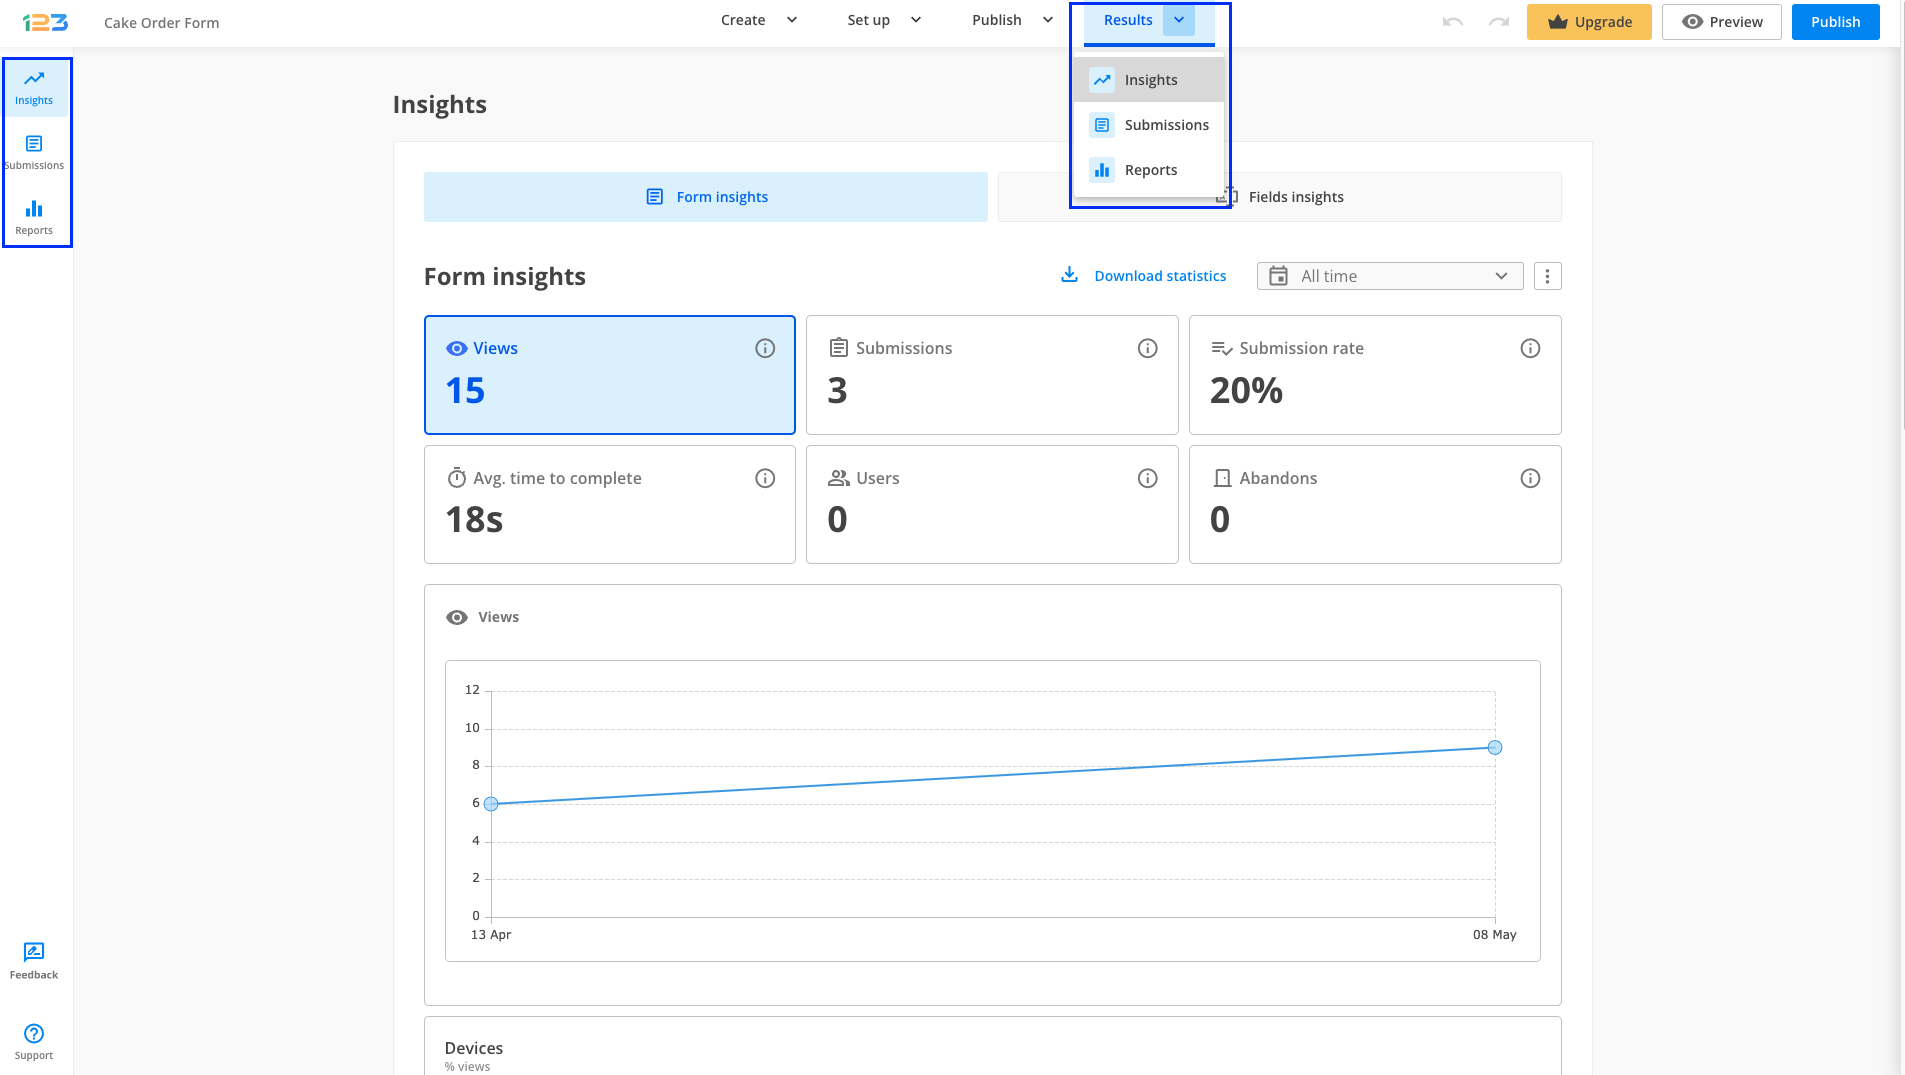
The first section is Insights where you can find quick information related to your form’s performance. 123FormBuilder gathers data on views & submissions, submission rate, and the average completion time of your respondents.
Additionally, you can find information related to the devices, referrers, and locations from where your respondents viewed and submitted the form.
By navigating to Submissions, you can check out the submissions table. 123FormBuilder gathers all of your submissions in one place. Here you can also filter and export your form data.
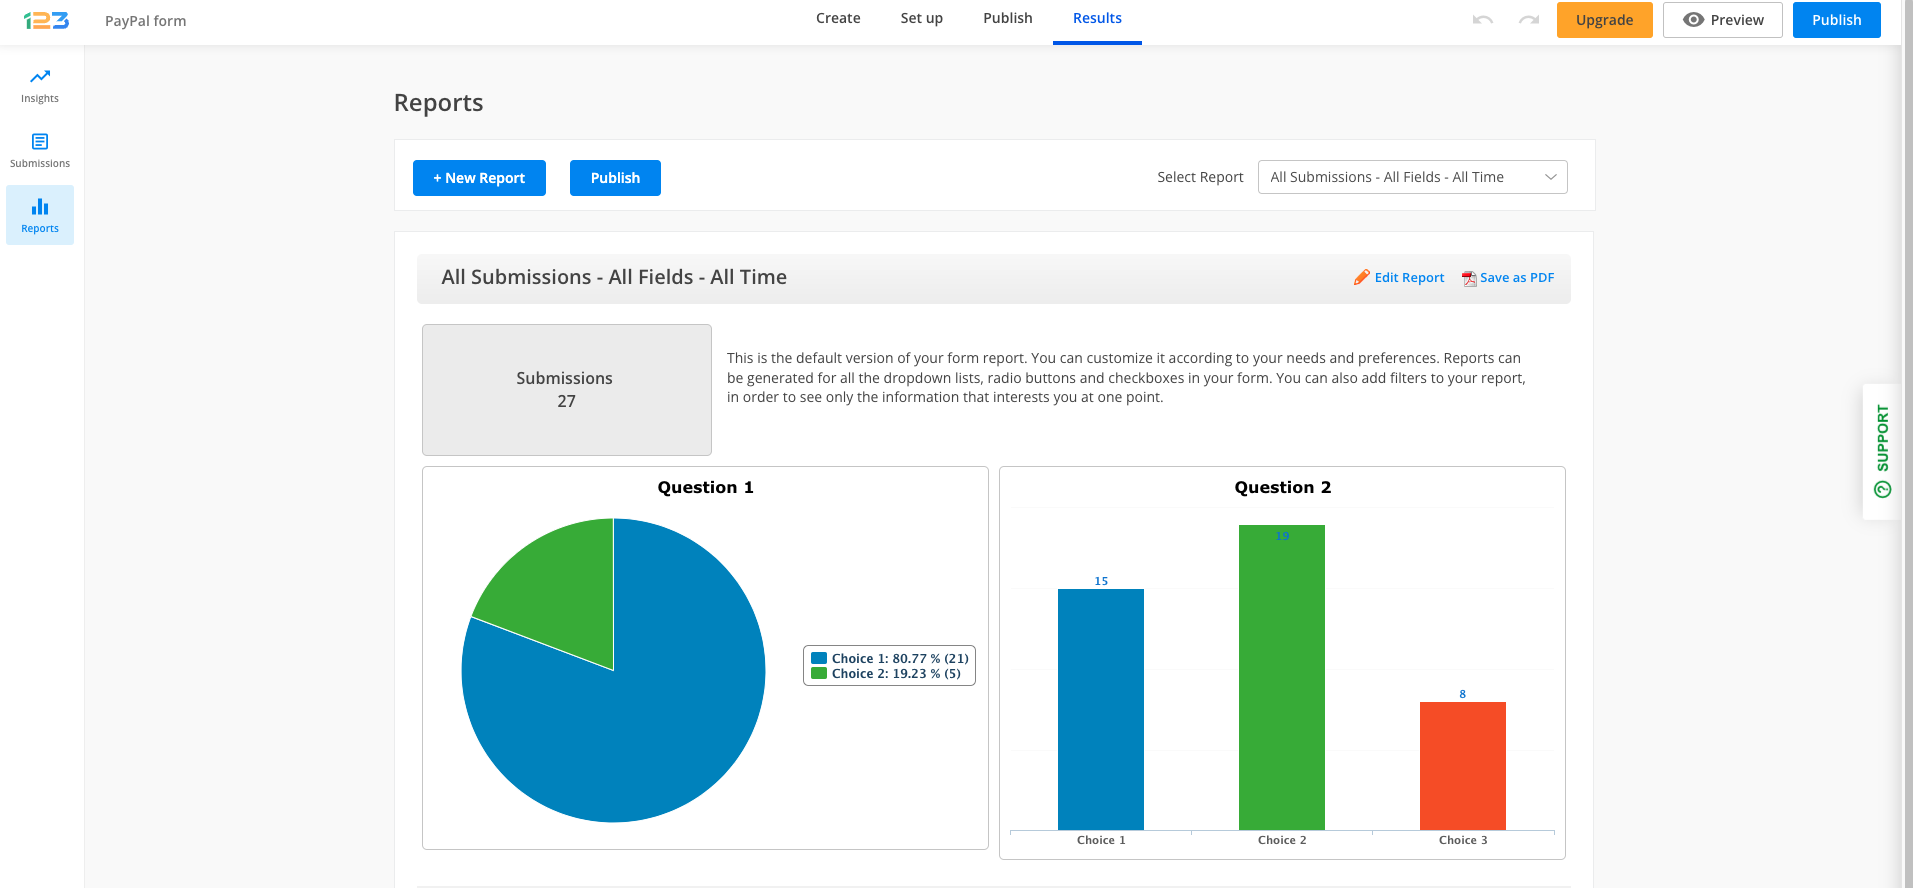
Reports offer you the possibility of creating custom reports, besides the default one. Here you can easily visualize the data your form has gathered as charts and graphs.
Similar Articles
Frequently Asked Questions
Here is a list of the most frequently asked questions. For more FAQs, please browse through the FAQs page.