123FormBuilder Knowledge Base
Search our documentation platform for answers, service specifications and 3rd-party integrations.
How to customize the Thank You page in 123FormBuilder?
You can easily customize the Thank You page by accessing the Form Editor of your online form. From the left side panel, click on Thank you.
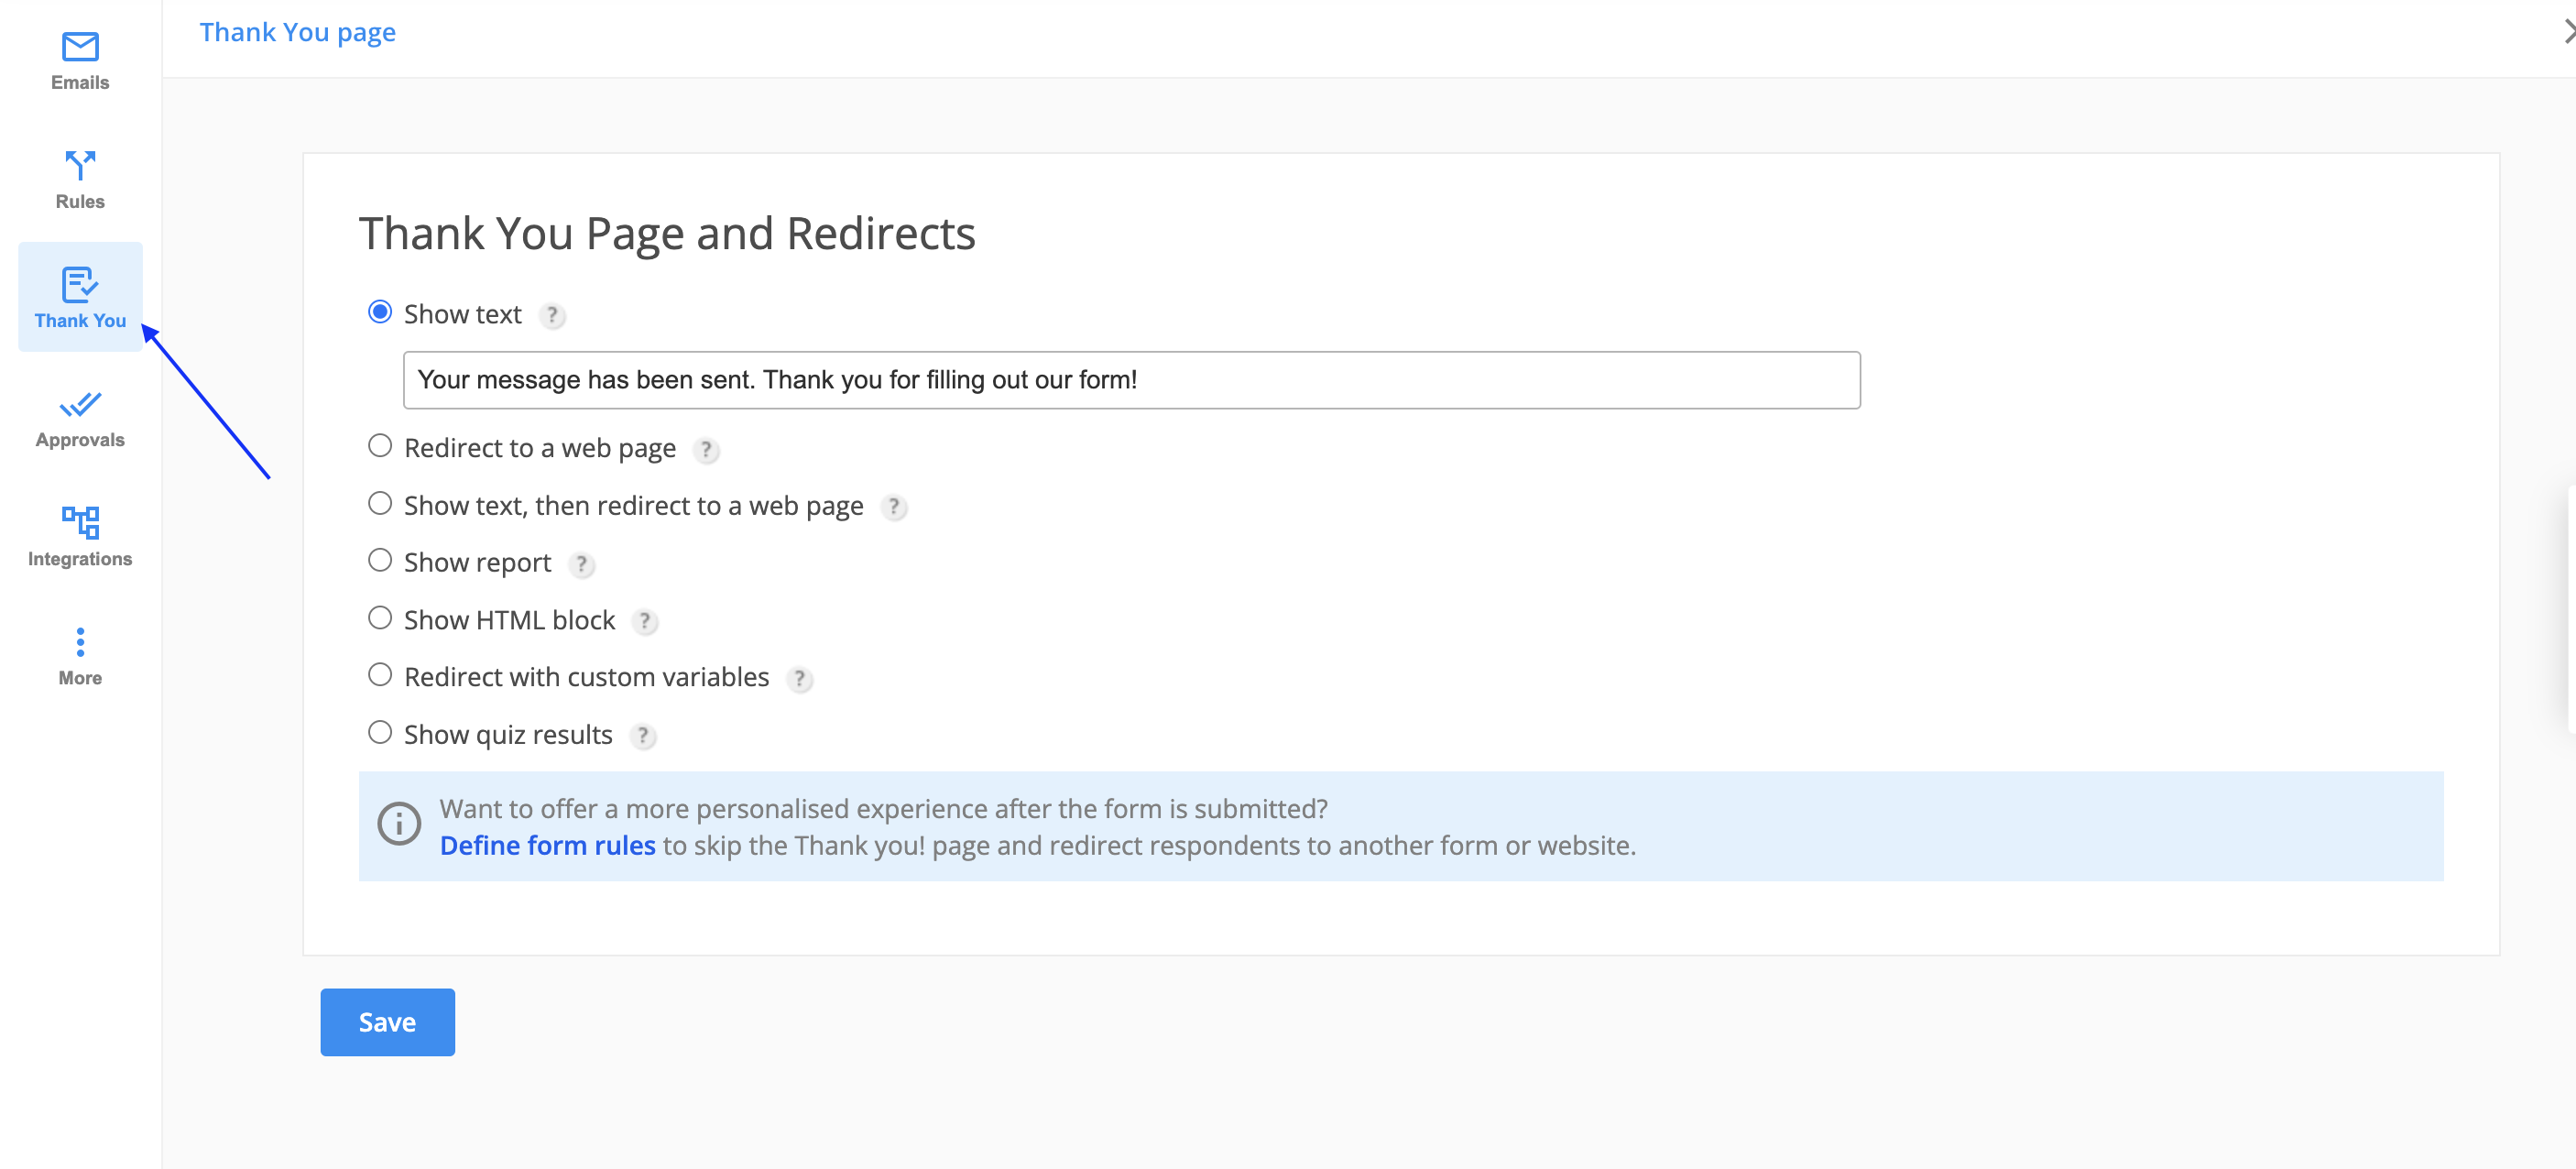
The next step is to click the option Show HTML block. Here you can add different codding elements, images, text styles, form inputs, and videos. You can also add a form input in the HTML block. Just select the field in the dropdown list located on the top, and press the Add button on the right.
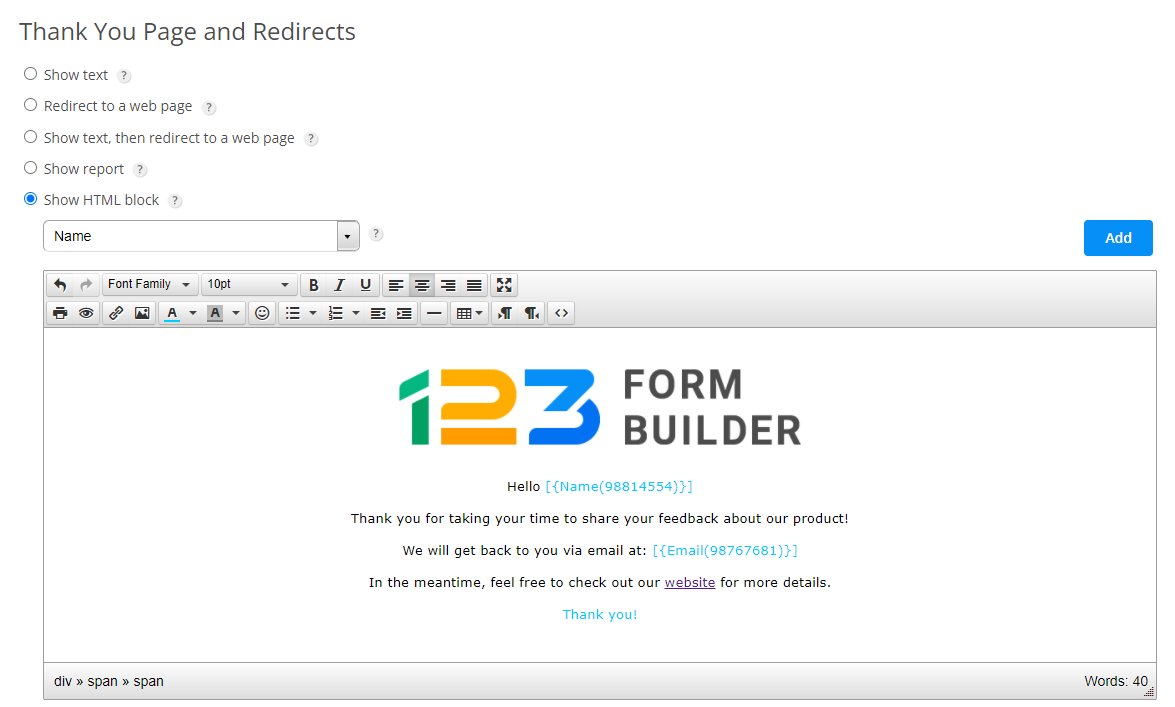
After submitting the form, your visitors will be redirected to a page with the content you have customized in the HTML block. It’s important to mention that the form’s header will also appear on the Thank You page.
Important Note
The custom Thank You page does not support JavaScript for security reasons. Instead, you can upload the script on the Web and add it to your form via its URL as described in our documentation.
If interested in how to embed videos in the HTML block, follow the steps from this documentation. In short, just hit Source code in the HTML block and paste the embed code there.
Are you familiar with editing notification email templates in HTML mode for your online forms? If so, then the HTML block of the Thank You page is not that different. The content within the HTML block is displayed the same way within the layout of the Thank You page. The only significant difference is the form field, because here you see a code of the field, while on the Thank You page your form visitors will see their input.
Try out the options of the HTML block and see how the content is displayed after submission.
25 comments
Leave a Reply
Similar Articles
Frequently Asked Questions
Here is a list of the most frequently asked questions. For more FAQs, please browse through the FAQs page.
Is there a way to insert a URL into the body of the page using a variable from a Salesforce integration AND have 123FormBuilder recognize it as a link?
I’m able to insert the variable, but 123FormBuilder doesn’t recognize it as a link.
When I add a link and insert the variable it gets encoded on save which prevents the variable from being picked up.
Hi Spencer, please contact us at customercare@123formbuilder.com and share with us the name of the form on which you are working so we can check the current settings. Thank you and we look forward to hearing from you!
Hello – just wondering if there is a way to set the background for the HTML block thank-you message to transparent? I have tried everything I can find the form’s design settings, but it still comes up with a white background. Thank-you!
Hello Hannah! Yes with a custom CSS that can be achieved. Please copy this code:
.form-container
{background-color:transparent!important;}
and paste the code in Edit- Themes – Add custom CSS.It should do the trick and make the background of the HTML block transparent.
On this form: https://www.nsdtc.net/level-1-registration We need to remove the default message that appears before completing purchasing (thank you for filling out the form….) Please notice this message appears before our THANK YOU PAGE. We don’t want to show ‘Thank you for filling out the form!’ message before purchasing.
Where can we remove/edit that default message, please?
Hello David! Thank you for your comment. To change that system message, please go to Settings – Translations – edit the language and paste that text in the search bar. Under the column called Translation, you are able to type your own message.
Here are more details on how to add a translation to your form.
Hi,
Is there a way to get a different URL for the Thank You page of the form so that you can track conversions of a form submit not just view?
At present the submit age appears the same as the from url itself.
Thanks,
Sophie
Hi Sophie!
You can add a Google Analytics conversion tracking script on the Thank You page of your online form. Make sure that in Settings – Thank You Page you have selected the option Show Text or Show text, then redirect to a web page. This step is mandatory to be able to track correctly the conversions
Next, create a JavaScript file and go to the Settings → Advanced section of your form, check the box Add a JS script to the Thank You page of your form and paste the URL of the JavaScript file (.js) where your Google Analytics conversion tracking code is hosted online.
Thank you!
I’d like to add a pdf to my thank you page that my customers can download after the form is completed. Is that possible? How?
Hello Ilana!
Yes. What you need to do is to add the link of a webpage in Settings – Thank you Page – Redirect to a webpage. The PDF will be embedded on your own webpage and users will be redirected to that page after submitting the form.
There is a second option to send the PDF file as an attachment in a custom email. More details about the autoresponder you can find here: https://www.123formbuilder.com/docs/can-i-attach-files-to-my-email-templates/
How do I disable the thank you page as I don’t want this to show when a form is submitted.
Hello Sally,
The Thank you page can not be completely removed, however you can redirect the back to your form’s location. To do that, please go to Settings – Thank you Page – select Redirect to a Webpage in the parent frame and insert the webpage link where the form is published.
Is there a way that after submission, the person gets an e-mail with a copy of his/her input in it?
Hello Laurien! You can send them a copy of their submission. To enable this feature, go to Settings → Notifications → Form User Options and tick the box Send a copy of the completed form to the sender
Is there any way to show different thank you messages depending on the selected language of the form? Somehow I don’t seem to find it anywhere.
Hi Michael,
When using the Redirect to a web page option under the Settings -> Thank you page section, it is possible to redirect users to a different URL that includes specific language based on the one selected on the form.
To redirect the user to a different page you would need to set up redirect rules from the Settings -> Rules -> Form Rules section.
Thanks.
Hello! Could you please explain how to change color and font size of the text on the “Thank you” page because it’s black by default and my background is dark, so it’s very hard to read. You can fill it out on my test website and see how it looks like.
Hello Ivan,
You can use the Show HTML block option under the Settings -> Thank you page section. This will allow you to edit how the Thank You Page text is displayed, in the same way the Form Header or HTML block would.
When using the Show Text or Show text, then redirect to a web page option under the Settings -> Thank you page section, the font color and size displayed on the Thank You Page by applying custom CSS code.
In this case the CSS code include below is generally applicable to forms. You would only need to replace the pixel size and color with the values best suited to your form.
.tdmain-thankyou font b#id123-thankyou {
font-size: 15px !important;
color: red !important;
}
Thanks.
On submission of the form, is there a way to reset the form, and open a custom url in a new window?
Hello Tony.
You can choose to open a specific URL in a new tab, by using the in a new frame option of the Redirect to a web page,in the Settings -> Thank You Page section. But, there is a chance that the page will be blocked by the users browser as a pop-up. Also, the form will only reset if the page is refreshed manually, as submitting the form cannot force o refresh of the entire page.
In this case you can choose the in the parent frame option, as it works best in the majority of case, redirects the user to the desired URL, and resets the form when returning to the initial page.
If you have any other questions, please contact our Support team at support@123formbuilder.com or via our contact form.
Thanks!
Dear 123FormBuilder, In some way i can save an other choice than ´show text´ (Thank You Page and Redirects). I want to redirect or show hmtl block. But when i choice that and also edit it and i save it, it’s still on ´show text´. What do i wrong?
Thank you
Hello,
Thank you for reaching out to us.
Please make sure that you make this change in your form’s Settings section –> Thank You Page. Afterwards, it should be applied to your form.
For further assistance, you can contact us at support@123formbuilder.com and send us the form’s link that you are referring to, so we can help you with this.
Thanks!
Excellent. Would be out of this world if we could embed a [print] button! 🙂
Yes great BUT I need WYSIWYG design ability not HTML for the non coders among us
Hello Simon!
You do not need to code anything when setting up your Thank You page. You can use the toolbar from the HTML Block to style the page as you see fit. If you want to add the input of a field, select the field from the dropdown displayed on top of the block and hit the button Add. This will include the field input as a tag, which you copy and paste it in other parts of your page. Whenever someone submits the form, the respective tag will be replaced with the input given by the submitter.
If you require assistance in setting up your Thank You page, feel free to contact our support specialists at support@123formbuilder.com or via our contact form.
Thanks!