How to create a Google Forms expense tracker

In today’s financial landscape, effective spending management is essential for success. An expense tracker form, particularly through Google Forms, offers a streamlined solution for individuals and organizations alike to monitor spending habits and make informed financial decisions. This guide explores the creation of a Google Forms expense tracker and its numerous benefits, including budgeting, financial awareness, tax deductions, and more. Let’s get started!
Why Create an Expense Tracker Form?
Crafting an expense tracker form offers various advantages:
- Budgeting: It aids individuals or organizations in monitoring spending habits, facilitating the creation and maintenance of effective budgets. Tracking expenses enables users to pinpoint areas of overspending and adjust their budgets accordingly.
- Financial Awareness: By tracking expenses, users enhance their financial awareness, gaining insights into their spending patterns. This clarity allows for more informed decisions regarding spending priorities.
- Expense Control: Structured documentation of expenses empowers users to exercise better control over their spending. The act of recording expenses acts as a deterrent to unnecessary purchases and encourages mindful spending.
- Tax Deductions: For businesses or self-employed individuals, an expense tracker form helps in keeping track of deductible expenses for tax purposes. This ensures that all eligible expenses are accounted for during tax return preparation, potentially leading to tax savings.
- Financial Planning: An expense tracker form supports financial planning by offering historical data on spending trends. Users can analyze past expenses to establish realistic financial goals, monitor progress, and make adjustments as necessary.
- Financial Accountability: In shared financial settings, such as households or organizations, an expense tracker form fosters financial accountability among users. It promotes transparency and facilitates discussions about collective financial objectives and obligations.
- Documentation: Maintaining expense records through a tracker form serves as documentation for future reference. This proves useful for audits, dispute resolution, or providing evidence for reimbursement claims.
- Analysis and Insights: Data gathered via an expense tracker form can be analyzed to extract valuable insights into spending habits, trends, and patterns. This analysis informs strategic financial decisions and identifies areas for improvement or cost-saving opportunities.
In summary, creating an expense tracker form offers a plethora of benefits, including enhanced budgeting, financial awareness, expense control, tax deductions, financial planning, accountability, documentation, and analysis of spending habits.
Google Forms is a user-friendly tool that allows you to quickly create customizable forms without any coding knowledge. This makes it easy for anyone to create and use an expense tracker, regardless of their technical expertise.
Steps to create a Google Forms expense tracker
To create a Google Forms expense tracker, you’ll need to design a Google Form to collect the necessary information about expenses, and then use Google Sheets to organize and analyze the data. Here’s a step-by-step guide:
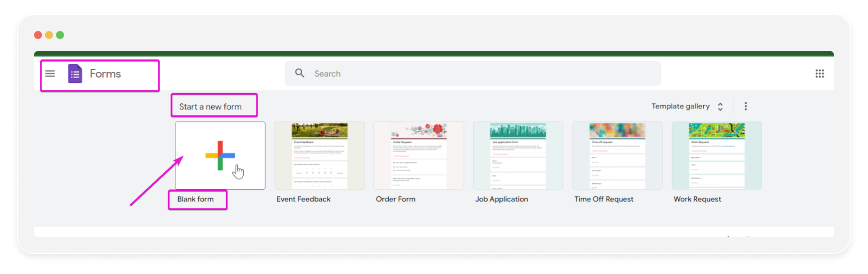
- Create a Google Form: Go to Forms → Start a New Form → Blank Form.
- Give your form a title like “Expense Tracker” and add a brief description if necessary.
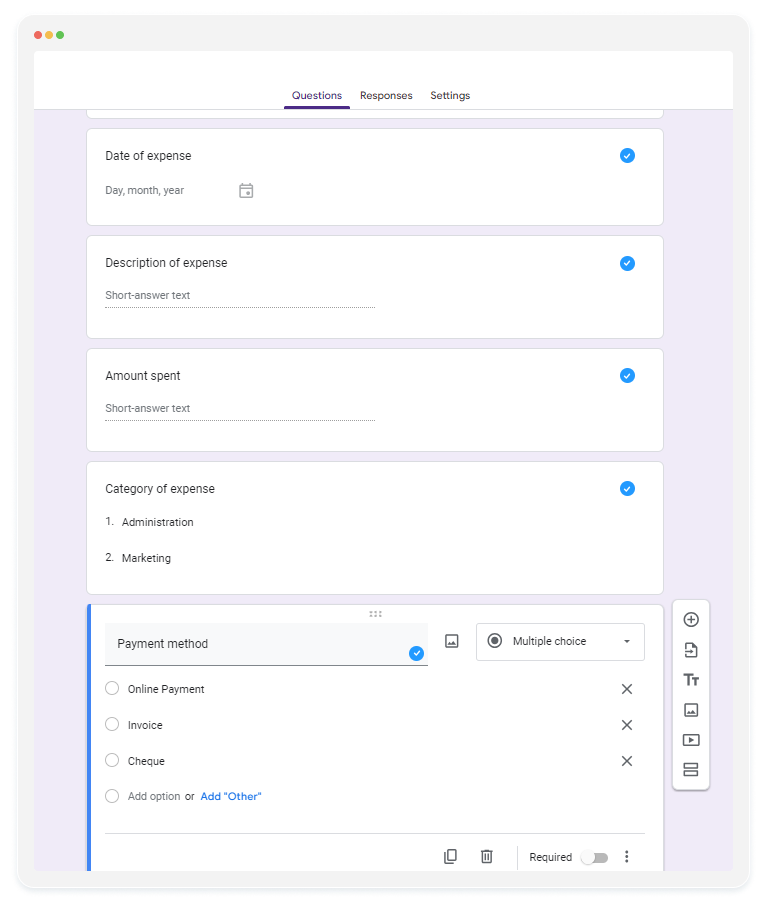
Add form fields to collect information about each expense. Some common fields may include:
- Date of expense (use the “Date” question type)
- Description of expense (use the “Short answer” question type)
- Amount spent (use the “Short answer” question type)
- Category of expense (use the “Multiple choice” or “Dropdown” question type)
- Payment method (use the “Multiple choice” or “Dropdown” question type)
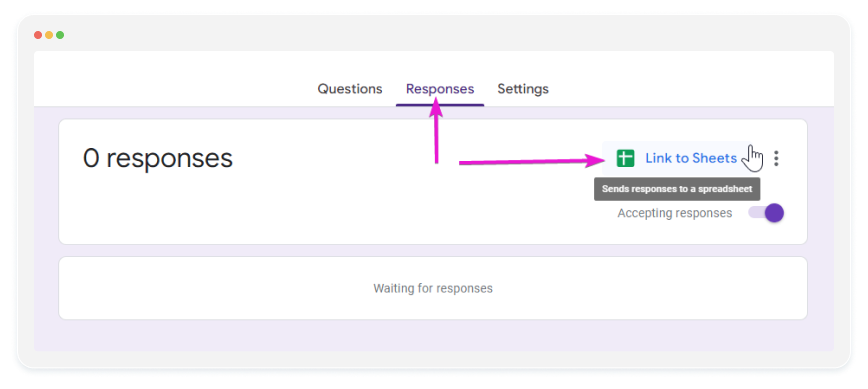
2. Link Google Form to Google Sheets:
Collect Responses in Google Sheets:
- In your Google Form editor, go to the “Responses” tab.
- Click on the Google Sheets icon to create a new spreadsheet or link to an existing one where responses will be collected.
3. Organize and Analyze Expense Data in Google Sheets:
- Open the Google Sheets spreadsheet linked to your Google Form.
- As responses are collected, they will appear in the spreadsheet.
- Organize the data by adding additional columns for any calculations or categorizations you want to perform.
- You may want to calculate total expenses, categorize expenses, or perform other analysis.
4. Share and Collaborate:
- Share the Google Form and Google Sheets spreadsheet with anyone who needs to input or view expense data.
- Collaborate with others in real-time to track and manage expenses efficiently.
By following these steps, you can create a Google Forms expense tracker to efficiently track and manage expenses. Adjust the form fields and spreadsheet as needed to fit your specific tracking requirements.
Crafting an Expense Tracker Form: Simplified with 123FormBuilder
123FormBuilder boasts a Template Gallery featuring a plethora of pre-designed templates tailored for various purposes, including expense tracking forms.
Simple Steps to Build Your Expense Tracker Form
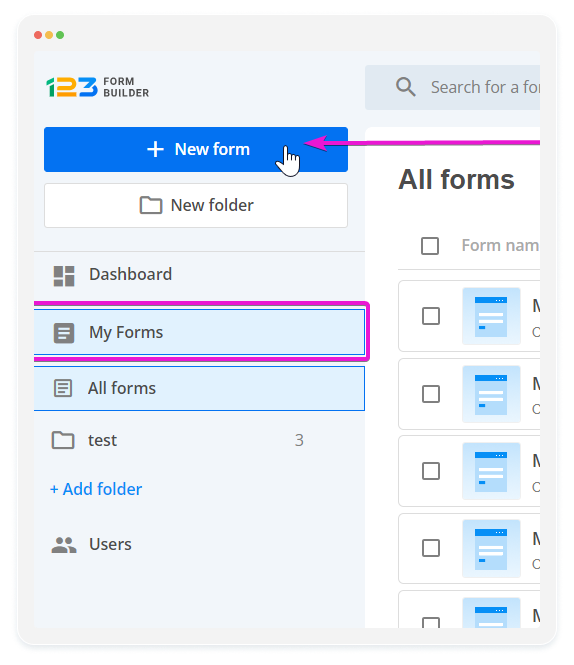
- Add the form: You can access the template gallery directly from your 123FormBuilder account.
- Go to My Forms → New Form.
- Click on the “check out the Template gallery” button.
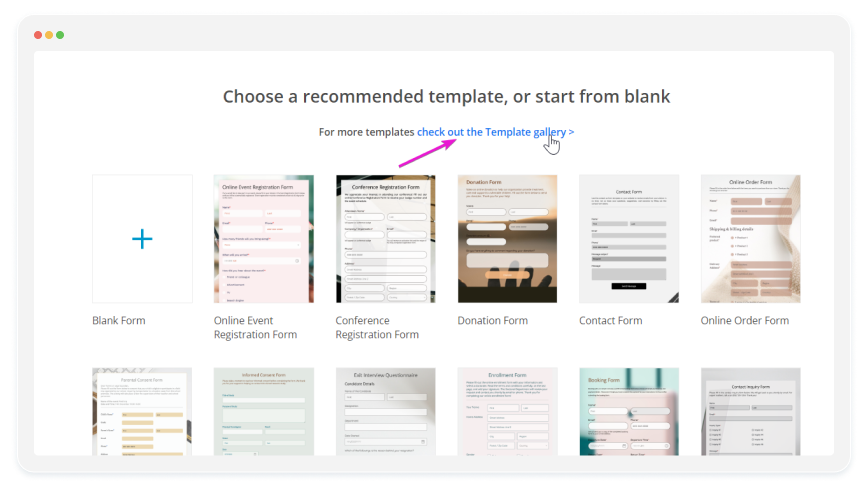
- Browse through the available templates or use the search bar to find an expense tracker template.
- Preview the template and click on the Start with this template button.
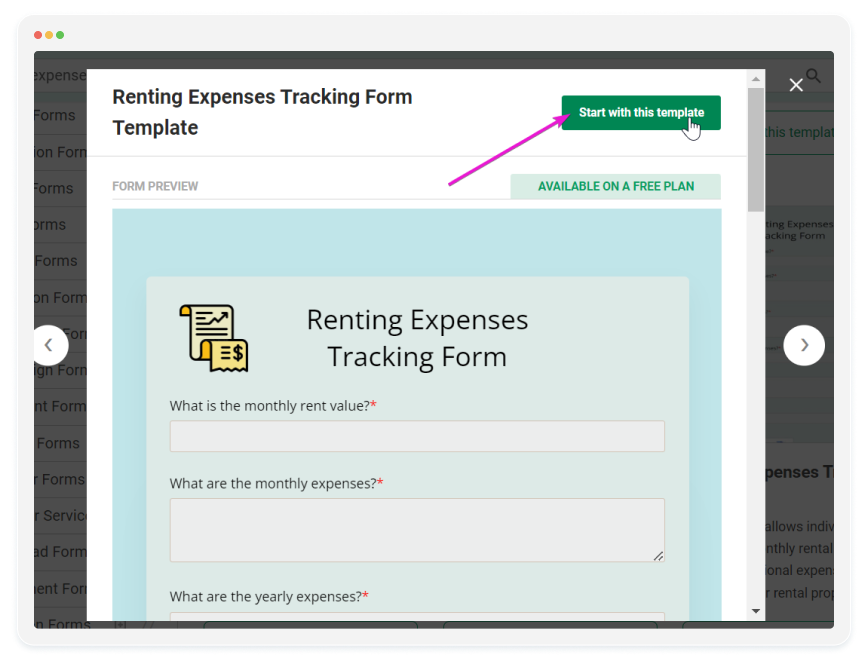
Once the template is loaded, customize the form fields according to your specific needs. You can add, remove, or edit form fields to tailor the form to your expense tracking requirements.
2. View and Analyze Responses
Responses submitted through your form will be collected and stored in your 123FormBuilder account in the Results section.
You can view and analyze responses from your dashboard, or export them to a CSV or Excel file for analysis.
You can also use the 123FormBuilder direct integration with Google Sheets and send the form responses to a Google spreadsheet created by the form or to an existing spreadsheet.
By following these steps and using a template provided by 123FormBuilder, you can quickly create an expense tracker form tailored to your specific needs.
In summary, creating an expense tracker form using Google Forms or 123FormBuilder offers numerous benefits, from improved budgeting to enhanced financial awareness. By following the steps outlined above, you can efficiently track and manage your expenses, leading to better financial planning and accountability. Whether you choose Google Forms or 123FormBuilder, both platforms provide user-friendly solutions to streamline the expense tracking process.
Load more...