123FormBuilder Knowledge Base
Search our documentation platform for answers, service specifications and 3rd-party integrations.
Knowledge Base
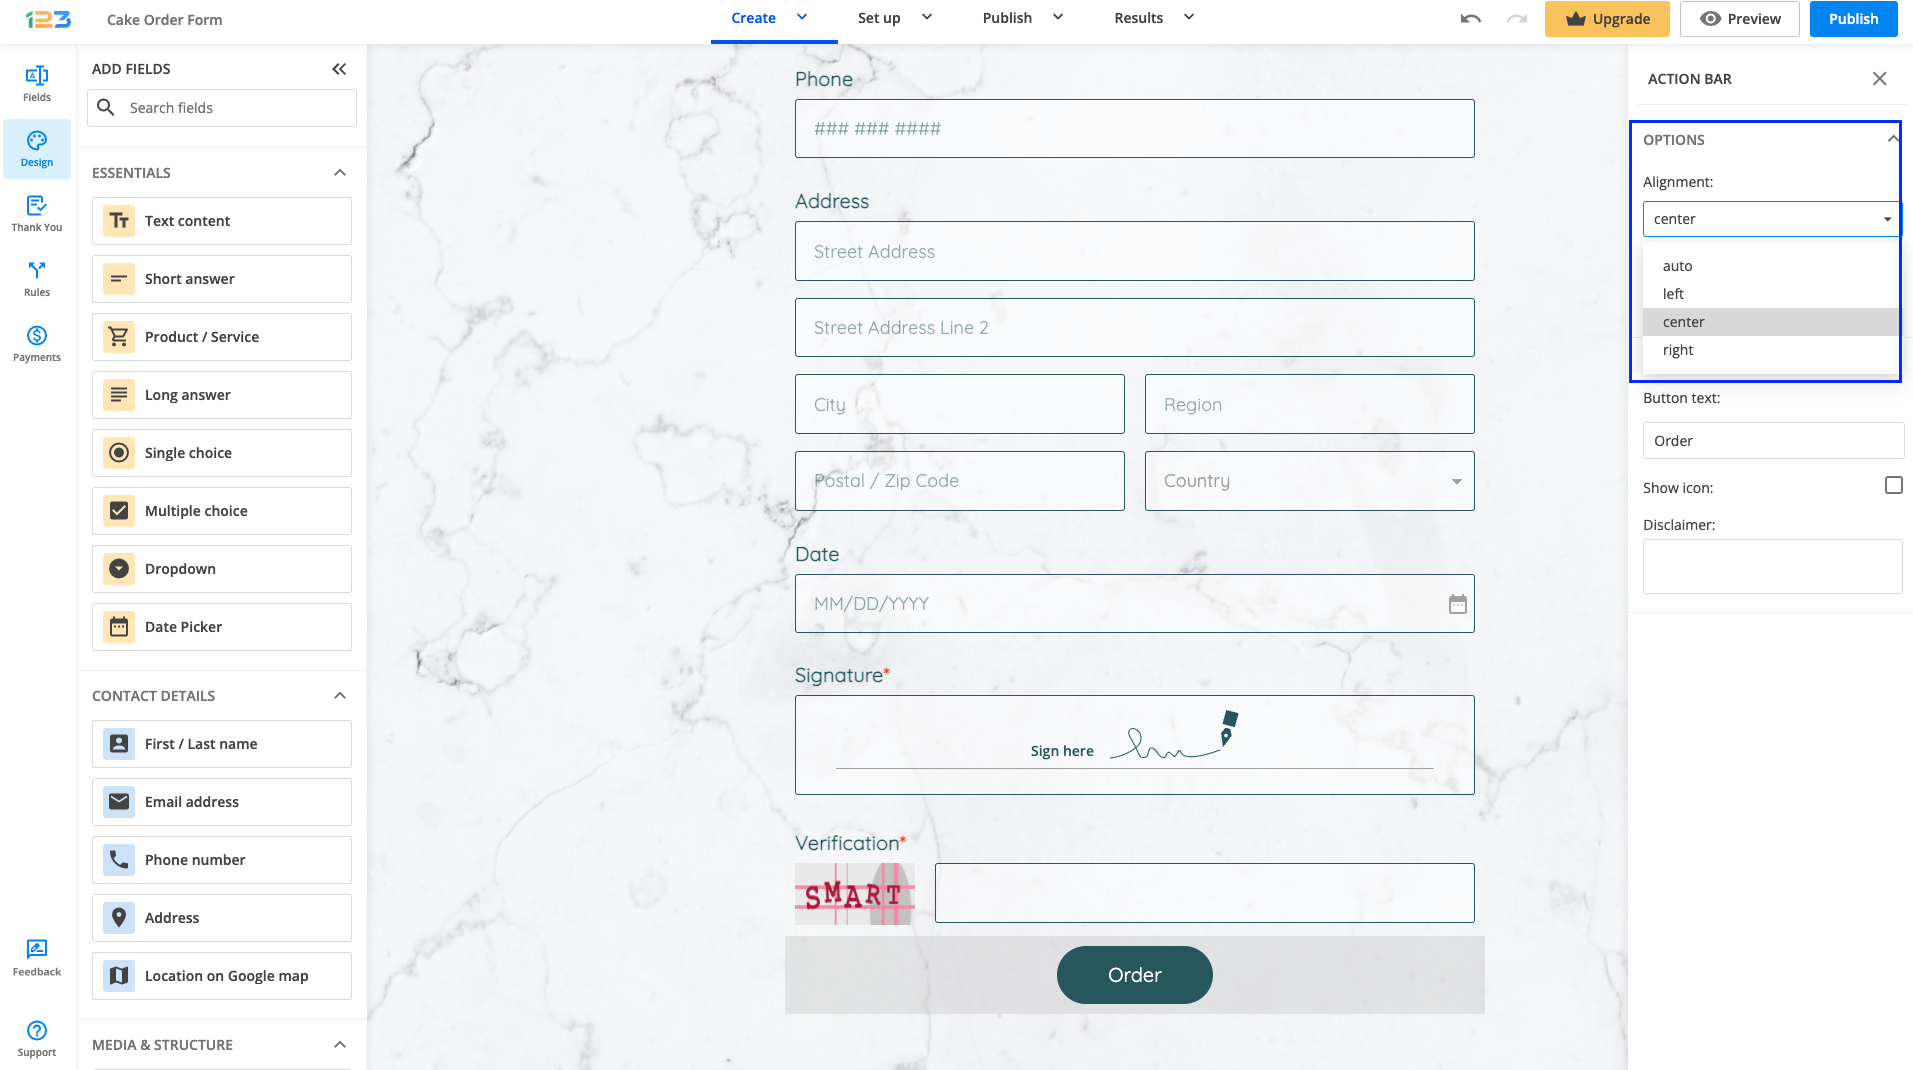
In order to align the Submit button on your form, all you have to do is to select the button in the first place.
In the left-side panel you will find different settings related to the Submit button. Under Alignment dropdown, you have several options: center, left, right and auto.
Related articles:
123FormBuilder is a professional web form builder that not only creates user-friendly contact forms but also covers them with many features that you might find useful.
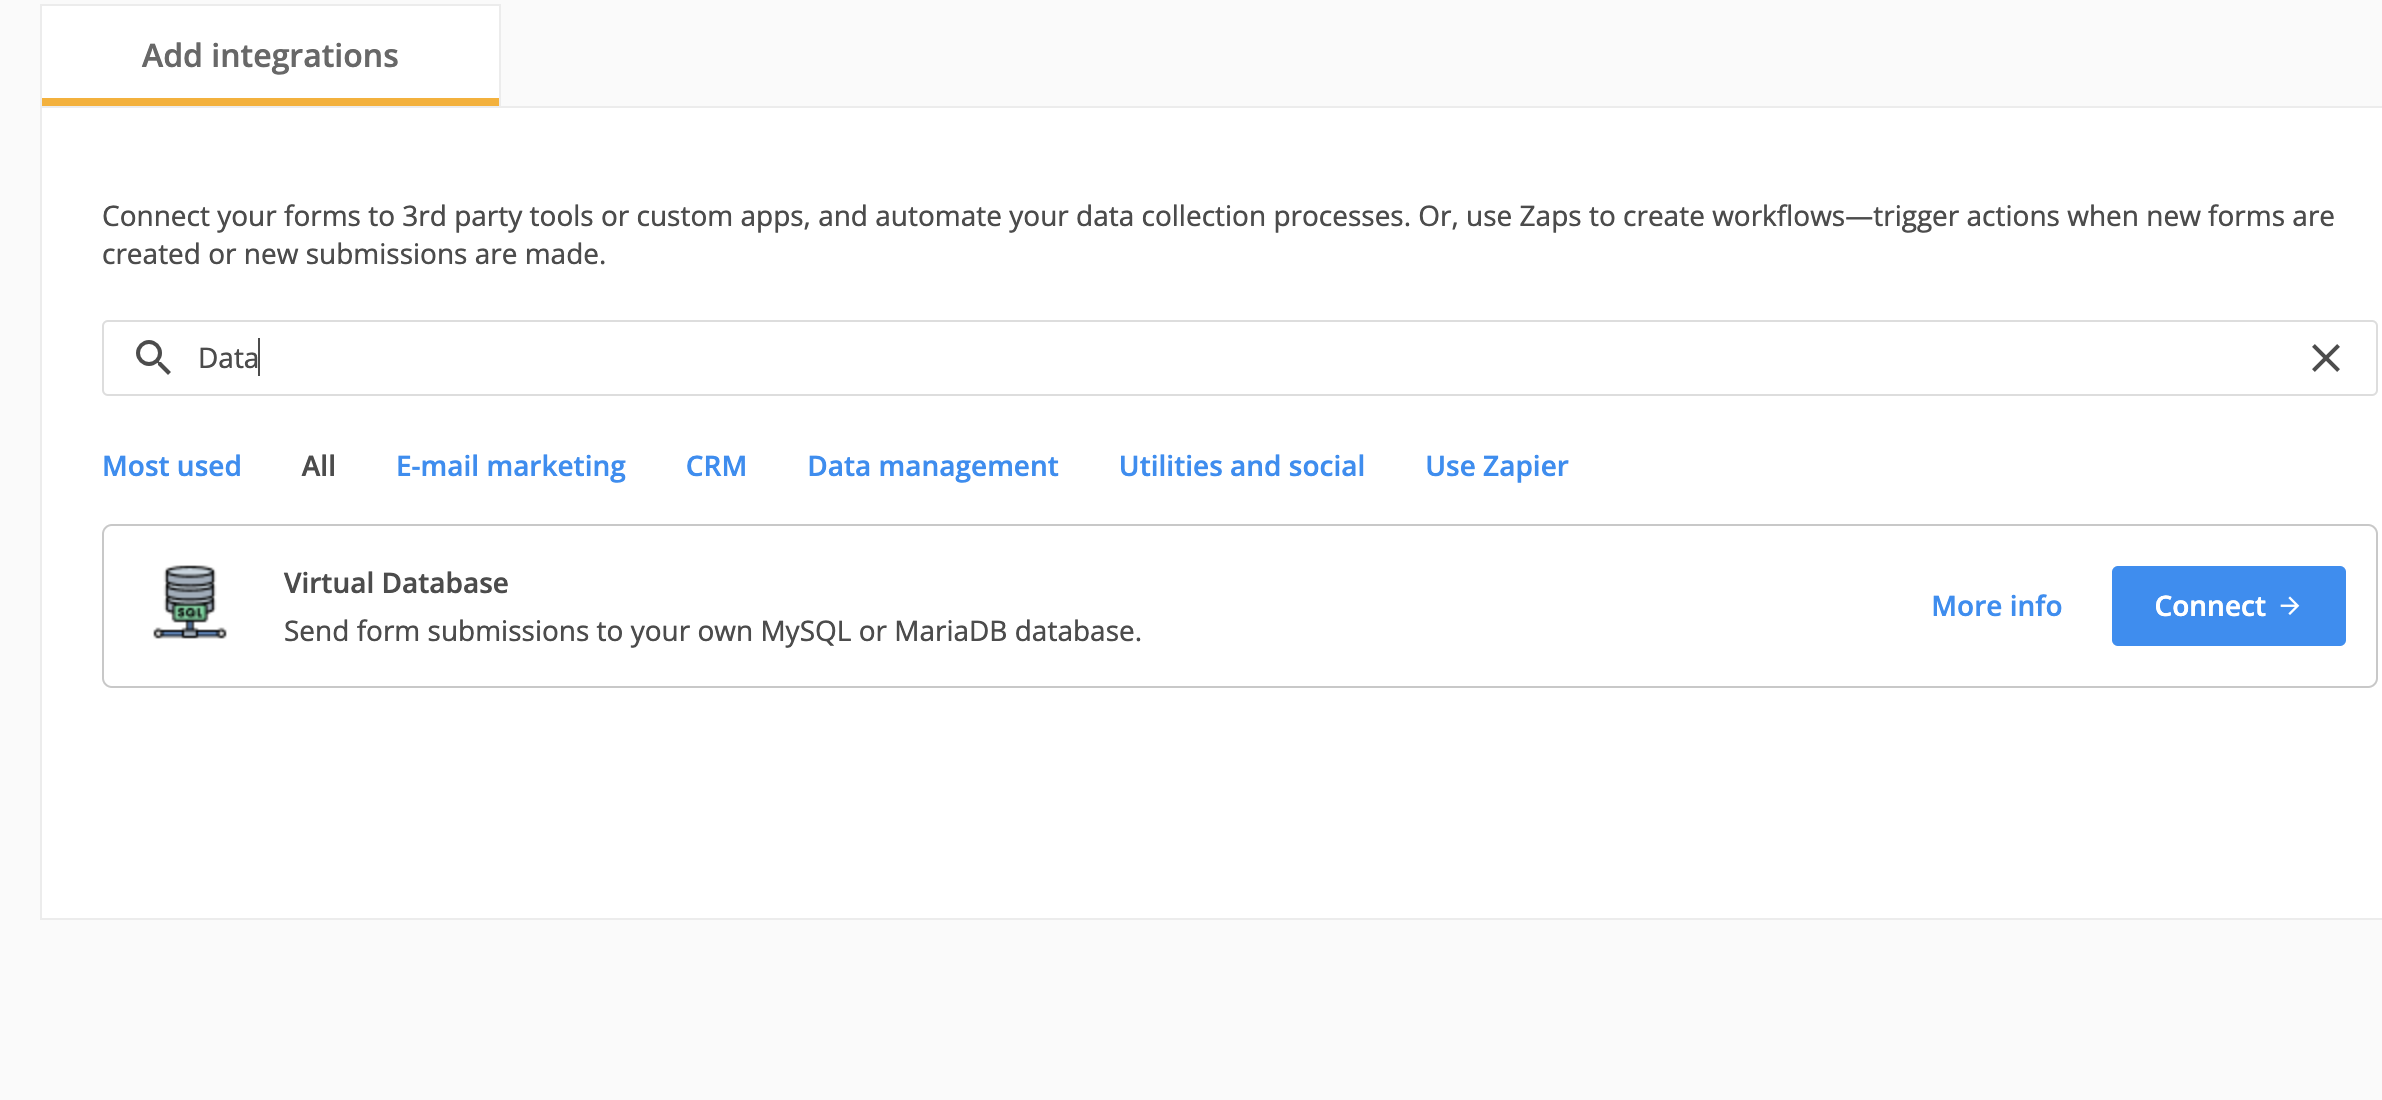
It was possible to connect your web forms with a CSV file, however, we facilitate the process. Now you can also send form submissions to your own MySQL or MariaDB database.
Starting with our Corporate plans you will be able to make the connection. Once upgraded, go to Integrations and look for Virtual Database.
After adding, you will notice two options:
- Use local database
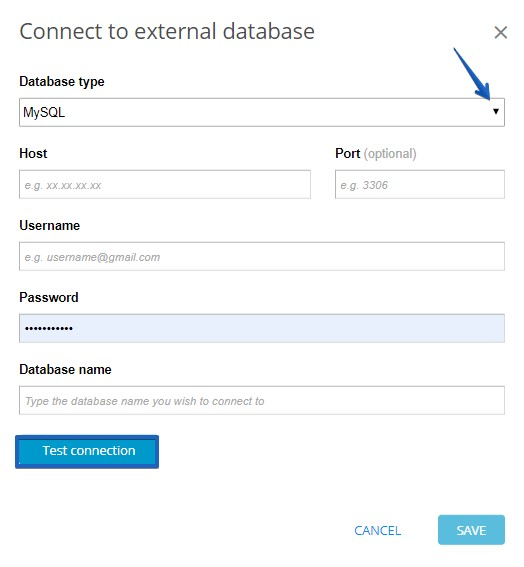
- Connect to external database

Select the second one. In the lightbox that appears enter your database details and test the connection.
For the MySQL connection, we support version 5.7
Below we provided two syntaxes as a starting point.
Inserting into the table:
INSERT (IGNORE) INTO table_name SET column_name=:field_control (SET second_column_name=:other_field_control, etc.)
Update the table info:
table_name SET column_name=:field_control WHERE other_column_name=:other_field_control (AND second_column_name=:second_field_control, etc.)
*Include REMOTE at the beginning of the above syntaxes if table is stored on remote server.
Here is an example:
When the form is submitted, the action should store the data in the contacts table.

Normally, if you fill the form twice using the same code, you will have 2 rows inserted, with the same code, and the corresponding data.
If you wish to only keep the latest data, you have to set the code column as unique. This is done from the Explore database panel. After selecting a table from the list also click on the key symbol at the bottom of the list. This will open up a separate view of the table columns and their type, from which you can enable/disable the primary key lock.
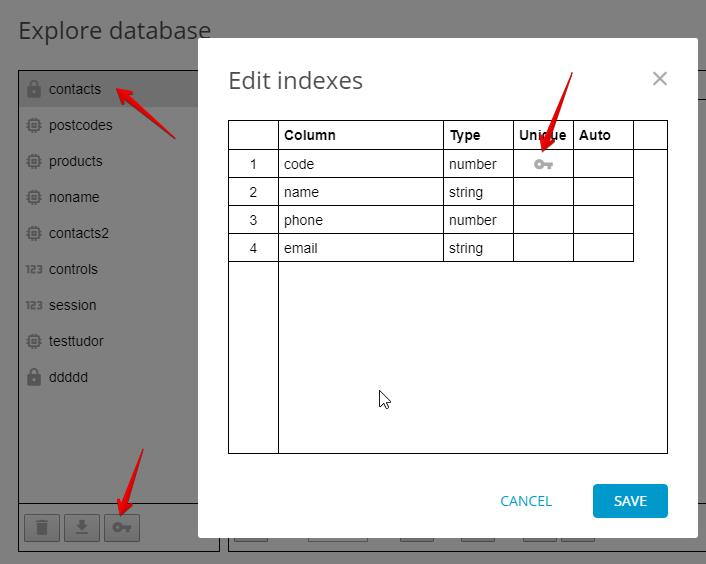
You will be able to use INSERT INTO IGNORE as a function so that you do not get entry rows with the same primary key.
Even if you are not familiar with SQL queries, our Corporate plans have an advantage. Once you sign up, a dedicated Account Manager will help you develop your forms based on your needs.
Related articles
Connect web forms with a database by using our Virtual database and dynamic prefill app integration. Starting with our Enterprise plans you can benefit from this feature to empower your business and productivity using our form builder.
Once the form(s) are linked with your CSV file, the information gathered will populate your database. Prefill forms fields from your CSV table to save time and improve consistency.
Let’s look at an example:
First, you will need your database in a CSV format. Below are listed the CSV file’s requirements:
- Cells are formatted with text
- Field delimiter is set to comma
- Text delimiter is set to quotation marks
- UTF-8 characters supported
Once you have the CSV file ready, go to your form’s Integrations section. Search for the Database Manager icon and click on Add.
The tables can be uploaded as a CSV file, through the Create table button. Here you can name the table and the given name will be used in the SQL rules, to return values.
Tables can be managed in the Explore database section.
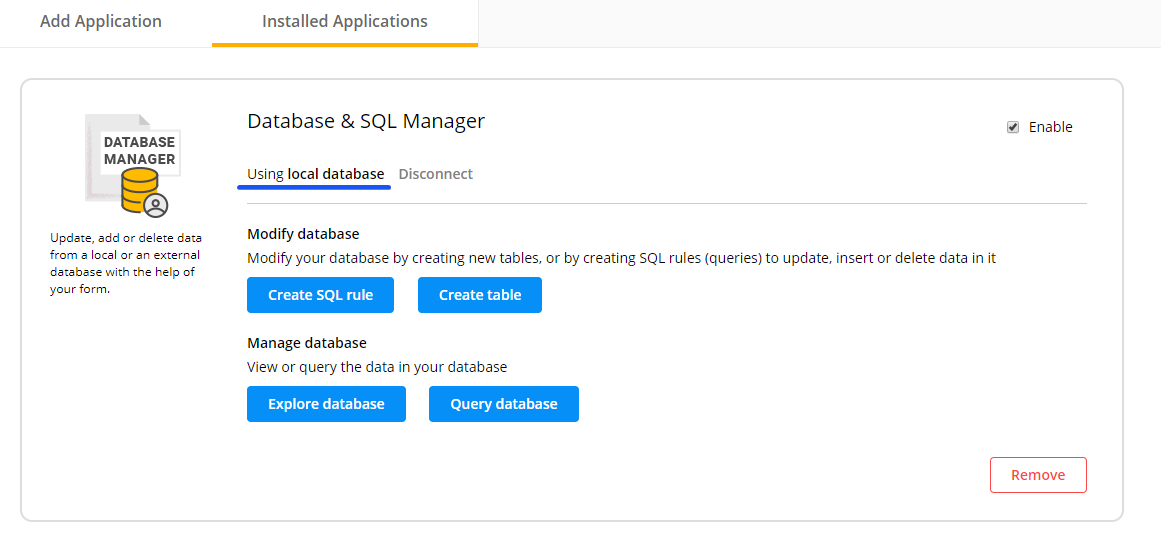
Tables will be displayed in the left-side panel. Clicking on a table will open its content in the main view.
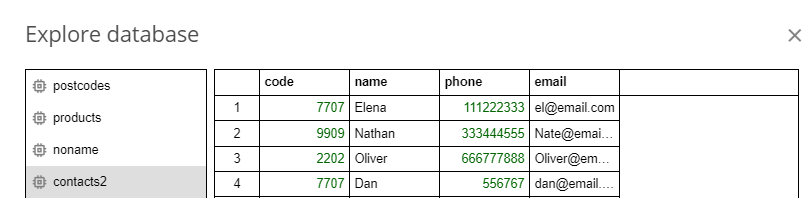
Create SQL rules to specify the acceptable values that can be inserted into a column or to prefill form fields. Create queries to search for certain customers that meet specific criteria.
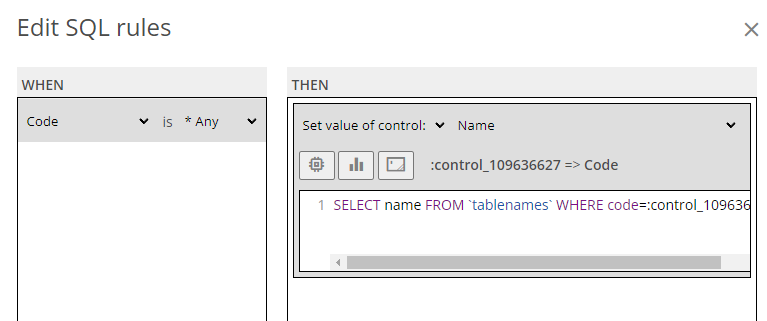
By prefiling your form fields based on a keyword you can avoid mistypes. The information is automatically pulled from your database and form users don’t need to re-enter their details over and over again.
That’s it! Now your form can read from your database and populate the data on the form.
Here are two syntaxes examples that you may want to use:
Inserting into the table:
INSERT (IGNORE) INTO table_name SET column_name=:field_control (SET second_column_name=:other_field_control, etc.)
Update the table info:
table_name SET column_name=:field_control WHERE other_column_name=:other_field_control (AND second_column_name=:second_field_control, etc.)
*Include REMOTE at the beginning of the above syntaxes if the table is stored on a remote server.
Here is an example:
When the form is submitted, the action should store the data in the contacts table.
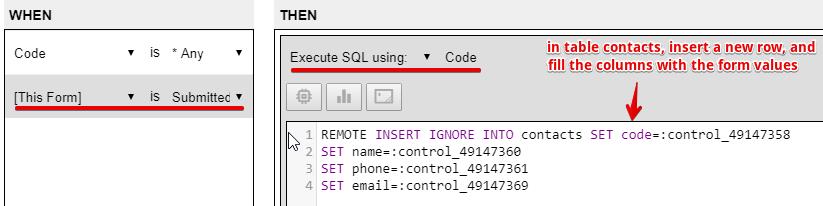
Normally, if you fill the form twice, using the same code, you will have 2 rows inserted, with the same code, and the corresponding data.
If you wish to only keep the latest data, you have to set the code column as unique. This is done from the Explore database panel. After selecting a table from the list also click on the key symbol at the bottom of the list. This will open up a separate view of the table columns and their type, from which you can enable/disable the primary key lock.

You will be able to use INSERT INTO IGNORE as a function so that you do not get entry rows with the same primary key.
Even if you are not familiar with SQL queries, our Corporate plans have an advantage. Once you sign up, a dedicated Account Manager will help you develop your forms based on your needs.
Related articles
If you’re looking for a guide on how to create a contact form for your website, consider reading this documentation.
123FormBuilder is a professional web form builder that not only creates user-friendly contact forms but also covers them with many features that you might find useful. Know that you can build a contact form with the forever free plan (Basic), while the paid plans enable more advanced features for your contact form.
To create a contact form, sign up for the 123FormBuilder service and follow the steps below:
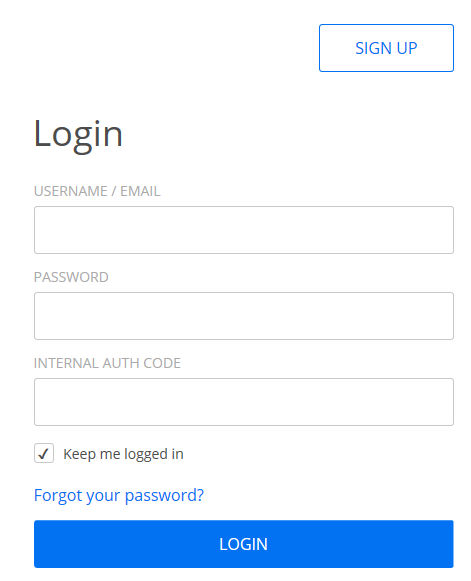
Sign up or log in to 123FormBuilder with your account credentials. If you’ve just signed up, you’re already logged in. If you already have an account, enter your username and password on the login page.
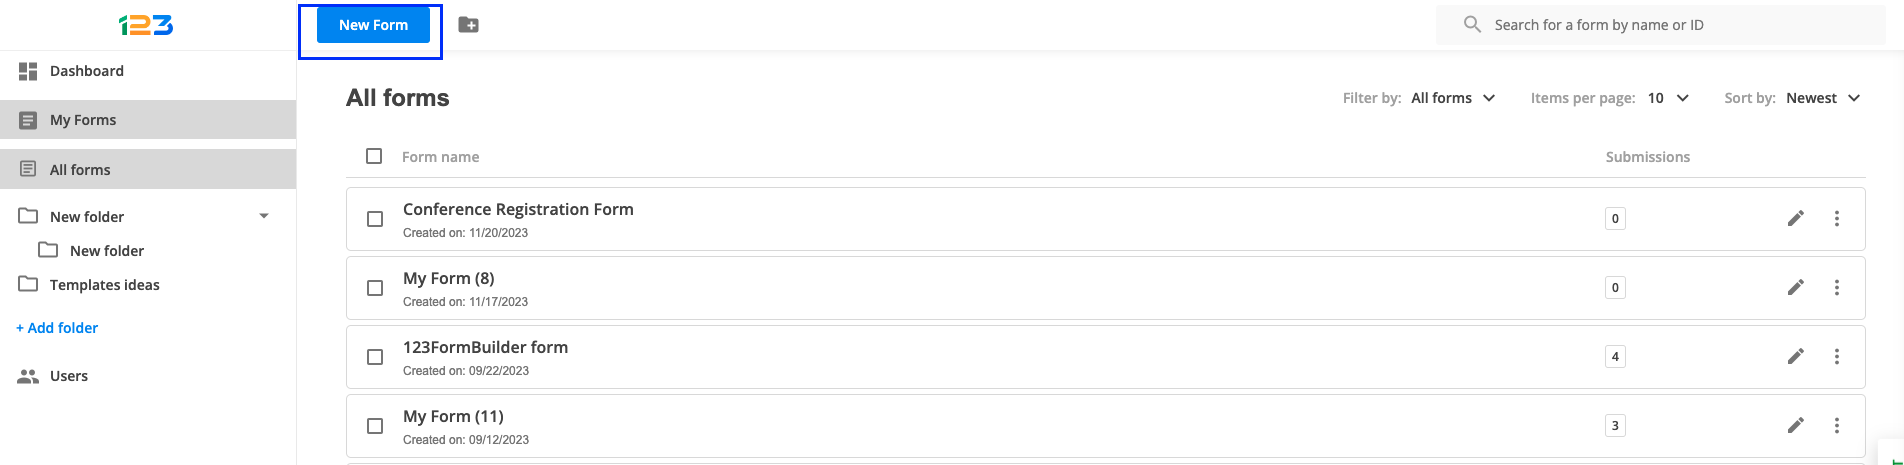
Click New Form on the top right side of your dashboard.
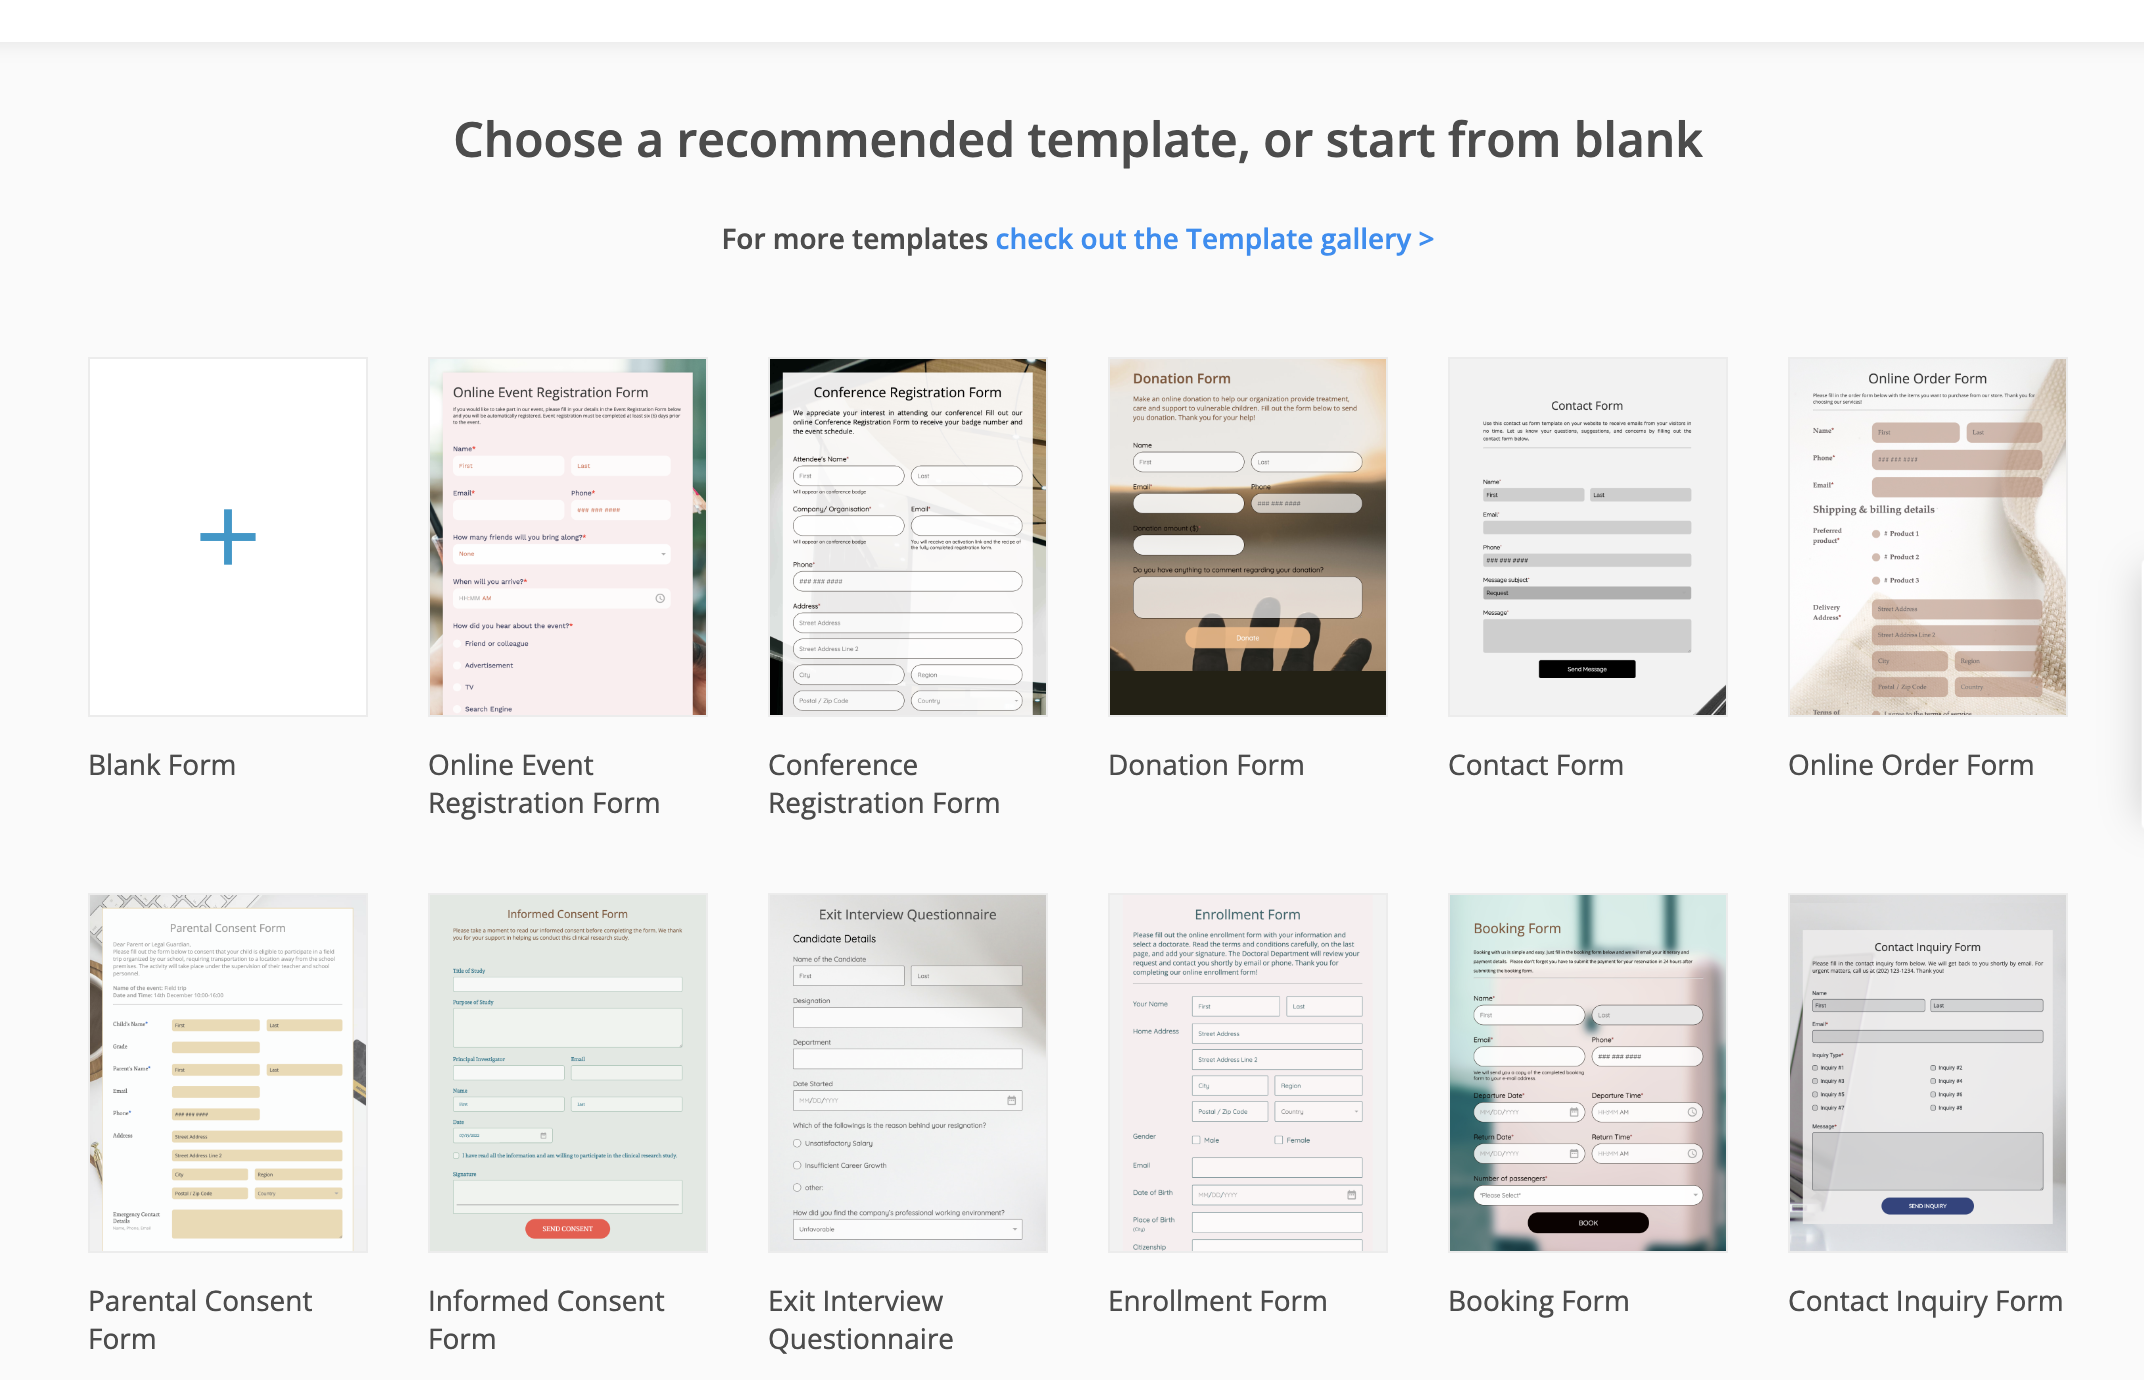
You can select a form template or you can create the form from scratch. If that is the case, select Blank Form.
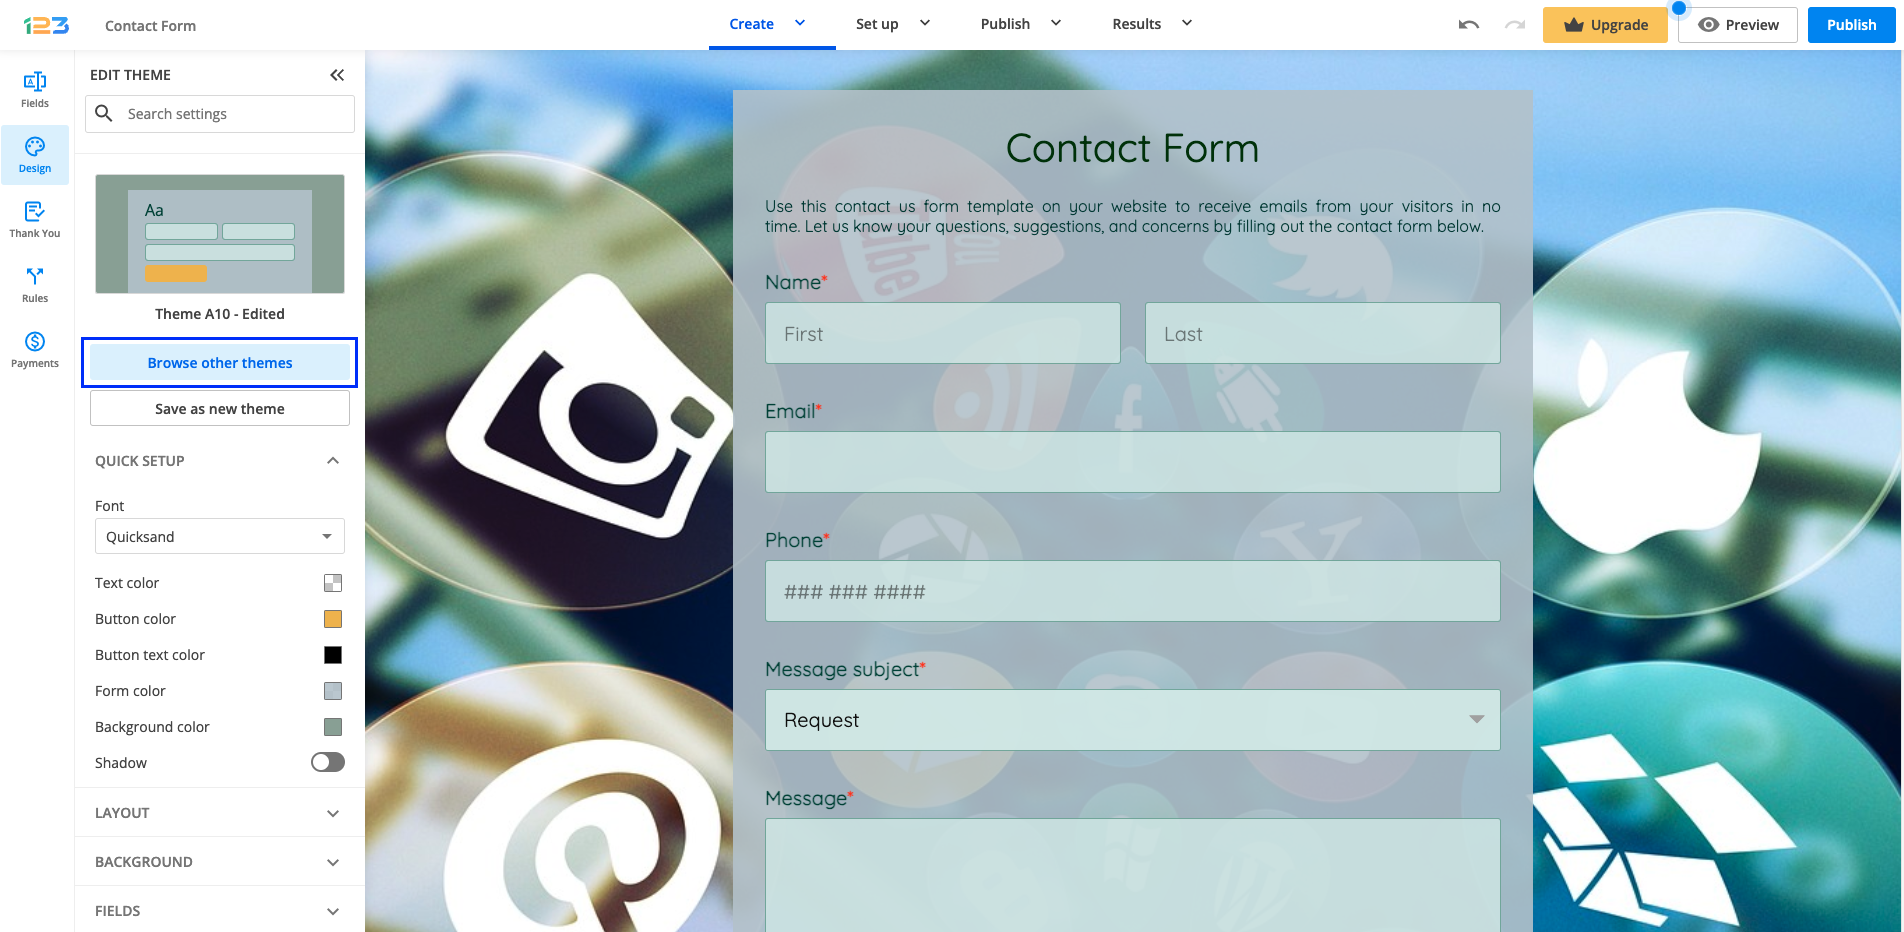
You are now in the Form Editor, where you can adjust the form fields and form layout (if you’ve selected a form template), or add your fields on the form.
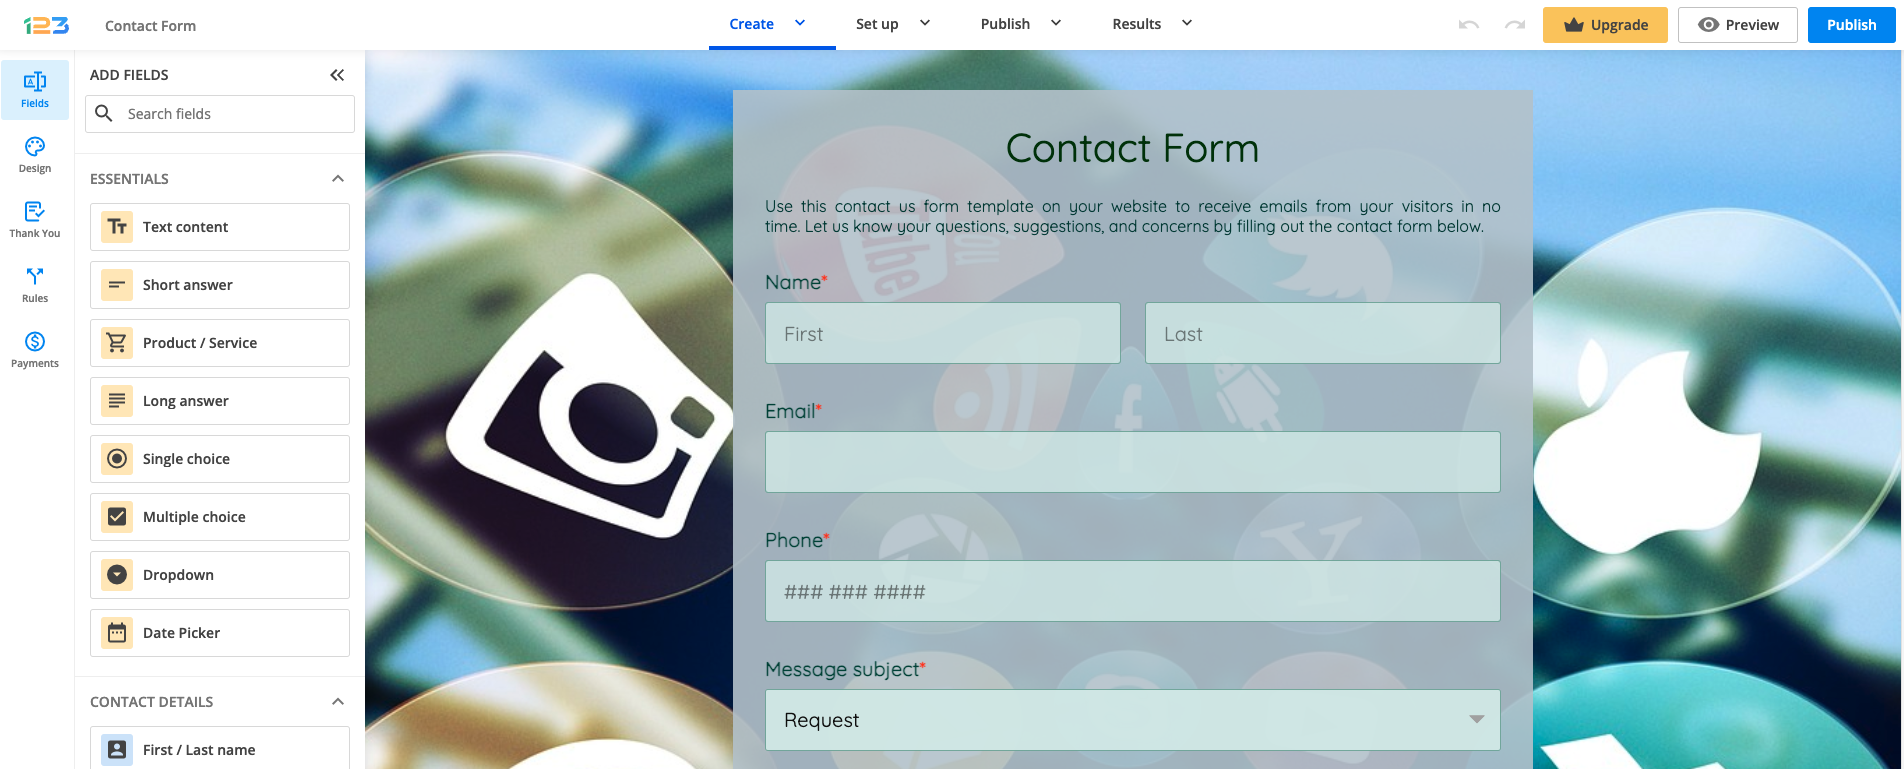
There are multiple types of fields, categorized based on different sections: Essentials, Contact details, Media & Structure, Uploads & Consent, Date & Time, Rating scales, Calculations, Payments.
To add a field on the form, select it and drag it to the layout. Hold the click on the field while placing it on the form. You can drag and drop the fields that are already included in the form layout if you want to change the order in which they appear. By hovering on the sides of the fields, you can adjust the layout and design of the form. You can also add multiple fields on one row and adjust their sizes.
You may also change the design of the form by clicking on the Design button from the left-side panel.
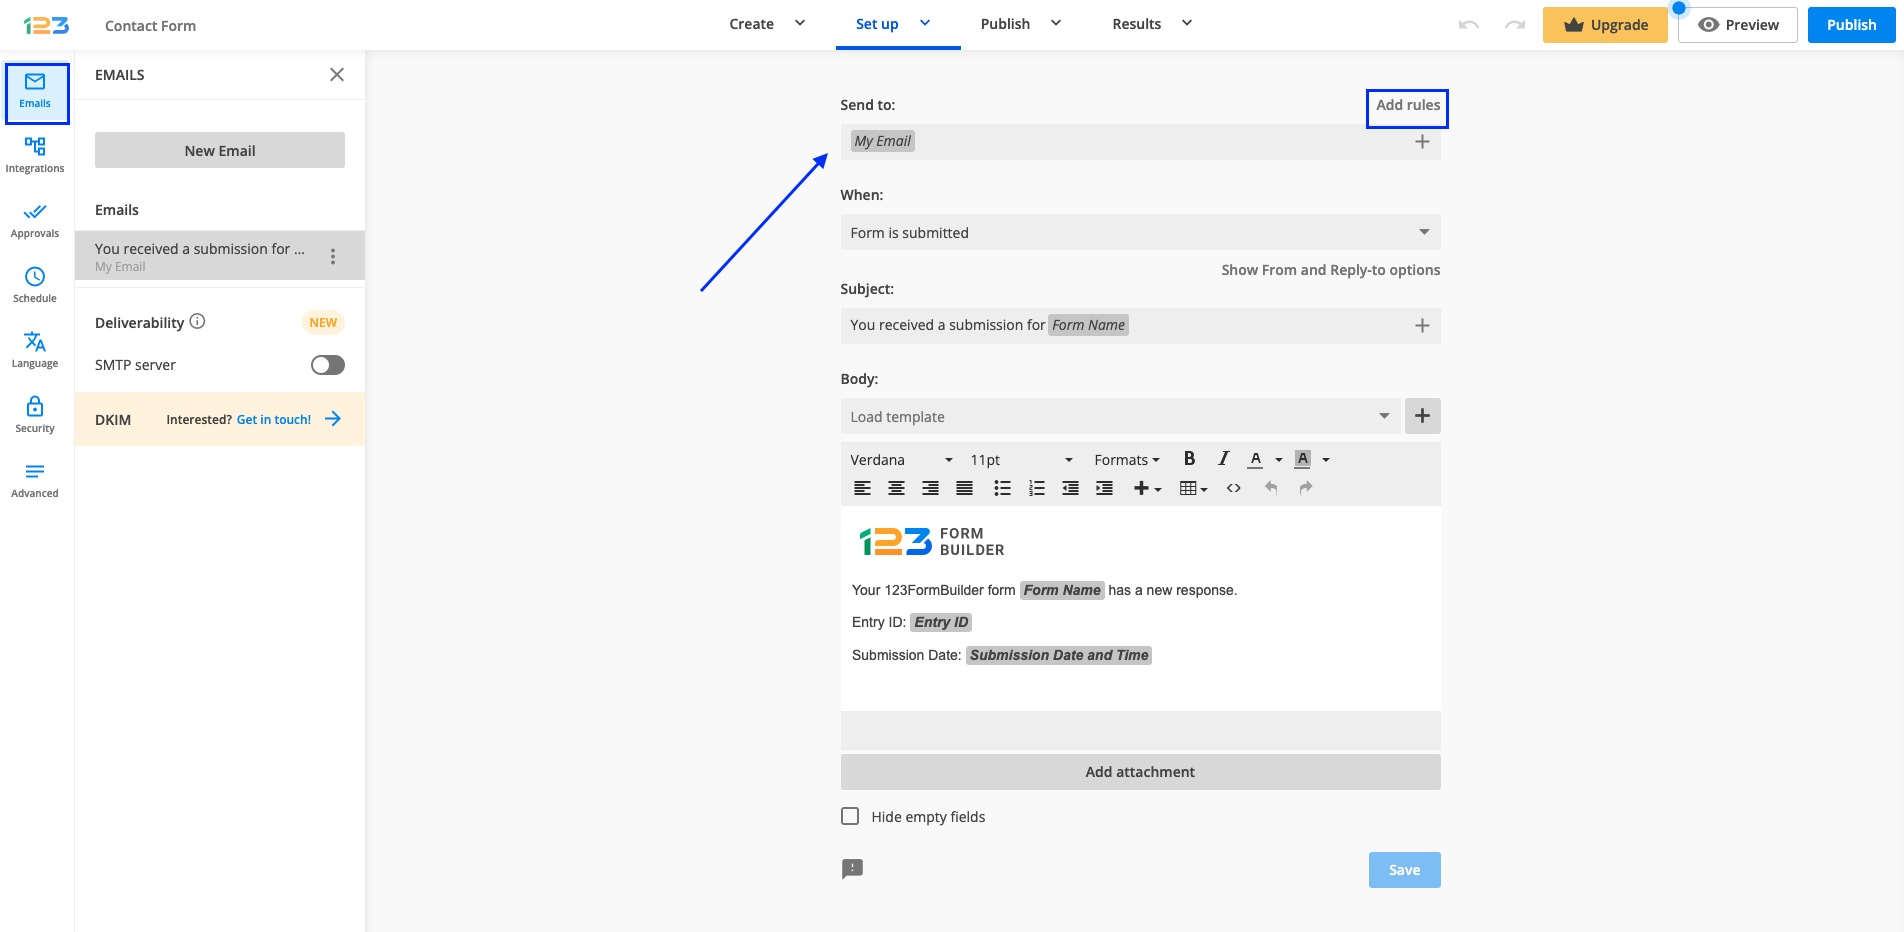
When you are done creating and designing the form, there are multiple other settings you can enable. However, in this article, we are going to set up the email notification that we receive after the contact form is submitted.
To start, select the Emails button from the left-side panel in your form editor. The email address associated with the 123FormBuilder account is automatically the recipient of the email notifications for each form created (My Email variable). You may change this by hovering over the email variable and clicking it to remove it. You can also add new recipients by using the plus sign button and creating branches based on certain conditions (Add rules).
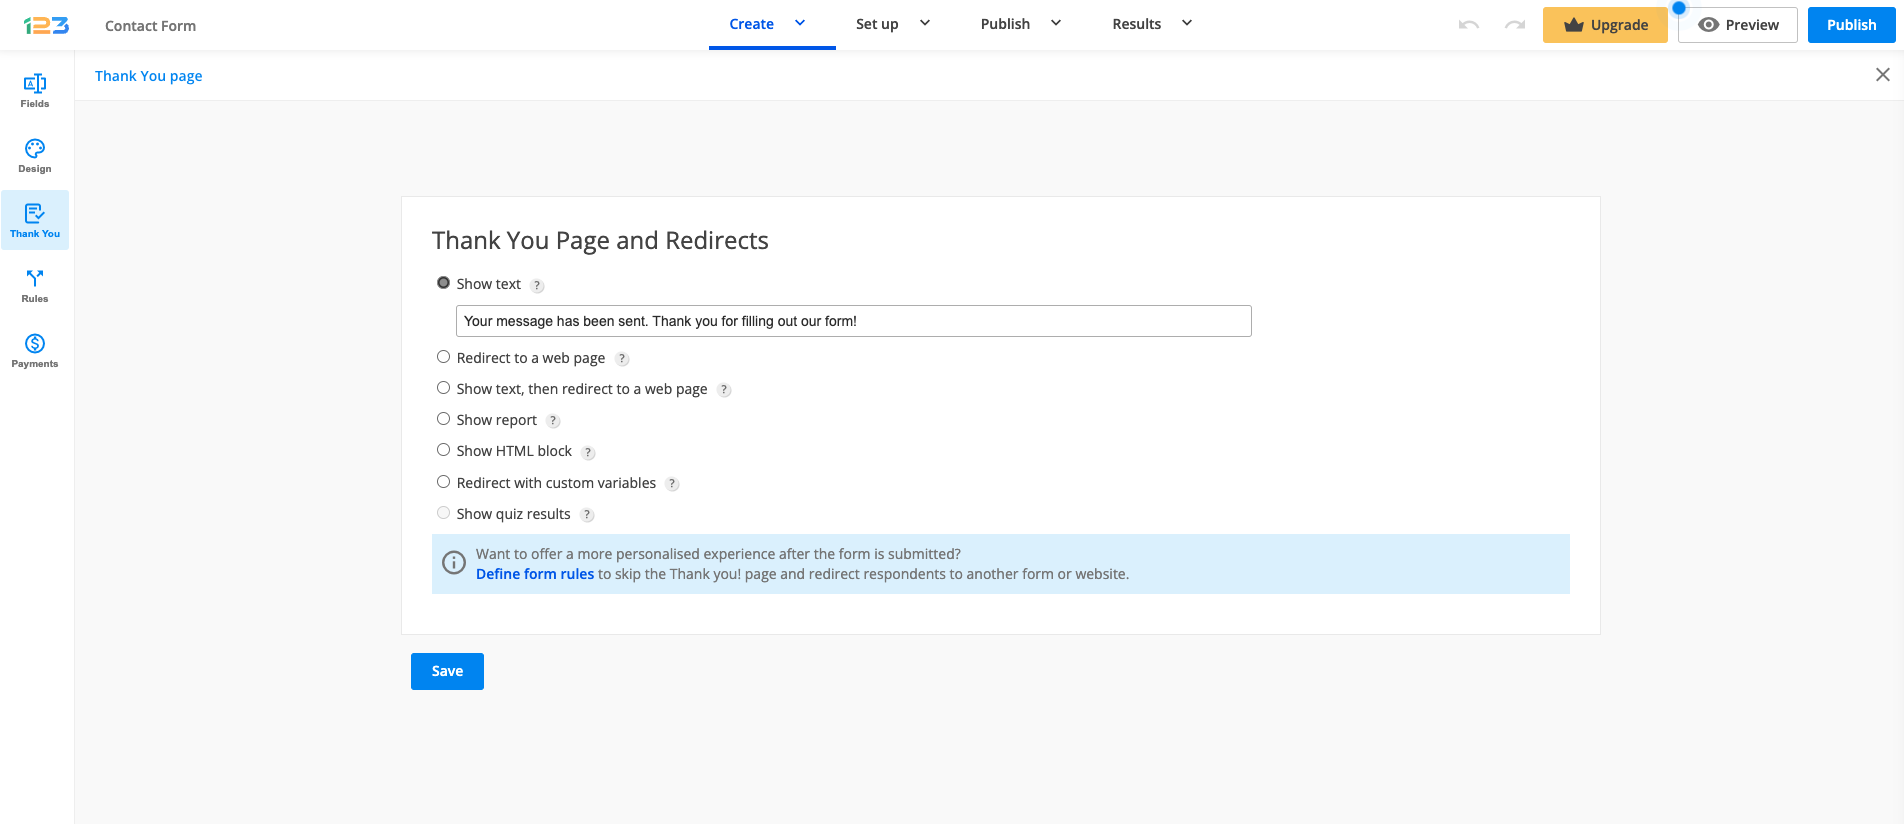
In the Thank you page section, select what should appear after the user submits the form.
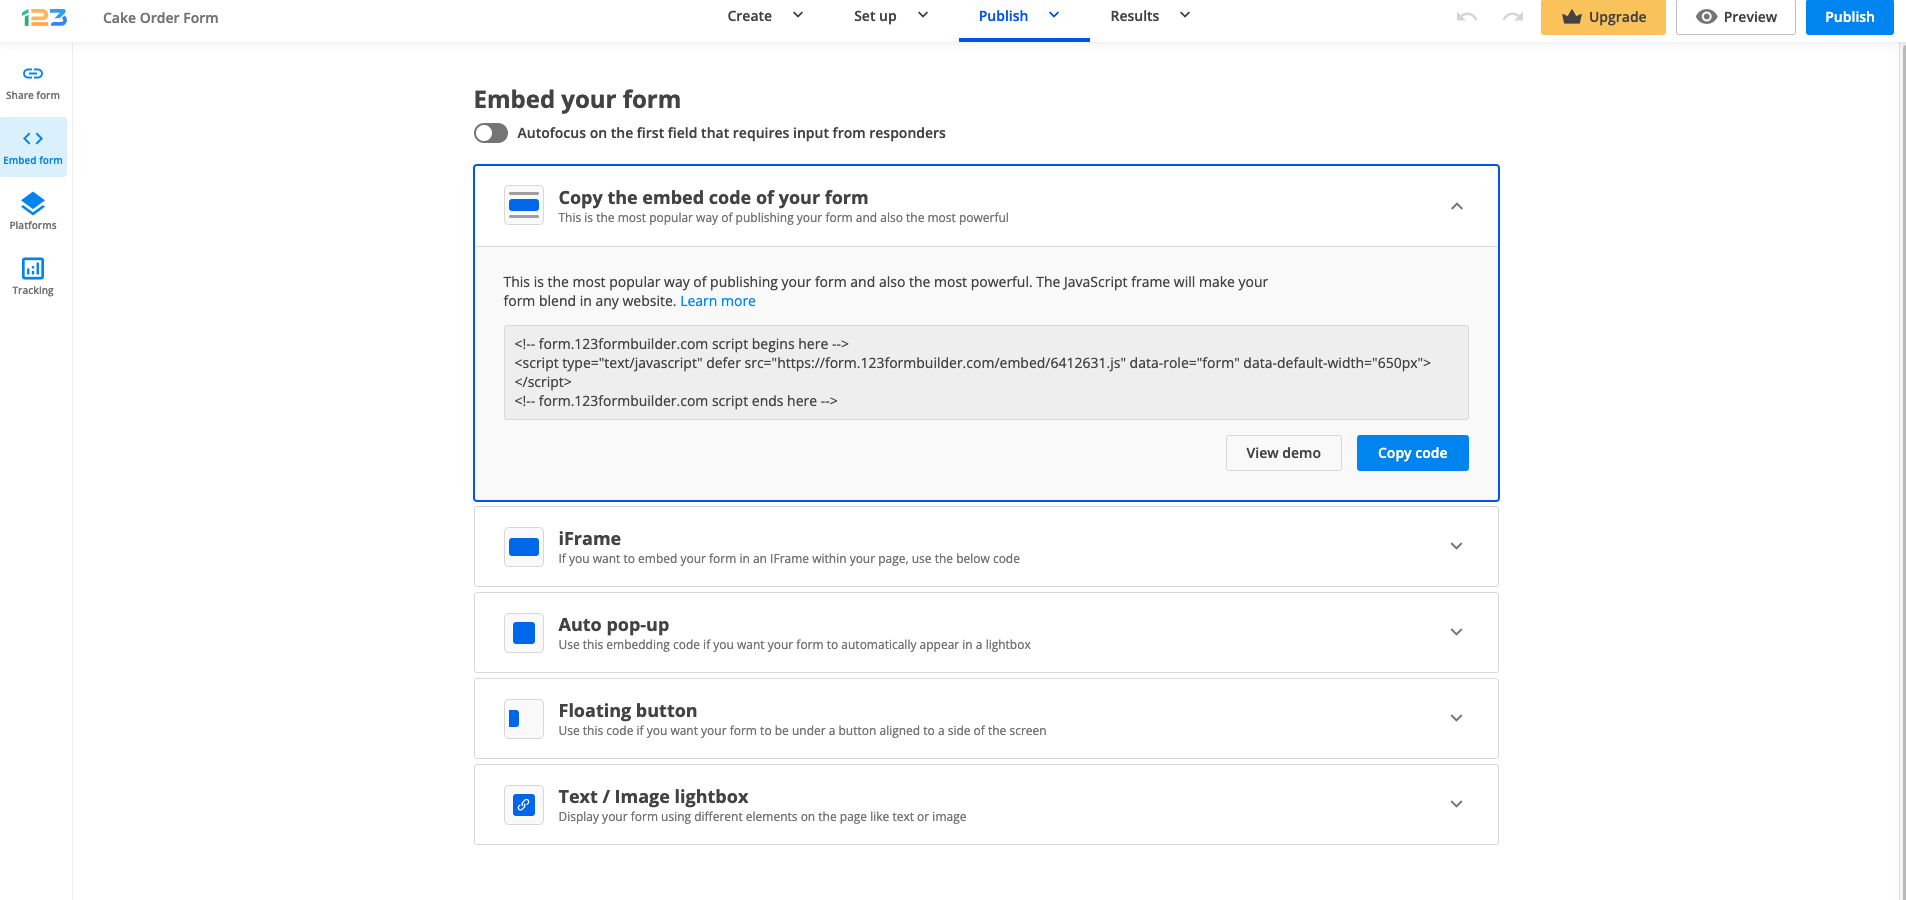
Finally, hit the Publish button to get the publishing code. 123FormBuilder provides many publishing options to choose from, but let’s assume we’re going to use the Javascript embed code.
In Publish, click on Embed form and select copy the first code – Javascript code.
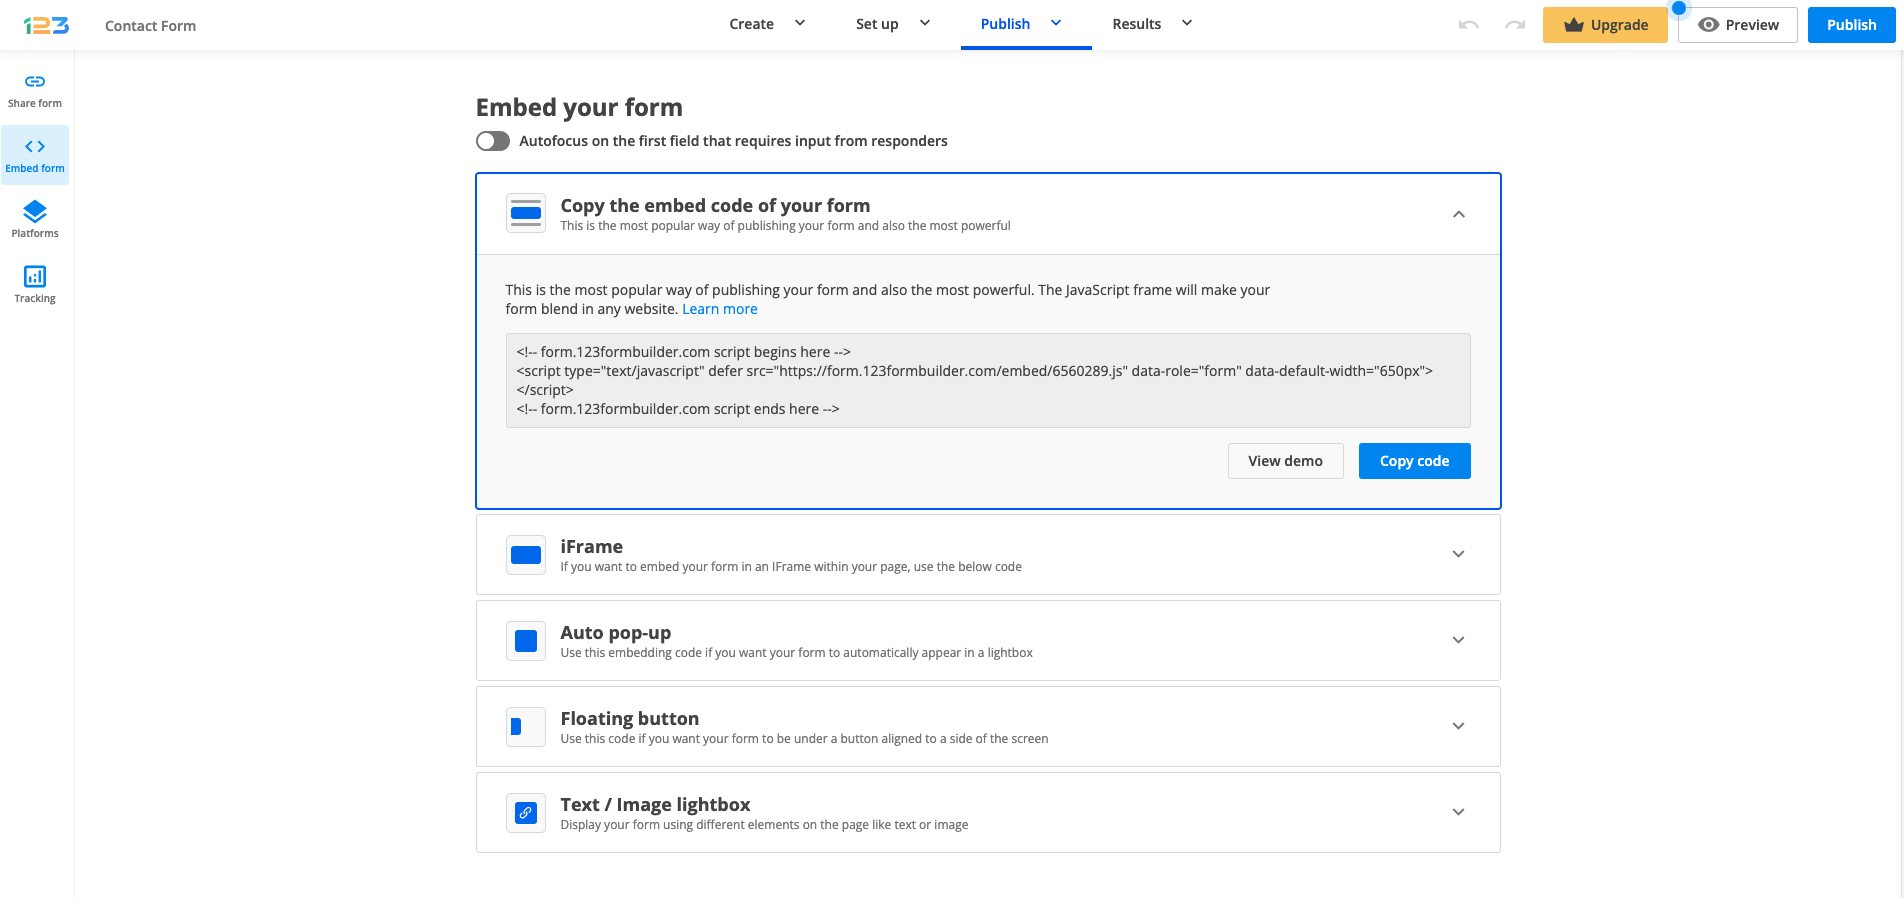
And there you have it!
A great contact form that will allow your audience to communicate with you fast and easily. And as you’ve seen, no coding skills were needed. If you want to build more advanced forms, feel free to browse around your account and create new forms.
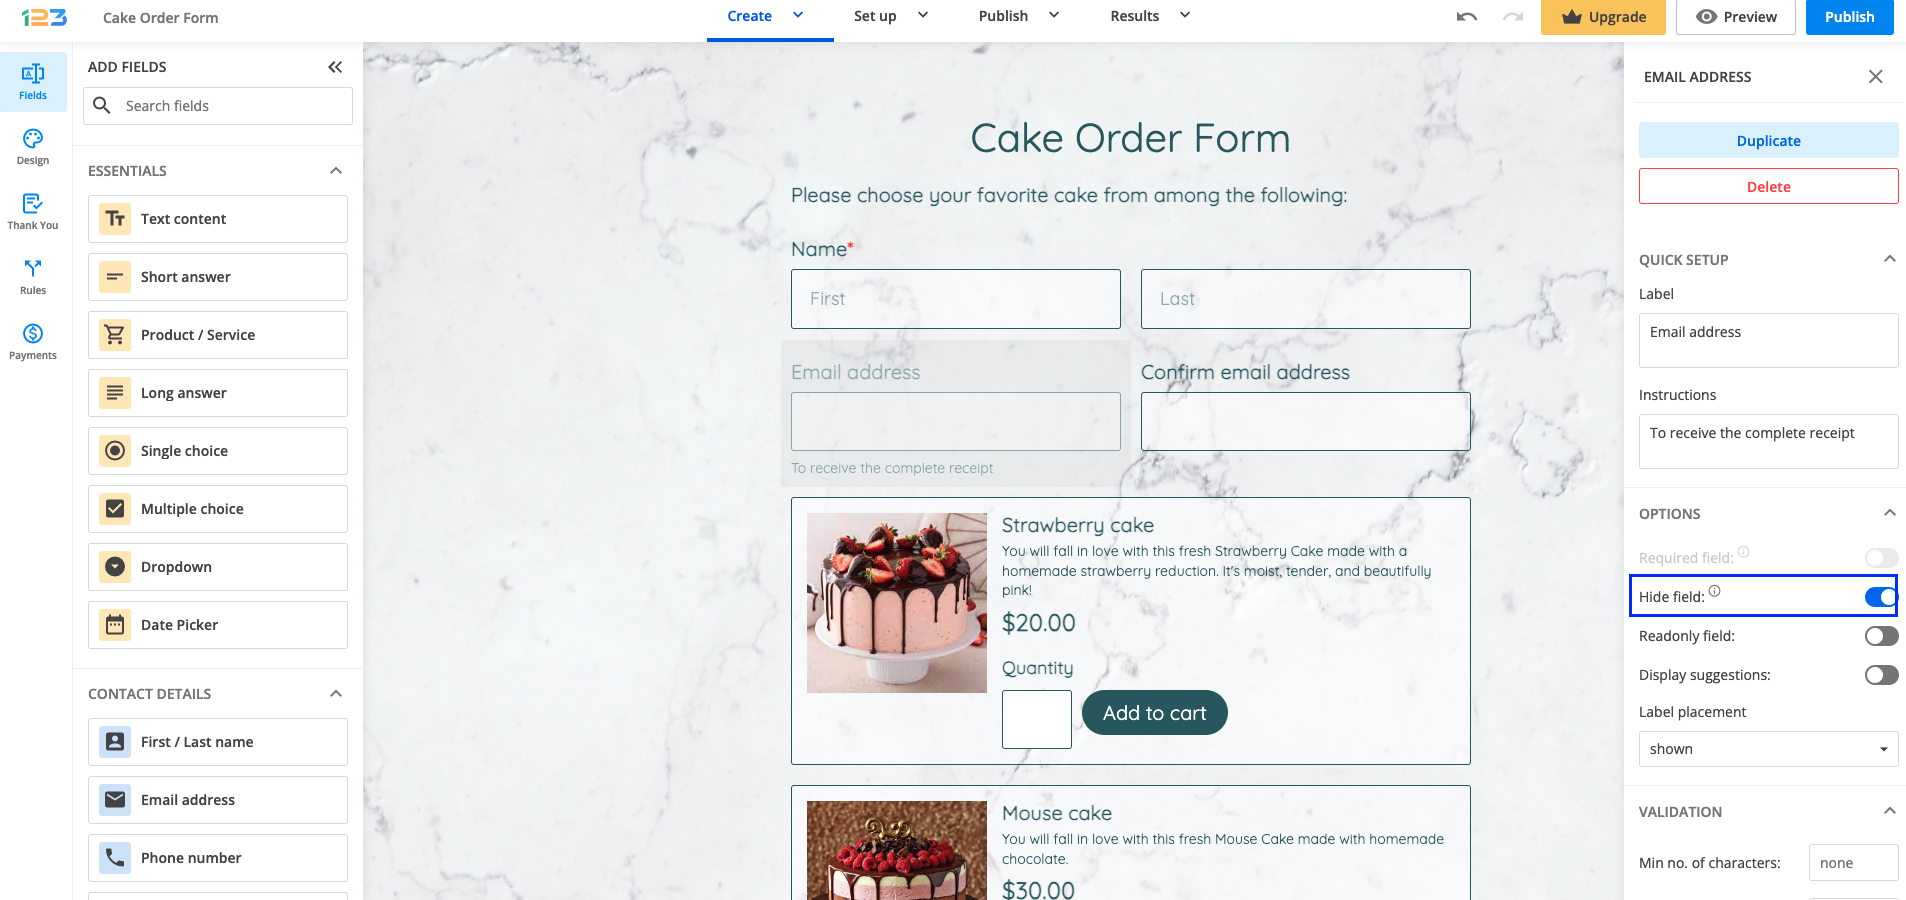
Setting up prefilled hidden form fields is a two-step process in our form builder. First, prefill the fields. Then, hide them.
1. Prefill form fields. There are two ways of prefilling form fields. If you publish forms anywhere else but on WordPress, use the approach described here. If you are publishing your form on WordPress, use the instructions here.
2. Hide form fields. Go to your Form Editor, click on the field that you want to hide in order to open its Edit Field panel, and check the box labeled Hide field.
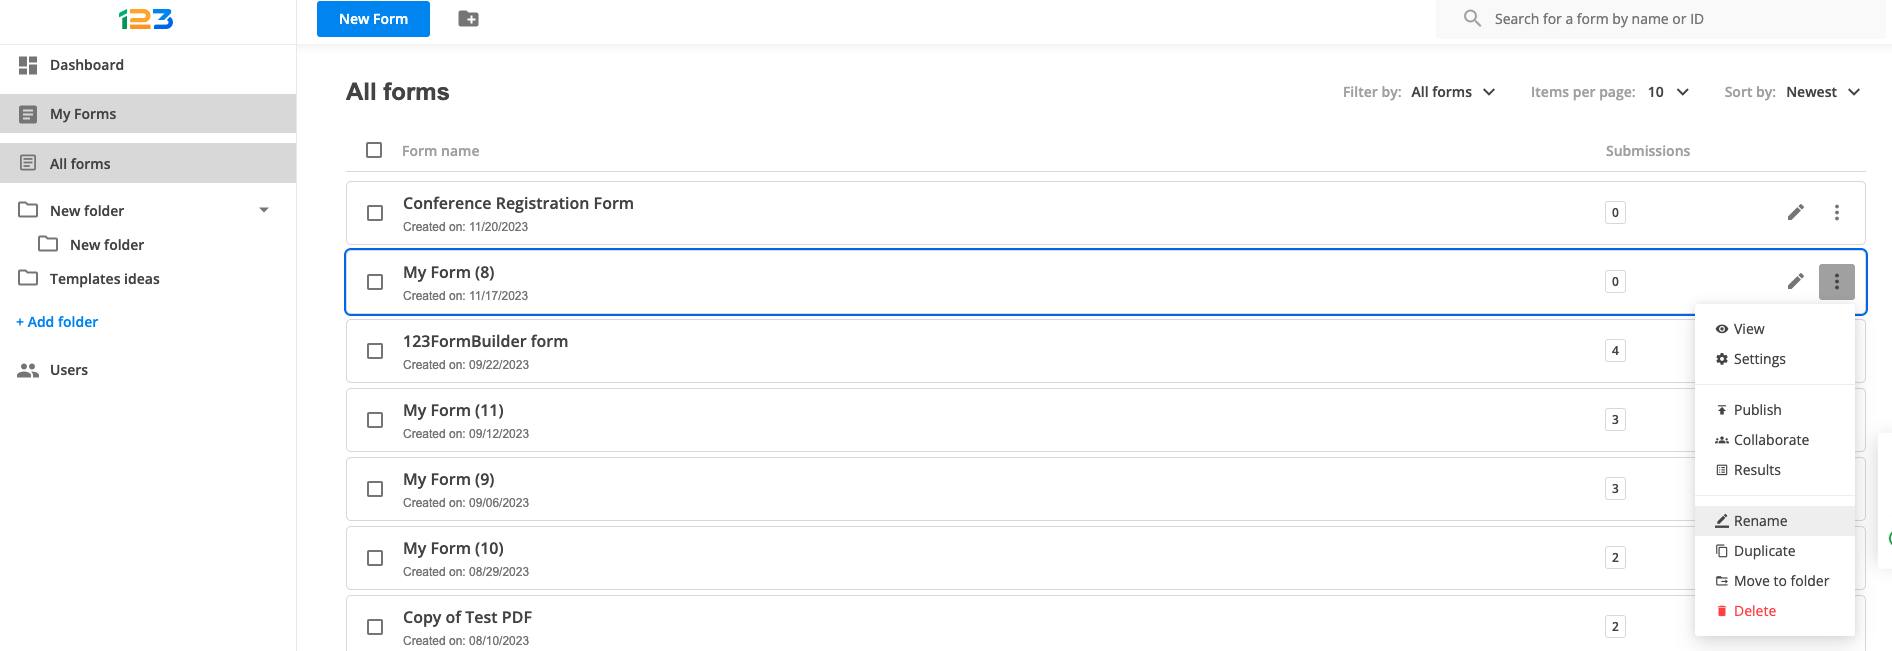
Changing the name of a form couldn’t be easier, and you have two options available to do so.
The faster way would be to go to My Forms from the Dashboard of your form builder account. Then hover over the desired form, click on the menu icon located on the right, and select Rename. A lightbox will open where you can change the name of the form and hit Save to exit.
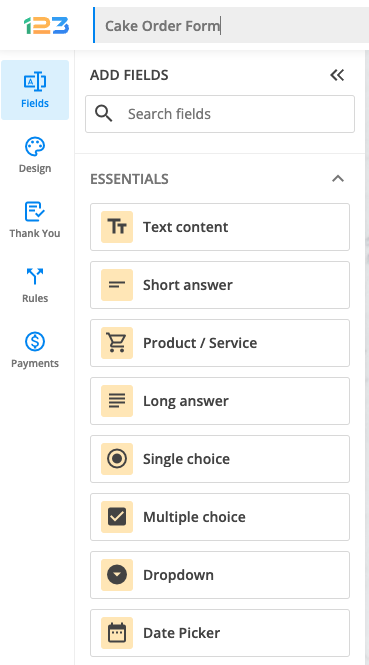
Another way of renaming your form is directly from Editor. Spot the form name – it is placed on the top of the page, right above the fields list. Click on the form name, delete the old name and type in the new one.
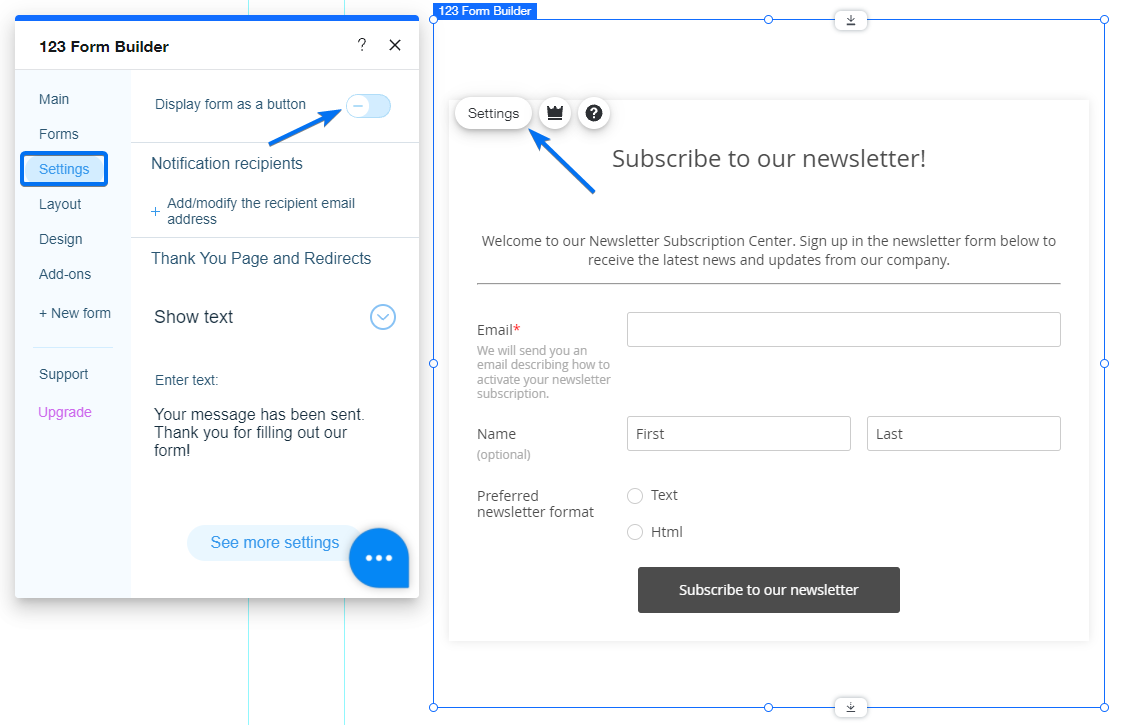
In this article, you will learn how to display web forms as buttons on Wix. Once the button is pressed, a lightbox opens the form. Lightboxes are great to grab the user’s attention and create more engagement.
First, go to your Wix Editor and double-click the form to open its main menu. Within the form builder menu, in Settings, toggle on the option Display form as a button.
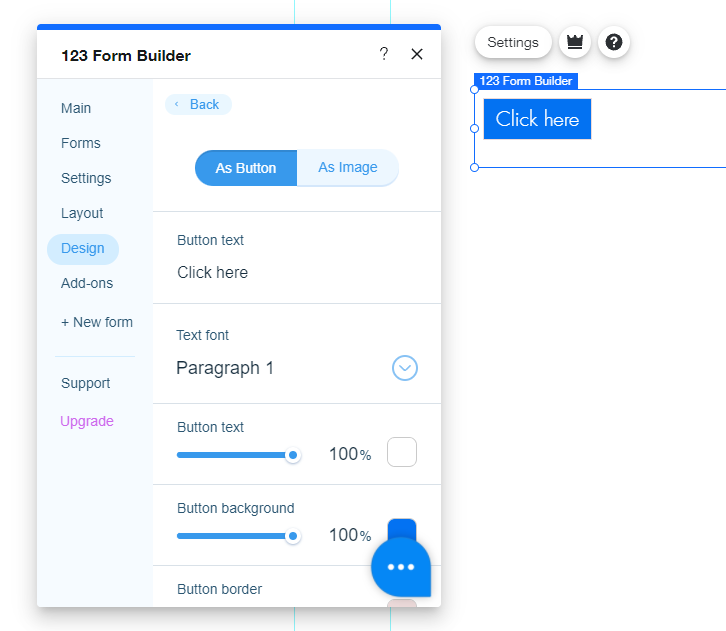
To change the appearance of the button switch to Design and choose Set Button Style.
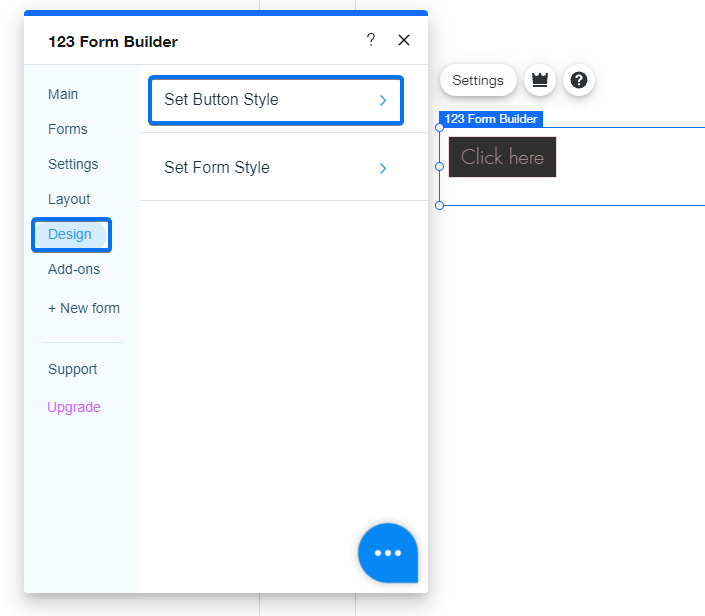
Here you can customize its design and change the button’s text.
You also have the option to upload your own image for the button.
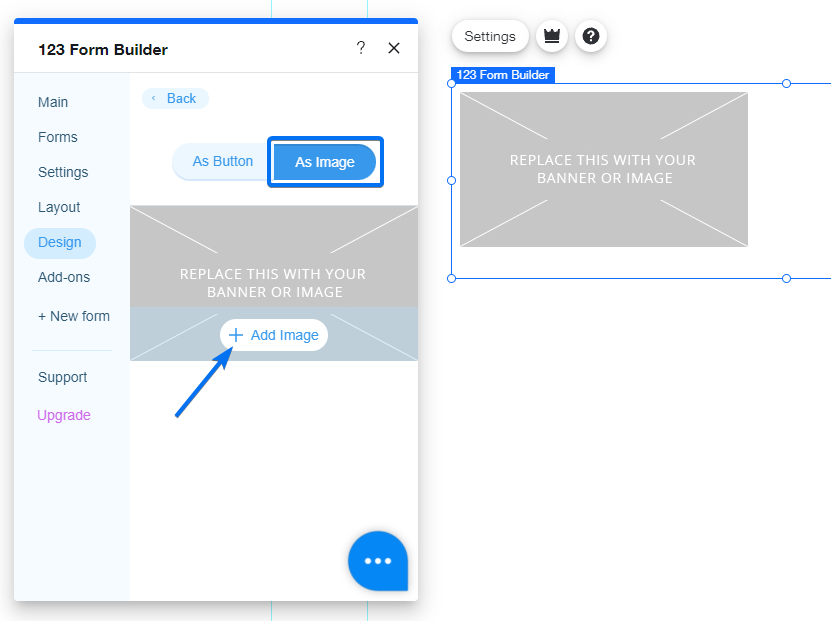
That’s it! Now your form is displayed as a button on your Wix webpage. Re-position the button on your webpage and hit Publish to save the changes.
Related articles
You can easily customize the Thank You page by accessing the Form Editor of your online form. From the left side panel, click on Thank you.
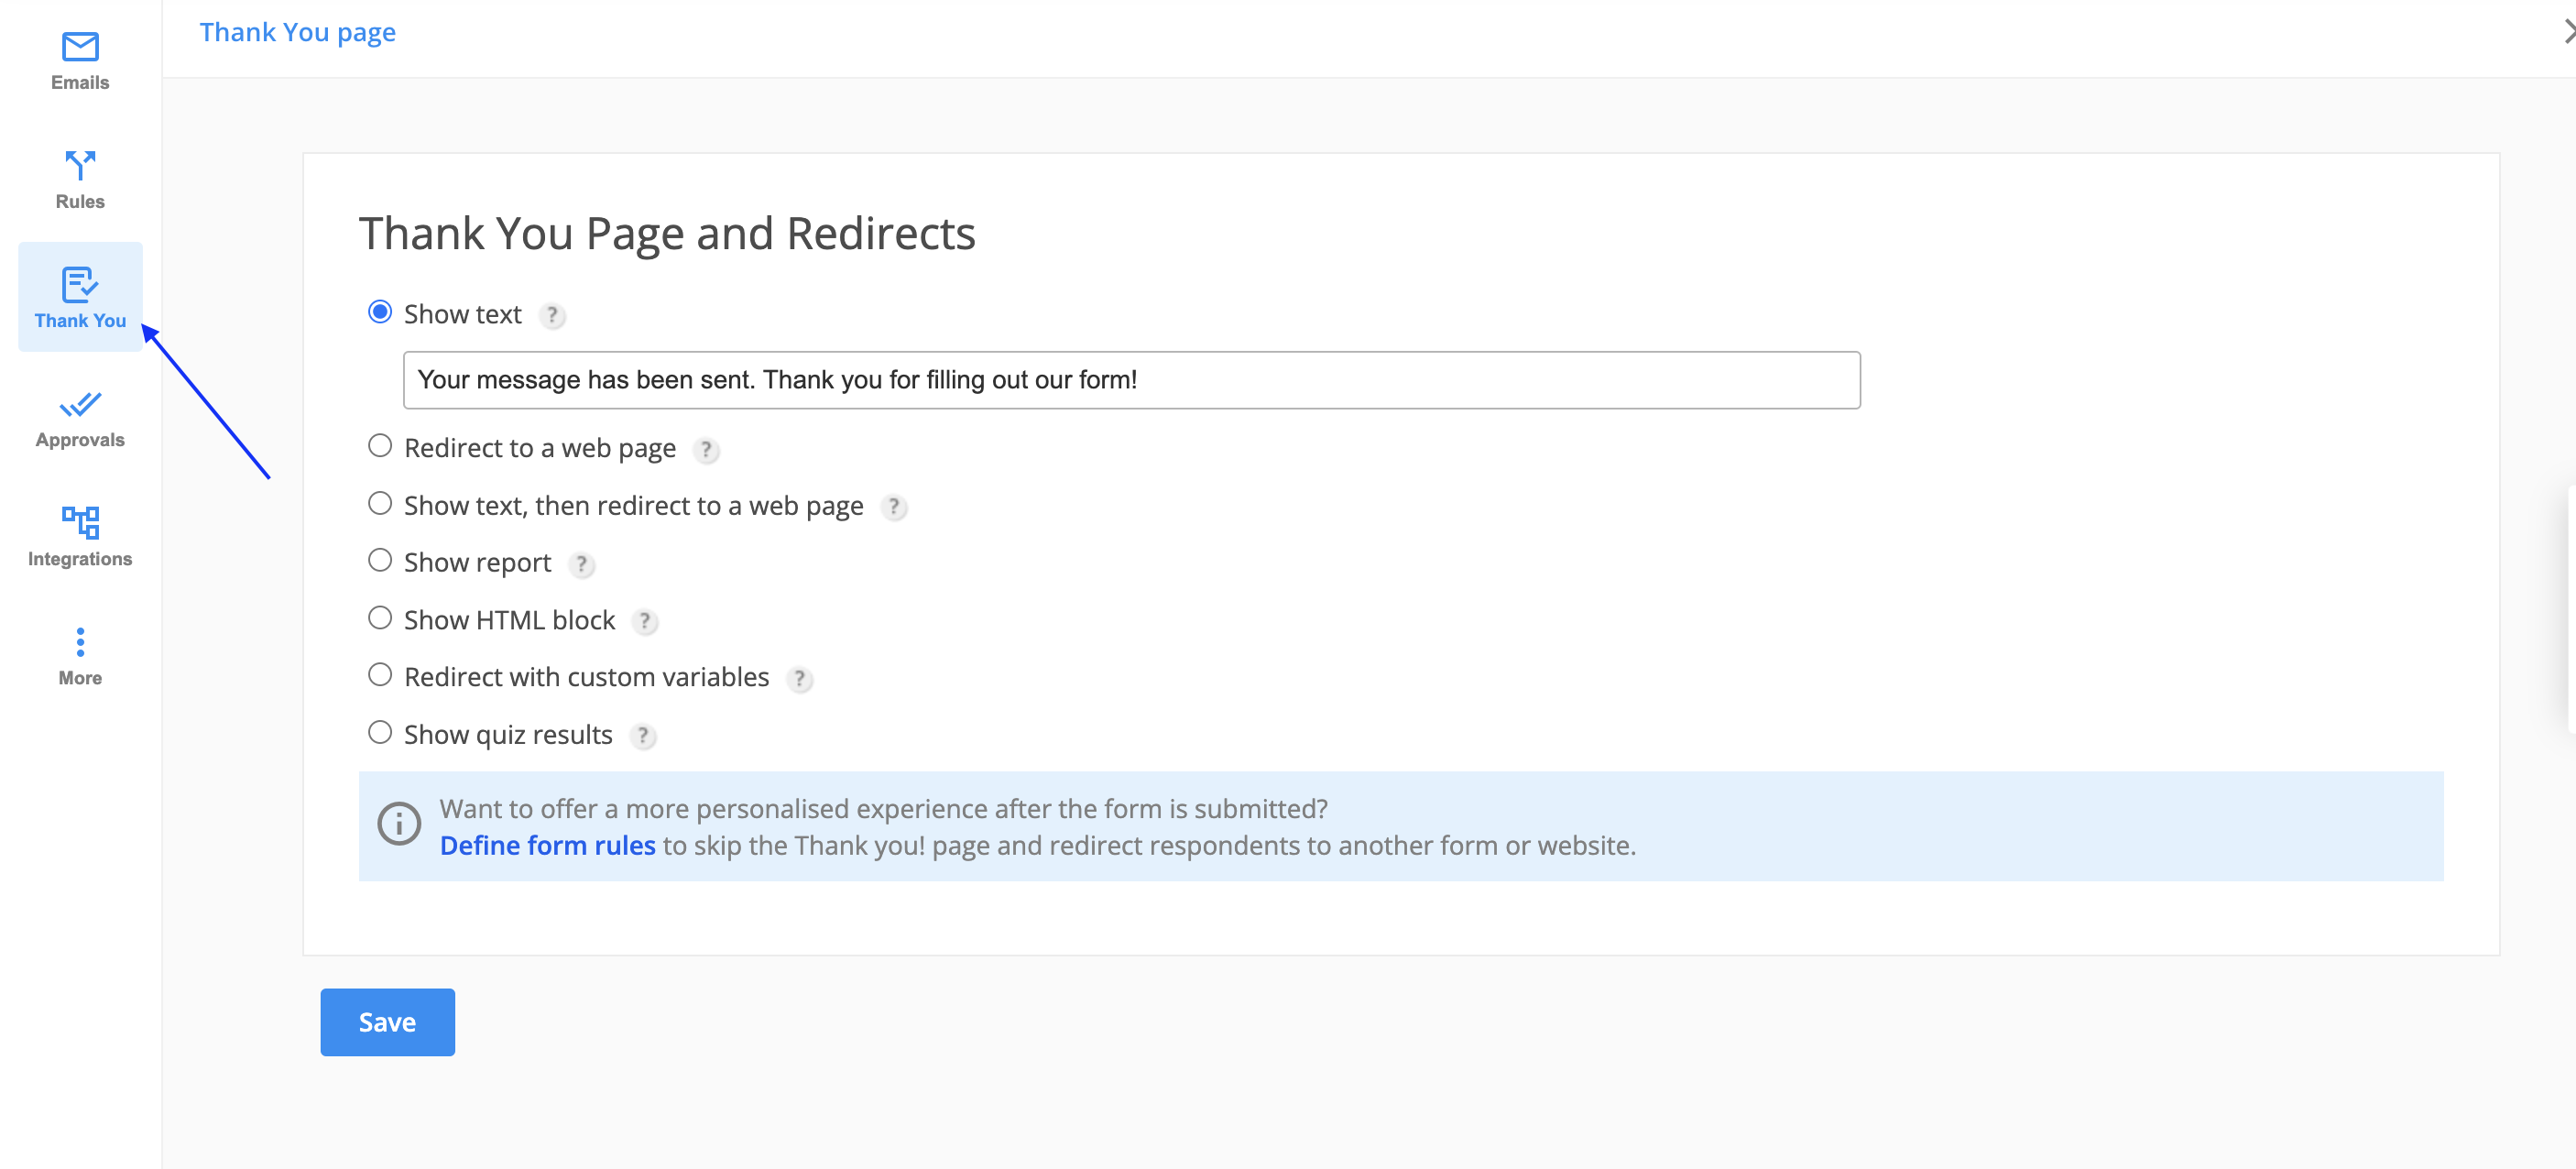
The next step is to click the option Show HTML block. Here you can add different codding elements, images, text styles, form inputs, and videos. You can also add a form input in the HTML block. Just select the field in the dropdown list located on the top, and press the Add button on the right.
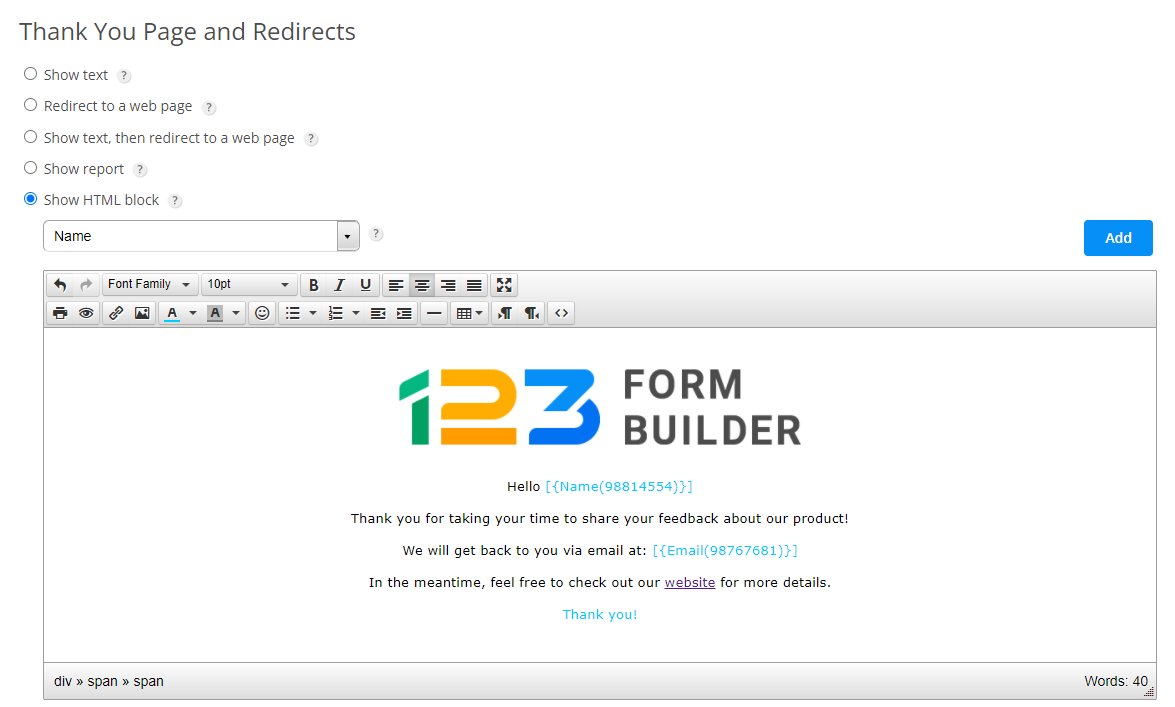
After submitting the form, your visitors will be redirected to a page with the content you have customized in the HTML block. It’s important to mention that the form’s header will also appear on the Thank You page.
Important Note
The custom Thank You page does not support JavaScript for security reasons. Instead, you can upload the script on the Web and add it to your form via its URL as described in our documentation.
If interested in how to embed videos in the HTML block, follow the steps from this documentation. In short, just hit Source code in the HTML block and paste the embed code there.
Are you familiar with editing notification email templates in HTML mode for your online forms? If so, then the HTML block of the Thank You page is not that different. The content within the HTML block is displayed the same way within the layout of the Thank You page. The only significant difference is the form field, because here you see a code of the field, while on the Thank You page your form visitors will see their input.
Try out the options of the HTML block and see how the content is displayed after submission.
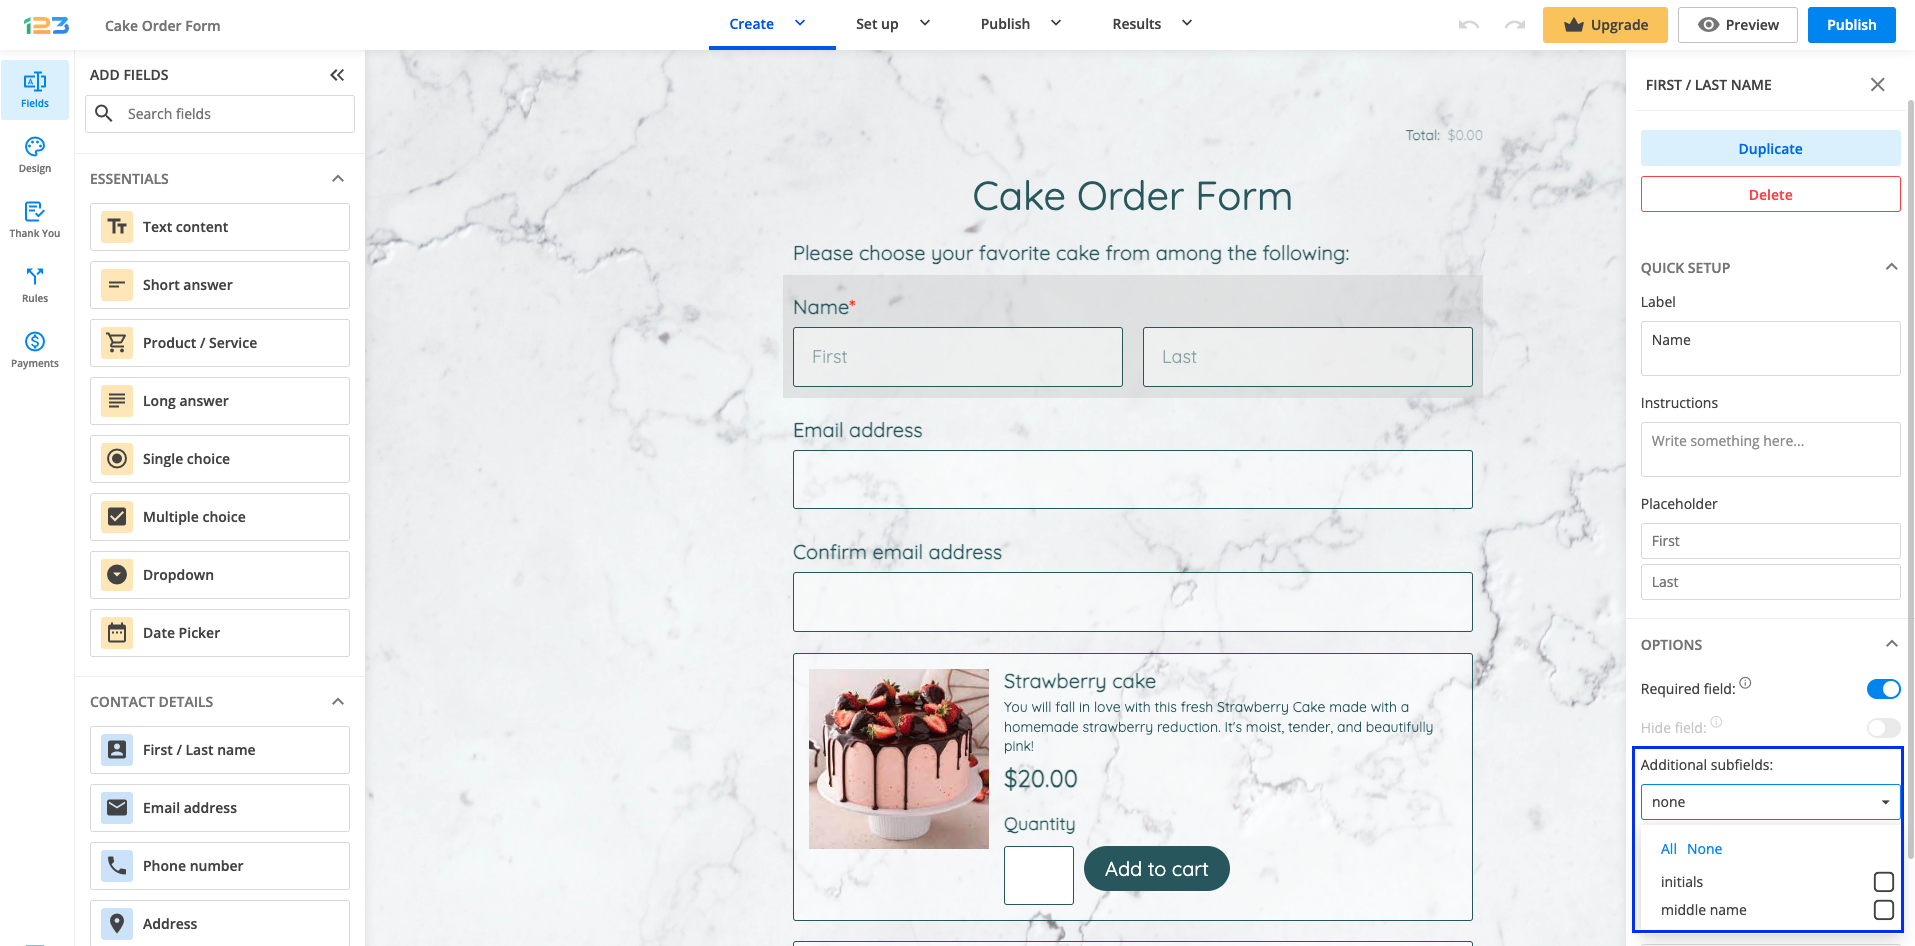
To add and customize additional subfields to the First/Last name field, you will have to simply select the field, go to Options in the left side panel. Under Additional subfields, you can add a small dropdown list for initial and middle name.
Important notes
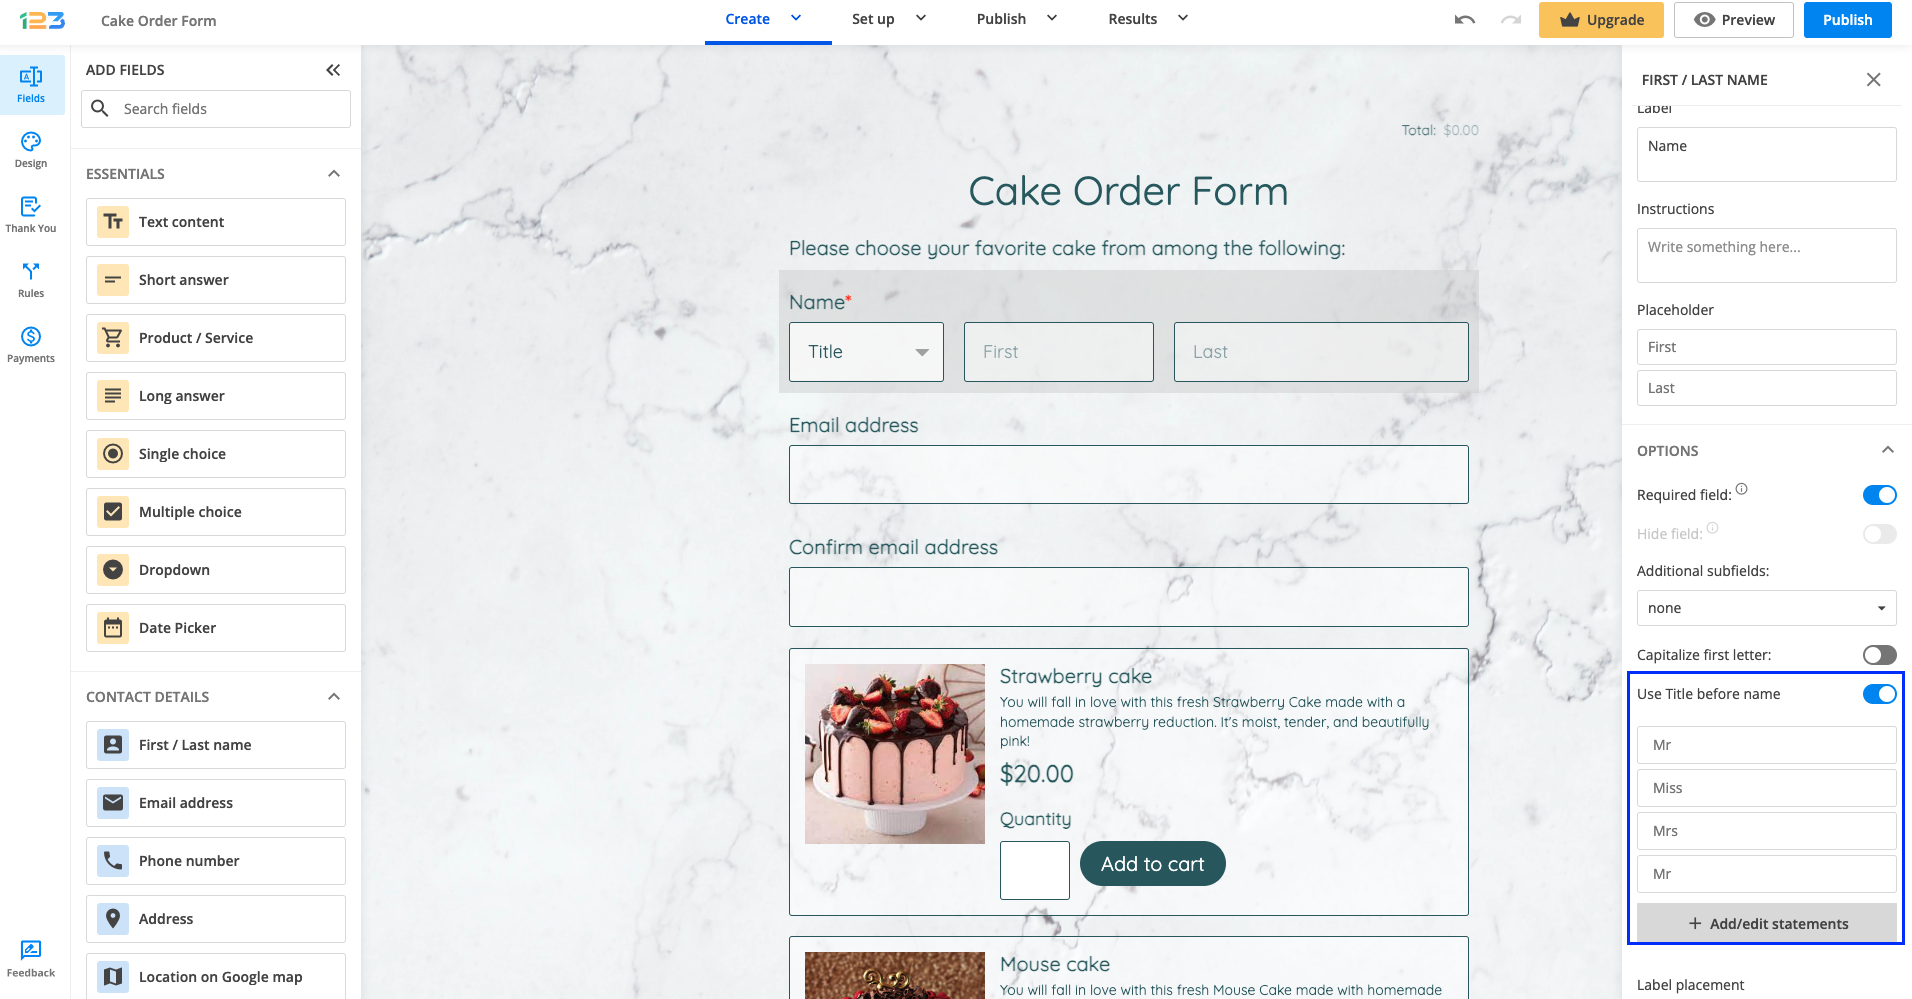
If you want to add a Title to the First/Last name field, you can do that by enabling Use Title before name option.
Once enabled, you are presented with some predefined options of title that can be easily edited – either edit the text or add more title options.
In Submissions table, a new column will appear for each subfield when any of this these options is enabled.
Placeholder text
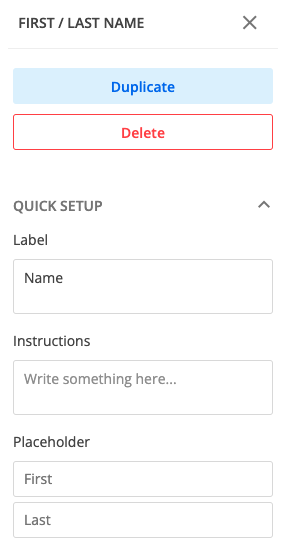
By default, the placeholder text that appears in First/Last name field is First and Last. These two options will be shown by default to respondents within the First/Last name field in order for them to understand where and how to provide input.
These two values can be changed with anything that fits your use case.
For example, we’ve changed the placeholder text to Test 1 and Test 2. These two texts will be shown to respondents and once they click within the input text box, the placeholder texts disappear. If your respondents do not provide their name, these placeholder texts won’t be send to the Submissions table, as they are only a visual aid for respondents and do not represent an actual value.
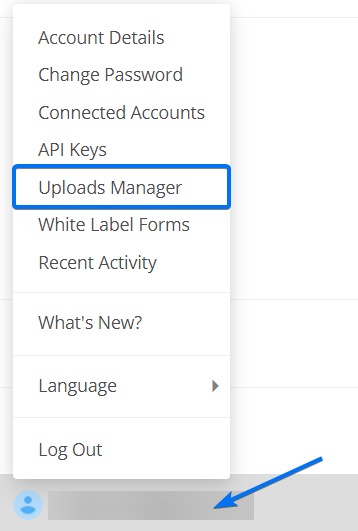
Use the File upload field on your form to receive files from your form users. Each of these files is stored in the Uploads Manager of your form builder account. To access this section, select your username and click on Uploads Manager. Here you can view all the files that have been uploaded on all your online forms.
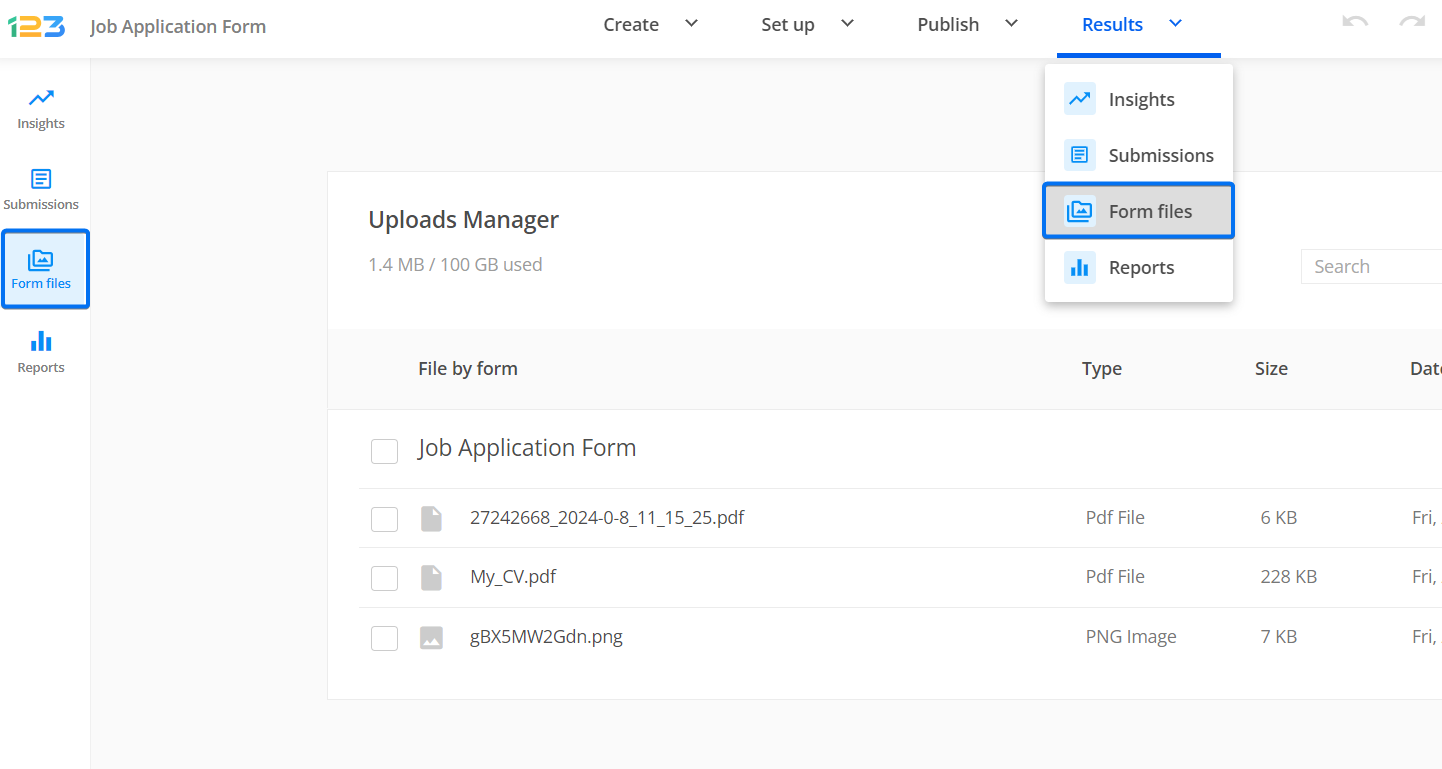
You can also see the files uploaded through each form separately by going to the forms Results → Form files section.
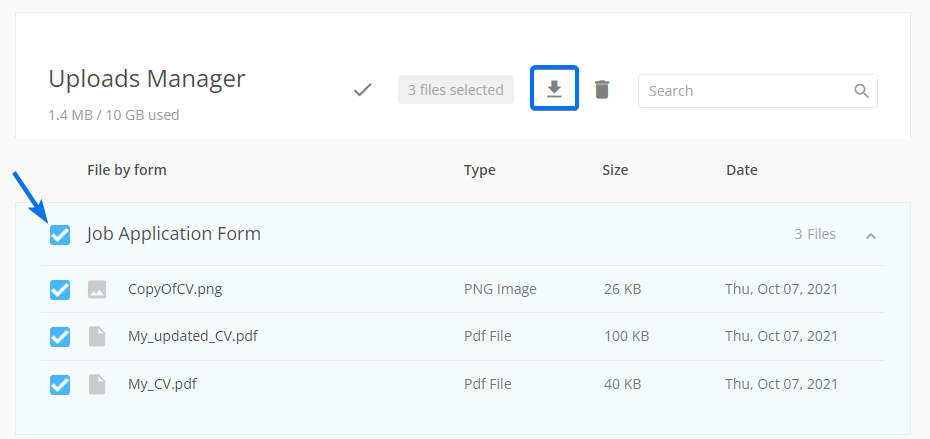
If you check one file you have the option to select all the files received through all your forms. To download only the files received from a specific form, check the box next to the form’s name. After that, the download button will display on the top right side of the page.
All files are archived in a .zip file. Therefore, you’ll need to unzip them on your device with the help of a dedicated software, such as 7-zip for example.
You’ll find the .zip file by the name archive followed by a string of numbers (e.g. archive-11962791196279).
Make sure you check the path where your browser will save the files. Some browsers will immediately ask for the path for your download (e.g. Firefox), while others will directly save the files in a predefined downloads folder (e.g. Opera).
Related articles
If you need to cancel the subscription for the Wix Starter Plan, the upgraded version of the 123FormBuilder app for Wix, follow the steps below:
1. In your Wix account, select your username from the top right corner and click on Premium Subscriptions.

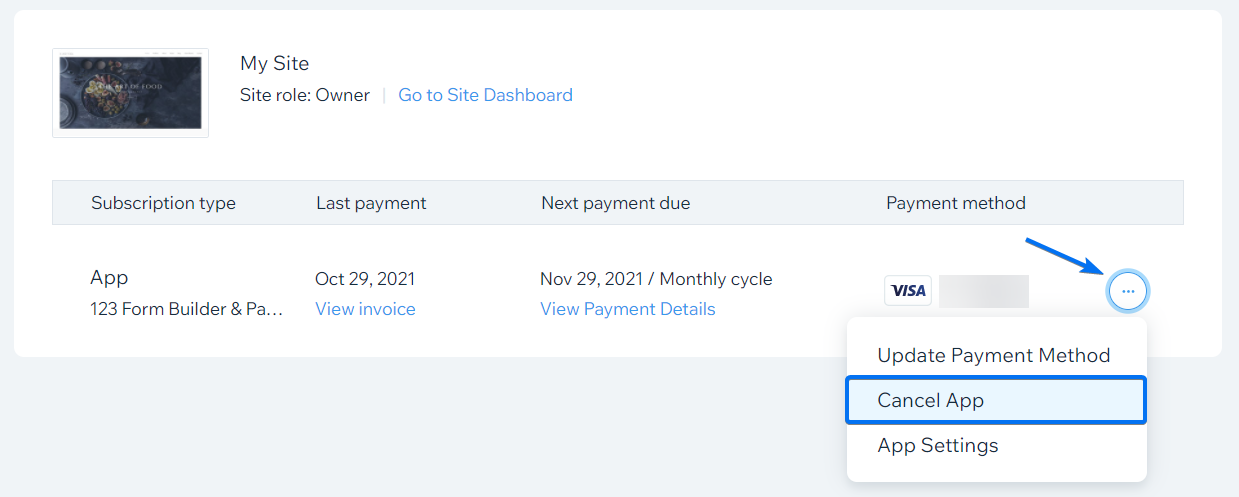
2. In the list with your upgraded apps, search for the form builder and click Cancel App.
3. In the next step, if you do not want to auto-renew your subscription, select the Cancel auto renew option. Below that, you will also be able to specify the reason why you are canceling.
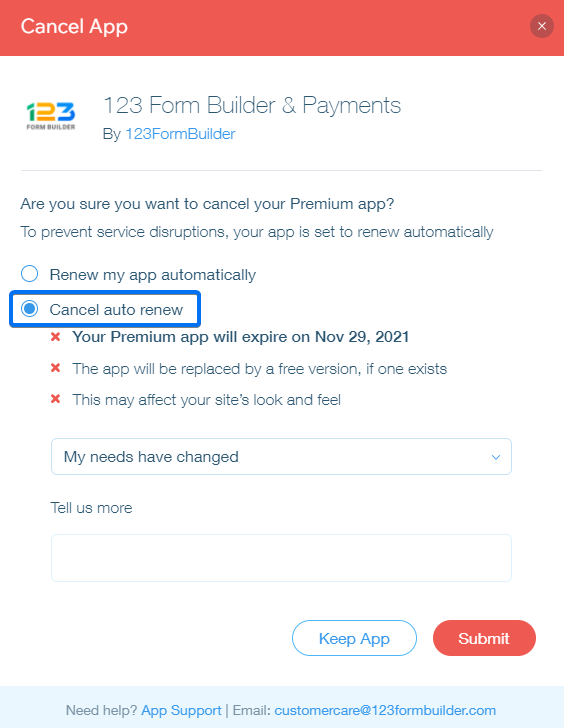
Click Submit and you are done. The subscription will end when the current billing period is over. If you change your mind and want to continue the subscription, click Turn Auto Renew On.
To embed online forms on hPage, you’ll need to copy the JavaScript code of each one of your forms and paste it into the editor of the webpage you own, in HTML mode. First, go to the Publish → Embed form section of your form in the form builder, copy the JavaScript that we have provided for you and log in to your hPage account.
Next, go to the Pages → Manage pages section, select the page that you want to edit, and switch to the HTML mode option.
Save changes and you are done. To view your online form in visual mode, return to the dashboard and press the Visit Website button. You’ll see your online form displayed on the webpage you have edited earlier.
Most Popular
Frequently Asked Questions
Here is a list of the most frequently asked questions. For more FAQs, please browse through the FAQs page.