123FormBuilder Knowledge Base
Search our documentation platform for answers, service specifications and 3rd-party integrations.
How to connect 123FormBuilder web forms with a CSV database file
Connect web forms with a database by using our Virtual database and dynamic prefill app integration. Starting with our Enterprise plans you can benefit from this feature to empower your business and productivity using our form builder.
Once the form(s) are linked with your CSV file, the information gathered will populate your database. Prefill forms fields from your CSV table to save time and improve consistency.
Let’s look at an example:
First, you will need your database in a CSV format. Below are listed the CSV file’s requirements:
- Cells are formatted with text
- Field delimiter is set to comma
- Text delimiter is set to quotation marks
- UTF-8 characters supported
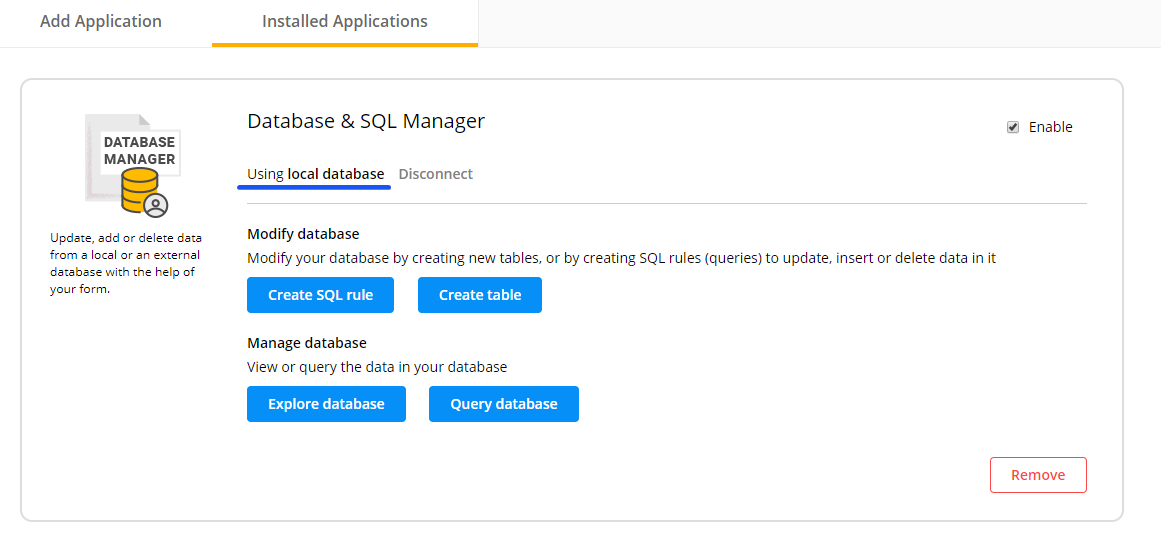
Once you have the CSV file ready, go to your form’s Integrations section. Search for the Database Manager icon and click on Add.
The tables can be uploaded as a CSV file, through the Create table button. Here you can name the table and the given name will be used in the SQL rules, to return values.
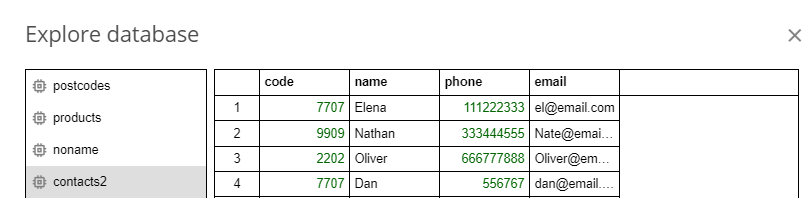
Tables can be managed in the Explore database section.
Tables will be displayed in the left-side panel. Clicking on a table will open its content in the main view.
Create SQL rules to specify the acceptable values that can be inserted into a column or to prefill form fields. Create queries to search for certain customers that meet specific criteria.
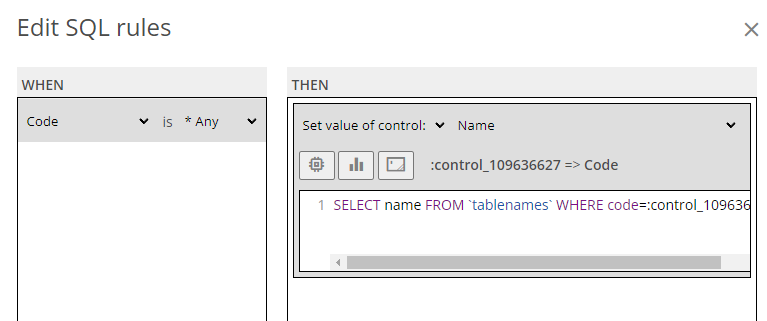
By prefiling your form fields based on a keyword you can avoid mistypes. The information is automatically pulled from your database and form users don’t need to re-enter their details over and over again.
That’s it! Now your form can read from your database and populate the data on the form.
Here are two syntaxes examples that you may want to use:
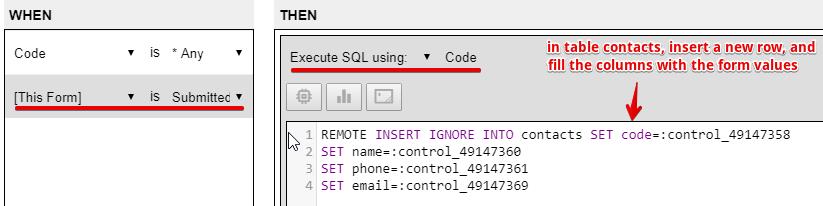
Inserting into the table:
INSERT (IGNORE) INTO table_name SET column_name=:field_control (SET second_column_name=:other_field_control, etc.)
Update the table info:
table_name SET column_name=:field_control WHERE other_column_name=:other_field_control (AND second_column_name=:second_field_control, etc.)
*Include REMOTE at the beginning of the above syntaxes if the table is stored on a remote server.
Here is an example:
When the form is submitted, the action should store the data in the contacts table.
Normally, if you fill the form twice, using the same code, you will have 2 rows inserted, with the same code, and the corresponding data.
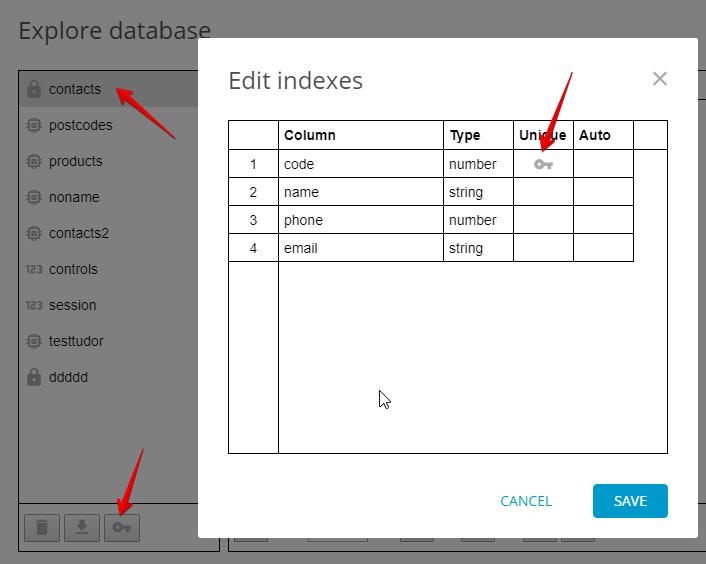
If you wish to only keep the latest data, you have to set the code column as unique. This is done from the Explore database panel. After selecting a table from the list also click on the key symbol at the bottom of the list. This will open up a separate view of the table columns and their type, from which you can enable/disable the primary key lock.
You will be able to use INSERT INTO IGNORE as a function so that you do not get entry rows with the same primary key.
Even if you are not familiar with SQL queries, our Corporate plans have an advantage. Once you sign up, a dedicated Account Manager will help you develop your forms based on your needs.
Related articles
2 comments
Leave a Reply
Similar Articles
Frequently Asked Questions
Here is a list of the most frequently asked questions. For more FAQs, please browse through the FAQs page.
Hello
I’ve tried following the steps outlined in this tutorial but i still have no luck.
When trying to upload the table I keep receiving the error message
“Failed to create table”
There was an error encountered while trying to create your table.
Please inspect if the “Advanced options” settings are setup correctly
There is a step here that is confusing. “Text delimiter is set to quotation marks”
Is there possibly an excel template or screen shot of how the CSV format should look.
Hi Carol! Since you are on our Enterprise plan, your dedicated account manager can guide you establishing the connection and answer your technical questions. Please get in touch with him/her. Thank you for your understanding!