How to Make a Poll in Google Forms

Polls are an excellent way to gather opinions, insights, and feedback from a broad audience quickly and efficiently. There are many options out there – free or paid – that allow you to build your own poll from scratch, and one of the most popular ones is creating a poll in Google Forms.
Google Forms provides a user-friendly platform to craft polls tailored to your needs. It allows you to create polls for various purposes, whether gathering opinions, conducting surveys, or making decisions. With its user-friendly interface and customizable options, crafting a poll in Google Forms is simple.
Let’s dive into a comprehensive, step-by-step guide on creating an engaging poll in Google Forms, and then we’ll show you how you can easily create a poll on 123FormBuilder, no coding needed!
Making a Poll in Google Forms
Creating your poll in Google Forms is straightforward, easy, and efficient. Let’s review the necessary steps:
Step 1: Access Google Forms
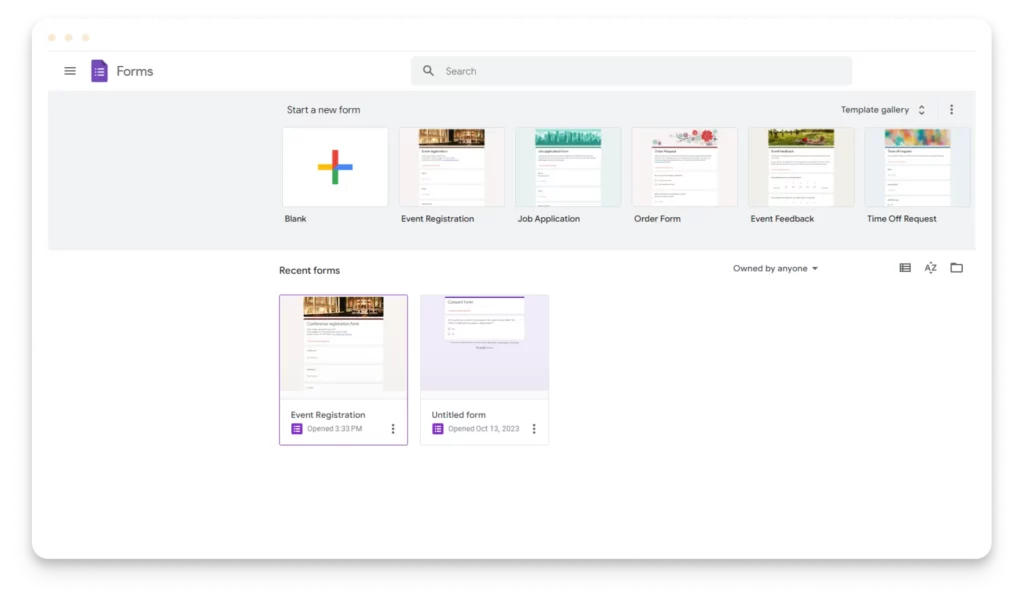
The first step to building your poll in Google Forms is logging into your Google account and accessing Google Drive. Click the “+ New” button in the top left corner, then select “Google Forms” from the dropdown menu.
Step 2: Create a New Form
When it comes to collecting opinions and feedback, Google Forms is the way to go! With a few clicks, you’ll be on your way to building a poll that is tailored to your needs. Remember to give your form a catchy title to grab your audience’s attention. Simply click “Blank form” in the top left of the form list and watch your poll come to life!
Step 3: Add Questions
With Google Forms, you cannot pick a ready-made poll, so you have to build it from scratch. After starting your form, give it a description, if needed.
To add a question, click the “+ Add question” button. You’ll be prompted to input the question text and choose the question type (multiple choice, checkbox, dropdown, short answer, etc.).
Select the appropriate question type for each query depending on your poll’s purpose. Try to keep your poll short, as most people would only want to spend a little time filling out surveys. And them losing interest means less valid data for you.

Step 4: Customize Questions
You can customize your poll in Google Forms as you see fit. You can add descriptions, images, and videos to your questions using the toolbar options. Additionally, use the “Required” toggle to make specific questions mandatory.
However, a uniform poll makes it easier for respondents to go through. You can easily track, manage, and report results with preset answers. Try to keep your preset answers as short and meaningful as possible.
It’s clear that people don’t want to spend too much time answering questions, but they don’t enjoy scrolling too much to read that many answer options either. Keeping it short and sweet is your best bet.
Step 5: Edit Form Settings
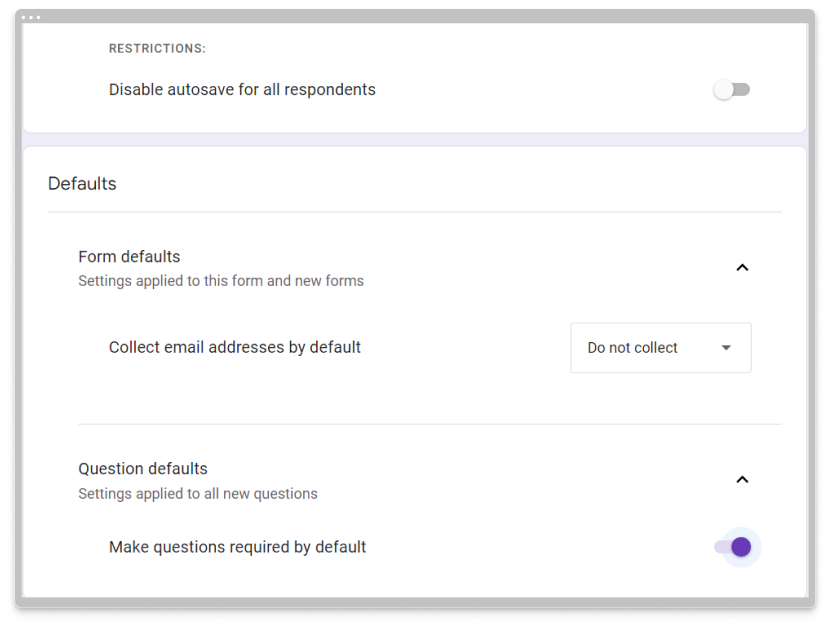
To further personalize your poll, click on the gear icon at the top right corner of the form window. Here, you can modify settings like allowing users to submit multiple responses, limiting responses, or collecting email addresses.
Make questions mandatory for responders by toggling the Required button, and allow response editing or limits. Add a progress bar, form completion confirmation, and turn autosave on or off for respondents.
Step 6: Preview Your Poll
Before sharing the poll, preview it by clicking on the eye icon at the top right corner. This allows you to see how the poll will appear to respondents and check for any errors or formatting issues.
Once you’re satisfied with the poll in Google Forms, it’s time to share it. Click on the “Send” button at the top right corner. You’ll be presented with different sharing options, including sending via email, generating a link to share, or embedding the form on a website.
Step 8: Collect Responses
As respondents answer the poll, their responses are automatically collected and stored in a Google Sheets spreadsheet linked to the form. You can view and analyze the gathered data anytime by accessing the linked spreadsheet in Google Drive.
Step 9: Analyze Results
To analyze the collected data, open the linked Google Sheets file. Here, you’ll find a summary of responses, charts, and graphs that offer insights into the poll results, helping you make informed decisions based on the feedback received.
As you can see, creating a poll using Google Forms is a convenient and efficient way to gather information and opinions from a targeted audience. Following these steps allows you to easily design polls tailored to your needs and effortlessly manage the collected data for analysis and decision-making.
Is Google Forms Enough for Polls?
While Google Forms is a powerful tool for creating polls, there are scenarios where its capabilities might not fully meet the needs of a business:
Limited Customization: Google Forms offers basic customization options. The platform’s customization might feel restricting for businesses seeking highly branded or visually tailored surveys.
Data Integration Challenges: Integrating Google Forms data with other business systems or software might pose difficulties. This limitation can be a hurdle for businesses requiring seamless data flow across various platforms.
Advanced Features: Google Forms provides fundamental poll features. However, businesses seeking advanced functionalities, such as complex conditional logic, advanced reporting, or more sophisticated user interactions, may find the platform lacking.
How to Create a Poll with 123FormBuilder
You’ve already seen how to build a poll in Google Forms, but what if I told you the entire process can be even simpler? With 123FormBuilder, you don’t have to worry about building your form because we already have thousands of ready-to-use templates. Of course, you can start for free and customize your form template to make it more personalized. Let’s see how the poll-creating process works for 123FormBuilder.
1. Sign up or log in
The first step, as always, is to log into your 123FormBuilder account. Or, if you’re on our form template page, choosing the template you want to use will do the trick. Simply press the “Start with this template” button. You will get to the login page, where you enter your credentials and access our editor.

2. Add questions
Even the most complex poll may need tweaking based on your business or needs. Our editor makes it easy to customize poll templates or even build your custom poll from scratch. Use text, single choice or multiple choice questions, embed images, videos, or PDFs, divide pages, or use page breaks, Likert scale, or star ratings.
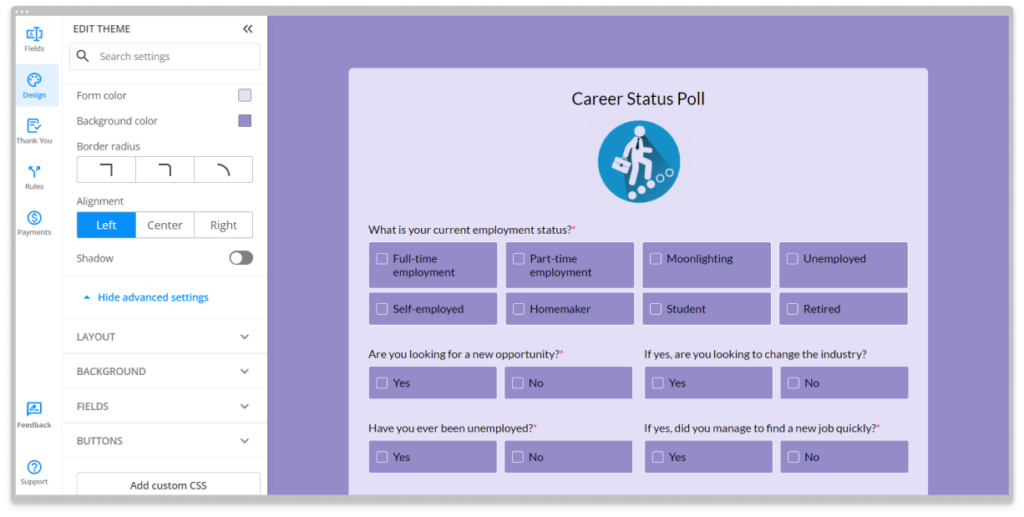
3. Customize design
Make your poll feel truly yours with design changes. Our Design section gives access to themes and advanced settings for layout, background, fields, and buttons.
Once you’re happy with your online poll, you can share it online and get submissions. Press the Publish button at the top right corner. You can embed your form on your website or social media, share it via a generated link, or integrate it with other platforms. 123FormBuilder makes it easy for you with its intuitive sharing options.
Simplify Polls with 123FormBuilder
123FormBuilder makes it incredibly easy for you to set up the perfect online poll. Crafting engaging quizzes that align perfectly with your preferences has never been easier. With its customizable features and intuitive design, this tool offers simplicity and versatility to both beginners and experienced quiz creators. Create quizzes effortlessly and make learning a fun experience for everyone. Get started today!