How to create a Google Forms approval workflow

Creating an approval workflow with Google Forms is an effective strategy for streamlining decision-making processes within any organization. This approach offers numerous advantages, including:
- Enhanced Efficiency: By automating routine tasks, eliminating the need for physical paperwork, and accelerating the approval process, organizations can save time and reduce bottlenecks.
- Greater Transparency: With the ability to monitor progress, access historical data, and keep all stakeholders informed, approval workflows ensure that nothing falls through the cracks.
- Accuracy and Consistency: Using standardized forms helps in collecting uniform data, thereby reducing discrepancies and mistakes.
- Improved Team Collaboration: Facilitates smoother communication and coordination across departments, making the approval process more cohesive and efficient.
Approval workflows are designed to streamline the process of reviewing and approving requests, proposals, or submissions. These are essential for managing various organizational needs, such as expense reports, leave applications, purchase requests, and project proposals. Leveraging Google Forms for your approval workflows not only simplifies their creation and management but also integrates seamlessly with the broader suite of Google Workspace tools, enhancing productivity and collaboration.
Here’s how it works
1. Form creation: Design a form that captures all necessary information for the decision-making process. It can include fields for details, attachments, and justifications.
2. Workflow definition: Set up the approval process by defining approvers, their order (sequential or parallel), and any conditions for approval/rejection.
3. Submission and routing: Users submit forms, triggering the workflow. The form automatically routes to the designated approvers.
4. Approval/rejection: Approvers review the form and provide their decision (approve, reject, request more info).
5. Notifications and actions: All parties receive notifications about the progress and final decision. The system can trigger subsequent actions based on the outcome.
Set up a simple approval workflow using the Form Approvals add-on
Creating a Google Forms approval workflow involves using Google Forms along with other Google Workspace tools such as Form Approvals add-on. Here’s a general outline of how you can set up a simple approval workflow using the Form Approvals add-on:
- Making your form should be the first thing you do. To begin, navigate to your Google Drive, select New -> Google Forms, and start using a blank form.
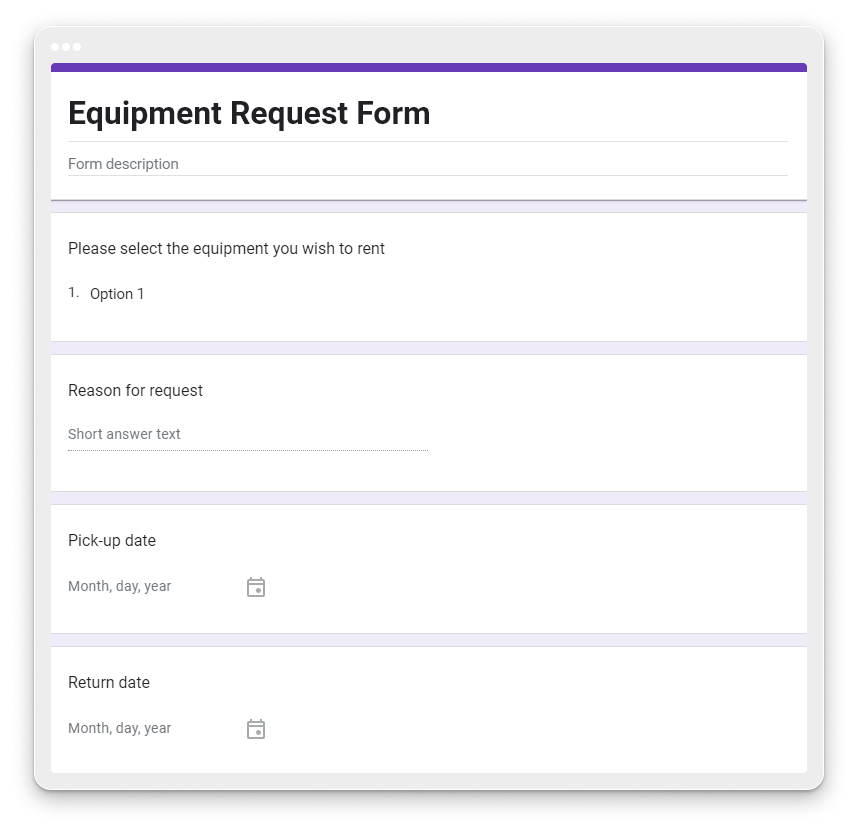
- You can now include every field that is necessary for your approval process. Requests for equipment are made using the example demo form below. Thus, we will ask the individual filling out the form to include the equipment that is requested, the reason for the request, the pick-up and return dates, etc.
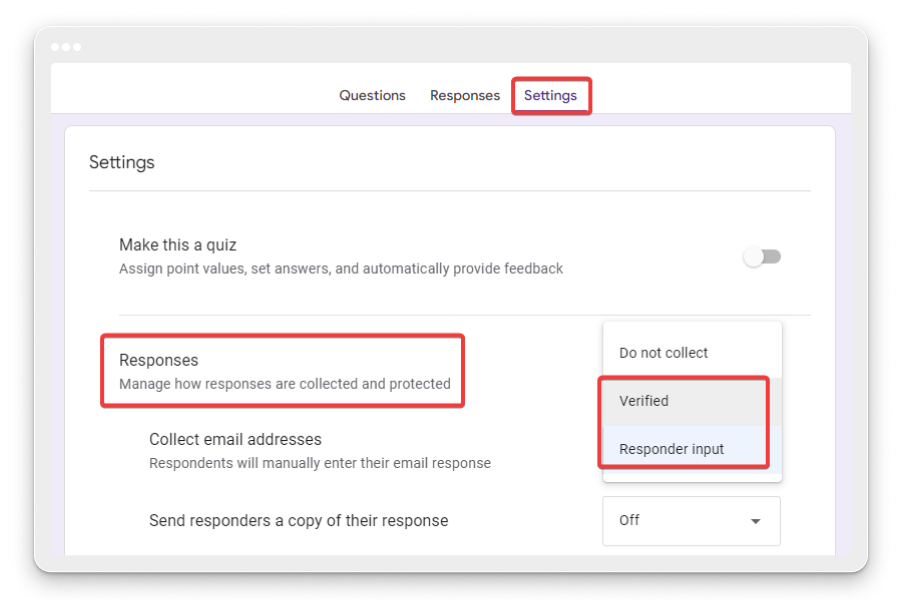
3. The email address of the person making the request is usually mandatory through the approval request. As a result, you can choose to allow the collection of email addresses under the Settings -> Responses section by choosing either the Verified (the email linked to the requester’s Google account) or Responder input option (which lets the user enter the desired email address).
4. The Google Workspace Marketplace has a number of add-ons that offer approval workflow features. “Form Approvals” is a widely used choice, and it’s the one we’ll choose too. To install it, go to Google Workspace Marketplace and search for Form Approvals.
5. Click on the add-on, then click the “Install” button and follow the prompts to install it.
6. Once the add-on is installed, open your Google Form.
7. Click on the puzzle piece icon (Add-ons) in the top-right corner of the form and select the add-on you installed from the list of available add-ons.
8. Follow the prompts to configure the add-on according to your workflow requirements. This typically involves setting up approval rules, defining approvers, and specifying what actions should be taken upon approval or rejection.
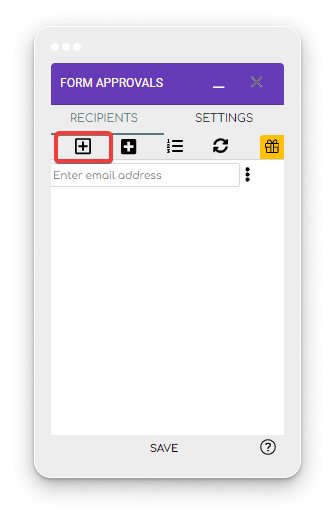
9. We will configure the approver for our sample form by selecting the static recipient option. It’s also possible that your workflow involves choosing a dynamic recipient as the approver, which displays a drop-down menu with all of the fields on your form.

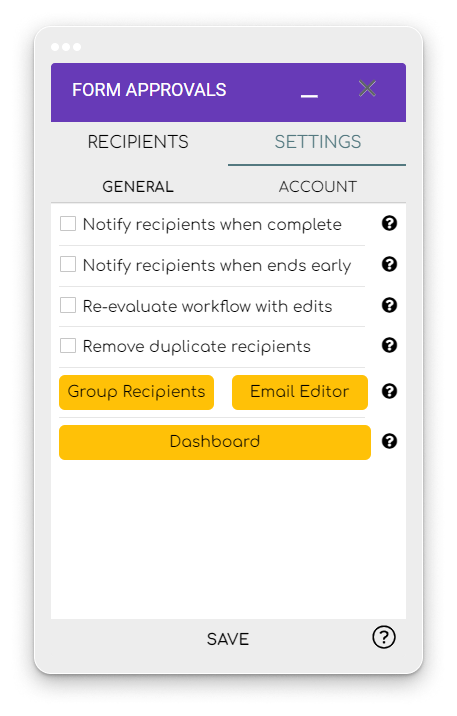
10. You can modify the email template and configure automated actions depending on the approval status by navigating to the Settings tab
11. Submit a test response through your form to ensure that the approval workflow functions correctly. Verify that notifications are sent to the appropriate approvers and that the status of the submission is updated accordingly.
The Advanced Capabilities of 123FormBuilder vs. Google Forms
123FormBuilder and Google Forms are both widely used for creating online forms and gathering data, providing capabilities for setting up approval workflows.
123FormBuilder stands out by offering both parallel and sequential approval processes with conditional routing. It enhances workflows with customized email alerts for each phase and integrates seamlessly with a variety of external applications and services such as payment processors, CRM systems, and email marketing tools.
Additionally, 123FormBuilder supports the use of digital signatures for confirmations, lets users set specific actions following approval or rejection, and offers real-time tracking of form submissions.
Though Google Forms is celebrated for its straightforward design and user friendliness, 123FormBuilder matches this ease of use with its intuitive drag-and-drop interface, allowing for form creation without any need for programming skills.
123FormBuilder further distinguishes itself by providing an extensive selection of form templates and customization features, including sophisticated form fields, conditional logic, file uploads, and payment integration capabilities.
Summary
Creating an approval workflow with Google Forms involves several steps, including form creation, workflow definition, submission, approval/rejection, and notification. Additionally, leveraging add-ons like “Form Approvals” from the Google Workspace Marketplace can further enhance workflow capabilities.
While Google Forms offers simplicity and ease of use, tools like 123FormBuilder provide advanced features such as parallel and sequential approvals, custom notifications, digital signatures, and real-time submission tracking. With a user-friendly interface and extensive customization options, these tools empower users to create robust approval workflows tailored to their specific needs. Ultimately, the choice between Google Forms and 123FormBuilder depends on the unique requirements and preferences of each organization.
Load more...