Create Invoices from Forms Using FreshBooks Integration

With the integration of 123FormBuilder and FreshBooks, you can transform your order form into an invoice, simplifying the invoicing process by digitizing operations. This integration allows you to easily create custom forms, collect client information, generate professional invoices, and automatically update your FreshBooks account with each transaction.
In this step-by-step guide, we will walk you through the process of setting up and using the 123FormBuilder and FreshBooks integration. We will cover everything from creating a customized form to automating the invoicing process.
Main Points and Benefits
Time and Error Savings:
- Eliminates manual data entry, reducing the risk of errors.
- Client information sync between platforms enables quick and accurate invoice generation.
Customization and Branding:
- Create professional-looking invoice forms aligned with your brand’s aesthetics.
- Builds trust with clients and increases the likelihood of prompt payment.
Automated Invoicing Process:
- Invoices are automatically generated and sent to client email addresses upon form submission.
- Reduces delays and ensures a smooth workflow, allowing you to focus on other business priorities.
Overview of 123FormBuilder and FreshBooks
Before we dive into the step-by-step guide, let’s take a closer look at 123FormBuilder and FreshBooks.
123FormBuilder is a versatile online form builder that allows you to create customized forms for a wide range of purposes. Whether you need a simple contact form or a complex survey, 123FormBuilder has you covered. With its user-friendly interface and drag-and-drop functionality, you can easily build forms without any coding knowledge.
On the other hand, FreshBooks is a popular cloud-based accounting software designed specifically for small businesses and freelancers. It offers a range of features to simplify your accounting and invoicing processes, including the ability to create and send professional invoices, track expenses, and manage client information. FreshBooks helps you stay organized and ensures that you get paid on time.
When these two powerful platforms come together, you can leverage their strengths to create a seamless and efficient invoicing system.
Transforming Your Order Form into an Invoice: A Step-by-Step Guide
1. Set Up Your 123FormBuilder Account:
To get started with the 123FormBuilder and FreshBooks integration, you need to set up an account on 123FormBuilder. Visit the 123FormBuilder website and click on the “Get started – It’s free” button.
The dashboard is where you can create and manage your forms. Take some time to familiarize yourself with the different features and options available. You can explore the pre-built templates or start from scratch by clicking on the “New Form” button. 123FormBuilder offers a wide range of form types to choose from, including contact forms, order forms, registration forms, and more.
- Visit 123FormBuilder’s website and create an account.
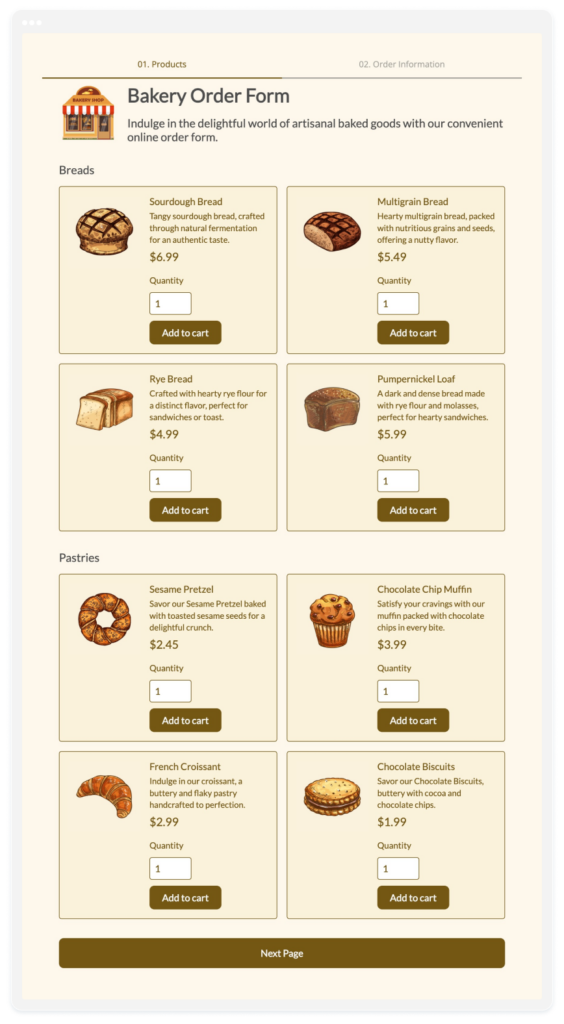
- Create and customize your order form to suit your invoicing needs (check out the video tutorial below, where we demonstrate the integration using a Bakery Order Form as an example.)
2. Enable FreshBooks integration in 123FormBuilder:
Now that you have created your form, it’s time to connect your FreshBooks account to 123FormBuilder. This integration allows for seamless data transfer between the two platforms, ensuring that client information is accurately synced.
- Navigate to the “Payments” section in your 123FormBuilder dashboard.
- Add FreshBooks and map fields for accurate data transfer.
To effortlessly link your FreshBooks account, simply enable the OAuth authorization option and click “Connect.” Ensure you’re already logged into FreshBooks beforehand.
3. Map fields for accurate data transfer
Mapping the fields is a crucial step as it determines how the data is organized in FreshBooks. For example, you can map the “Name” field from your form to the “Client Name” field in FreshBooks. Similarly, you can map the “Email Address” field to the “Client Email” field. Take the time to review and double-check the field mappings to ensure that everything is set up correctly. Once you are satisfied, save your changes and move on to the next step.
- Map out the client information in 123FormBuilder with the corresponding FreshBooks fields.
- Choose the document type you wish to create: Invoice or Estimate. For example, you might use an Estimate when providing a preliminary cost projection for a project or service.
4. Test the integration
Before you start using your invoice form, it’s essential to test it thoroughly to ensure everything works as expected. Take the time to fill out the form yourself and test all the form fields and features. Make sure that the data is transferred correctly to FreshBooks and that the invoice is generated accurately.
- To test the integration, you need to enable the sandbox mode in 123FormBuilder.
- Head over to the “Preview” tab in 123FormBuilder and fill out your order form with test information to ensure everything is working correctly.
Once you are confident that the form is working correctly, it’s time to launch it and start collecting client information. You can embed the form on your website or share the form URL directly with your clients. 123FormBuilder provides various options for sharing and embedding forms, allowing you to choose the method that best suits your needs.
5. Manage Invoices in FreshBooks:
As clients start submitting the form, their information will be automatically synced with FreshBooks, and an invoice will be generated based on the provided details. The invoice will be sent to the client’s email address, ensuring that they receive it promptly. This automation saves you time and eliminates the chances of manual errors.
- Go to the “Invoices” tab in FreshBooks to check out the newly created invoice and see that all form data was properly filled.
All the steps presented above are exemplified in our video tutorial for easy reference and follow along.
With the 123FormBuilder and FreshBooks integration in place, managing and tracking your invoices becomes a breeze.
FreshBooks offers a range of features to help you stay organized and on top of your invoicing process. You can view and manage all your invoices from the FreshBooks dashboard, allowing you to track payments and monitor outstanding balances.
FreshBooks also provides reporting features that give you insights into your business’s financial health. You can generate reports on revenue, expenses, and overdue invoices. These reports help you make informed decisions and identify areas for improvement.
In summary, integrating 123FormBuilder with FreshBooks streamlines invoicing. Follow our step-by-step guide or watch the video tutorial for clarity. Once set up, managing invoices becomes efficient, allowing you to focus on your business.
Load more...