How to Create a Quiz with Google Forms: A Step-by-Step Guide

Quizzes are a precious tool for a variety of purposes, such as education, training, and interactive engagement. They can test knowledge and understanding, reinforce concepts, and provide feedback.
Additionally, quizzes can be structured in various ways to suit different needs and objectives. For example, they can be timed, scored, or graded, including multiple-choice, true/false, and fill-in-the-blank questions. They are a versatile and effective means of promoting engagement and learning.
Google Forms offers a seamless platform to design and deploy quizzes effortlessly. Let’s learn to create a quiz with Google Forms first. Then, we’ll show you how to use 123FormBuilder to quickly make your online quiz.
Crafting an Interactive Quiz with Google Forms
Embarking on creating a quiz with Google Forms is a straightforward process that offers both ease and efficiency. Let’s break down the steps to set up your own engaging quiz:
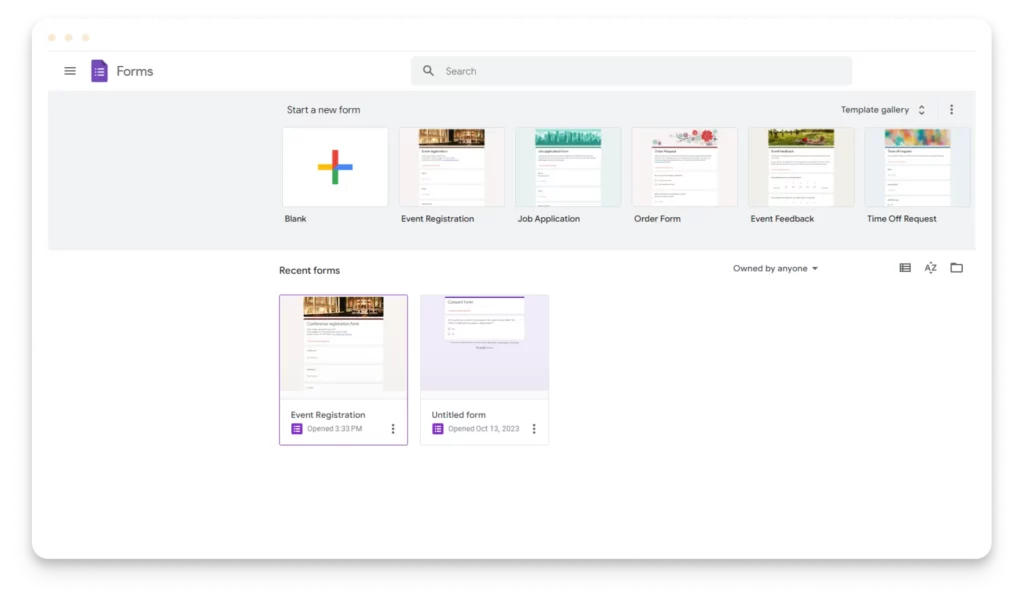
Step 1: Access Google Forms
Start by going to forms.google.com. Then, click the prominent “+ Blank form” button to initialize a fresh, blank form ready for customization, or pick an existing form you can modify to your taste.
Step 2: Configure Quiz Settings
Next, click on the Settings tab, where you will find a list of settings. First, you will toggle the “Make this a quiz” button to let Google know that your new form is a quiz.
Additionally, consider enabling the “Collect email addresses” and set the response limit to 1 to minimize chances of cheating.
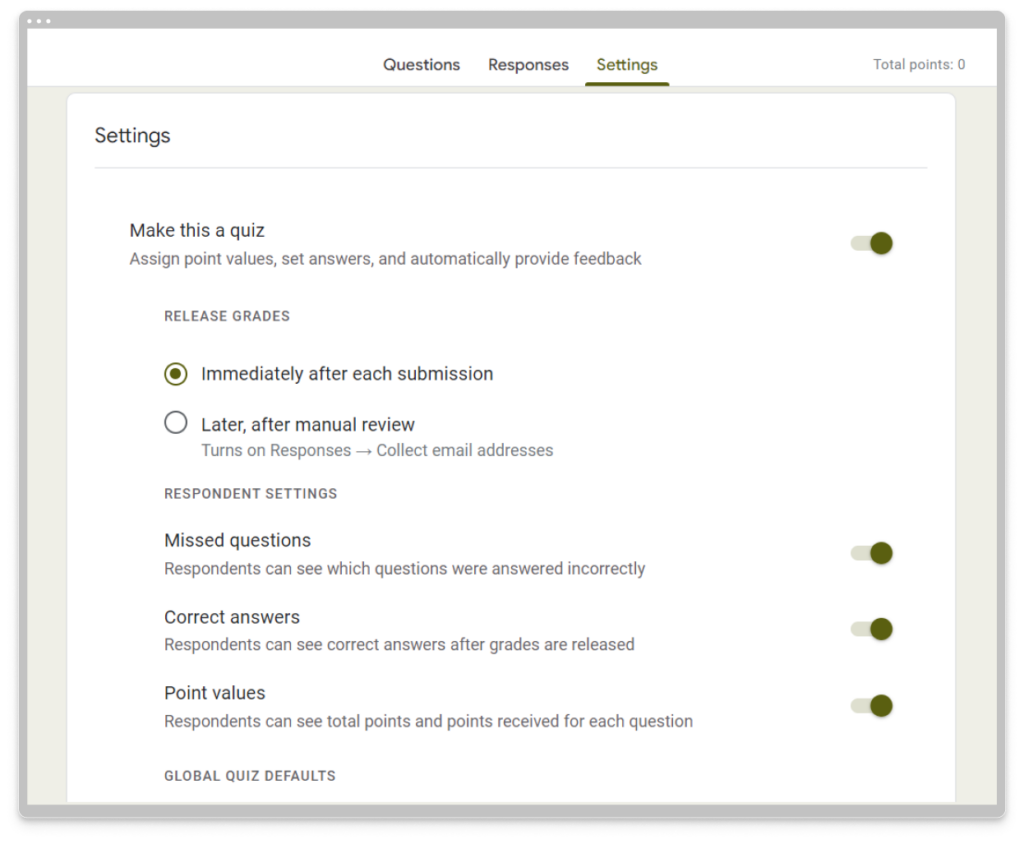
Under Settings, you can enable automatic grading for immediate scoring feedback to participants. Customize visibility settings according to your requirements, such as displaying question point values.
Step 3: Customizing Your Quiz
Navigate back to the Questions tab. Ensure your quiz has a clear title and a brief description. This section is also ideal for collecting responder identification details, such as their name, email address, or telephone number.
Step 4: Adding Quiz Questions
Add questions by selecting the “+” on the side menu and setting the question type to “Short answer.” Duplicate fields for efficient entry of additional details, such as the last name.
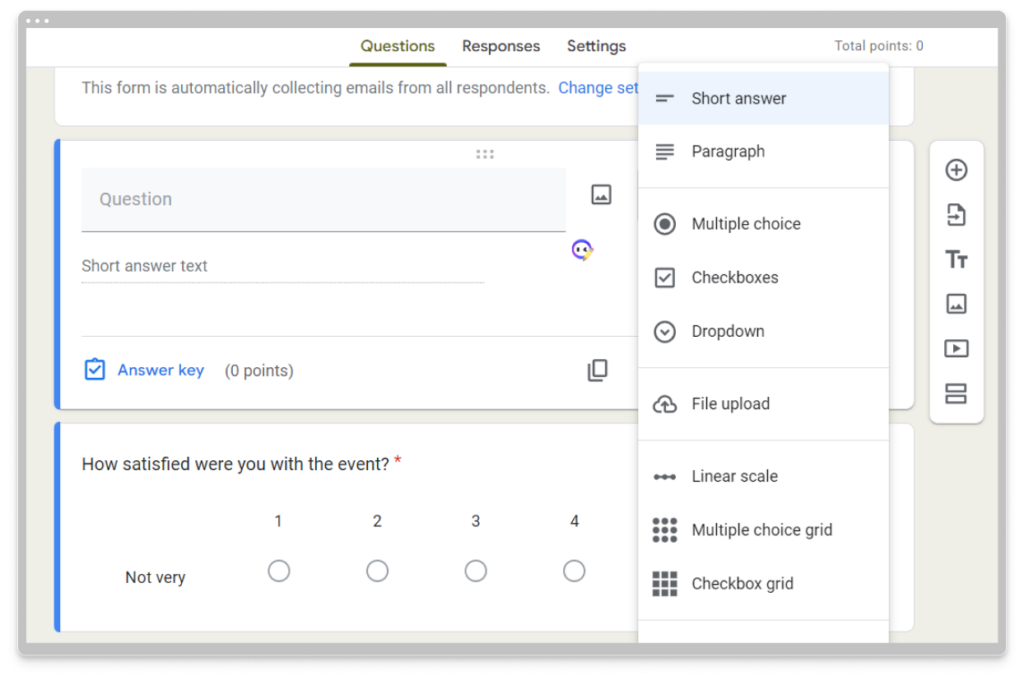
Step 5: Structuring Quiz Queries
Create the core quiz questions using the “Multiple choice” question type. Input your query and options, and press Enter to add another answer. Enhance questions by integrating visuals for a richer experience.

Step 6: Configure Answer Keys
Designate the correct answers and assign point values for each question. Use the “Add answer feedback” feature to guide respondents with tailored responses for right and wrong answers.

Step 7: Review and Analyze
Preview the quiz for accuracy and completeness using the eye icon at the top-right corner. You can go to Settings – Presentation to set up how the form and responses are presented and add a confirmation message.

Once satisfied, click the “Send” button to share it via a link or email or embed it on a website.
Test the quiz to gather sample data. Access the “Responses” tab to analyze the overall results of individual responses and assess students’ performance.
Step 8: Use Data Insights
Leverage the analytical tools within Google Forms to interpret quiz results effectively. Export data to Google Sheets for further analysis or to manage quiz-related information.
That’s it! You’ve created your first Google Form Quiz! All you have to do now is publish it online, on social media, in email marketing, or on your website and wait for submissions to come in.
Is Google Forms Enough for Quizzes?
Google Forms offers quick tools to facilitate quiz creation and management. However, exploring other platforms might benefit more diverse functionalities, such as fill-in-the-blank questions or additional field options.
While Google Forms offers a user-friendly platform for creating quizzes, there are a few challenges users might encounter:
- Limited Customization Options
Google Forms provides basic customization features but may lack the depth and flexibility needed for highly specialized quizzes. Users might face challenges creating complex question formats or incorporating advanced design elements beyond the platform’s capabilities. - Constraints in Question Types
Although Google Forms supports various question types, it might only cover some possible formats. This limitation could challenge educators or businesses requiring specific question structures, such as matrix-based questions or advanced logic in quizzes. - Advanced Grading Complexity
While Google Forms allows automatic grading, configuring complex grading systems can be challenging, especially for quizzes with varying scoring criteria or subjective answers. Users might need help setting up intricate grading rubrics beyond essential point assignments.
Addressing these challenges might involve exploring additional tools or platforms offering more extensive customization, diverse question types, and advanced grading features tailored to quiz needs. Integrating complementary applications or platforms can help overcome these limitations and enhance the overall quiz-taking experience.
123FormBuilder: Creating Quizzes Made Effortless
123FormBuilder is an excellent solution for your quiz needs. You can choose an existing quiz template or build your own from scratch, using must-have features like conditional logic. Here’s a simple guide to making your quiz with 123FormBuilder.
Step 1: Sign Up or Log In
Visit the 123FormBuilder website and sign up for a new account or log in if you already have one. The signup process is quick and straightforward.
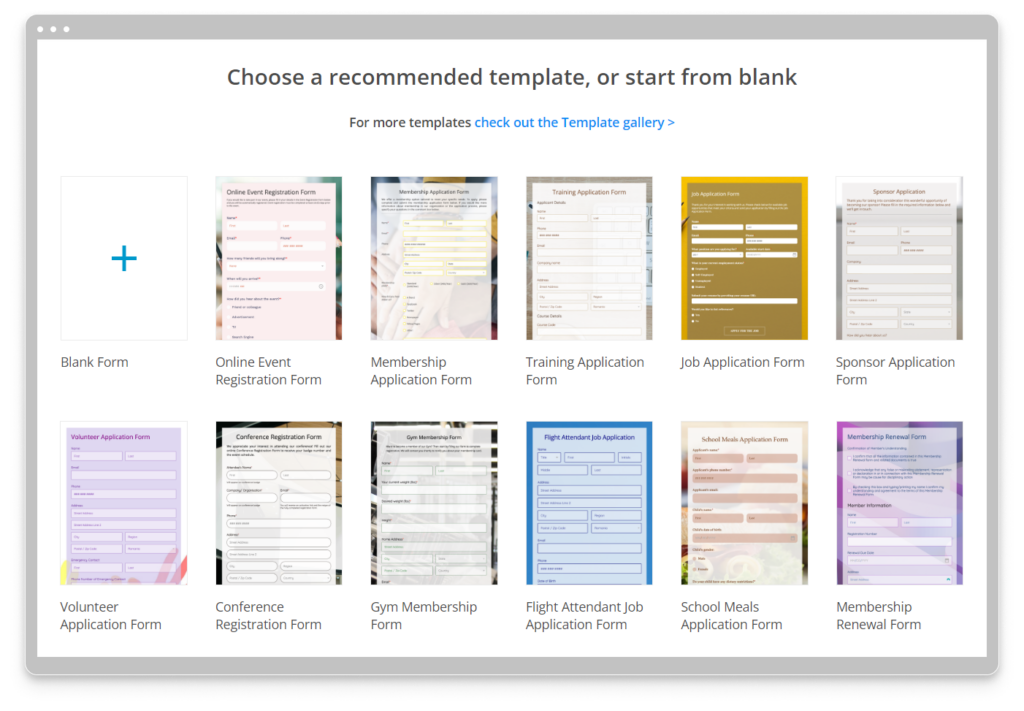
Step 2: Choose Quiz Template
Upon logging in, browse through the template gallery or start from scratch by selecting a blank form. Choose the quiz template to begin crafting your questions.
Step 3: Add Questions
Start adding questions using various question types available in the Create – Fields Tab located on the left side of the page. Utilize multiple-choice, text, rating, set up rules and notifications provided by 123FormBuilder.

Step 4: Customize Design and Settings
Personalize the quiz’s appearance by customizing colors, fonts, backgrounds, and themes from the Design tab. Set up every visual detail to perfection to tailor the quiz experience.

Step 5: Publish and Share
Once your quiz is ready, publish it seamlessly by pressing the Publish button on the top right corner. Embed it on your website, share it via a generated link, or integrate it with other platforms using the intuitive sharing options provided by 123FormBuilder. As submissions start coming in, check how your quiz is doing by visiting the Insights tab located in the Results tab of your editor.
Simplifying Quizzing with 123FormBuilder
123FormBuilder’s user-friendly interface simplifies the entire process of creating quizzes. It offers simplicity and versatility in creating quizzes that align perfectly with your preferences. Its customizable features and intuitive design cater to beginners and experienced quiz creators, allowing them to craft engaging quizzes effortlessly.