How to add payment methods on Google Forms

Looking to collect more than just data with your forms? As your needs evolve, you might find yourself wanting to automate workflows and even collect payments seamlessly. While Google Forms offers a user-friendly form-building experience, integrating a payment processor within your form may require some guidance.
In this article, we’ll walk you through a step-by-step tutorial on how to collect payments using Google Forms. Additionally, we’ll explore the array of payment processors available through 123FormBuilder, empowering you to seamlessly integrate payment collection into your forms.
How to collect payments with your Google Form
By default, Google Forms does not offer any direct integration with payment processors. In this case, we will need to be a bit creative in how we can collect payments through our Google Form. There are several ways through which you could do this.
- Peer-to-peer payment
A peer-to-peer system allows one to send money to another person through money transfer apps, such as Zelle or Venmo. The advantage of these apps is that they do not change additional fees, so they could be an option for people who want to collect small fees and don’t need to have the complex structure of a payment processor.
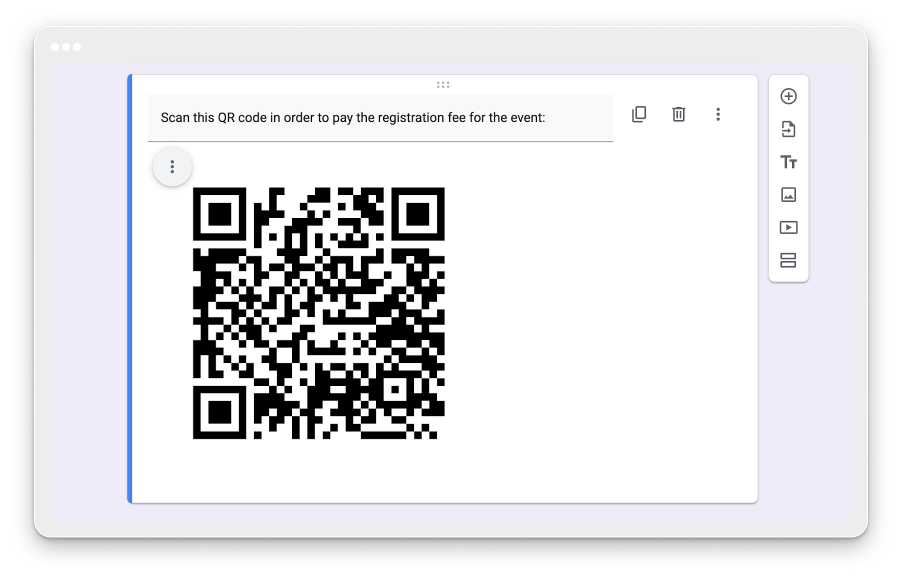
After creating your Google Form, you need to generate a QR code from your payment processor of choice.
Once the QR code has been generated, all you have to do is to add an image of the QR code to your form by clicking on the Add image icon.
Do not forget to provide the question label, with clear instructions so that your respondents could understand that they need to make a payment.
2. Use Google Workspace add-ons
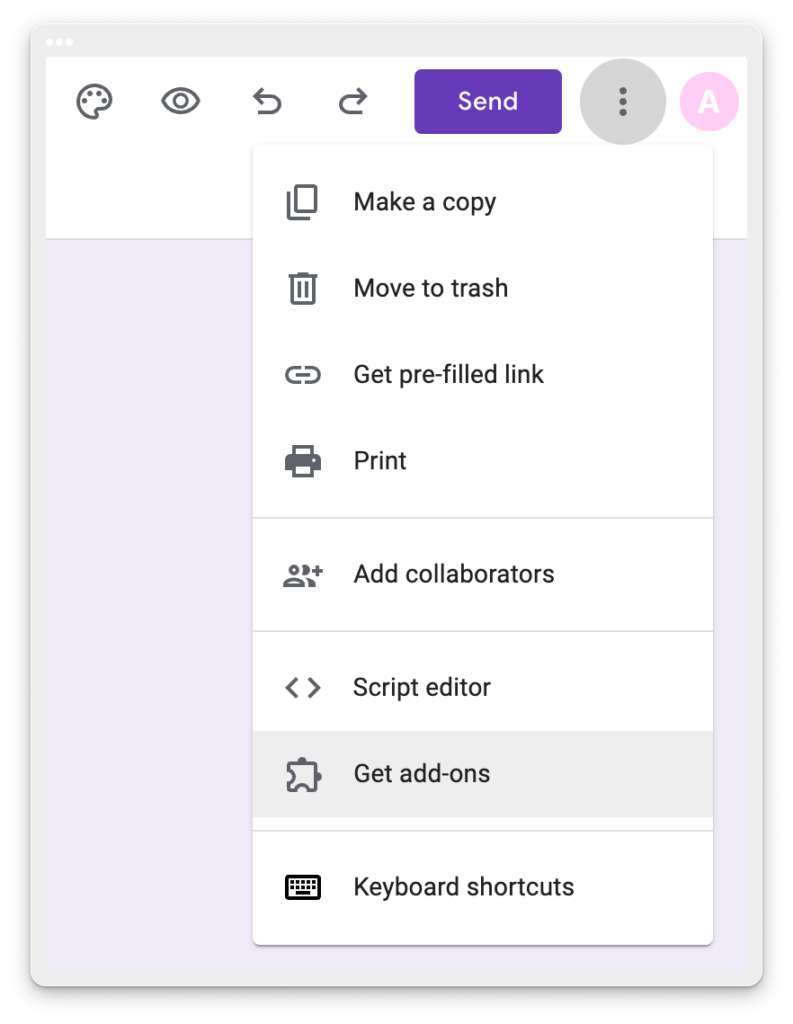
Another option of collecting payments through your Google form is by using Add-ons. Click on the three dotted menu to the top right corner and select Get add-ons.
Now all you have to do is to search for payment options in Google Workspace Marketplace. For example, we’ve searched by payment search term and several options are available. Neartail seems to be a very good option – you can create order forms and collect payments through it. Payable Forms is another option heavily used by other users.
Once important note when using such add-ons: since we are talking about payment processors, don’t forget to test your form end-to-end. Use the test mode this add-ons offer and make a test payment in order to check the flow of the form.

3. Connecting a link
If you are interested in using PayPal, Google Pay or Apple Pay, good news, you can use them to collect payments through your Google Form.
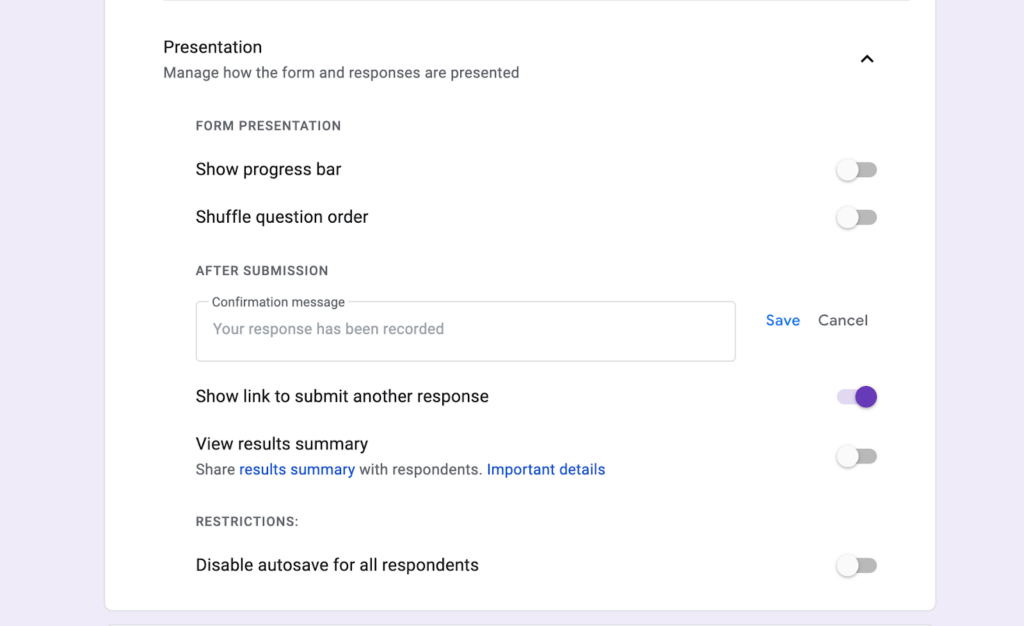
After creating your form, go to Settings tab and navigate to Presentation section.
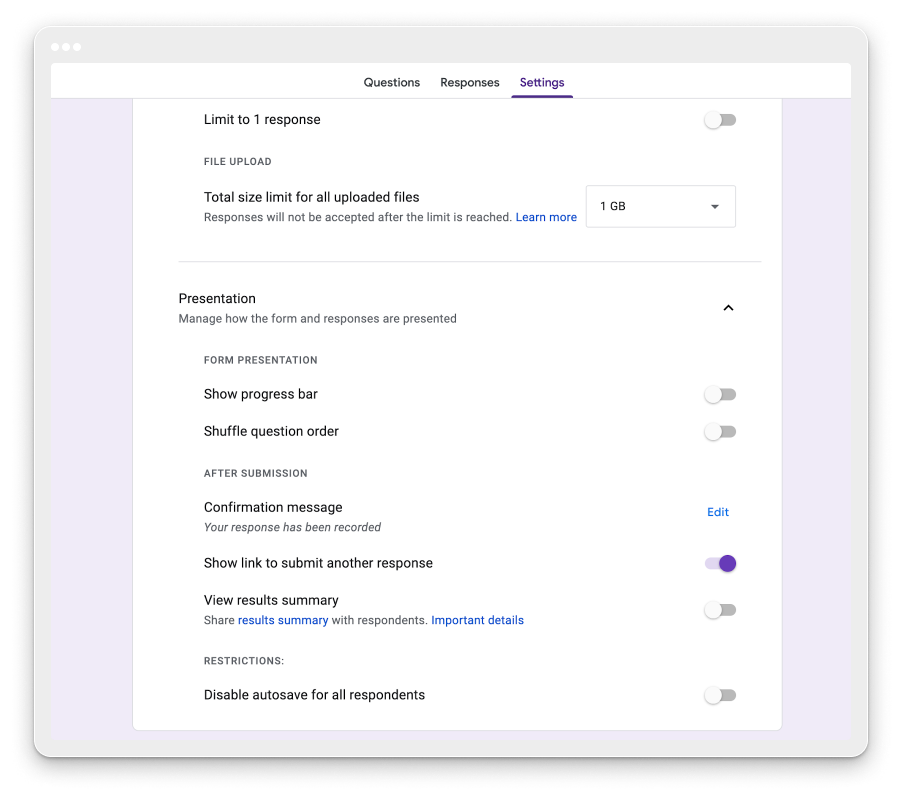
Click on Edit for Confirmation message and provide the URL for your payment processor in the Confirmation message box.
All these options could get the job done, but I think we can all agree that we would like to avoid situations where respondents don’t scan the QR code or don’t click on the link payment and you end up without collecting the payment.
Collect payments with 123FormBuilder
Good news! You can integrate your 123FormBuilder form with more than 10 payment processors. The process is really easy no matter what payment processor you choose to use.
Once you’ve created your 123FormBuilder form and assigned prices to your fields, all you have to do is go to the Payments section. Here you can find an extensive list of payment processors.
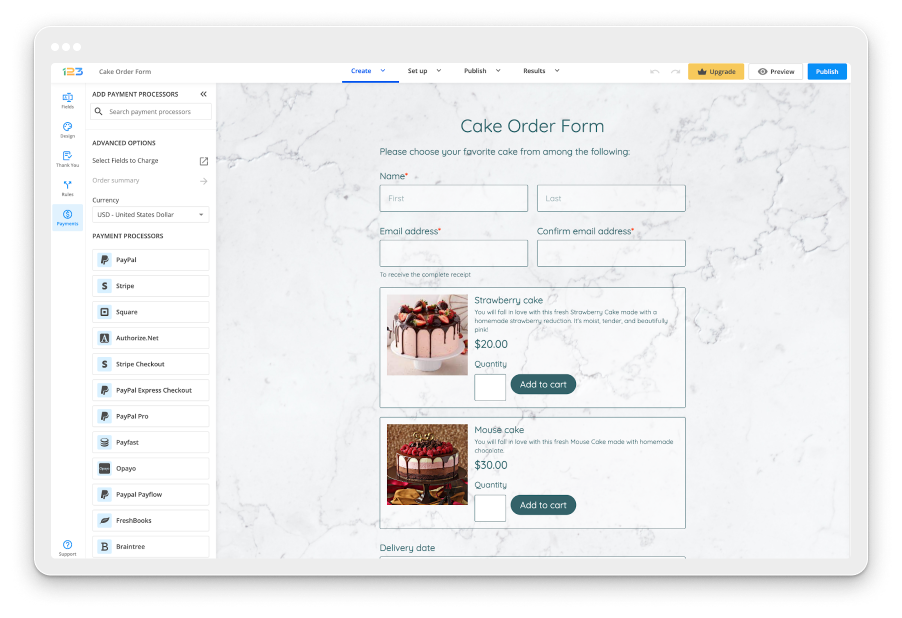
For our Cake Order form, let’s take PayPal as an example. Once you’ve clicked on PayPal, to the right side of the screen you’ll notice all the necessary settings for this payment processor. Also, if you are interested in finding more on how PayPal is working and how to set it up, don’t hesitate to click on Learn how to.
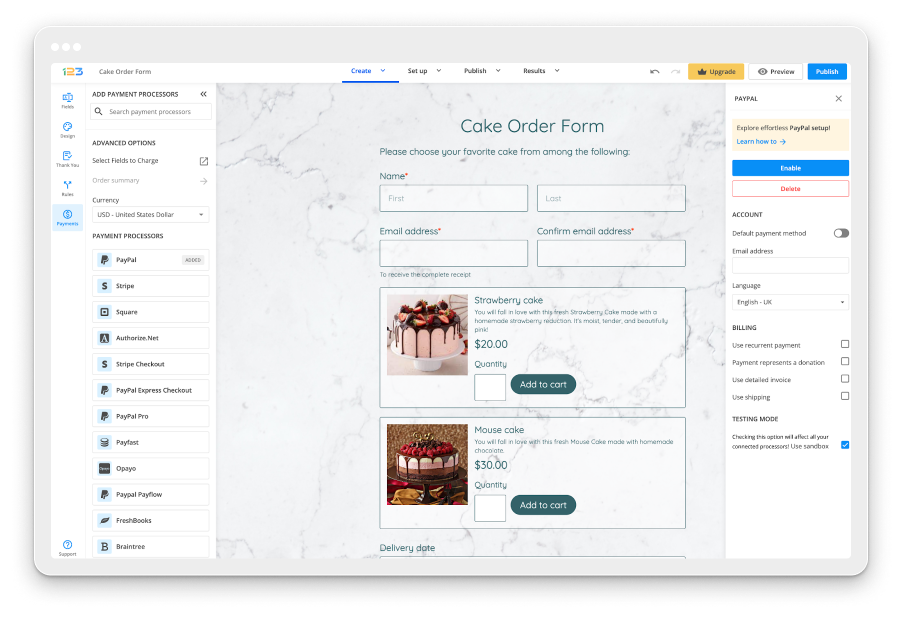
In order to set PayPal up, you need to provide the email address for your PayPal account and select its language.
If you are interested in collecting recurring payments or donations, you need to check the appropriate checkboxes.
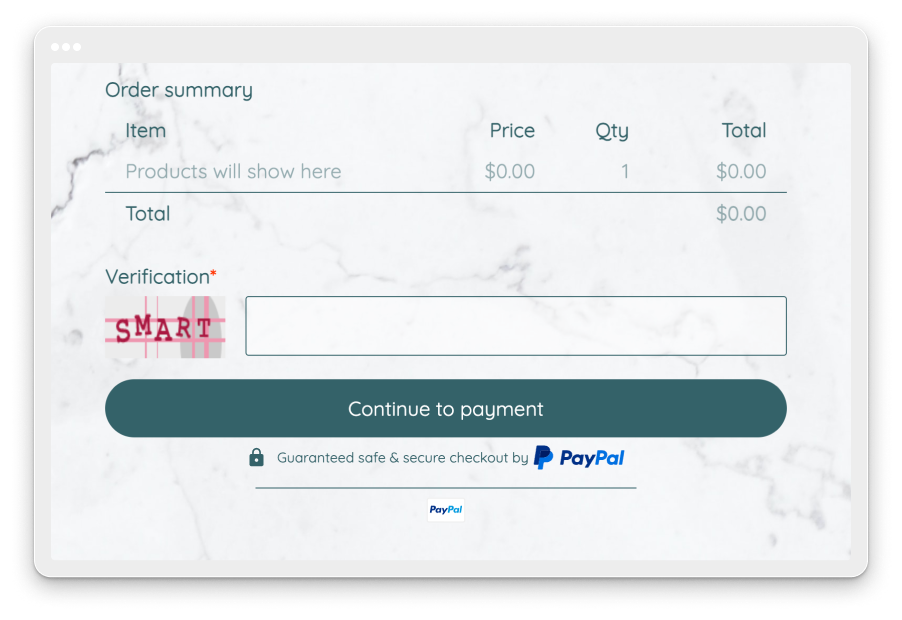
Do not forget to click on Enable button in order for the payment processor to work. Once PayPal has been enabled, you will notice a couple of changes on your form:
- An order summary is displayed – this functions similar to a cart, where all the products selected by your respondents will be displayed with its price and quantity
- The Submit button is changed to Continue to payment – the reason behind this is to inform respondents that they have a payment to make after submitting the form
- Disclaimer text & payment processor logo – this is meant to offer your respondents trust to make the payment through your 123FormBuilder form.
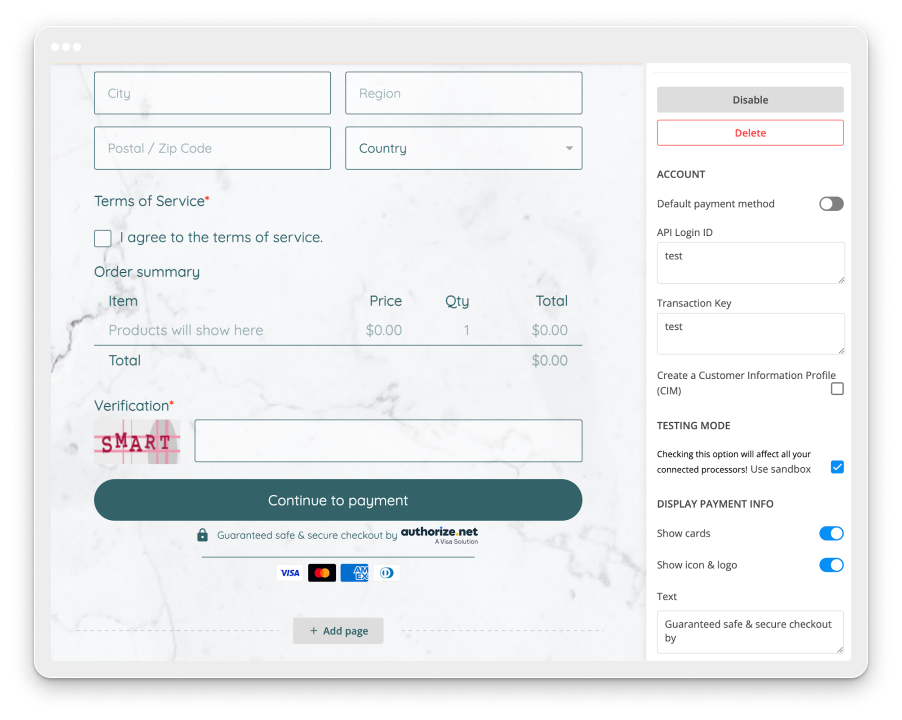
Additionally, if you go for another payment processor, for example Authorize.net, there is an additional change on the form.
By default, we are displaying the accepted cards by Authorize.net on the form, so that respondents could be informed beforehand with what they can do the payment.
You can choose to hide the accepted cards by disabling Show cards from the right side of the screen. If you want to, you can also choose to disable Show icon & logo in order to hide the payment processor logo.
Even if these settings are editable, we strongly recommend keeping them to the default state. They are meant to offer more trust and confidence for your respondents to do the payment and this translates in more complete submissions and payments made through your form.
While Google Forms offers basic form-building capabilities, integrating payment processors within your forms can be a bit challenging. However, with the help of peer-to-peer payments, Google Workspace add-ons, or direct payment links, you can collect payments effectively.
Alternatively, 123FormBuilder offers a seamless solution with more than 10 payment processors integrated directly into the platform. Whether you choose PayPal, Authorize.net, or another option, setting up payments with 123FormBuilder is straightforward and ensures a smooth user experience for both you and your respondents.