123FormBuilder Knowledge Base
Search our documentation platform for answers, service specifications and 3rd-party integrations.
Knowledge Base
To create custom objects in Salesforce through form submissions, go to the Integrations section of your form within the form builder and select Custom Object in the Create Object dropdown of the Salesforce application.
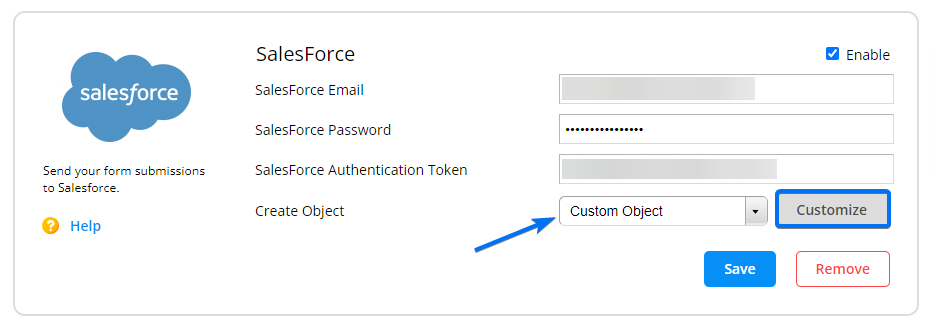
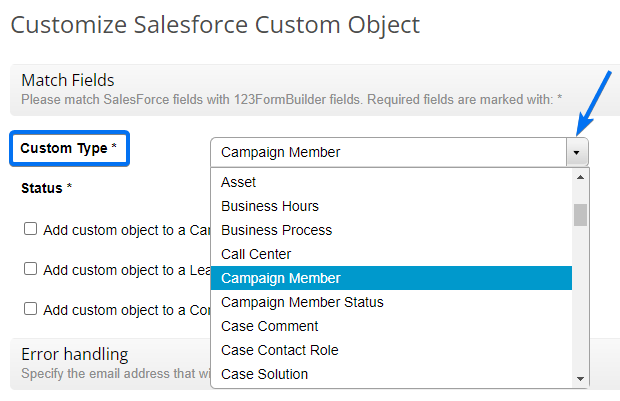
Next, hit Customize and select the type of custom object you want to create in your Salesforce account, in the Custom Type dropdown.
Here, you’ll find listed standard and custom objects of your Salesforce account. Once selected, all Salesforce fields associated with the object will appear below. Match them with your form fields to send the form data you need. Click on Save after editing and you are done.
With this plugin, you can access the login page of 123formbuilder.com directly from your cPanel account, where you can create your form and get its code. However, the plugin can be installed only by the administrator of the server where the cPanel account is hosted. This plugin can be installed easily with root credentials, by following these simple steps:
-
- Enter command:
cd/usr/local/cpanel/bin/
- Enter command:
-
- Copy this line to complete the download:
wget https://www.123formbuilder.com/download/123form-builder.cpanelplugin
- Copy this line to complete the download:
- After the download has been completed enter the command:
run:/usr/local/cpanel/bin/register_cpanelplugin 123form-builder.cpanelplugin 123form-builder.cpanelplugin
And that’s about it. The plugin can now be found in the Software/Services section of the cPanel account, under the name 123FormBuilder (don’t worry, it’s still 123FormBuilder, but under a slightly different name).

If the plugin is no longer needed, it can be uninstalled with the following command:
/usr/local/cpanel/bin/unregister_cpanelplugin 123form-builder.cpanelplugin
Email marketing campaigns allow you to connect easily with customers. With Constant Contact, you can create effective email marketing campaigns quickly. The only thing that could make things better is the 123FormBuilder – Constant Contact integration.
When integrated with Constant Contact, your 123FormBuilder web forms will send information to your mailing lists at each form submission. Each message equals a new contact and a wider audience for your email marketing campaigns.
How to enable the integration
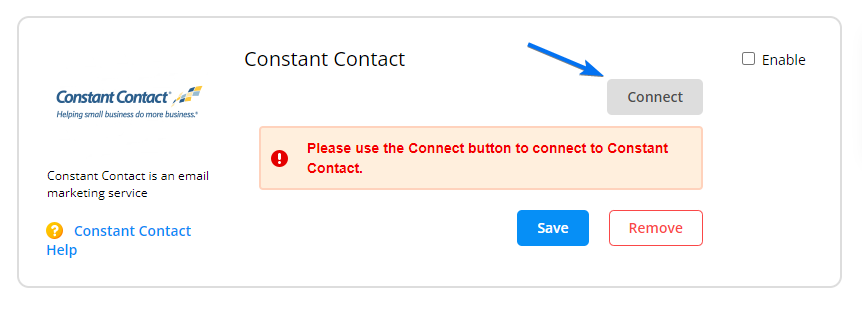
From the Form Editor, go to the Integrations section, select Constant Contact from the list, and press Add. In the application box, click Connect.
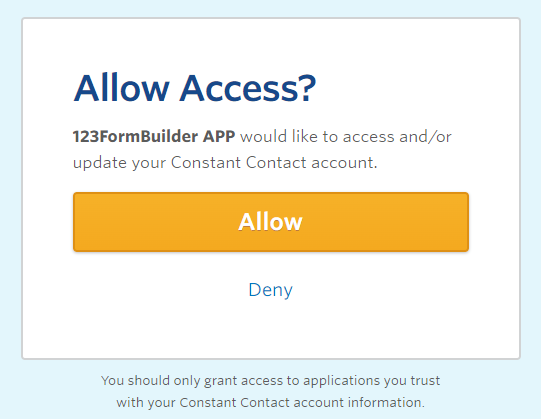
You’ll be redirected to a Constant Contact page where you need to provide your authentication data and grant access to the 123FormBuilder application.
Back to the 123FormBuilder interface, choose the list where you want to add contacts, then click Customize. Here you can match Constant Contact fields with the fields in your 123FormBuilder web form. The data sent to your mailing list is based on these associations.
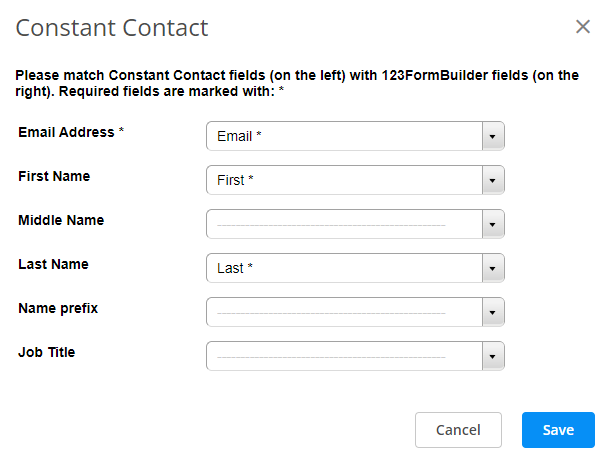
You can opt to update contacts by email if they already exist in your list, as well as send a welcome email on submission. Scroll down the customization lightbox and tick the checkboxes below to enable these options.
Press Save in the customization lightbox, then Save again in the main application box.
That’s it! From now on, the contacts received through your form will be added automatically to your mailing list.
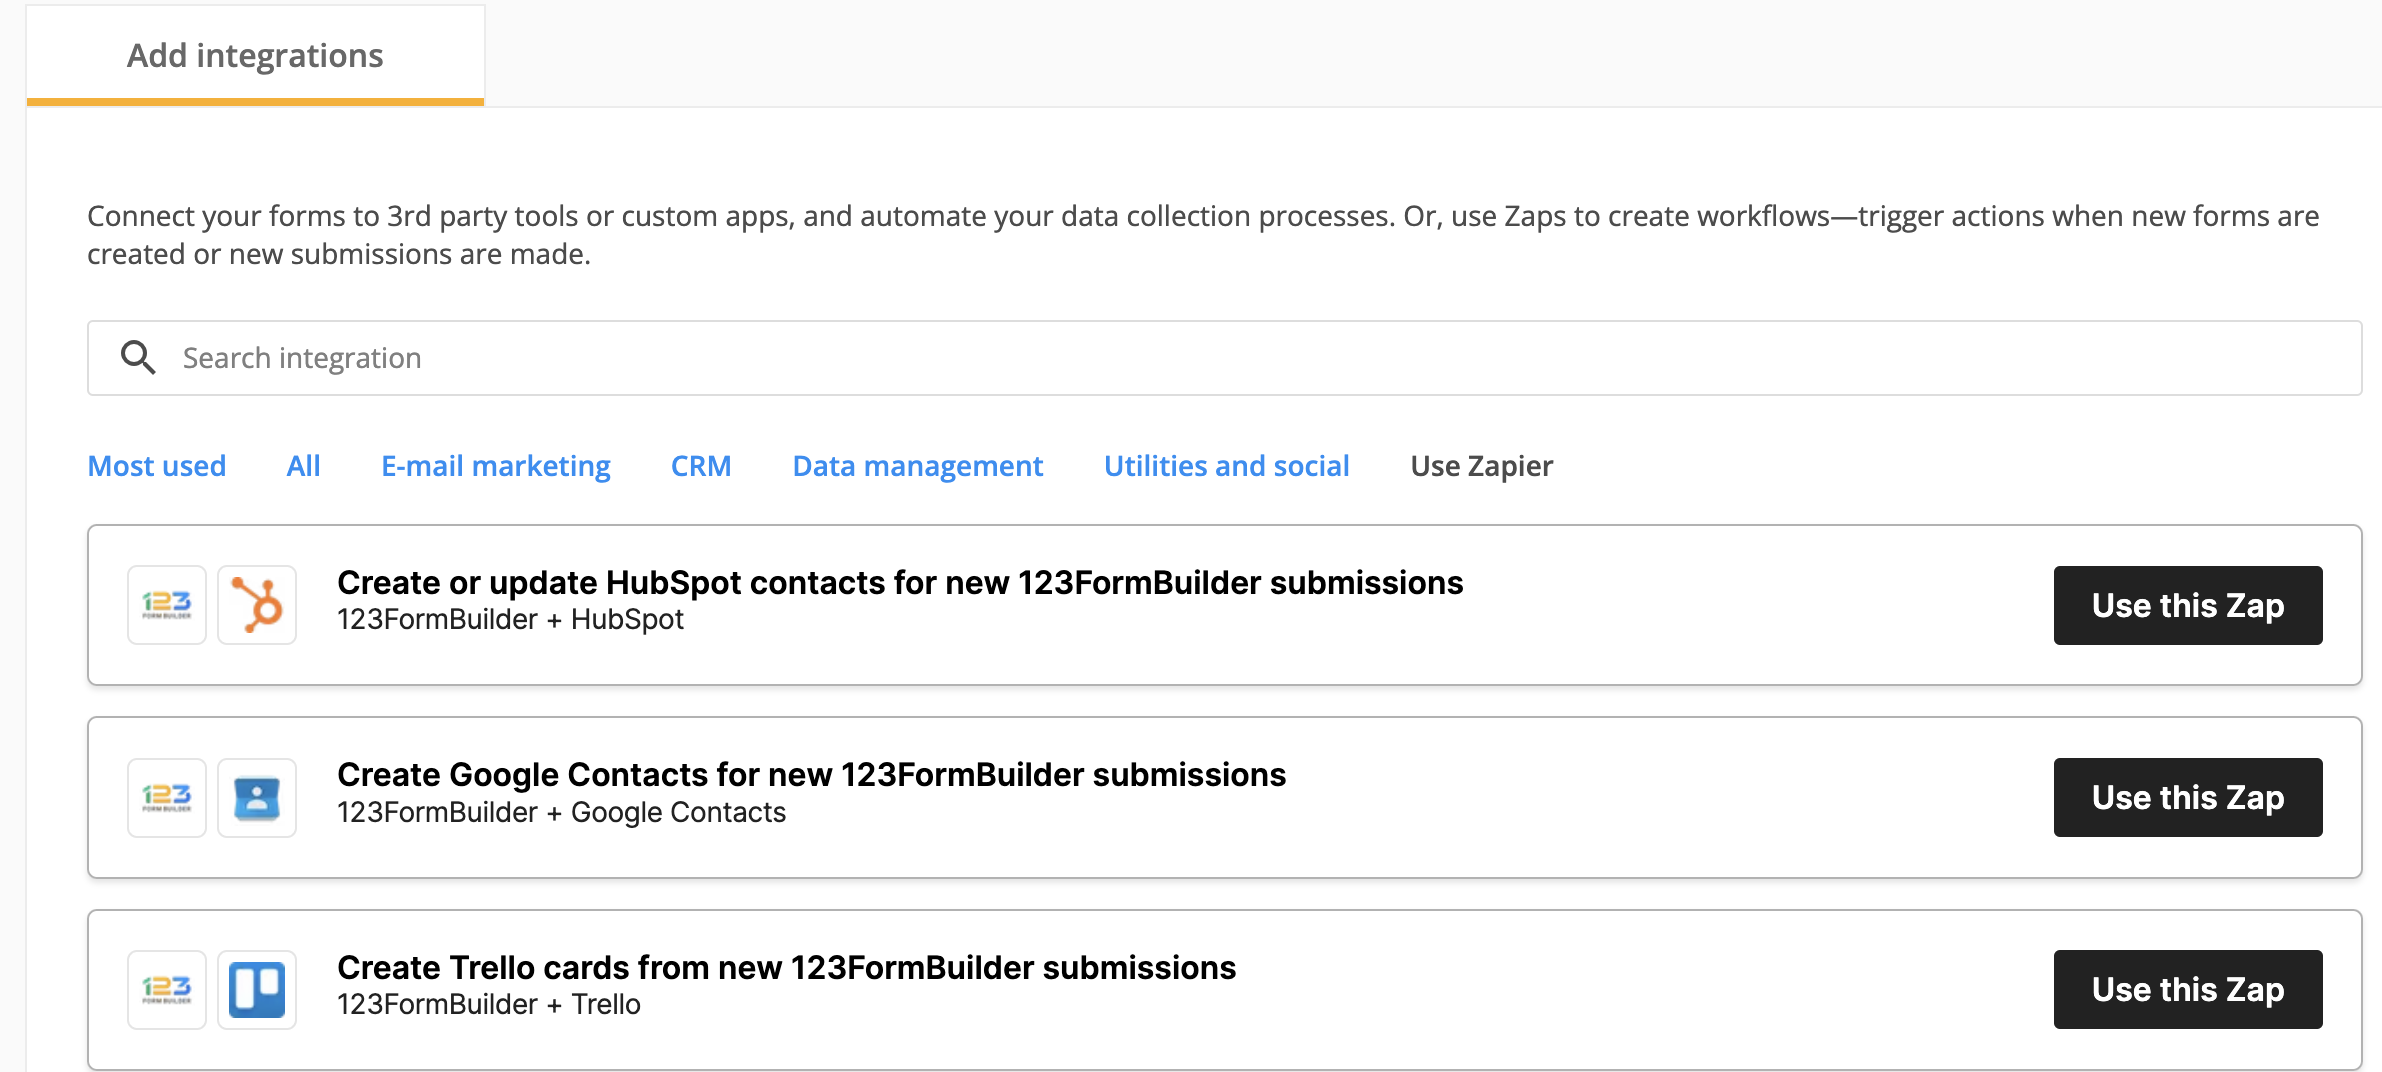
Trello is a great tool to organize your projects, events and plan your daily tasks. Use 123FormBuilder submissions to create tasks and ideas and turn them into Trello cards.
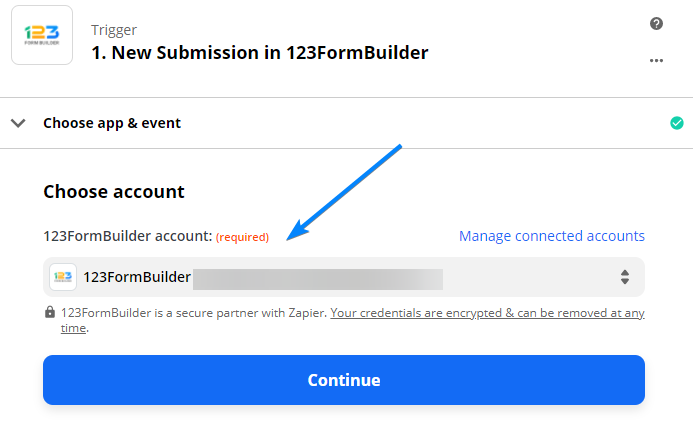
Open the Integrations section of your form and click on Use Zapier tab. Search for Create Trello cards and click on Use this Zap.
Next, in the pop-up window connect your 123FormBuilder account.
Select your form from the dropdown menu.
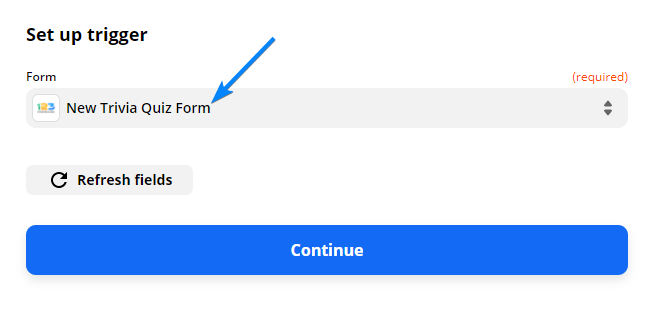
Make sure that you have at least one submission made on the form to test the trigger.

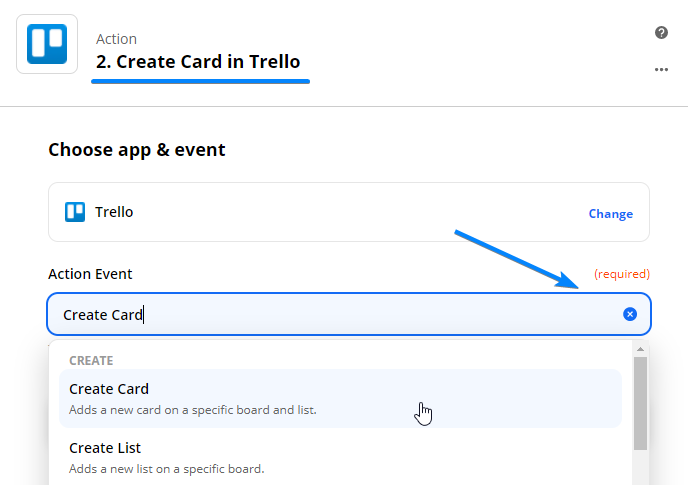
At Action Event choose to create a card.
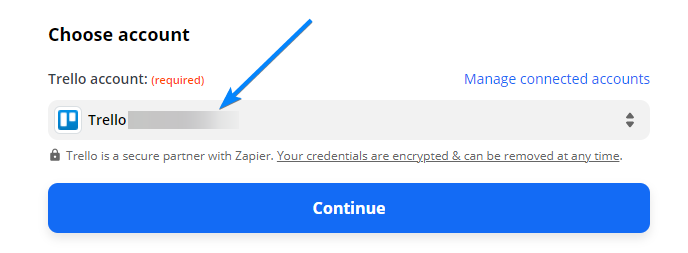
Select your Trello account.
Continue by choosing your Trello board and List. In the Name and Description boxes, you can insert form field variables.

Finally, make a test submission and check your card in your Trello Board.
Custom notifications work together with the resend option. All form recipients will receive your resent email templates. You can choose to resend any of the email templates created in your form’s Emails section.
Here are some examples of use cases in which you might need to resend email notifications:
- Sending reminders via SMS or Email.
- Receiving feedback after an event.
- Thank you messages.
- Send a follow-up email.
- When orders are not finished you can send their payment links.
- Increase customer engagement.
Important Note! When you compose a new email to deliver after the submission date, make sure to delete it. If not, all the templates displayed in your Notifications section will be delivered to new entries.
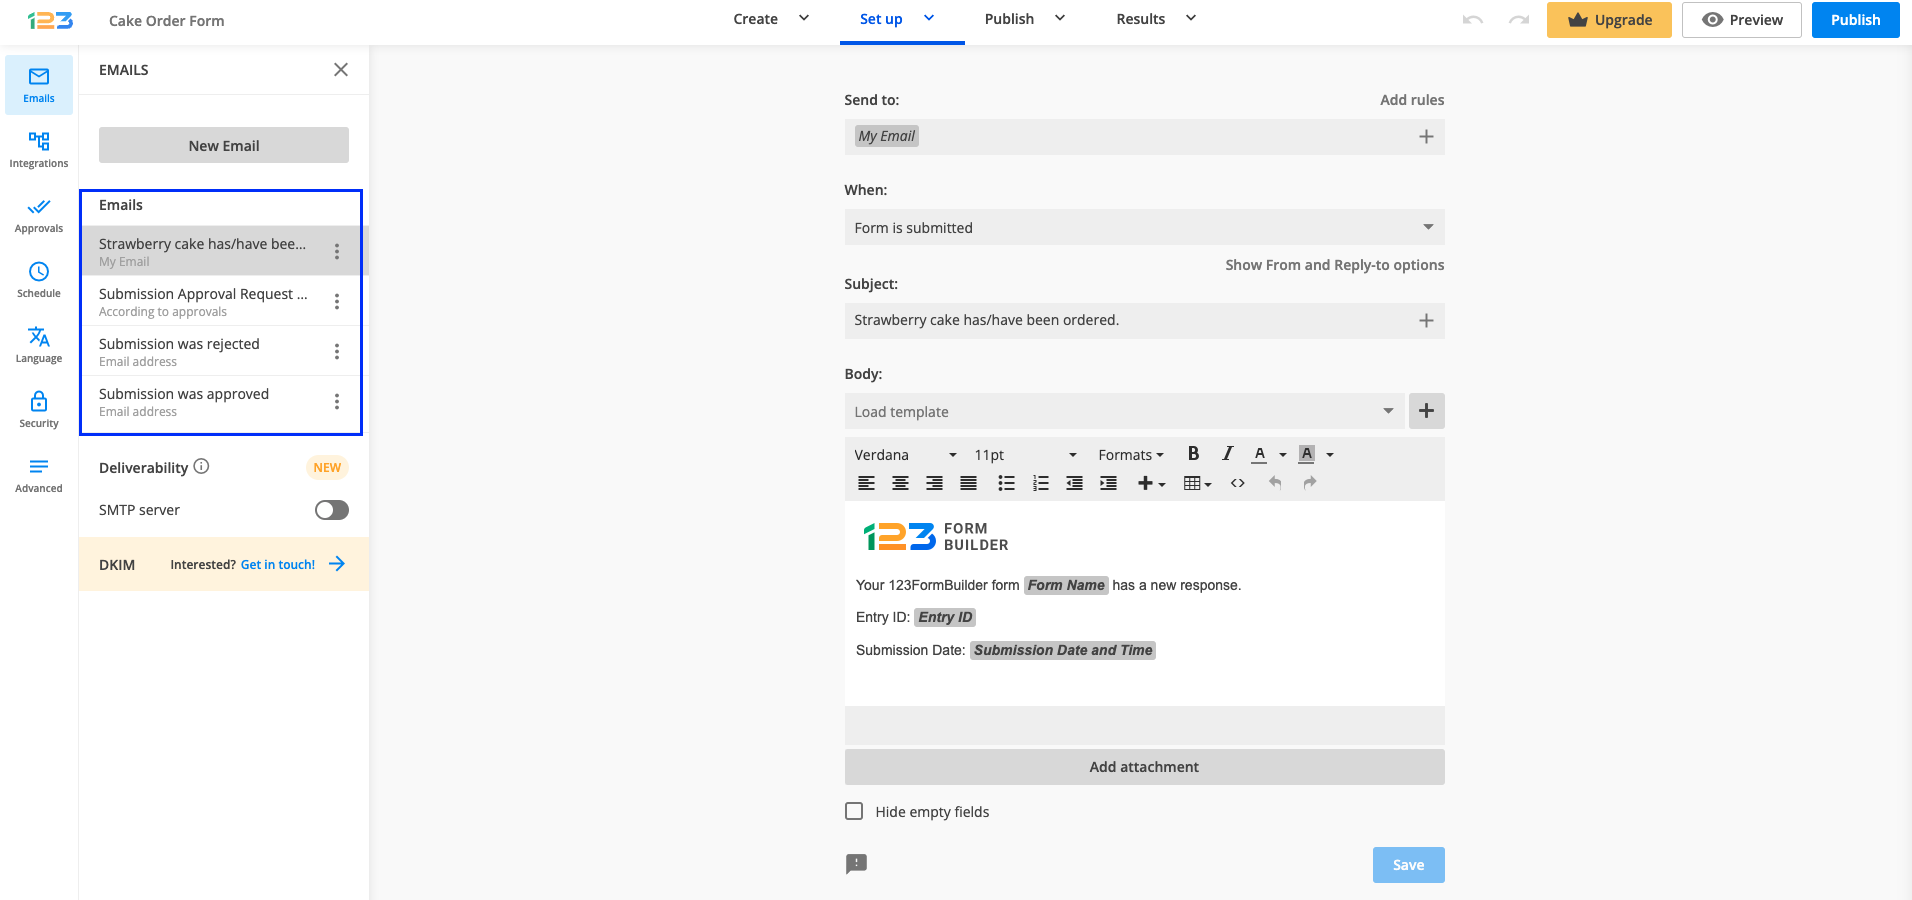
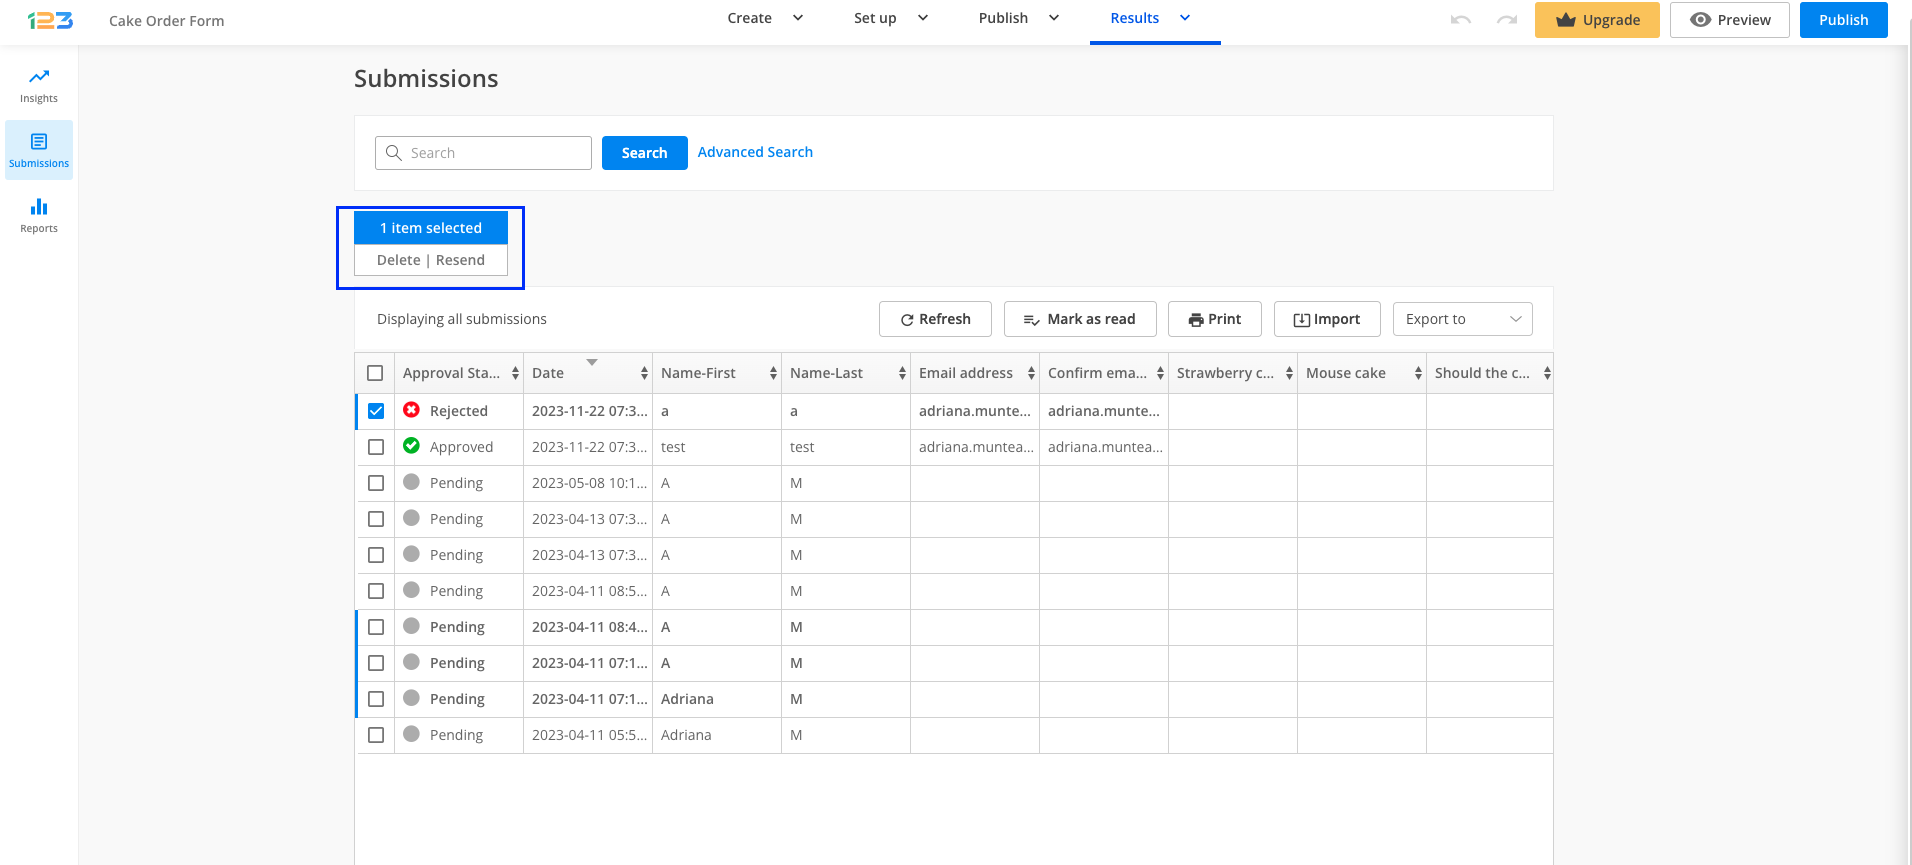
To resend an email, navigate to Results – Submissions, check the desired entries and choose Resend.
In the lightbox that opens, all email templates composed for your form will be listed. Select the templates that you want to be delivered.
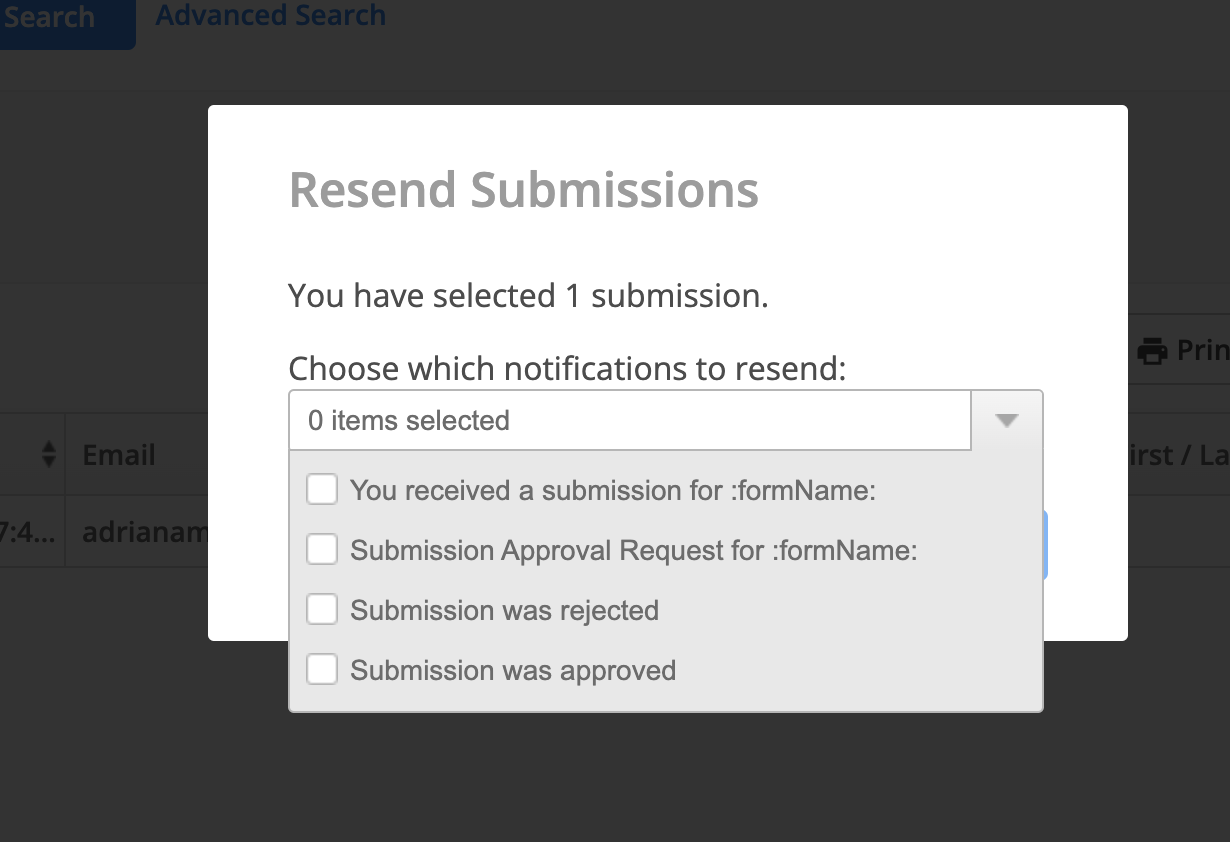
That’s it! All of the selected templates are sent to your form recipients.
Yes, we do provide IP geolocation. When adding the Address field, the Default country setting is set on autodetect. This means that we will autodetect the IP of your form visitor and automatically fill in the Country subfield on the form.
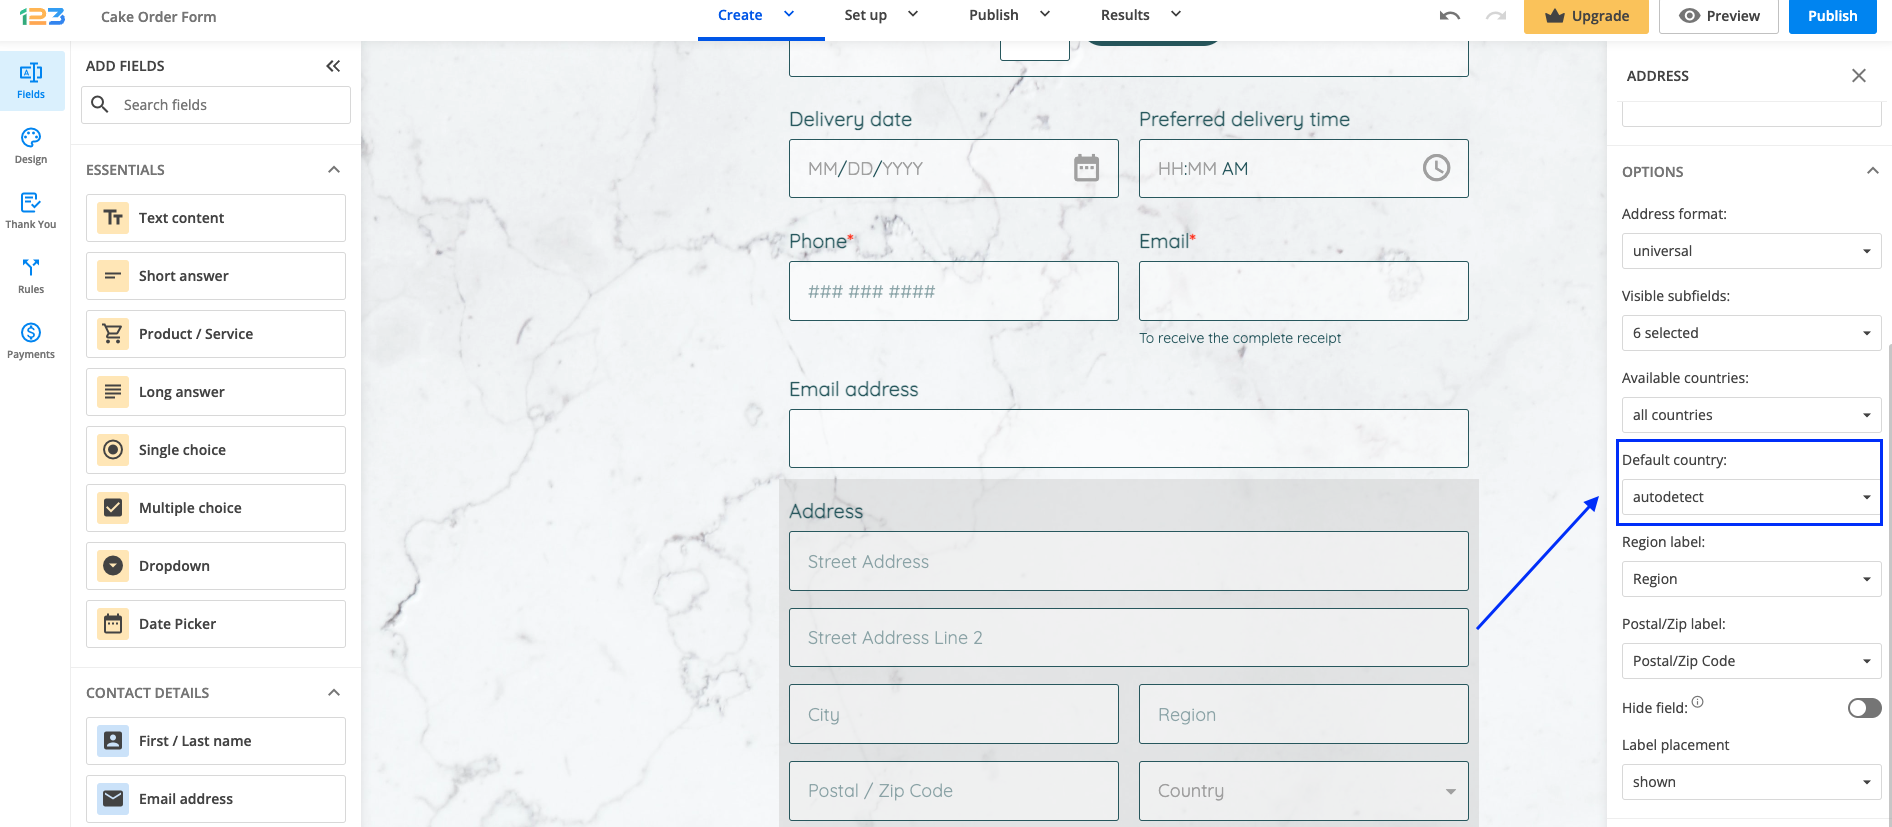
If you need to display a certain country for all your form visitors, go back to the Form Editor and select the Address field. On the right-side panel, under the Options section, select the Default country dropdown and set the country of your choice.
Related articles
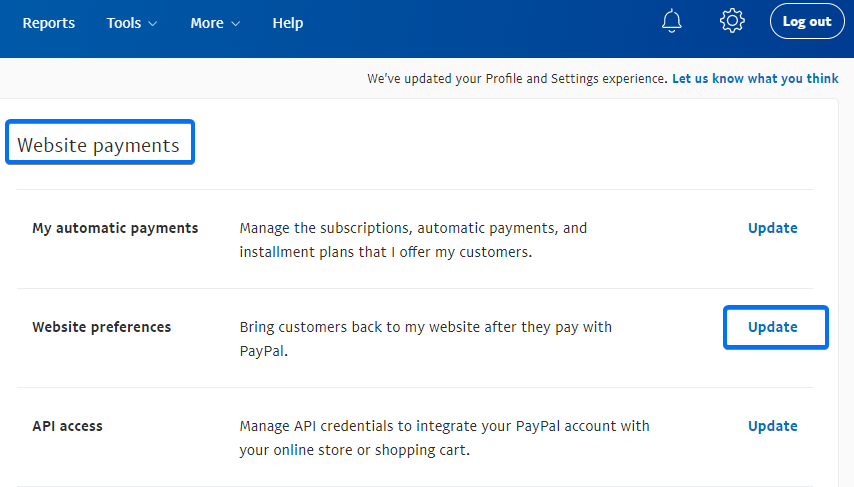
Sometimes, when creating and using PayPal order forms, when you send an email after the payment, the submission does not arrive in your inbox at all. In order to fix this, please disable the option Auto return to website after payment in your PayPal settings.
To do this, log in to your PayPal account, click on Website Payments then go Website Preferences. Click on the Update button.
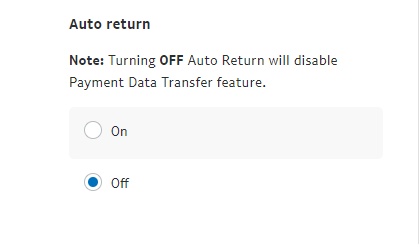
Under Website Payment Preferences set the auto-return on Off.
Whenever you want to change a text or system message, you will need to customize the form’s translations.
To start, from the Form Editor click on the Set up tab from the top navigation bar and then select the Language icon from the side menu. Here you can add new languages to your form and customize them. Hover over the desired language to select the Customize (pencil) icon.

This will open the customization lightbox pictured below, where you can add the translations. On the left side, you’ll notice all the form fields that you’ve created and all the system messages that form users may see while filling out and sending the form. Add the translations in the text boxes on the right side. Once you’ve finished adding the desired text, press Save.

Use the Search bar to find sentences or words more easily.

The formatting changes applied to form fields in the editor – such as text color and font size – are reflected in the customization lightbox as well. The inline editing menu from the editor is also available in the right-side column for you to customize the translated text, ensuring it matches the original formatting seamlessly.

All the languages that you add are listed in the Language left side panel. To review and make changes to a language that you’ve set up, simply hover over it with your mouse cursor. The following actions are available in this order: Make default, Customize, or Remove.

Click the Preview button to preview the form. The translations made will be displayed on the live version of the form (not in the editor).
Important Note
The default language can not be deleted.Related articles
Duplicate records cause trouble for the business, as well as the admin. Clients may get angry if multiple sales reps contact them with the same purpose. At the same time, sales reps lose trust in the CRM and question the validity of the data they rely on. So what can you do to prevent duplicate records?
On Salesforce side
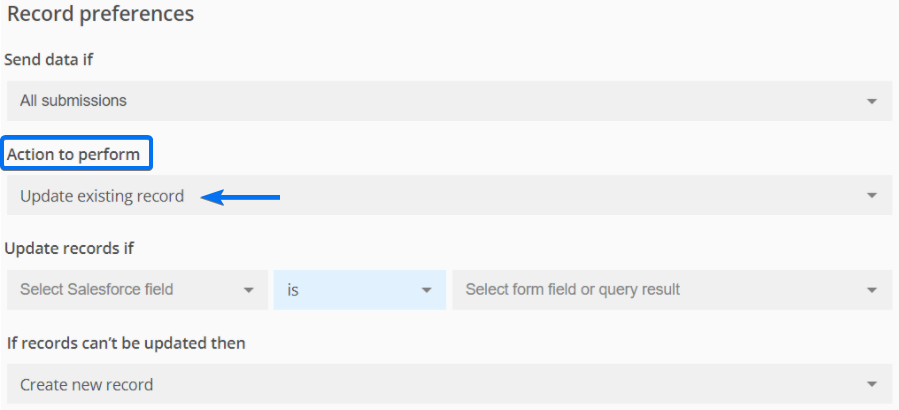
Use Matching and Duplicate rules. If you need more details about setting this up, you can always check this Trailhead article. Depending on how the Duplicate Management is configured, creating a duplicate record can be blocked altogether or it can be allowed to show an alert. To bypass this alert enable the option Override Duplicate Rules when creating/updating record from the mapping interface, under Record Preferences.

When choosing to block duplicate records from being created, the 123FormBuilder app will also throw an error and won’t create the record, if the form is set up to create a new record instead of updating an existing record.
On 123FormBuilder side
In the form builder app, in Salesforce Integration → Object Mapping, under Record preferences, make sure to choose the Update existing record option for Action to perform.
This setup allows adding a single criterion for identifying an existing record in Salesforce. But most times, the Matching and Duplicate rules created in Salesforce involve multiple criteria. For example: for Contact, one may use Last Name and Email or Date of birth.
This is why we recommend using the Record ID as a criterion for Updating existing record when setting up the Object Mapping.
Since your form visitors don’t know the Salesforce Record ID, here’s what you can do to identify it:
- Create a lookup to identify the record and return it’s ID. Next, use prefill (URL or dynamic) to populate a hidden field on the form with the Record ID (this works for simple matching criteria, that use the AND operator).
- Create a query to identify the record and return it’s ID. Use the ID in Object Mapping, instead of a form field.

Related articles
Trigger-based notifications are great to empower your business. Emails are triggered by a specific action made either by a user or recipient. One of the key benefits of sending trigger-based notifications is to increase the relevance of your emails.
Types of triggers
This section provides an outline of all the triggers that are available for your 123FormBuilder emails. Remember that some triggers will work only if a certain feature is enabled on the form (payments, approvals).
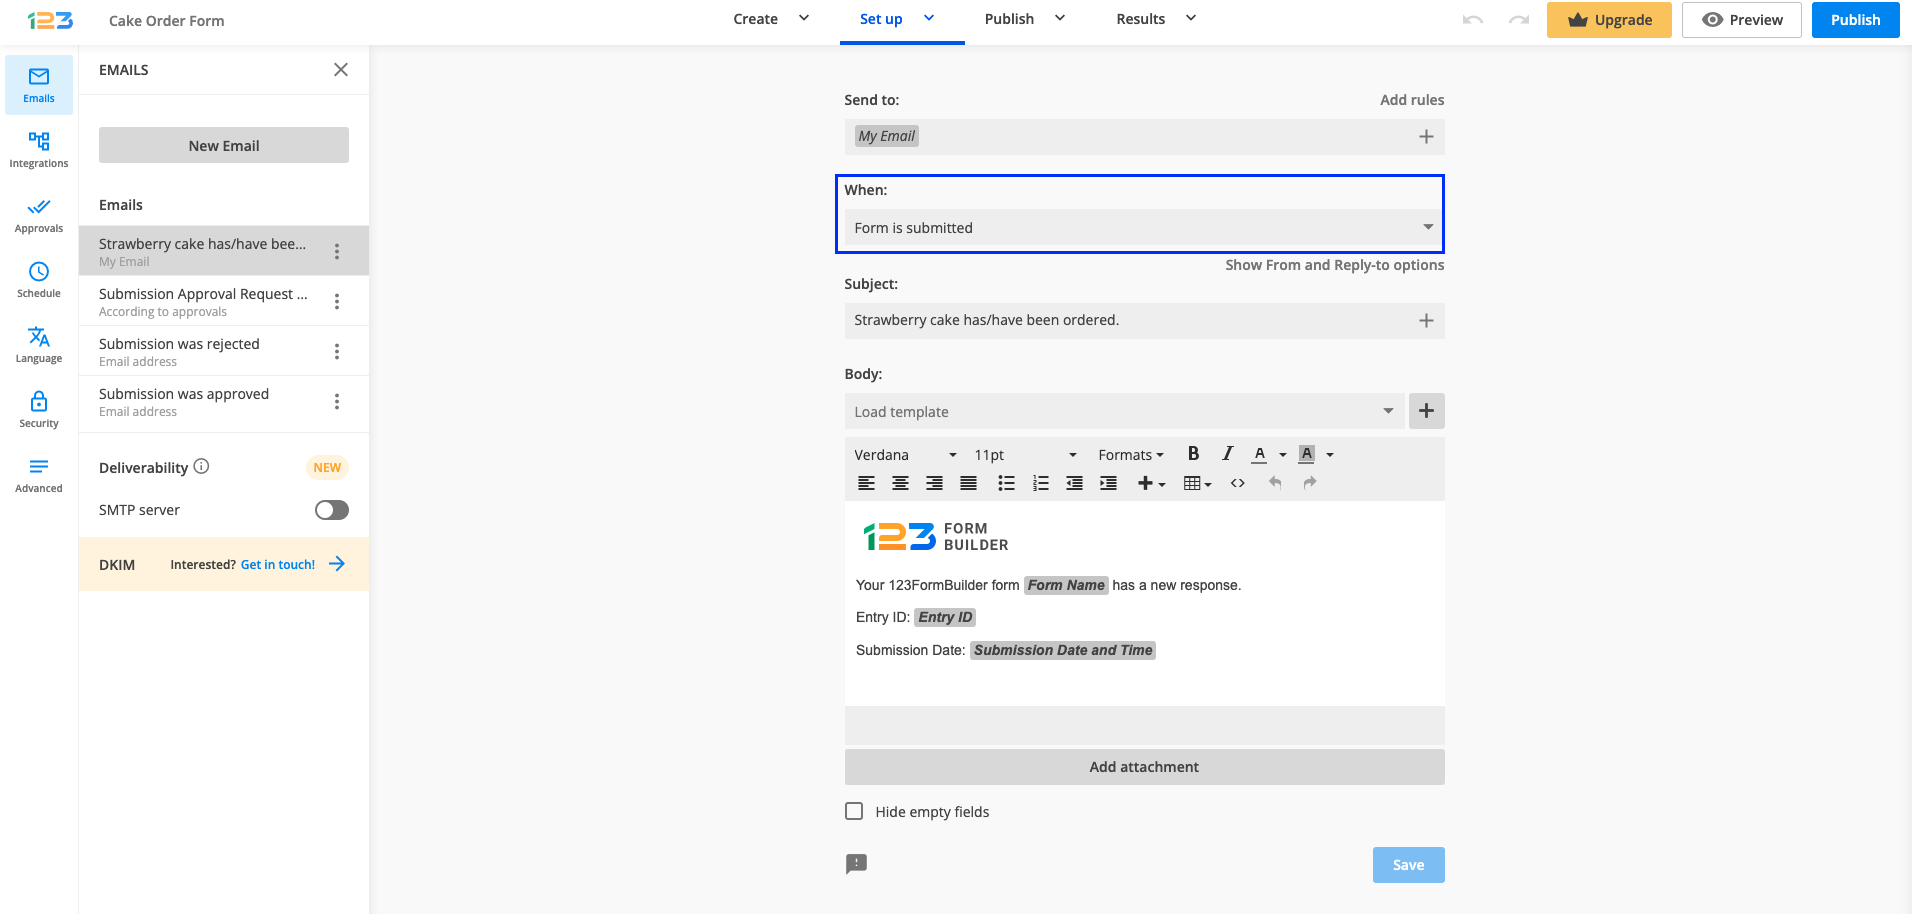
- Form is submitted
- Form is submitted + Delay
- Payment is processed
- Payment is processed + Delay
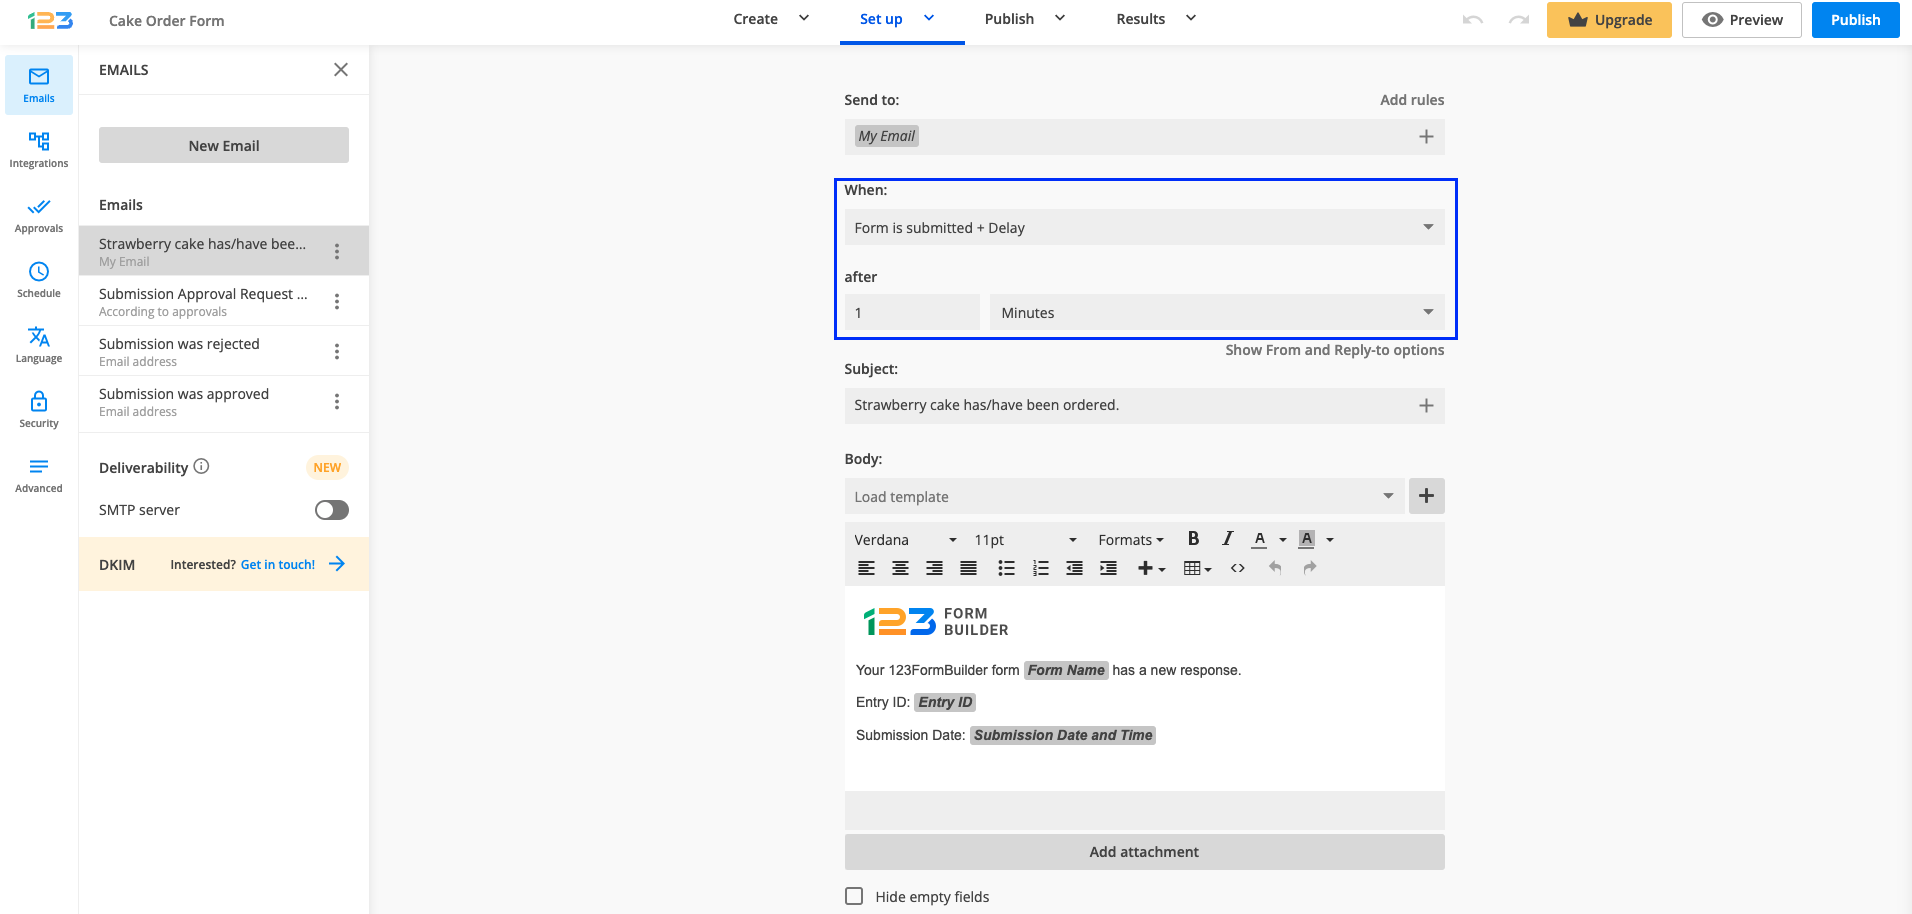
- Submission is approved
- Submission is rejected
Form is submitted / Form is submitted + Delay
The email template can be sent right after the user has pressed the submit button or after a period of time.
You can delay emails on your form by minutes, hours, days, weeks, and months. Once you have selected one of these options, a box will be displayed on the left where you’ll need to add an input. For example, if you have selected the option Minutes and added the input 1, the email will be sent 1 minute after the form has been submitted.
Payment is processed / Payment is processed + Delay
The same principle applies to these triggers. The only difference is that they are based on the status of the user’s payment. These emails are sent automatically after your customers finish their payments. This trigger is available only if you have established an order form, or more precisely, if you have added a payment processor to the form.

Submission is approved / Submission is rejected
You can send a custom email when an entry is approved or rejected by one of your recipients.
First, you need to enable the submission approval option from the forms Approval section. Three new emails will be automatically created, which you can then go back and customize in the Notifications settings.
Related articles
No. We are a web form & survey building service used for data collection and we do not offer a feature for creating login systems.
It is forbidden to create forms that request sensitive data, such as passwords, email credentials, or other credentials, from form users.
The only thing we have in common with a login system is the ability to collect data with a web form. All of the other elements are outside the scope of our service.
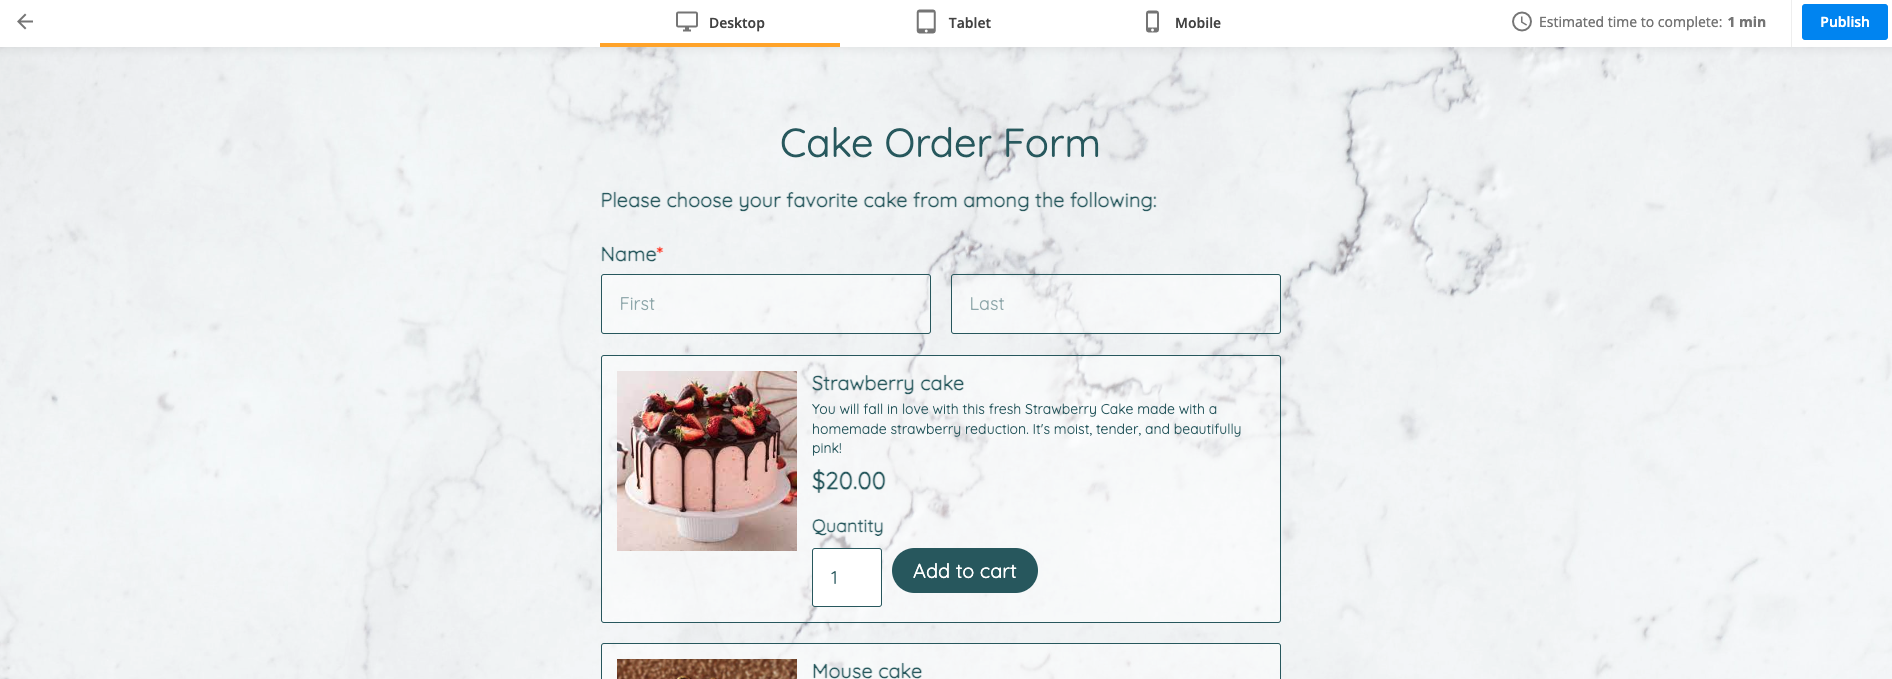
Yes, our form builder has a real-time preview. As soon as you add or edit the fields on your form, you’ll see the changes in Preview. Go to the Preview button (top right corner) to view your form.
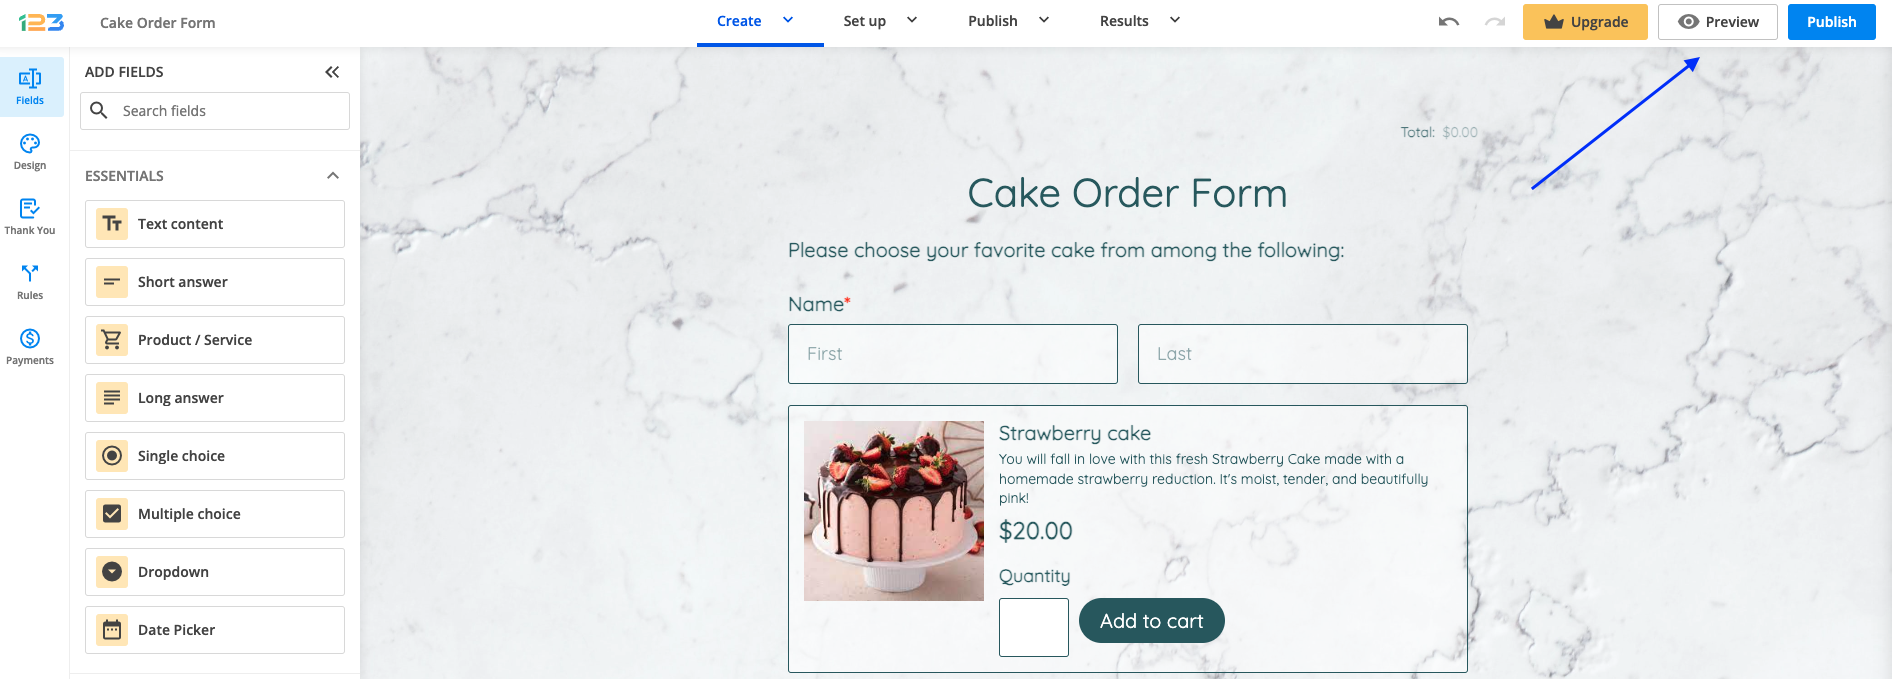
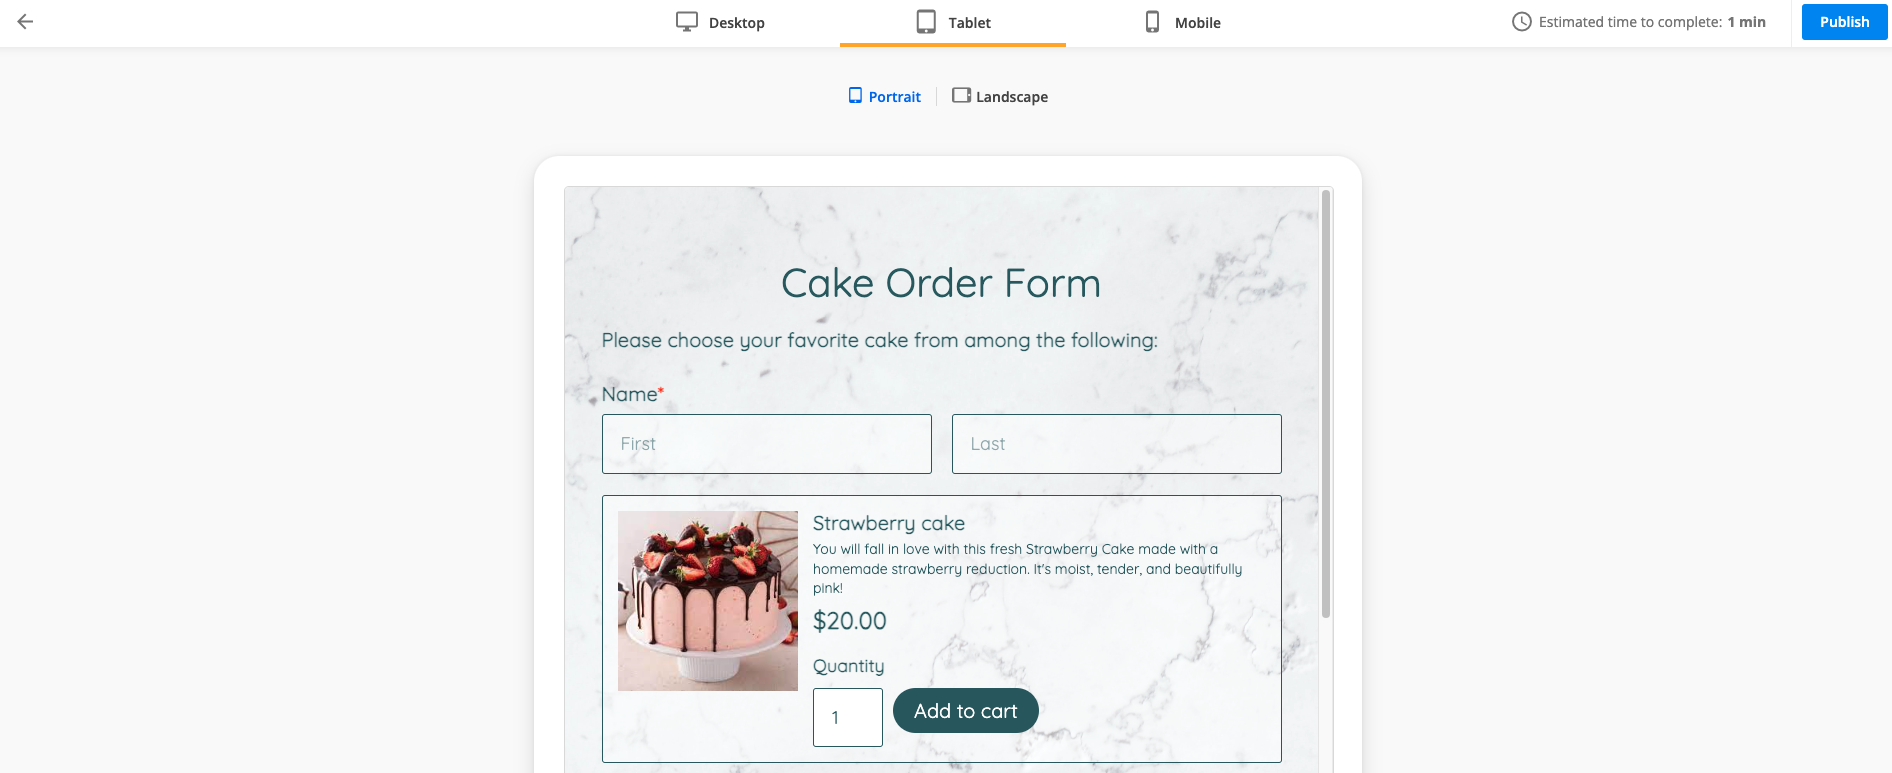
In Preview mode, you can check how the form looks on a Desktop, Tablet, or Mobile by selecting the view you are interested in.
For both Tablet & Mobile, you can check 2 different real-time previews: Portrait & Landscape.
If you want to make changes to the form, you can go back to the Editor by accessing the back arrow (top left corner) or if you are happy with how the form looks, you can directly publish it and share it with others by clicking on the Publish button.
Related articles
Most Popular
Frequently Asked Questions
Here is a list of the most frequently asked questions. For more FAQs, please browse through the FAQs page.