How to send conditional emails based on Google Forms responses

Conditional notification emails offer a powerful tool to tailor communication, ensuring recipients receive timely and relevant information aligned with their input.
Let’s explore the benefits of this feature:
- Personalized Communication: Tailor email content to match respondent answers, creating a more engaging and relevant experience.
- Timely Information: Deliver notifications promptly, ensuring recipients receive information directly related to their input, boosting engagement.
- Automated Processes: Automate email sending based on specified conditions, saving time and streamlining communication efforts.
- Targeted Follow-Up: Trigger follow-up actions based on responses, such as sending additional information or special offers, tailored to respondent interests.
- Workflow Integration: Integrate notification emails into broader workflow automation, notifying team members or stakeholders about specific tasks or events based on form responses.
- Enhanced User Experience: Provide customized information, improving overall satisfaction and fostering a positive perception of your organization or brand.
Overall, sending conditional notification emails based on responses from Google Forms allows you to deliver personalized, timely, and targeted communication to recipients, ultimately improving engagement, efficiency, and user experience.
To send conditional notification emails based on Google Forms responses, you can utilize add-ons such as “Form Notifications” or “Email Notifications for Google Forms.”
Here’s a step-by-step guide using Form Notifications as an example:
- Install the Form Notifications Add-on
- Open your Google Form and click on the puzzle piece icon in the upper-right corner of the form.
- In the Add-ons menu, click on “Get add-ons” and search for “Form Notifications” and install it.
- After installing the add-on, access it by going to the Add-ons menu and selecting “Form Notifications” → “Configure notifications.”
- Set Up Notification Rules
- In the Form Notifications sidebar, click on “Add Rule” to create a new notification rule.
- Define the trigger conditions for the notification rule based on form responses. For example, you can specify that the notification should be sent when a certain response option is selected.
- Configure Email Notification
- Customize the email notification settings for the rule, including the recipient email addresses, email subject, and email body.
- You can use placeholders or variables to include form responses dynamically in the email body.
- Save and Activate Rule
- Once you’ve configured the notification rule, save it.
- Activate the rule to ensure that it is applied to form responses.
- Test the Form
- Test your Google Form by submitting responses that match the trigger conditions defined in the notification rule.
- Verify that the conditional notification emails are sent correctly based on the specified conditions.
Review and manage existing notification rules as needed. You can edit, deactivate, or delete rules from the Form Notifications sidebar.
By following these steps and customizing the notification rules according to your specific requirements, you can send conditional notification emails based on Google Forms responses using the Form Notifications add-on. Similarly, you can use other add-ons like “Email Notifications for Google Forms” to achieve similar functionality with slightly different features and interfaces.
Send conditional notification emails based on responses with 123FormBuilder
Here’s a quick rundown on how to send conditional notification emails based on responses using 123FormBuilder:
- Once you have created the desired form, simply go to Set-Up → Emails and click on the New Email button to add a template:

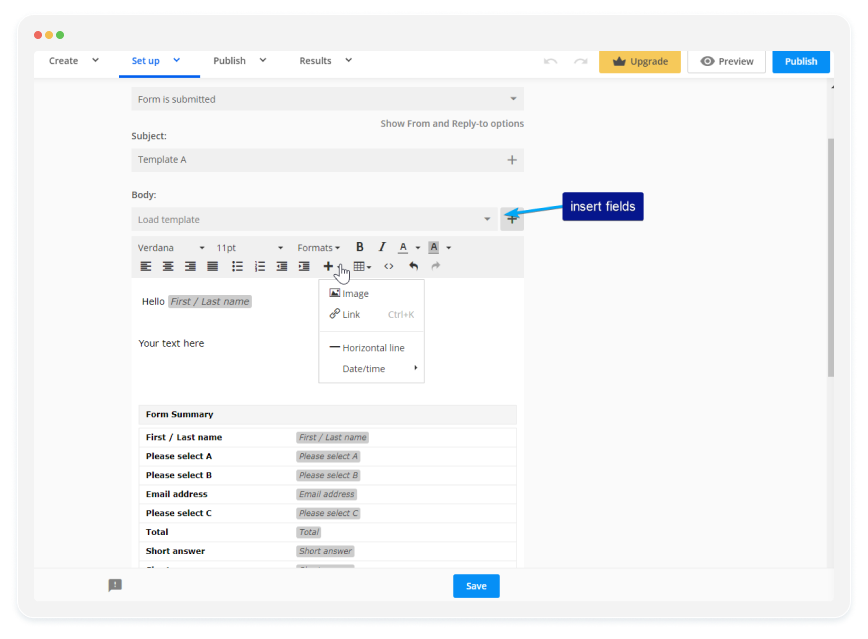
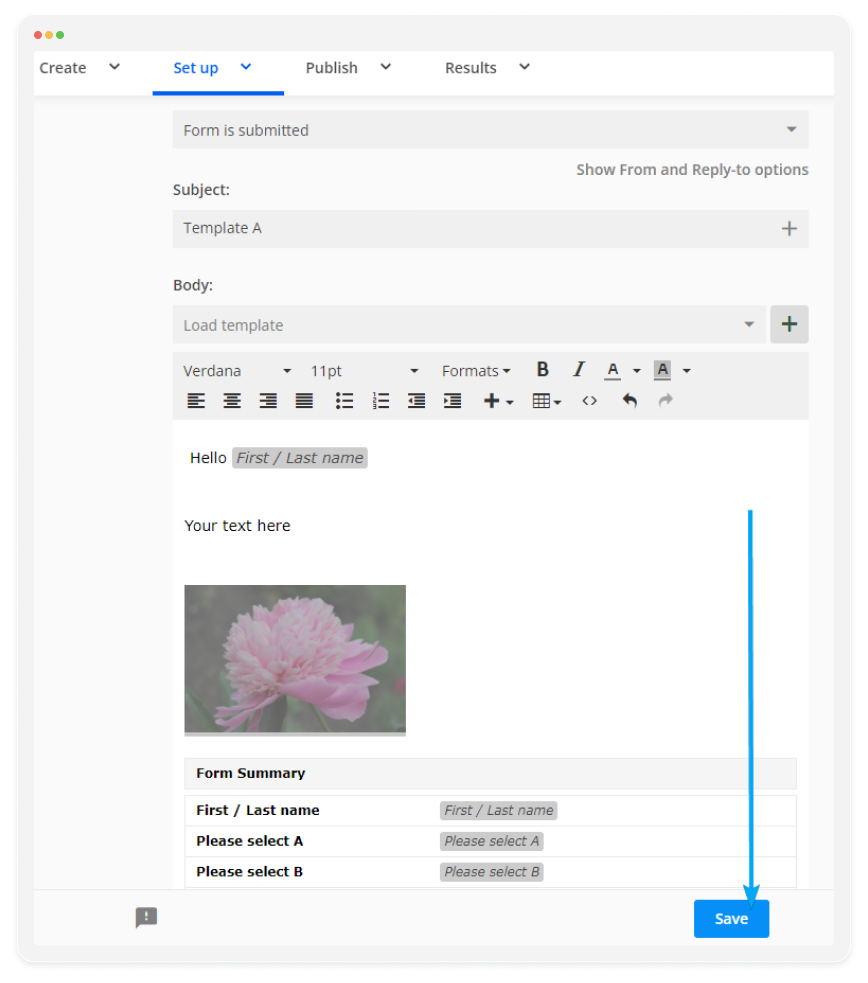
2. Customize the Body of your email template in order for the notification email to contain the exact information that you want. You can add your own links and images, and also insert submission input into the template:
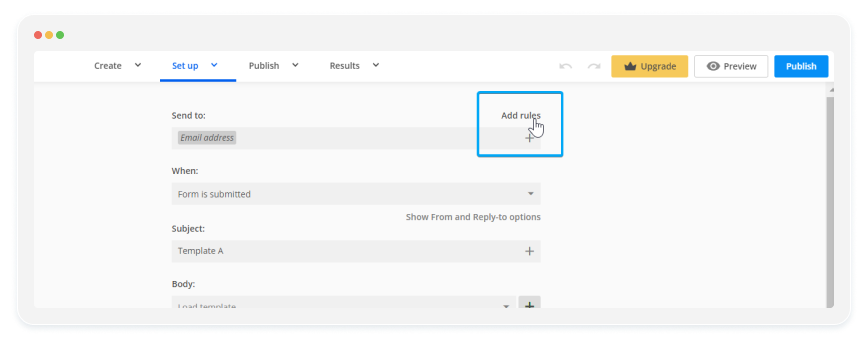
3. Go to Add rules:
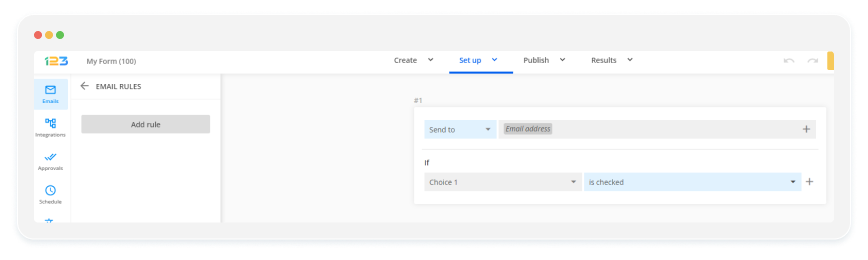
4. Create the notification rule. Add the Email field as Send to (or the email addresses to which you want to send the email template) and specify the conditions that it needs to meet.
In our below example, the email template will send only when “Choice 1” is selected:
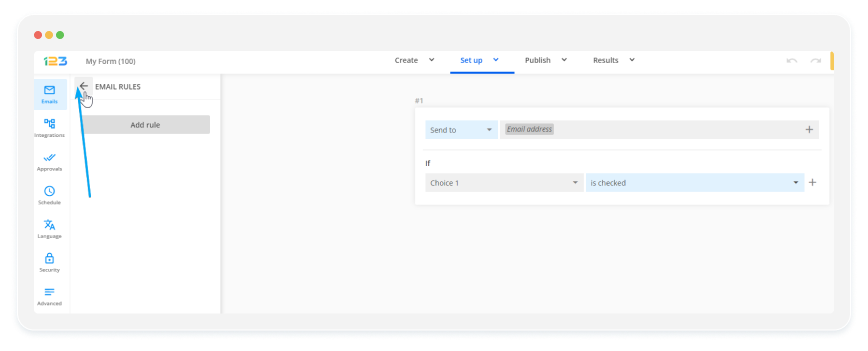
5. Go back using the arrow from the left and save the changes by clicking on the Save button:
And that’s all! By following these steps, you can create multiple email templates and set different rules/conditions for each one.
In conclusion, sending conditional notification emails based on Google Forms responses offers numerous benefits, including personalized communication and streamlined workflow automation. Using add-ons like “Form Notifications” or “Email Notifications for Google Forms,” you can easily set up and customize notification rules to suit your needs, enhancing engagement and efficiency. Additionally, platforms like 123FormBuilder offer an easier solution for creating and managing notification emails, providing a seamless experience from form creation to email customization.
Load more...