How to Create Conditional Questions in Google Forms

Google Forms is a versatile tool for collecting information, and one of its powerful features is the ability to create questions with conditional logic. These questions appear based on previous answers, ensuring your survey or form is relevant to each respondent. Here’s a step-by-step guide to help you master this feature:
1. Create or Open a Google Form
First, navigate to Google Forms (forms.google.com) and either create a new form or open an existing one.
2. Add Your Questions
Start by entering the initial questions. You’d typically have these regardless of whether you use the conditional feature.
3. Understand “Sections”
Before diving into conditional questions, grasp the concept of “sections.” Google Forms uses sections to organize different sets of questions. Conditional logic will direct respondents to different sections based on their answers.
4. Setting Up Sections
Sections assist in structuring your form and can guide respondents to specific parts based on their answers.
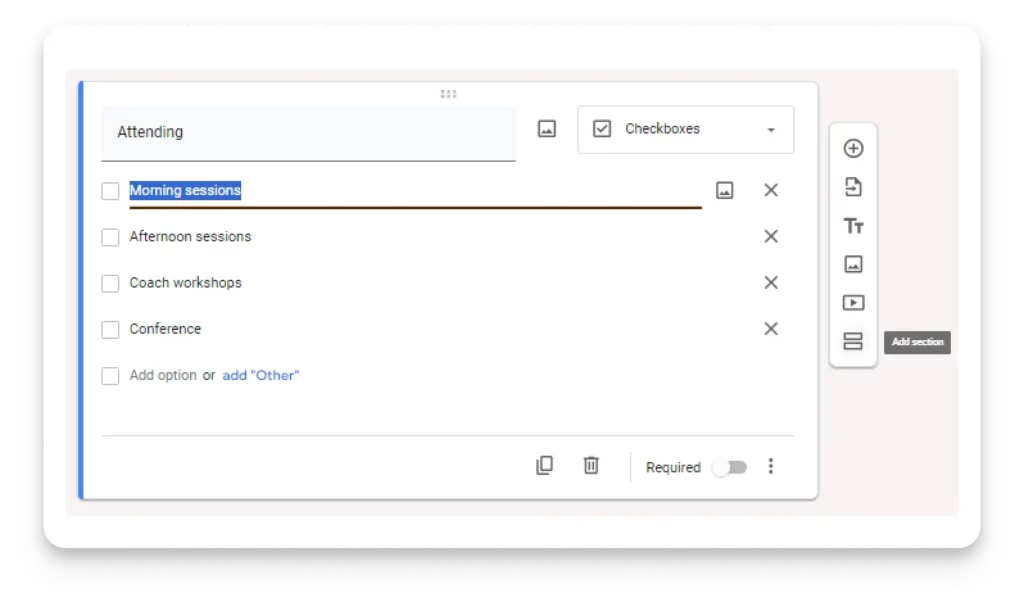
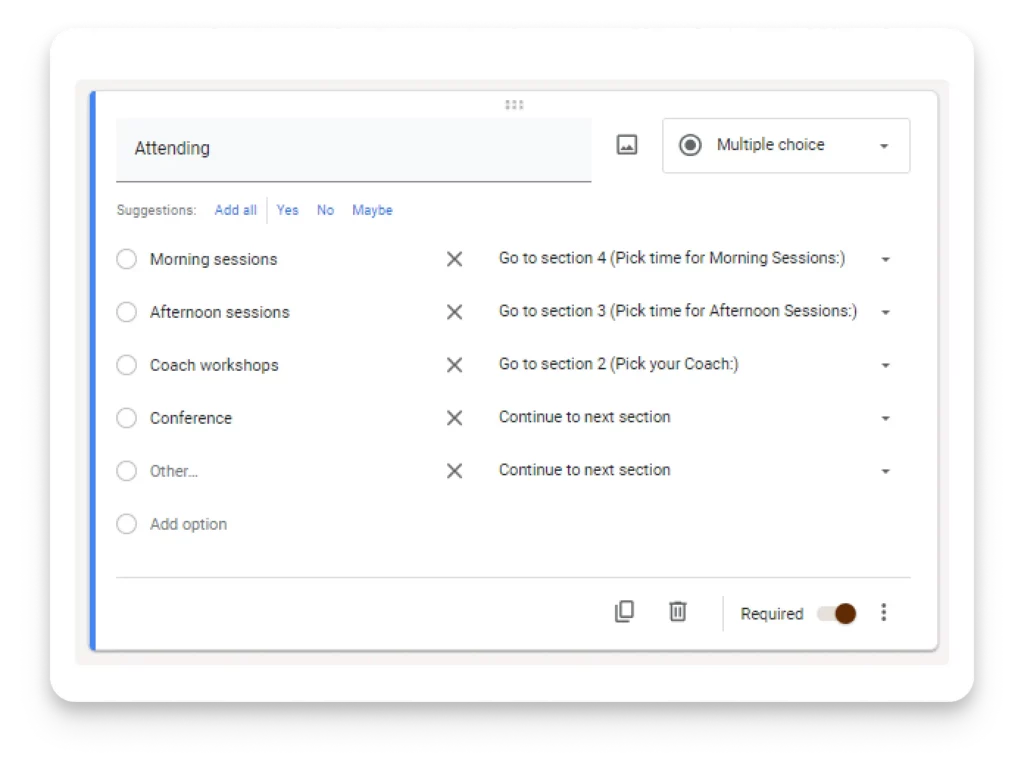
Let’s insert a section right after the “Attending” question. Choose the question “Morning Sessions” first, and click on the two rectangles icon at the bottom of your form. This will create a new section.
You can think of sections as separate pages in your form. Each section can contain one or multiple questions.
Next, follow the logic described earlier and add sections for each question option (Afternoon sessions, Coach workshops, Conference. etc.).
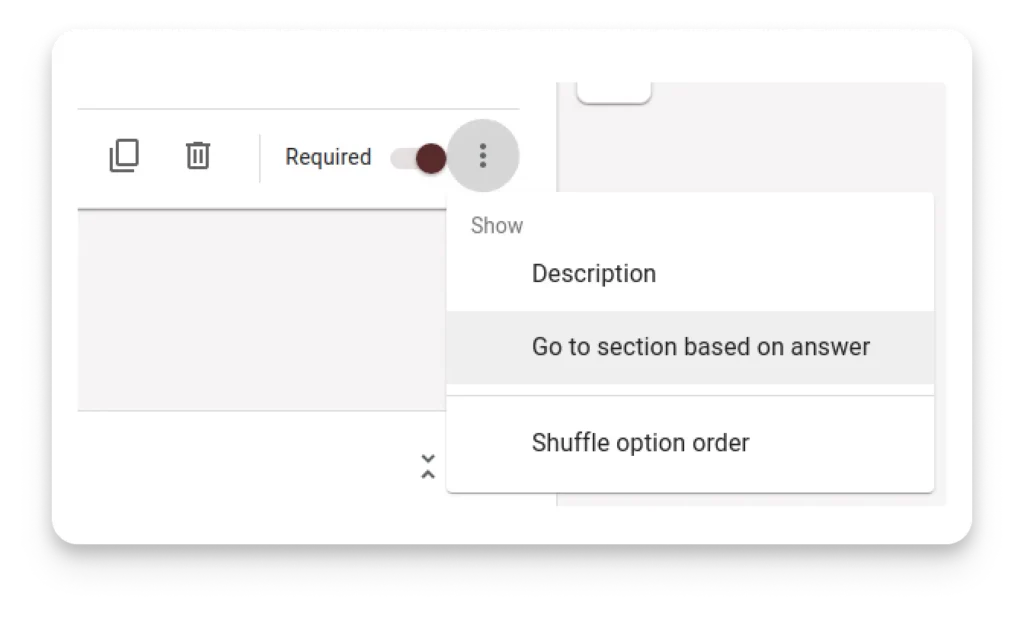
Once you’ve inserted the sections, click on the three dots located at the bottom right. From there, choose ‘Go to section based on answer’ to apply conditional logic rules.
5. Add Conditional Questions to the newly added Sections
In the new sections, add the questions that you want to appear based on a specific answer to a previous question.
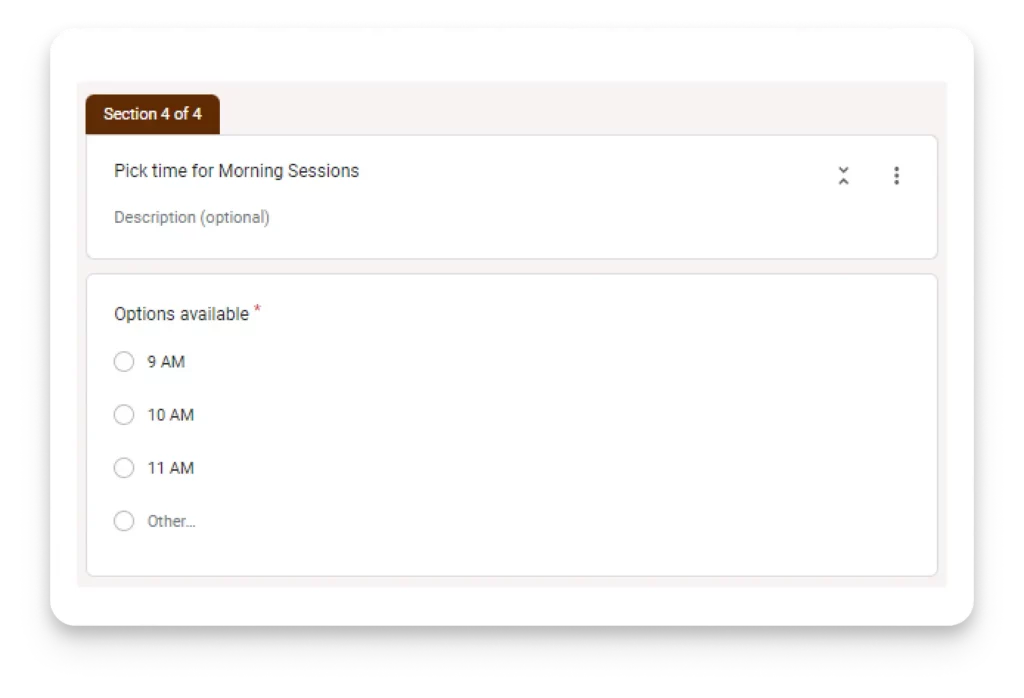
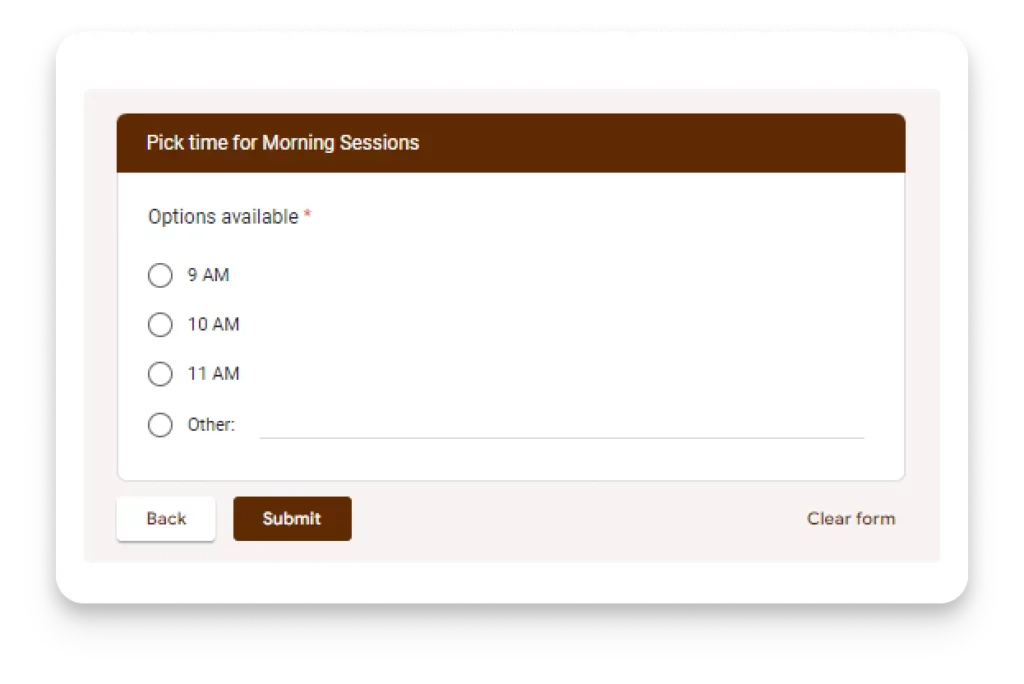
See below an example for the first option section: “Morning sessions”. In this particular case, I’ve named the section: Pick time for Morning Sessions, and created a conditional question: Options available, with multiple choice field.
You can also insert conditional questions following the same rule for the remaining sections: Afternoon sessions, Coach workshops, Conference, etc.
6. Implementing Conditional Logic
Return to the initial question that will determine which section (conditional questions) the respondent sees next. Click on this question, then select the proper section name.
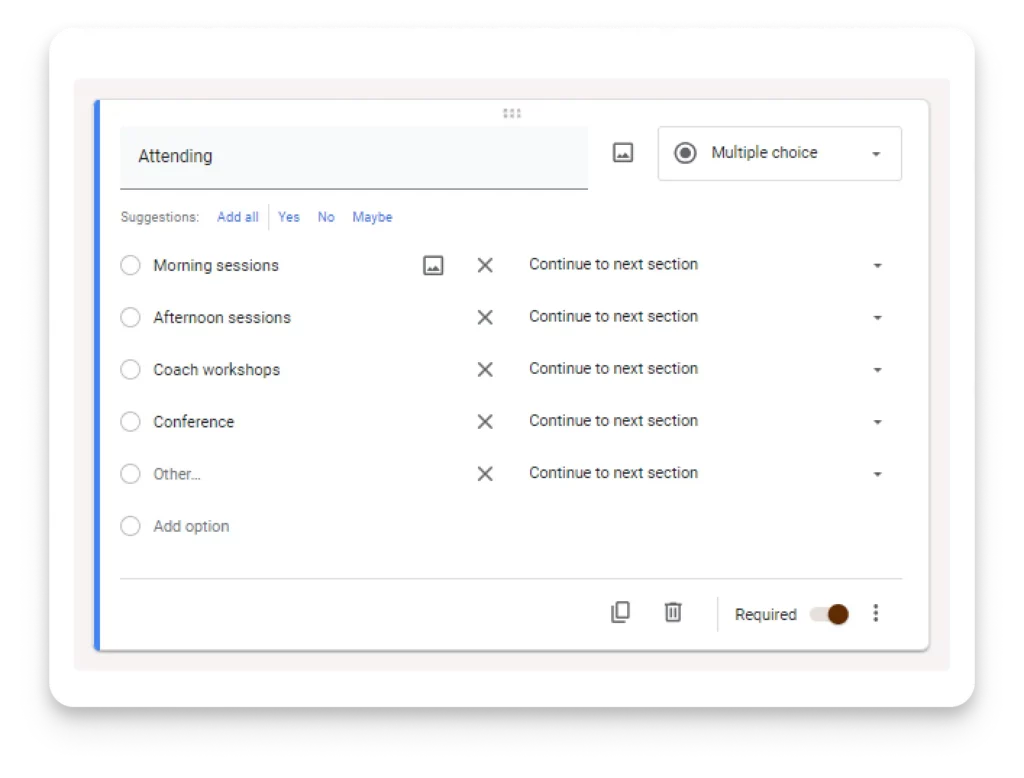
You’ll now see drop-down menus next to each answer option for that question. Using these drop-downs, you can decide which section a respondent should be directed to based on their answer.
7. Preview Your Form
Testing your form is crucial once you’ve set up all your conditional questions and logic. Go to the preview mode by clicking the eye icon at the top of the screen. Fill out the form as a respondent would, trying different answer combinations to ensure all paths and conditions work correctly.
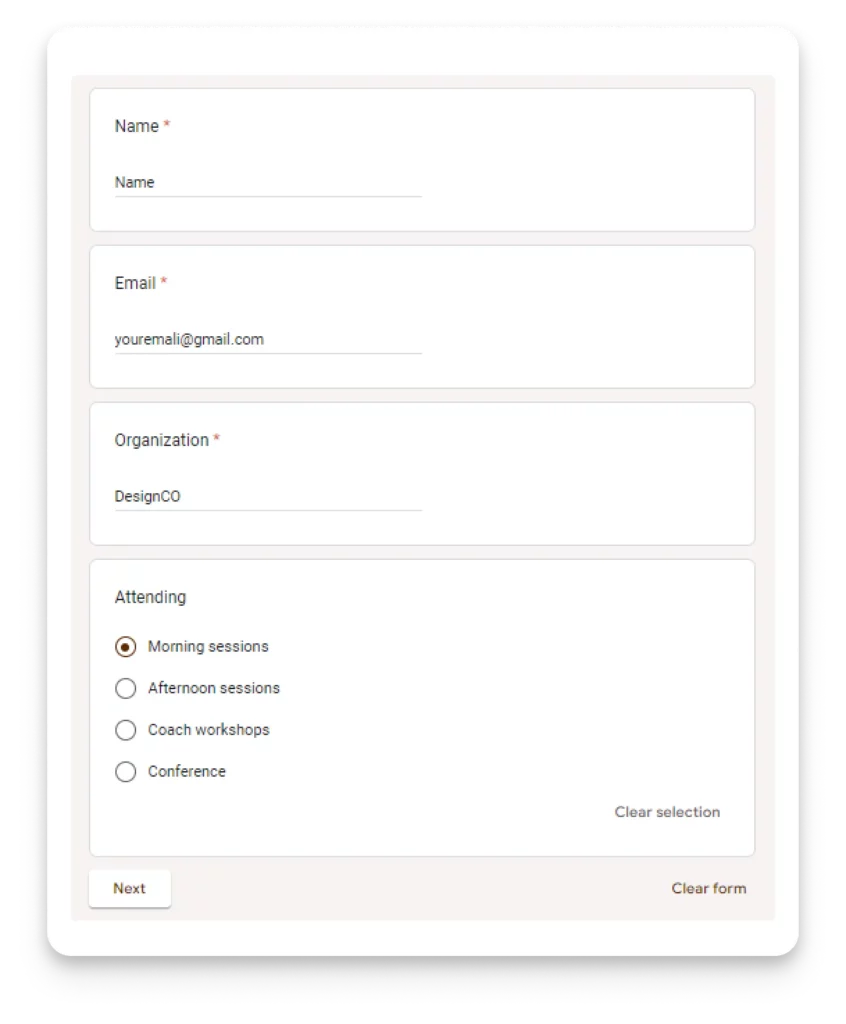
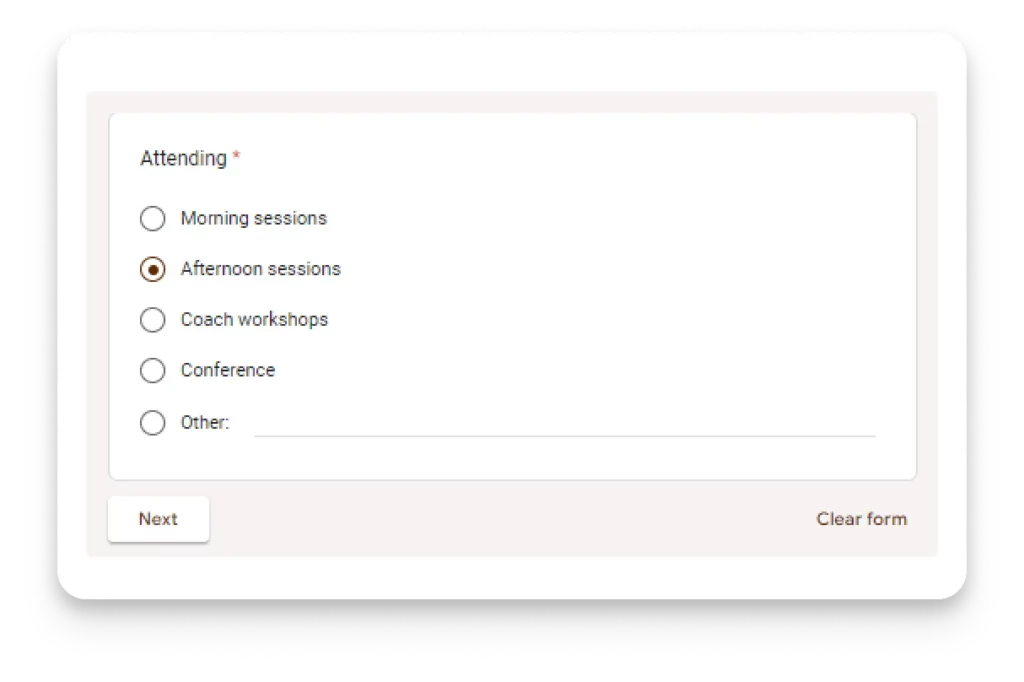
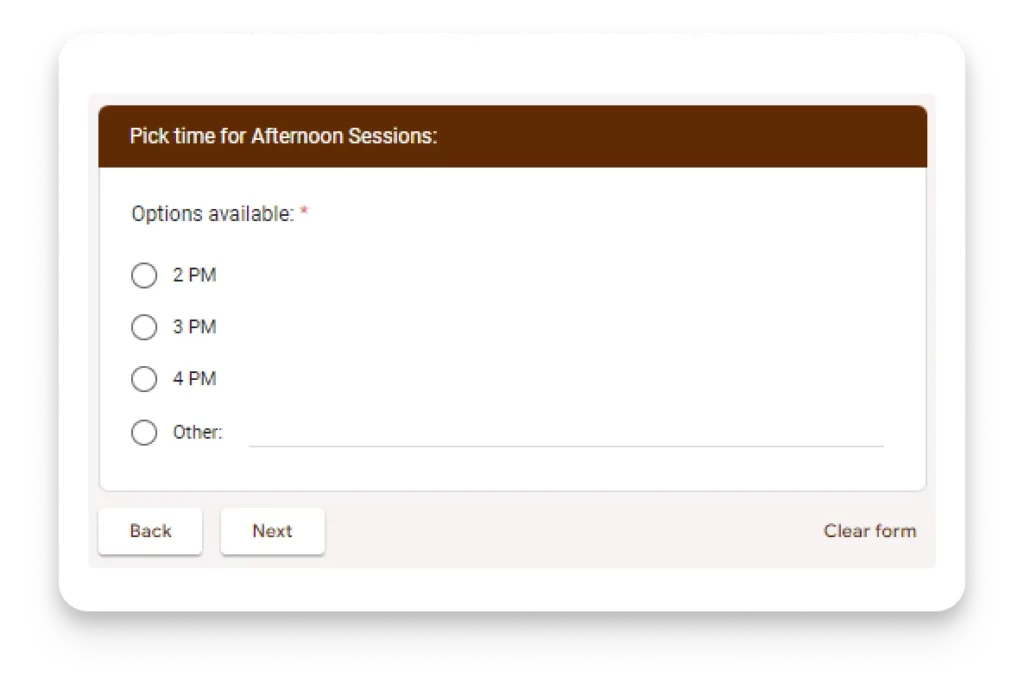
In preview mode, individually test each conditional question. For clarity, let’s look at examples for the options “Morning sessions” and “Afternoon sessions”:
After testing, make any necessary adjustments. Once everything is working seamlessly, you’re ready to share your form!
8. Conclusion
While Google Forms offers a range of functionalities, setting up conditional logic can be challenging for those unfamiliar with its interface. Its capabilities can sometimes fall short of intricate or multifaceted conditional flows. For those seeking a more intuitive experience and advanced conditional logic options, platforms like 123FormBuilder come to the rescue.
123FormBuilder is designed to offer versatility in form creation, allowing for complex conditional sequences with ease, making it a favorable alternative for those needing more comprehensive capabilities.
Google Forms is great for simple tasks but can be tricky for complex surveys. If you want to customize your questionnaire for each respondent’s details and preferences, Google Forms can make the process clunky. For instance, understanding why a customer is unhappy means jumping between different sections, which can be tedious.
Comparing Conditional Logic Options: 123FormBuilder vs. Google Forms
1. User Interface:
- Google Forms has a minimalist interface, making it approachable for beginners. However, setting up conditional logic, known as “Go to section based on answer,” requires maneuvering between sections which can get confusing for more complex forms.
- 123FormBuilder has a more dynamic interface tailored for form creation and provides a clear pathway for setting up conditional logic. The visual flow aids in understanding how the logic sequence works.
2. Flexibility and Versatility:
- While Google Forms supports basic conditional logic, it’s primarily section-based. This means users are redirected to different sections based on their answers. It’s functional for simple use cases but may be limiting for intricate surveys.
- 123FormBuilder offers a broader spectrum of conditional logic capabilities and allows for simple and complex conditions. Users can show/hide specific questions, send customized emails, or redirect to different web pages based on responses.
3. Complexity Handling:
- Google Forms can become cumbersome due to its section-based approach when building intricate surveys with multiple conditional paths. Maintaining a clear overview of the form’s flow may be challenging.
- Designed with complexity in mind, 123FormBuilder supports multi-layered conditional scenarios. Its interface is built to help users keep track of even the most complicated form flows.
4. Integrations and Actions:
- Google Forms allows conditional logic to direct users to different sections; its actions based on logic are limited.
- Apart from merely directing users, 123FormBuilder’s conditional logic can trigger many actions. This includes sending specific notifications, integrating with other tools, or changing form behavior based on user input.
While both Google Forms and 123FormBuilder offer conditional logic functionalities, the latter stands out when it comes to versatility, handling complexity, and action-triggering capabilities. For those needing a deep dive into advanced conditional flows, 123FormBuilder might be the preferable choice.