How to use dynamic fields in Google forms

Using dynamic fields in Google Forms to prefill forms presents numerous benefits for both form creators and users. Although Google Forms may not have all the advanced features, its capabilities for dynamic prefill can greatly enhance the experience for both you and your respondents. Here’s why you should consider using it:
Improved User Experience
- Reduced Time Commitment: Prefilling eliminates repetitive data entry, saving users time and reducing frustration. This is especially helpful for long forms or those requiring similar information across multiple submissions.
- Minimized Errors: Manual data entry is prone to typos and mistakes. Prefilling with verified information from previous interactions or reliable sources like Google Sheets ensures data accuracy.
- Personalized Touch: You can prefill specific fields based on user information (like name, email) or previous form submissions. This adds a personal touch and makes the form completion process more engaging.
Enhanced Data Quality
- Accurate Information: Prefilling reduces errors and ensures the data you collect is reliable and usable for further analysis. This saves time and resources compared to manually correcting inaccurate entries.
- Increased Completion Rates: Faster and easier forms with prefilled data encourage users to complete them, leading to a higher response rate for your surveys or questionnaires.
Streamlined Workflows:
- Reduced Manual Work: Less time spent entering or transferring data frees you up for tasks that require more human input, like analyzing results or following up with respondents.
- Automated Data Transfer: Prefill can automate data transfer between different forms in your workflow. For example, a customer’s shipping address from a previous order can automatically populate the prefill for a new purchase.
Setting Up Dynamic Fields in Google Forms
Google Forms itself doesn’t have built-in functionality for dynamic fields. However, you can achieve a similar effect using a free add-on called Google Forms Dynamic Fields. Here’s how to set it up:
- We start by creating or accessing the Google Form under where we want to use the dynamic fields
- The Google Forms Dynamic Fields add-on is then installed.
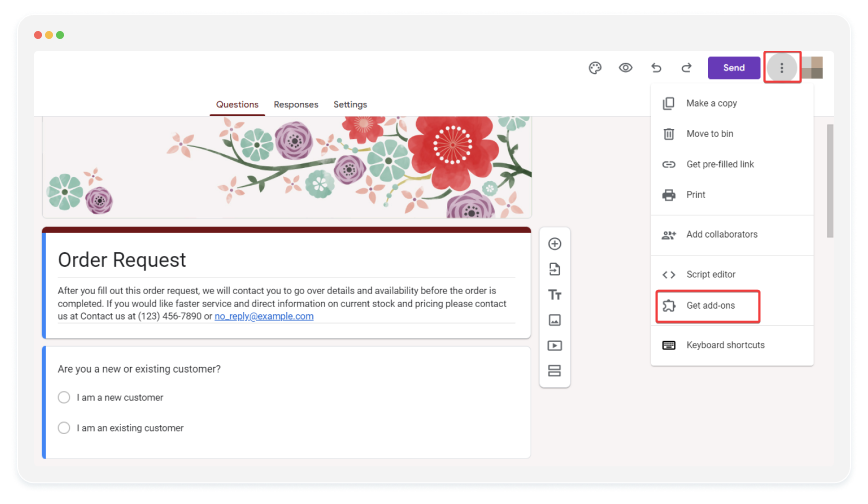
- We may reach the Get Add-ons section by clicking on the three dots menu located in the upper right corner.
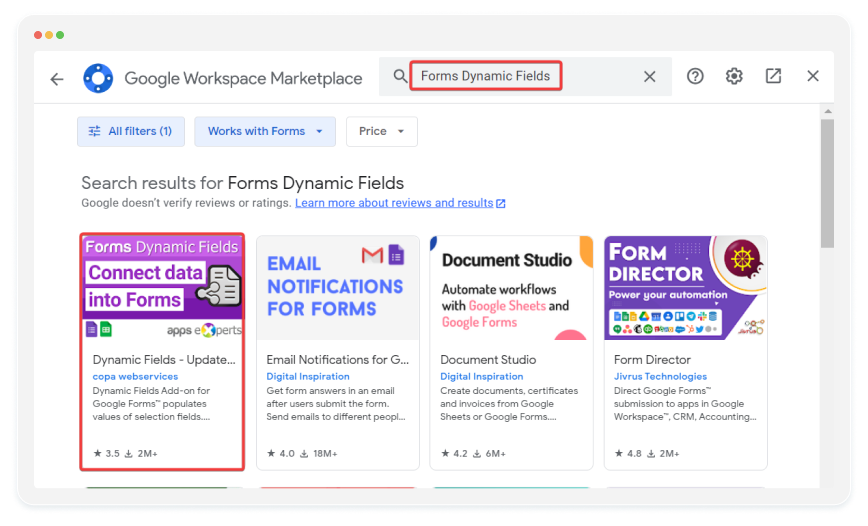
- Enter “Forms Dynamic Fields” into the search bar and select “Install.”
- Give the add-on the authorization it needs to operate.
3. Select the question where options dependent on answers to another question should be displayed. Usually, there will be a drop-down, multiple-choice, grid, list, or checkbox style of question.
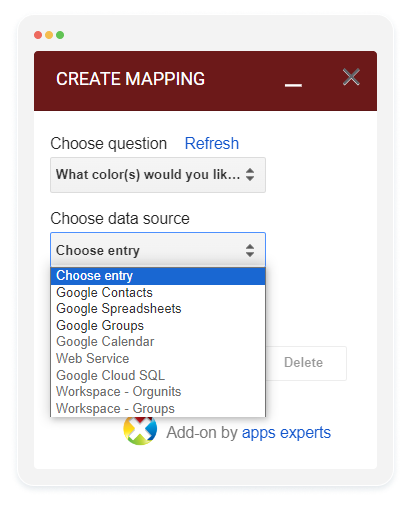
4. Click the “Add-ons” menu in your form, select “Forms Dynamic Fields” and choose “Create Mapping.”
5. In the “Choose a question” section, select the question where you want dynamic options to appear.
6. Choose a data source for the dynamic values.
7. Define the specific range or column in your Google Sheet that contains the data for the dynamic options (if using a Sheet as the source).
8. Click “Save” to create the mapping.
9. Update the form (optional): The add-on automatically populates the chosen question with dynamic options based on the mapping you created.
10. Make sure the dynamic options update correctly based on user selections in the source question.
Key reminders
- The free version of Forms Dynamic Fields allows mapping to a single source question or a single Google Sheet. Paid plans offer additional features like cascading logic and multi-source mapping.
- Ensure your data source (another question or Google Sheet) is properly formatted for the add-on to interpret the data correctly.
Discover even more robust form creation capabilities with 123Formbuilder, an alternative to Google Forms. Experience firsthand how integrating online forms can streamline your processes and elevate your efficiency to new levels.