How to create Google Forms on a mobile device

Google Forms has long been a favorite for creating surveys, quizzes, and feedback forms due to its simplicity and integration with other Google services. However, the rise of mobile technology demands tools that are not just desktop-friendly but also fully functional on mobile devices. This guide will walk you through the easy steps to create Google Forms on a mobile device, ensuring you can craft and share forms anytime, anywhere. Plus, we’ll introduce you to creating forms with 123FormBuilder on mobile, offering an alternative that might just make your data collection even smoother.
Creating Google Forms on Mobile: Step-by-Step Guide
- Open Google Forms App
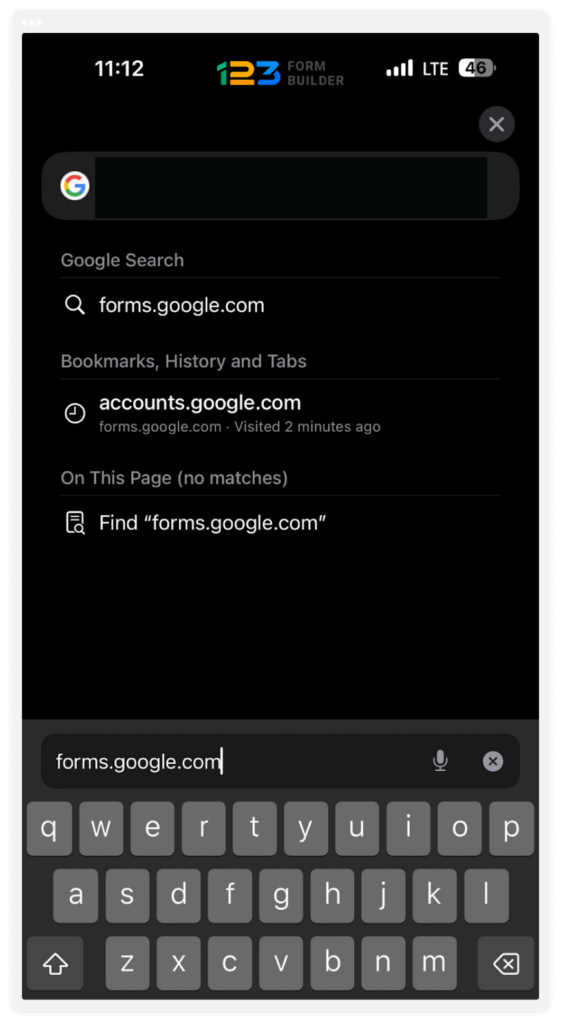
If you haven’t already installed it, download the Google Forms app from the App Store (for iOS devices), Google Play Store (for Android devices) or you can even open your mobile browser and type: forms.google.com.
2. Sign in
Open the app and sign in with your Google account credentials. If you don’t have a Google account, you’ll need to create one.

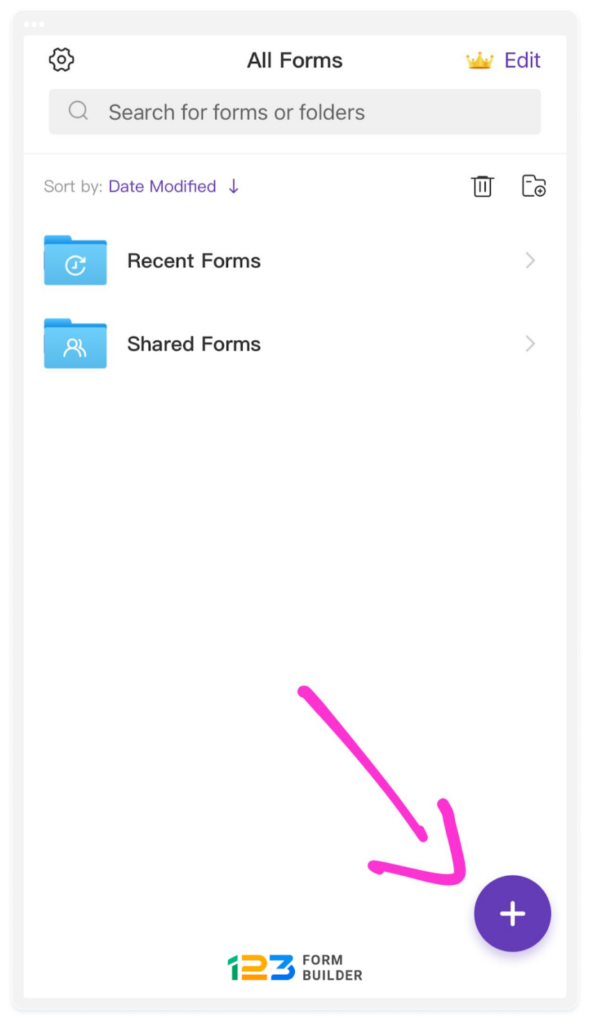
3. Create a New Form
Once you’re signed in, tap the “+” icon to create a new form.
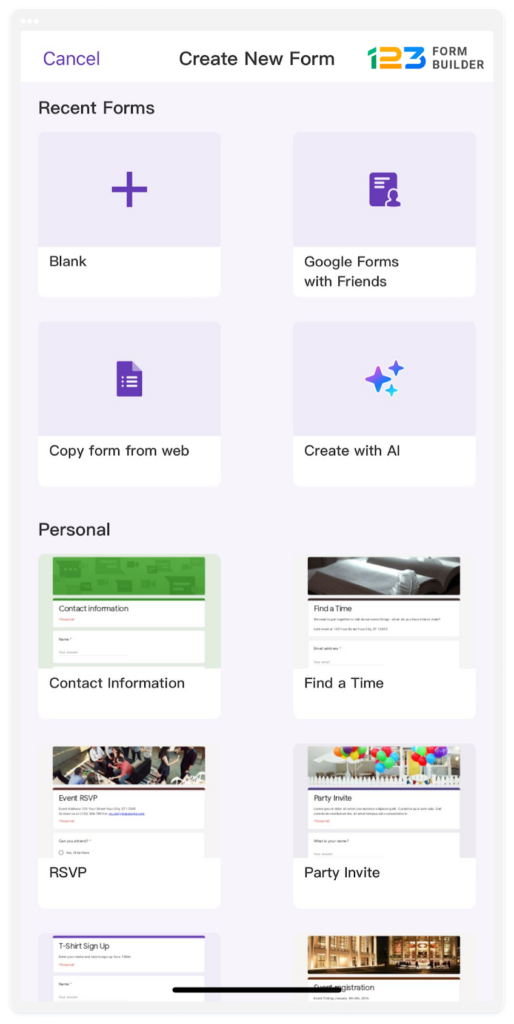
4. Choose a Template or Start Blank
You’ll have the option to choose a template or start with a blank form.
5. Edit Form
Tap on the section titles to edit them, add questions, select question types (multiple choice, short answer, etc.), and customize as needed.
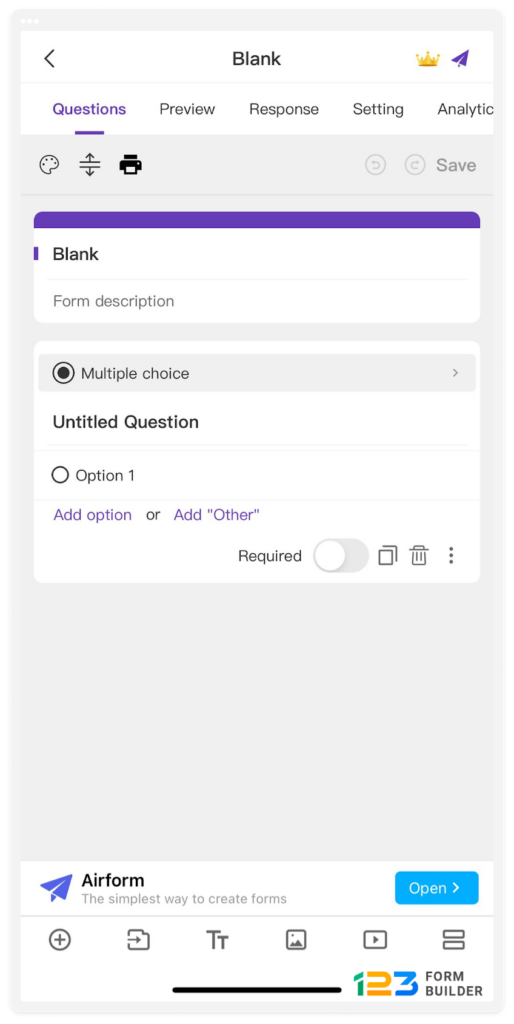
6. Add Questions
To add a question, tap on the “+” icon where you want to add it. Then choose the type of question you want to add and fill in the details accordingly.
7. Edit Question Settings
For each question, you can customize settings such as whether it’s required, adding descriptions, or adding answer validation.
8. Preview Form
Once you’ve finished creating your form, you can preview it by tapping on the ”Preview” button on the top left corner. This allows you to see how your form will look to respondents.
9. Share Form
When you’re ready to share your form, tap the send icon (typically a paper airplane icon) in the top right corner. You can then choose how you want to share your form, such as copying the link to share manually or sending it via email.
10. Manage Responses
Open your form in the Google Forms app and tap on the ”Response” tab. Here, you can see individual responses or view them collectively in a summary.
11. Edit Form
If you need to make changes to your form after it’s been shared, you can still edit it by opening the form in the Google Forms app and tapping the edit icon (usually a pencil icon).
Creating Forms with 123FormBuilder on Mobile
123FormBuilder offers a robust and user-friendly platform that caters to your form-building needs directly from your mobile device. Whether you’re looking to conduct surveys, register event attendees, or gather customer feedback, 123FormBuilder simplifies the process, making it accessible to anyone, anywhere, at any time.
This section will guide you through each step of creating a form using 123FormBuilder on your mobile device, from signing in and selecting a template to customizing your form and sharing it with the world. Let’s get started on transforming the way you collect and manage data, making it a hassle-free experience that moves with you.
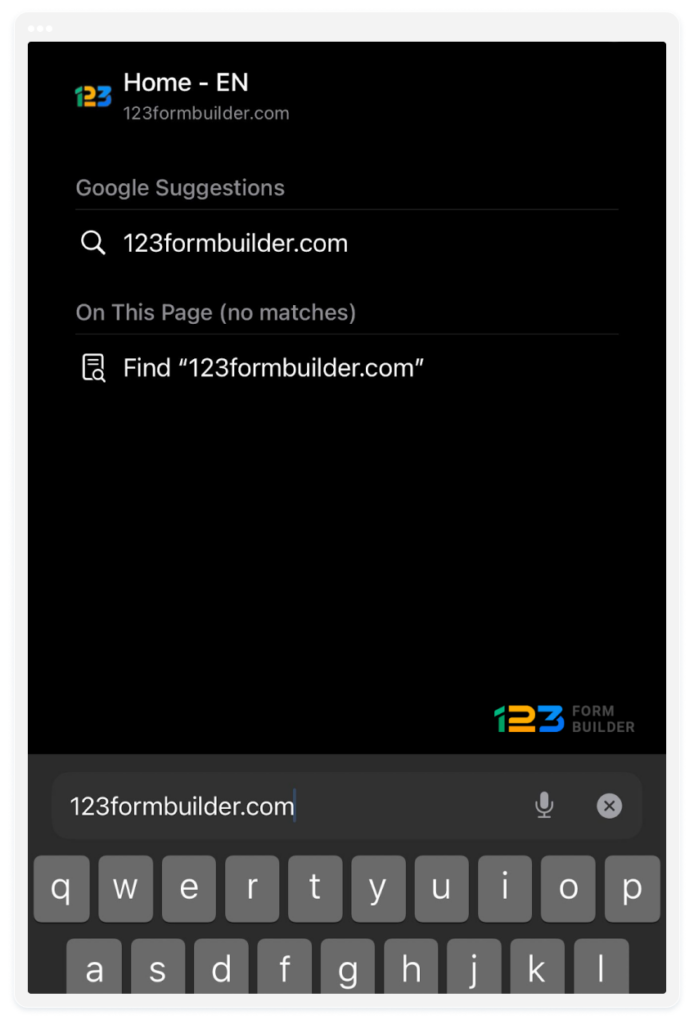
- Open up your browser on your mobile device and type: 123formbuilder.com
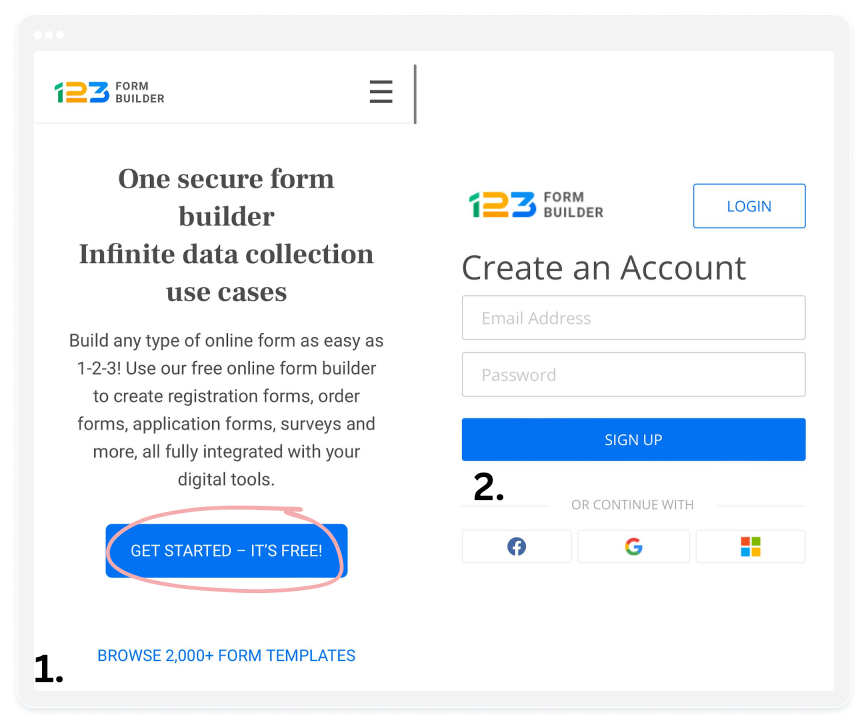
2. You can create a new account using an email and a password. Or, if you already have an account, all you need to do is to log in and get started.
3. Once you’re signed in to your account, tap the “+ Create Form” button to create a new form
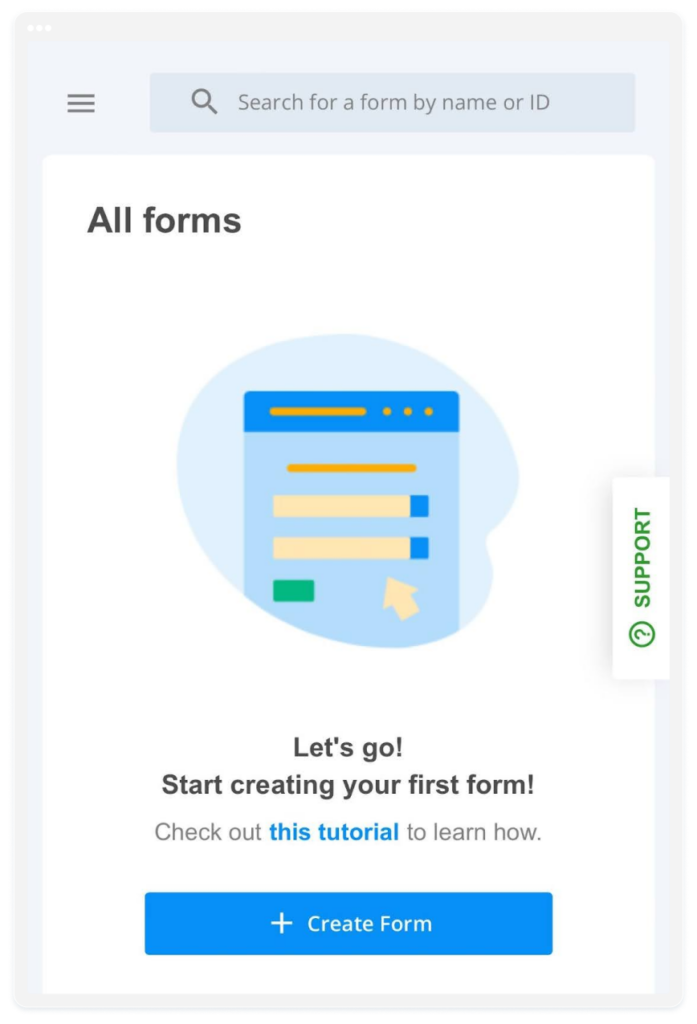
3. You can choose between using a template or start with a blank form.

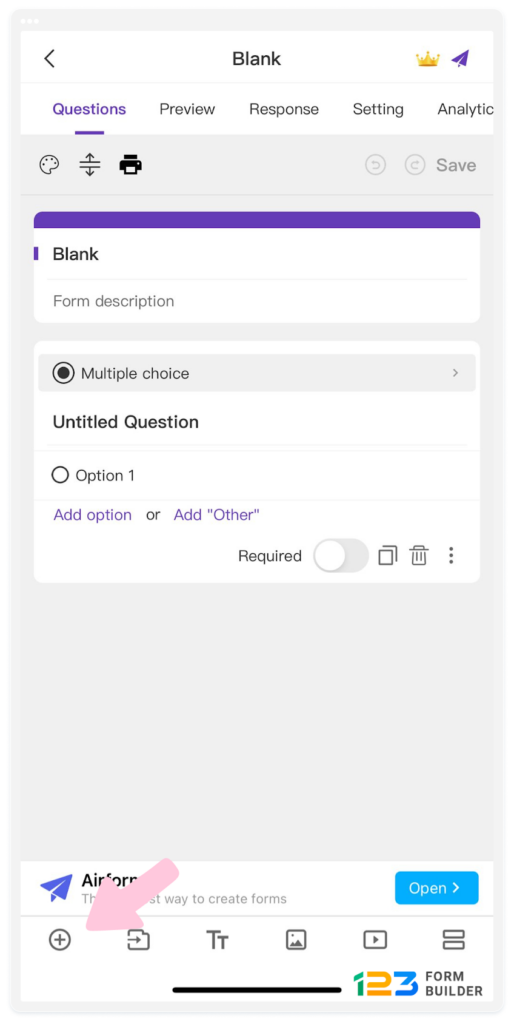
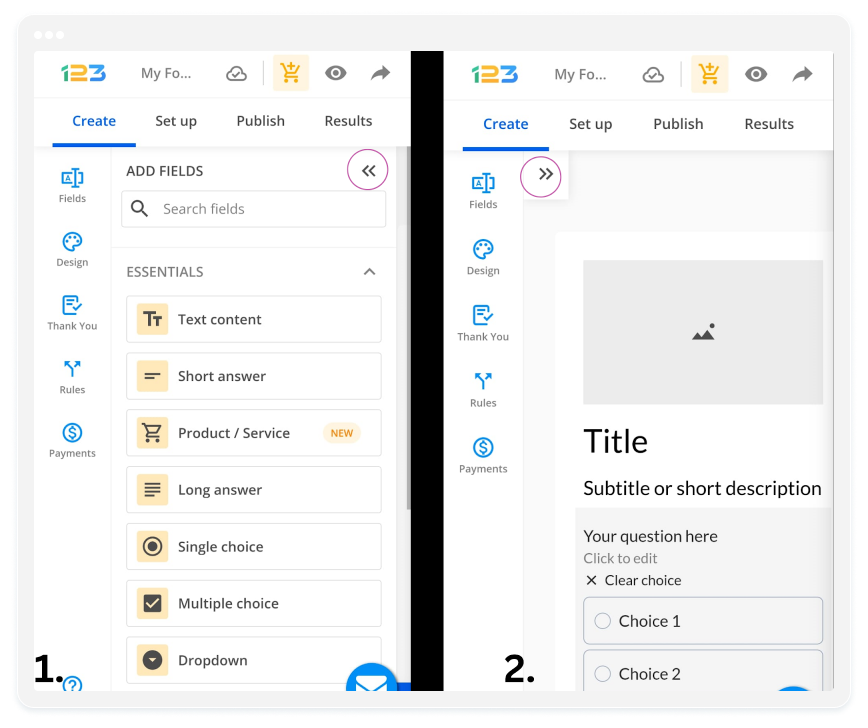
5. Once you create a form, the ”Add Fields” section will open up. You can tap on the fields you want to add to your form and customize them as needed, you can add short/long answer fields, single or multiple choice fields, product field, etc.
To close up the ”Add Fields” section or open it again, you will need to tap on the 2 consecutive arrows.
6. You can customize the settings for each field you add, such as whether it’s required, adding descriptions, or adding a character limit.
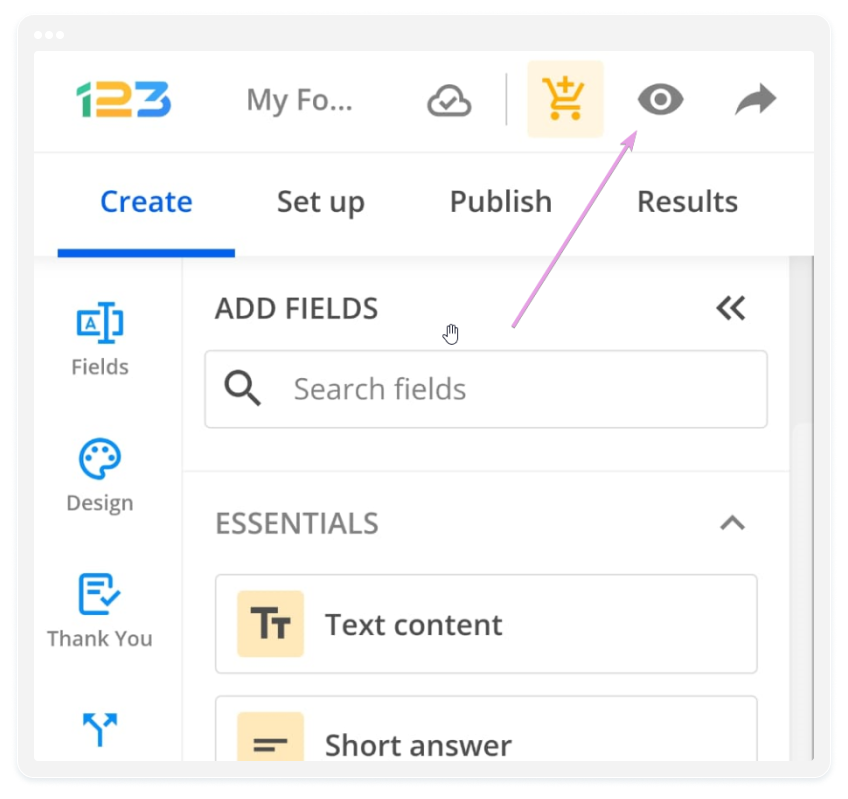
7. Once you are satisfied with the outcome of your form, you can preview it by tapping on the ”Eye” icon that is on the top right corner. This allows you to see how your form will look to respondents.
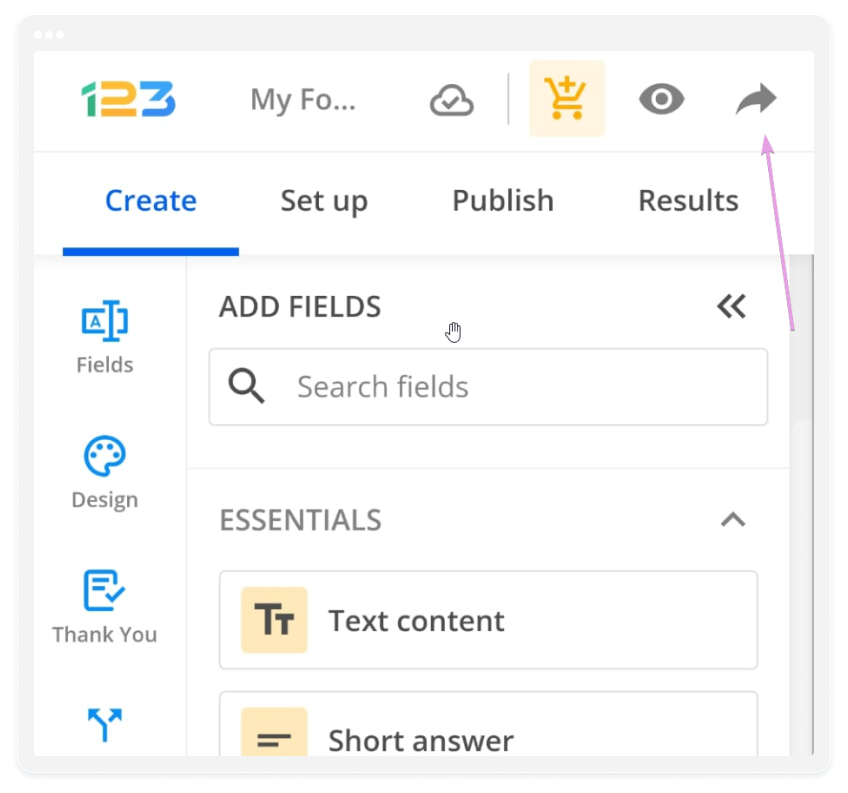
8. When you’re ready to share your form, tap the ”arrow” icon in the top right corner, next to the ”Preview” button. You can then choose how you want to share your form, such as copying the link to share manually or sending it via email or you can even embed your form into your website.
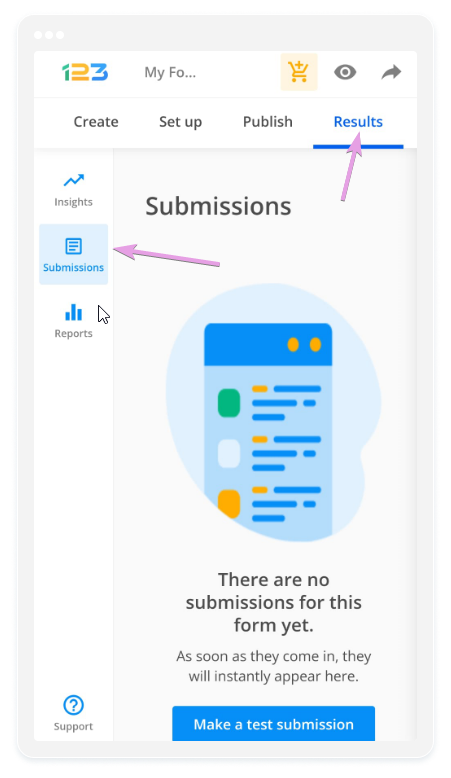
9. To see the form submissions, you will need to go to the ”Results” tab→ Submissions. Here, you can see them collectively in a table.
10. If you need to make changes to your form, you can still edit it by opening the form in the 123FormBuilder application and tapping on the form.
Whether you’re a Google Forms fan or a newcomer to 123FormBuilder, the ability to create, share, and manage forms on a mobile device is a game-changer. It empowers you to collect data, feedback, and insights without being tethered to a desktop, giving you the flexibility to work efficiently from anywhere.
Remember, the key to effective digital communication and data collection is not just the information you gather but how easily and efficiently you can do it.
Load more...