123FormBuilder Knowledge Base
Search our documentation platform for answers, service specifications and 3rd-party integrations.
Knowledge Base
This integration has been deprecated.
Use the 123FormBuilder – Desk.com integration to receive tickets directly through form submissions. It’s easy to set up and you do not need to do anything else besides following the steps below:
1. In My Forms select the web form that you want to integrate with your Desk.com account.
2. Go to Applications.
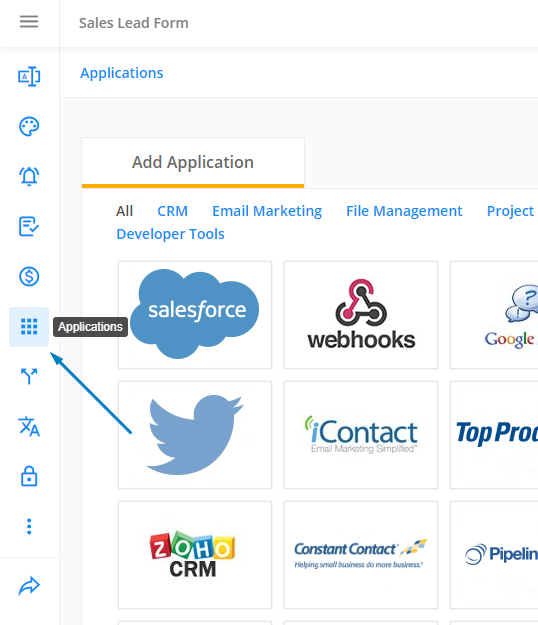
3. Browse the applications list for the Desk.com app.
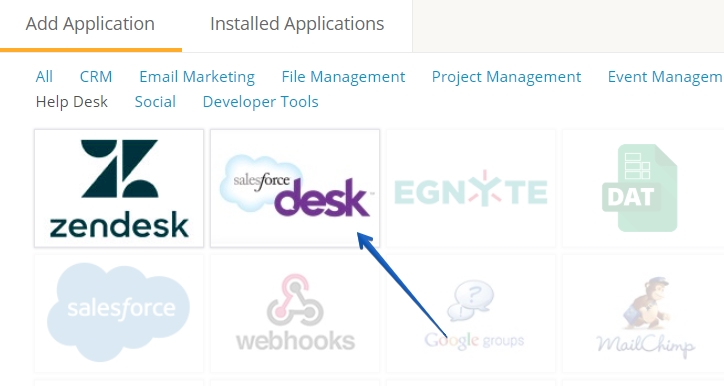
4. Hover over the Desk.com logo and hit Add.
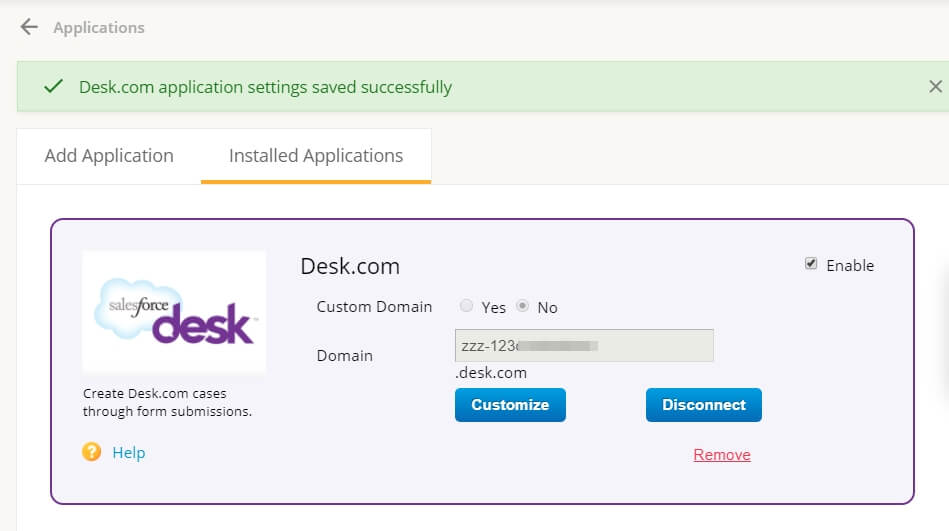
5. The Desk.com app will appear under the Installed Applications tab, as seen here:
6. Enable the Custom Domain option if your domain doesn’t contain the Desk.com brand name, or leave the option in its default state.
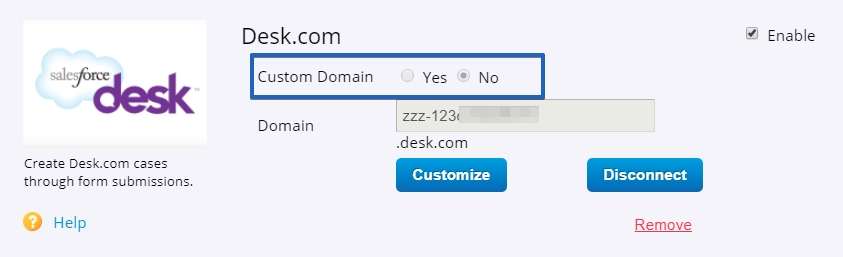
7. Next, type in the name of your domain in the text box and hit the Connect button.
8. You’ll be redirected to enter the credentials of your Desk.com account if you’re not already logged in Desk.com.
9. You’ll need to grant access to 123FormBuilder, more specifically – your form, to send submissions to your Desk.com account.
10. You are now redirected back to 123FormBuilder where you must map fields and adjust other settings in the customization lightbox.
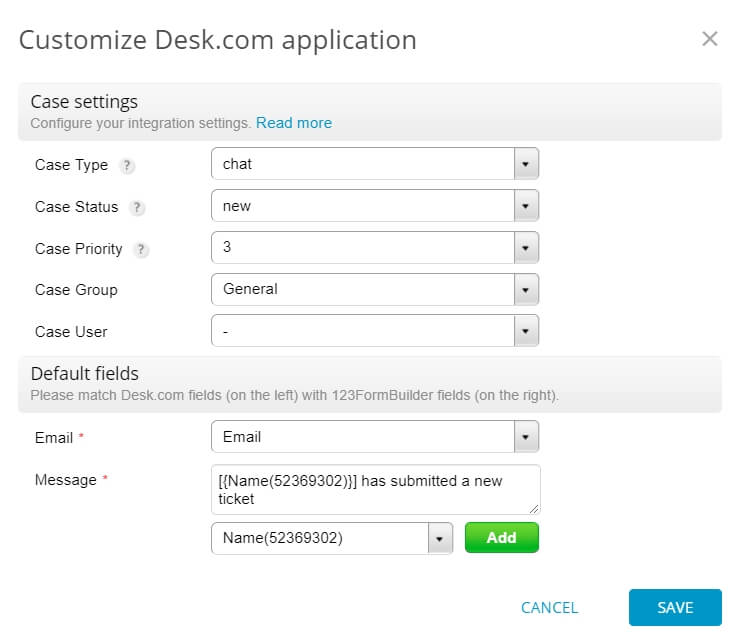
Note: Mandatory fields are email and message.
Associate your default and custom fields from Desk.com from the left with your form fields on the right.
11. Fill in the Error Handling box with your email address to get notified if a bad connection occurred with one of your tickets. By default, it’s set with the email address of your 123FormBuilder account, but you can change it at any time.
12. Press Save to complete integration.
Now you can receive tickets in your Desk.com account from the submissions that are sent from your online form.
If you encounter login problems or other similar issues while trying to use our web form builder, you’ll need to enable third-party cookies in your web browser. This is done easily by following the steps below for the web browser that you use.
How to enable third-party cookies in Google Chrome
1. Navigate to your Settings from the three-dot menu located on the top right.
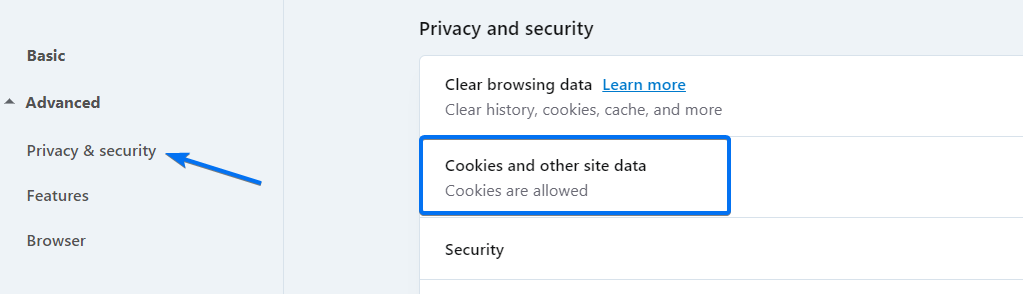
2. Select Privacy and security from the left-side menu.
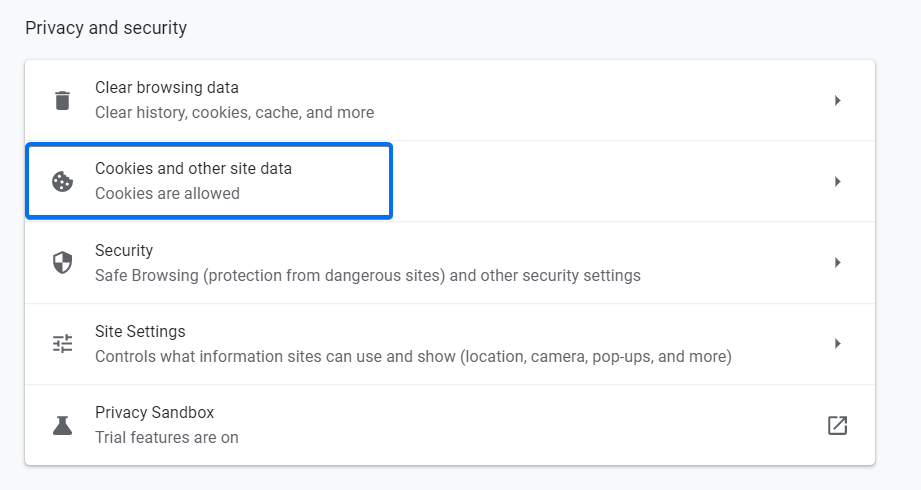
3. Click on Cookies and other site data.
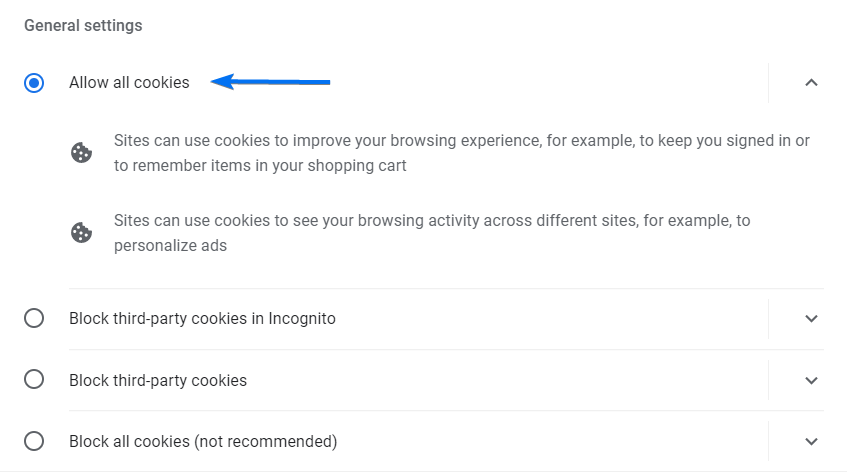
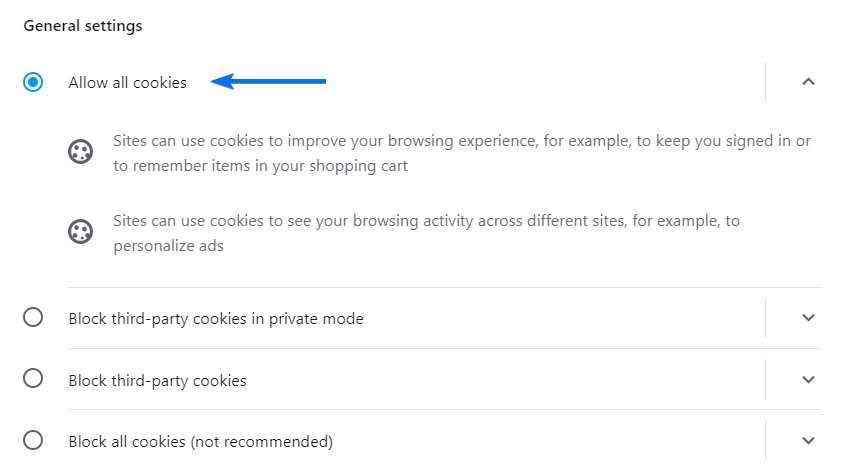
4. Select the option Allow all cookies.
How to enable third-party cookies in Mozilla Firefox
1. Click Open Application Menu, the three-dot menu located on the top right.
2. Go to Settings.
3. In Privacy & Security, select the Standard radio button.

How to enable third-party cookies in Internet Explorer
1. Click the gear icon from the top-right menu.
2. Select Internet options.
3. Hit the Privacy tab.
4. Click the Advanced button.
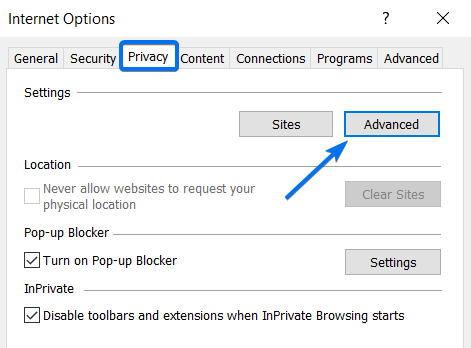
5. Under Third-Party Cookies select Accept.
6. Make sure both columns have the option to allow cookies enabled.
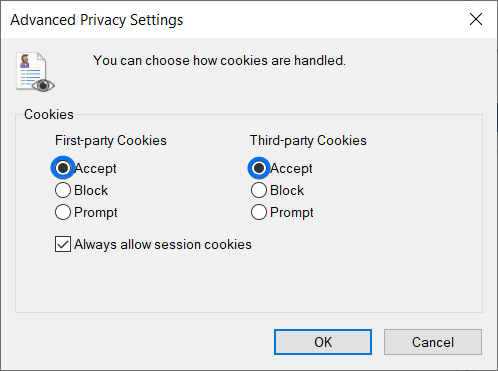
7. Exit the popups by pressing OK.
How to enable third-party cookies in Microsoft Edge
1. Go to Settings from the three-dot menu located on the top right.
2. Select Cookies and site permissions.
3. Click on Manage and delete cookies and site data.

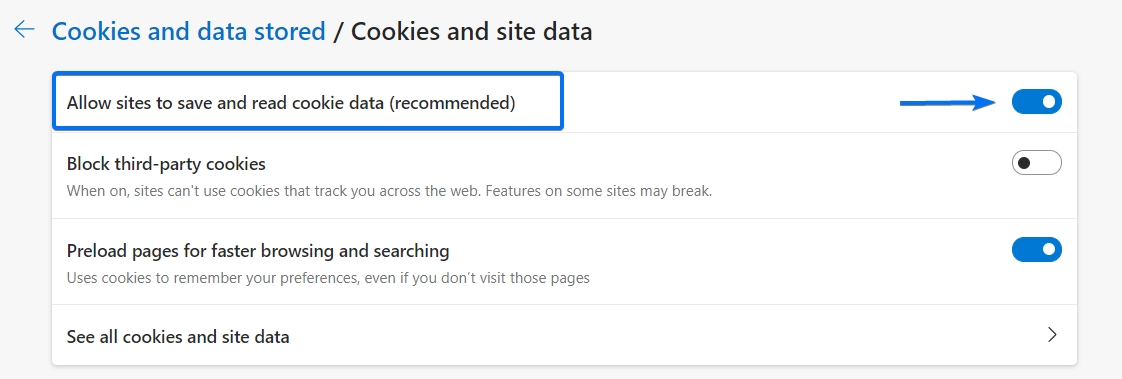
4. Enable the option Allow sites to save and read cookie data.
5. Make sure to disable the option Block third-party cookies.
How to enable third-party cookies in Safari
1. Go to Settings.
2. Hit Preferences.
3. Select the Privacy tab.
4. Deselect the checkbox before the Prevent cross-site tracking option.
5. Deselect the checkbox before the Block all cookies option.

How to enable third-party cookies in Opera
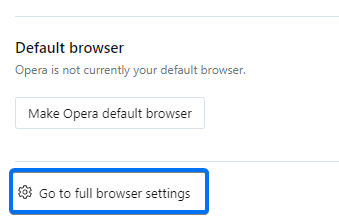
1. Select the Easy setup icon located on the top right.
2. At the bottom click on Go to full browser settings.
3. Collapse the Advanced menu.
4. Choose the Privacy & security section and hit Cookies and other site data.
5. Select the option Allow all cookies.
Related articles
If you receive the error message “The SMTP information you have provided is incorrect” or anything similar, while trying to activate the SMTP feature on your web form, check if your credentials are correct.
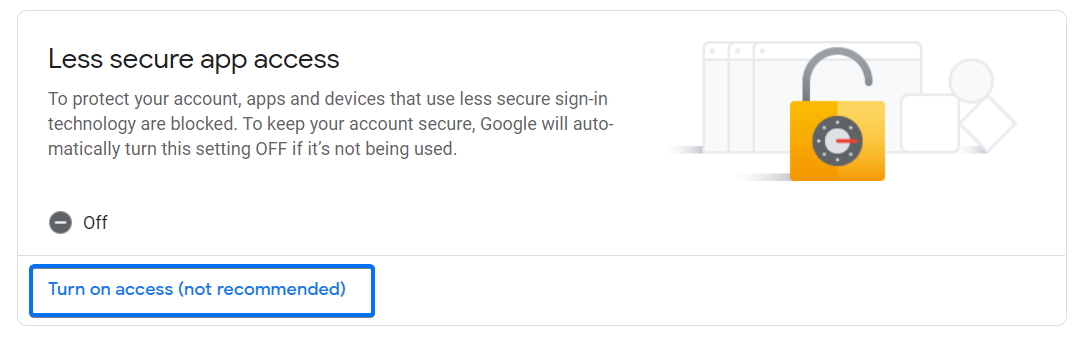
Do you use Gmail? If the issue persists, it could mean that Google blocks the connection. To prevent this from happening, access the form builder, and go to the Security settings of your Google account. Scroll down to Less secure app access and click on Turn on access. Also, make sure that you do not have the Google 2-Step Verification option enabled.
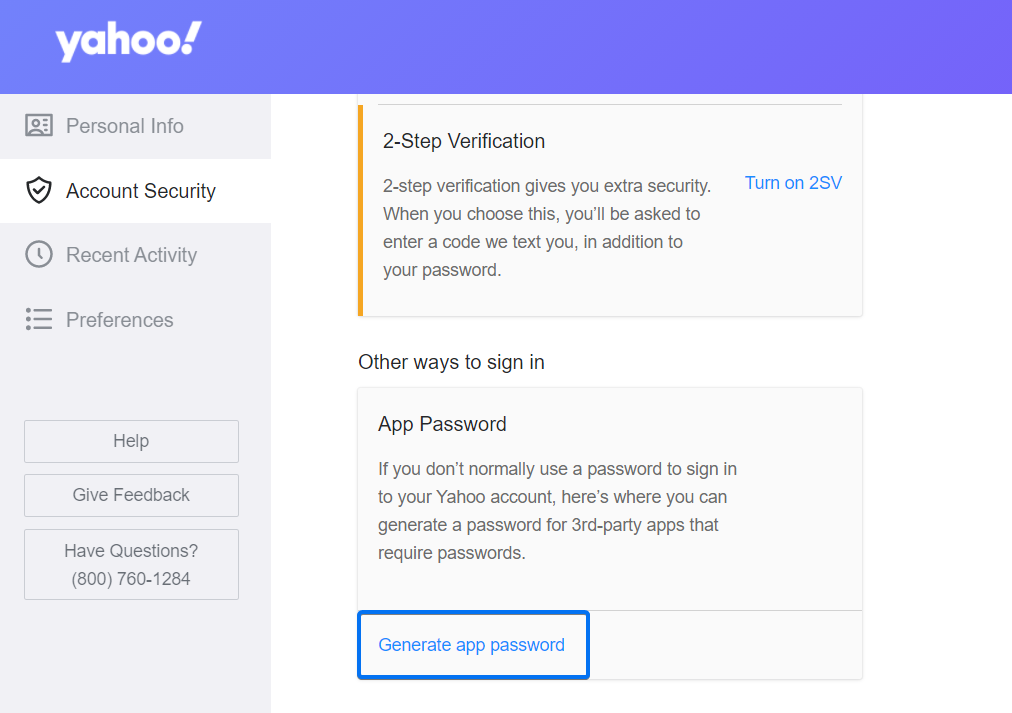
If you are using Yahoo Mail, you’ll need to add your App Password to activate SMTP on your form. This is different from the password used to log in to your Yahoo Mail account.
To generate the App Password, go to your Yahoo account settings and select the Account Security tab. Scroll down to find the App Password section and click on Generate app password.
A popup will appear on the screen. Select the blue Get started button to move forward. Next, you’ll need to give your app a name so you can better recognize it and the service it represents. Once you’re done, click on Generate password and copy the app password into the SMTP options of your form.
Related articles
In order to cancel the subscription payment on PayPal for any of your clients, log into your PayPal account and go to Send & Request Payments as seen in the image below.

Afterwards, click on Create & Manage Invoices and select the client.
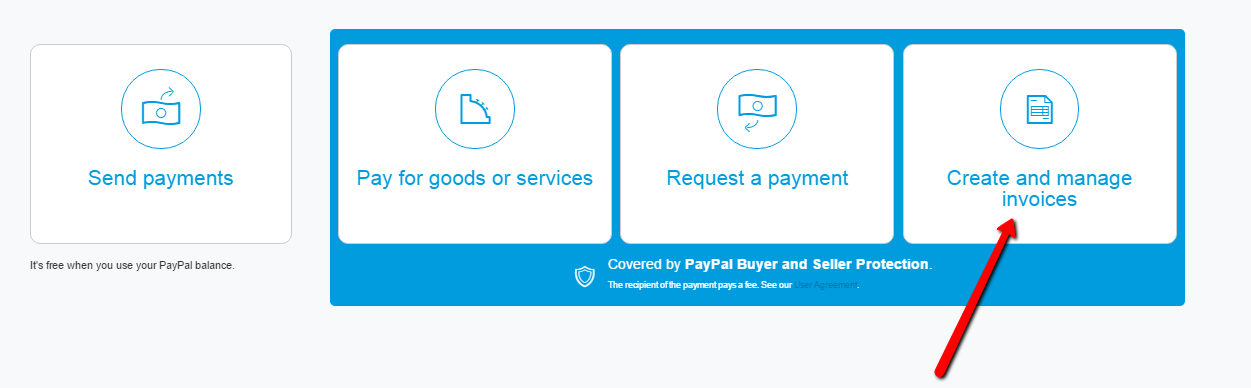
Once you’ve selected the client, hit the Cancel button. This will stop the subscription from running.

That’s about it! If you require more assistance, don’t hesitate to contact our customer support specialists.
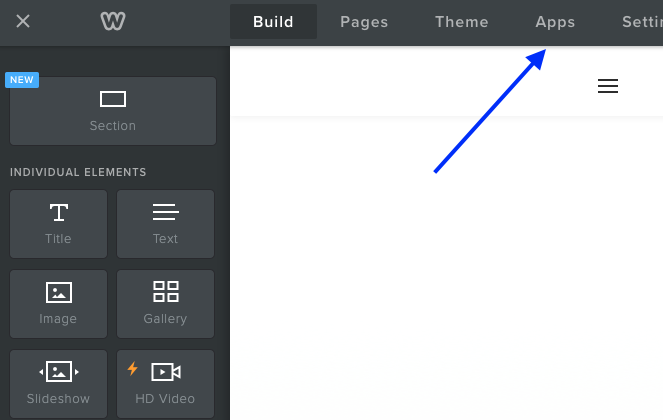
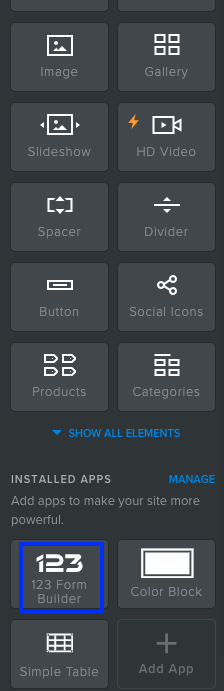
For starters, log in to your Weebly account and open your website in editor mode. To access the app center, click the Apps button that is located above the basic elements panel and search for 123FormBuilder app.
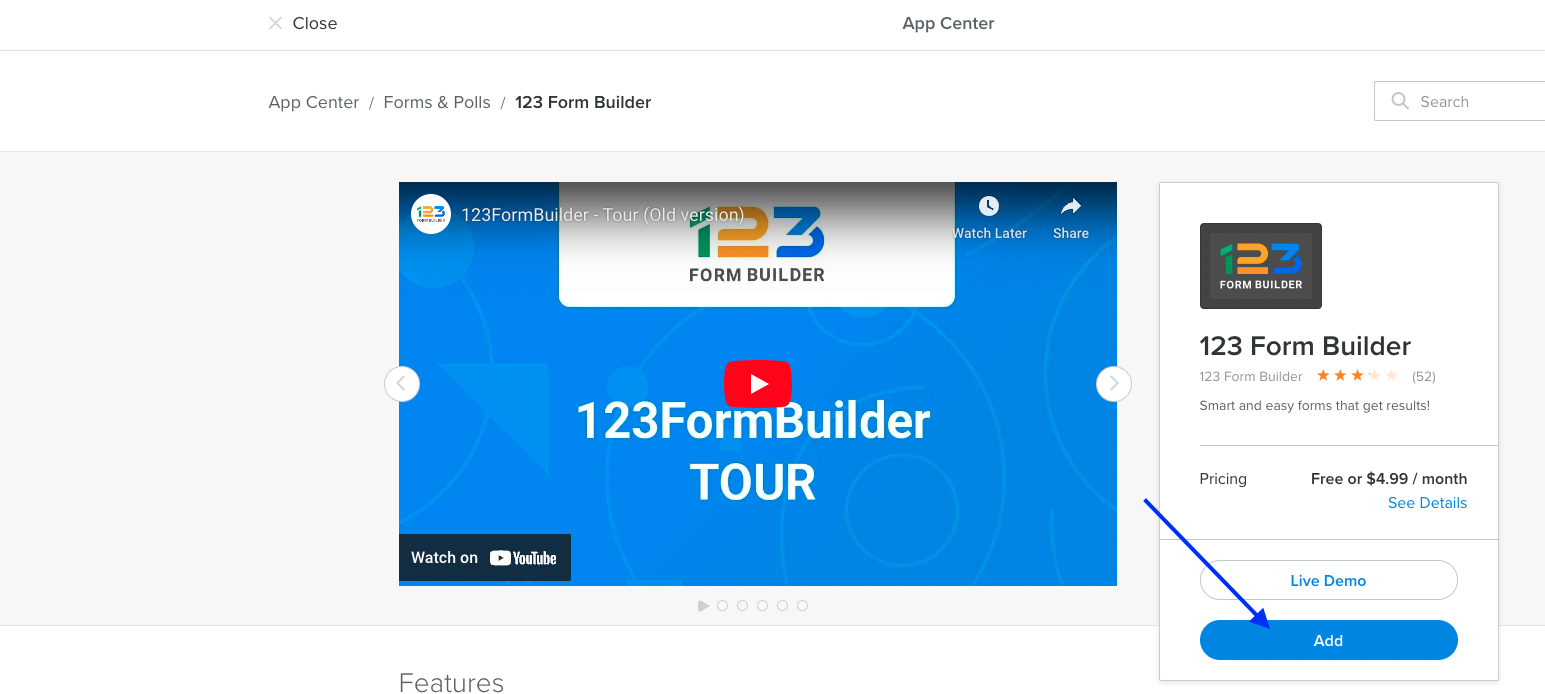
Next, select the app within the list and click the Add button on the presentation page.
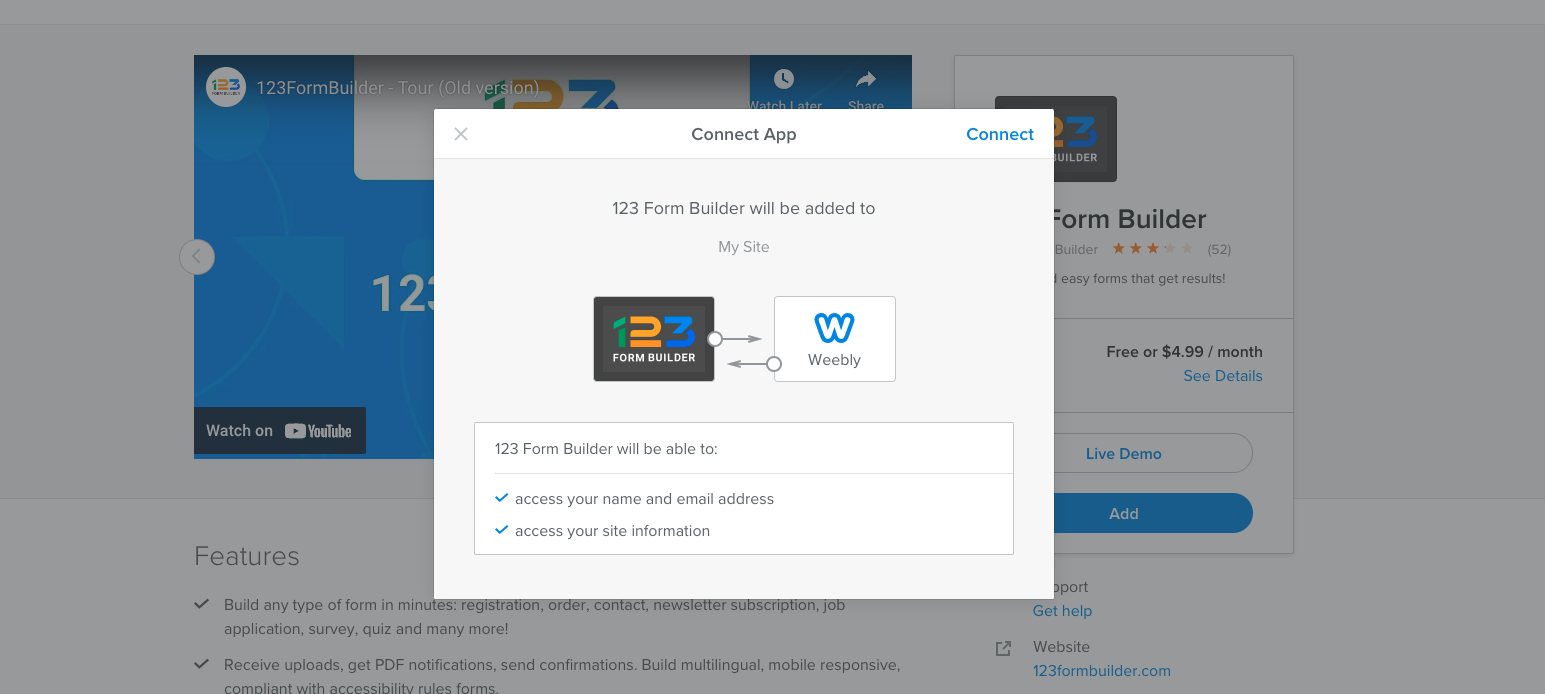
A lightbox will pop up on the screen for which you will need to agree for the 123FormBuilder to have access to your page, by pressing the Connect link on the top right side.
You’ll find the 123FormBuilder app under Installed Apps in the Elements tab.
Drag and drop the 123FormBuilder app on your page as any other element within Weebly’s website editor.
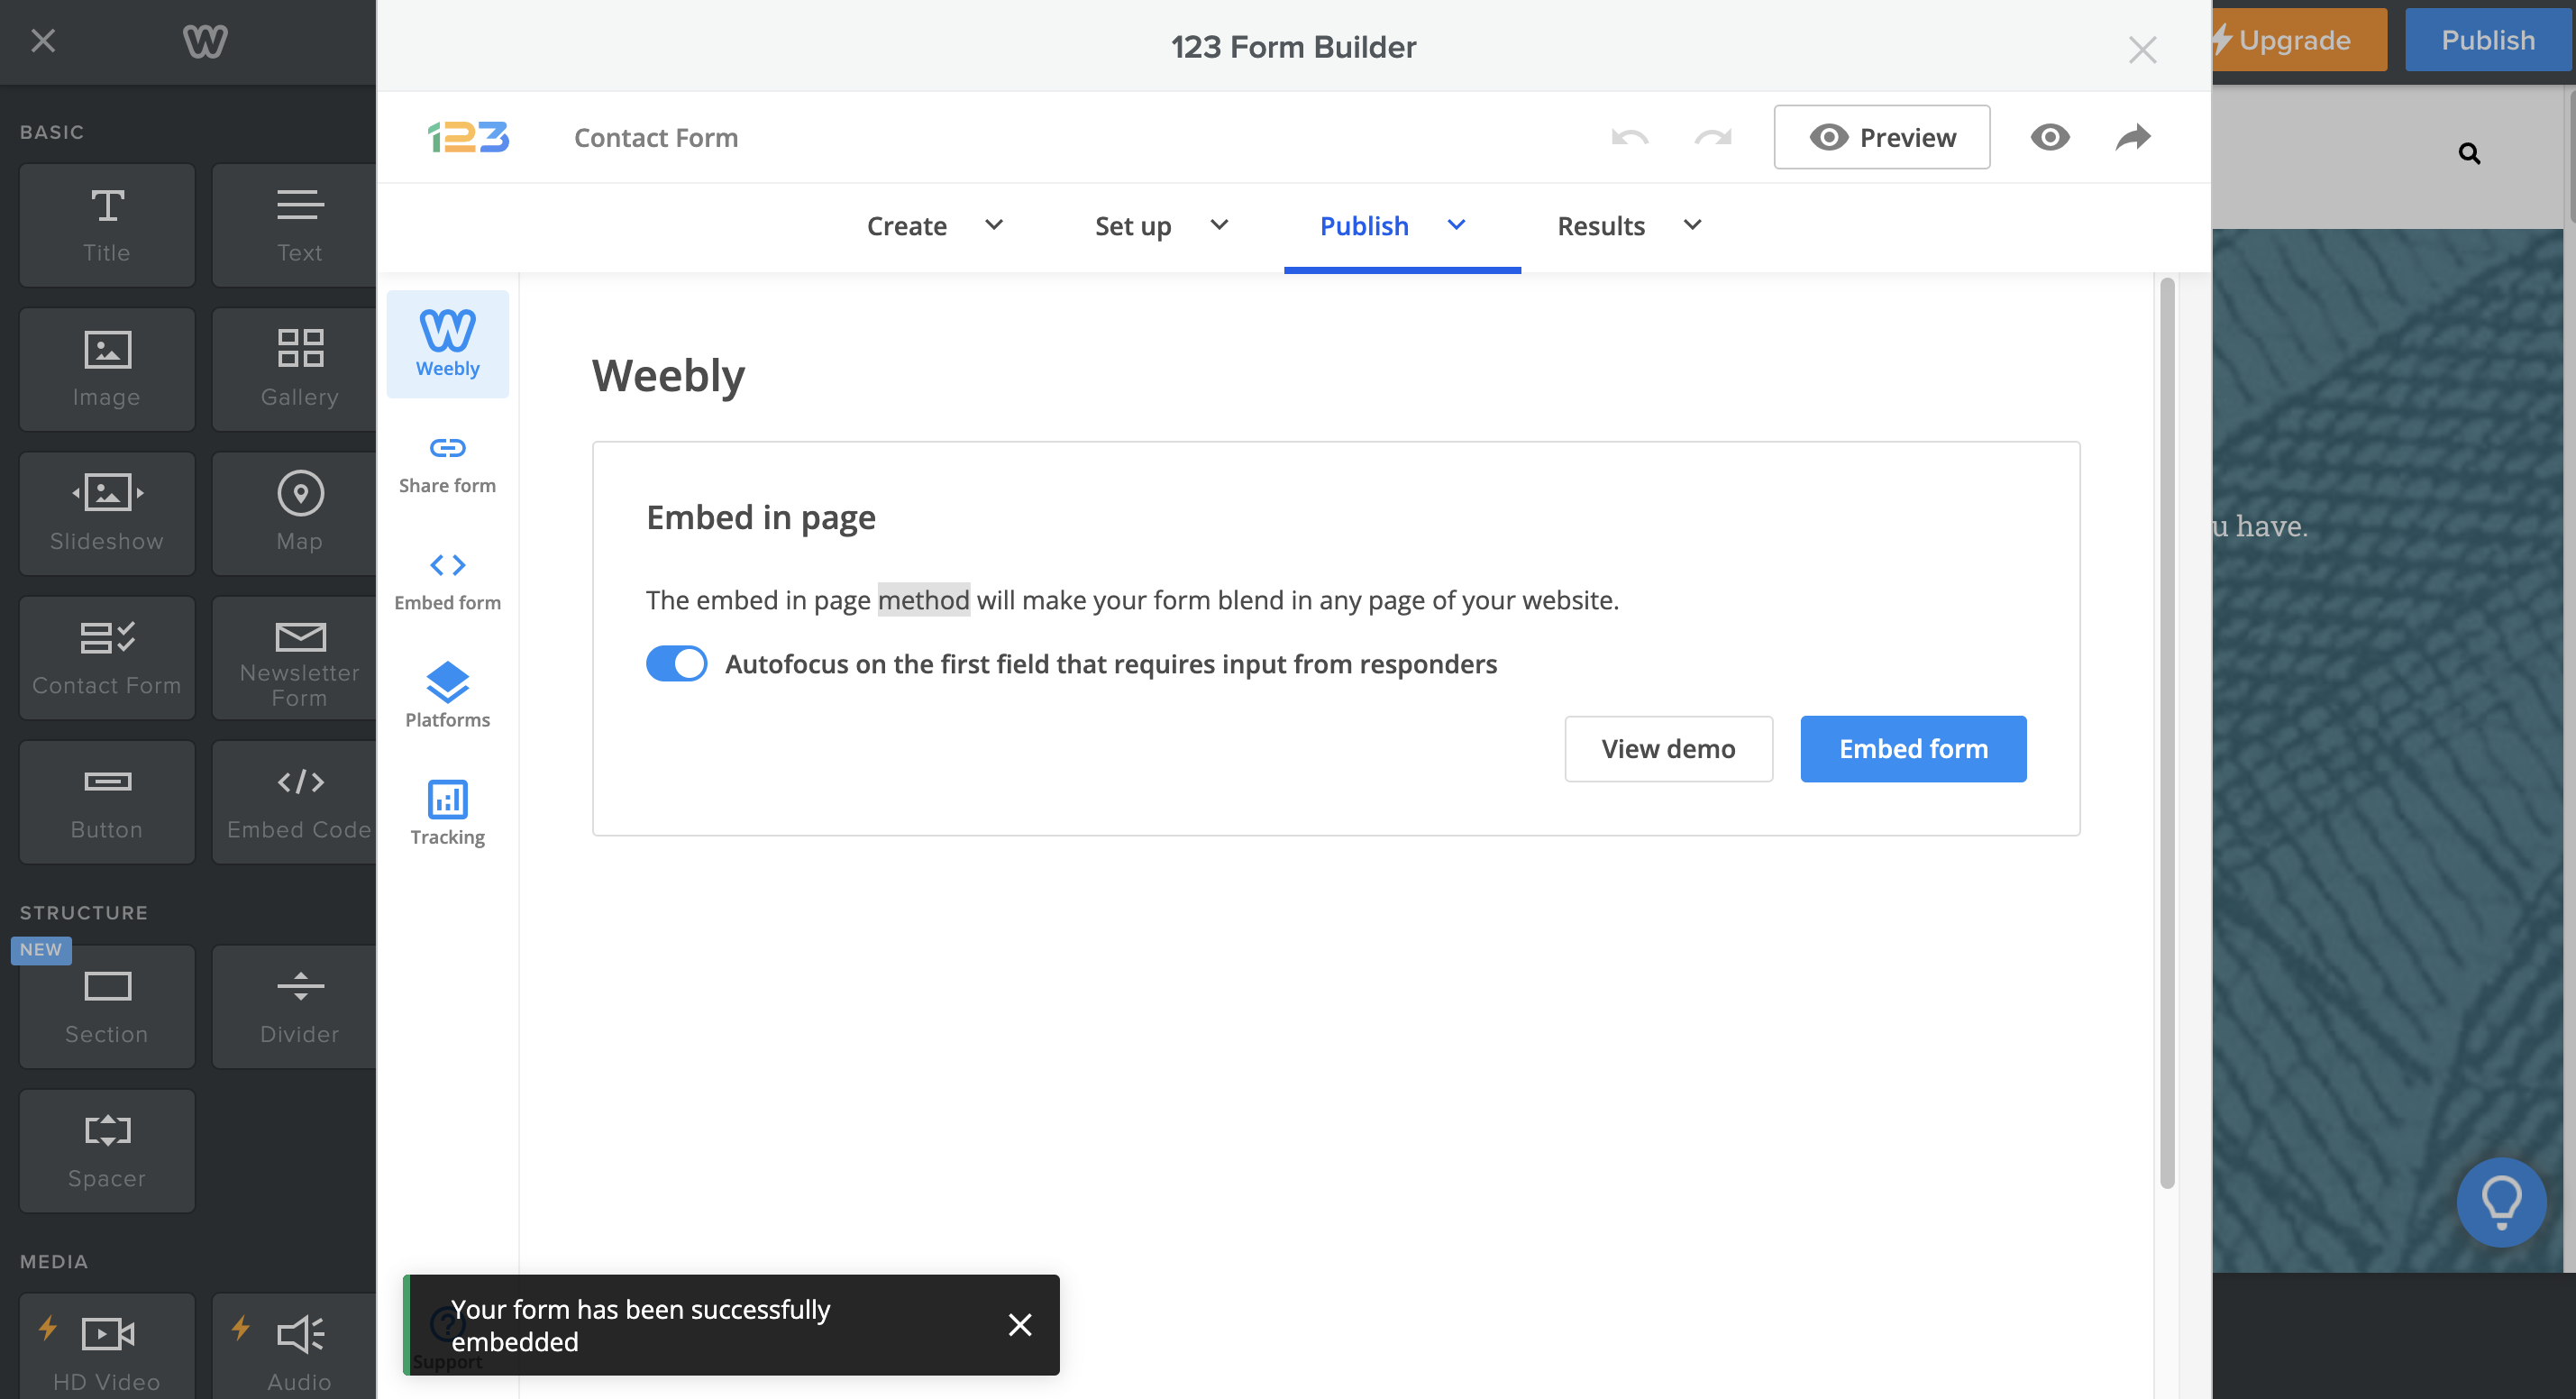
You’ll see a contact form on your page. That form is added by default whenever you drag and drop the 123FormBuilder – Third Party element into your web page.
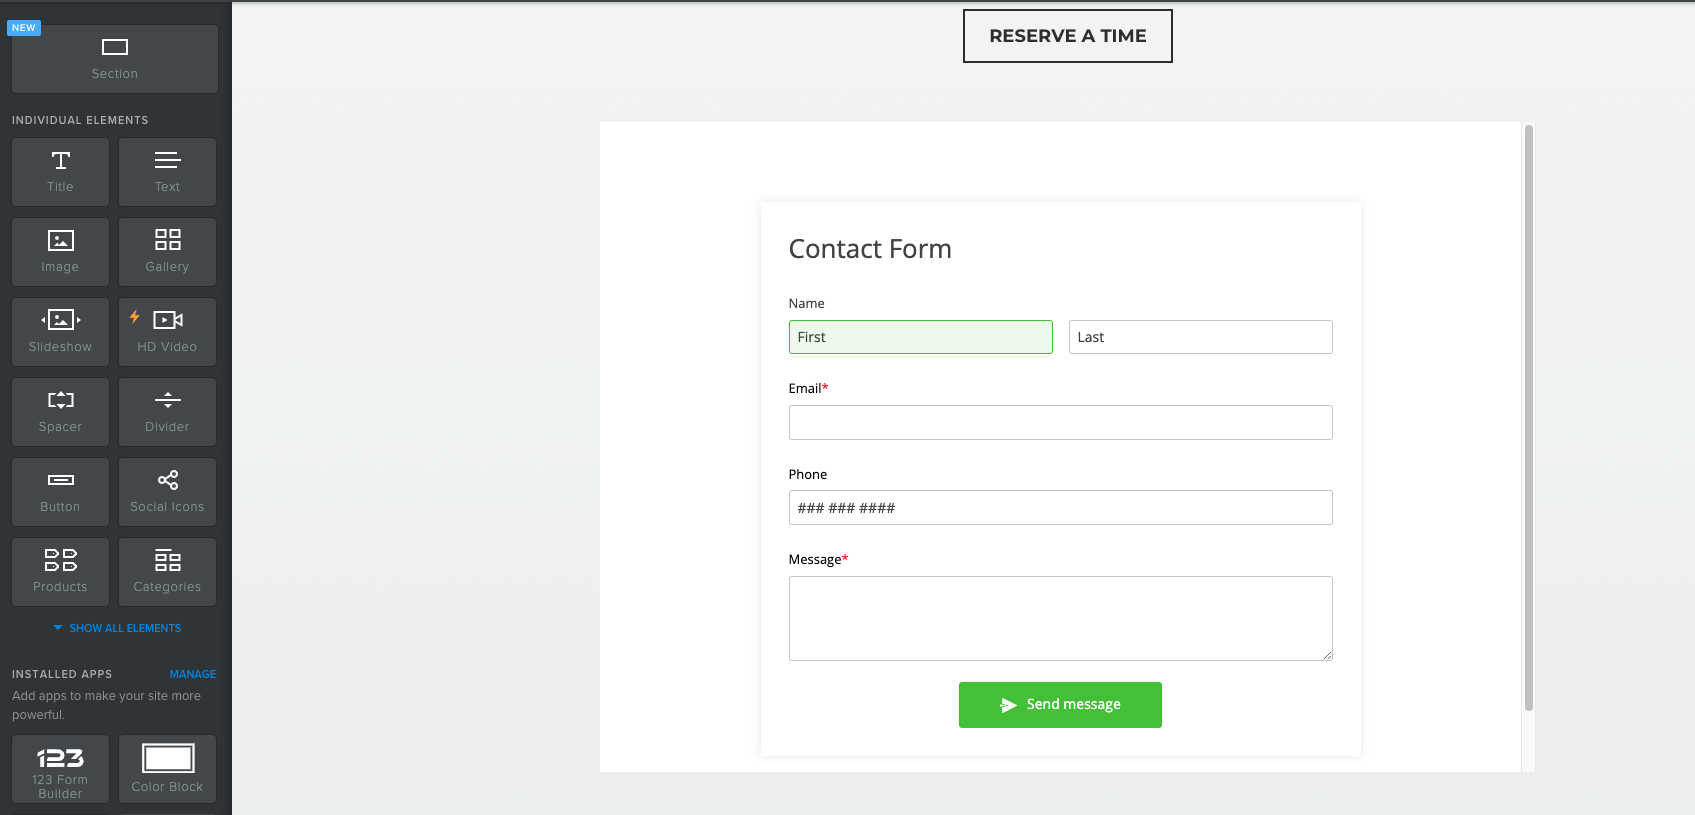
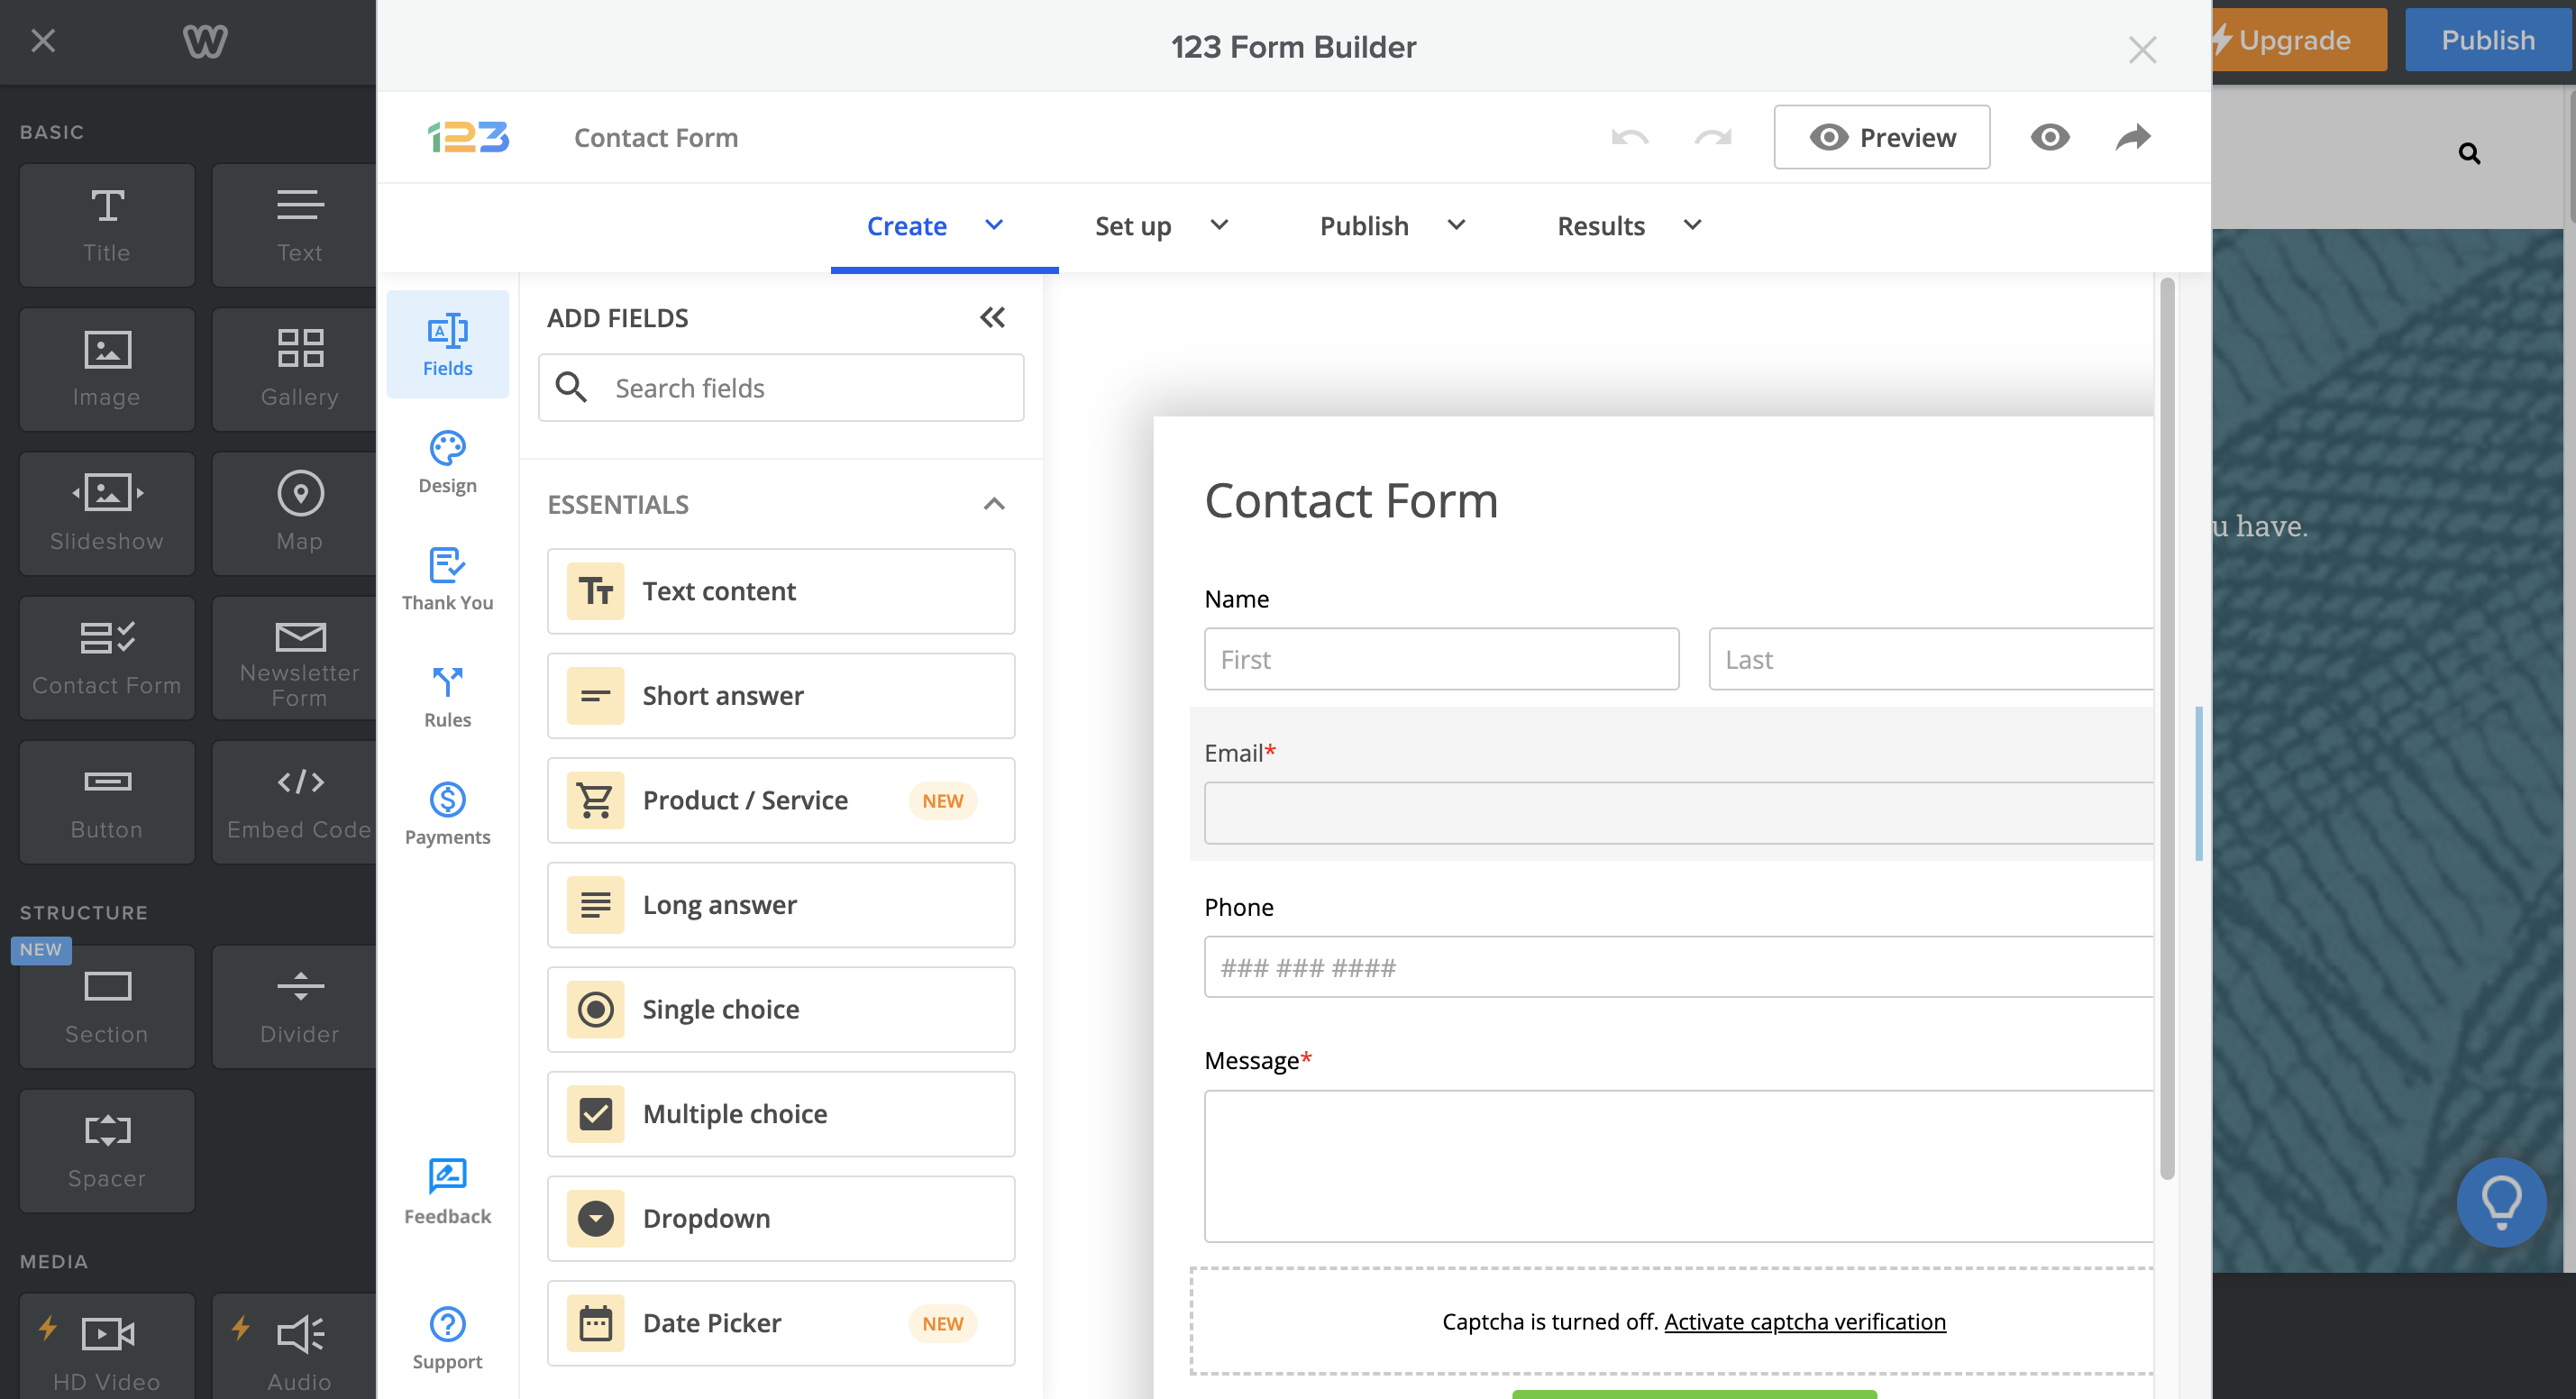
To edit the current web form, click the element and a popup will appear on the screen. This is the same interface as seen on 123FormBuilder, with the same options and features. The popup will open in Edit, where you can drag and drop fields in the layout and adjust certain options, such as form width or label placement
Finally, to publish the form on your current web page, click on the Publish icon.
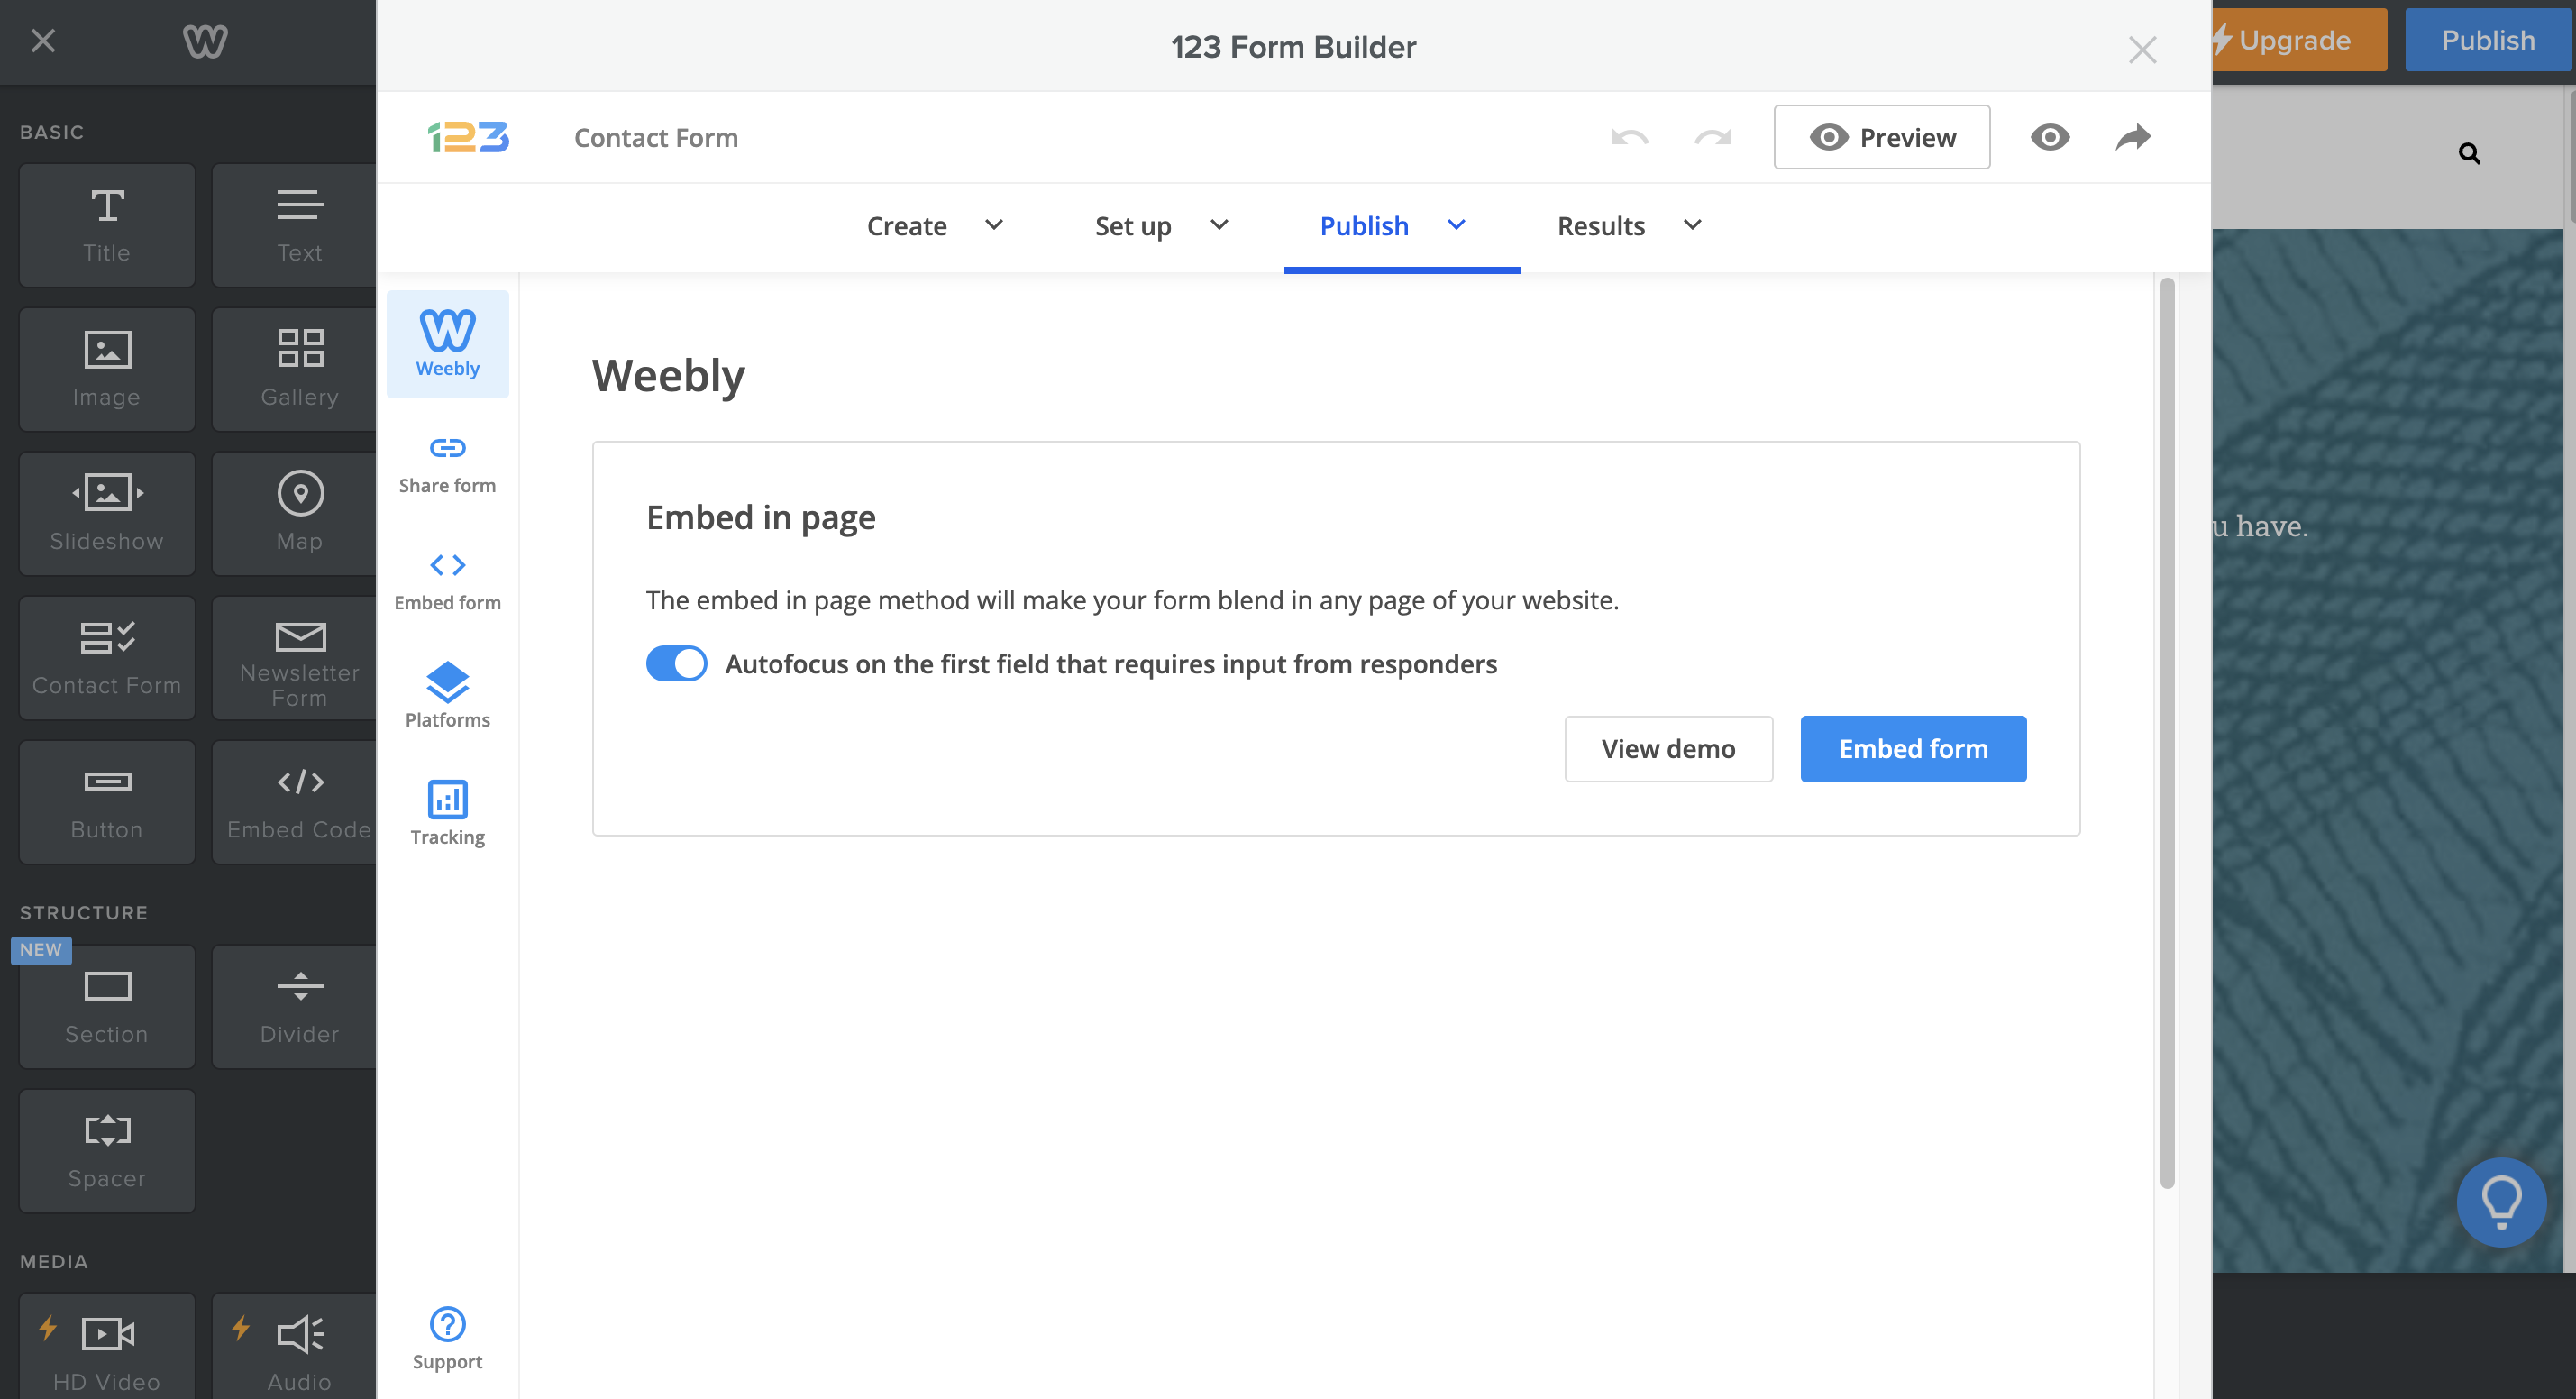
When clicking on Embed form button, you will receive a confirmation message like the one below:
Now you can close the popup and the form will appear on the web page as you’ve created it. If you want to check for submissions, open the popup again, and go to Results for some statistics and graphs.
123FormBuilder is actively taking all the measures needed to keep your form data secured. We host our data on AWS (Amazon Web Services) and store all information in data centers across the United States and the European Union on a 256-bit SSL connection. All servers are scanned on a daily basis by AWS and McAfee Security, thus preventing any type of security threats. You may read more about how we handle service security on our security page.
As for your personal data within your form builder account, all necessary precautions and measures are made to be compliant with the needed data security laws within the US and internationally in healthcare (HIPAA), and in general (Data Protection Act).
However, data protection is a responsibility shared between 123FormBuilder and you as the owner. This means that certain measures are yours to make, such as keeping your account’s password secret and not sharing it.
Security features
123FormBuilder has additional security features that you may use to secure your account, forms, submissions, and uploads as follows:
- Multi-Factor Authentication Device. Log in to your 123FormBuilder account in a two-step process with the help of your smartphone. The first step involves typing in your account username and password. The next step involves entering a secret code that your phone generates. The code resets automatically every minute. You’ll need an authentication app installed on your phone.
- Data Encryption. You may use this feature to encrypt all data obtained from your form users.
- Form Password Protection. You may password protect your forms so that people cannot open them unless they have the correct password. Good for groups that work on a certain project.
- Anti Spam Protection. Add a verification box that generates different characters below your form before the submit button. Your form visitors can’t submit the form unless they type the correct characters. Therefore, no spam can get through.
- IP Submission Limit. Limit the number of submissions you accept from the same IP. You can reset the limit by hour/day/month/year or never. This way, you may prevent the same spam messages from arriving in your submissions grid.
- Uploads Visibility. You may hide your uploads when not logged in to your account or password-protect them. This means that the files cannot be viewed or obtained via their URLs. Comes with three options: public, show only after entering the password or show only when logged in the same browser.
We are also compliant with the UETA and ESIGN Acts when it comes to using the Digital Signature field on your forms.
Important Note
If you are a paying user, you benefit from a full recovery of your forms and submissions in case you deleted them from your account while the subscription was active. We can restore your data, but only within a 30 day period from the day the deletion occurred. Older deleted data is erased from our servers for better optimization.With our form builder, you can manage your submissions as you see fit in the Submissions section and export them to CSV or Excel (.xlsx format). Exporting your submissions to CSV is explained in this article. Below we will explain how to export your form submissions to Excel, as follows:
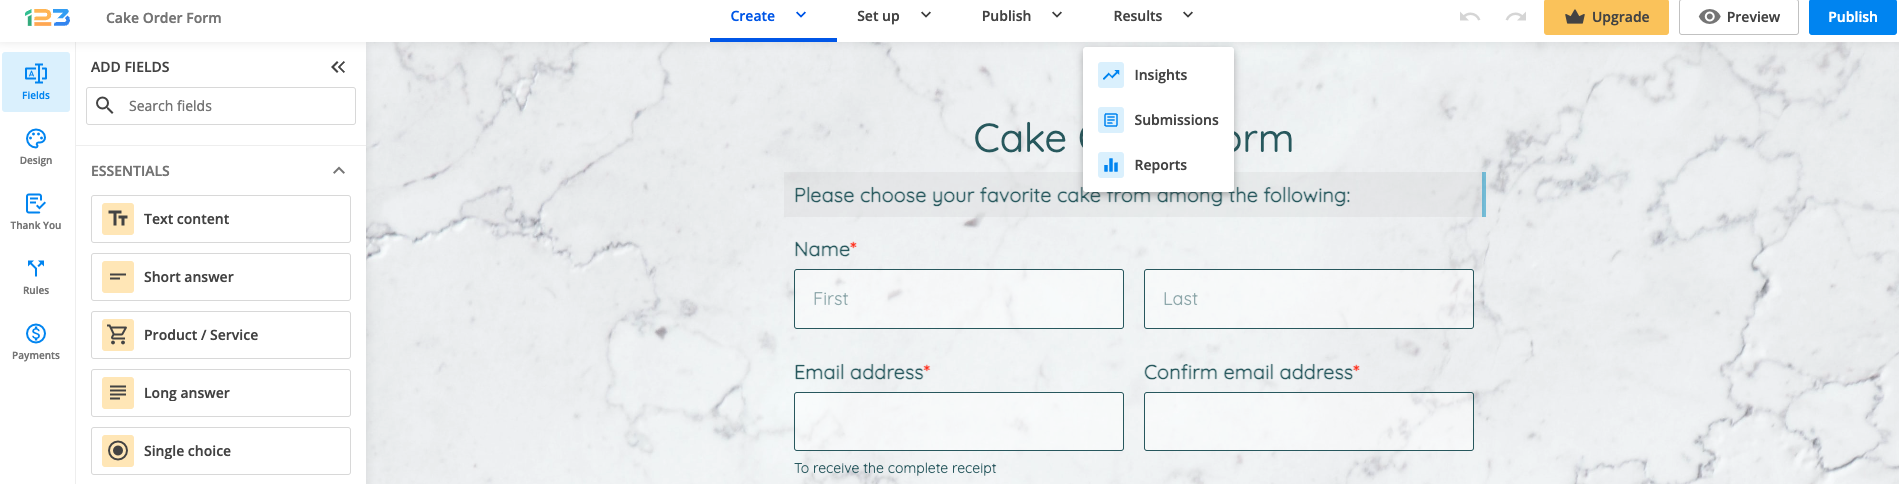
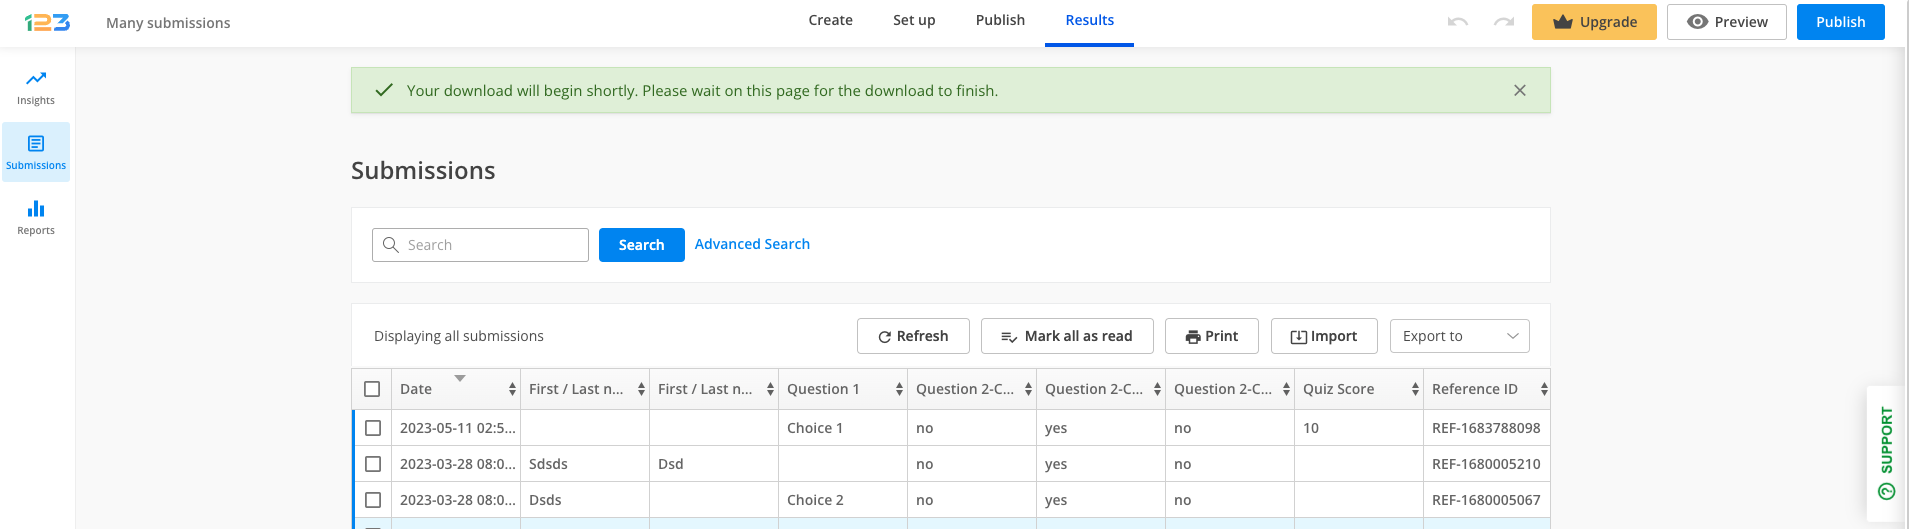
1. Once logged in to your 123FormBuilder account, select the desired form to open its Form Editor. Afterward, click on the Results button to access the Submissions section.
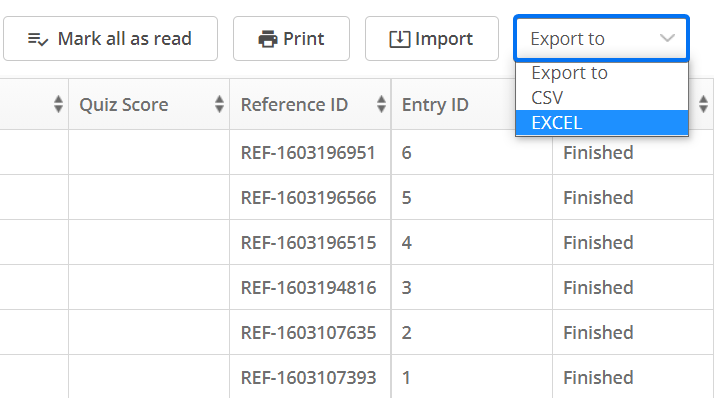
2. Use the dropdown on the top right side of the submissions table and select Excel.
3. A lightbox will pop up on the screen where you can type the email address where the download will be sent to. By default, the email address associated with your 123FormBuilder account will receive the download. You may opt to include or exclude the table header by checking the box.
We do not send the excel file in the content of the email, but the link from where you can download it. This is a measure to secure your data.
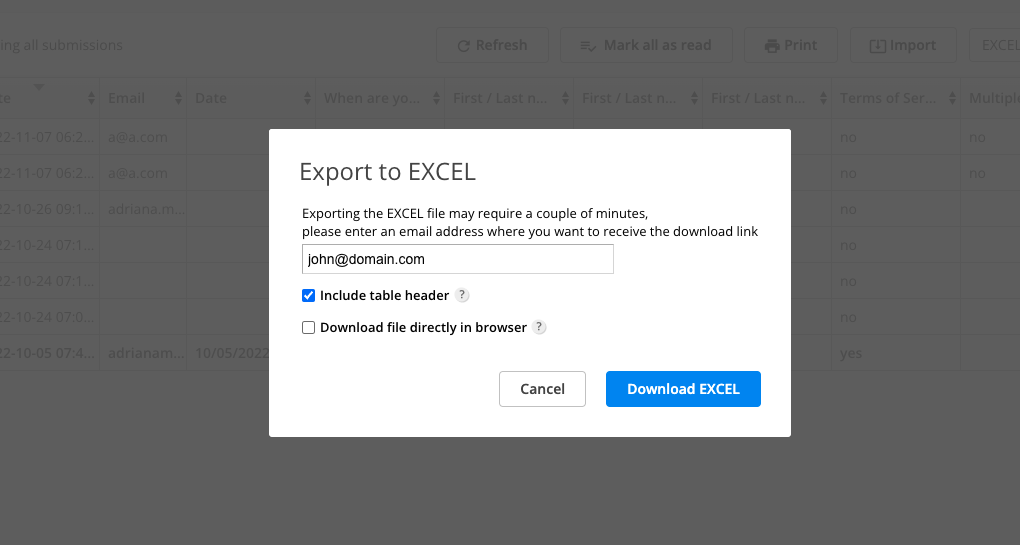
Another option of exporting your Excel/CSV file is to Download file directly in browser. If you check this option, your file will be downloaded directly in browser and not sent via email.
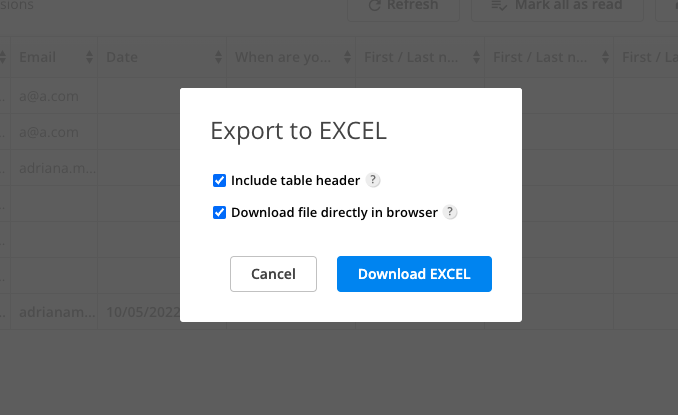
4. Press Download EXCEL and wait for the email that contains the downloadable link. If you checked Download file directly in browser, then a banner will be shown at the top of the page and the file will automatically download in that page.
If you have problems receiving emails from 123FormBuilder, try creating a whitelist in your email client, as explained in our documentation here.
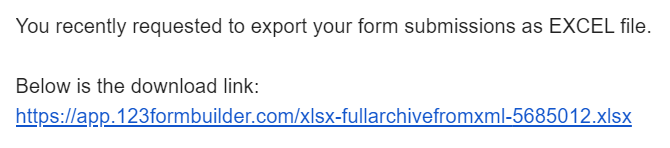
Finally, the email with your Excel export will look as in the image below.
Important Note
In order to be able to download the .xlsx file, you need to be logged in to your email account and 123FormBuilder account in the same browser.ActiveCampaign is a web-based automated marketing platform. It helps users to increase the conversion rate of their marketing and sales processes.
With the 123FormBuilder – ActiveCampaign integration, you can create fully customized professional web forms with our form builder and integrate them with your ActiveCampaign account to receive leads through form submissions. These leads are sent to a mailing list of your choice. But without further ado, here’s how you enable this integration on your web forms at 123FormBuilder.
Setting up the ActiveCampaign integration
1. Select the online form that you want to integrate into your ActiveCampaign account. You’ll find all your forms listed in the My Forms section.
2. Afterwards, go to Integrations and search form ActiveCampaign using the search bar.
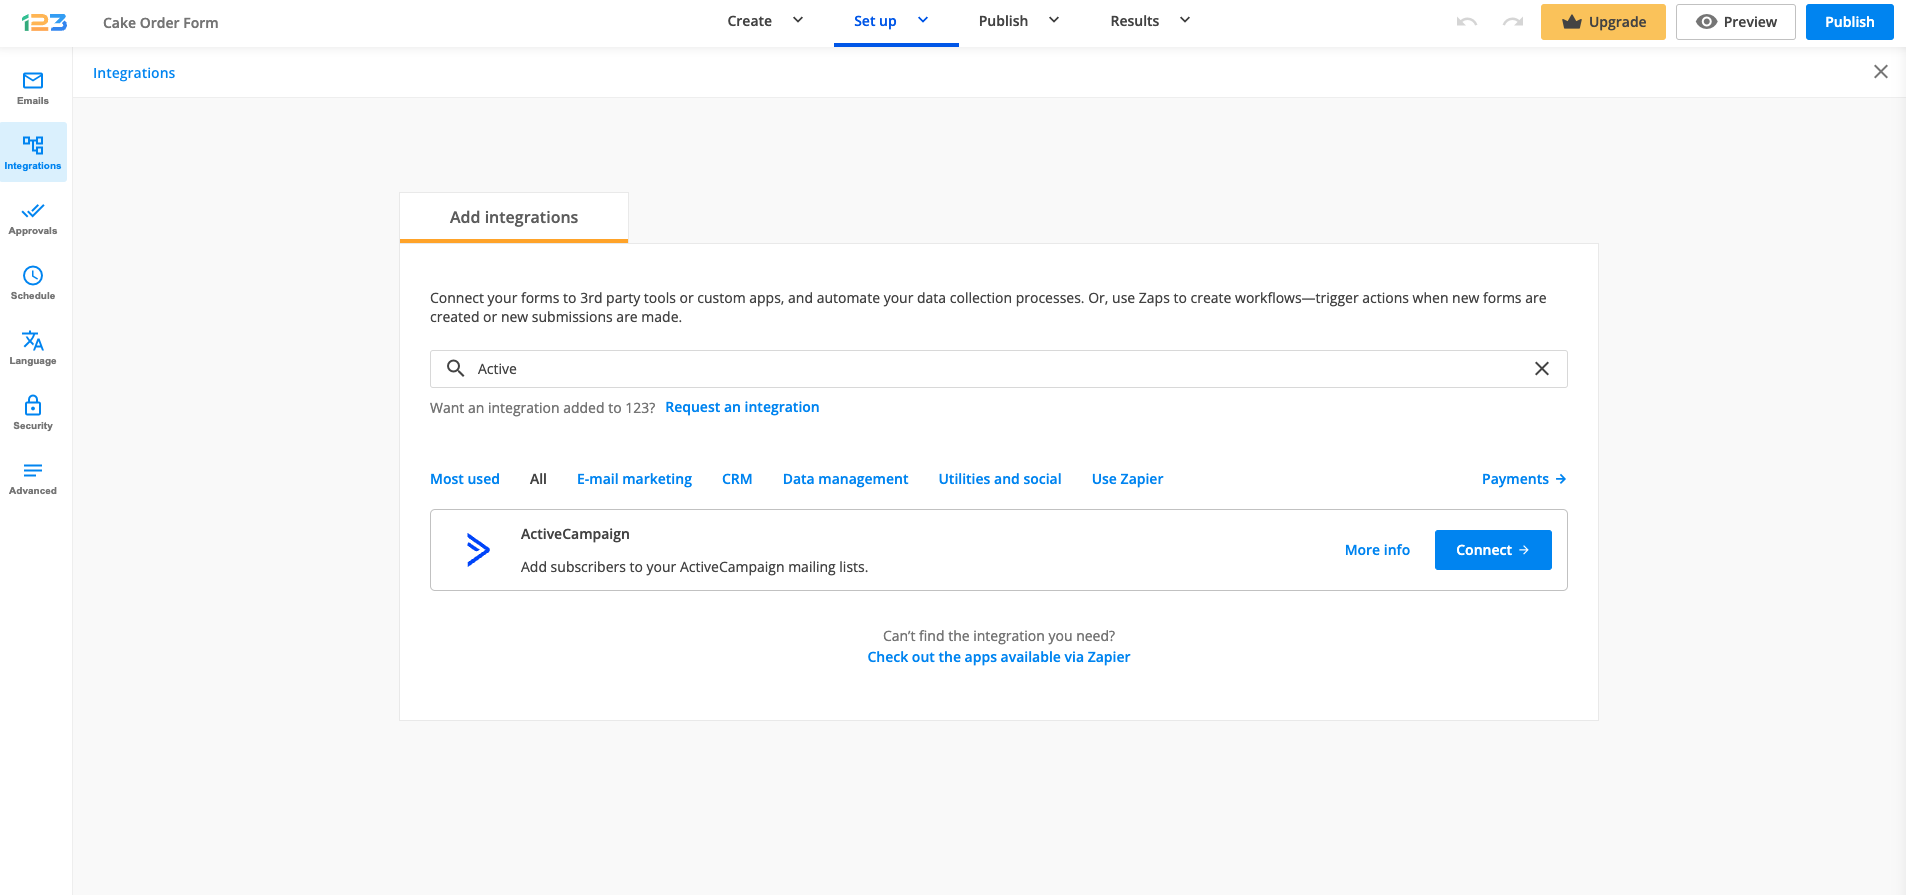
3. Hover over the logo and use the Add button to add the app to your form.
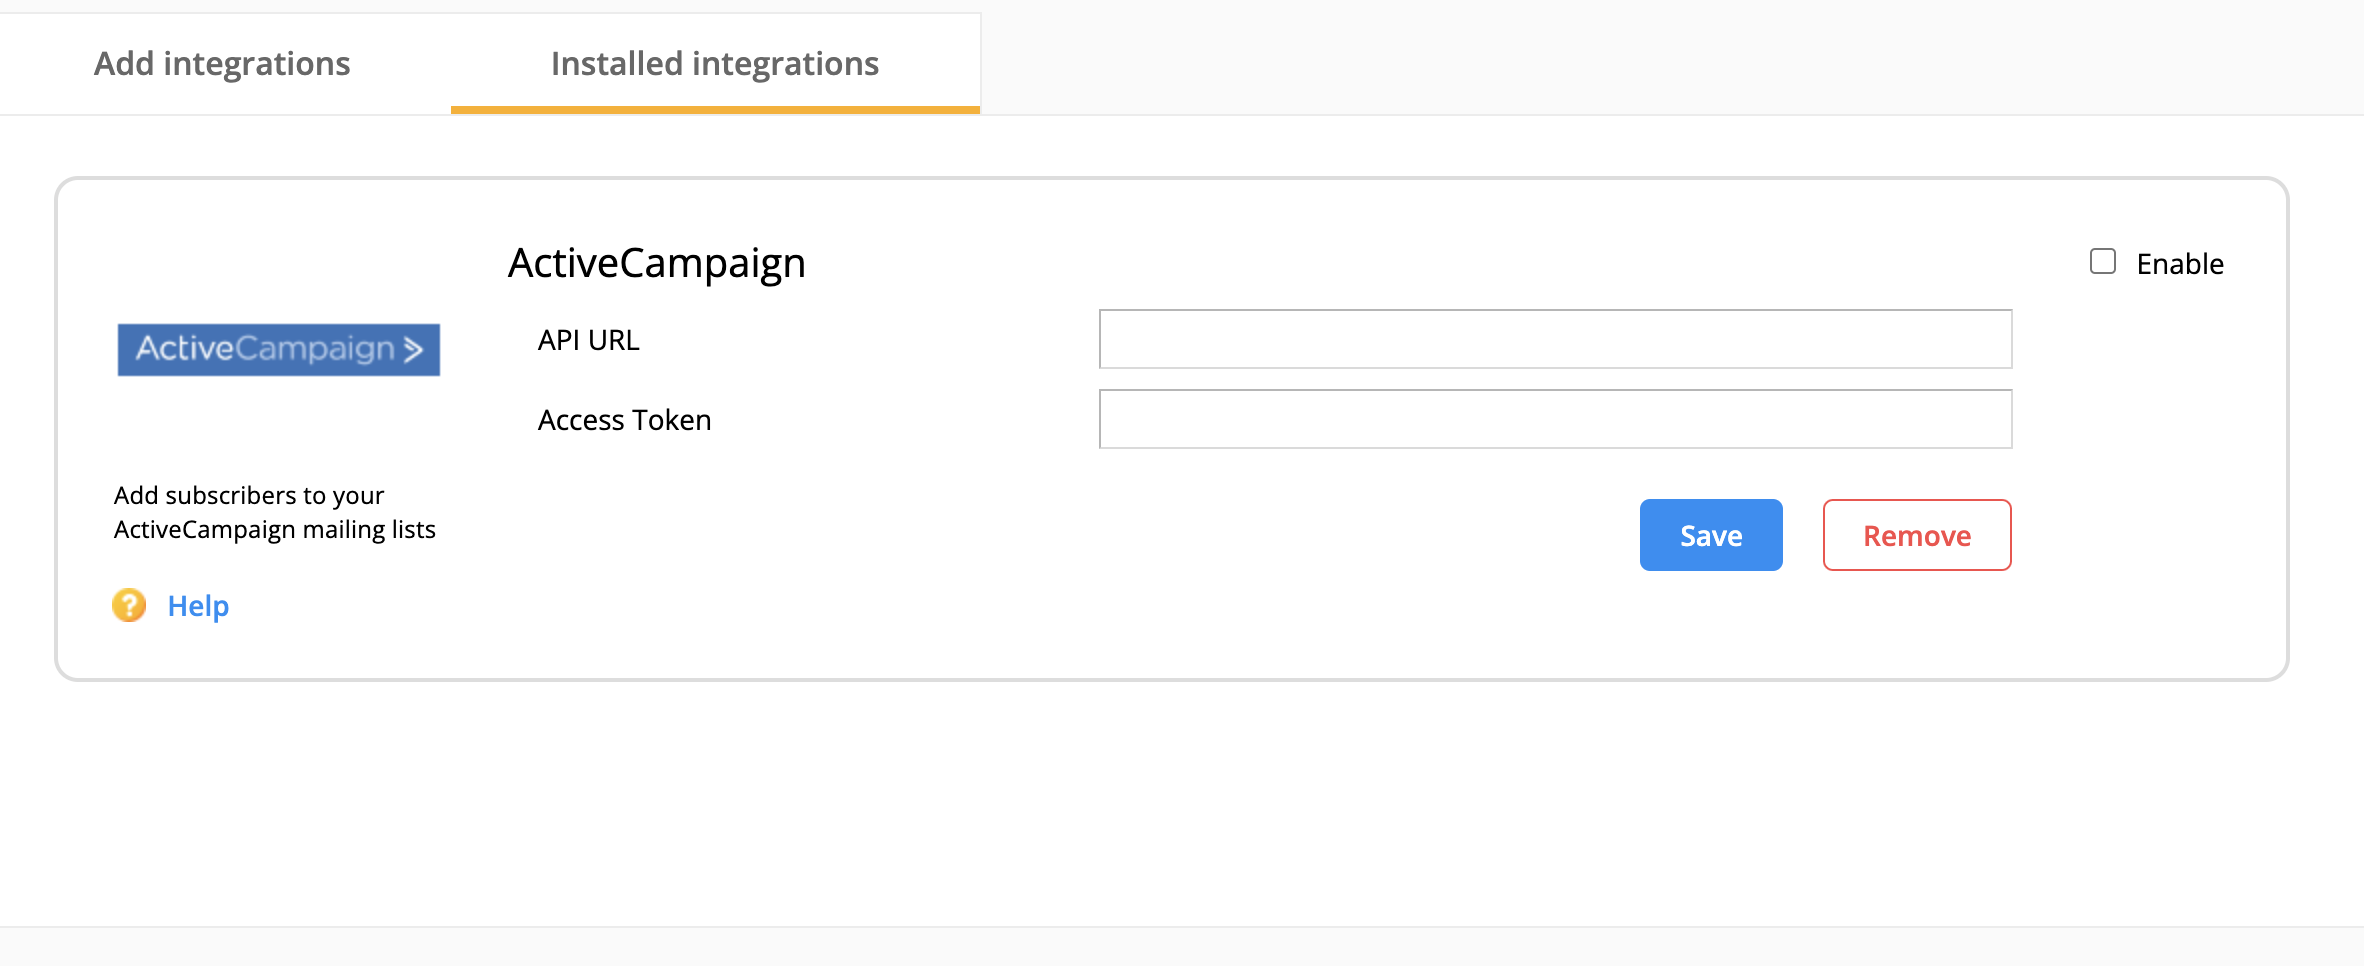
4. In the app box, enter the API URL and Access Token of your ActiveCampaign account. Don’t know where to find them? Log into your ActiveCampaign account and go to Settings → Developer. You’ll find the API URL under URL and the Access Token under Key.
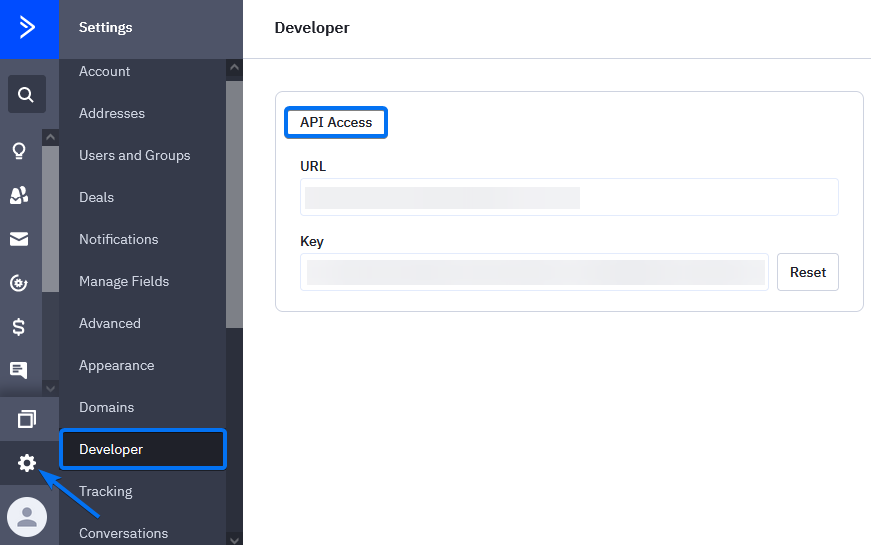
Copy them both and paste them in the ActiveCampaign app on 123FormBuilder, where needed.
5. Next, click Save and wait for the customization lightbox to pop up on the screen.
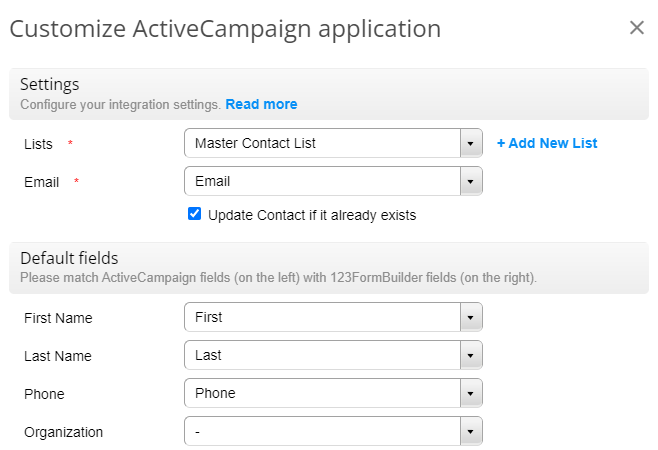
6. This is the customization phase of the integration. Select the list where you want to create your leads upon submission and associate the Email field of your form. Make sure the Email field is required otherwise the submission will not be sent to ActiveCampaign. You can update your contacts by checking the designated option, under email.
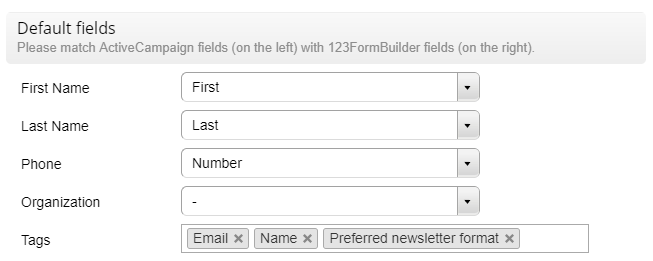
7. In Default Fields, associate fields and add tags, if needed. Tags can be the labels of the fields, but you may also type them in the input box and separate them by a comma.
8. The error handling step is just to track errors from certain submissions. In case a submission fails to create a contact in your ActiveCampaign list, you will be notified by email. You may change the email address to any other address you want.
9. Once you have finished setting up your integration, click Save and you’re done. Each form submission will create a contact in your ActiveCampaign list.
To prevent form submissions from being flagged as spam in your Zendesk account, you’ll need to create a white list and add the 123FormBuilder domain. By doing this, all form data will be successfully saved in Zendesk as intended. To create a white list, log in to your Zendesk account and go to Admin → Settings → Customers.
Under end-users (customers), click the Whitelist box and type in our domain: 123formbuilder.com
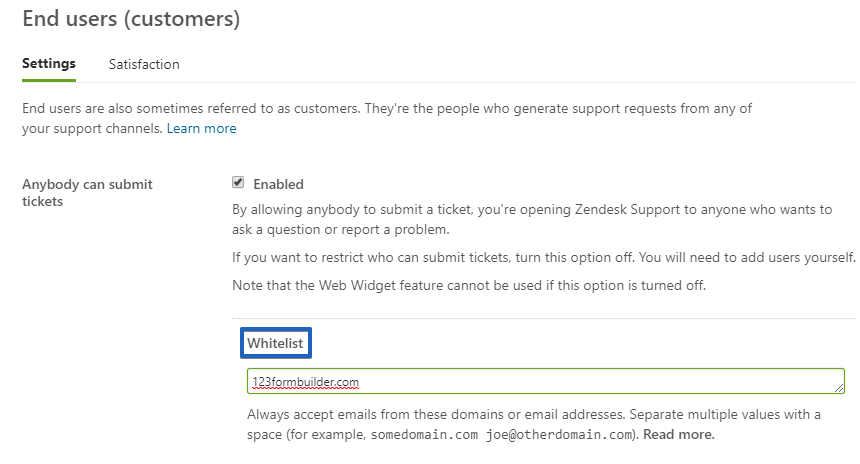
Next, scroll down and press the Save tab. And that’s it! From now on, you will no longer lose tickets or other submissions that were submitted on your web forms.
This integration has been deprecated. If you need to integrate your 123FormBuilder form with Keap, you can always achieve this through a Zapier integration.
You can create new contacts in your Keap account (formerly Infusionsoft) through form submissions, but only if you use Zapier as the tool that will connect the two platforms. It’s quite simple. You’ll just need a Zapier premium account.
To integrate 123FormBuilder with Keap, follow the steps below:
1. Log into your form builder account and open your form.
2. Head over to Applications.
3. At the bottom, click on the 123FormBuilder hyperlink.

4. Search for Keap to create the connection.

3. Choose the triggers and click on Connect 123FormBuilder + Keap Max Classic.

4. Connect your 123FormBuilder account.

5. Select your form from the dropdown list.

6. Pick a sample to set up your Zap (make sure to have at least one submission made on your form).
7. Connect your Keap account and choose an action.

8. Match the form fields with the ones from Keap.

9. Press continue and, finally, test out the connection.
Keep in mind that the Basic free plan allows only 100 API calls per day. If you need to create more API calls, you’ll need to upgrade your account. Starting with the Gold plan, you can make unlimited API calls.
Web forms can be easily published in the content of your One.com web pages. With 123FormBuilder, a supercharged online form maker you can create powerful web forms in minutes and have them published with different methods. In this guide, we will show you how to embed your web forms in your One.com built website.
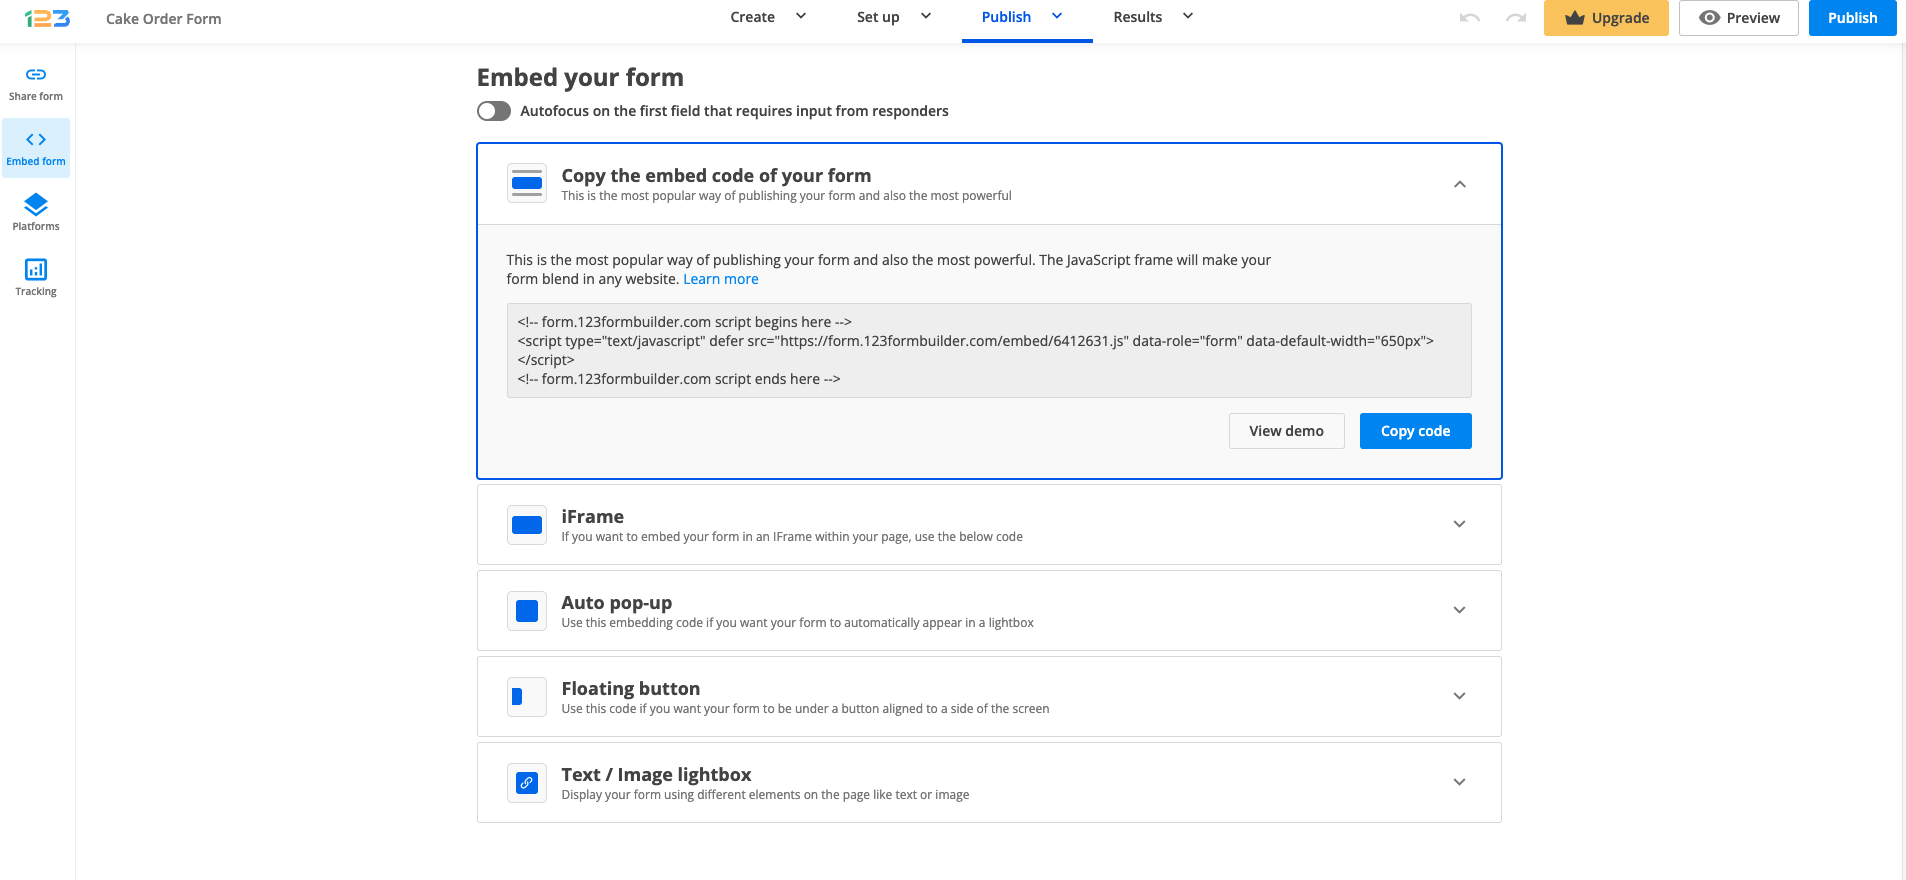
Log in to your 123FormBuilder account, select the form you want to publish in My Forms, go to the Publish → Embed form section and copy the Javascript code. We recommend the JavaScript option for embedding your form, so you will not be required to republish the form each time it’s edited.
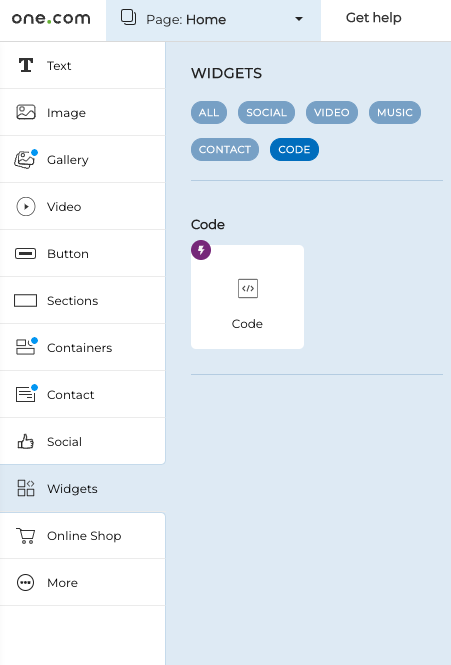
After you have selected your website and the web page where you want the form embedded. In the menu on the left, click on Widgets and select Code.
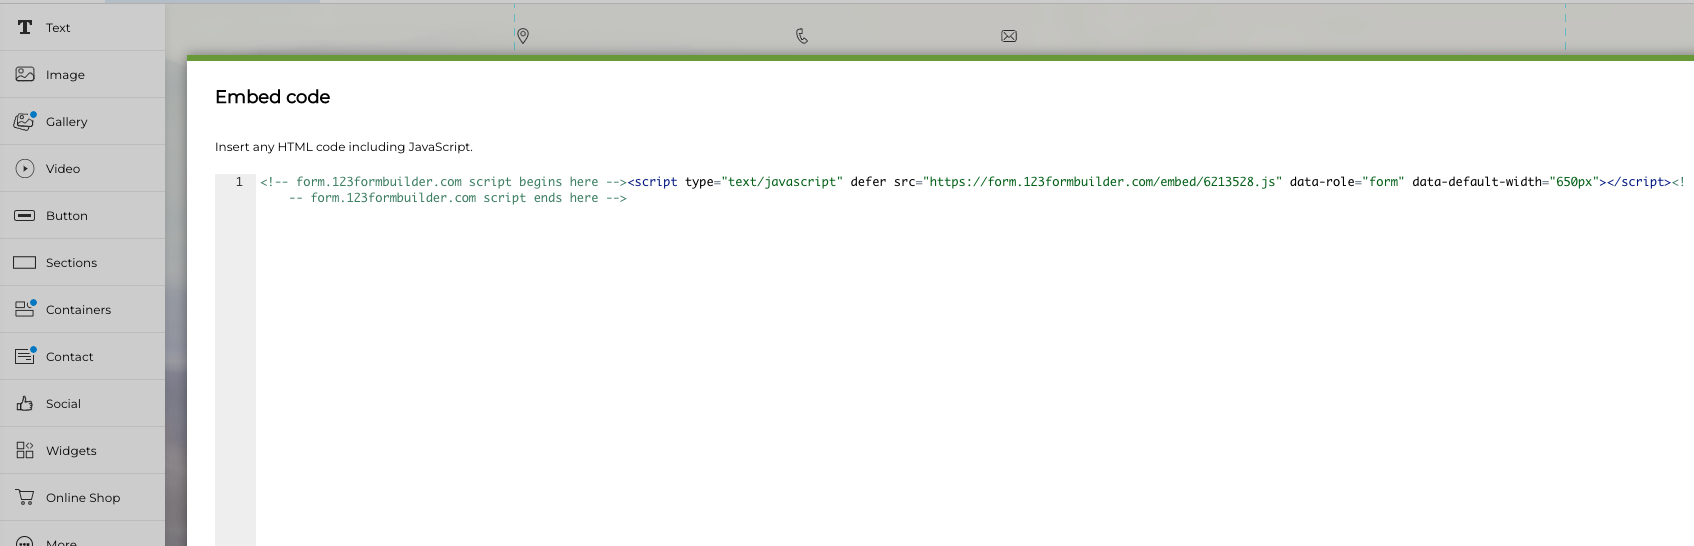
Here you will have to paste the JavaScript code of your form and hit the Save button.
Adjust the size of the component on the page, if needed, and don’t forget to save your web page. Use the preview mode to see how your form is displayed on the web page. From now on, you can receive submissions from your One.com website.
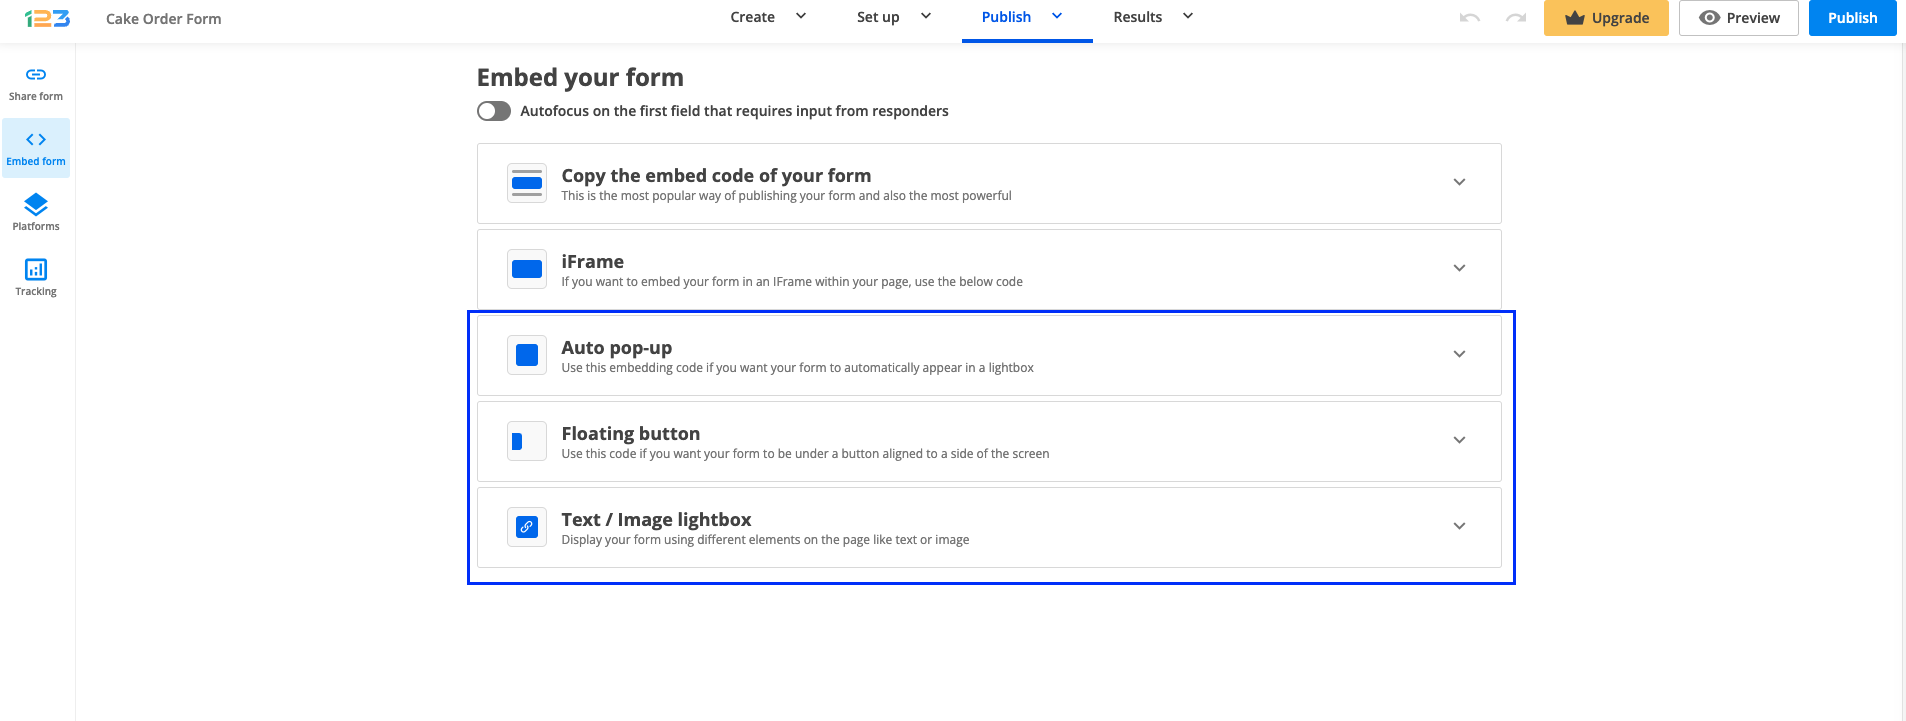
If you want to add the form in a lightbox, instead of selecting the Embed form tab in the Publish section of your form on 123FormBuilder, and you can choose from Auto pop-up, Floating button and Text/Image lightbox. Copy the code that suits your needs best from the four available options and repeat the steps above.
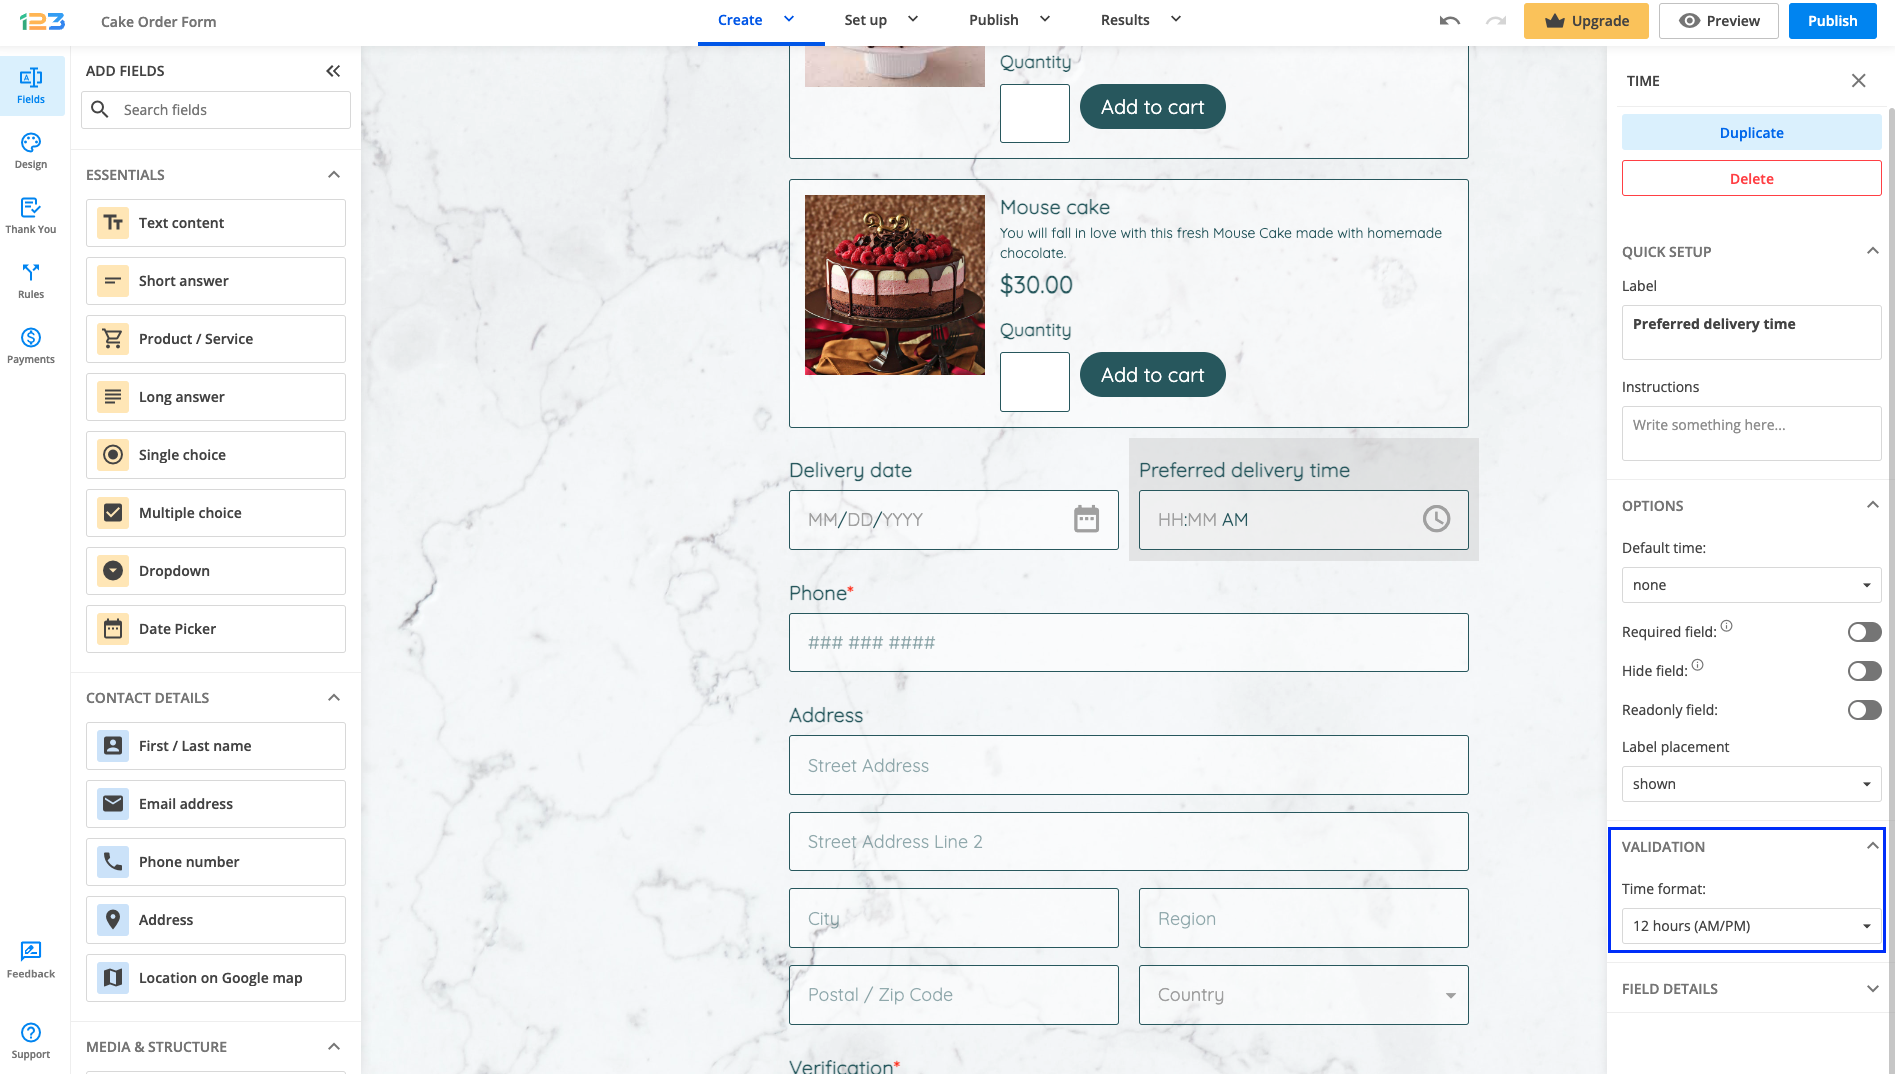
The Time field can have two different time formats: 12-hour or 24-hour format If you want to change the format, access the form builder and all you have to do is to select the Time field added on the form. In the left side panel, under the Validation section, you will find the Time format option. If you select the 12-hour format, respondents can choose between AM and PM by using the clock icon inside the field.
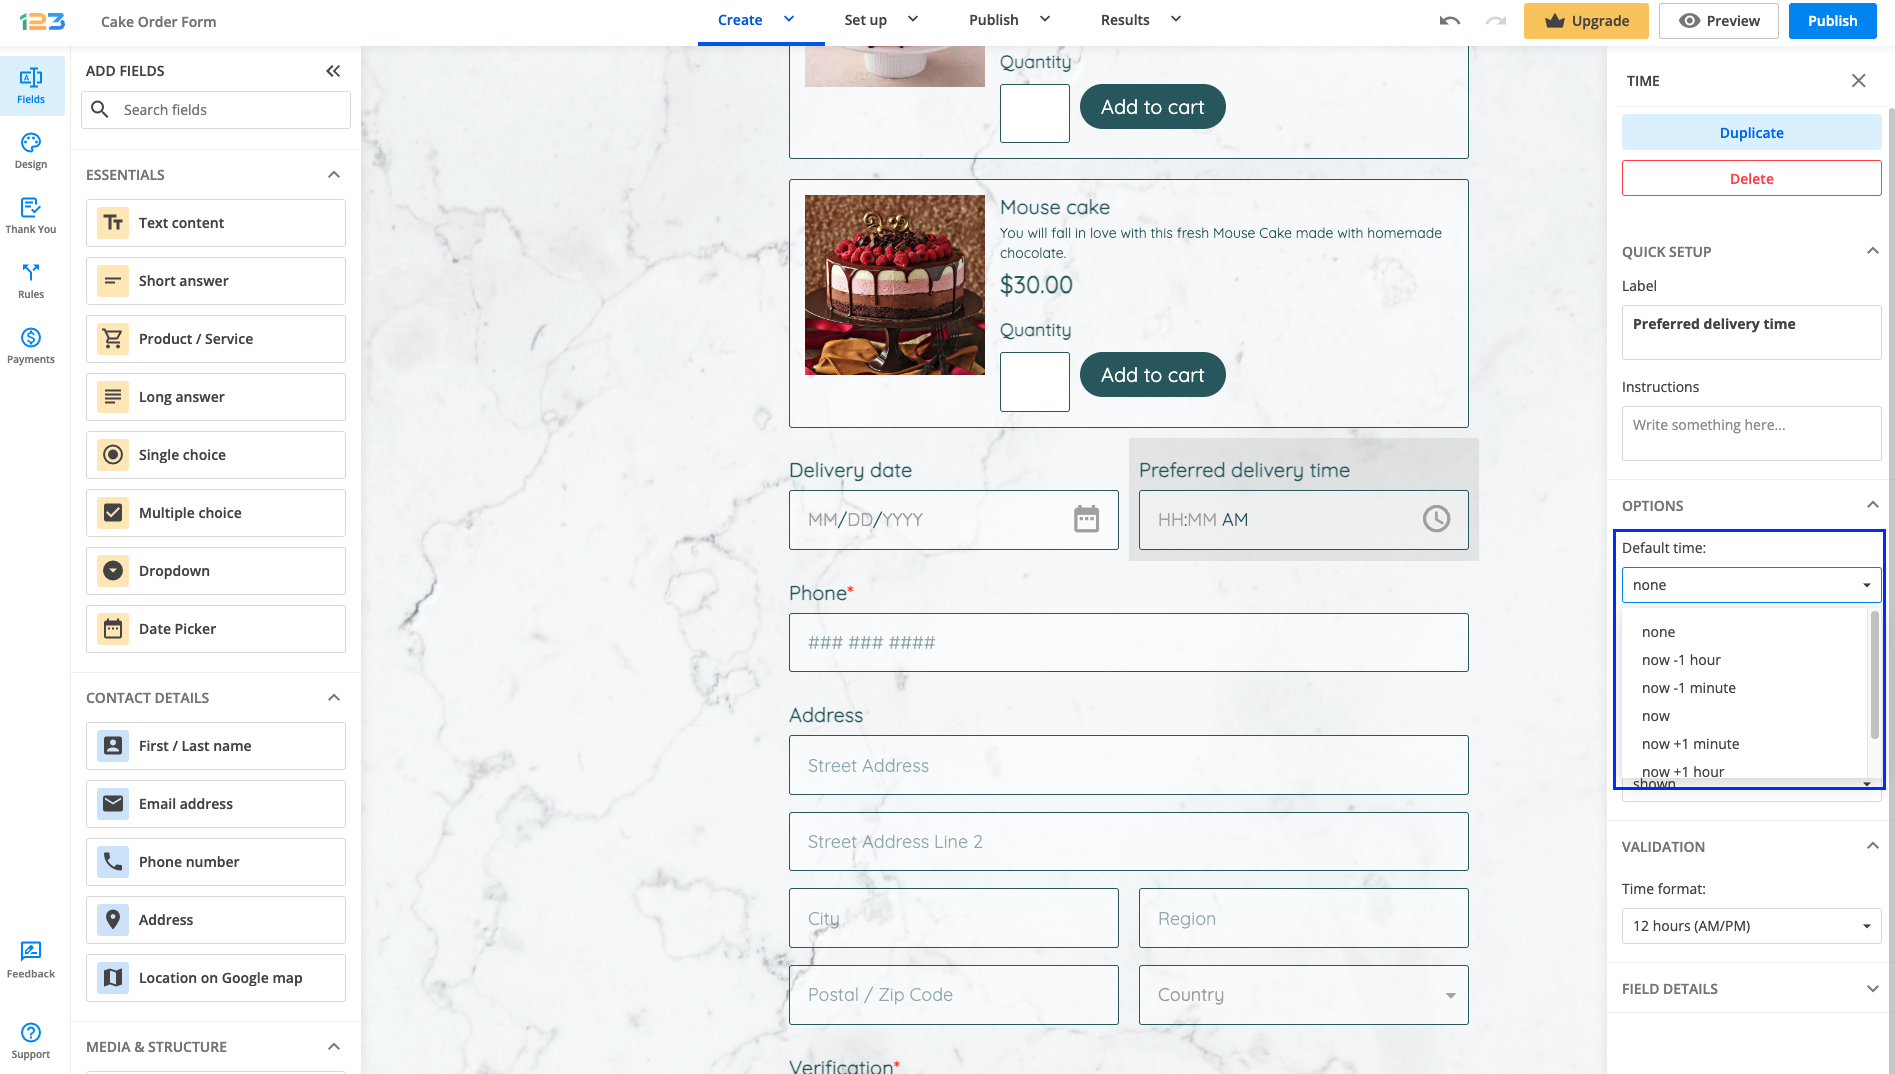
Under the Options section, you can set a default time for your form. The now option will automatically fill in the current time the form is being filled in by your respondents.
Most Popular
Frequently Asked Questions
Here is a list of the most frequently asked questions. For more FAQs, please browse through the FAQs page.