123FormBuilder Knowledge Base
Search our documentation platform for answers, service specifications and 3rd-party integrations.
[AppExchange – 123FormBuilder] Data sources in Object Mapping
The Object Mapping section allows you to automatically send data to Salesforce when a form is submitted, based on a previously defined setup.
When an object is added, all of your Salesforce fields are available to be used in the mapping. For each Salesforce field from the left, you can choose, on the right side, the form fields that have a validation matching the Salesforce data type, as well as a few other sources for the data.
In this article we will explain which other data sources can be used in a mapping:
- Custom values (with/without form fields as variables);
- Alternative values (for picklist fields);
- Salesforce values (for picklist fields);
- Lookup & Query result (Salesforce values which can be looked up/queried in advance);
- Lookup Relationship (record IDs of other mapped objects).
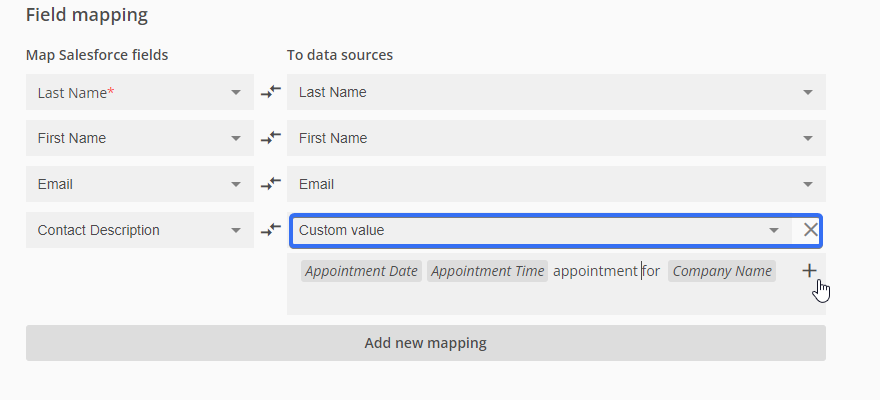
Custom values
Custom values are a great way to send to SF fields a predefined text, a description or user input from multiple form fields. By clicking the plus sign you can add multiple field variables.
An example would be sending the date and time field into a single SF field.
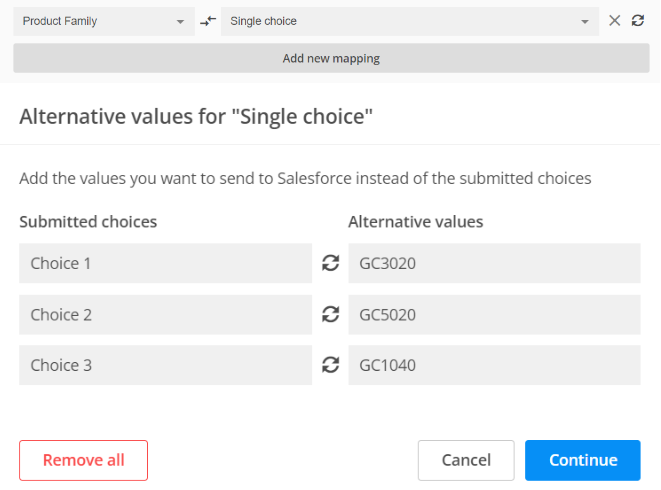
Alternative values
This option is available only for choice fields and allows sending a specific value that is different from what’s selected on the form.
E.g.: The choices on the form will list the Products as “GenWatt 100kW, GenWatt 300kW, GenWatt 200kW”, but in Salesforce the Products are listed as “GC3020, GC5020, GC1040”.
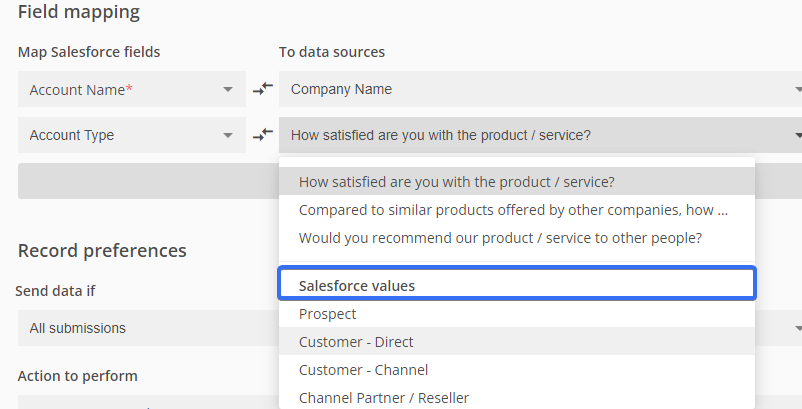
Salesforce values
This option is available for picklists and will list the values which exist in Salesforce.
Use this data source when the same value needs to be sent for all submissions and the value doesn’t depend on what the form visitors choose on the form.
Examples:
- Status = “New” for any Ticket created via the form or
- Account Type = “Prospect” for all accounts created via the form, etc.
Lookup or Query results
The returned values from lookups and queries can be used in the object mappings.
This requires setting up a Lookup or Query prior to the mapping.
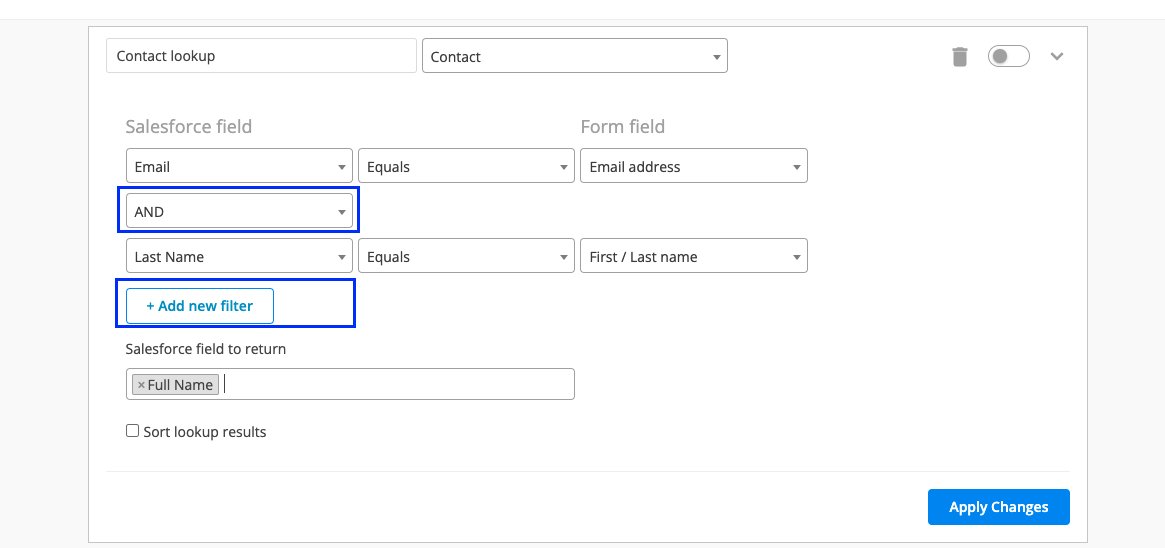
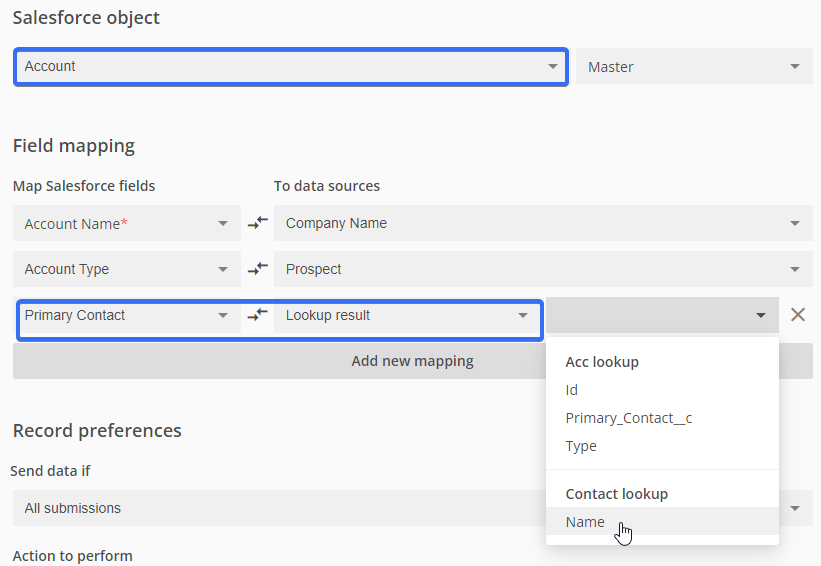
E.g.: Imagine sending to Account a value from the Contact object. Let’s say we want to send contact Name to the Primary contact field of an Account (as text, not as lookup, in this example).
First step is setting up the Contact lookup to get the contact name based on a filter. You can add multiple filters by clicking on Add new filter button.
Note: currently the AND/OR logic operators are exclusive -> if AND operator is chosen, all the logic operators between the filters are set to AND. If you change one logic operator to OR, all of them will be changed to OR automatically. We are currently working on bringing improvements to this area by allowing you to set up multiple filters with AND and OR logic operators combined.
Then, the last step is to create the Account mapping and use the lookup result for the Primary contact:
Lookup relationship
This option makes it possible to easily relate records from different objects that are created via the same submission.
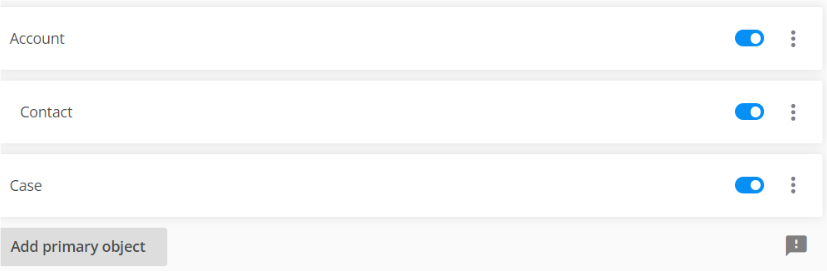
E.g.: Let’s take this scenario – when the form is submitted, based on the setup, it will create an Account, a Contact and a Case. We want the Case to be related to the Contact and the Account.
To achieve this, we go to the Case mapping → search for the Contact ID/Account ID SF field → map it to Lookup Relationship → choose the Contact/Account:
In Lookup relationship, you can identify the object mapping you want to use by the object mapping name that you’ve given to that object mapping.

Was this useful?
Learn more from related articles:
Similar Articles
Frequently Asked Questions
Here is a list of the most frequently asked questions. For more FAQs, please browse through the FAQs page.