123FormBuilder Knowledge Base
Search our documentation platform for answers, service specifications and 3rd-party integrations.
Knowledge Base
123FormBuilder is an Authorize.net certified solution, so you can easily integrate Authorize.net with your form. This means you can trust our form builder to receive money in your Authorize.net account from your clients through form submissions.
Setting up your Authorize.net integration
1. Click New Form from your account dashboard and start creating your payment form.
You can use choice fields (Single/Multiple choice and Dropdown lists) to display the products on sale or, even better, the Product field.
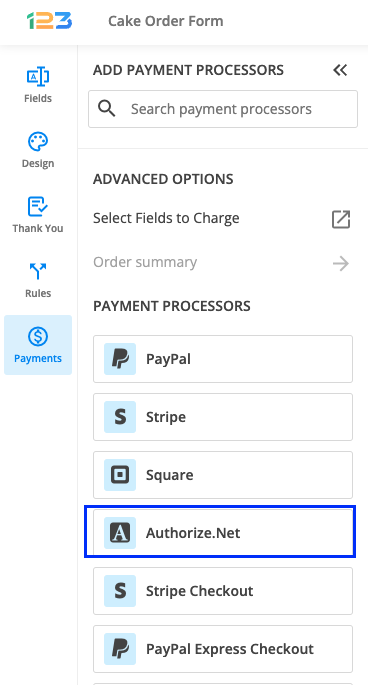
2. In your Form Editor, in the left side panel, you will notice the Payments section. By using the search bar, you can quickly find Authorize.net.
3. After adding Authorize.net to your form, you will notice a couple of changes: the Authorize.net payment processor has a tag near its name and the settings panel opens up to the right side of the page.
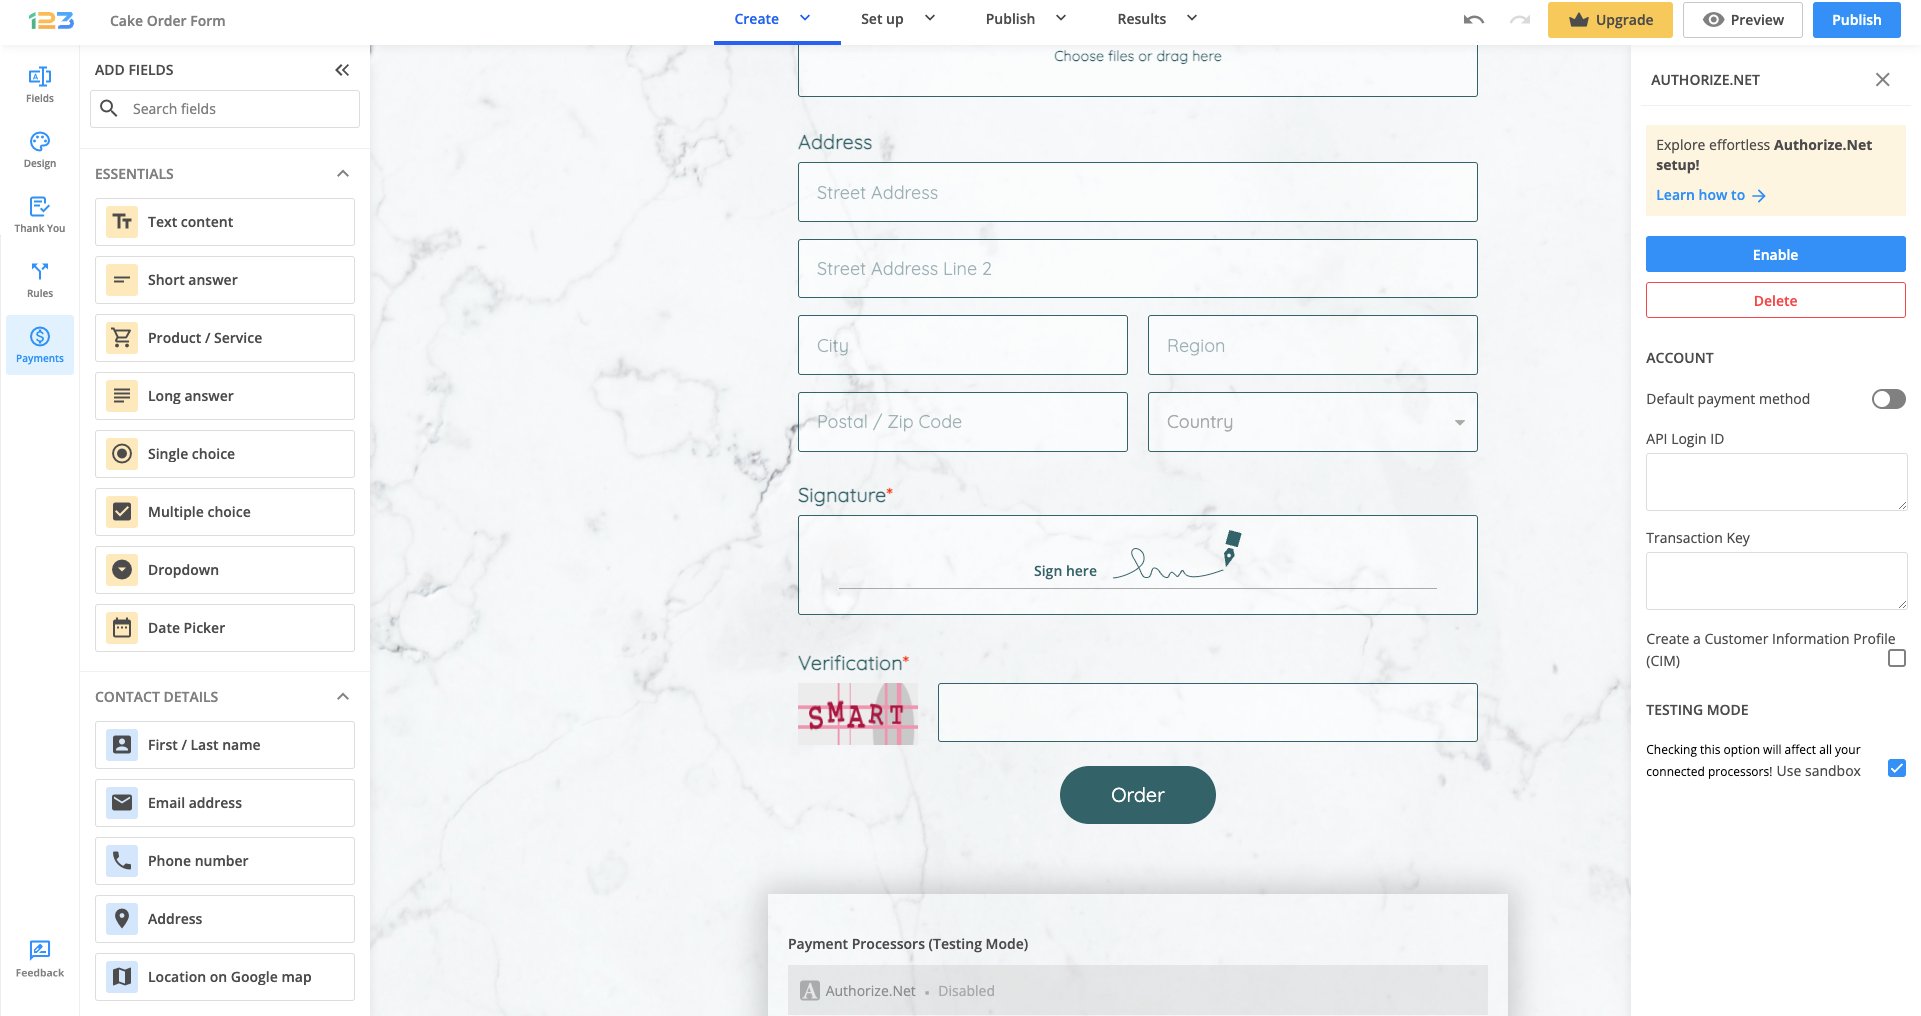
4. In order to set up the Authorize.net integration, you have to enter the API Login ID and Transaction Key.
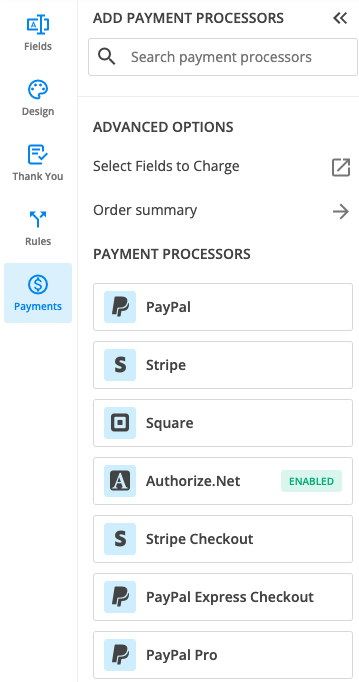
5. Lastly, click on the Enable button to turn on the payment integration. By enabling Authorize.net, you will notice a couple of changes on your form.
The Authorize.net payment processor on the left side panel has an Enabled tag on it. This way, you can easily scan which payment processor is enabled on your form.
Another change is that an Order summary will show up on your form. This will display all the products selected by your respondents, together with the price per option, quantity, and total price. To customize the Order summary, simply click on it and the available settings appear on the right-side panel.
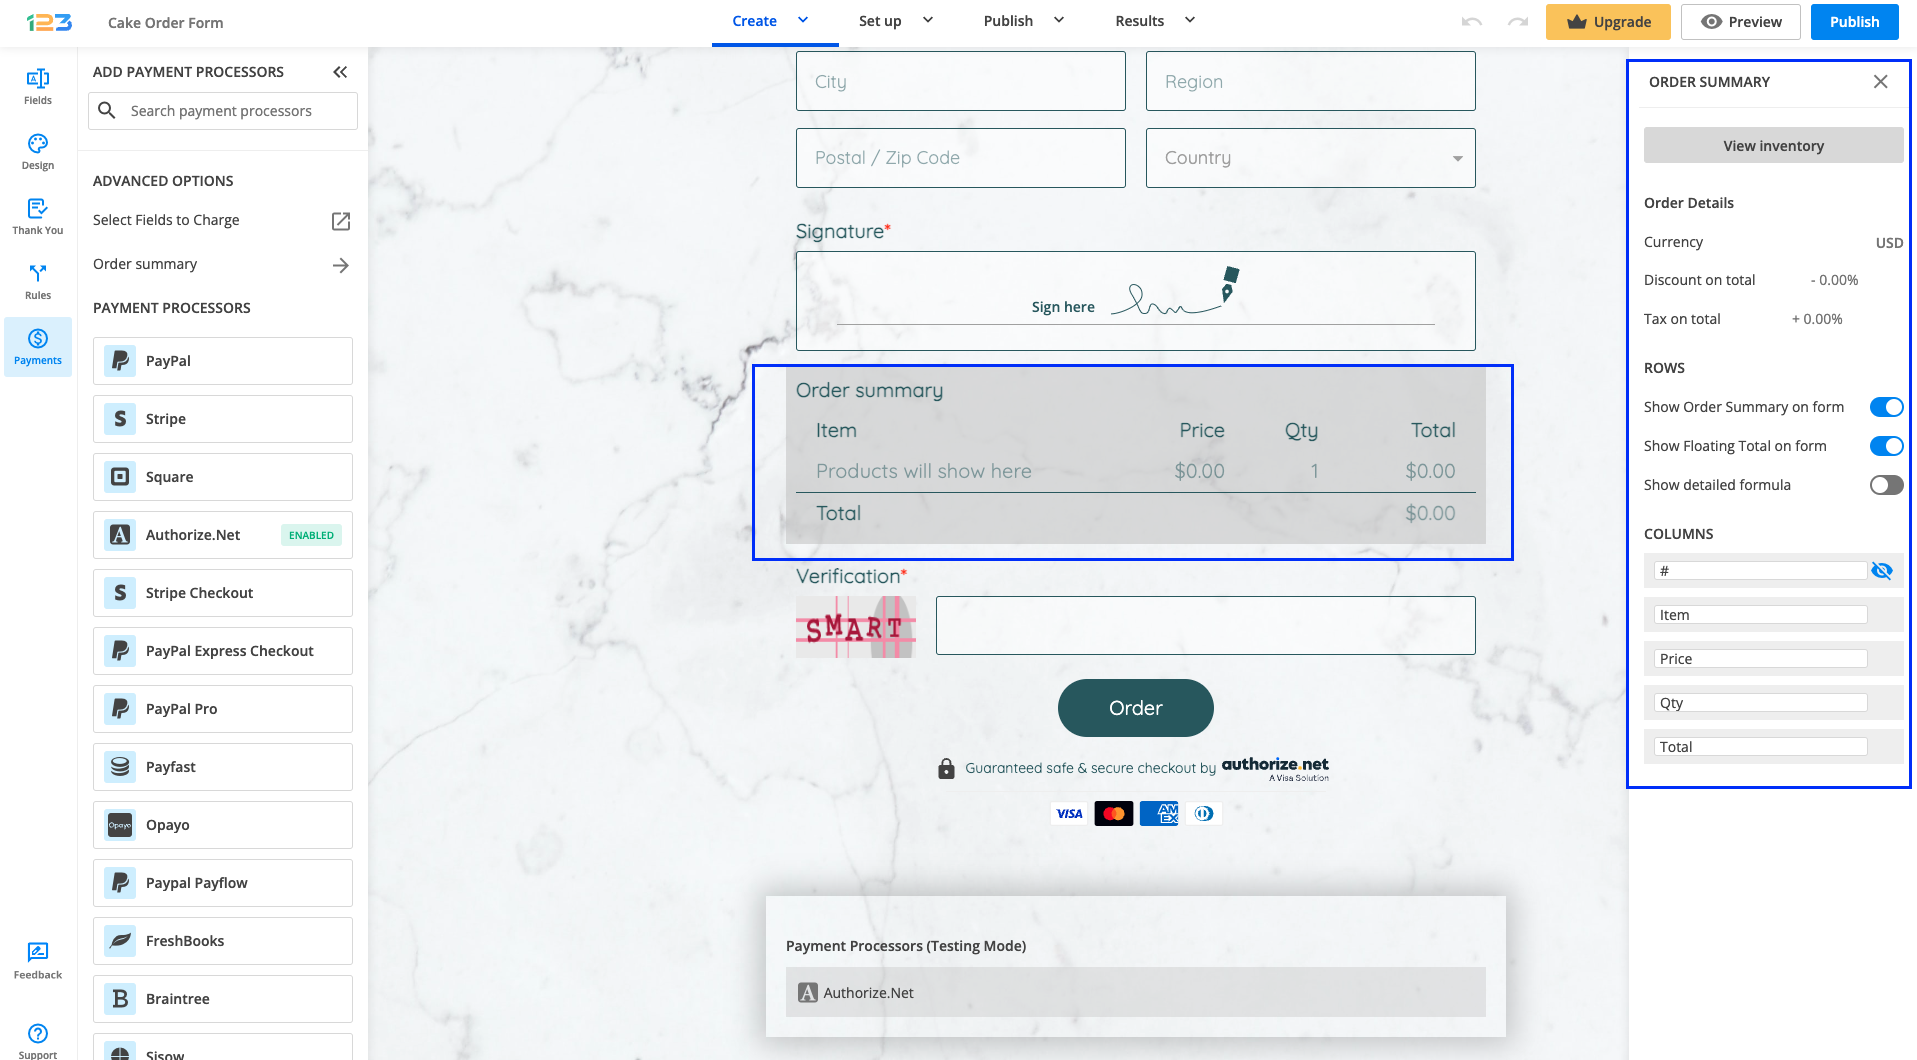
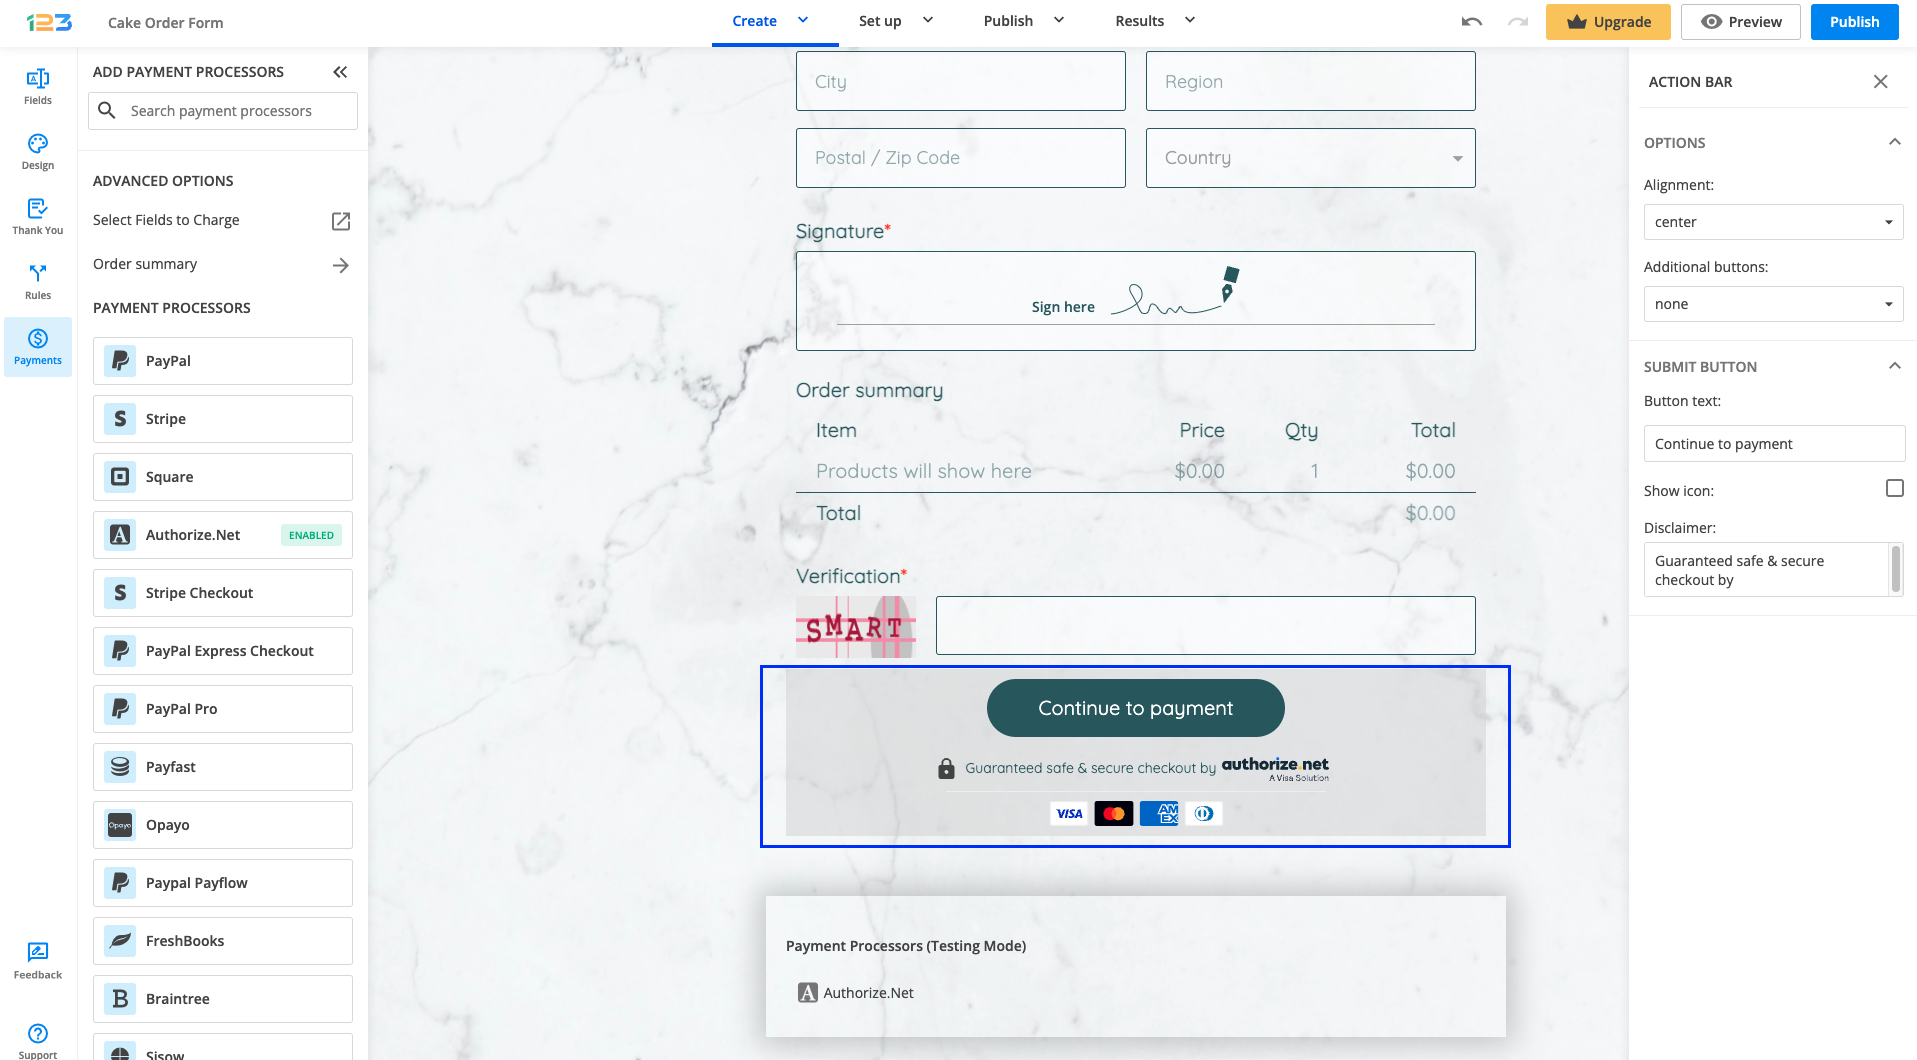
The final change is related to the Submit button. Once your payment integration is enabled, the Submit button is changed to Continue to payment. Below it, we display a disclaimer along with the Authorize.net logo so respondents know they are proceeding to payment.
The accepted cards by the Authorize.net integration are also visually displayed so that respondents know from the start what is the accepted payment method.
You can customize the action bar (everything related to the submit button, additional buttons, disclaimer, etc) by simply clicking on this area.
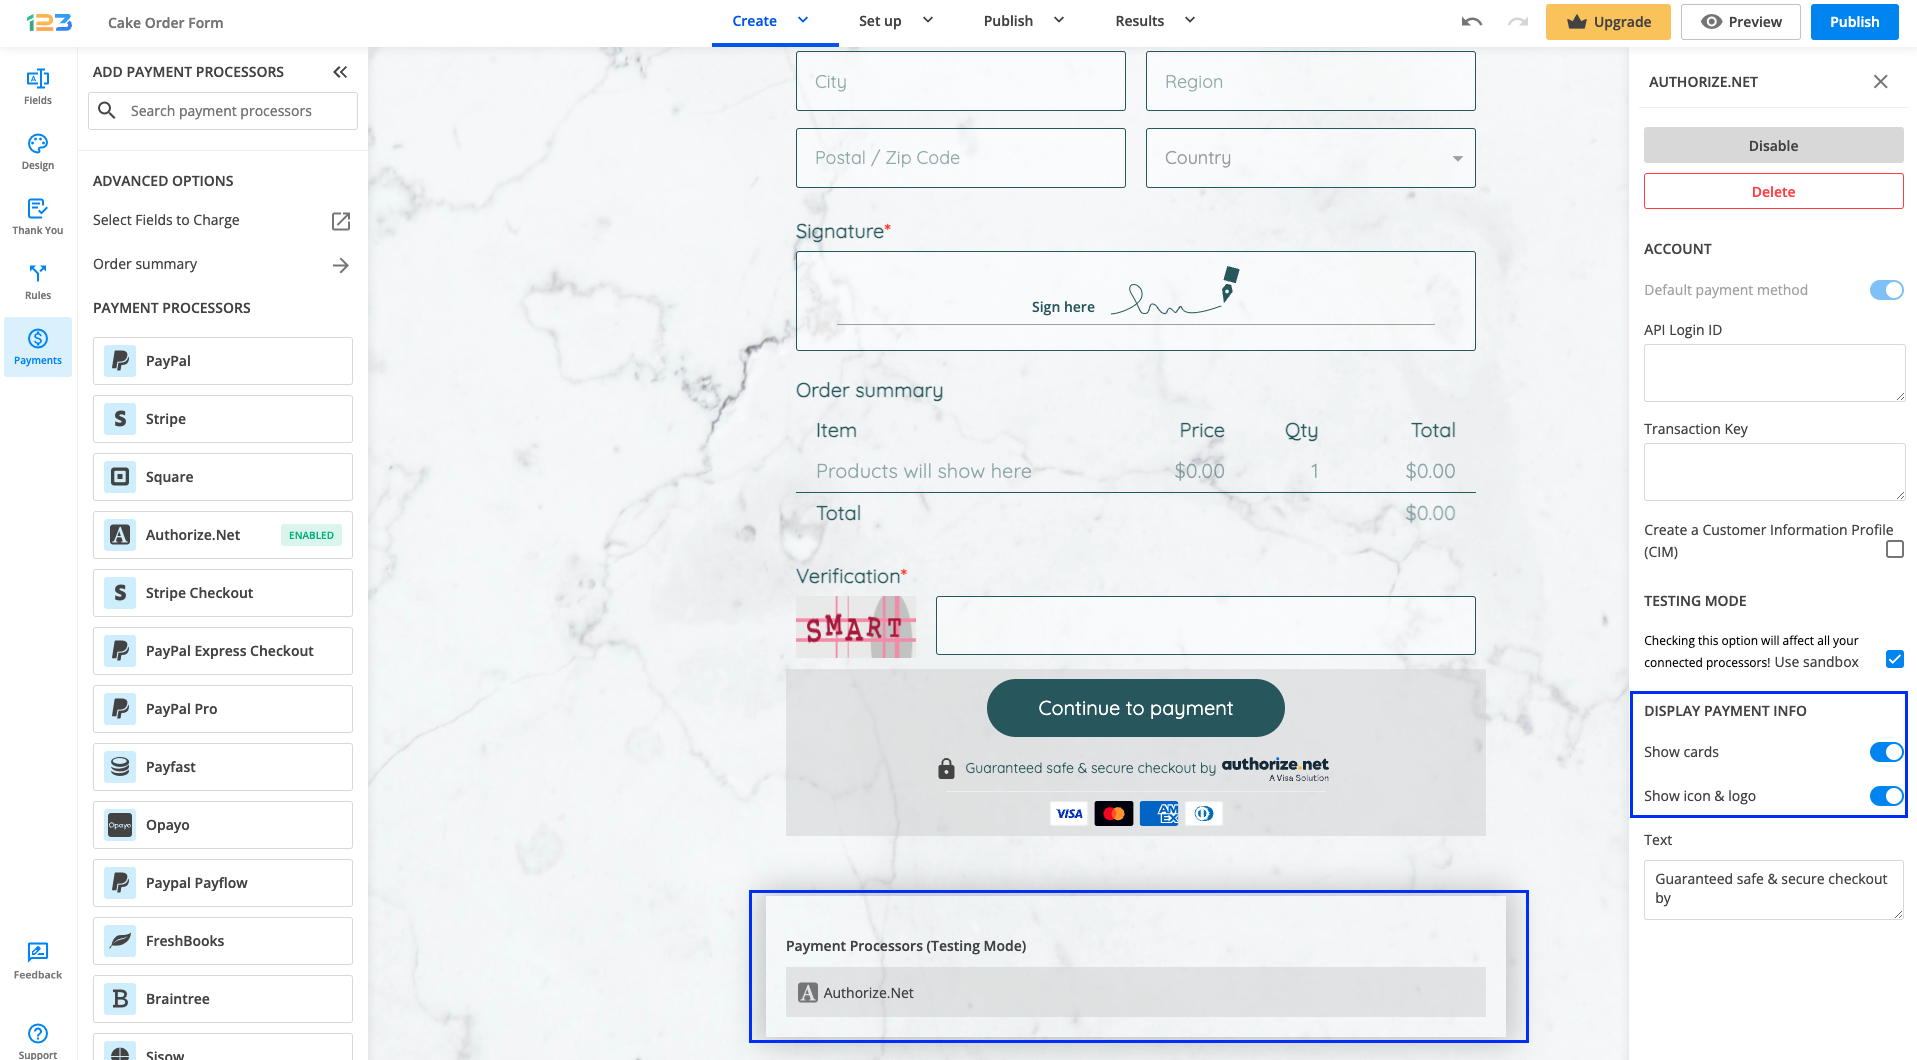
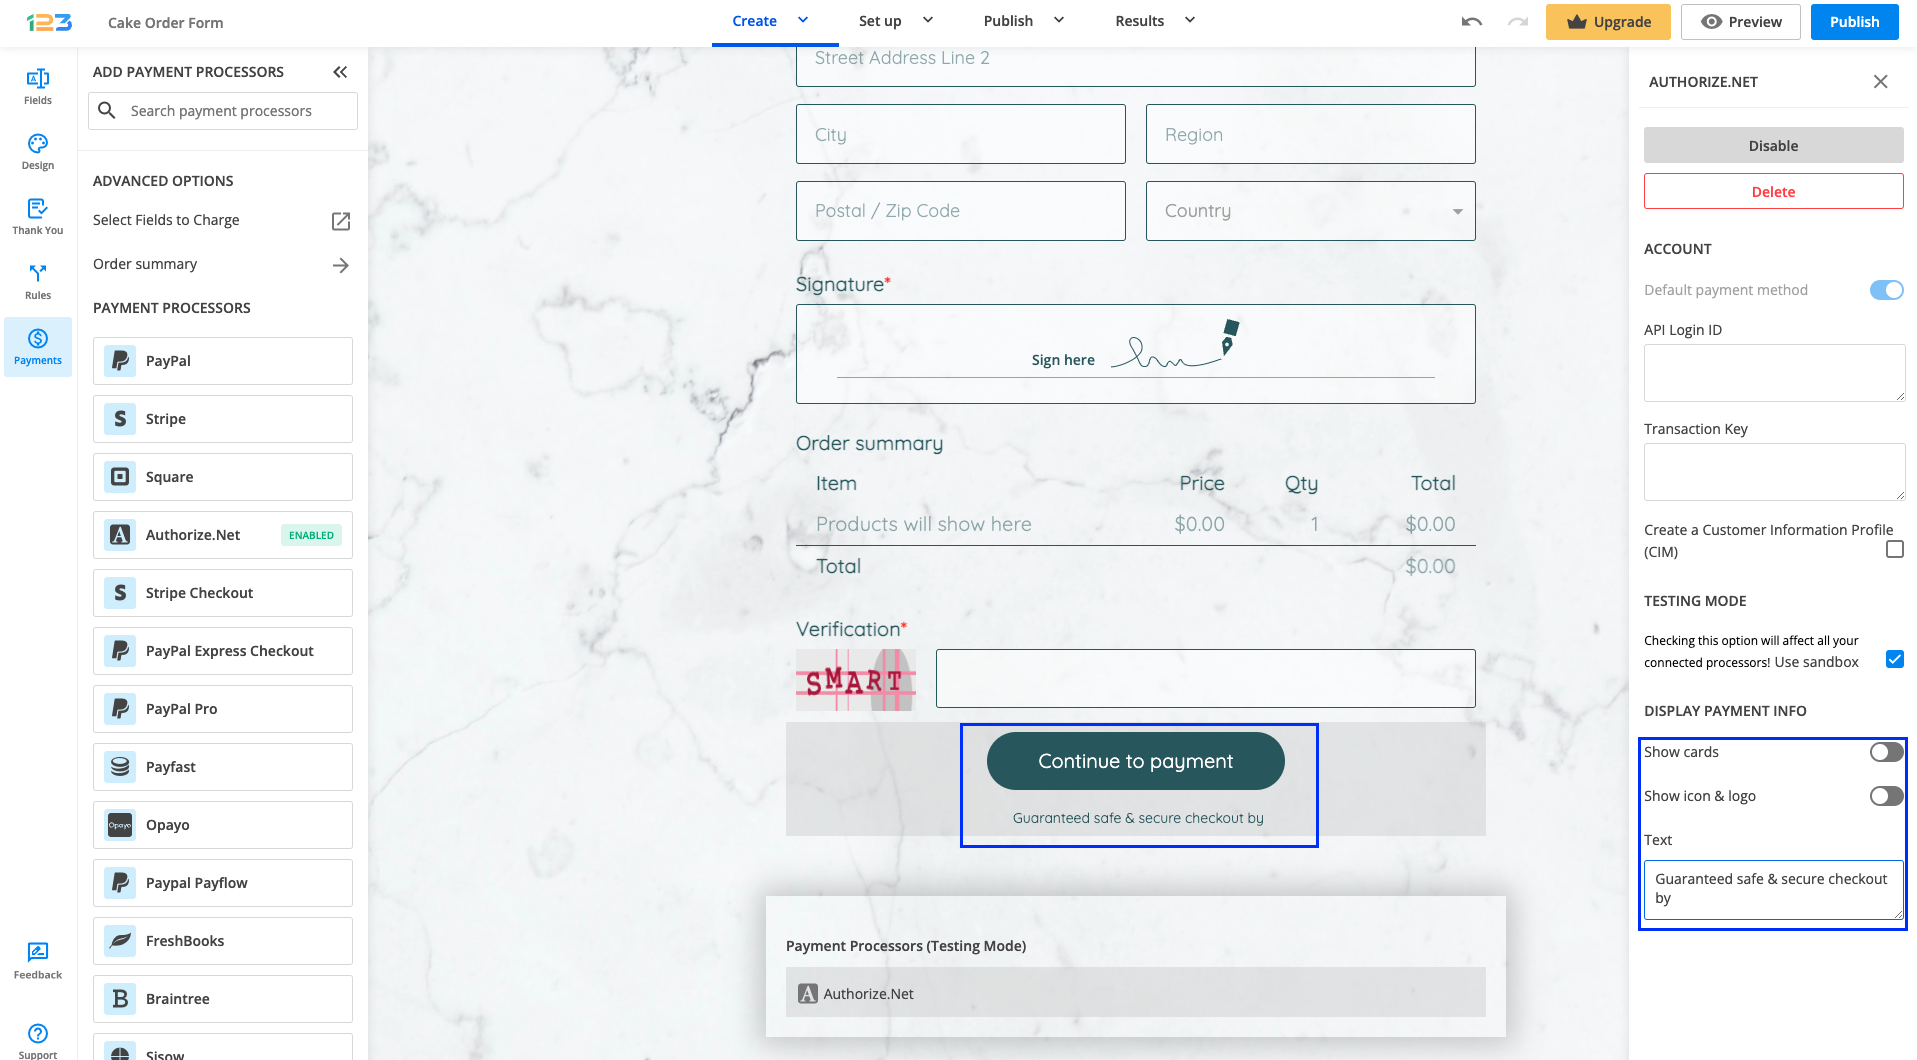
Click on the Payment processor below the form to open its settings on the right-side panel. Another thing you can customize is whether you want to show the accepted cards and the icon & logo on the form. By default, they are on.
Note: If you disable both Show cards and Show icon & logo, we recommend editing the Text as it wouldn’t make sense for respondents.
Authorize.net authentication data
To retrieve either one of your authentication data, follow the steps below:
1. Log in to your Authorize.net account.
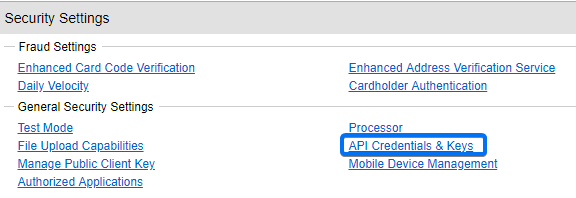
2. Go to the Account → Security Settings section and select API Credentials & Keys. Here, you can copy the Login ID and Transaction Key that you require back in 123FormBuilder.
Important Note
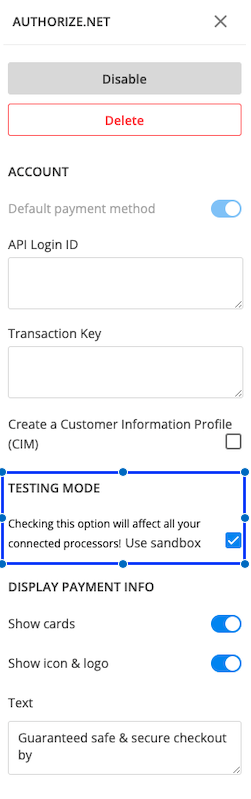
To test your order form, you’ll need a sandbox account created at Authorize’s Sandbox platform for developers.Use the information of your sandbox account to set up your Authorize.net integration. Enable payments in sandbox and start simulating a transaction.
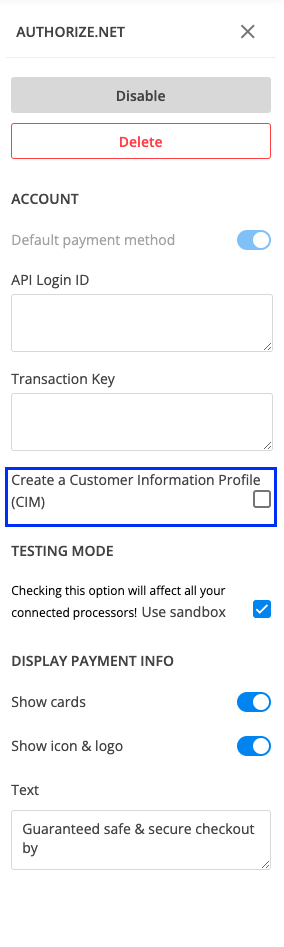
Tick the option Create a Customer Information Profile (CIM) if you want to save client profiles in your account based on the submitted credit card number from the first purchase. When a form user submits an order for the first time, a profile will be created on Authorize.net with the payment and shipping information. The shipping information may be changed each time the form user submits another order on your form.
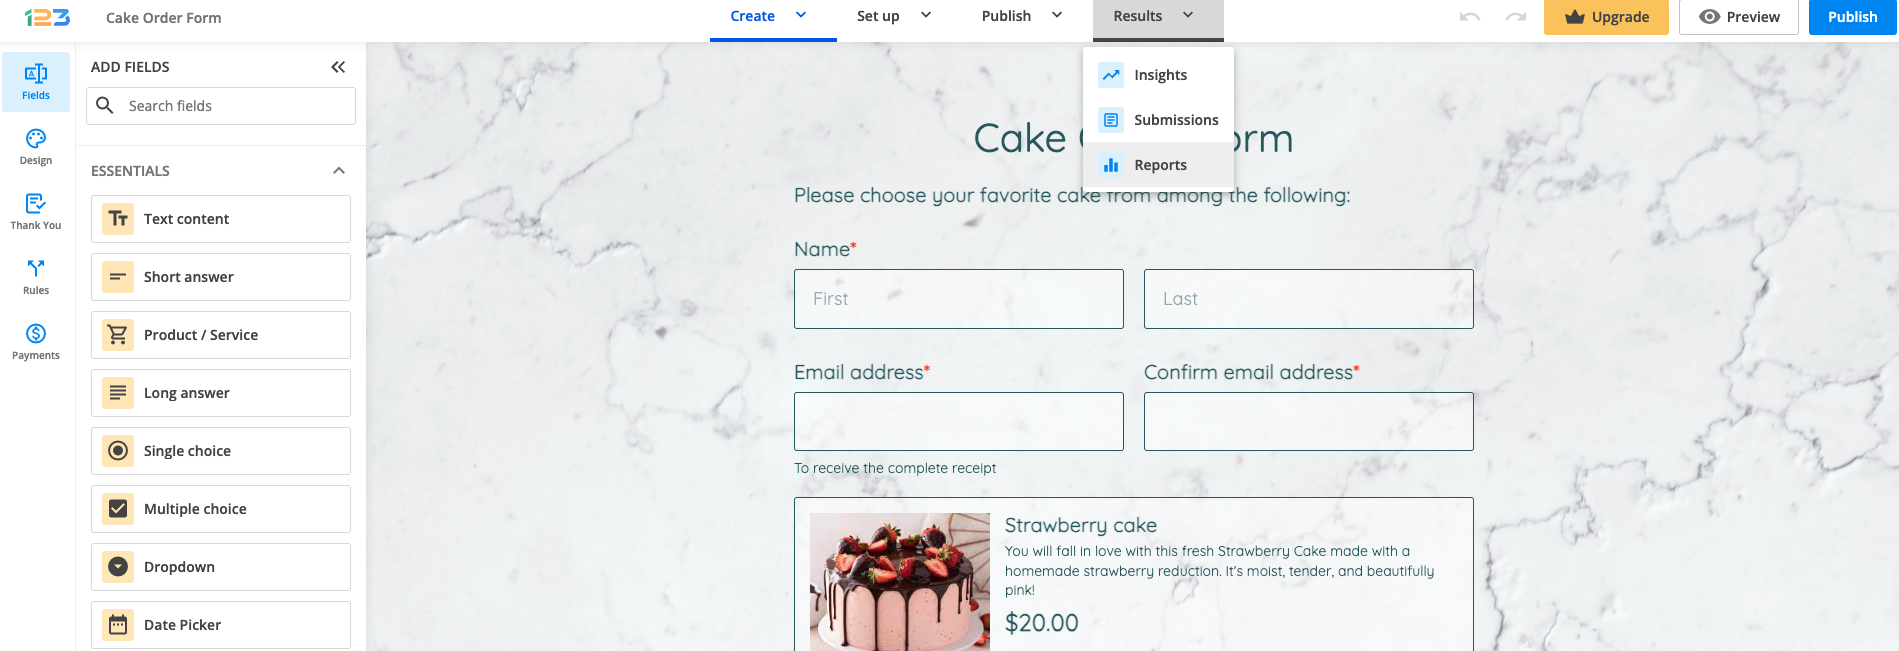
Yes, you can filter reports based on the submission date. Click on Results button and then navigate to Reports section.
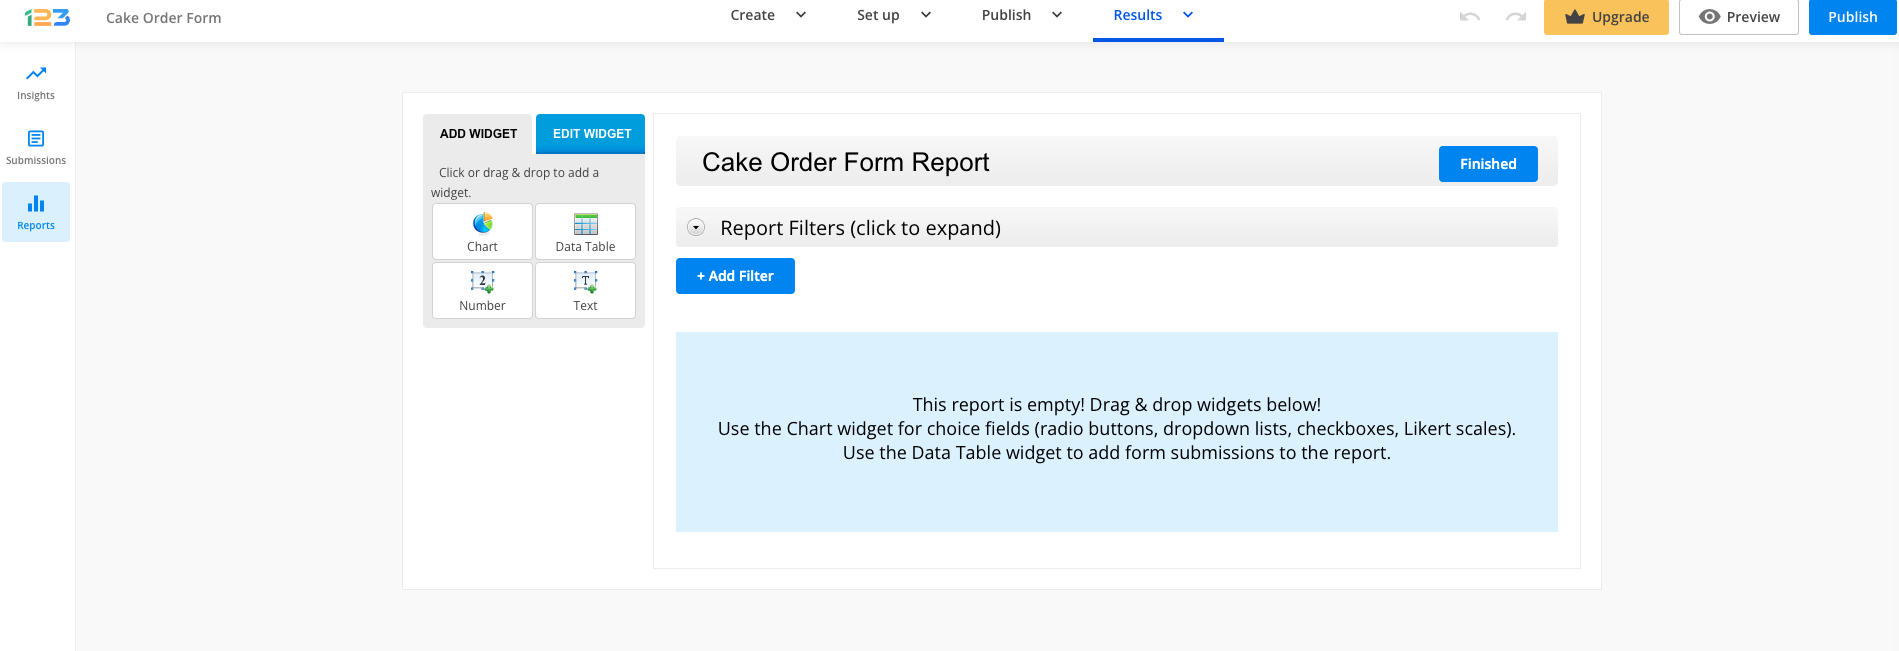
Click on Edit your report, expand Report Filters on page top, then Add Filter.
Select the option Submission date in the first dropdown list, then greater than or less than, and, finally, pick the date of reference using the calendar. To open the calendar, click on the small picker on the right.
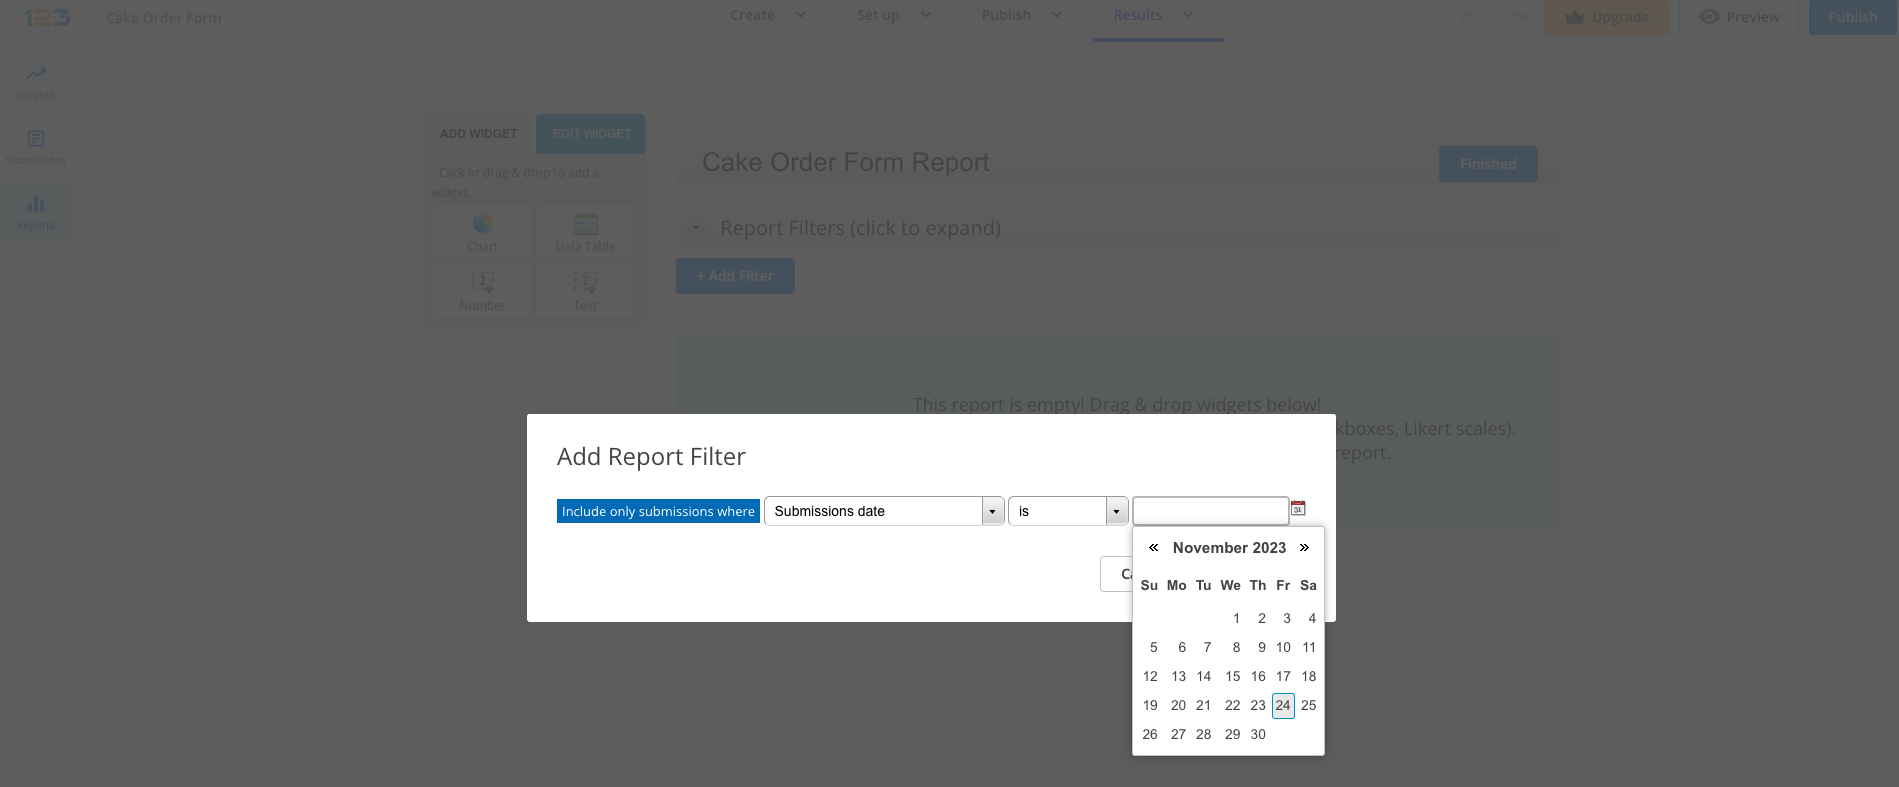
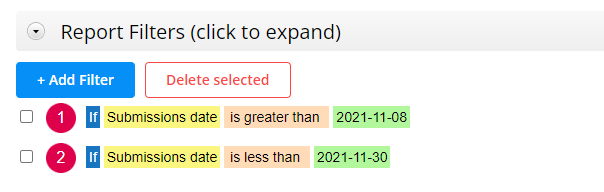
If you want to refer to a specific period of time in the past, then use two such filters: one with greater than, one with less than.
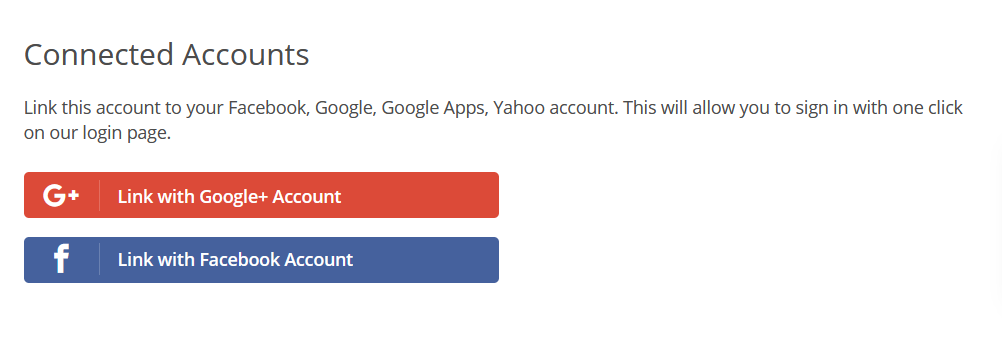
Yes, you can log in using an open ID. We offer the possibility to connect your Facebook and Google+ accounts.
Select your username in your Account Dashboard and go to Connected Accounts. Here you’ve got the two open ID login options. Click on any of them, provide your authentication data for the respective application and you’re done. After that, you’ll be able to log in on the login page.
Tip 1: You can create multiple associations for the same account. In other words, you can associate your 123FormBuilder account with both accounts at the same time.
Tip 2: You can even sign up from the very beginning with your account from one of the two platforms.
Related articles
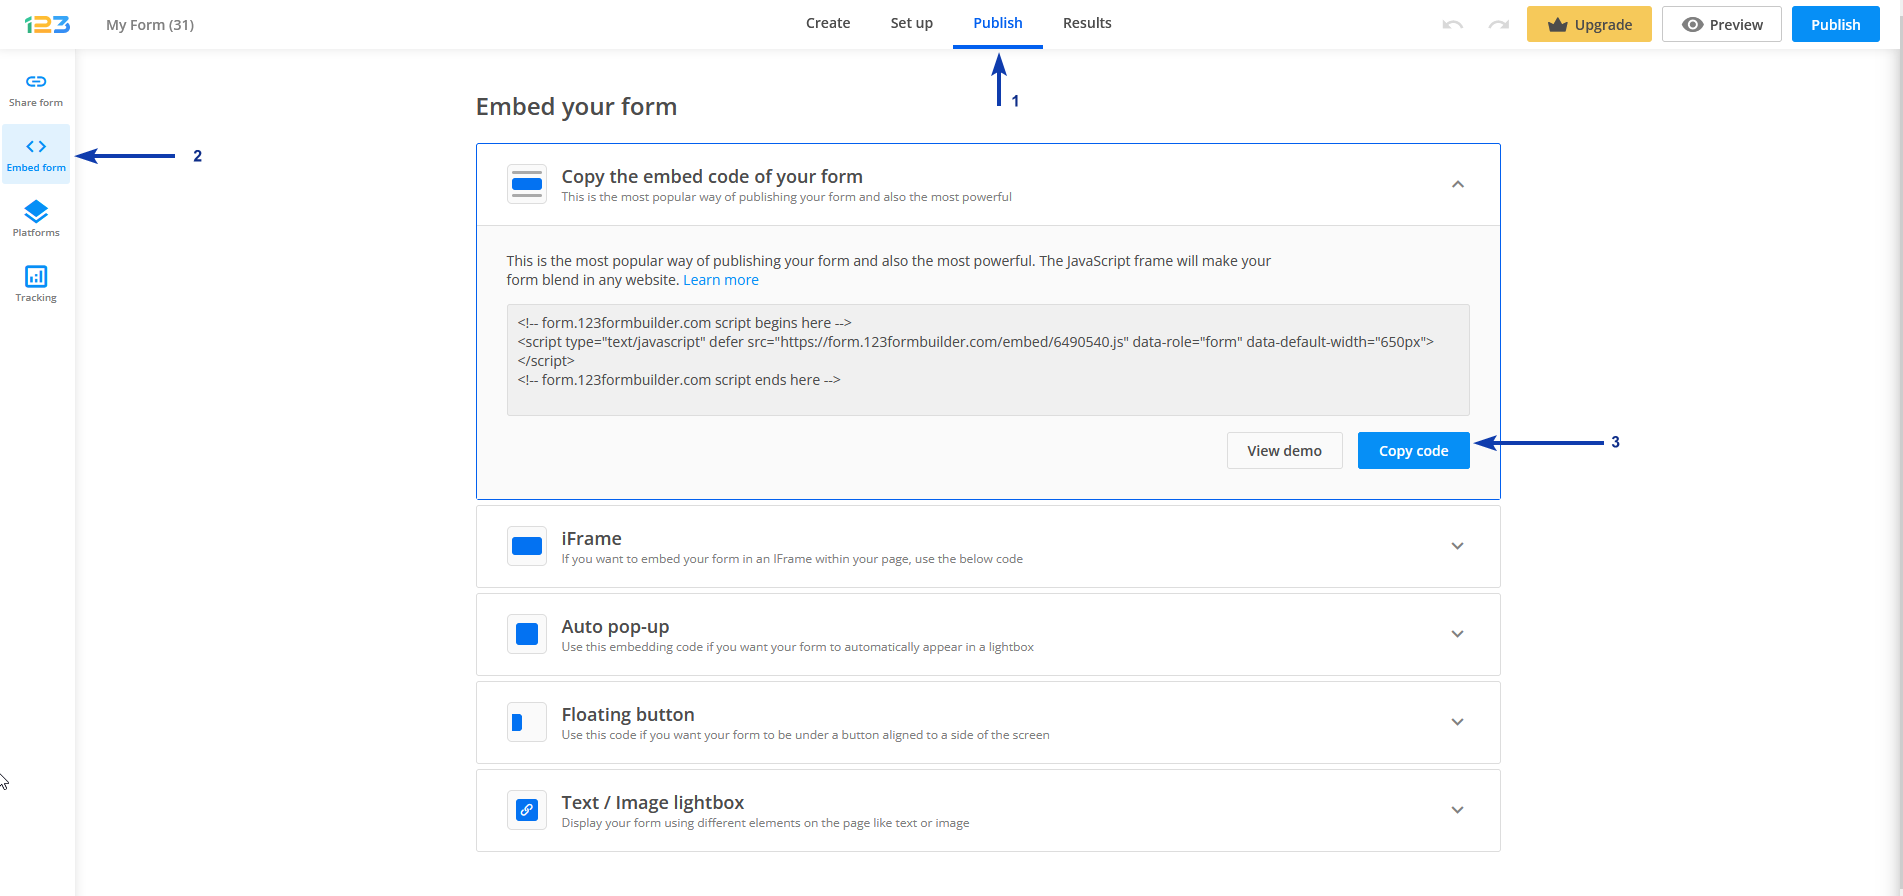
Yes, you can easily publish online forms on Moodle. All you need to do in your 123FormBuilder account is to go to the Publish → Embed form section of your online form and copy the JavaScript code.
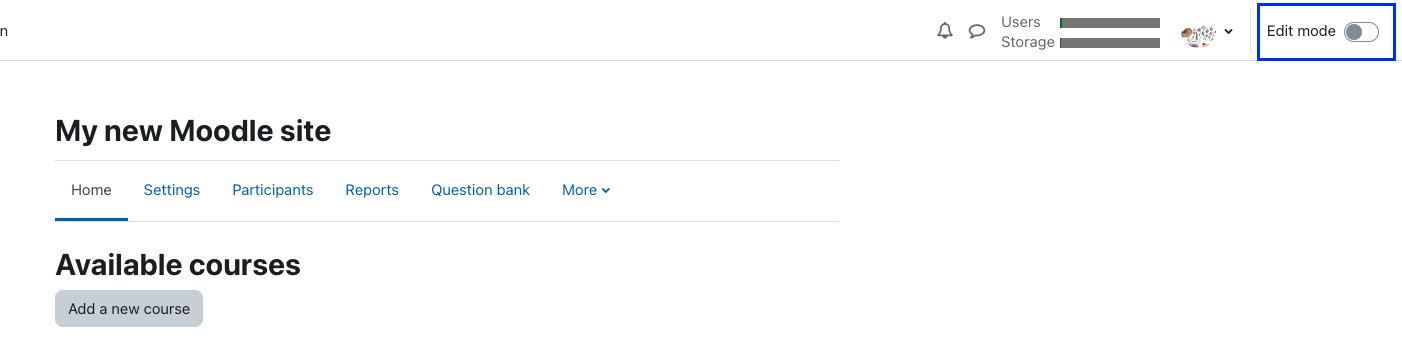
Log in to your Moodle admin account and enable editing by switching the toggle in the header ON
After enabling the Edit mode, you will be able to add an activity or a resource. Click on Add an activity or resource and go to the Resources tab. From there, you will be able to add a Page.
All you have to do is add a name and a description for your page and in the Content section, expand the options available in order to have access to HTML option. You will have to input the JavaScript code of your form inside the content. Note: The JavaScript code will automatically update your online form on Moodle while you edit it in your 123FormBuilder account.
Click on Save and Display at the bottom of the page and then you will be able to preview your form that was embedded using JavaScript:

Yes, you can, but only if you use the downloaded version of Joomla for FTP. Before you paste the code onto your Joomla article, you need to make certain settings for your Joomla website, in order to allow the JavaScript code of our web forms to run. To enable these settings, just follow the steps below.
- Access the Site menu → Global Configuration → Text Filters and for Super Users make sure the No Filtering option is enabled.
- In the Extensions tab go to Plugin Manager → Editor TinyMCE → Basic Options → New Lines: Br Elements → Prohibited Elements. Make sure you remove Script and iFrame from that list.
- While still in Extensions, access Template Manager → Templates and choose your active template. Click on its name to edit it.
- Next to $doc → addStyleSheet, insert this line:
https://www.123formbuilder.com/includes/tinybox/tinyboxstyle.css
Make sure the line is added within the tags of the file.
(Optional: if you don’t have $doc = JFactory::getDocument(); declared already, add it before $doc->addStyleSheet). - Now go to the article you want to insert forms to. In Edit Article click on Source Code (or Tools → Source Code).
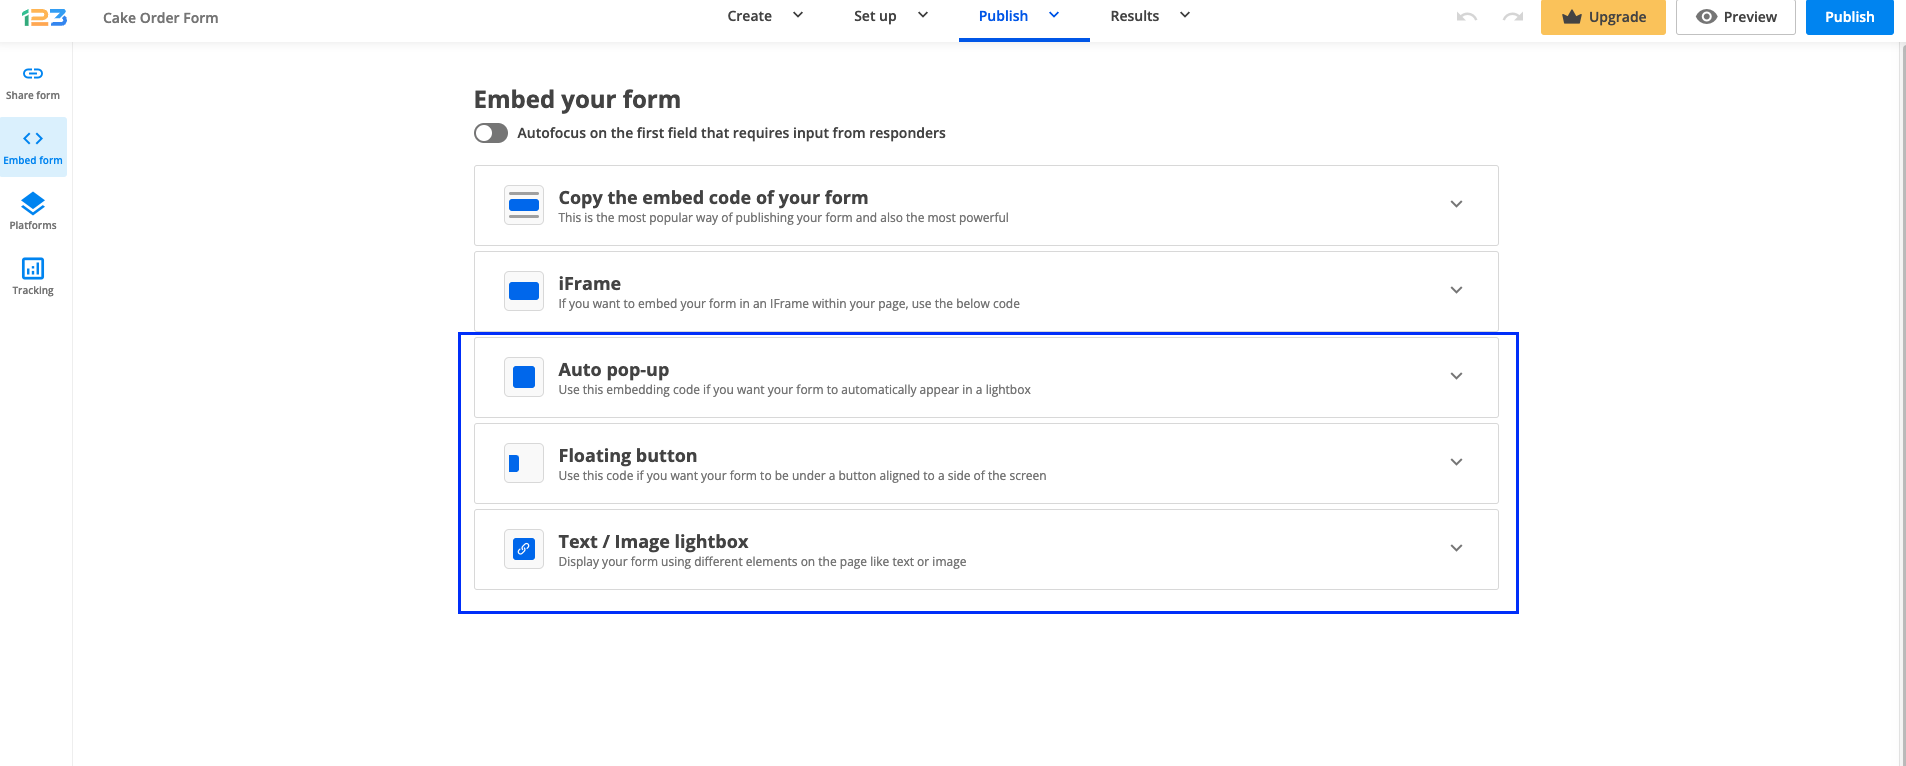
- In your 123FormBuilder dashboard, access the form editor, and go to Publish → Embed form → Lightbox. Choose the option you need (text link, image link, floating button, or auto popup), then copy the form code and paste it into the Joomla article source code box. Save the content and you’re done.
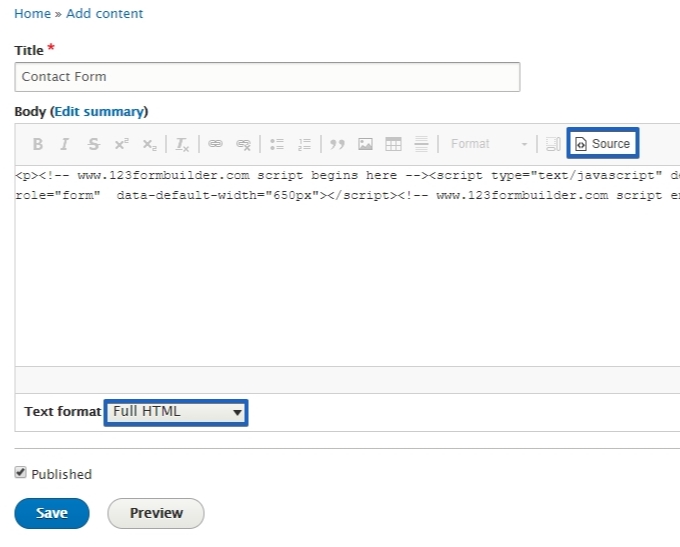
Yes, you can publish your form on any Drupal website. And you don’t even need a plugin or an extension to do so. In your form builder account, copy the form code from Publish – Embed form – Javascript and paste it into your Drupal page editor.

Make sure to select the option Full HTML in the Text format dropdown list and paste it in the source code of the page, as shown below:
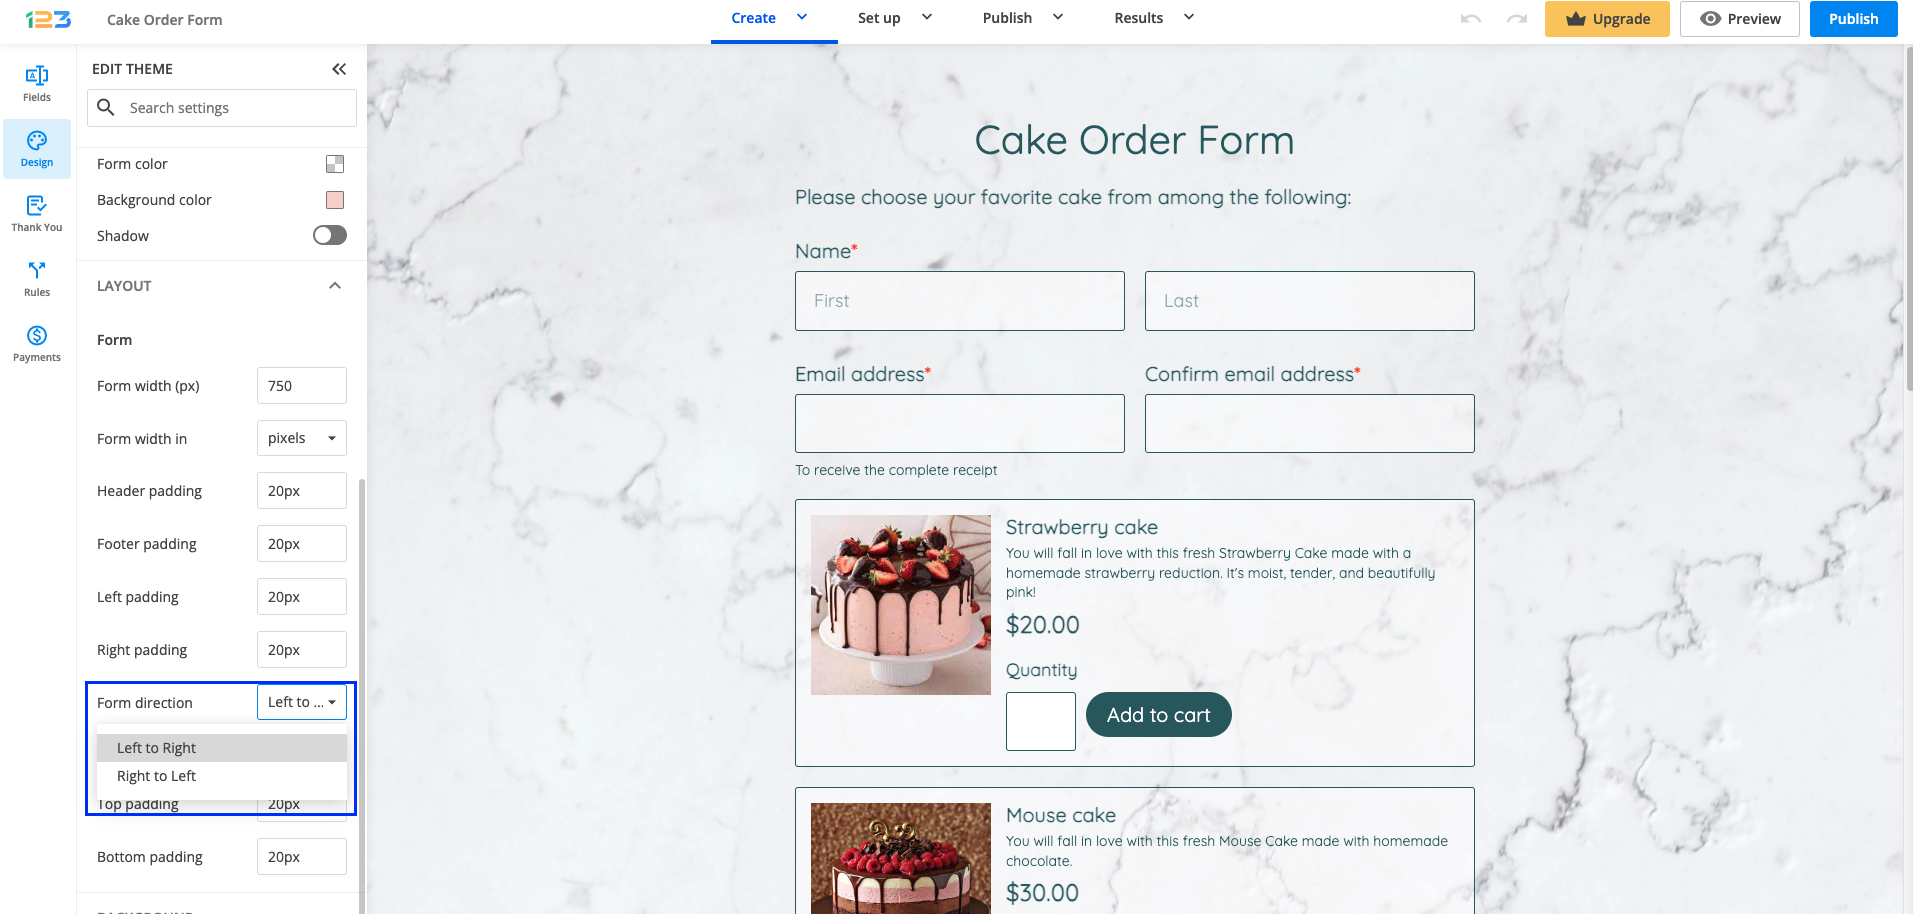
Yes, you can change the text direction on your form for Hebrew reading users using our form designer.
From the Form Editor, go to Design and expand the Layout section. Under Form subsection, you will find the option called Form direction. Afterward, select Right to Left from the dropdown list. This will change the text direction right away in the editor of your form.
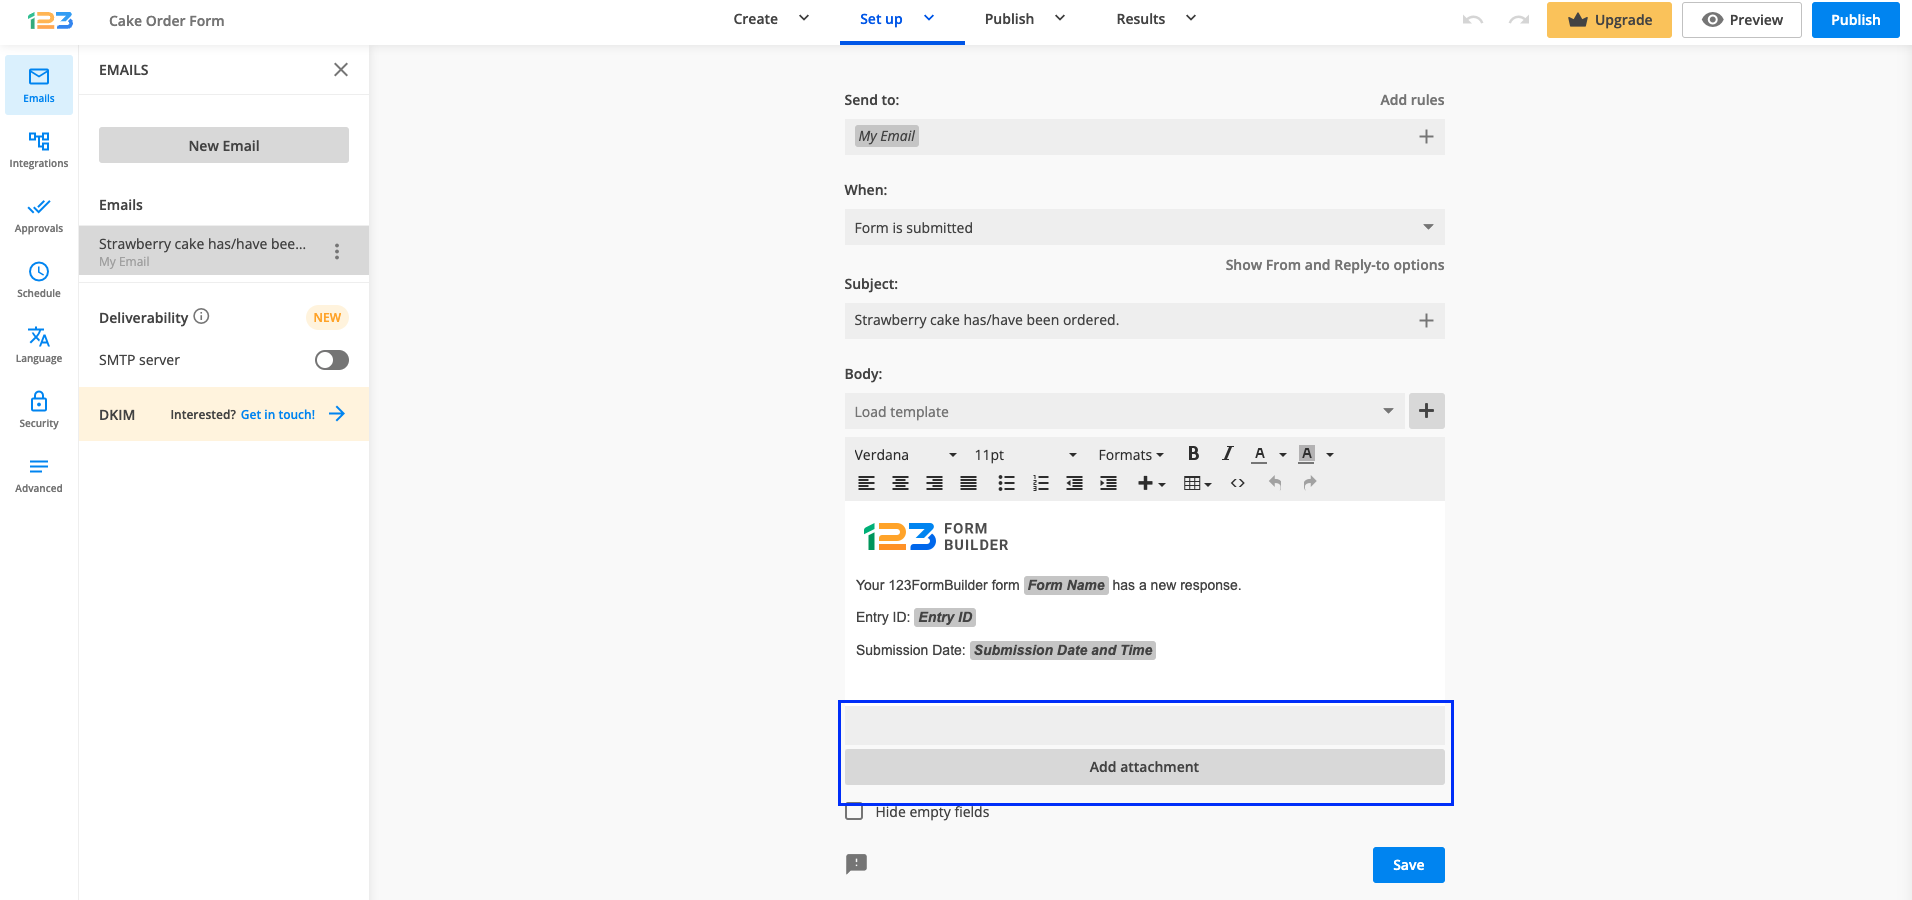
You can choose to receive a copy of the email notification in PDF format. All you have to do is to access the form you are interested in and go to Emails section.
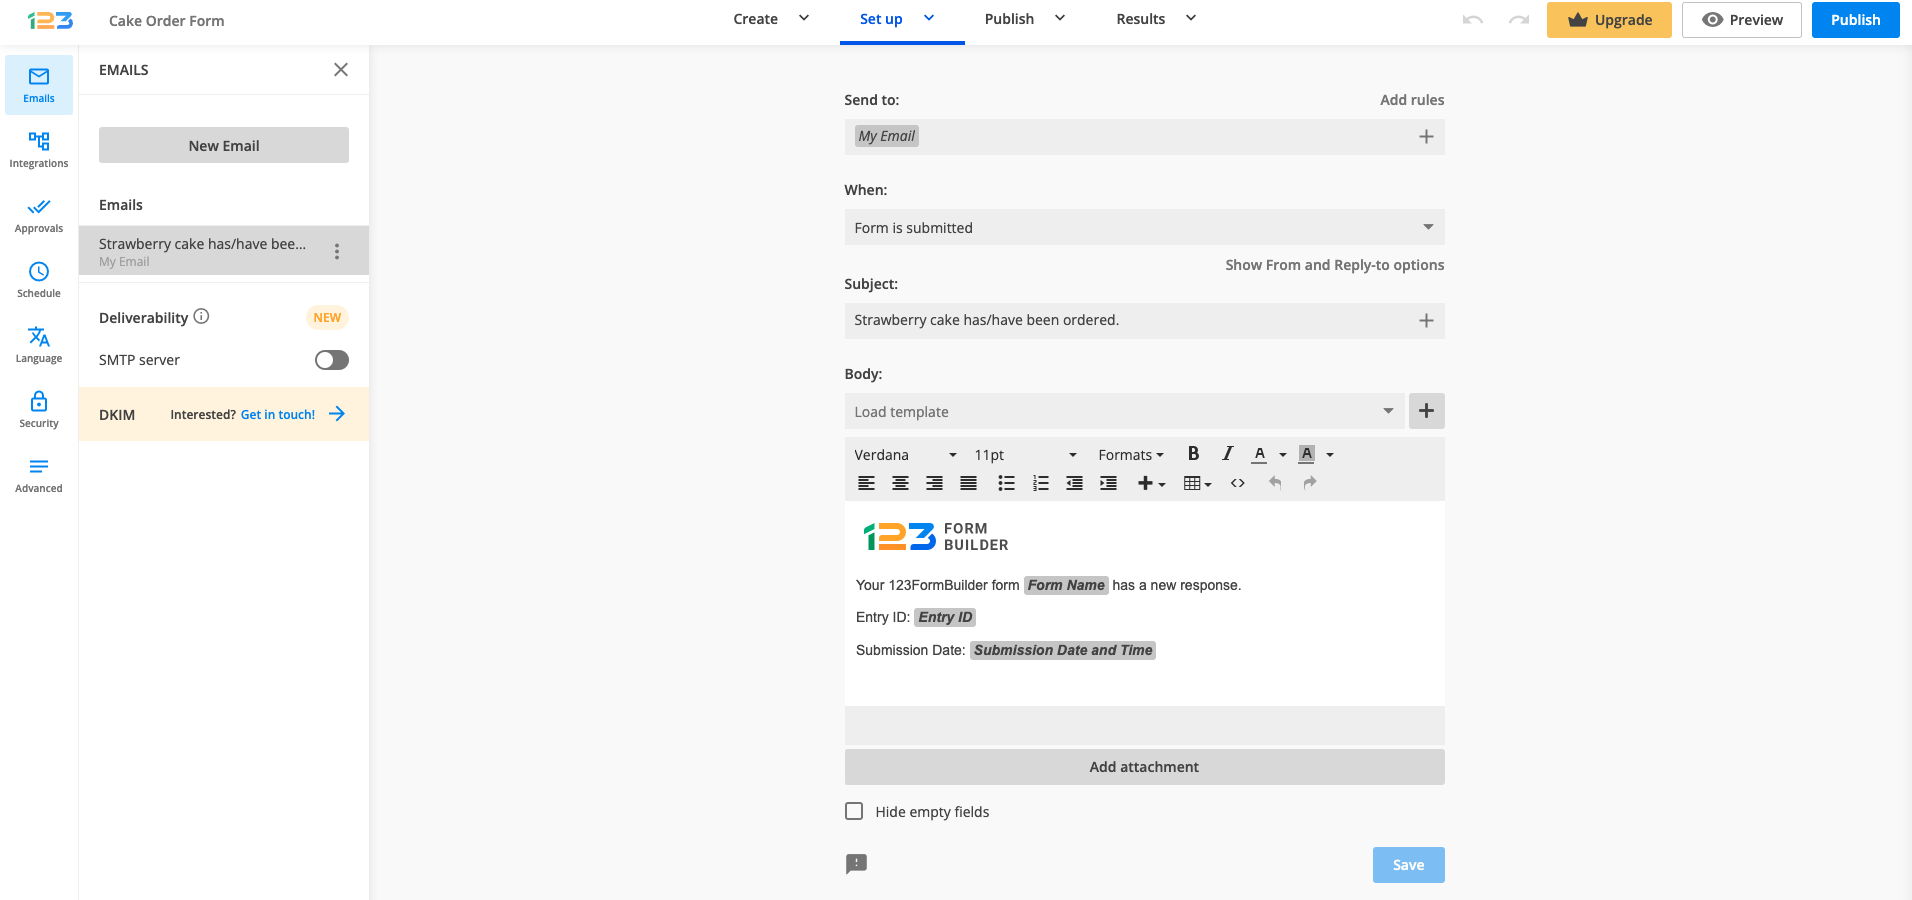
By clicking on Add attachment button, you will find two options available: Submission PDF & Submission PDF using form layout.
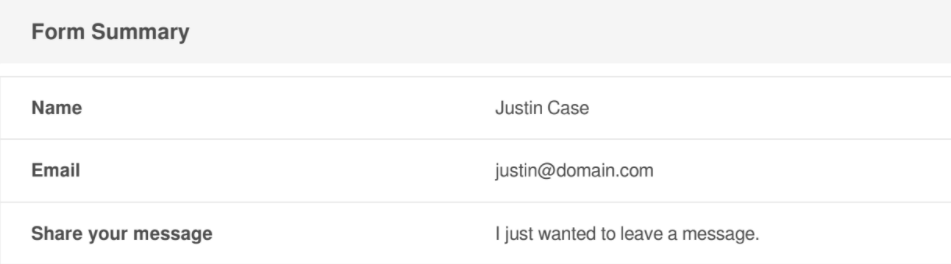
Submission PDF – select this option if you want to attach submissions as PDF to the notification email. The PDF attachment looks something like this:
Submission PDF using form layout – select this option is you want to receive a PDF attachment that will include the layout of the form, as seen online, with the data included in the form inputs. The PDF form layout looks something like this:
If the submission is updated (form data has been changed), a new PDF file will be generated. You can download the updated PDF files from the Submissions section.

Related articles
The answers of your choice fields (Single choice, Multiple choice, Dropdown) and the statements of your Likert Scale can be randomized.
In the form builder, select the desired field and access the settings on the right-side panel. Afterward, go to Options and enable the option called Randomize choices. This will reorder the options of your field each time the form is accessed.

This feature is best suited for online quizzes to prevent submitters from cheating while answering the questions.
Related articles
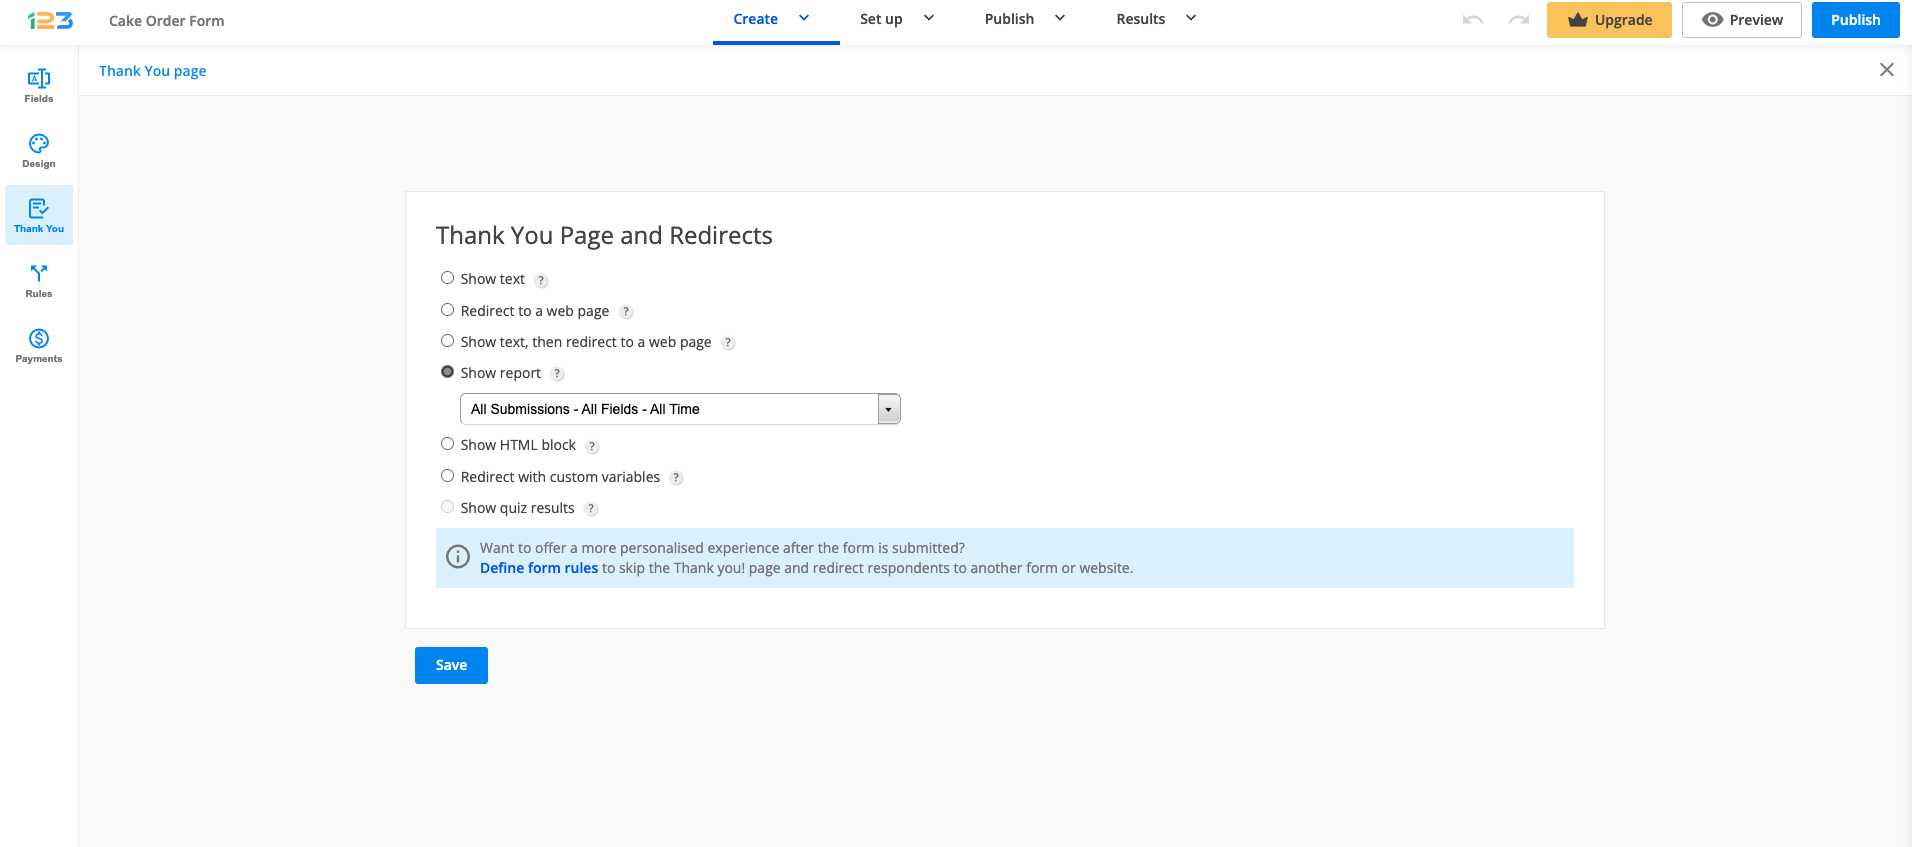
You can redirect users to a form report after they have filled out and sent the form. This can be either the default report or a custom report that you have designed in the Reports section.
The option of redirect users to your report after submission works best with surveys and survey reports.
You can enable this option by going to Thank you section and selecting Show report option. If you have multiple reports created, select, in the dropdown list, the report that you want to use. After clicking Submit, users will see the report that you have selected.
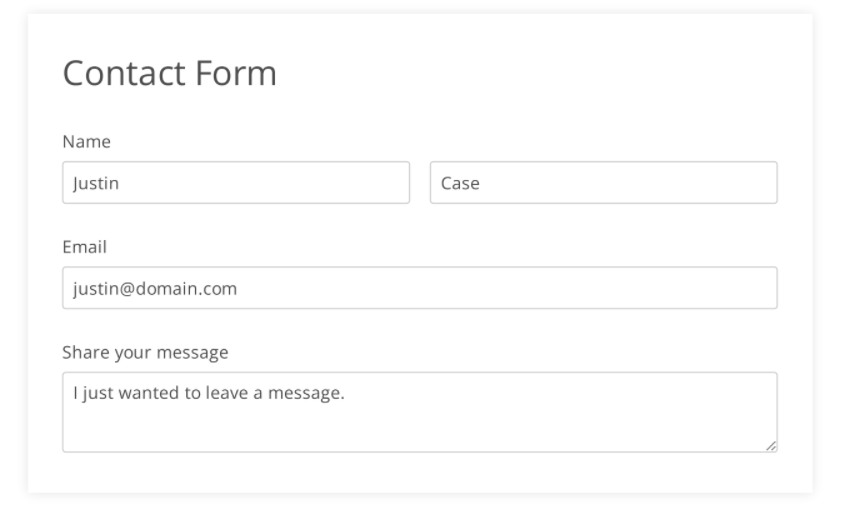
The autofocus on the first field is usually useful. However, there are situations when it gets in the way of a clean user experience. For example, if there is more textual content at the beginning of your form (an HTML block containing information or instructions). In such cases, you really don’t want the cursor to jump on the first input field automatically since the information above would go unseen.
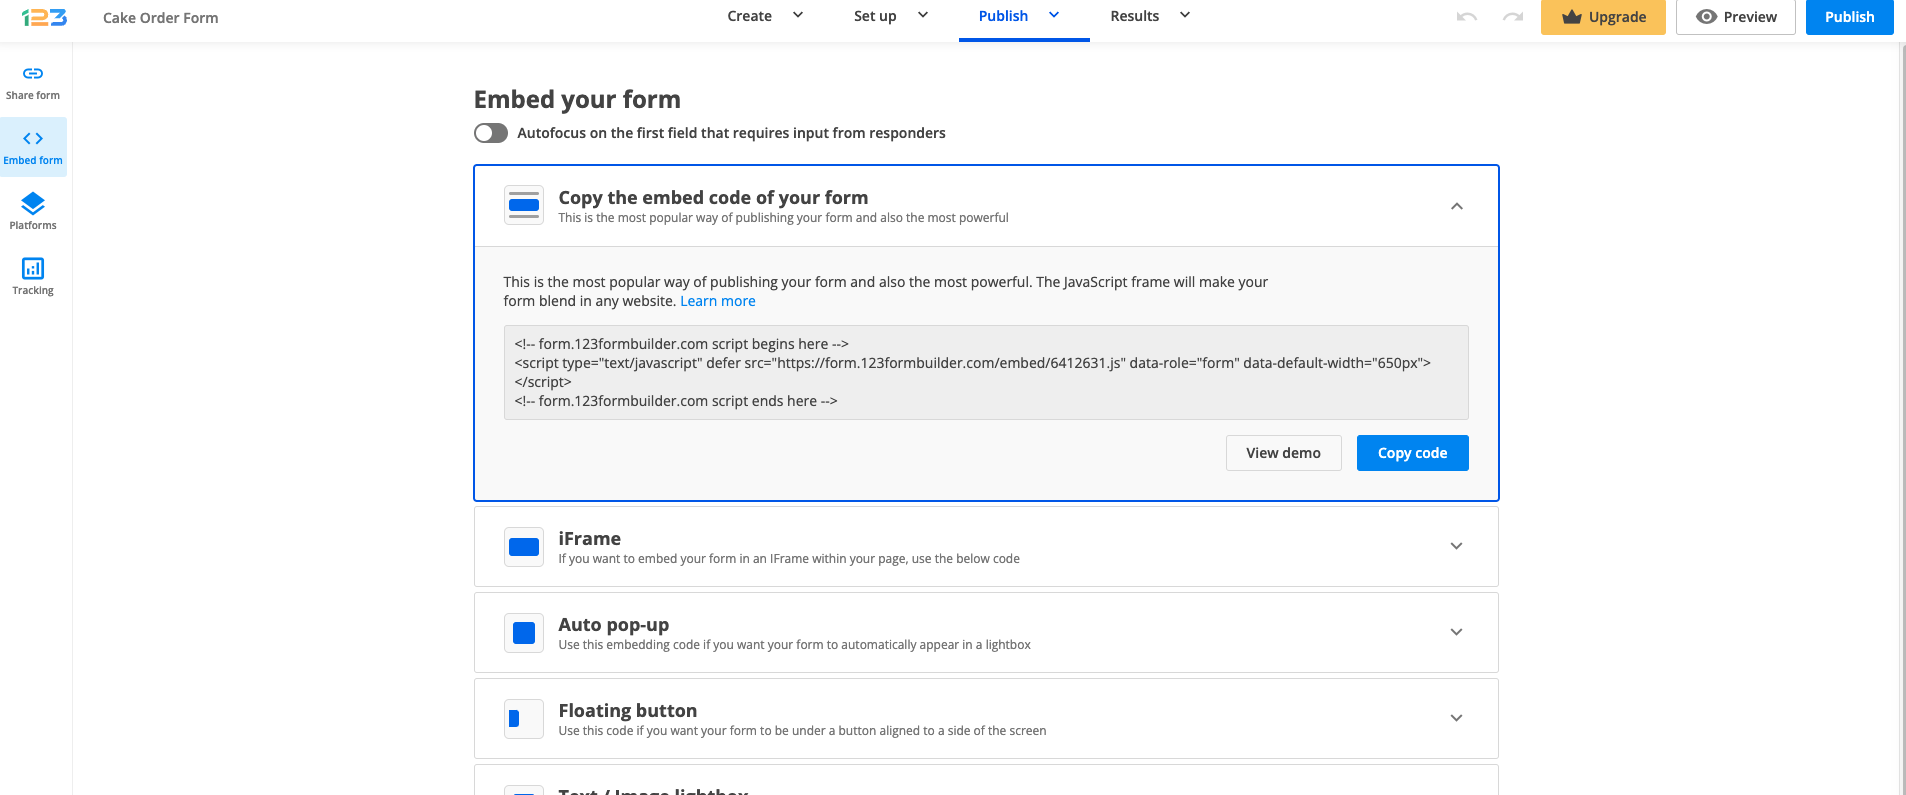
With the recent changes made to our platform, autofocus is automatically disabled. However, if you have older forms on which autofocus is still on, you can disable it easily.
Go to Publish -> Embed form section. Right below the title of the section, you have the option of disabling Autofocus.

Most Popular
Frequently Asked Questions
Here is a list of the most frequently asked questions. For more FAQs, please browse through the FAQs page.