123FormBuilder Knowledge Base
Search our documentation platform for answers, service specifications and 3rd-party integrations.
Knowledge Base
Let’s say you were waiting for some important messages, but none of them arrived in the inbox of your email account. It’s not because they weren’t sent, but because your email account filtered them as spam messages. To avoid having important messages marked as spam and lose them, you’ll need to create whitelists. Whitelists allow users to compile lists of senders they wish to receive emails from.
Keeping in touch with our users is a top priority, therefore we encourage each one of them to create a whitelist in their email account. This way, messages sent by us will not get lost and we can offer better assistance.
Here is how to make a whitelist on the most used mailing platforms:
Gmail
1. Open your inbox, click on the gear icon close to your Google account icon, and select See all settings.
2. Select the Filters and Blocked Addresses tab and click on Create a new filter.
3. In the From box, write the domain name admin.123formbuilder.com
4. Click on Create filter, in the bottom-right corner.
5. You can also choose to archive the message or send it to a label (folder) if you have created any. If you tick the option Never send it to Spam, each message from us will arrive in your inbox.
6. Press Create filter in the bottom-right corner and you’re done.
Important
Repeat for admin.123formbuilder.io the same steps listed above.Optional: You can tick the option Also apply filter to X matching conversations, X being the number of emails found in your account with admin.123formbuilder.com or admin.123formbuilder.io as the sender. If it’s 0, you no longer need to use this option.
Yahoo
1. In the top-right corner, click on the gear symbol next to Settings.
2. Go to More Settings → Filters.
3. Click on Add new filters to create a filter.
4. Give the filter a name.
5. Below From, first select the filter criterion contains and then write the domain name admin.123formbuilder.com
6. Click Save to apply the changes.
Important
Repeat for admin.123formbuilder.io the same steps listed above.Outlook
1. Under Settings, click on View all Outlook settings.
2. Select Junk Email and under Safe Senders and domains click on Add.
3. Write the domain name admin.123formbuilder.com and press Enter on your keyboard.
4. Click Save and you’re done.
Important
Repeat for admin.123formbuilder.io the same steps listed above.AOL
1. Log in to your AOL webmail account.
2. Go to the Contacts section located on the left side, and add a New Contact.
3. In the Email1 box, type in noreply@123formbuilder.com which is the sender of our email notifications.
4. Click Add Contact and you’re done!
Important
Repeat for noreply@123formbuilder.io the same steps listed above.This concludes the tutorials for creating email whitelists for the most commonly used platforms. We hope this proved useful and that you will no longer lose messages sent by our team.
Domain Name for our EU platform
If you are from the EU and have an account created on our EU 123FormBuilder platform, follow the same steps explained above with the following details:
- Domain name: eu.admin.123formbuilder.com
Related articles
Field validation is really useful as it lets you gather the data only in the format that meets your requirements. For each type of field, you can find in the right side panel under the Validation section the available restrictions you can place on that specific field. Below you can find the available field validation in our form builder:
- Number/Formula/Price → numeric, numeric plus (for numbers with decimals)
- Email → email format
- Link → URL, page must start with https
- Date → mm/dd/yyyy; dd/mm/yyyy; yy/mm/dd; mm/yyyy
- Time → 12 hours/24 hours
- Phone → numeric, by default 3-3-4, but there are various choices (2-2-4, 2-3-4, 2-3-8, etc)
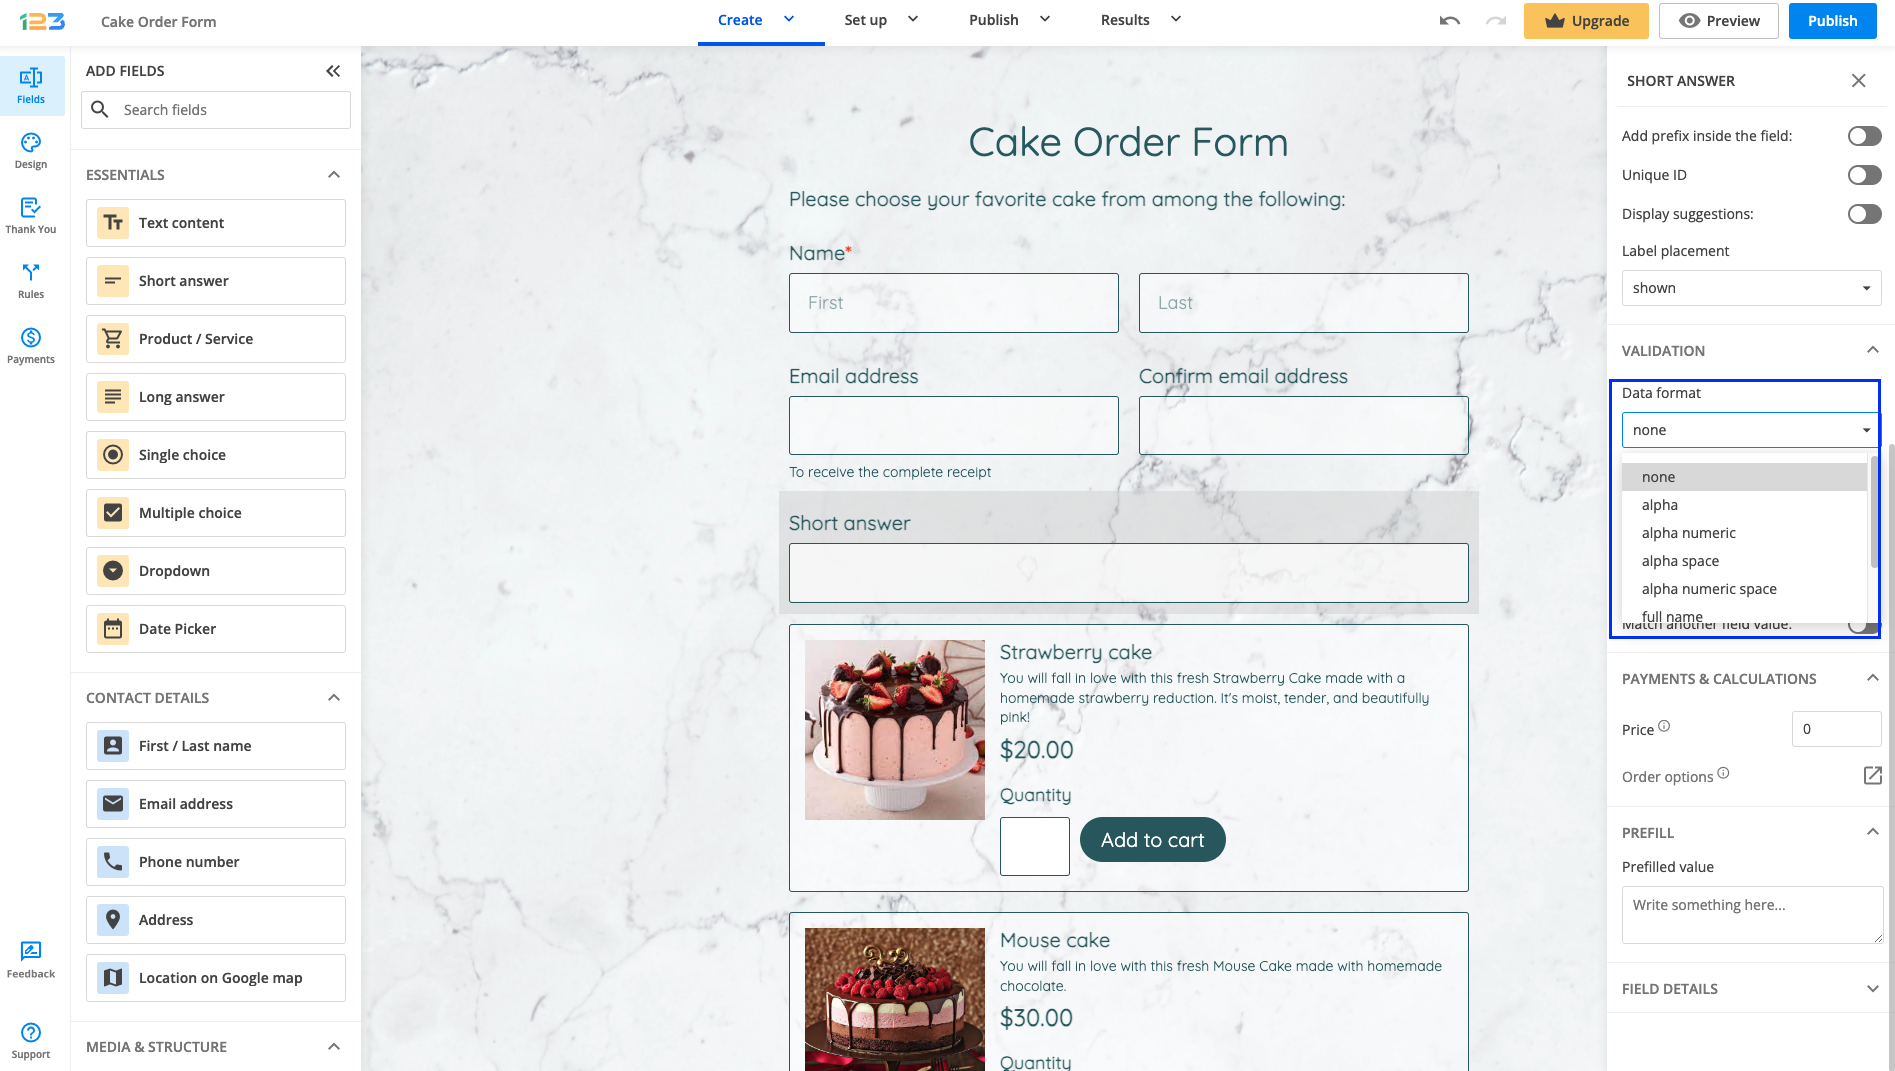
For the Short answer field, there are more complex validations available:
- alpha – only letters
- numeric – only digits
- alpha numeric – letters and digits
- alpha space – letters and white spaces
- alpha numeric space – letters, digits, and white spaces
- full name – e.g. John Doe – the value must contain at least one space character
- regular expression – add a regex code to define your own validation code (the regex has to start and end with a forward slash: “/”)
If the default size doesn’t meet your requirements, you can easily resize the lightbox from Terms of service field.
Once your Terms of service field has been selected, in the left side panel you will find under Agreement text section different possible customizations.
The lightbox can be resized using Popup width and Popup height – just type in the size that fits your needs.

Related articles:
Once an Address field has been added on the form, you will notice that by default, it looks like below, containing:
- Street address
- Street address line 2
- City
- Postal/Zipcode
- Region
- Country → automatically filled in
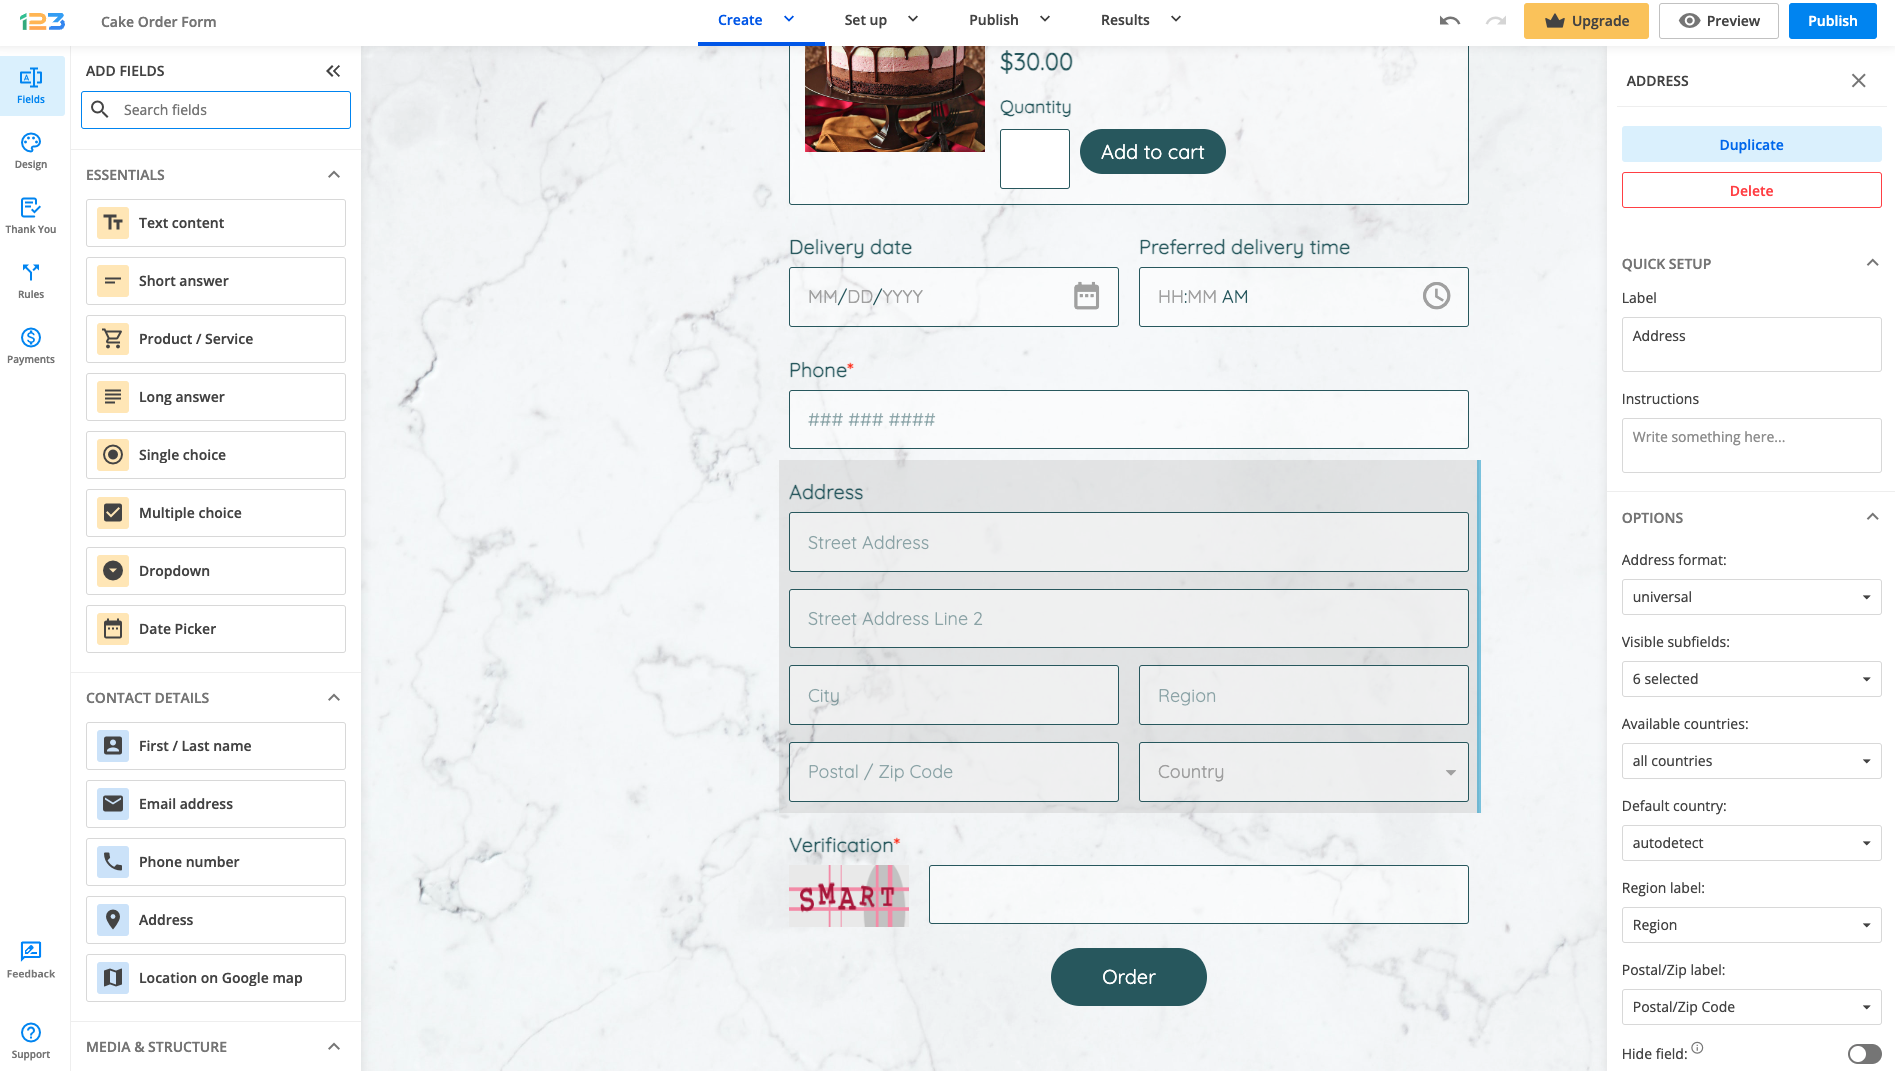
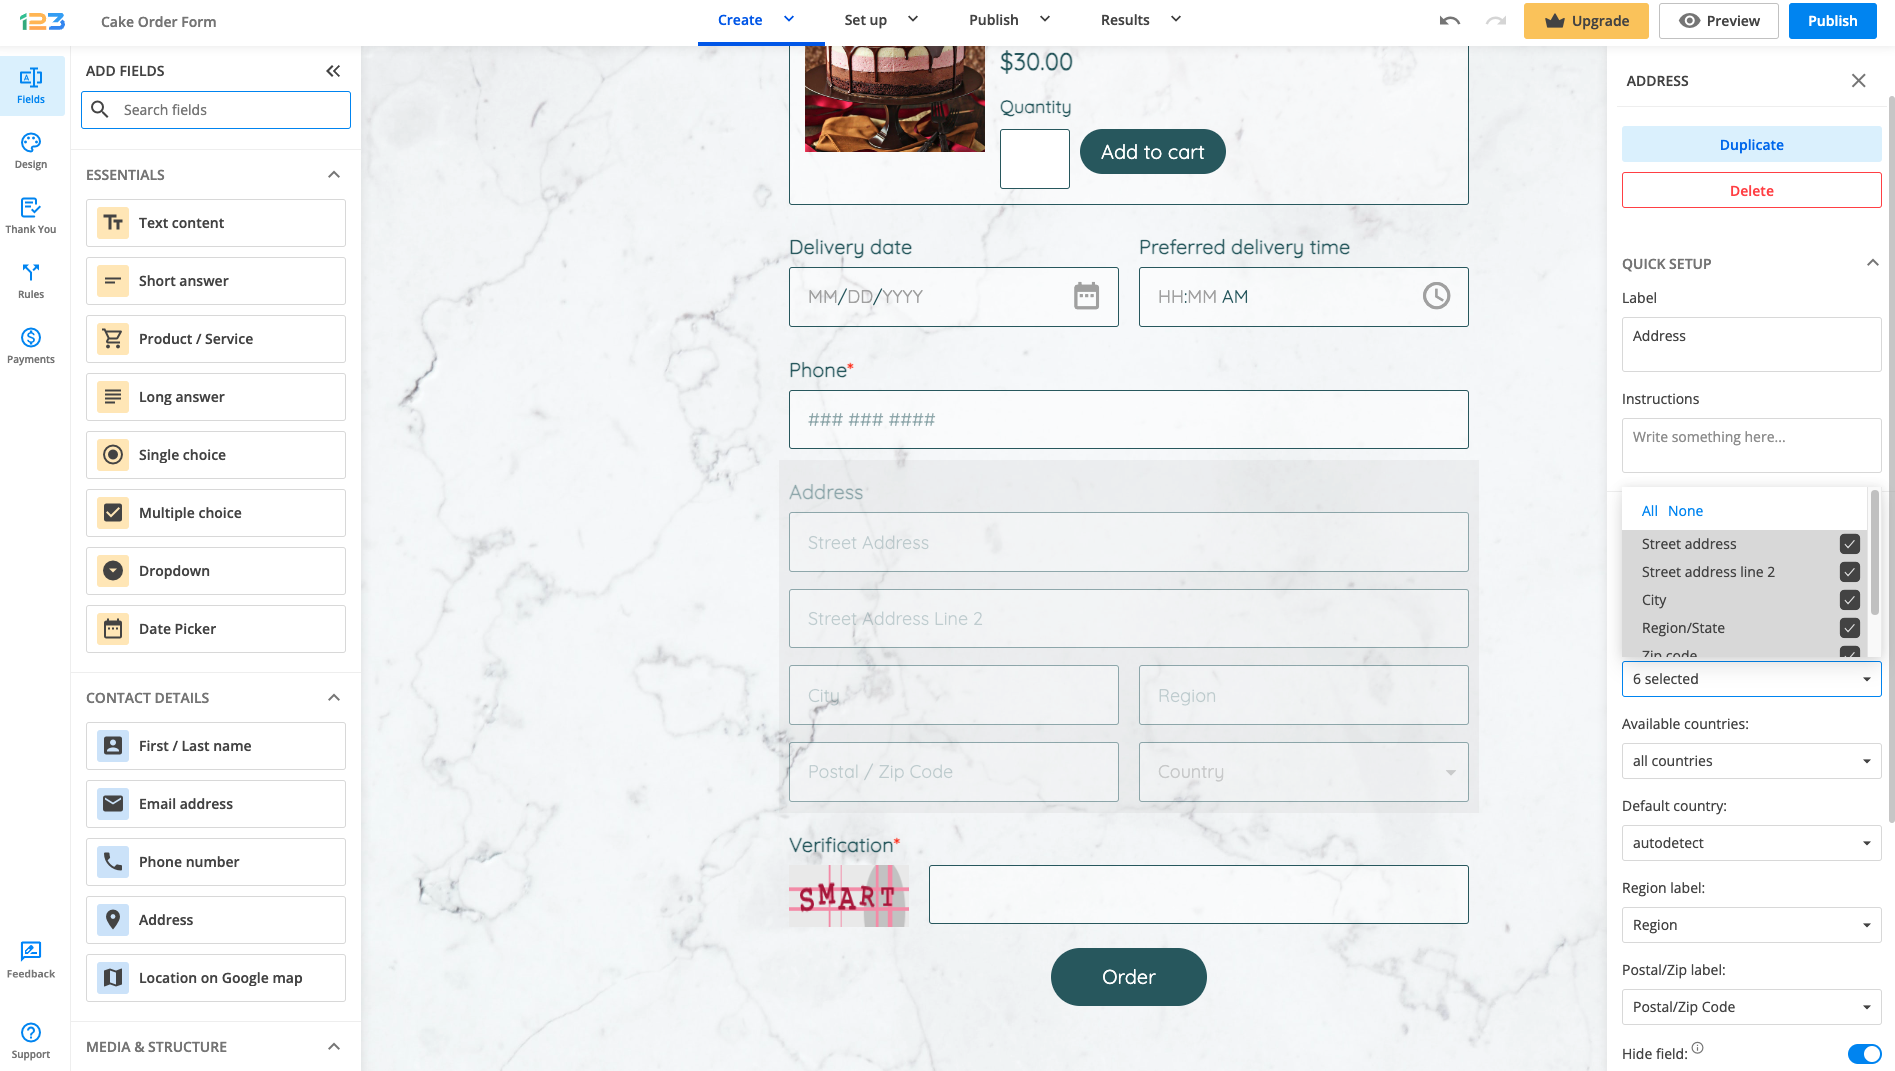
Required field – under Validation section, there is an option of making the field required. Unlike the other fields, here you can select which subfields from Address are required. You can select All, some subfields or clear all your selections by clicking on None.

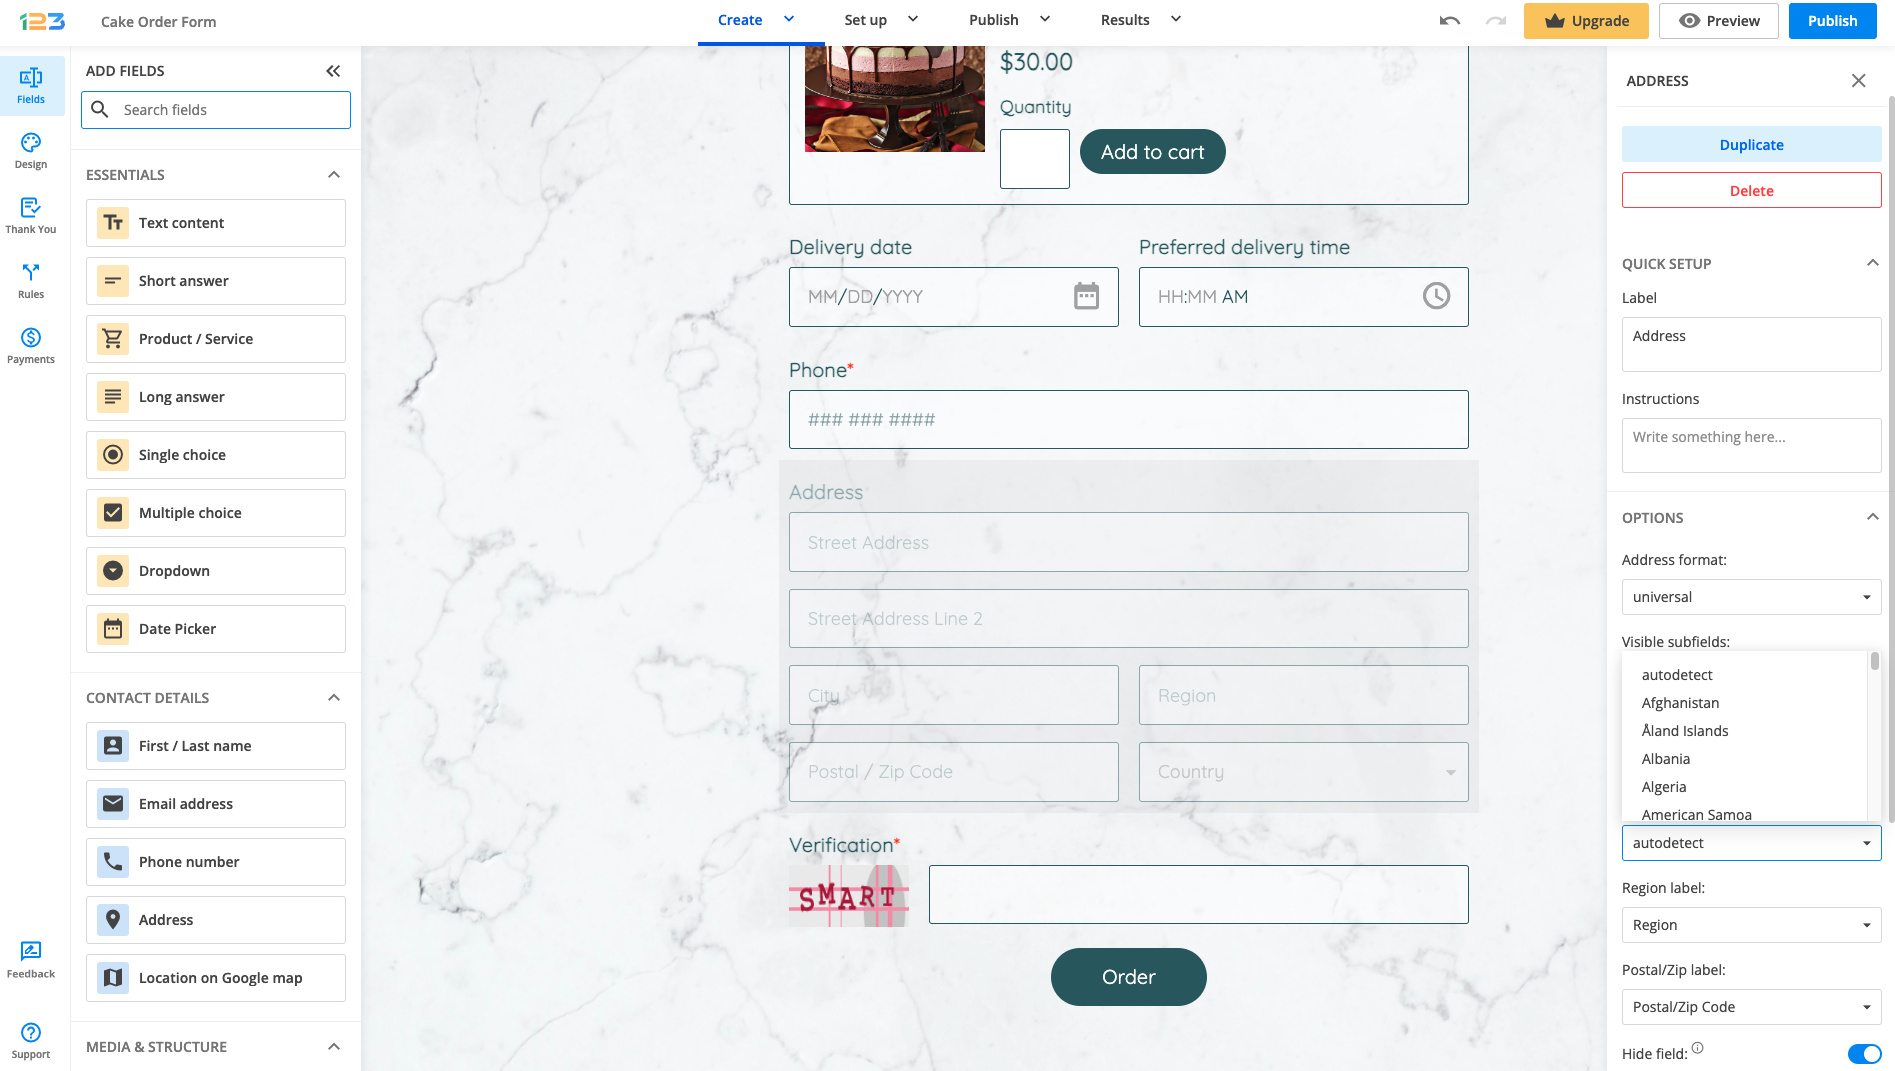
Address format – by default, it is set as universal, but you can change it to fit United States/ Canada/Australia/United Kingdom format.
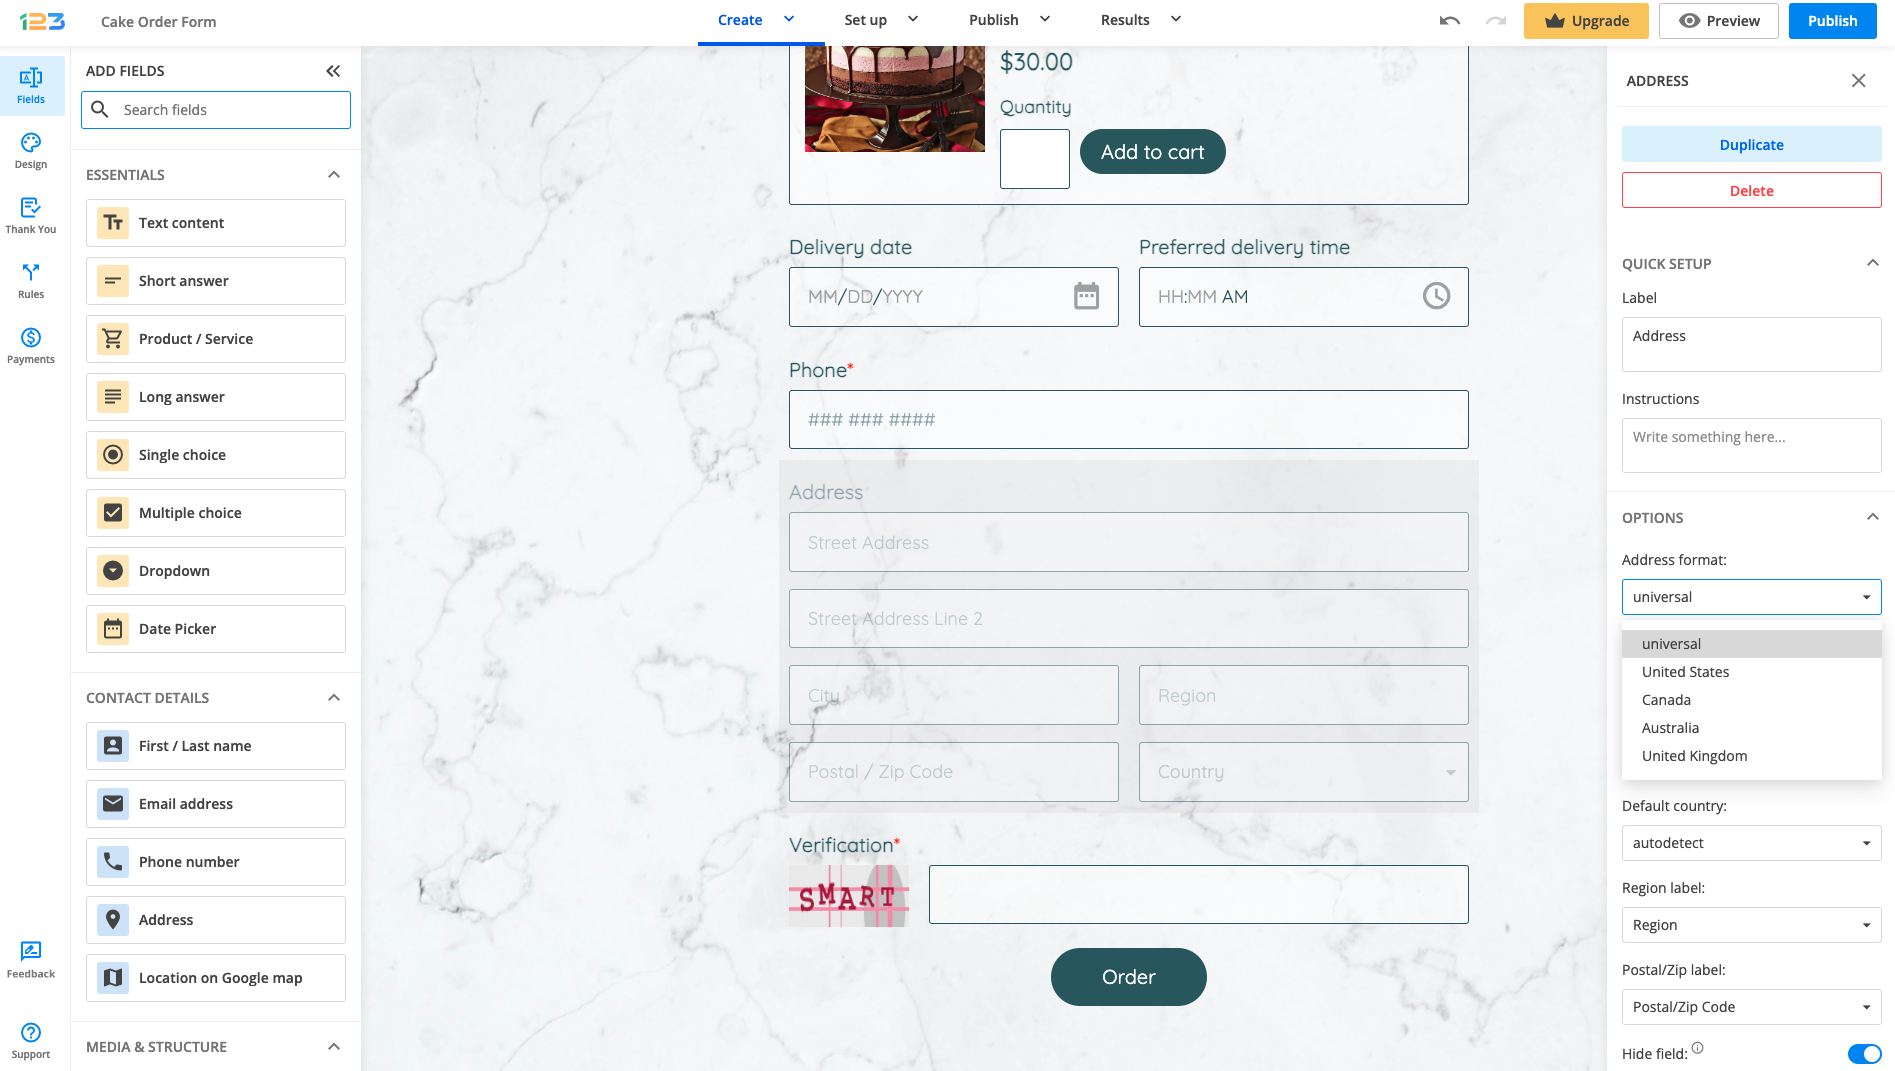
Visible subfields – by default, all subfields are visible, but if you don’t want some of them to show up, you simply have to untick them.
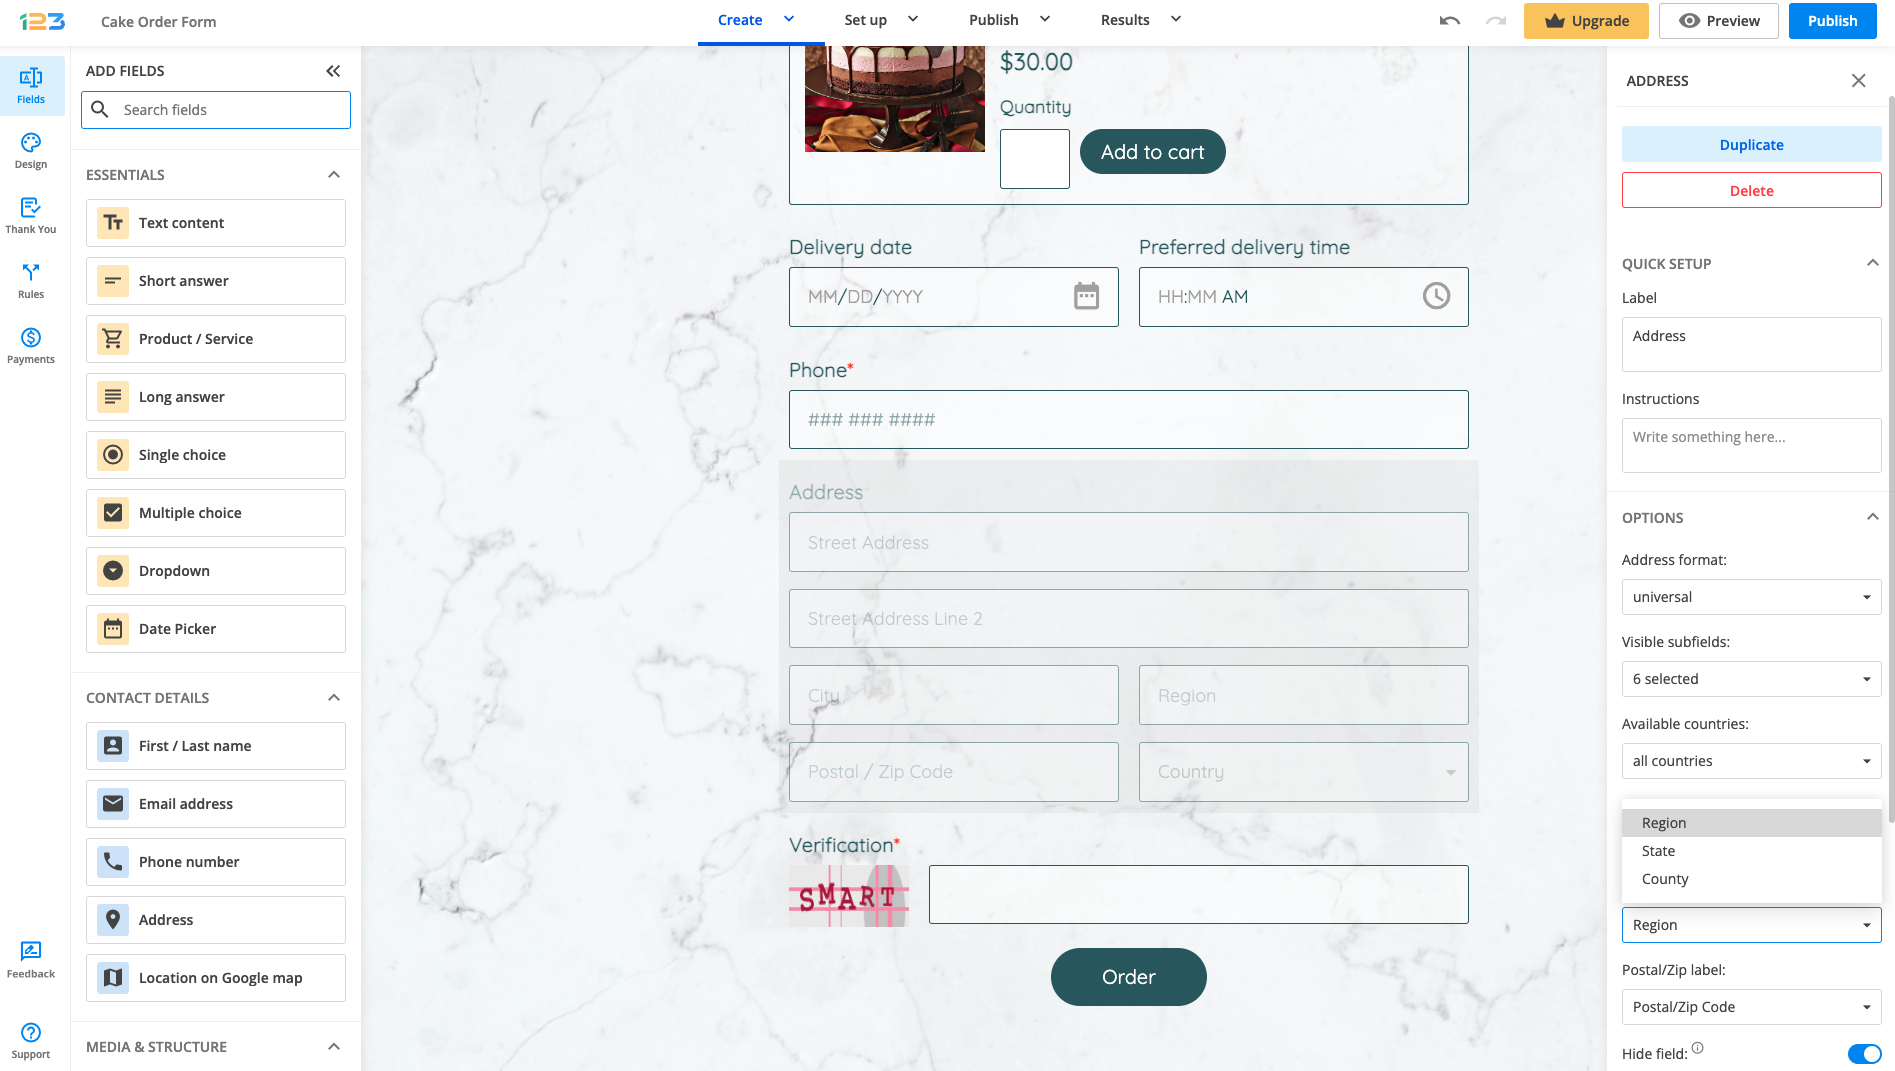
Available countries – by default, all countries are available, but you can select the ones that you are interested in by checking them in the dropdown. You can select from 250 available countries and international entities. To uncheck them all, simply click None, on top of the dropdown list. You also have the option to check All countries back.
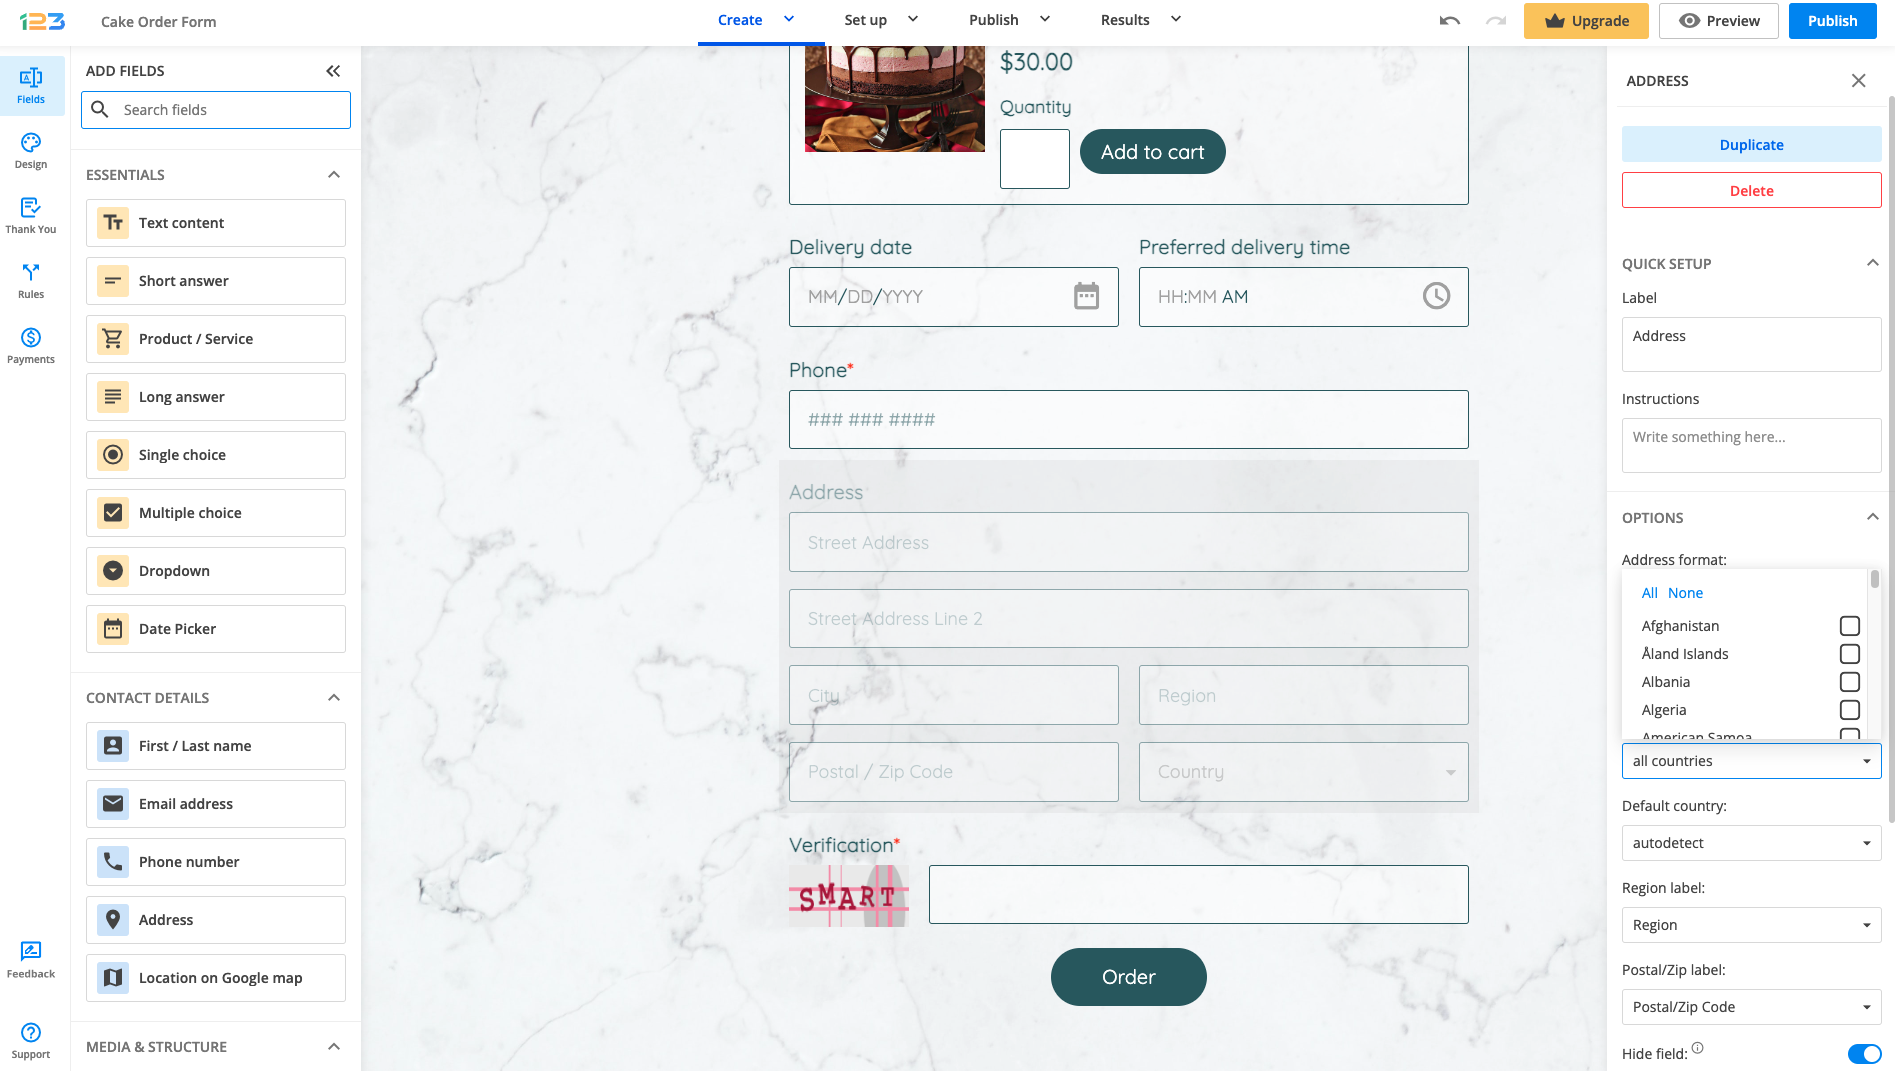
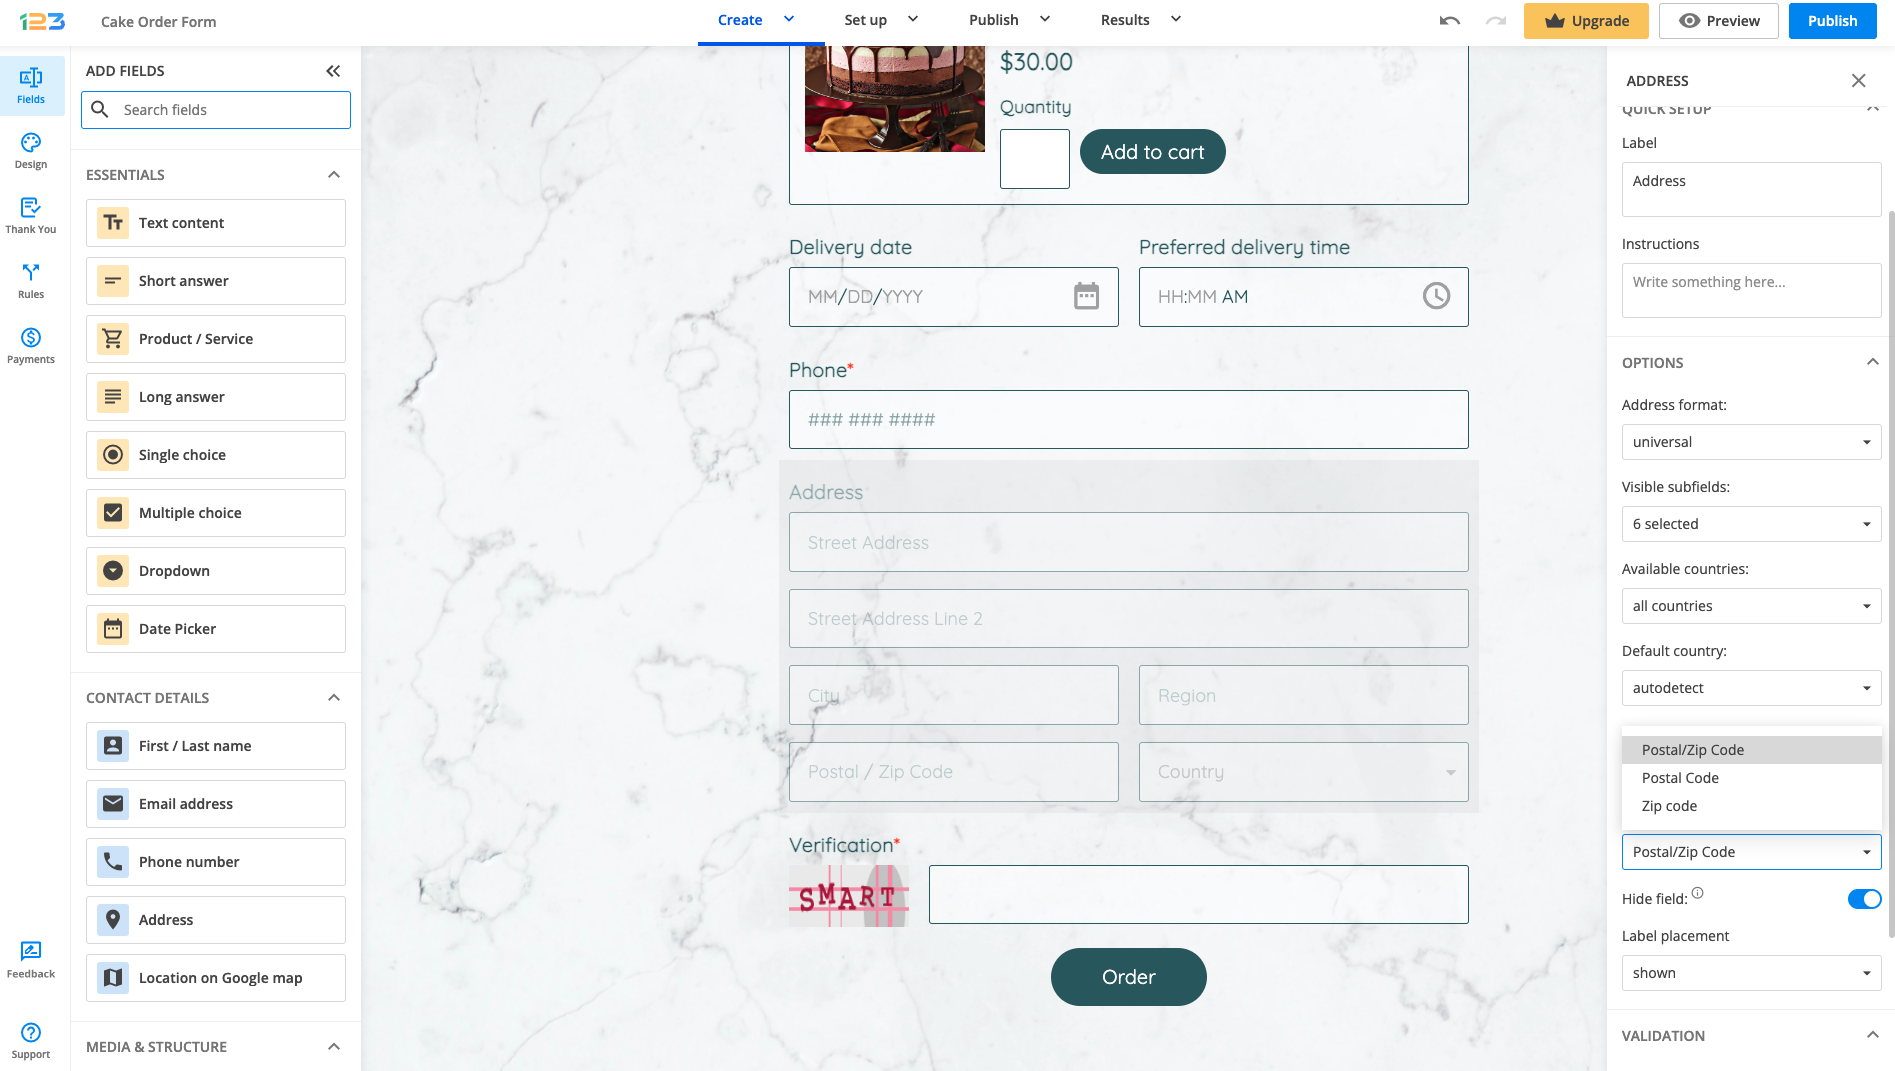
Default country – by default, it is set as autodetect, this meaning that the Country subfield will automatically populate on the form depending on the respondents’ IPs. You can select one country to be the default one and it can be changed by respondents on the form if it is not applicable to them.
Region label – by default, it is set on Region, but you can change it to fit your needs. If you want to use the Region/State/County option, notice that it only changes the placeholder inside the subfield. In order to use your form on a global scale, where some form users might come from region-divided nations or states, such as the United States or Mexico, you could use Translations and write down your own placeholders, for example, “Region/State”.
Postal/Zipcode – by default, it is set on Postal/Zipcode, but you can change it to only one of the option.
PayPal has got its own order form summary. Therefore, those fields cannot be changed from your 123FormBuilder account unless the Detailed invoice option is enabled in the PayPal integration panel.
Instead, you could try PayPal Pro or PayPal PayFlow, which offers more details of the purchases made by your buyers.
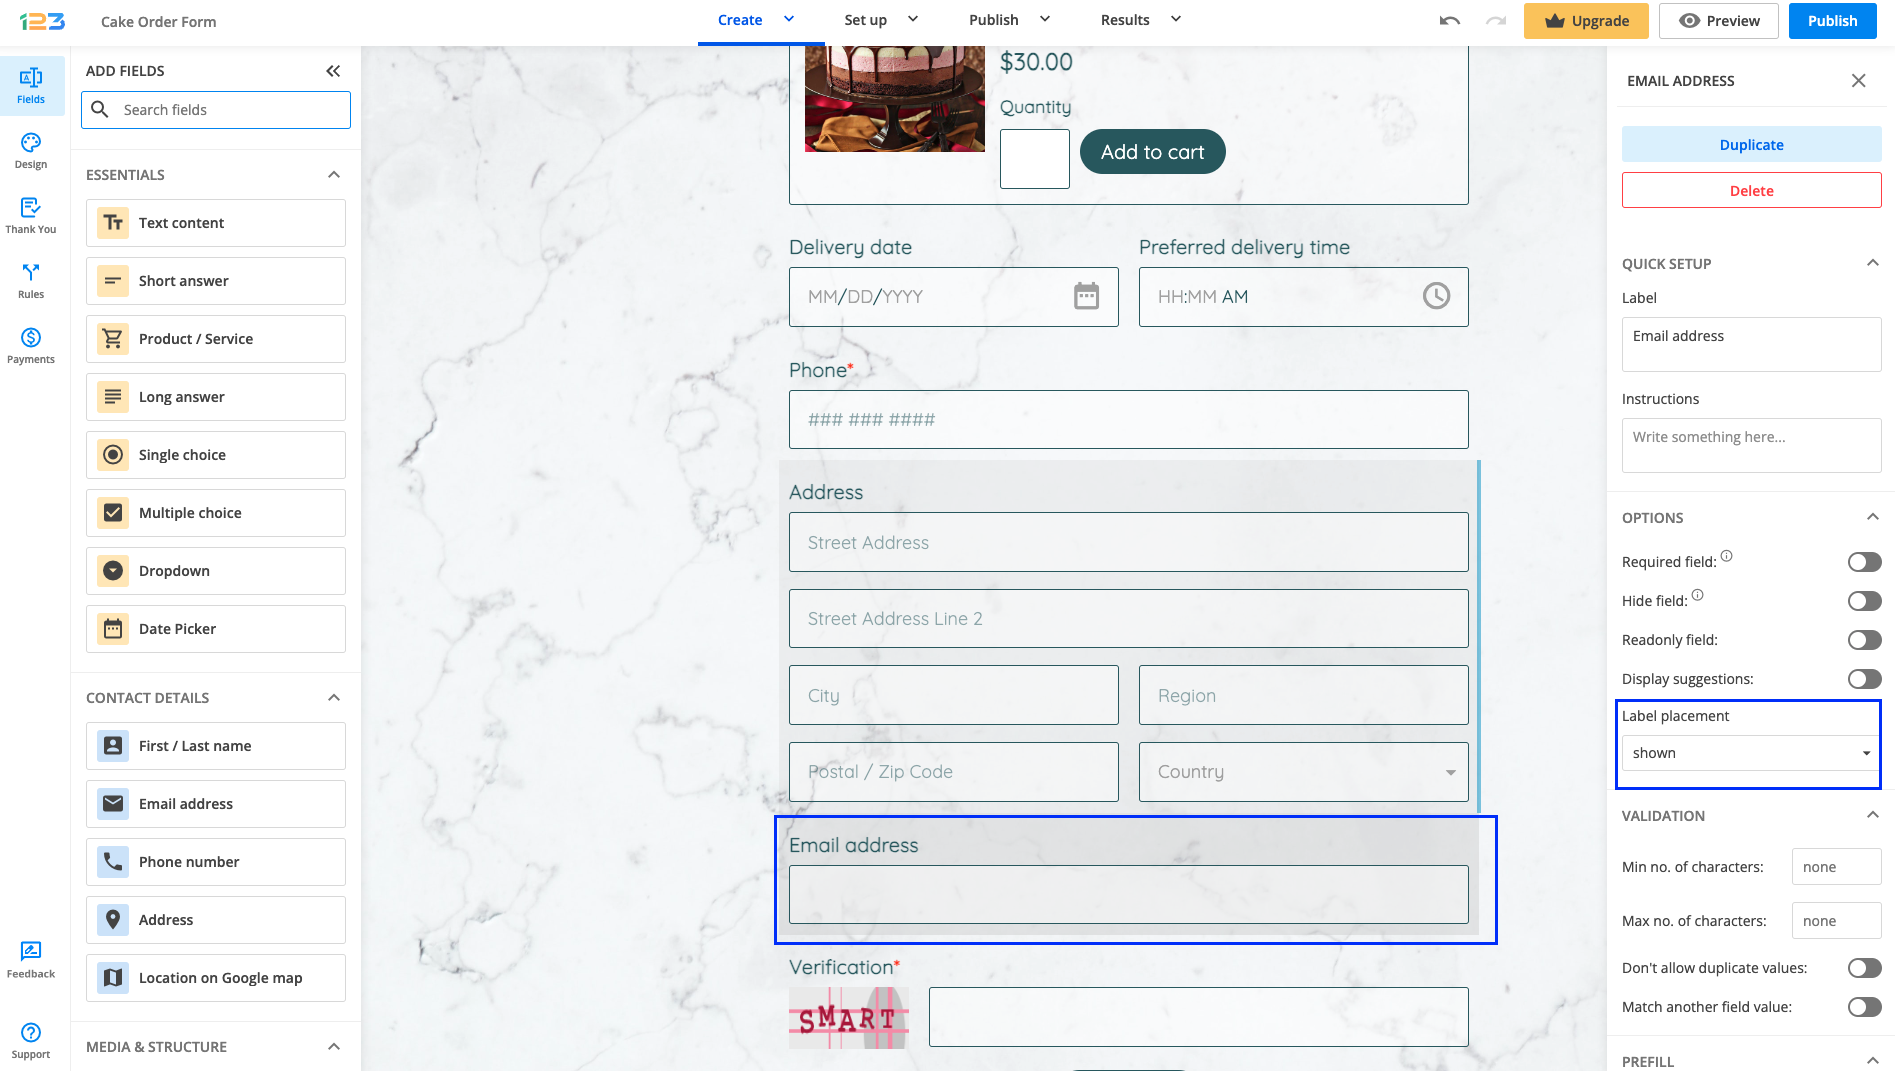
If you want to style your form or make it more dynamic, you can change the label placement by deciding to either show it or hide it. This setting has to be applied to each field individually, it does not apply automatically to the entire form.
All you have to do is to select the field you are interested in bringing changes to and in the left side panel you will find the section Options. Label placement is the setting that allows you to play around with the question text.

Shown: by default, the label placement is set on shown and looks like below:
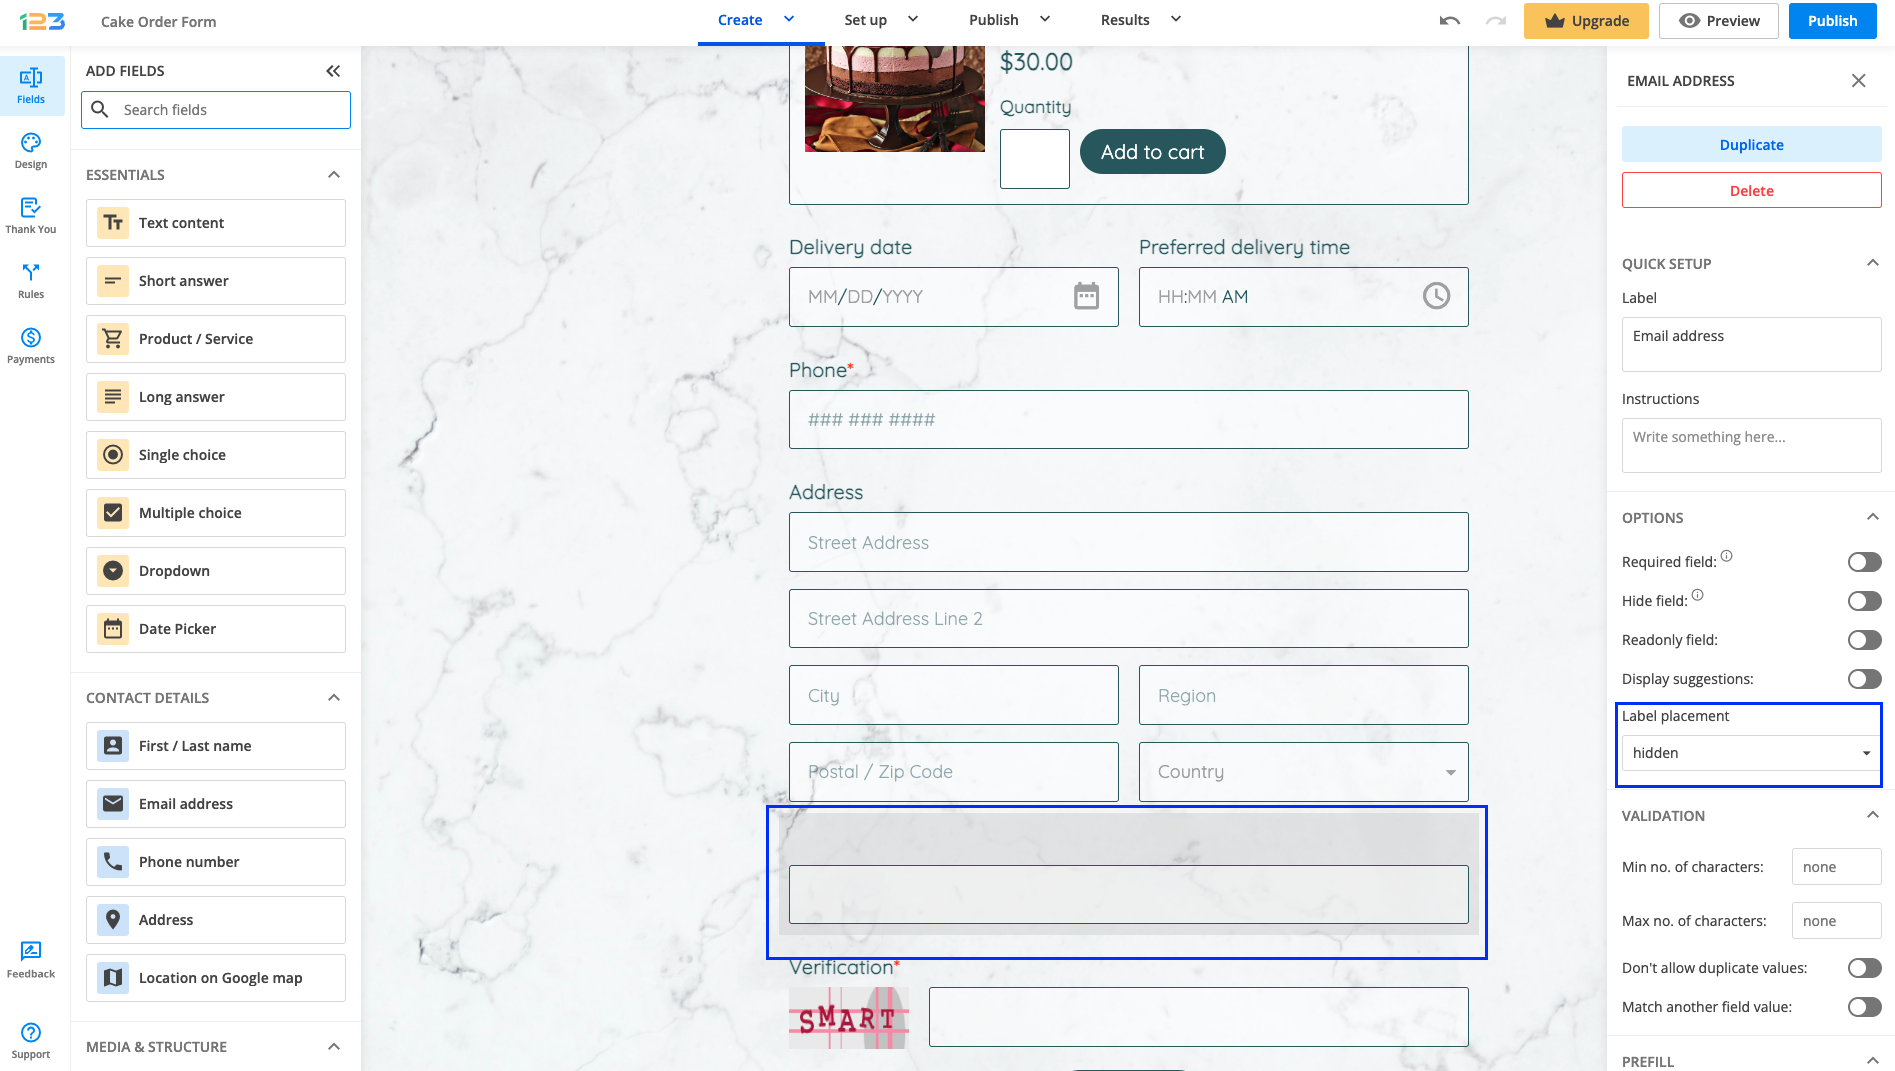
Hidden: when chosen, this setting makes your question text hidden.
Inside the field: when choosing this option, the question text is placed inside the field and once respondents interact with the field, the label disappears.

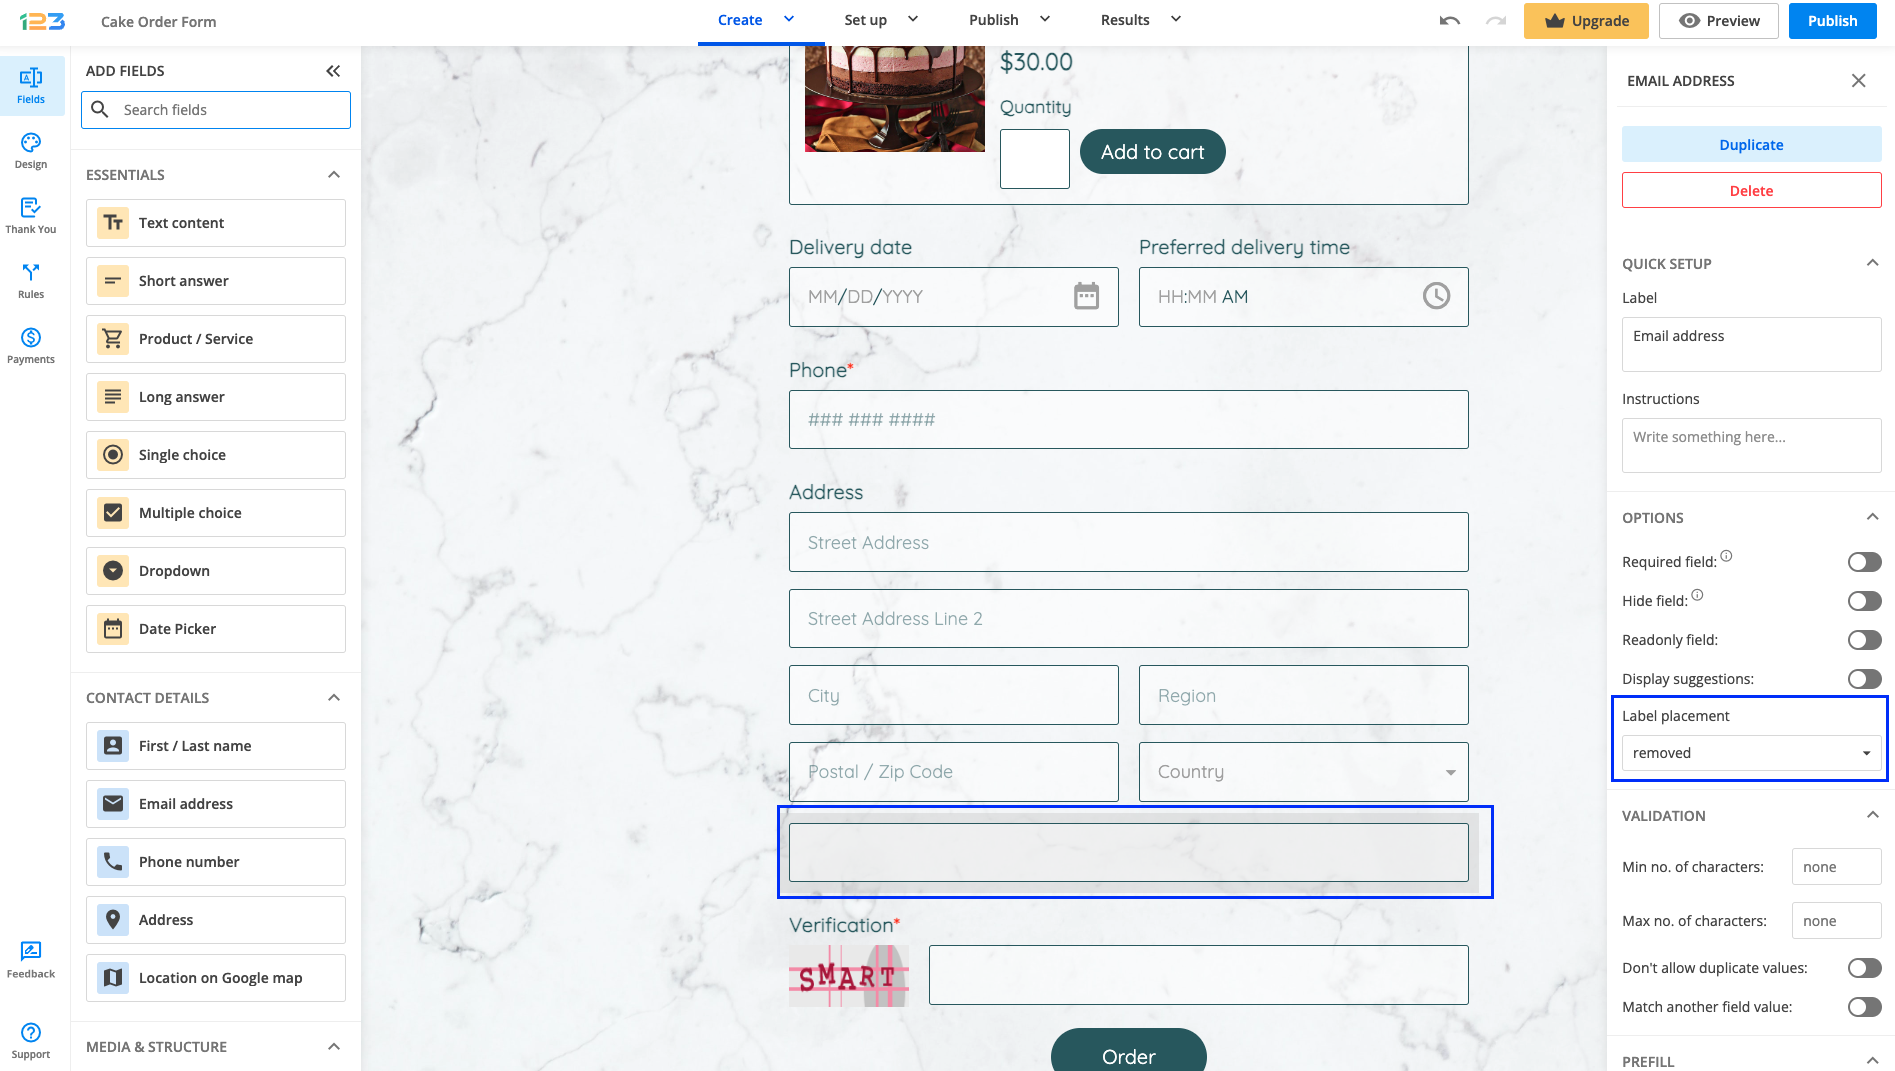
Removed: similar to Hidden, this option hides the label, but also the white space.
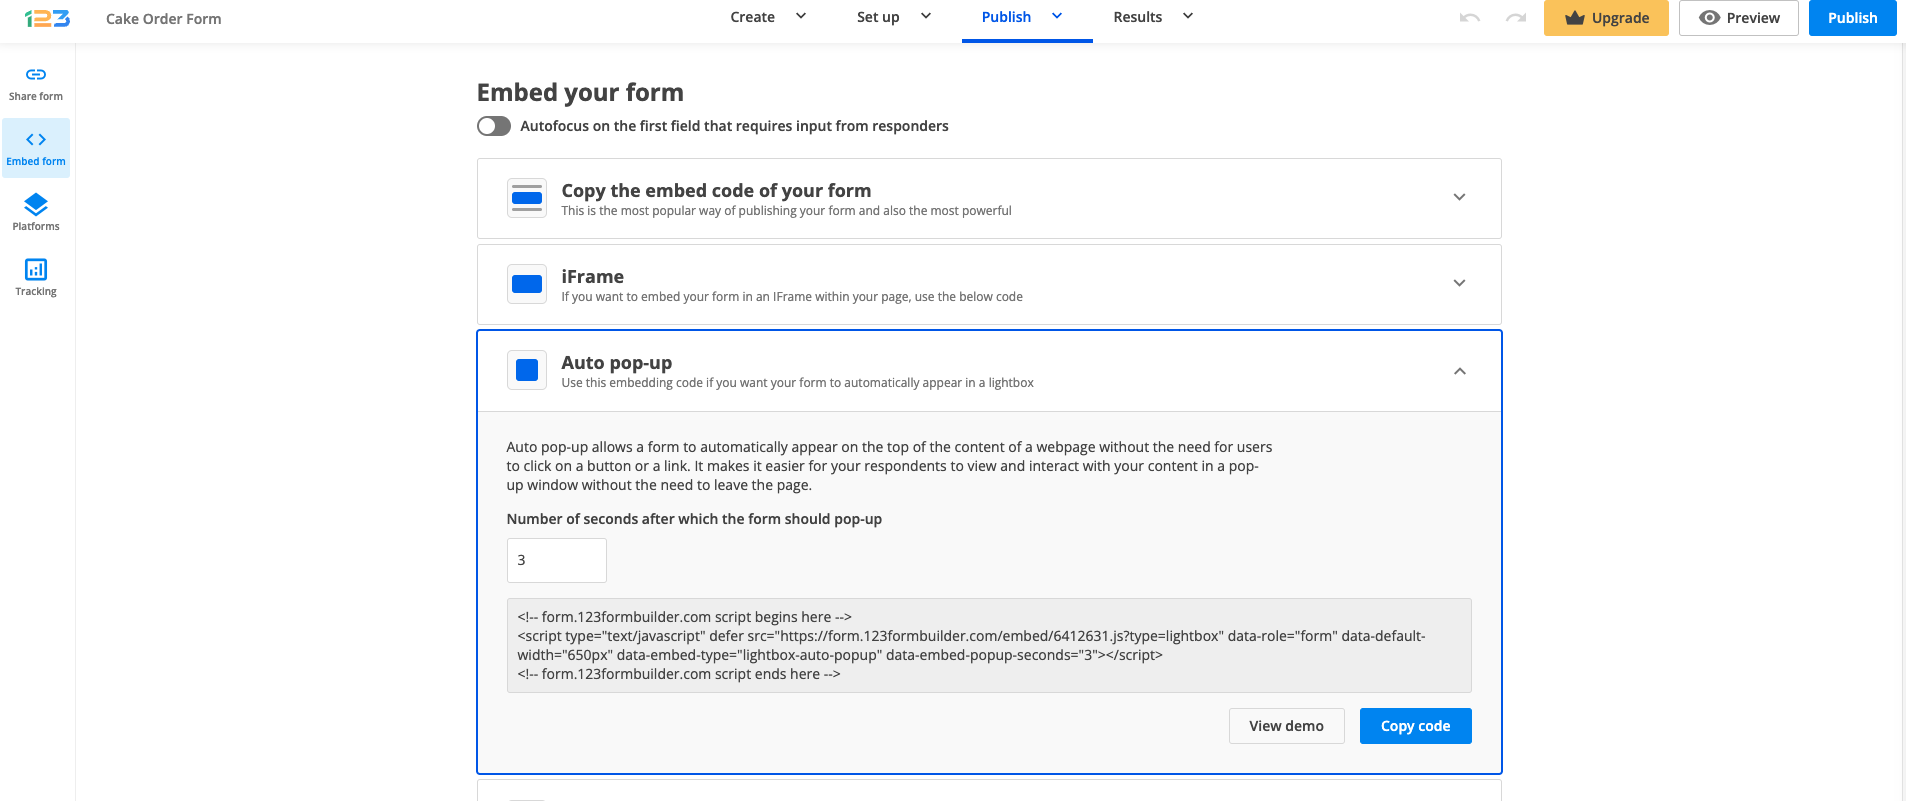
Your lightbox form can be triggered to pop up on the screen after a period of time of your choice. The user doesn’t need to do anything; the form will simply show up on the page in a lightbox.
In order to set up this form behavior, access your form builder account. Next, go to the Publish → Embed form section of your form. In the Auto pop-up, add the number of seconds you want to pass before the popup is triggered. Next, copy the code within the box and paste it into the code interface of your webpage.
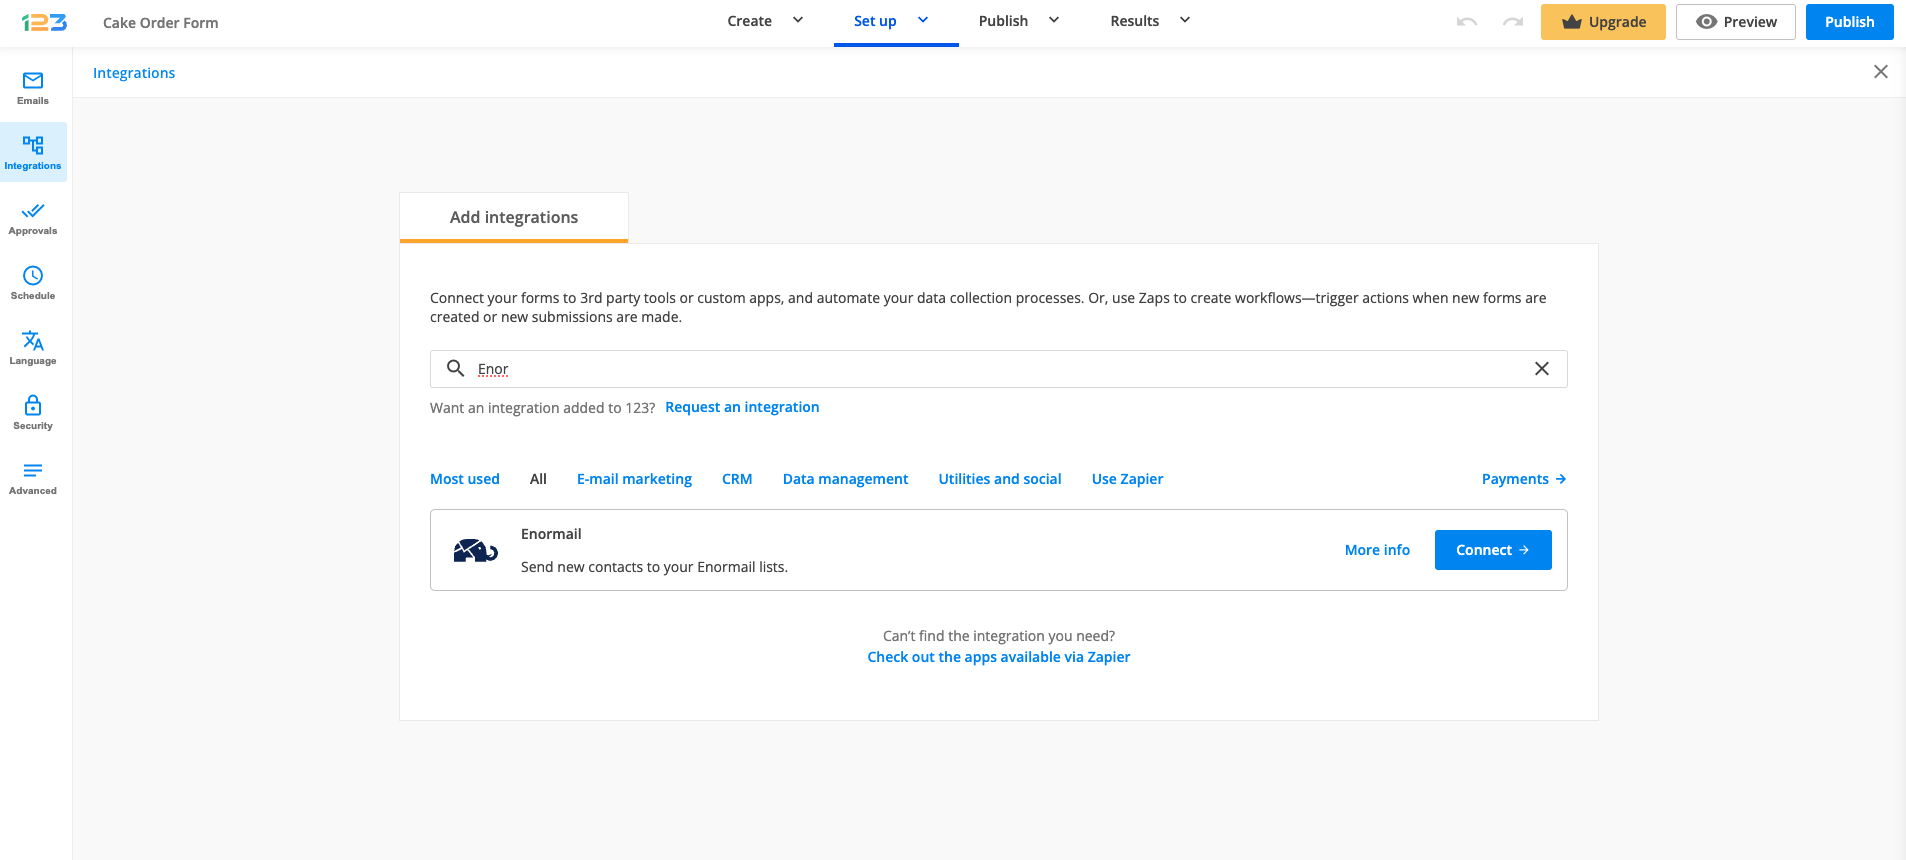
This integration is specially provided for our Dutch users. With this application, you can integrate your 123FormBuilder web form with your Enormail mailing lists. The fields to which you can send data are Name, Email, Last Name, Gender, Company, Address, ZipcodeCity, Country, Telephone, and Mobile.
You will find the application in the Integrations section of your form. All you have to do is search for Enormail using the search bar and click on Connect.
Set as required the fields Name and Email in your Form Editor.
In Settings – Applications add Enormail and introduce the API Key of your Enormail account. You’ll find your API Key in the section Mijn account – API toegang of your Enormail account.

Select a list from Use list and hit Customize.

Associate Enormail fields with your 123FormBuilder fields. They are split into Mandatory fields and Optional fields. If you choose to use Gender, set the choice option with the values m and f in your Form Editor. Otherwise, it won’t appear in your Enormail account. Next press Save and you’re good to go!

Now your Enormail list will retrieve contacts from your form, at each form submission. You’ll find your entries in Contacten within your Enormail account. That’s all and it’s easy as 1-2-3!
Important: Integrating complex fields, such as Address, into your form will not allow for subfields to be associated separately with your Enormail fields. Therefore we recommend you use Short text and Number fields to describe the location.
Important Note
This version of the API was deprecated. If you still need to automate your data collection processes, and retrieve collected data or make various operations related to your 123FormBuilder account through API calls, you can use our new and improved API v2. Please visit our developer documentation for more details.At some point, while using our API, you may fail to access the data from your form builder account. It’s best that you understand from the very beginning the cause of these errors. Therefore, here is a complete list of all the API responses you’d receive, with explanations attached.
In XML and JSON, the API error messages appear as tags (<errorMessage>), respectively names/keys (message).
And here is the confirmation message that you will receive when your webhook is added successfully.
There have been some problems reported when trying to open exported CSV files in Microsoft Excel. The submissions wouldn’t appear as tabular textual data. This is due to the fact that Excel sometimes can’t directly transform all data accordingly from the exported file. Follow the steps below on how to open a CSV file in Microsoft Excel:
1. In Excel click on New and create a Blank workbook.
2. Next, go to Data → Get External Data → From text.
3. Import the CSV file from your computer.
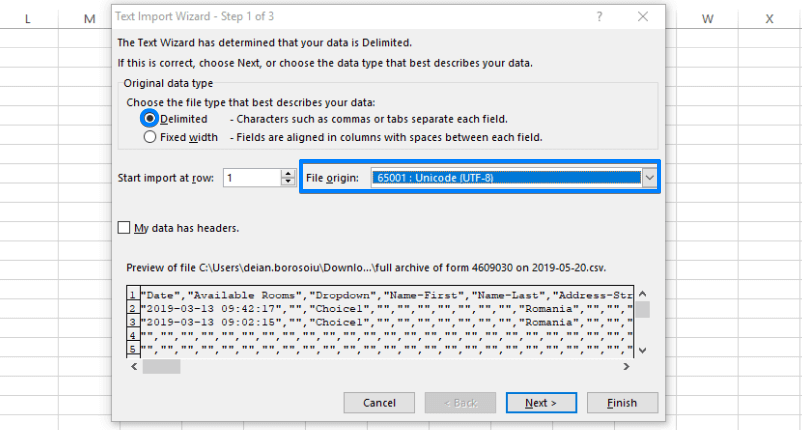
4. Check Delimited and, at File Origin, select 65001:Unicode (UTF-8) from the dropdown list.
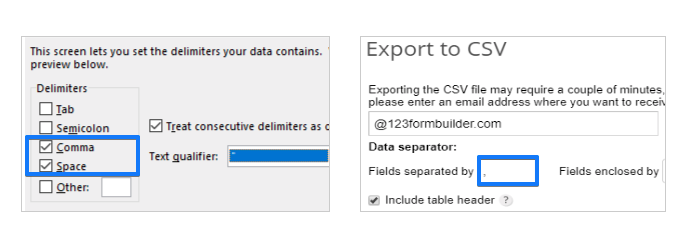
5. Click Next and, at Delimiters, choose the delimiter (field separator), be it space or comma. You’ll see the changes in the window below, within the wizard panel. The delimiter that you choose should be the same as the one you selected when exporting the CSV file from your 123FormBuilder account (Data Separator).
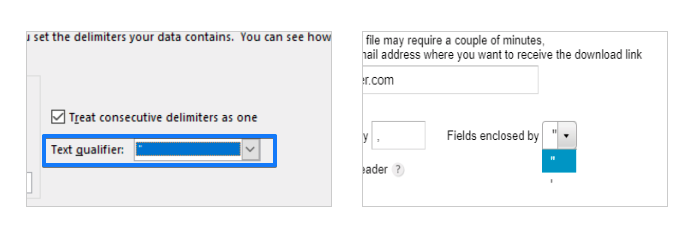
6. In the same panel choose the enclosure of the fields in Text qualifier. The qualifier that you choose should be the same as the one you selected when exporting the CSV file from your 123FormBuilder account. Hit Next, then Finish.
7. Hit Ok and you’re done. Your submissions should now be organized within a table with well-structured columns in your Excel window.
If this doesn’t work, select New worksheet before pressing Ok, instead of leaving it on Existing worksheet. Don’t forget to save your workbook.
Related articles
PayFast is a payment processor for South Africa, therefore it will accept payments only in South African Rands.
Setting up your PayFast integration
1. Click New Form from your account dashboard and start creating your payment form.
You can use choice fields (single/multiple choice and dropdown lists) to display the products on sale or, even better, Product field.
2. In your Form Editor, in the left side panel, you will notice the Payments section. By using the search bar, you can quickly find Payfast.

3. After adding PayFast on your form, you will notice a couple of changes: the PayFast payment processor has a tag near its name & the settings panel opens up to the right side of the page.
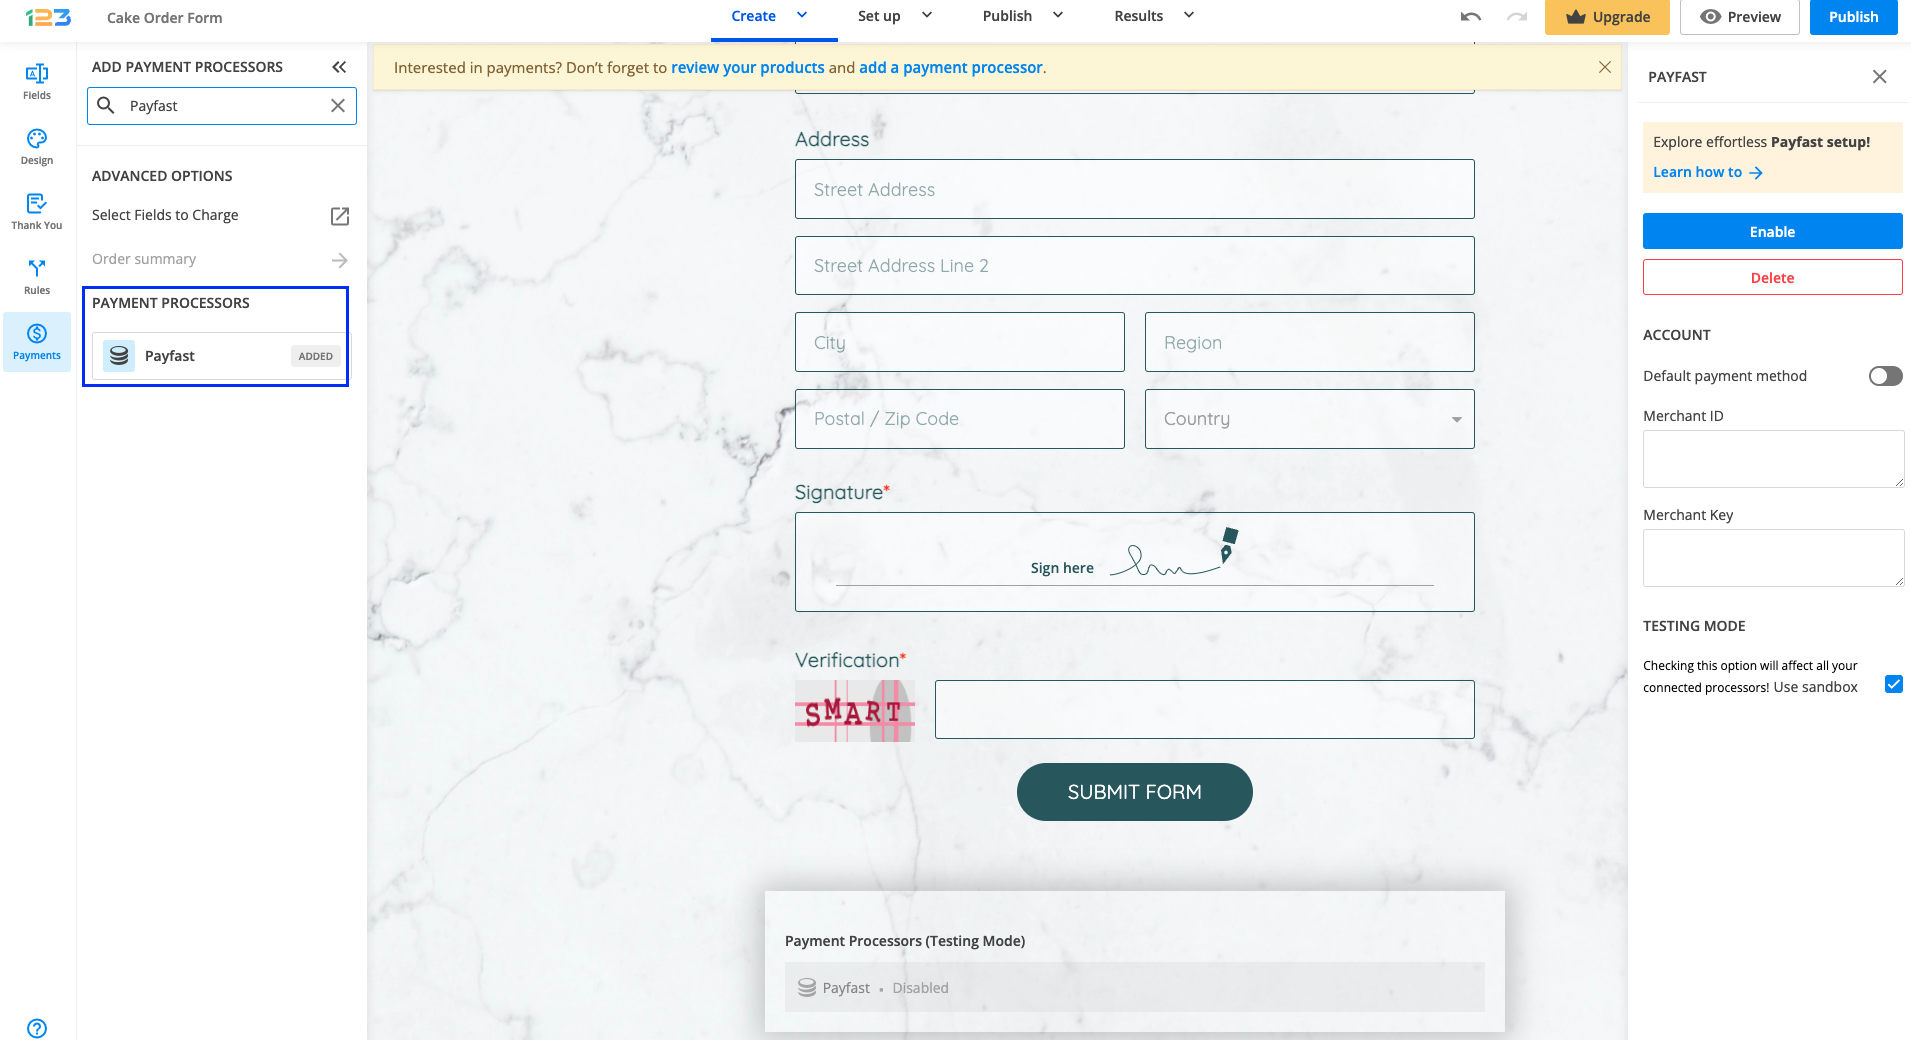
4. In order to set up Payfast integration, you have to provide your Merchant ID and Merchant Key.
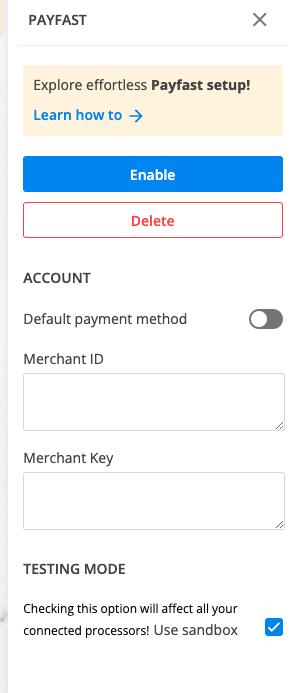
If you don’t want to make a real payment, but just want to test the integration, different settings should be made in your 123FormBuilder account:
a. Enable your integration with the following information:
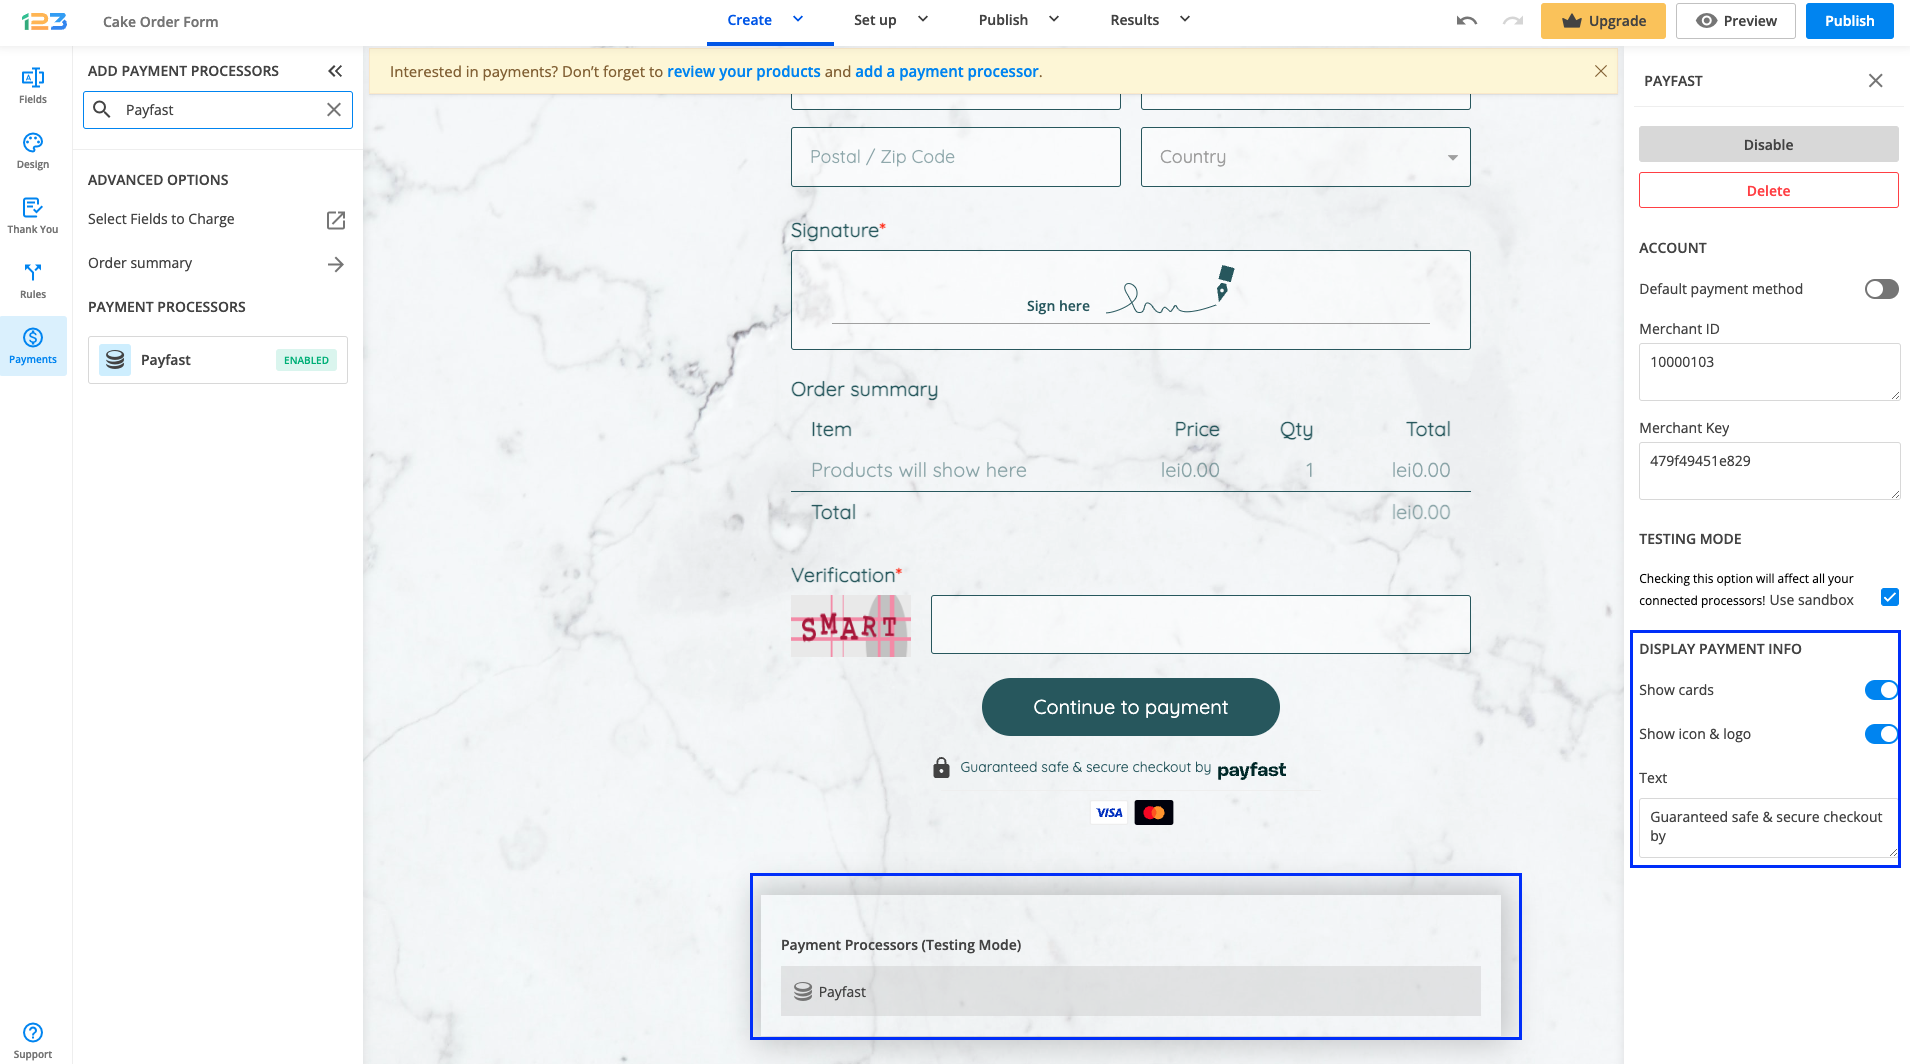
Merchant ID: 10000103
Merchant Key: 479f49451e829
b. Tick Use sandbox
Then, once redirected to PayFast, you need to log in under Returning buyer with the following data:
Username: sbtu01@payfast.co.za
Password: clientpass
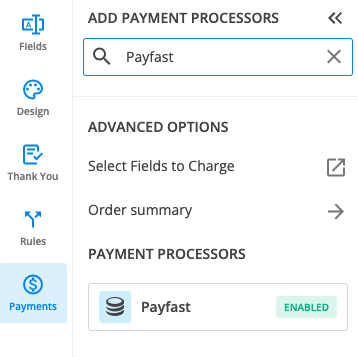
5. Enable the payment integration by clicking on Enable button. By enabling Payfast, you will notice a couple of changes on your form.
The Payfast payment processor on the left side panel has an Enabled tag on it so you could easily scan which payment processor is enabled.
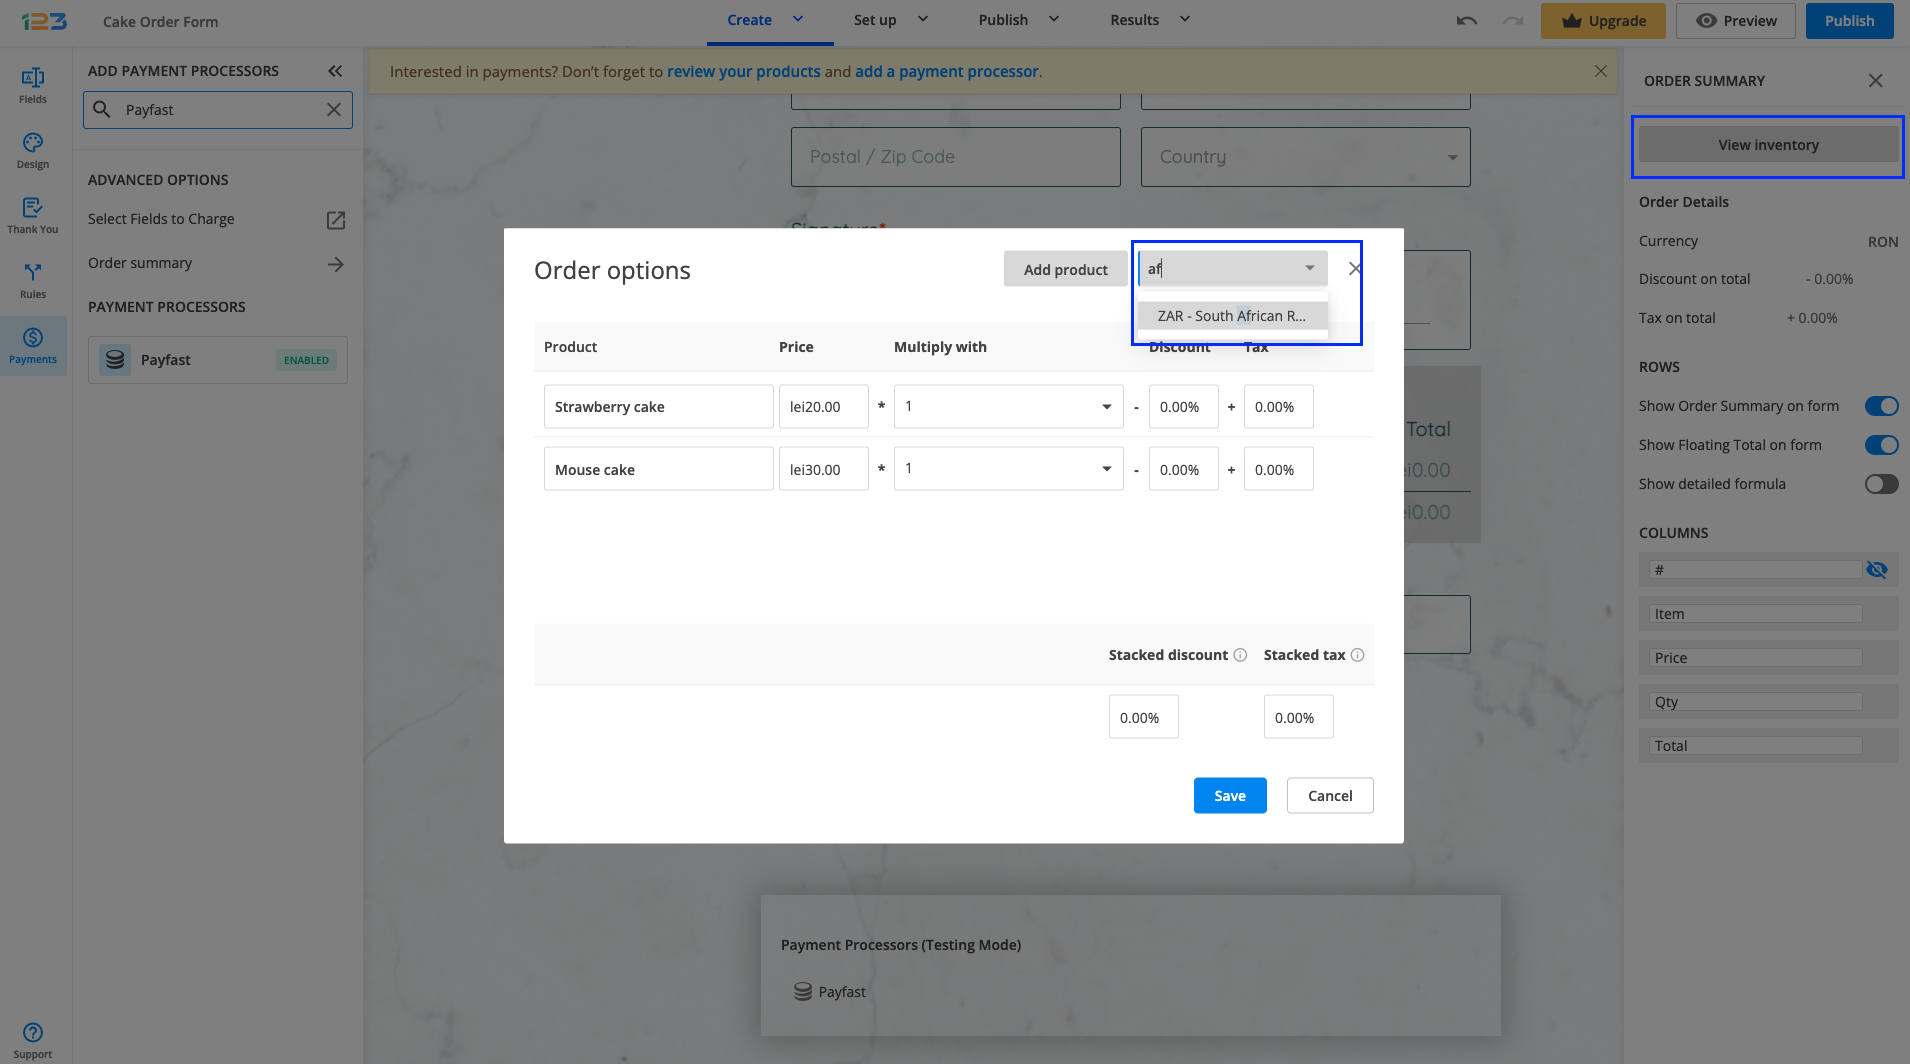
Another change is that on your form it will be displayed an Order summary. Here will appear all the products your respondents select on the form, together with the price per option, quantity and the total price. If you want to customize the order summary, all you have to do is click on it and the available settings appear on the right side panel.
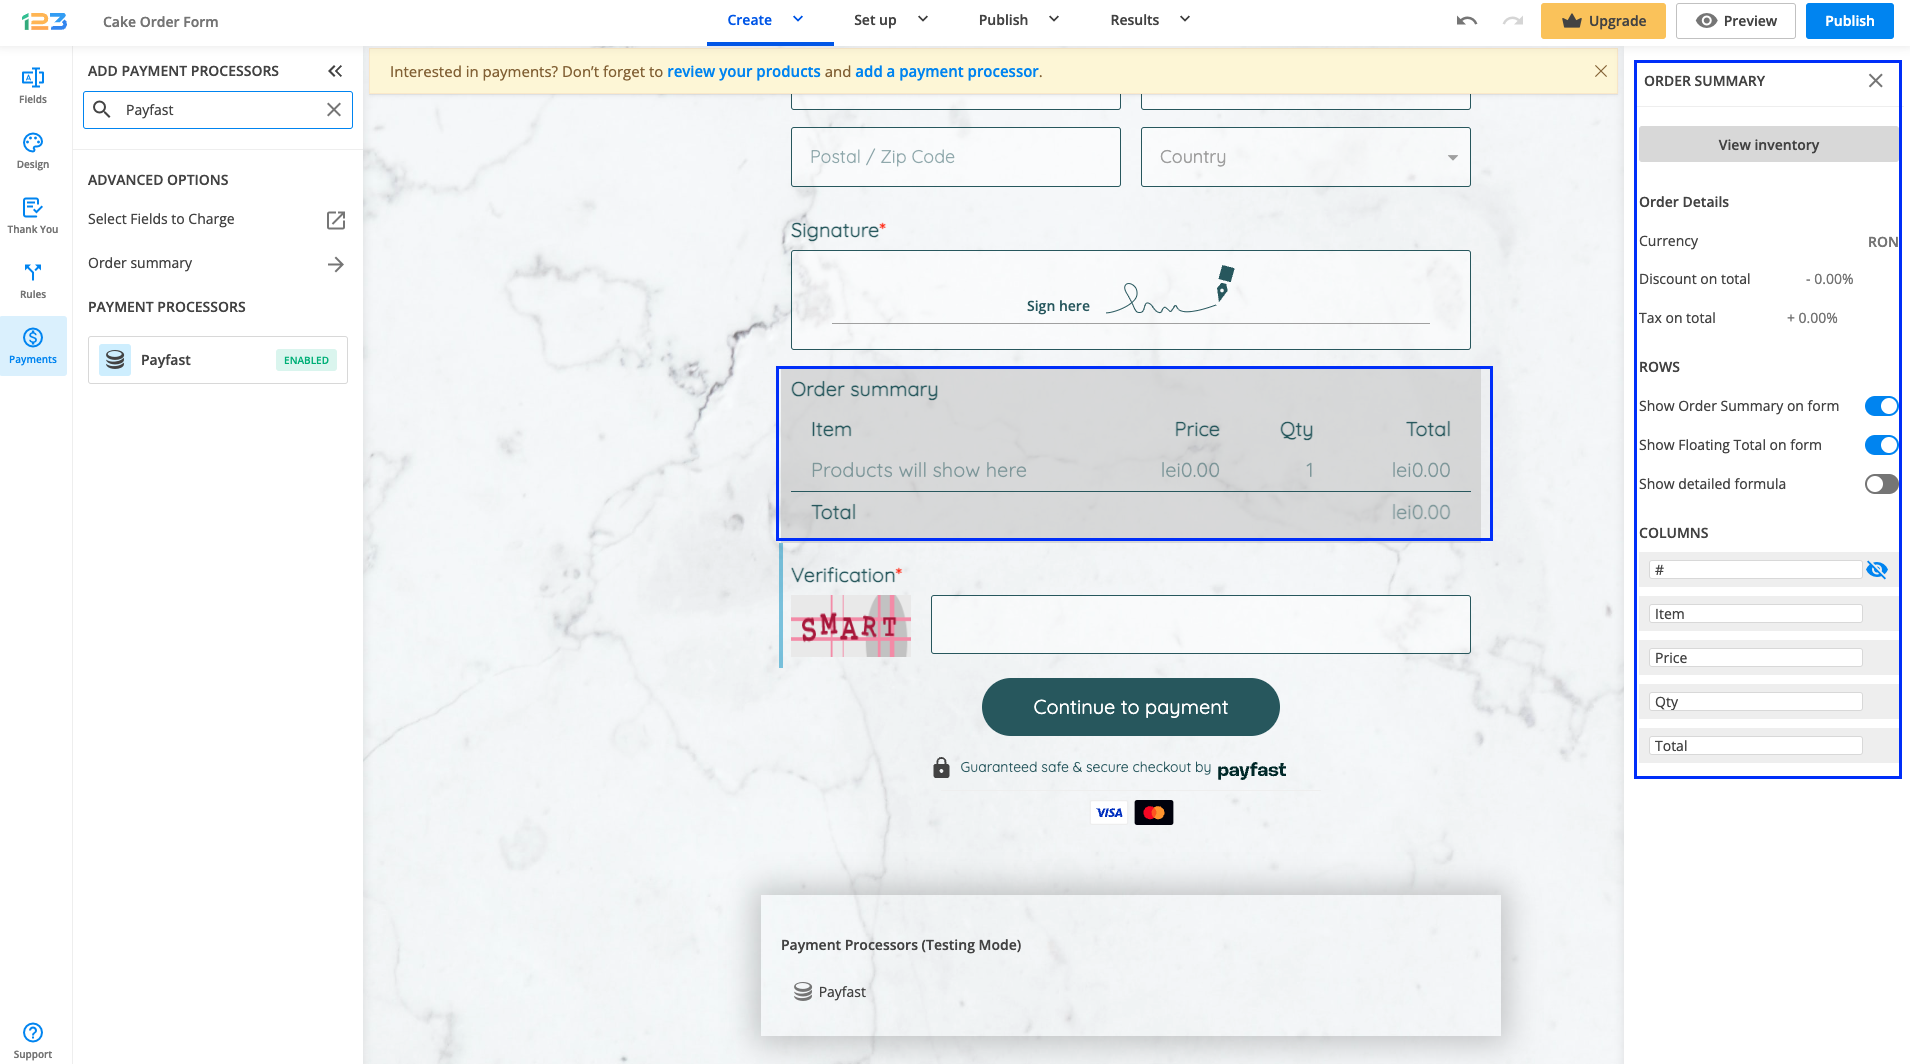
Note: You need to set the Currency to South African Rand. To do so, click on View inventory and from the second dropdown, select the appropriate currency.
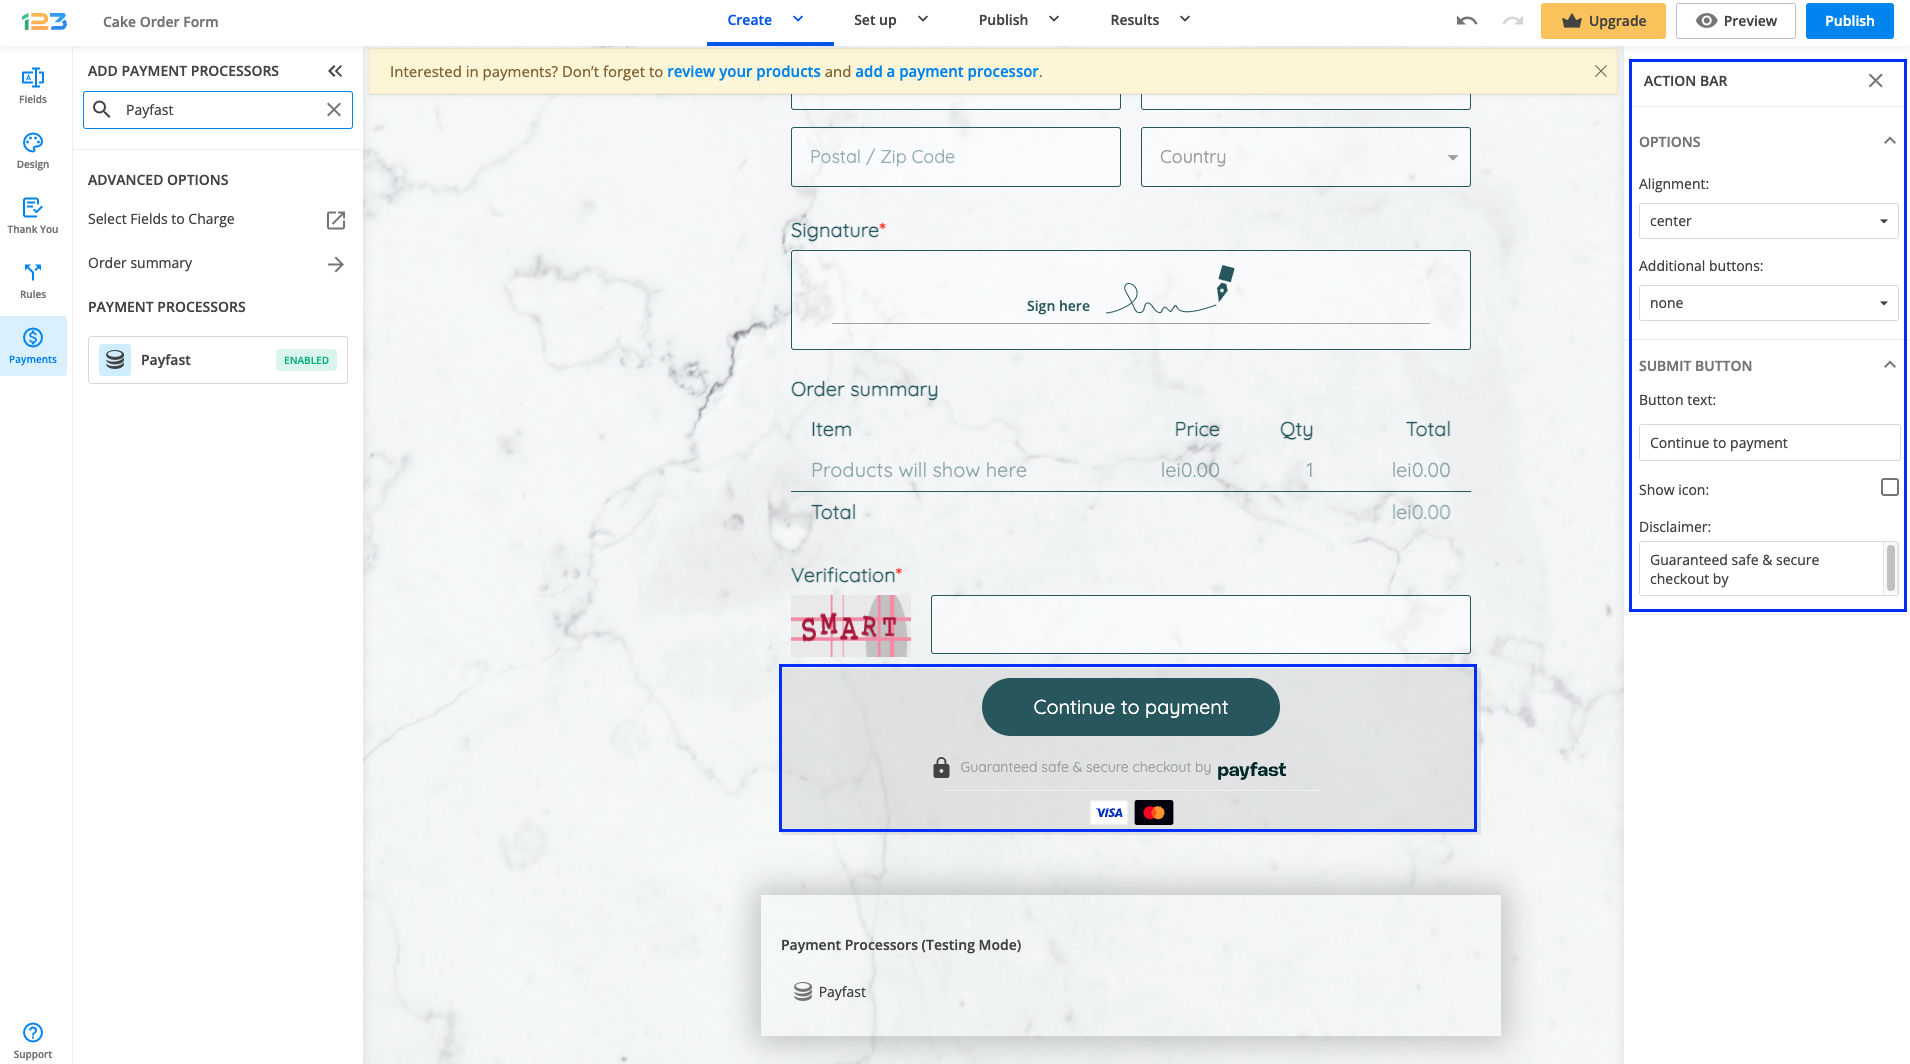
Another change is related to the Submit button. Once your payment integration is enabled, the Submit button is changed to Continue to payment. Below it, we are displaying a disclaimer together with the Payfast logo so that respondents are aware they are proceeding to a payment.
Also, the accepted cards by the Payfast integration are visually displayed so that respondents know from the start what is the accepted payment method.
You can customize the action bar (everything that is related to the submit button, additional buttons, disclaimer, etc) by simply clicking on this area.
Under the Continue to payment button, we are displaying a disclaimer text, together with the logo & icon of the payment processor and the accepted cards. You can disable these settings by clicking on the payment processor and going to Display payment info.
In order to get the settings information from your PayFast account, you have to log in to your PayFast account and go to Settings. There, under Merchant identifiers, you can find your Merchant ID and Merchant Key.
123FormBuilder provides a very simple way to receive Braintree payments with your forms. You will be able to accept donations, orders, and subscription fees easy as 1-2-3.
Setting up your Braintree integration
1. Click New Form from your account dashboard and start creating your payment form.
You can use choice fields (single/multiple choice and dropdown lists) to display the products on sale or, even better, Product field.
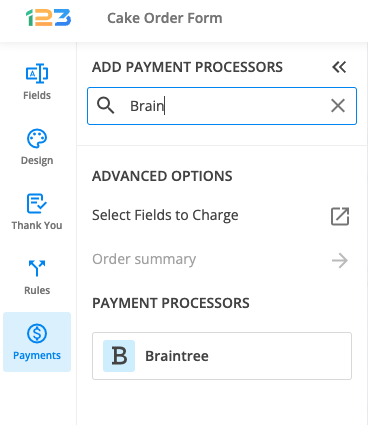
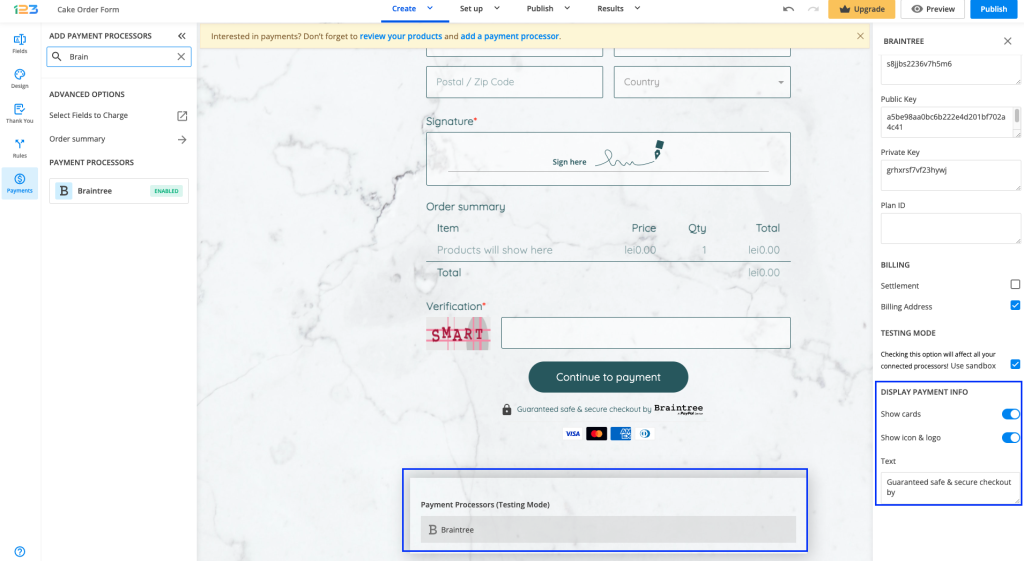
2. In your Form Editor, in the left side panel, you will notice the Payments section. By using the search bar, you can quickly find Braintree.
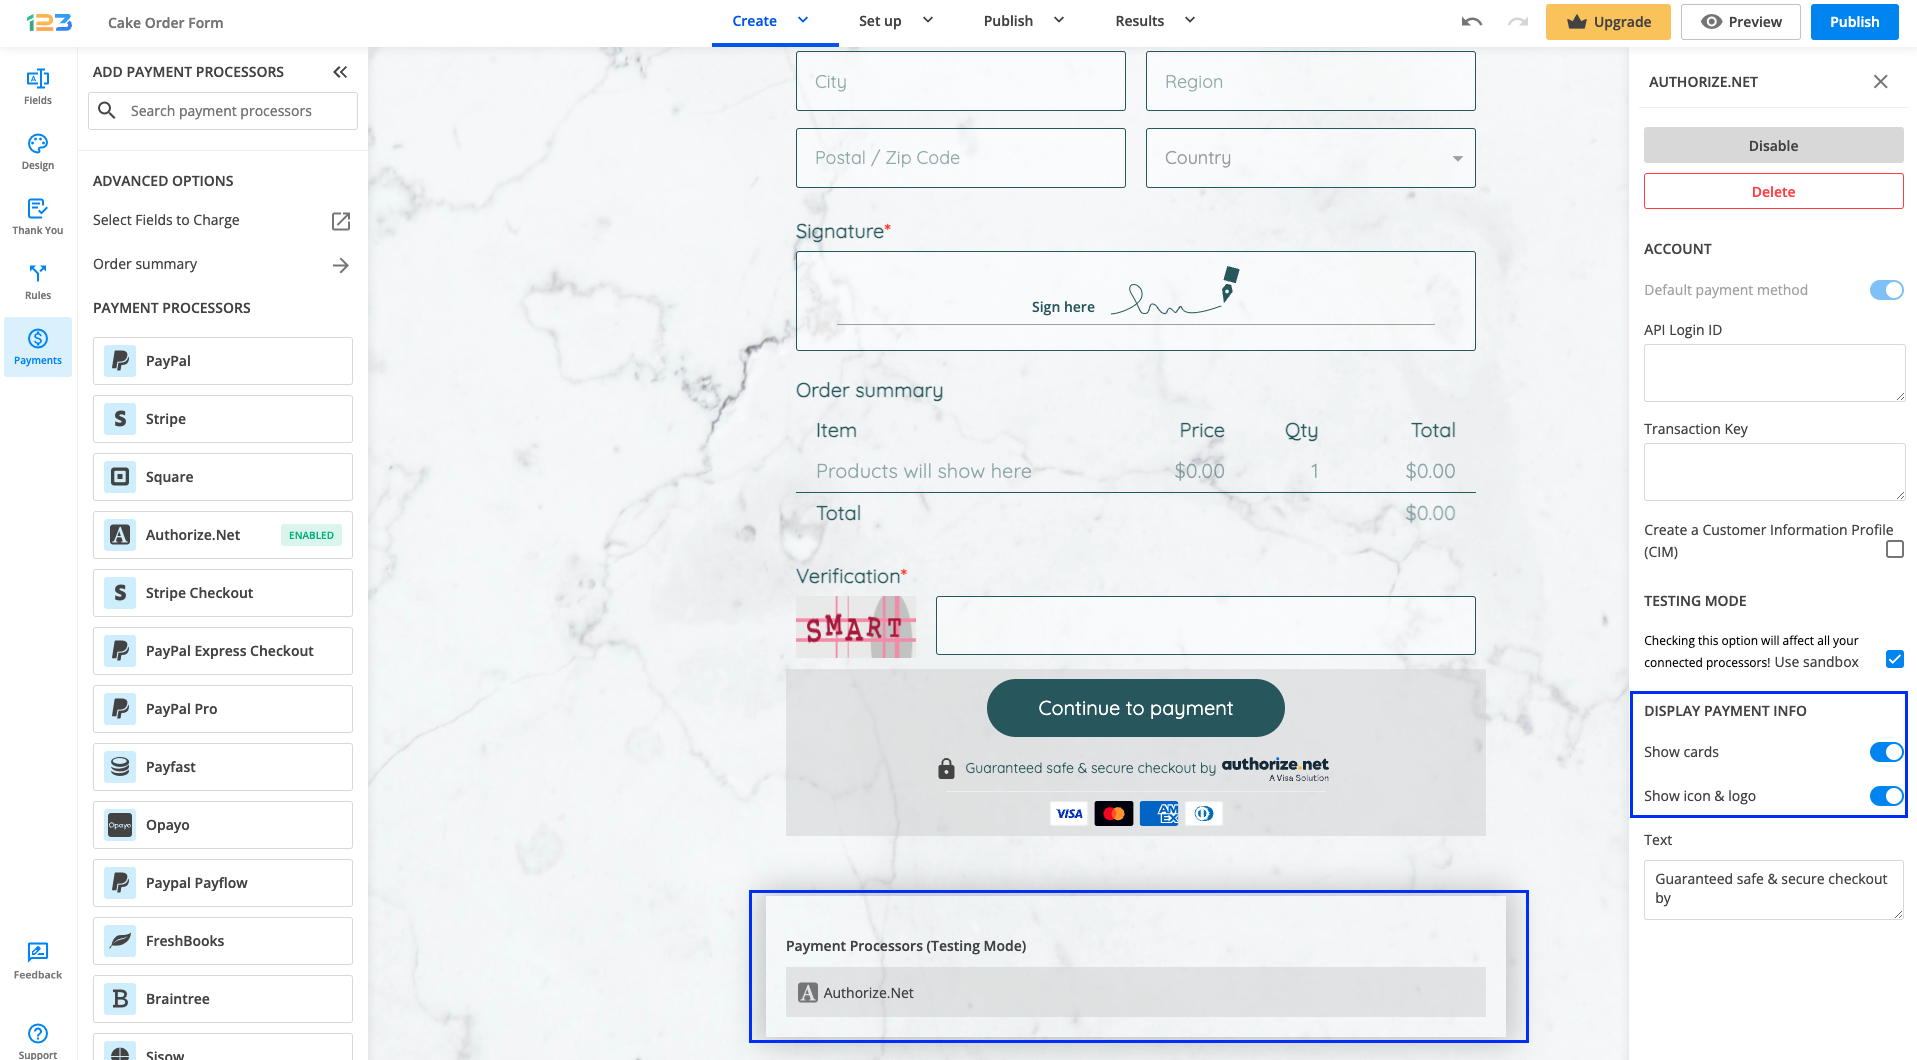
3. After adding Braintree on your form, you will notice a couple of changes: the Braintree payment processor has a tag near its name & the settings panel opens up to the right side of the page.
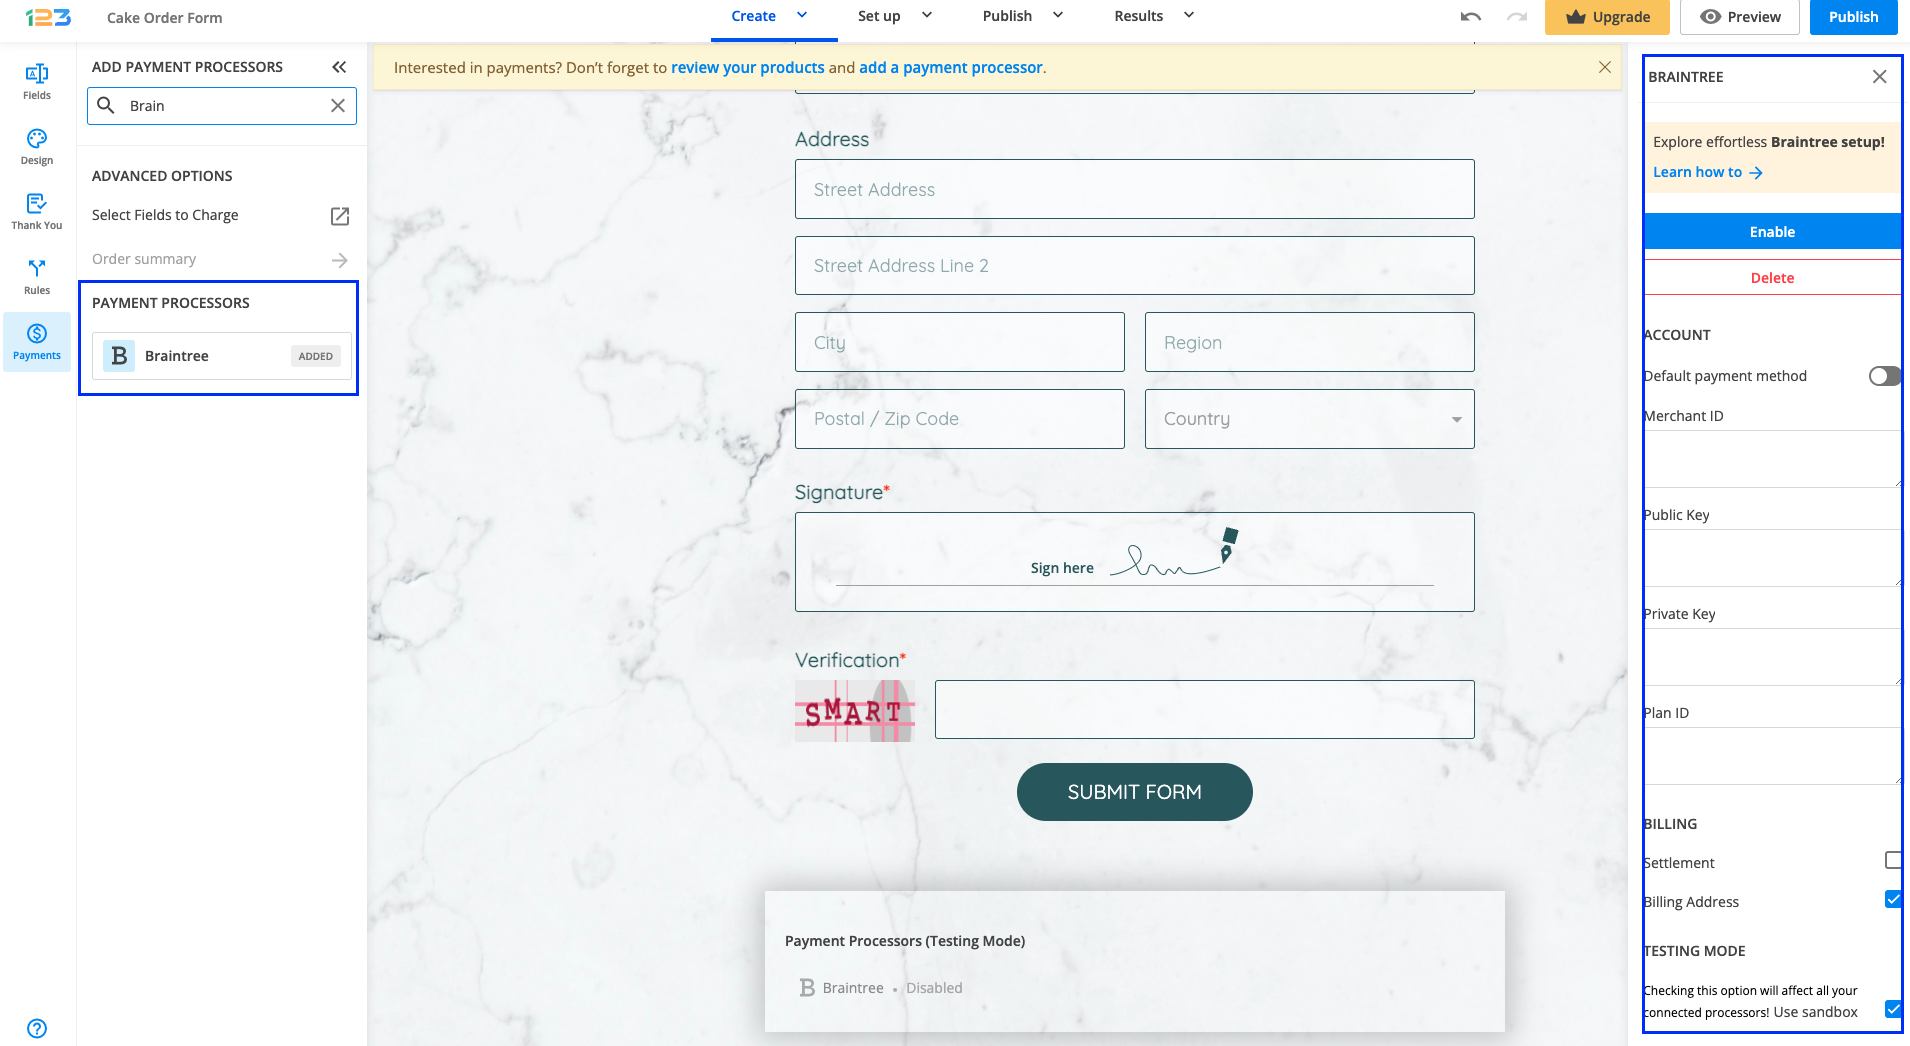

4. In order to enable Braintree, you need to provide the Merchant ID, the Publich Key, Private Key and Plan ID.
The Braintree payment processor on the left side panel has an Enabled tag on it so you could easily scan which payment processor is enabled.
You may check the box for Settlement that will submit the payment for settlement in your Braintree account, although it’s only optional.
To test your 123FormBuilder – Braintree integration, you’ll need to create a sandbox account in Braintree (if you do not have one already).
Go to https://sandbox.braintreegateway.com/ to obtain a sandbox account. In 123FormBuilder, enter the credentials of your sandbox account from Braintree the same as above. Enable the sandbox on the bottom page. From now on, each payment will be submitted in sandbox mode.
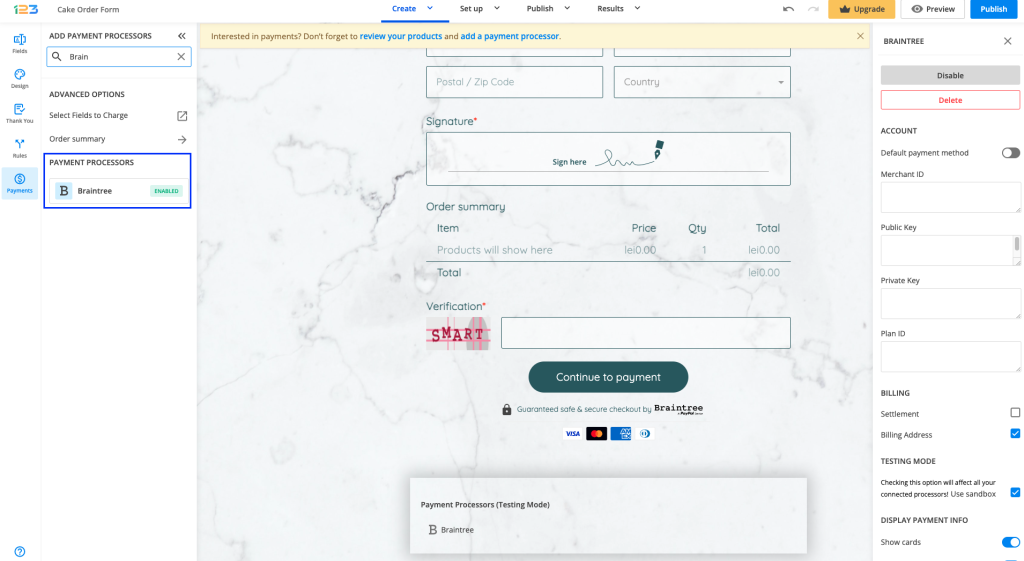
5. By enabling Braintree, you will notice a couple of changes on your form.
The Braintree payment processor on the left side panel has an Enabled tag on it so you could easily scan which payment processor is enabled.

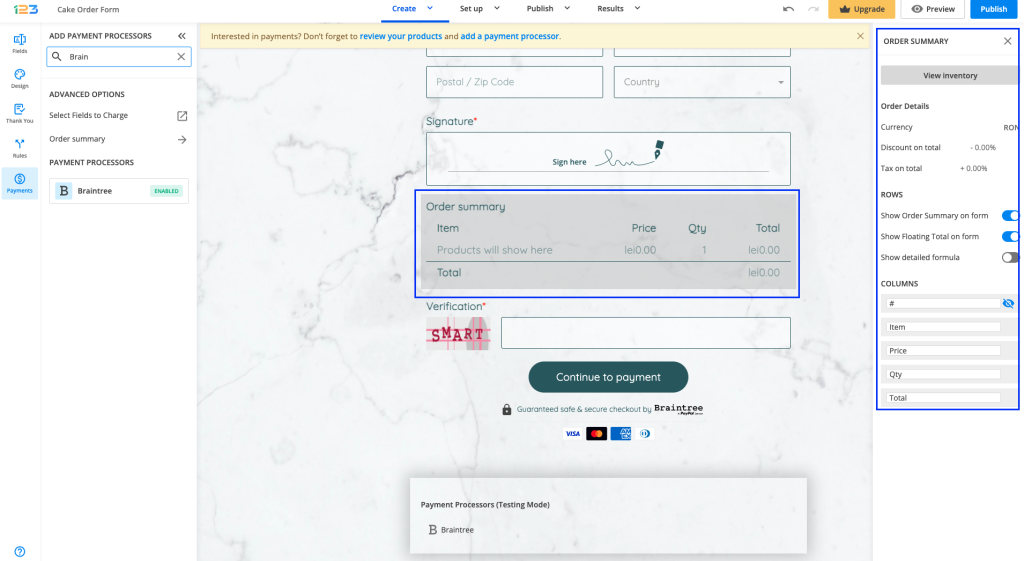
Another change is that on your form it will be displayed an Order summary. Here will appear all the products your respondents select on the form, together with the price per option, quantity and the total price. If you want to customize the order summary, all you have to do is click on it and the available settings appear on the right side panel.
Another change is related to the Submit button. Once your payment integration is enabled, the Submit button is changed to Continue to payment. Below it, we are displaying a disclaimer together with the Braintree logo so that respondents are aware they are proceeding to a payment.
Also, the accepted cards by the Braintree integration are visually displayed so that respondents know from the start what is the accepted payment method.
You can customize the action bar (everything that is related to the submit button, additional buttons, disclaimer, etc) by simply clicking on this area.
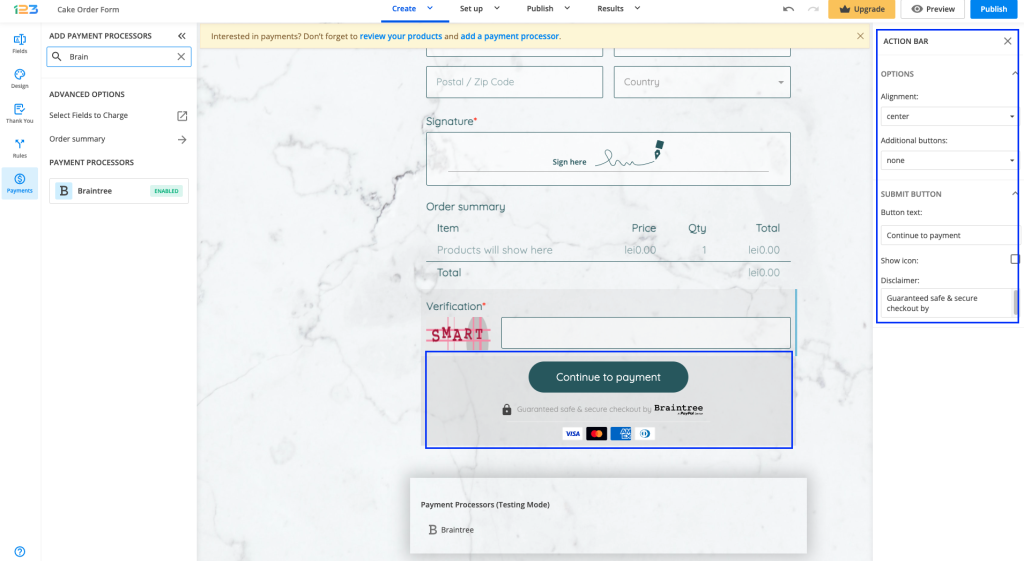
By clicking on the Payment processor below the form, the settings for the payment processor are opened to the right side panel. Another thing that you can customize is whether you want to show the accepted cards & the icon and logo on the form. By default, they are on.
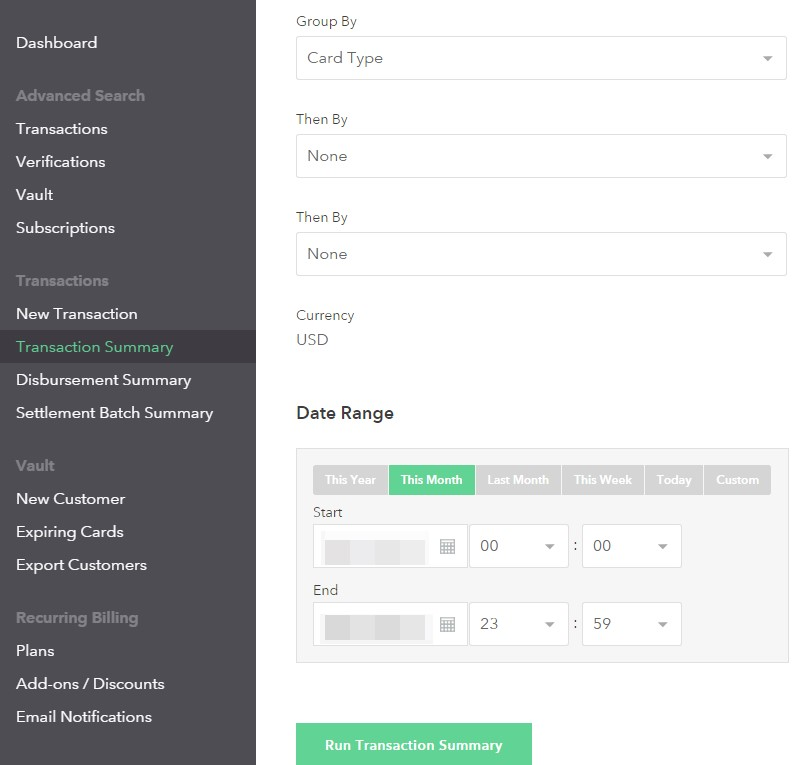
In order to check your transactions in Braintree (Transaction Report), in your Braintree account, go to Transactions → Transaction Summary. After you customize the settings according to your needs, simply click on Run Transaction Summary to see your transactions.
In order to set up recurring payments with your Braintree integration, you will have to create a new plan. Go to Recurring Billing → Plans and hit New. Next, specify the Plan Details and the Billing Details. Finally, paste the Plan ID in the Settings → Payments section of your 123FormBuilder account, under Braintree → Plan ID.

Customers who are using the Braintree payment processor to send you money will pay in the currency you have set up in your Braintree account. This setting will override the currency selected in your form’s settings. To double-check the currency go to Products and click the currency sign.
Most Popular
Frequently Asked Questions
Here is a list of the most frequently asked questions. For more FAQs, please browse through the FAQs page.