123FormBuilder Knowledge Base
Search our documentation platform for answers, service specifications and 3rd-party integrations.
Knowledge Base
No, you cannot. Especially if you intend to receive submissions this way. Even though we encourage the use of JavaScript to embed forms on different web pages, embedding them into emails is not the case. That’s because it implies a security risk for the majority of webmail clients. Yes, you can embed HTML content into an email if it supports HTML elements, but online forms are not exclusively HTML built. Even though you succeed in embedding your online form into an email, chances are the end-user will not be able to submit it at all.
The best solution in this matter is to provide the link to your online form within the email. This way, your end-users will click on the link and have the form opened on a separate page where it’s fully functional. Go to Publish → Link to retrieve the link to your online form.
If you want to read more, follow Campaign Monitor’s article on using forms in email.
In conclusion, it’s not that you can or cannot embed forms into emails. It’s about the fact that online forms don’t work properly or at all on different email platforms (e.g. Yahoo, Gmail, Outlook).
Related articles
A favicon is a tiny icon displayed in the browser tab where the webpage is opened. It usually has the extension .ico and is used for branding the content of the webpage. You can change the favicon of your 123FormBuilder account with one of your own.
To change the favicon of your 123FormBuilder account, you need the Professional plan. Here’s how you can change the favicon:
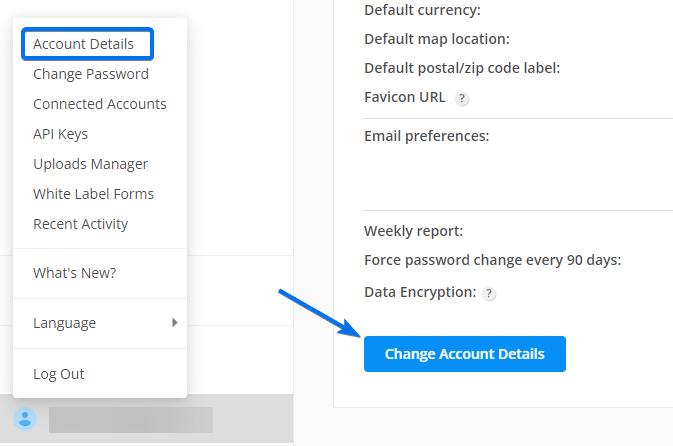
1. Log in to our form builder and go to My Account → Change Account Details.
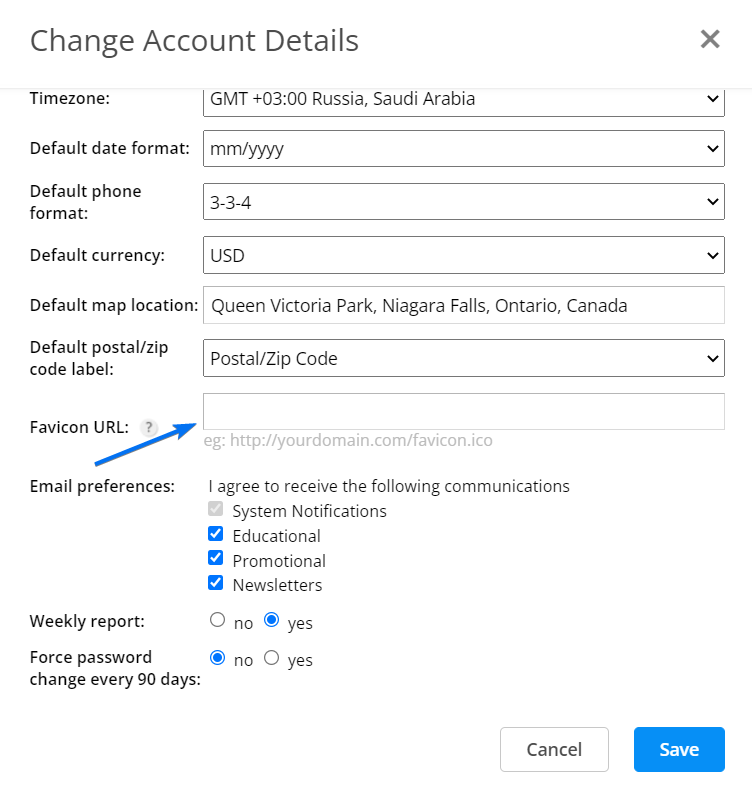
2. Afterwards, scroll down to the last line, paste the URL of your favicon in the Favicon URL box and hit Save.
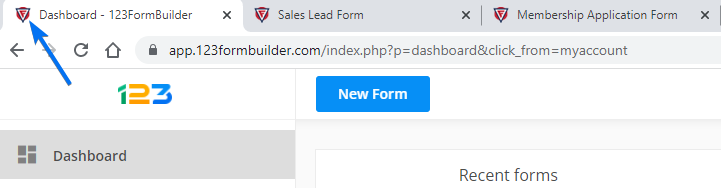
Reload the page so your favicon will replace the default one. Find the Refresh button of your Internet browser, click it and you’ll see your favicon immediately.
Important Note
The proportions of a favicon are 16 pixels in width and height (16×16).This filter works only when the option Allow respondents to save the submission and resume later is enabled in the Advanced section of your form in the form builder. It refers to the column Status located in Submissions. You can use this column to filter submissions in your custom reports.
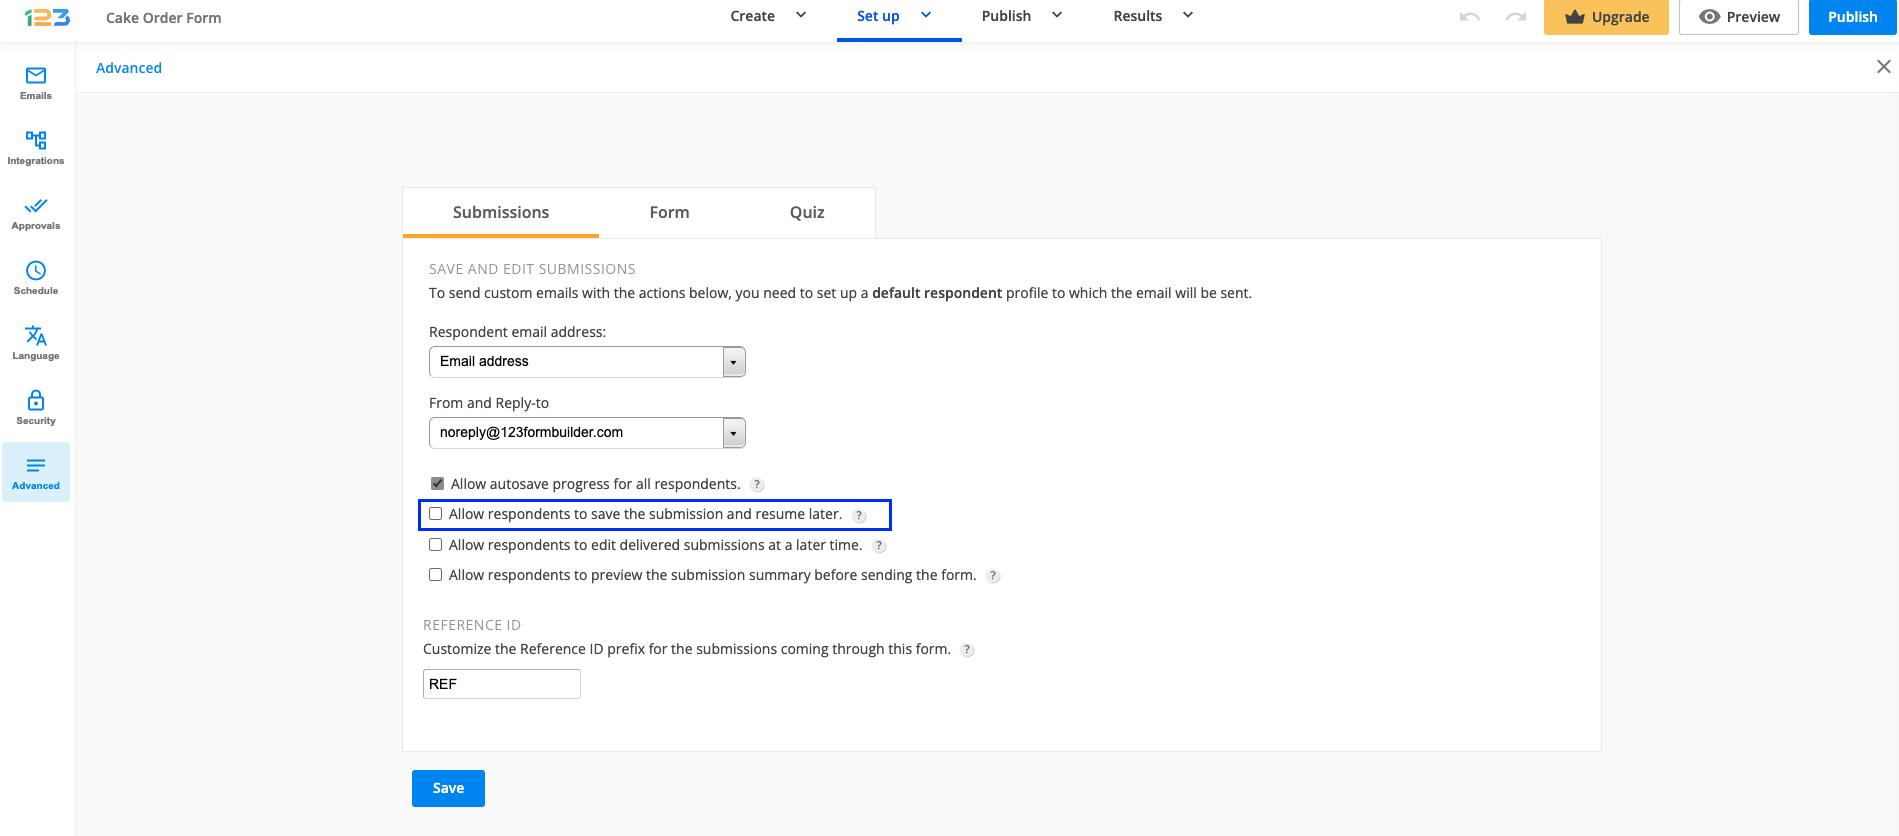
You can either filter submissions that are finished or incomplete. An incomplete submission means that the submitter has saved the submission to resume it later, but has not done it at the moment. Once they submit the form, the submission is finished.
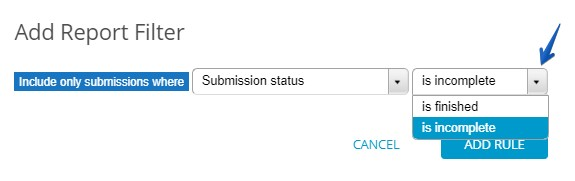
In Reports, select your custom report and hit Edit Report

Afterwards, click on Report Filters and hit Add Filter.

Select Submission status in the dropdown and select either the condition is finished or is incomplete, depending on your needs. Next, press Add Rule and that’s it.
You can filter reports based on submission status for the following report widgets: Chart, Numeric and Data Table.
Once you have enabled the Authorize.net payment gateway for your online order form in your form builder account on 123FormBuilder, some errors might occur while your clients submit your online order form – Authorize.net error codes. This is caused by some of the settings you have set up in your Authorize.net account. But rest assured, this is a guide on how to fix these issues.
Typical errors that might appear are the following:
1. The referrer, relay response, or receipt link URL is invalid.
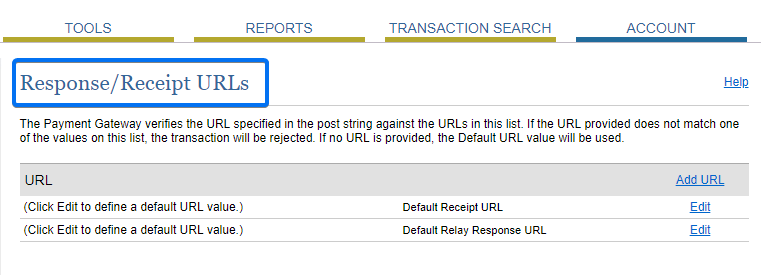
This error usually occurs when you have set up some URLs in your Authorize.net account, in the Account → Response/Receipt URLs section. You’ll need to delete all URLs located there and see if the error persists.
If the error still appears, it means you have one or more Silent Post URLs that you need to delete as well.
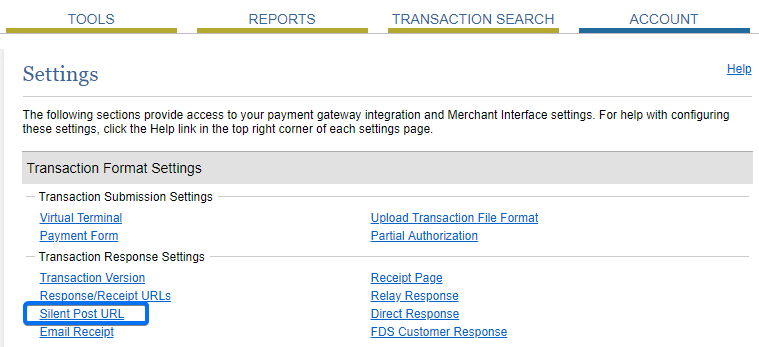
In your Authorize.net account, go to Account → Transaction Format Settings. Under Transaction Response Settings, click on Silent Post URL to remove the link.
Next, return to the Account → Response/Receipt URLs section and delete the Silent Post URL(s) that appears there.
2. Error 33: Email is required.
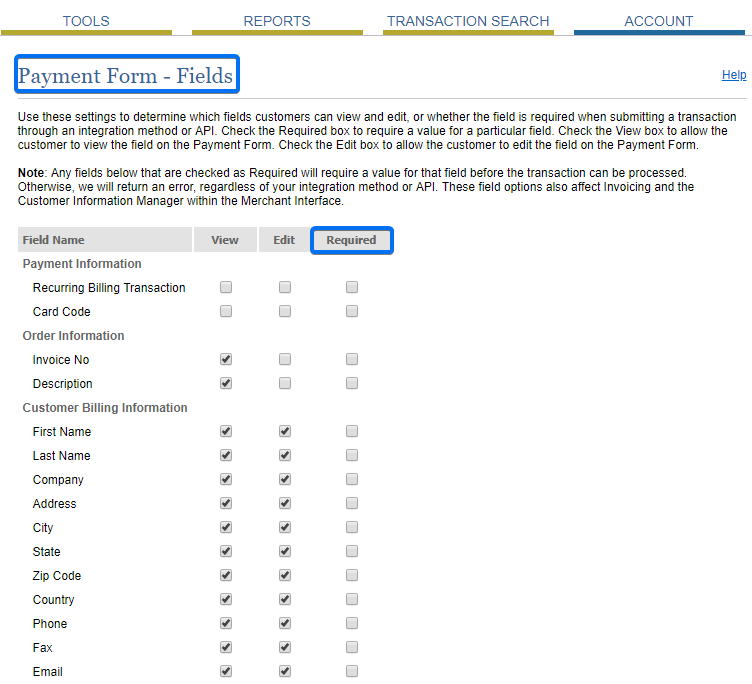
This error appears when you have set the email field as required in your Authorize.net account. Other fields might be the cause as well, so it’s best if you check that other fields are also optional, such as Phone or Bill to First Name. Here’s how you fix it:
In Account → Settings, go to Transaction Submission Settings and click on Payment Form. From there, go to Form Fields and disable the required status of the field that caused the error. Don’t forget to save your changes and see if the error happens again on your order form.
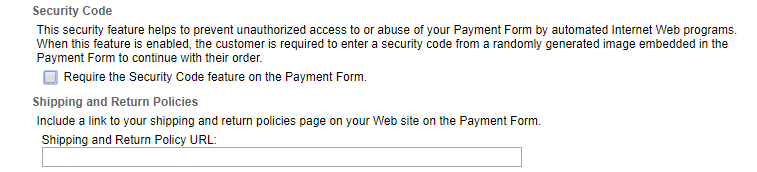
3. Error 312: The specified Security Code was invalid.
This is caused by the Security Code that couldn’t pass to your 123FormBuilder account when the order form was submitted. To prevent this from happening again, you’ll need to disable it in your Authorize.net account.
The security code is an image Captcha from Authorize.net that can interfere with the integration, the reason why it needs to be disabled.
In Account → Settings, go to Transaction Submission Settings → Payment Form and click on Form Fields. Scroll down to the bottom and disable the option Require the Security Code feature on the Payment Form.
On the 123FormBuilder form creator, you can create new posts on your WordPress site through form submissions. You’ll need the 123FormBuilder plugin for WordPress and the steps described below to create a new post after each submission. To create posts through form submissions, go to the Integrations section of your form, and add WordPress. The application box will drop as seen in the image below:
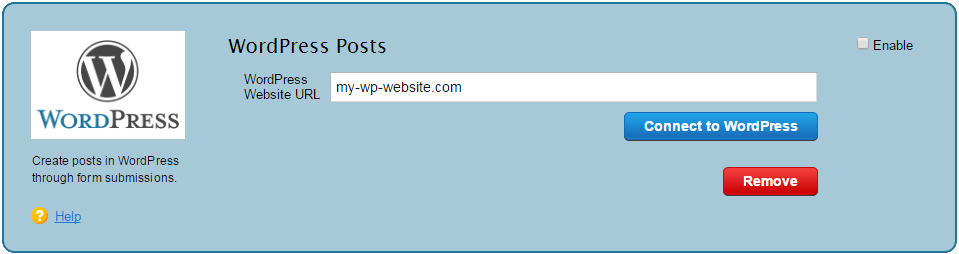
1. Provide the URL of your WordPress blog and click on Connect to WordPress.
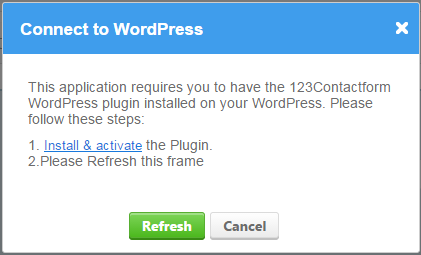
2. If the 123FormBuilder plugin is not yet installed on your WordPress account, a frame will pop up on the screen as seen below. Click on Install & activate and you’ll be redirected on WordPress to access your account to install and activate the 123FormBuilder plugin. After that, return to the frame and press Refresh. If the plugin was already installed before this step, you’ll be redirected to the WordPress Posts customization lightbox, to map form fields with WordPress post fields.
Note: If you have already installed the 123FormBuilder plugin on your WordPress site, but get this frame on screen, make sure the plugin has been activated and hit Refresh.
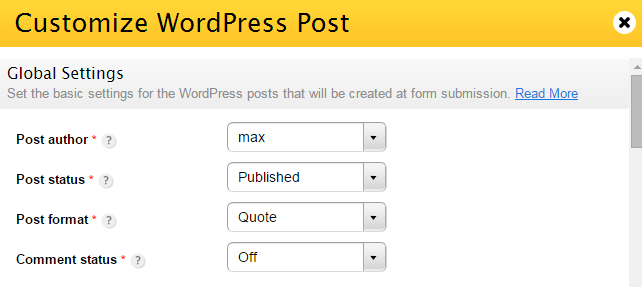
3. In WordPress Posts → Global Settings, set the author of the posts, the status of the posts, the posts’ format, and if the respective posts accept comments or not. These settings are applied for all submissions on the form. Only WordPress users can be selected as post authors.
4. In WordPress Posts → Default Post Fields, you can provide a default value or associate form fields to the title of the post, content, excerpt, tags, and featured image. You can only associate File Upload fields to Featured Image. Tags are separated either by a comma or by the Enter key of your keyboard.
5. Now you have to select the categories where the posts will be grouped in. You can either set all posts to be grouped in the same categories or allow form users to select the categories before submission.

- Preselect categories. Use this option if you want to group all posts in the same existing categories of your WordPress site. All categories can be viewed and select in the list below. Select All Categories to group posts in each existing category of your WordPress account or Select Categories to manually select the categories you want.
- Allow users to select categories adds a dropdown list where you can map a Radio buttons, Checkboxes, or Dropdown field from your web form. However, selected categories in the list below will overwrite the available choices you have added in the Form Editor.
6. In WordPress Posts → Custom Post Fields, you can associate form fields with custom fields from your WordPress account. WordPress custom fields are displayed on the left and form fields on the right, through the dropdowns.
7. Your email associated with the 123FormBuilder account will be automatically added in the WordPress Posts → Error Handling section. In case the integration fails for a form user because of a bad network connection, you’ll be notified by email. You can change the email address at any time in this section.
8. In the end, press Save. From now on, each submission will create a post on your WordPress blog. Check your WordPress account to see the results. In your 123FormBuilder account, go to the Submissions section of your online form to manage your entries.
Whenever you want to adjust your settings, return to the application, and press the Customize button to enter the customization lightbox.
Yes, you can save all your form reports as PDF files on your computer or device. It can be the default report or a custom report you have created for your online form.
Important Note
Reports that contain other widgets than chart or number will not be saved on the PDF file.To save reports as PDF, log in to your 123FormBuilder account, go to the Results section of your form then select the Reports tabs.
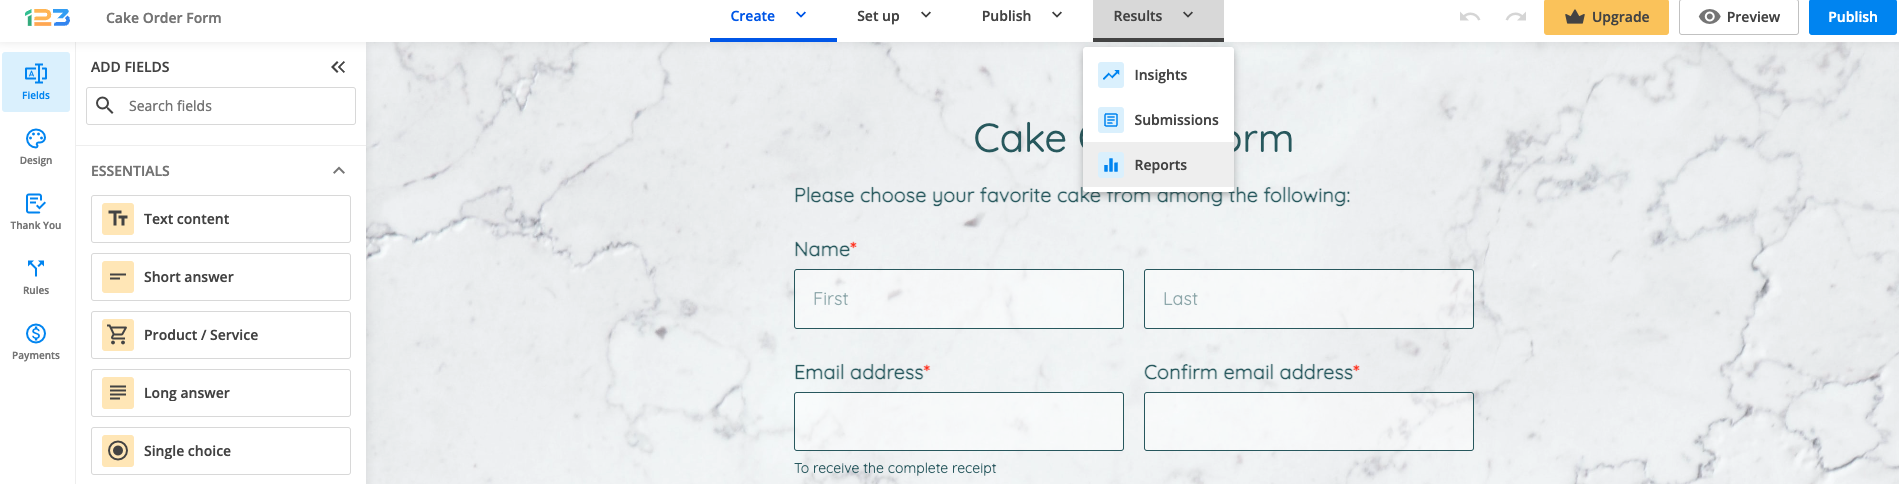
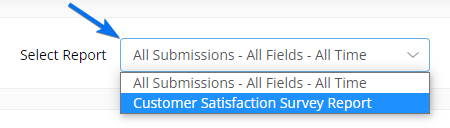
Next, select from the dropdown list the report you want to save.
Now, hit the Save as PDF link, located below the selector. This will download the respective report in PDF format.

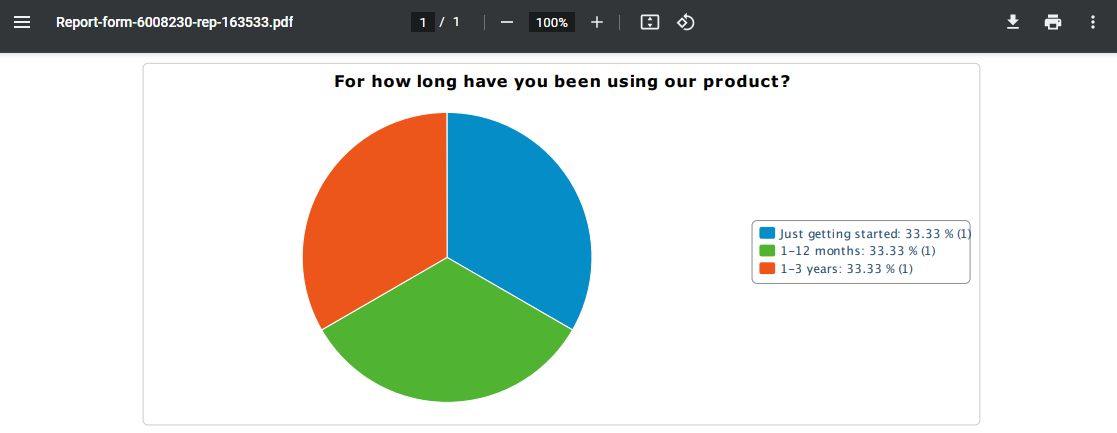
When opened, the PDF file will contain your form report similar to this example:
Related articles
Yes, you can add a Google interactive map to your web form. Adding an interactive map to your online form is a great way to enhance user experience by providing a visual representation of locations.
Let’s say you own a travel agency and you regularly create online reservation forms for different tour packages and destinations. By incorporating an interactive map into your forms, you can not only showcase the accommodation options but also help travelers explore the proximity to understand how they can reach their destination and navigate the local area upon their arrival. Thus, travelers can seamlessly explore the location without leaving the online form.
Setting up the Google map field
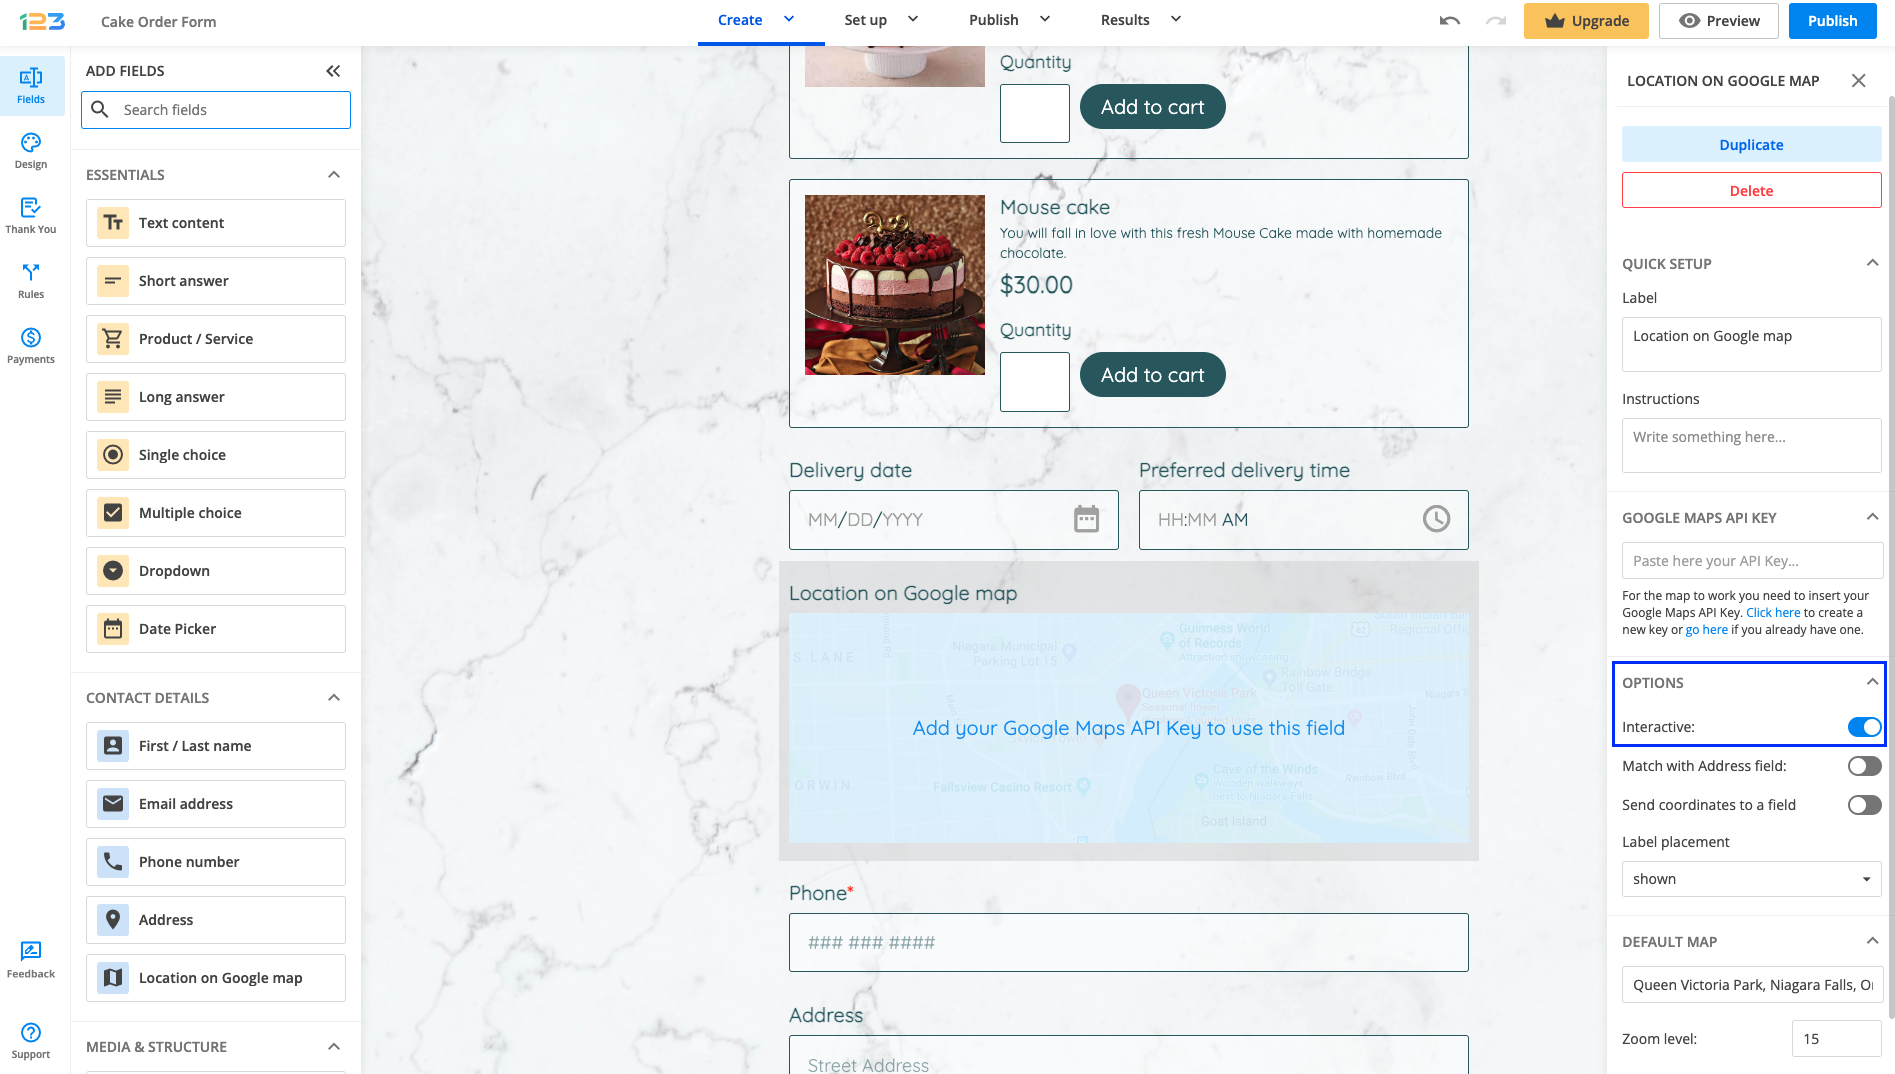
In your form builder account, select your form and go to the Create tab. There, you will find the Location on Google map field in the Contact details section.
Drag and drop it on the form and head over to the right-side panel to customize the map.
To use the Location on Google map field, you will first need to create a Google API Key. Keep in mind that Google’s Map service will require you to set up a billing account for the API usage. You can check their pricing system here. For more information about your Google API Key, read this guide.
Once you have your Google API Key is time to configure the map. In the Default Map field, type in the address of a location and you will be able to see the changes on the map instantly. A marker will be displayed on the map.
By default, the map is set as interactive, meaning that users can navigate through the map and also view the map in satellite mode. You can also adjust the zoom level and set it between 1-22 pixels. The Google map is interactive only in preview/view mode.
If you don’t require the Google interactive map, but a static Google map, return to its Edit panel and uncheck the option Interactive.
Related articles
When embedding your online forms on several websites, we recommend using JavaScript as the publishing option. JavaScript contains a parameter that enables better submission tracking than the other available options (Iframe, Link to form, and Lightbox). Furthermore, changes applied to your form on 123FormBuilder will also be applied on the web pages where the form has been published. So you don’t need to republish the form over and over again.
In conclusion, check if you have embedded the online form with the JavaScript code. If not, change the existing code from the web page with the JavaScript code of your form. Remember to always use JavaScript, but only if it’s supported on the website.
You can map multiple form fields to the description area of your Zendesk tickets created through form submissions.
In the Integrations section of your online form within the form builder, go to the Zendesk app, and hit Customize to open the customization lightbox.
Next, click on the text area from Description and use the dropdown displayed below to add the form fields you want. Select the field and click on Add to include the input of the field in the description area.
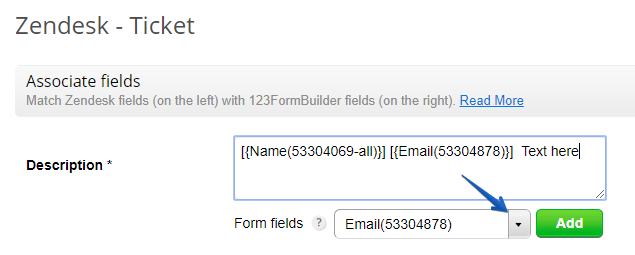
Repeat the steps each time you want to include another field from your online form. Exit the customization lightbox through the Save button.
In the 123FormBuilder – Zendesk customization lightbox of your form in the form creator, you can match your form’s input fields and choice fields with fields from your Zendesk account. When mapping choice fields, you’ll notice that the first items that appear in the select dropdown are options from Zendesk and what appear under are the available options you’ve enabled in the form editor.
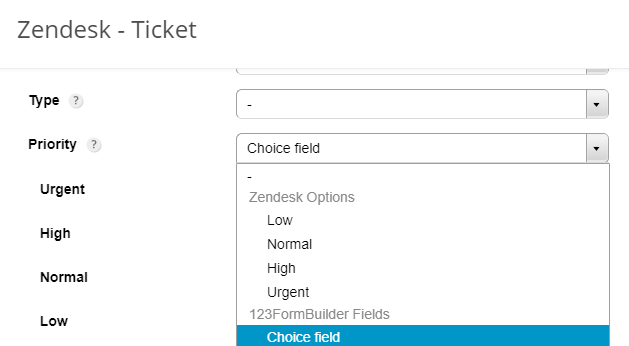
Therefore, you can set a priority, status, and type for the new ticket without having to add choice fields to your online form. You’ll just manually select the priority, status, and type of the ticket in the customization lightbox and all submissions will have the same priority, status, and type. But if you want to let your form users choose the state of the ticket, you’ll need to add choice fields and map them properly.
Once you map a choice field for Priority, Status, or Type, additional dropdowns will be added below to associate the available choices with the available options in Zendesk. This is due to the fact that we send all choice fields as boolean so that Zendesk can understand the nature of the information. Boolean data is commonly used for checkboxes (multiple selection fields), radio buttons (single selection fields), and dropdowns. It consists of only two values: true and false.
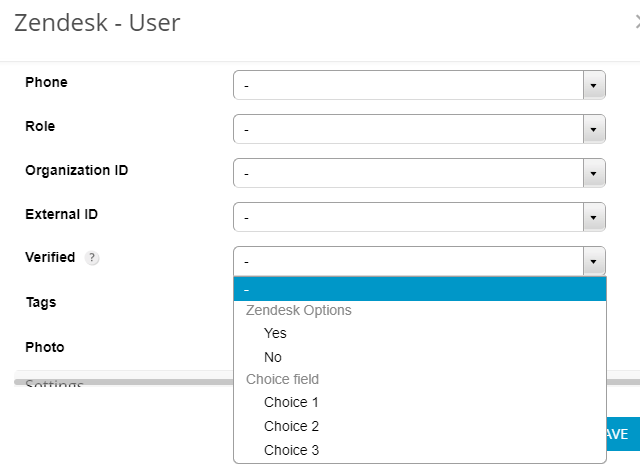
For options where Zendesk returns the choices yes and no, the situation is different. They also return a true or false value in Zendesk, depending on if they were selected or not. Take for example the field Verified for User in the customization lightbox. You can only associate one available choice from a choice field. If selected, the value is considered true and will be saved in Zendesk as Yes. If not, the Verified option in Zendesk will be set as No.
After you have added the 123FormBuilder – Zendesk integration to your form, you might encounter an error on the application box that states you have entered incorrect details of your Zendesk account. This happens for one of the following reasons:
1. You really have entered the wrong login details, so make sure the credentials are correct.
2. You’ve been using the Zendesk integration before Zendesk changed its API infrastructure, leading to a change in our integration as well. You’ll need to remove the Zendesk application and add it again to your form, only this time you’ll need to provide the username and token of your Zendesk account.
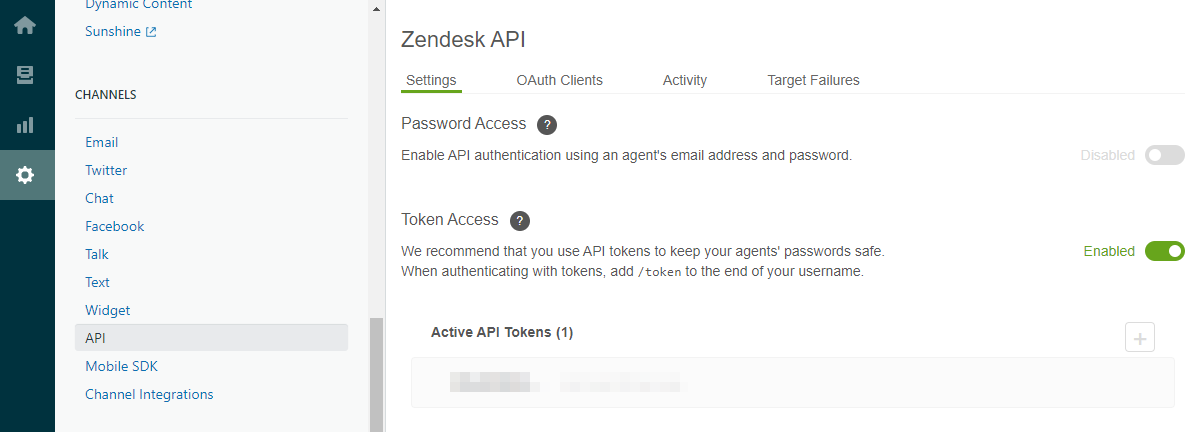
3. Your Token Access is not enabled in Zendesk. Log into your Zendesk account, open the agent interface and go to Admin → Channels → API. In the Settings → Token Access section, tick the checkbox Enabled.
Yes, you can create rules based on quiz results within our online quiz maker. If it’s a Field rule, Email rule, or Form rule, you can change the behavior of the form based on the score of the quiz.
If you have set up quiz points on your form, then you simply have to go to Field/Form rules you’ll find the Quiz score field on the bottom part of the first dropdown list within the rule. The quiz score will change in real-time if the form user selects other options on the quiz before submission.
The only operators that are available for the quiz score are: is, is greater than, is less than.
Here is an example:
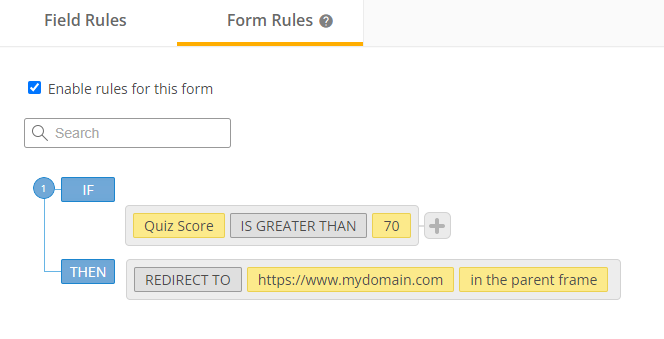
This is a form rule that redirects form users to a web page on submission if they scored over 70 points on the quiz. Here you can add the URL of a downloadable document, such as a certificate.
Most Popular
Frequently Asked Questions
Here is a list of the most frequently asked questions. For more FAQs, please browse through the FAQs page.