123FormBuilder Knowledge Base
Search our documentation platform for answers, service specifications and 3rd-party integrations.
Knowledge Base
To see all of your submissions, go to My Forms within the form builder, click on the dotted menu, and then on the Results button or on the number of submissions displayed next to each form.
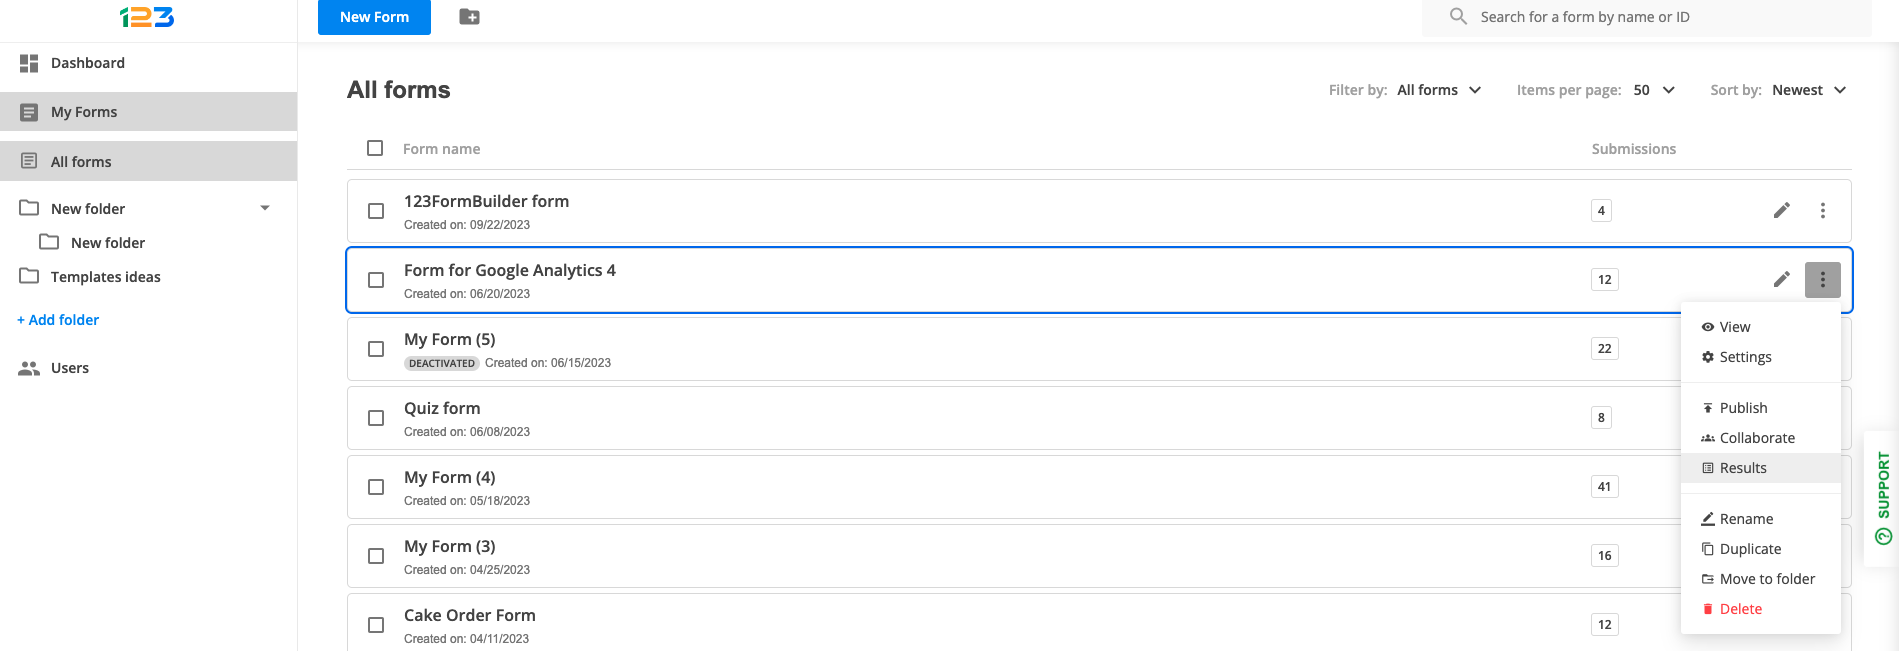
If you have accessed one of your forms, use the Results button.
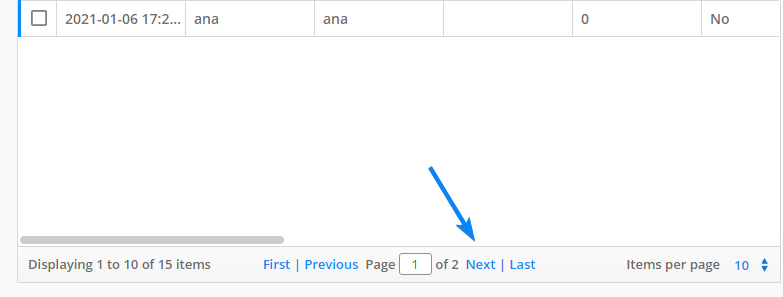
Use the navigation arrows at the table bottom to go through all form submissions.
Related articles

Related articles
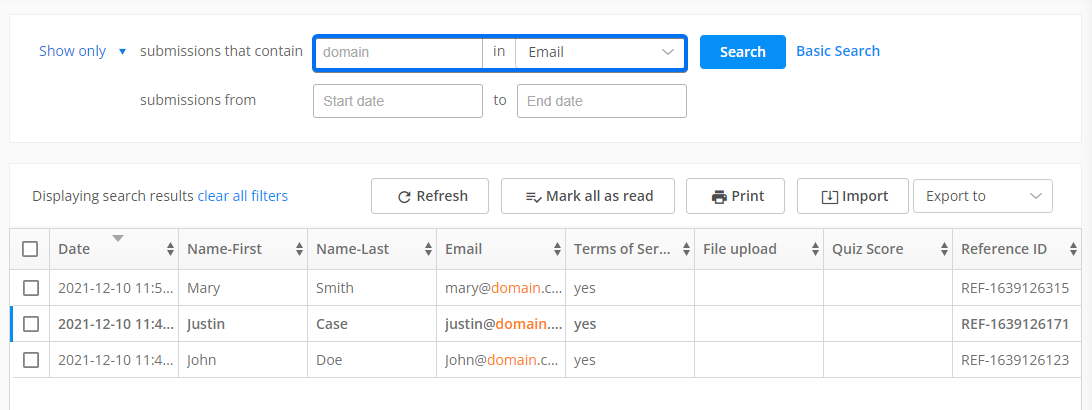
Submissions are listed in a table, one per row and with form fields as columns.
To select a form submission entry, simply click on one. Use the first checkbox on the left side of the table header to select or deselect all submissions.
Once a submission/entry is selected, two buttons will appear on the top left side of the table: Delete and Resend. Press the first button to delete the selected submissions or the second one to resent them at the same time. The submission entry will be emailed to the form’s recipients.

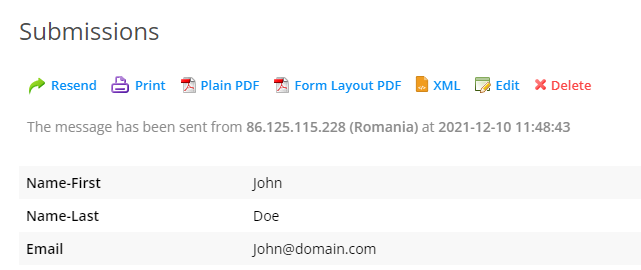
Hover over an entry submission and click it to open the submission lightbox that shows the content separately and from where you can resend, print, save as PDF (Plain PDF or Form Layout PDF), edit or delete that specific submission.
To sort submissions by date, reference ID, country, or IP, click on Advanced Search. You can sort submissions by keyword using the box at the top of the table. Type in the word you’re looking for, choose the form field where the search should be made and press Enter on your keyboard. Only the submissions containing that word will then be listed in the table. The filtered entries can be exported to CSV/Excel.
On the bottom part of the table, you can also set the submissions table to display 10, 20, 50, 100, or 150 entries per page.

Subaccounts can be added starting from our Gold plan. You can only purchase subusers licenses on the same plan as the main account. Therefore, if you are a Platinum user, all your subaccounts will have the Platinum plan as well.
The price for a subaccount is the same as the subscription used on the main account. With the Gold and Platinum plans, you can expand up to 10 subusers. If you are looking to add more subaccounts for your business, our custom corporate plans can accommodate your needs. Get in touch with our Enterprise team for more information.
To see a detailed description of the 123FormBuilder plans, have a look at our Features list.
Please feel free to contact us when you want to start adding subaccounts to your form builder account.
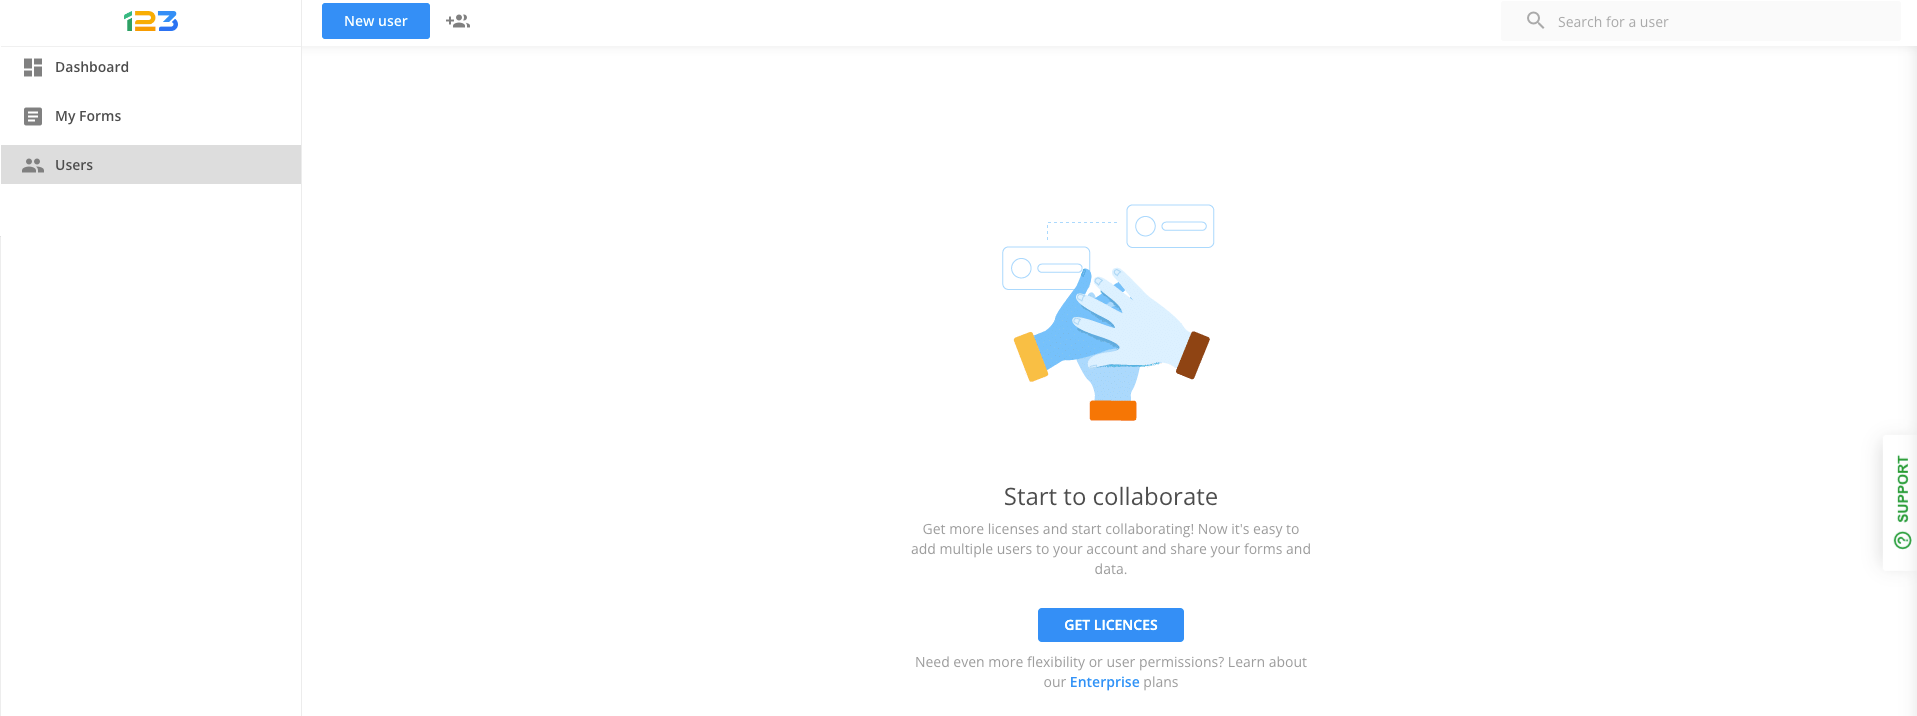
Only the Account Owner, Super Admin, or Group Admin, can access the Users panel within the form builder account, where they can create new Users. Here is where they can also view the Permissions settings for the Users, where they can give access to Forms or Folders, with the default permissions specific to the User role.
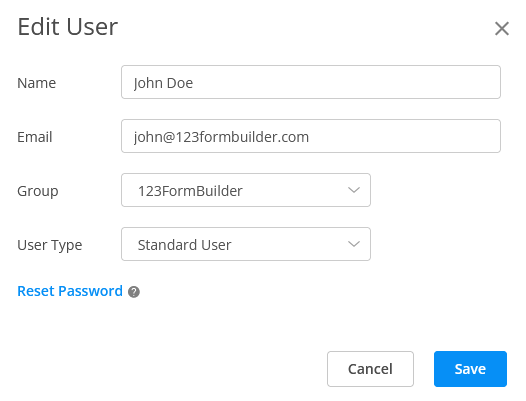
Select the Show more icon next to a user and click on Edit to change user information (Name, Email, Group, User Type). Here you can also reset the password for the user.
Hover over a User and click on Set Permissions to grant or remove access to forms and folders. Only users with Admin roles can access the Permissions page. This page offers an overview of all forms and folders that any specific User has access to.
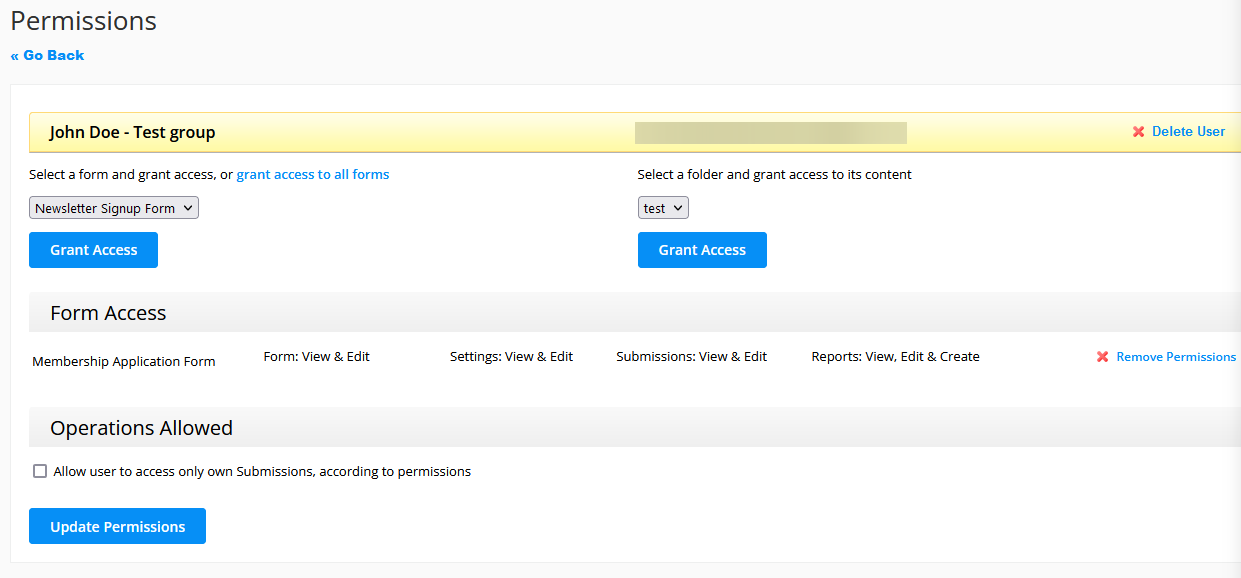
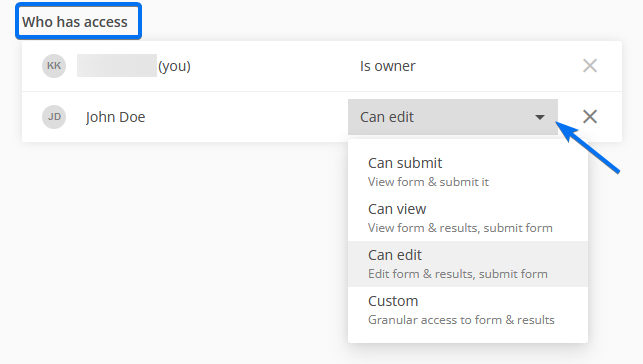
Each section – Form, Settings, Submissions, Reports has got a set of permission levels – No access, View only, View & Edit and View, Edit & Create.
Once a User receives access to a Form or Folder from Users → User → Permissions, their User will appear in the Who has access list for that particular Form/Folder. The permission for each section is set individually from the Who has access list of each form.
While it doesn’t allow for granular permissions settings, the Permissions page offers:
- A means for Admin users to have a quick overview of the User and the Forms or Folders they have access to.
- Another way to give access to Forms to the User (besides the Share option).
- A means to quickly revoke Form access from specific Users.
To delete a form in your form builder account, go to My Forms and click on the three dots icon next to the form that you want to have removed. Afterward, select Delete. A warning message will pop up to make sure you really want to delete your form.
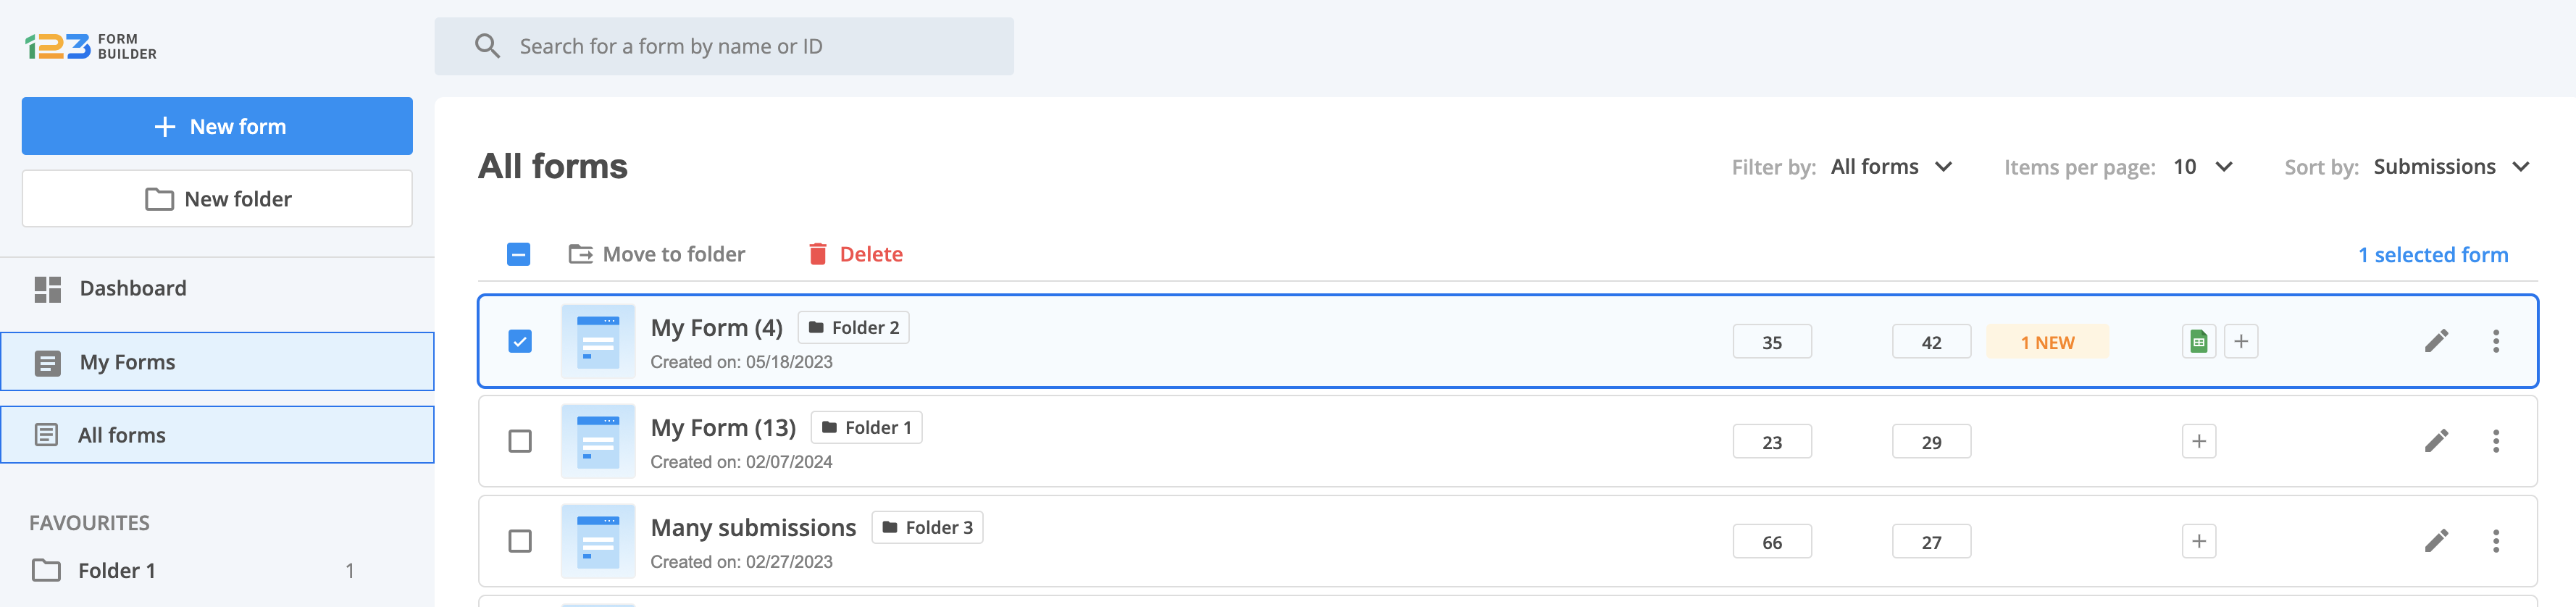
You can also check the form you are interested in deleting and then click on Delete button right next to the header of the form table.
Restore a Deleted Form
If you are using a paid plan account, we can recover any of your deleted forms within a 30 day period. Upgrading your account to a paid subscription after the deletion will not recover it. We can recover forms that are created under a native paid plan (Gold, Platinum, Professional, Enterprise subscriptions).
No, you may use it for whatever HTML / PHP forms you wish, but you are required not to use it on illegal sites. Any user that will try to send spam through this site will have the account deleted and the IP banned. Read our Terms of Service for more information.
You can create a large variety of online forms and surveys, including event registration forms, order forms, quizzes, polls, and the list can continue. Check out our available free form templates and see which one suits you best. We believe in the diversity of both our services and our clients, therefore giving you the possibility to not only create standard web forms or surveys but to also brand them.
Benefit from our integrations with 3rd Party Apps and the payment gateways provided for your web forms. Build a complex order form and start making money fast.
For more information, consult our features list to learn about our available subscriptions and the benefits they offer.
If you have questions or need assistance, contact us and our Customer Care Team will get back to you as soon as possible.
You can create and use 5 web forms if you own a Basic free account. You can add up to 10 fields on each of your free forms. Gold users can create 25 forms. Platinum can create 100 forms and Diamond users can create 200 forms. For further information on what each service plan has to offer, check out our features list.
One of the main aspects of My Forms is that it allows you to better manage your forms by creating folders.
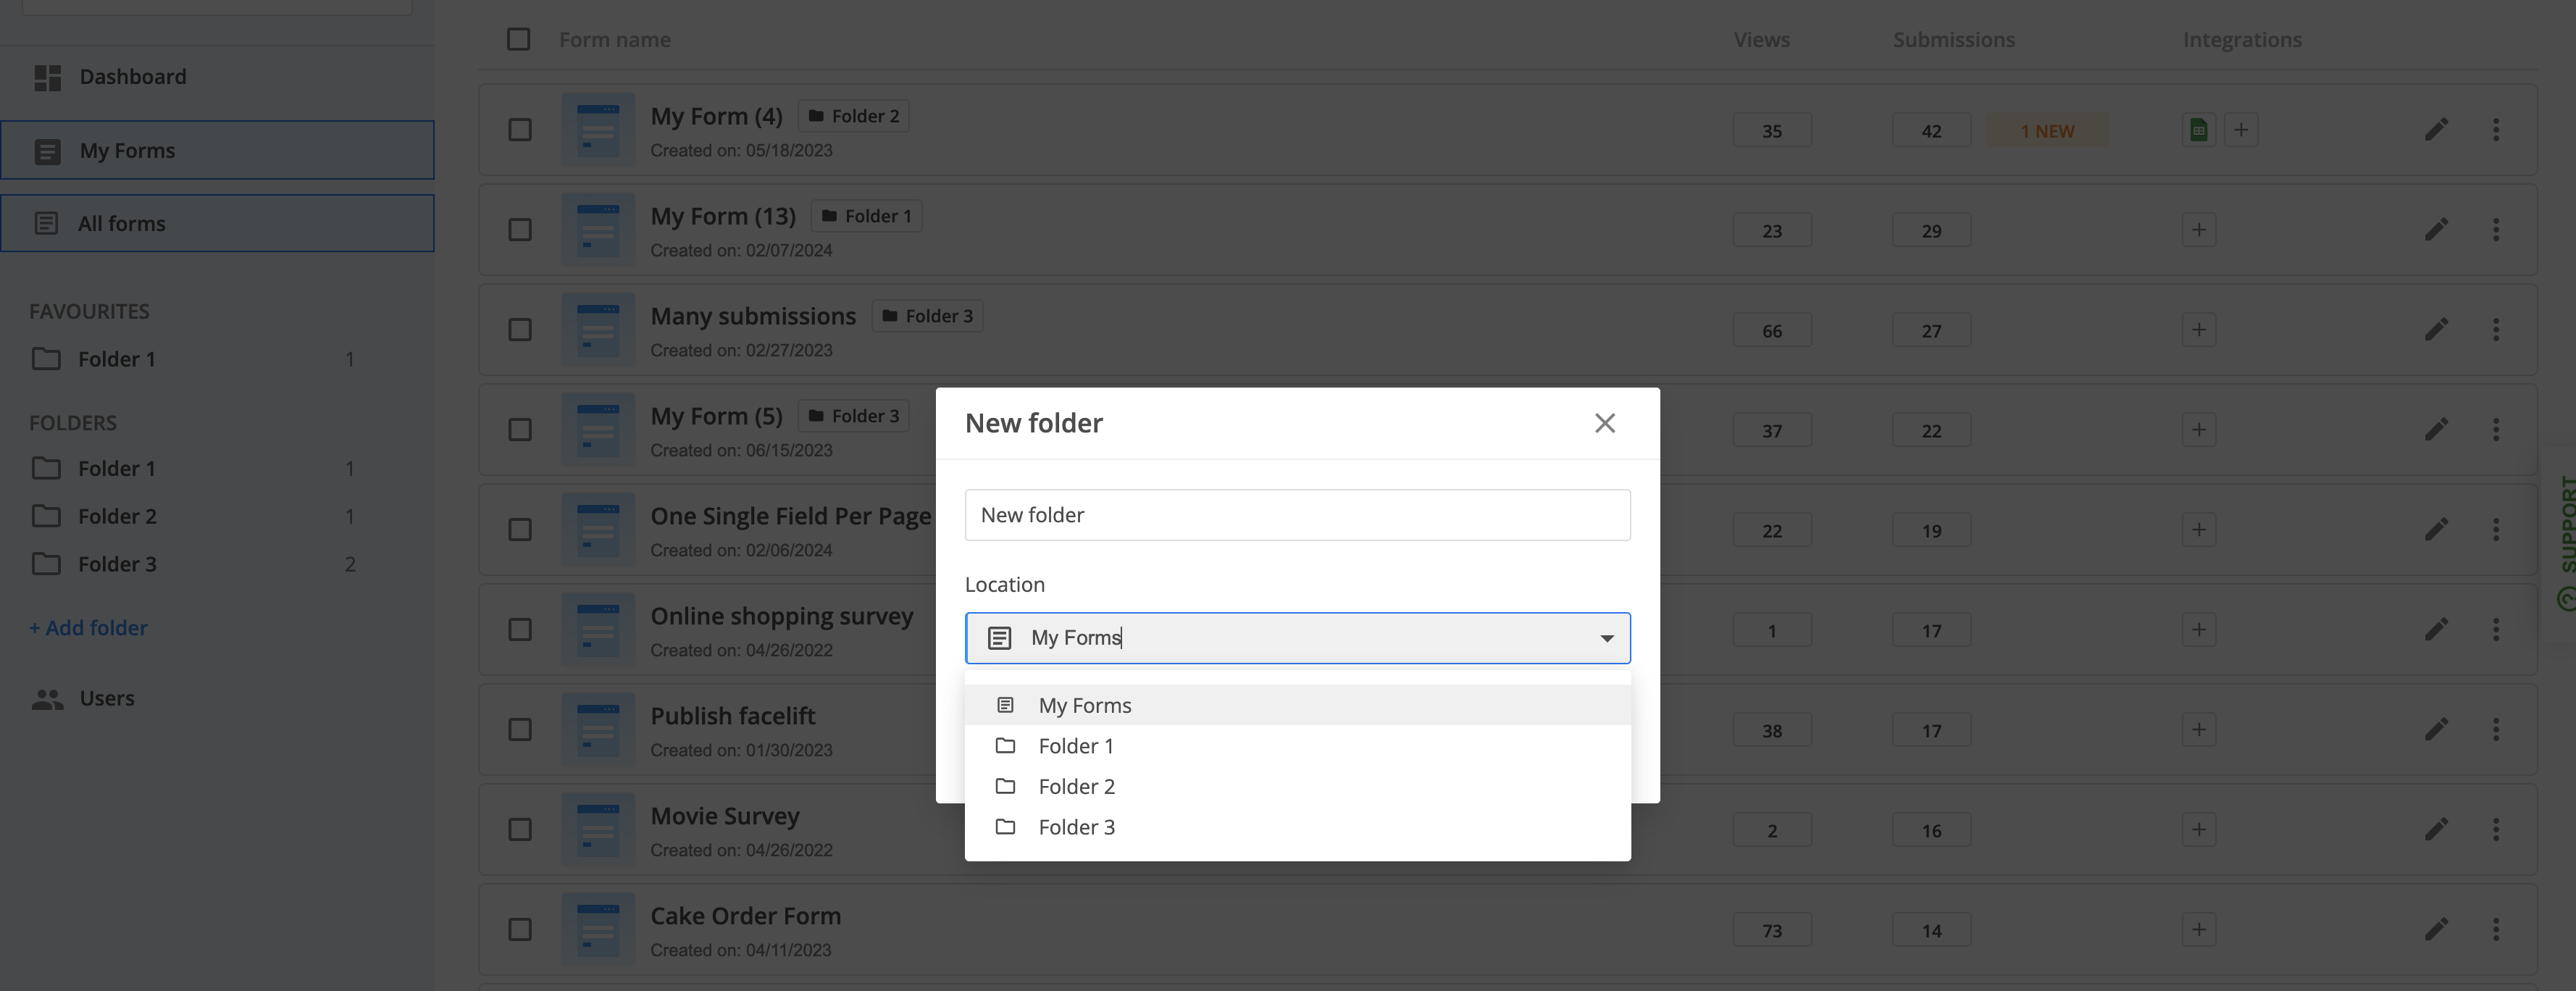
You can easily create a folder by clicking on New folder button.
A modal is displayed where you can provide the folder name. When you already have a folder created in My Forms, besides the folder name, you’ll be asked to choose the location of the folder. If you want it to be a main folder, then My Forms is the right option. If you want to have the new folder as a subfolder, then click on the dropdown and select its main parent folder.
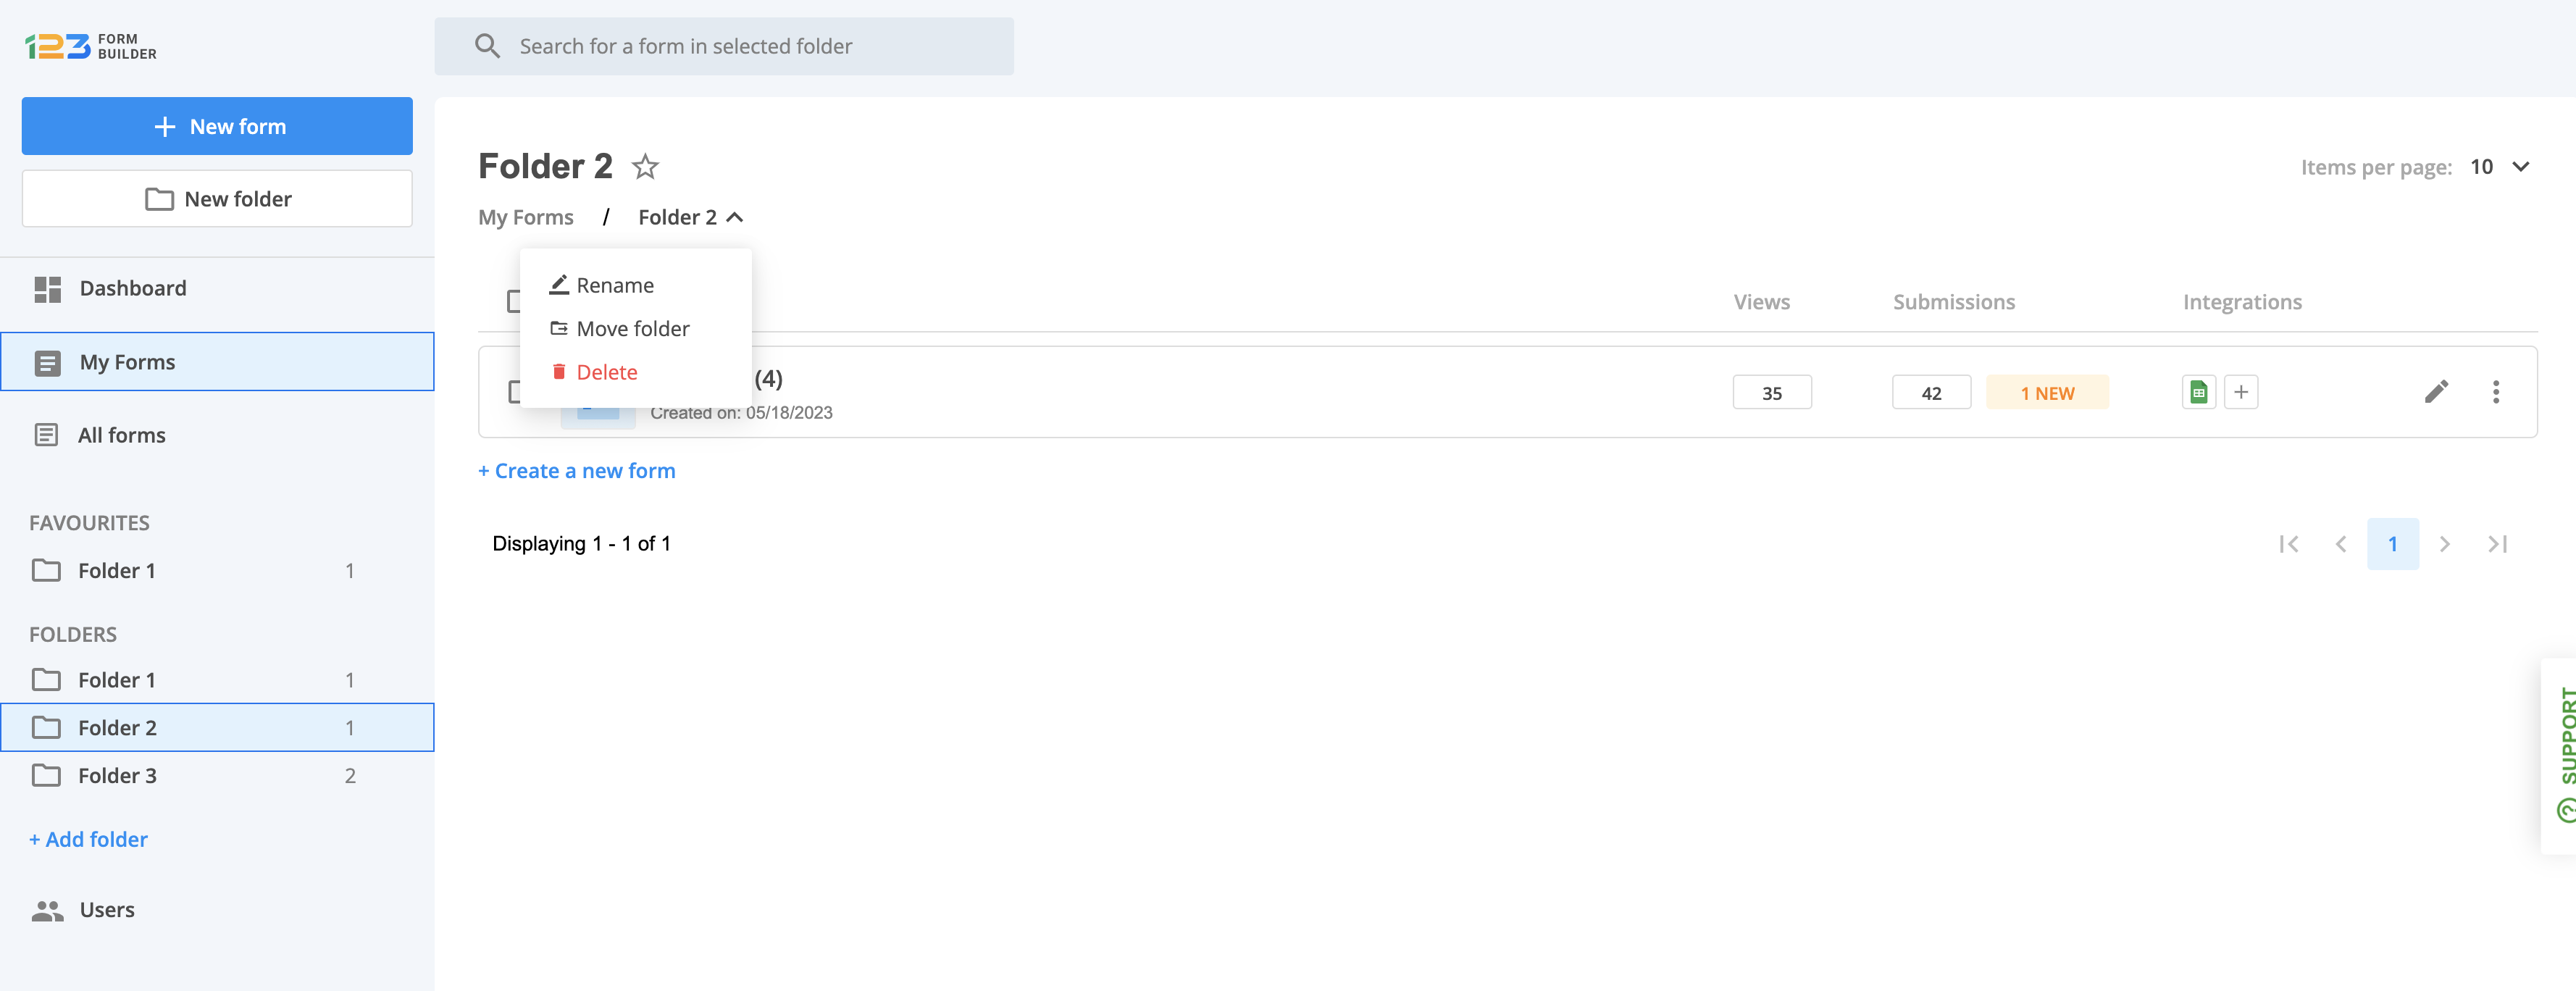
When navigating to a folder, you’ll notice that there are several options available for a folder. By clicking on the arrow icon, you’ll have quick access to renaming the folder, moving the folder to another folder or even delete it.
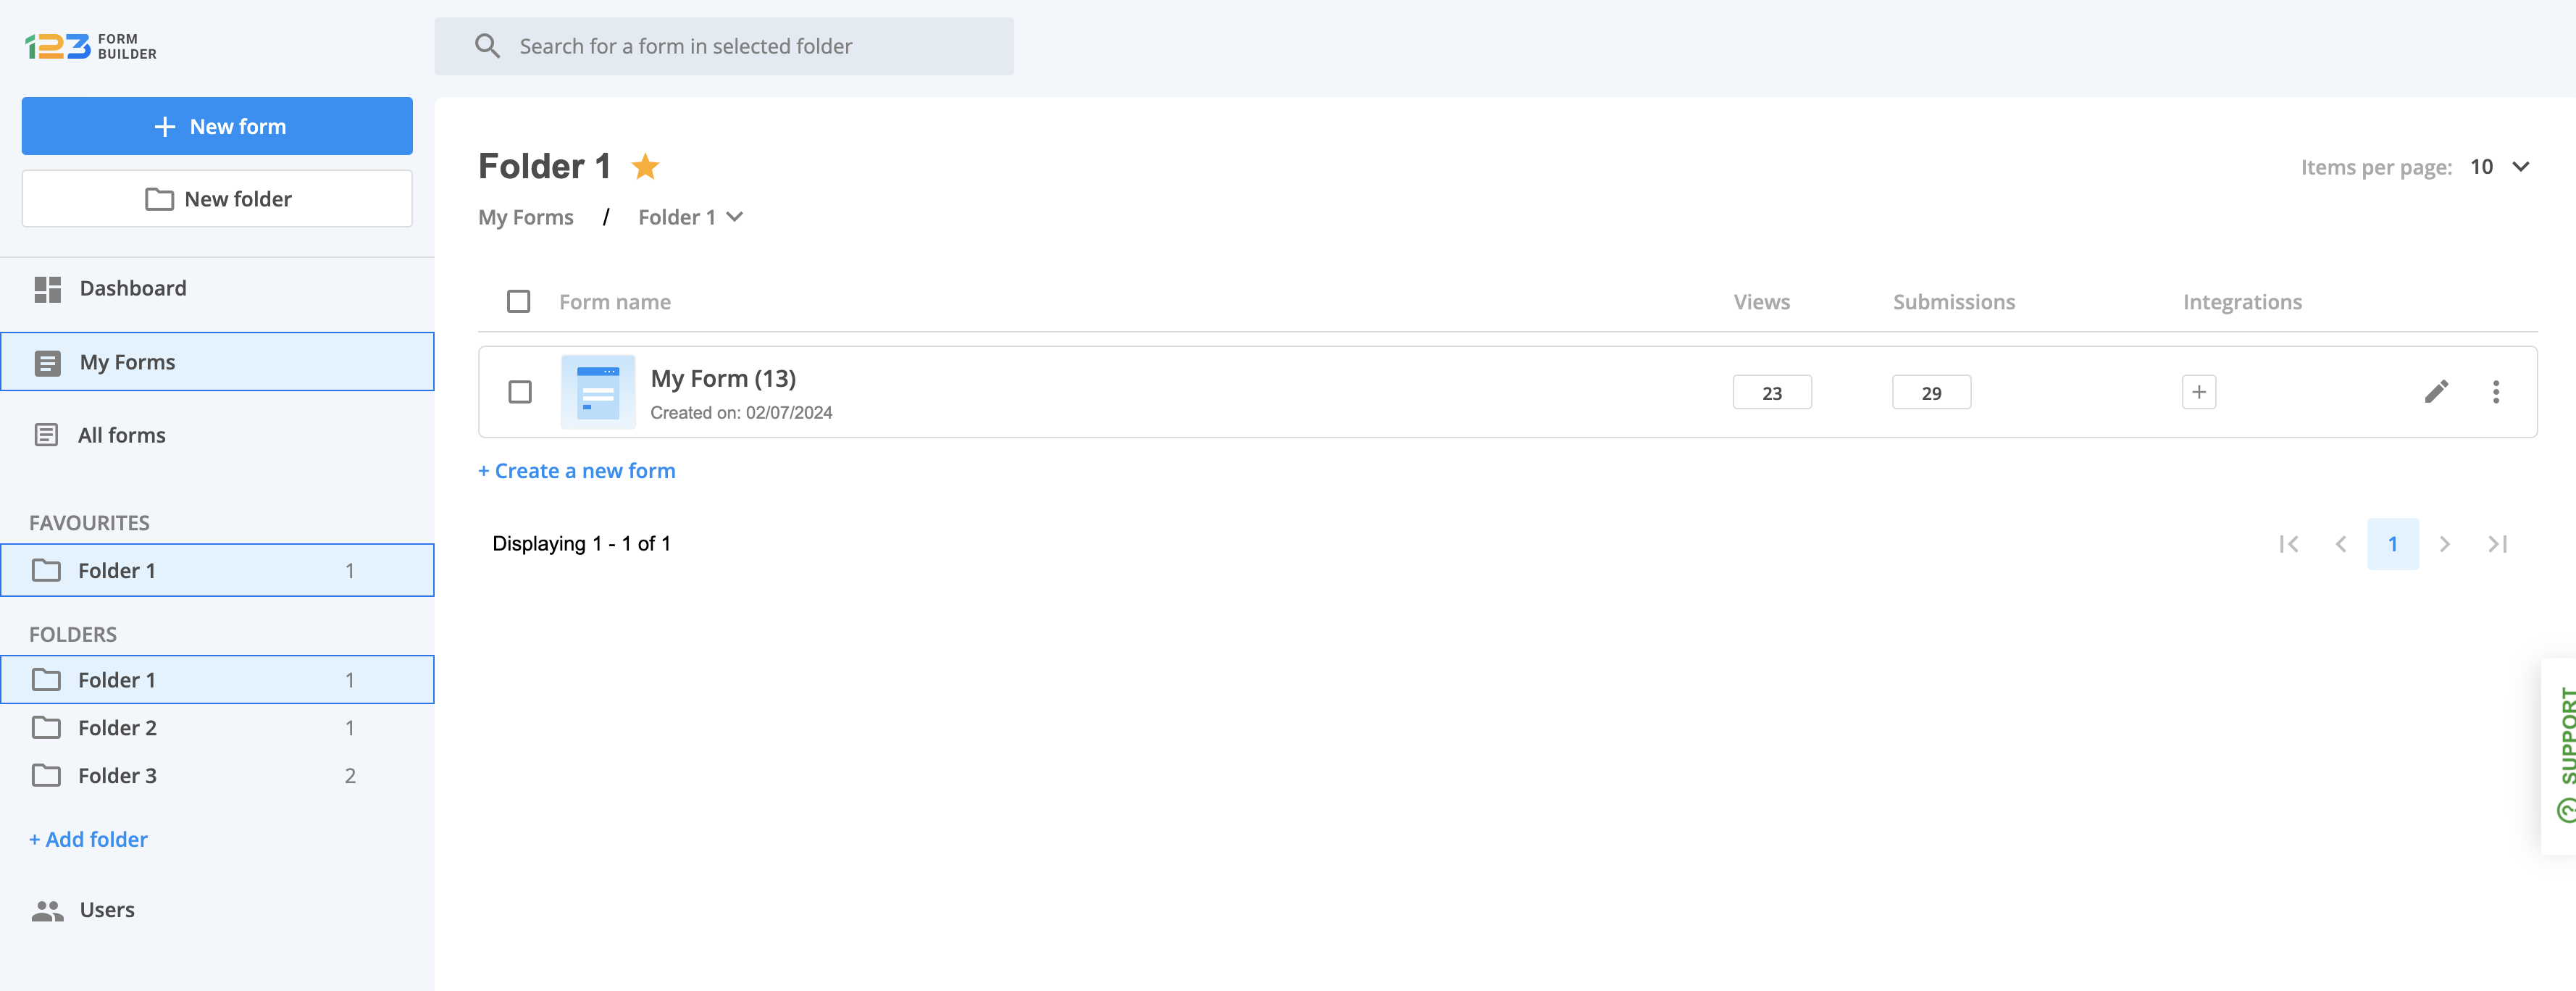
Once you are in a folder, you’ll notice right next to the folder name a star icon. This is used to mark a folder as favorite. Once a folder has been marked as favorite, it will also be displayed under the FAVOURITES section on the left side of the page.
Related articles
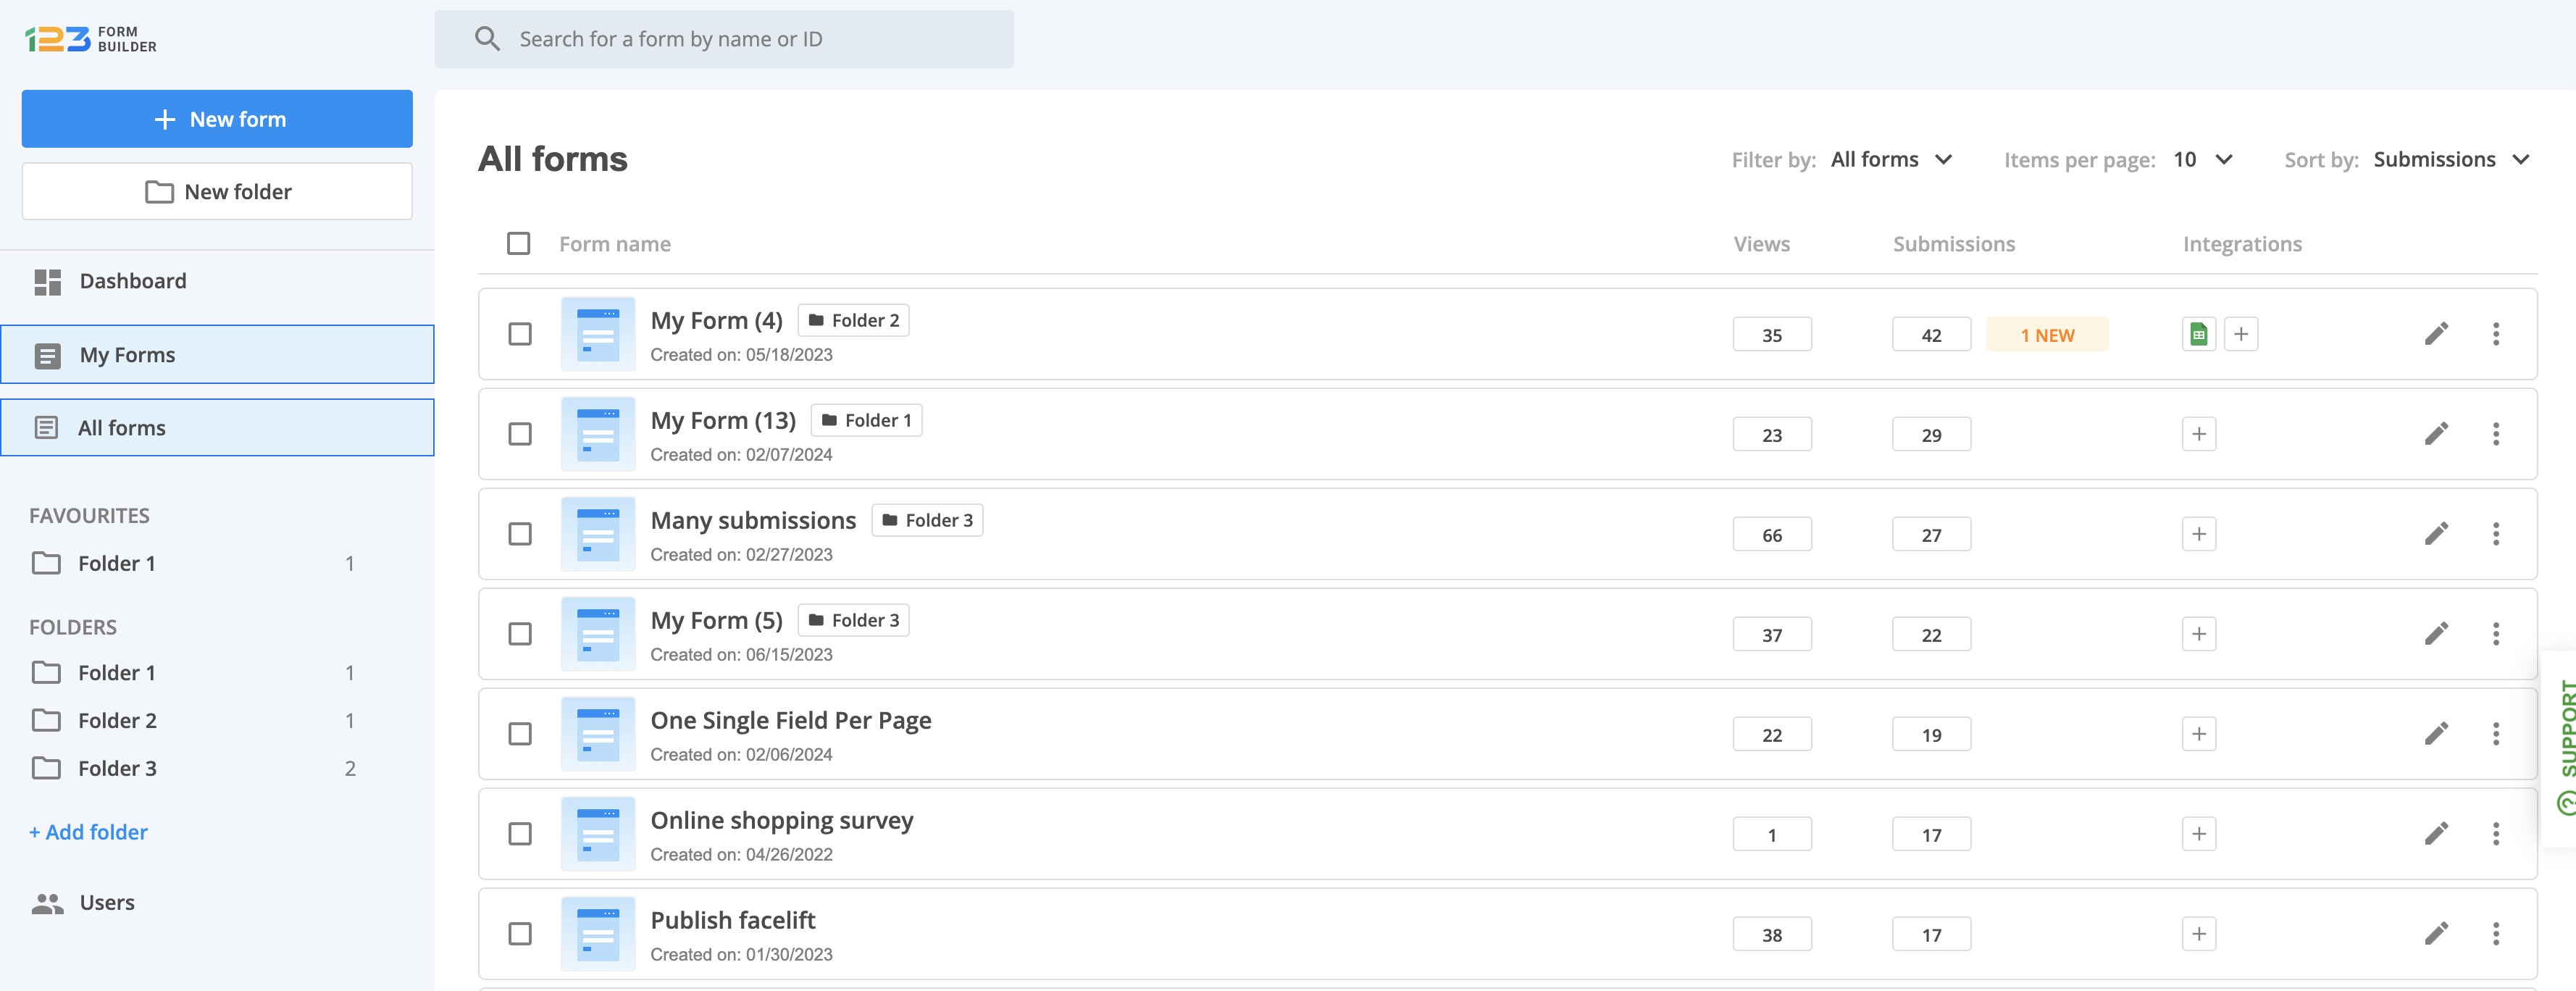
In My forms, you will see the list of your forms & & folders. For each form, we are displaying additional information related to that specific form in order for you to have a broader & quicker view of how your forms are performing.
Let’s take the options one by one.

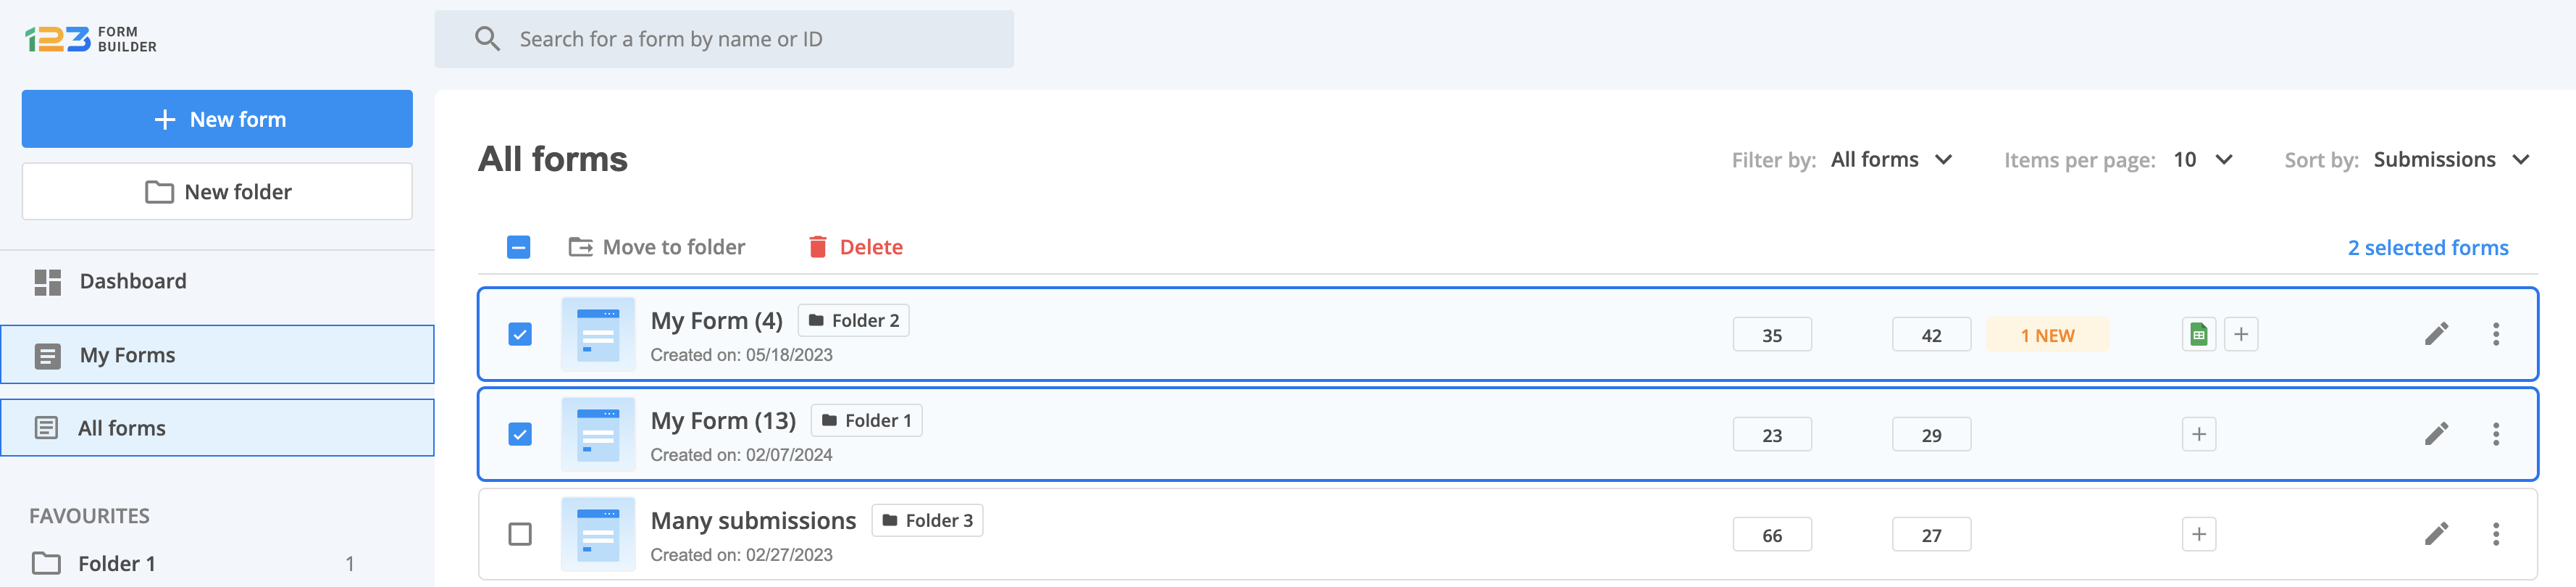
For each form, we are displaying some quick information so you could easily scan the form & its performance.

Next to the title of the form, we are displaying a tag with the folder name. This appears only when a form is part of a folder. By clicking on the folder name, you are redirected to the folder where we are displaying all the forms that are part of that folder.
Under the title of the form, you can find the date when the form was created.
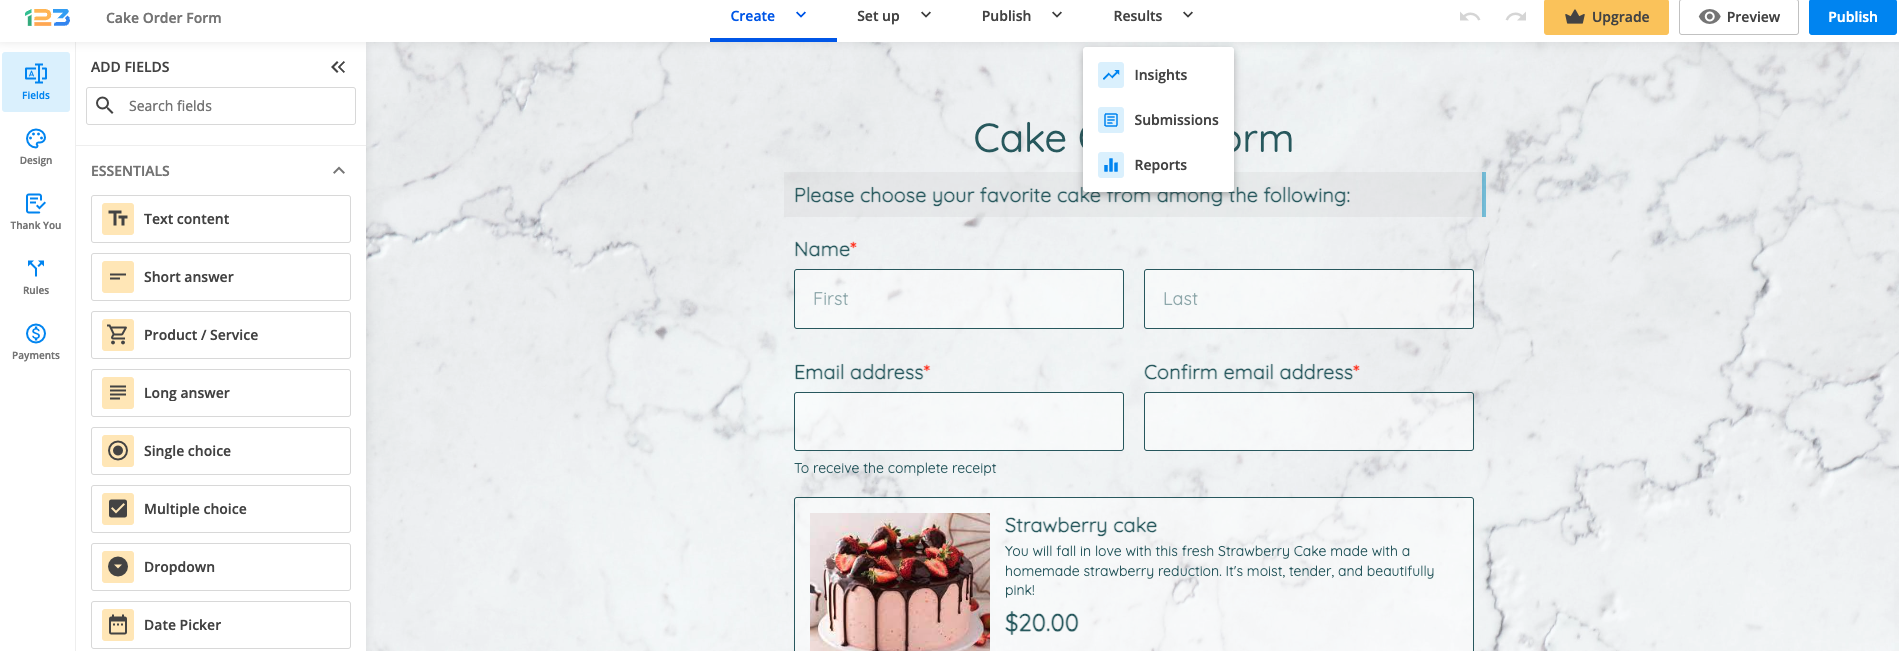
Under the Views column, we are displaying the total number of views the form has gathered. By clicking on the views number, you are redirected to the Insights section of the form.
Under the Submissions column, we are displaying the total number of submissions your form has gathered. By clicking on the submissions number, you are redirected to the Submissions section of the form. If your form has gathered submissions in the last 24 hours, the total number of submissions gathered in the last 24 hours is displayed in an orange container.
Under the Integrations column, we are displaying the enabled integrations on your form. For example, in the below example, we have Google Sheets integration enabled. By clicking on the Google Sheets icon, you are redirected to the Integrations section. If you don’t have an enabled integration, you can quickly navigate to Integrations in order to add one by clicking on the plus sign.
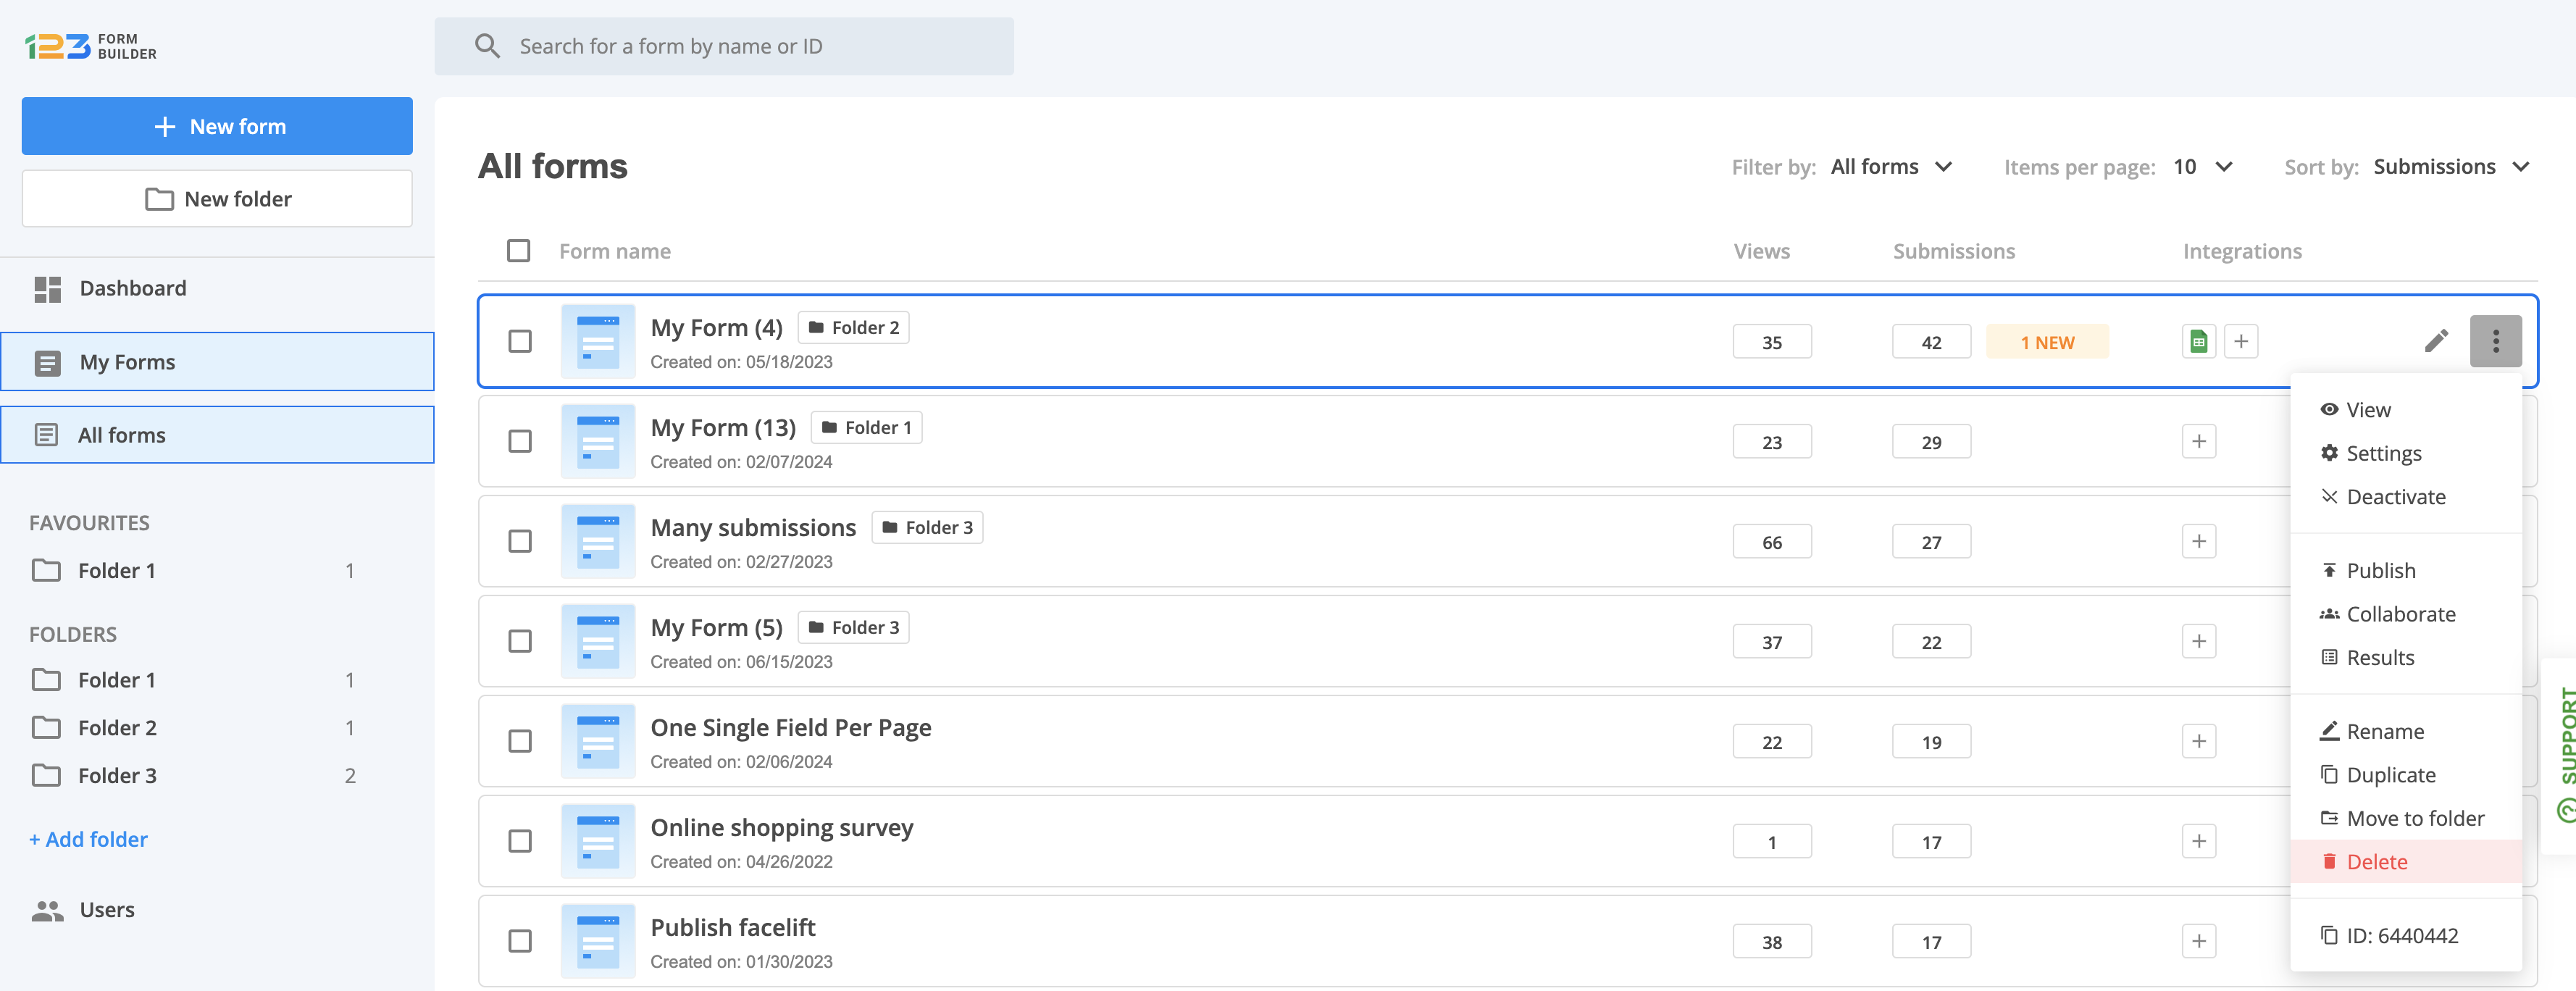
By clicking on the dotted menu, you have several options available.
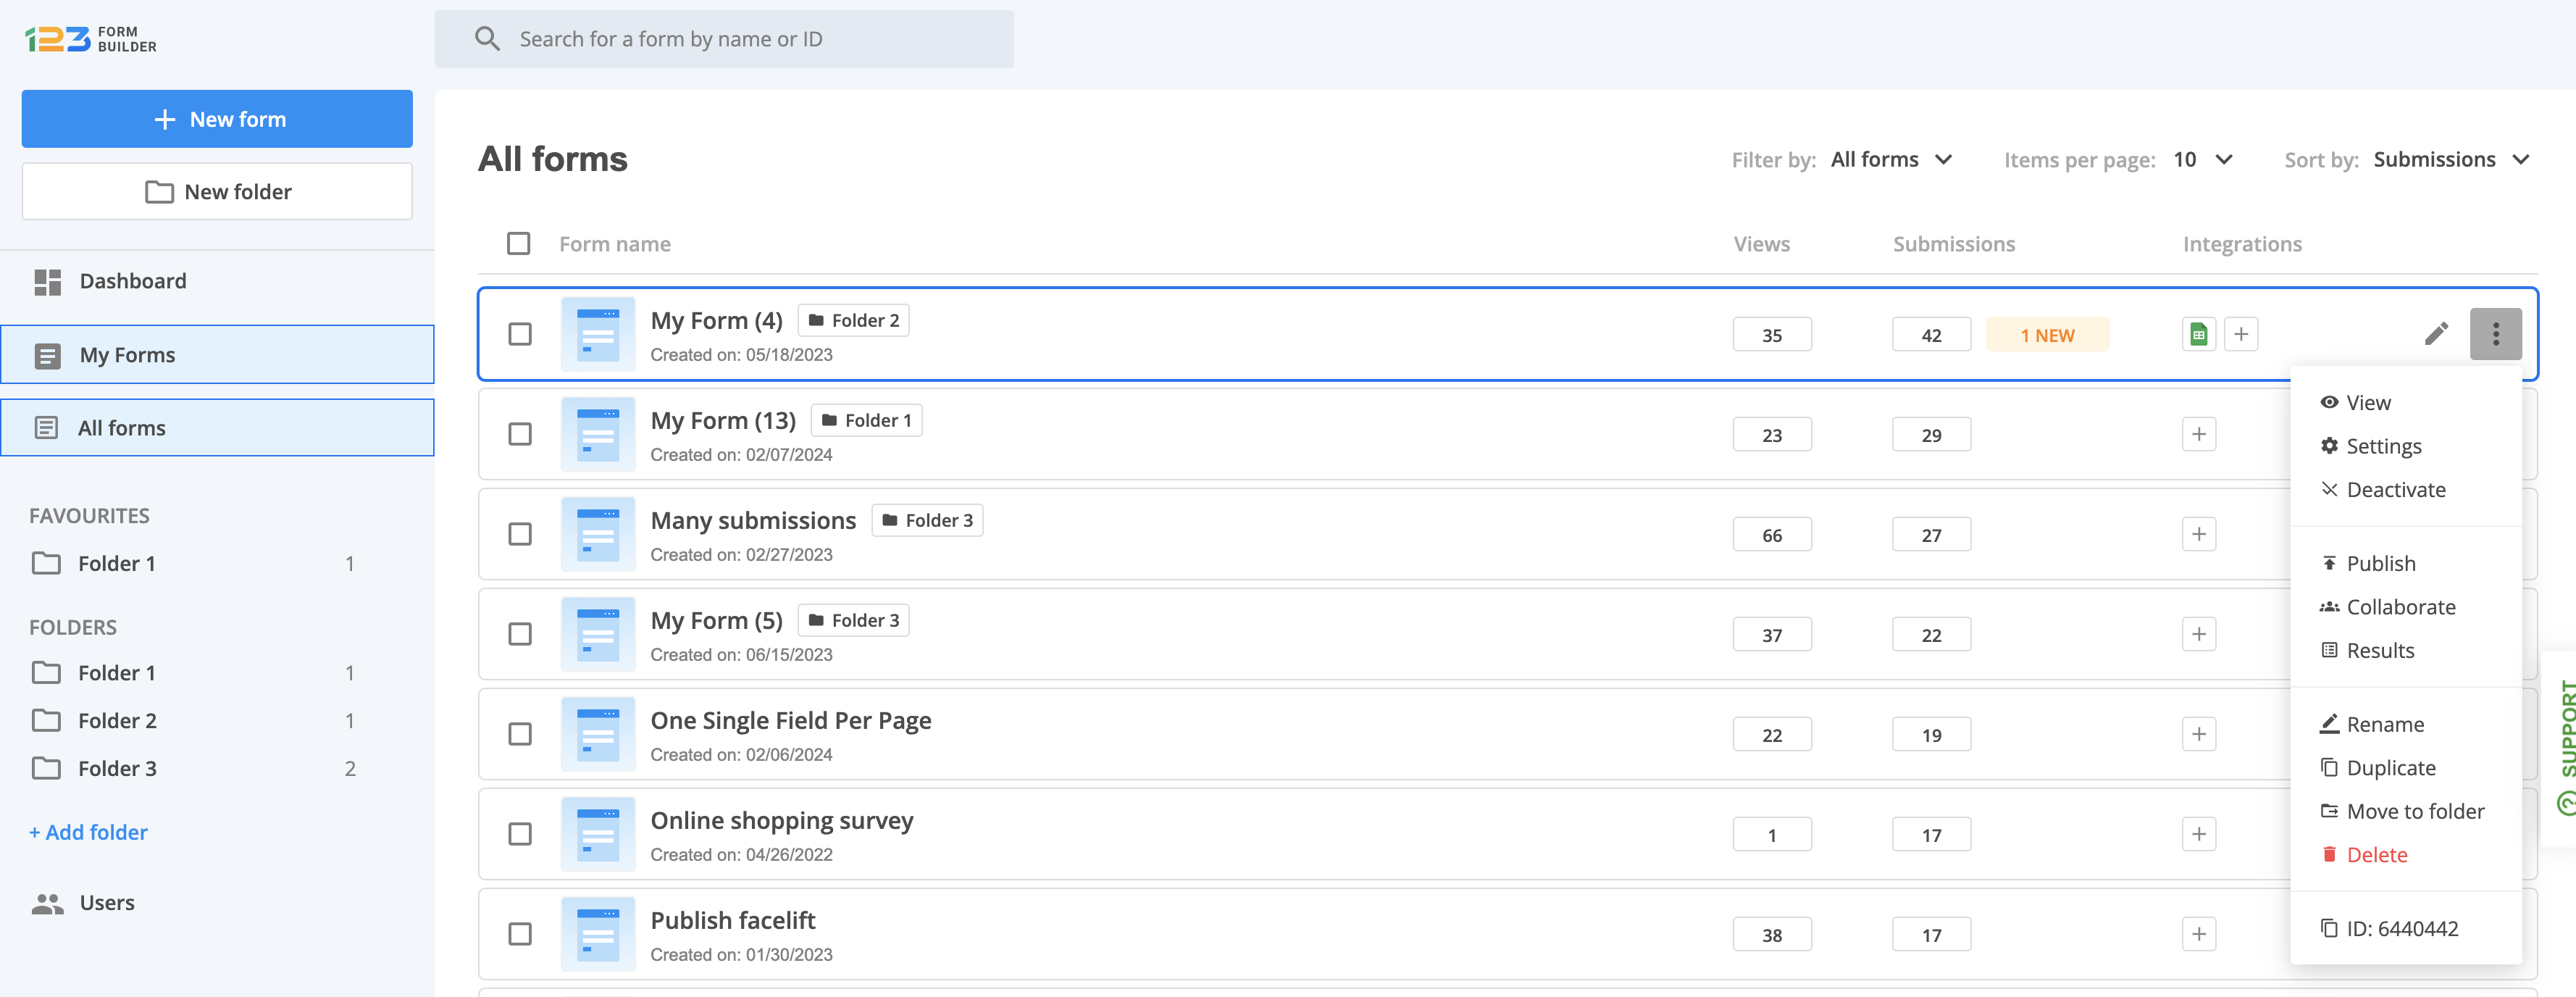
View – used if you want to open up the form within a new tab
Settings – by clicking on Settings, you will be redirected to the Set up section of the form.
Deactivate – this acts as a quick way of activating/deactivating your form. For more options regarding the schedule of your form, please check Schedule section. More info about it can be found here.
Publish – used if you want to quickly navigate to the Publish section.
Collaborate – this option is used if you have subusers on your account. From here you can set permissions to whom can view/edit your form.
Results – used if you want to quickly navigate to the Reports section.
Rename – used if you want to rename your form.
Duplicate – used if you want to duplicate a form with all its settings so that you wouldn’t start the work on a new form from scratch.
Move to folder – you can move a form to a folder by using this option.
Delete – option used to delete your form.
ID – here you can find the ID of your form. This is meant to help you easily identify your form. By clicking on it, you copy the ID to your clipboard.
You can select multiple forms and some quick actions will be available: either move the selected forms to a specific folder or delete the selected forms.
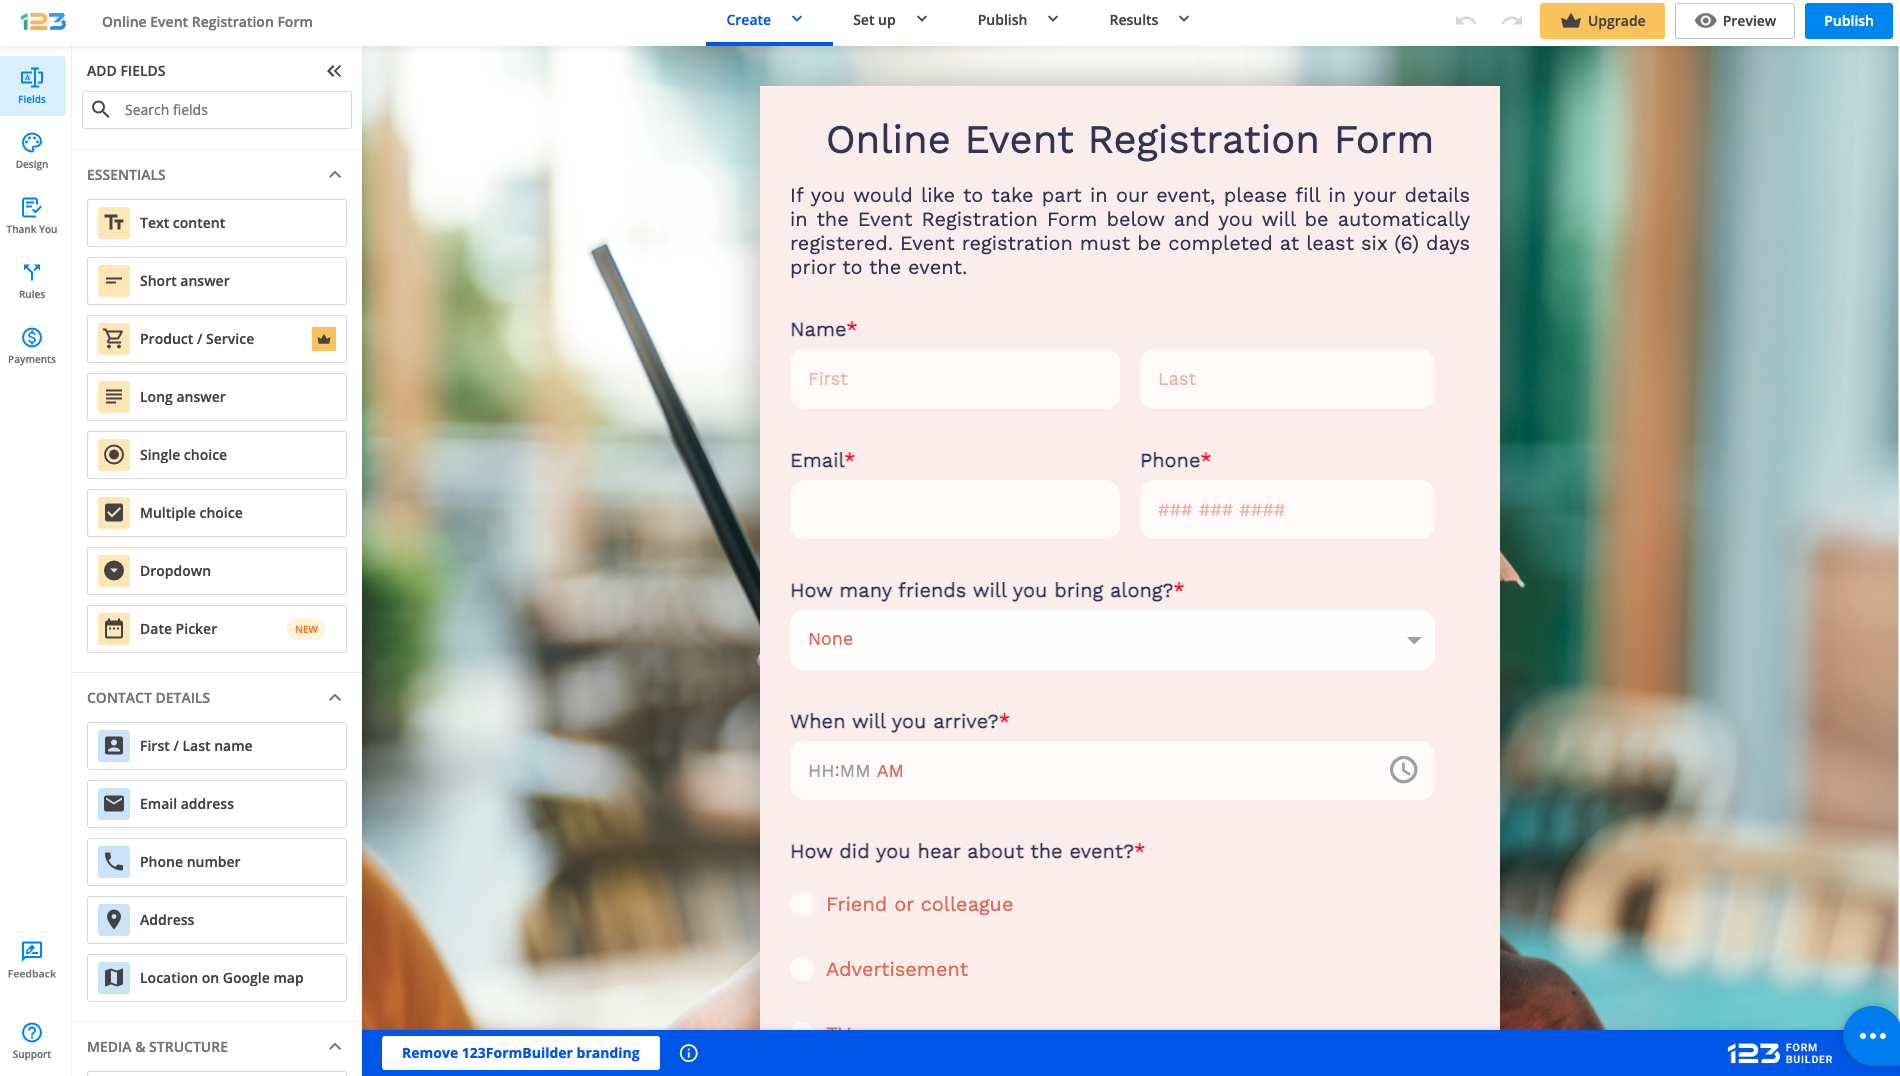
On Free plan, on the bottom of the forms there is a backlink to 123FormBuilder that you can not remove. The 123FormBuilder branding is visible in Editor, but also on the form, so your respondents will see it.
If you want to remove it, you can click on the bottom right corner toggle so you could upgrade to a paid plan.
Important Note
Free users that will remove the 123FormBuilder branding from their web forms will be held responsible for violating our Terms of Service and their accounts will have limited access.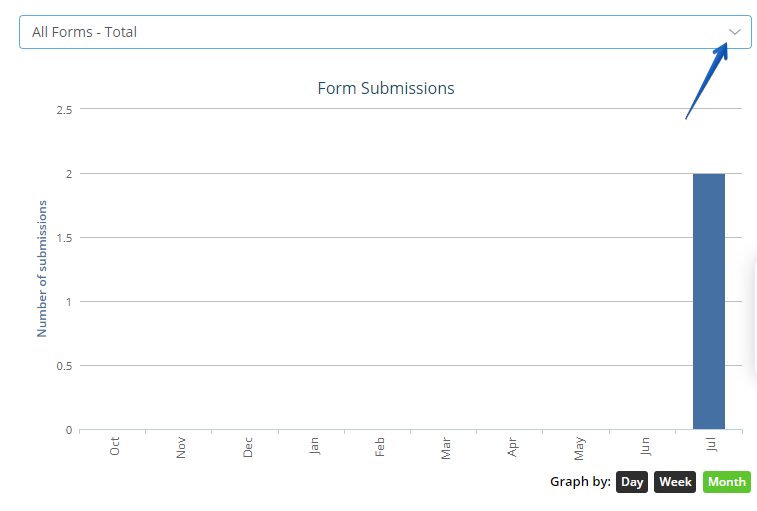
Most Popular
Frequently Asked Questions
Here is a list of the most frequently asked questions. For more FAQs, please browse through the FAQs page.